|
Re: KPack's 1954 Panama
|
||||
|---|---|---|---|---|
|
Home away from home

|
Don and Howard, that turned out to be the issue. Thanks for the guidance. I wasn't sure if the column (shroud) could be repositioned or not, so thanks for clearing it up. I loosened the brackets and put a pry bar against the steering box to push up the column until the gap at the wheel was about 1/8", then tightened the brackets again. Worked great.
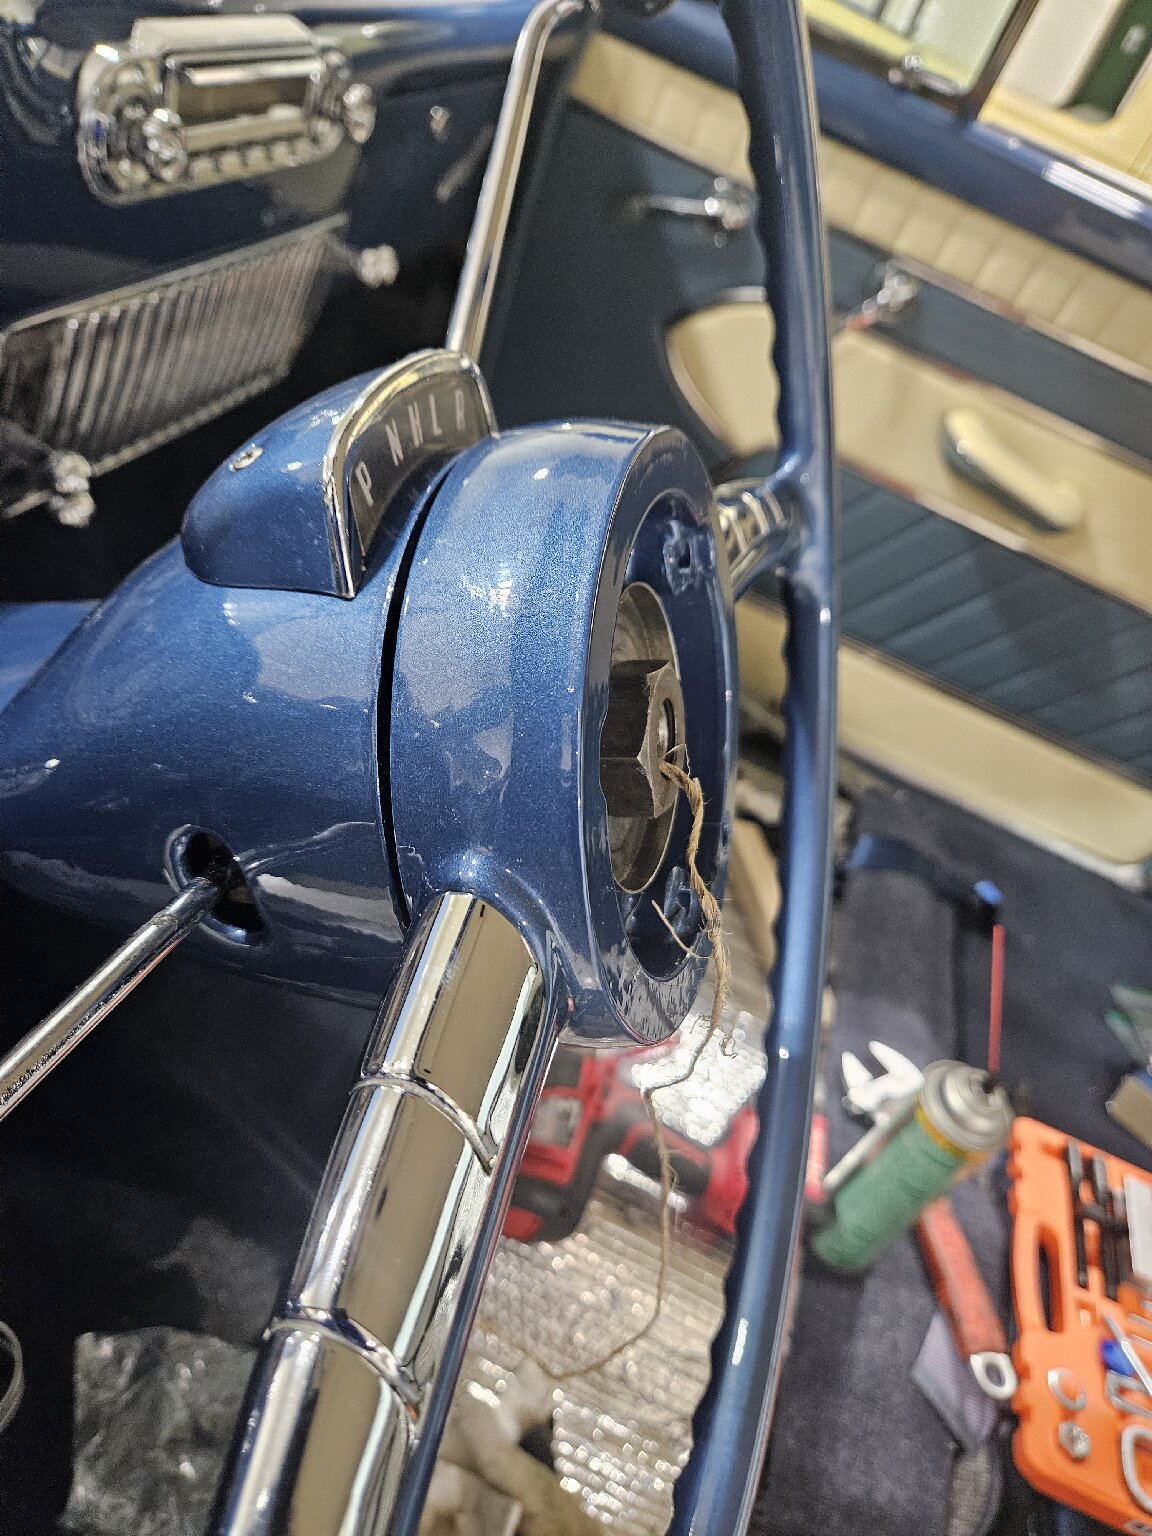 The steering wheel nut sits just proud of the column itself, which is how it was prior to removal. 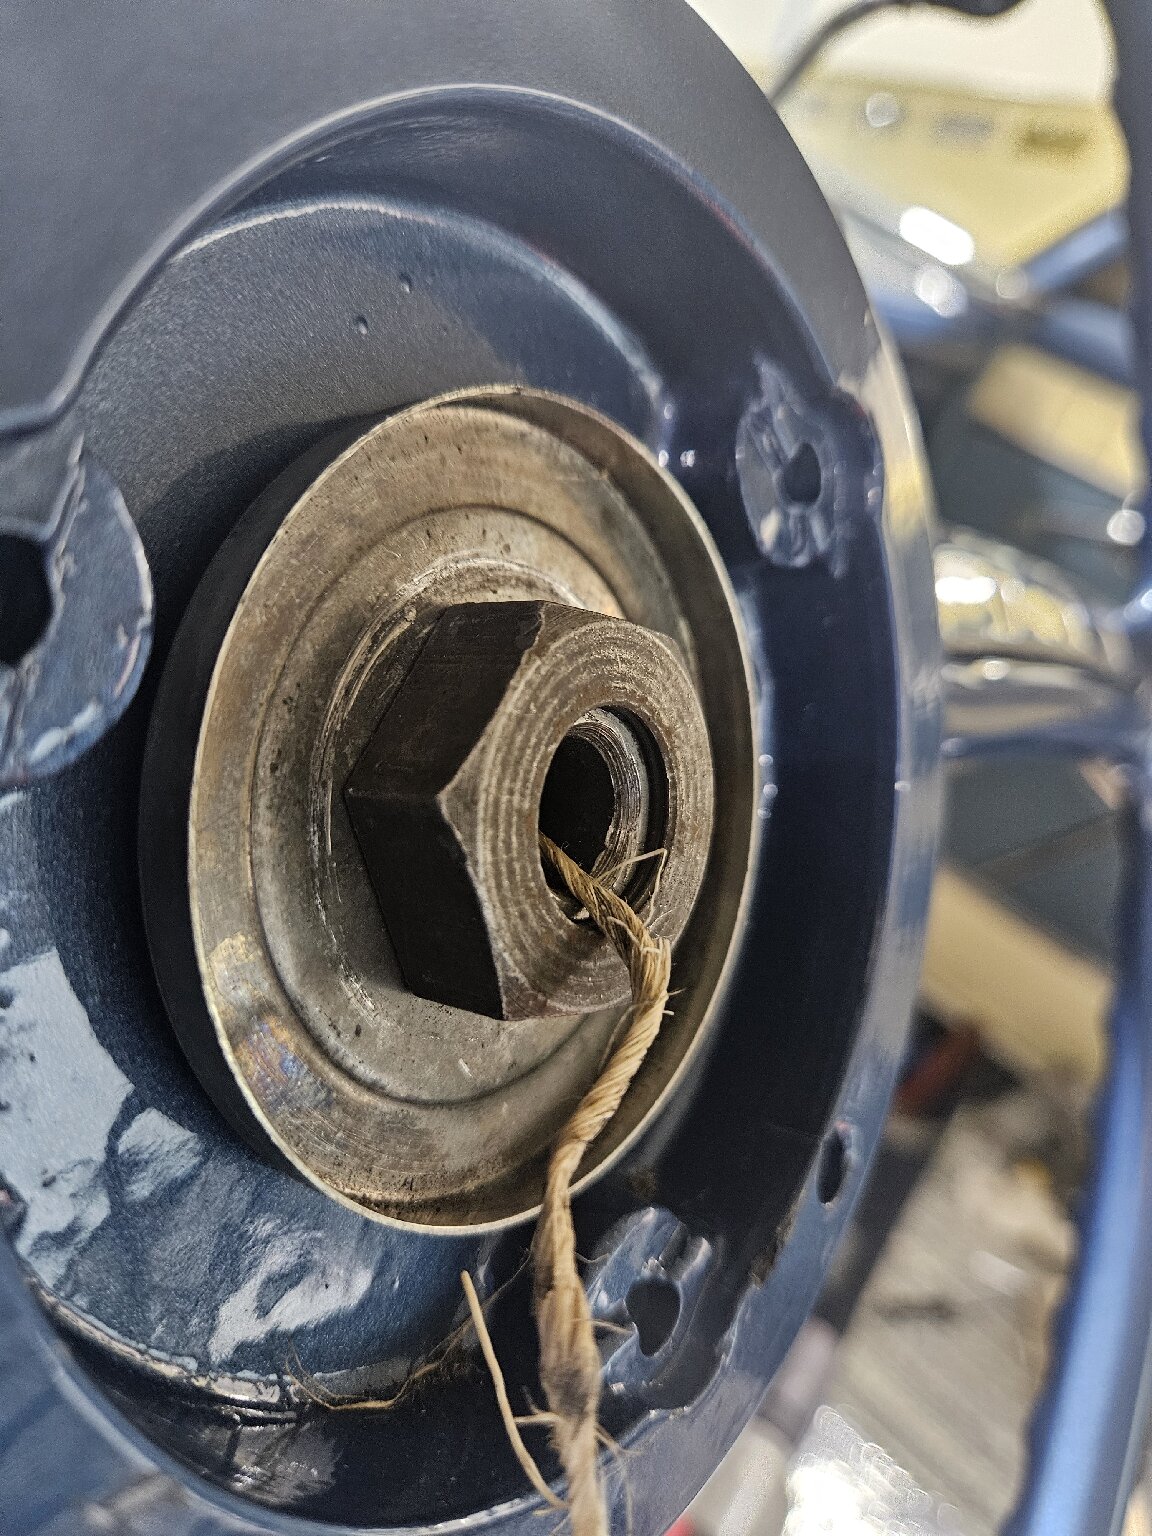 I noted the bearing sounded terrible. It must have gotten a bunch of dirt/sand/dust in it. I cleaned it all out, blew it dry, then packed it with fresh grease. All quiet and smooth now. 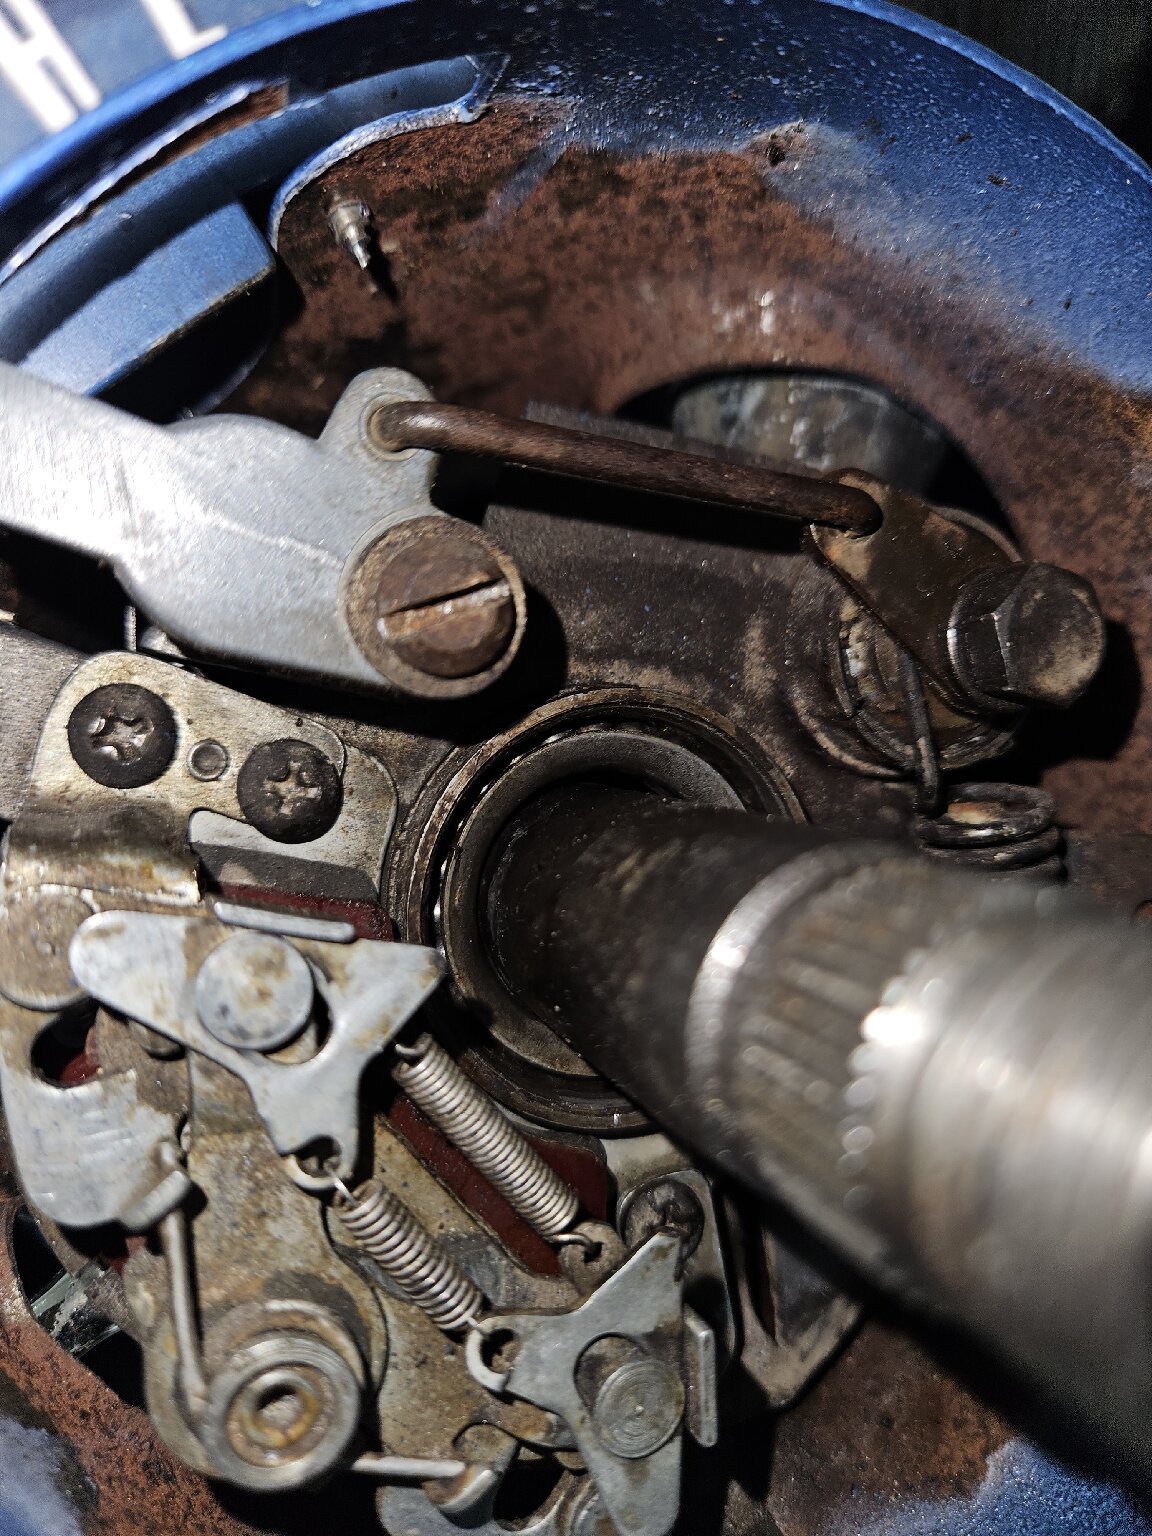 With that addressed I put the rest of the dash back together, as well as the rest of the front trim. I'm very pleased with how it all came out. I also tested all the electronics and I'm happy to say that everything works. I had corrected nearly all the electrical oddities that I had found (ignition switch set up wrong, all the red wires for battery power were wrong) so I wanted to be sure I hadn't screwed something up. The horn even works better now. 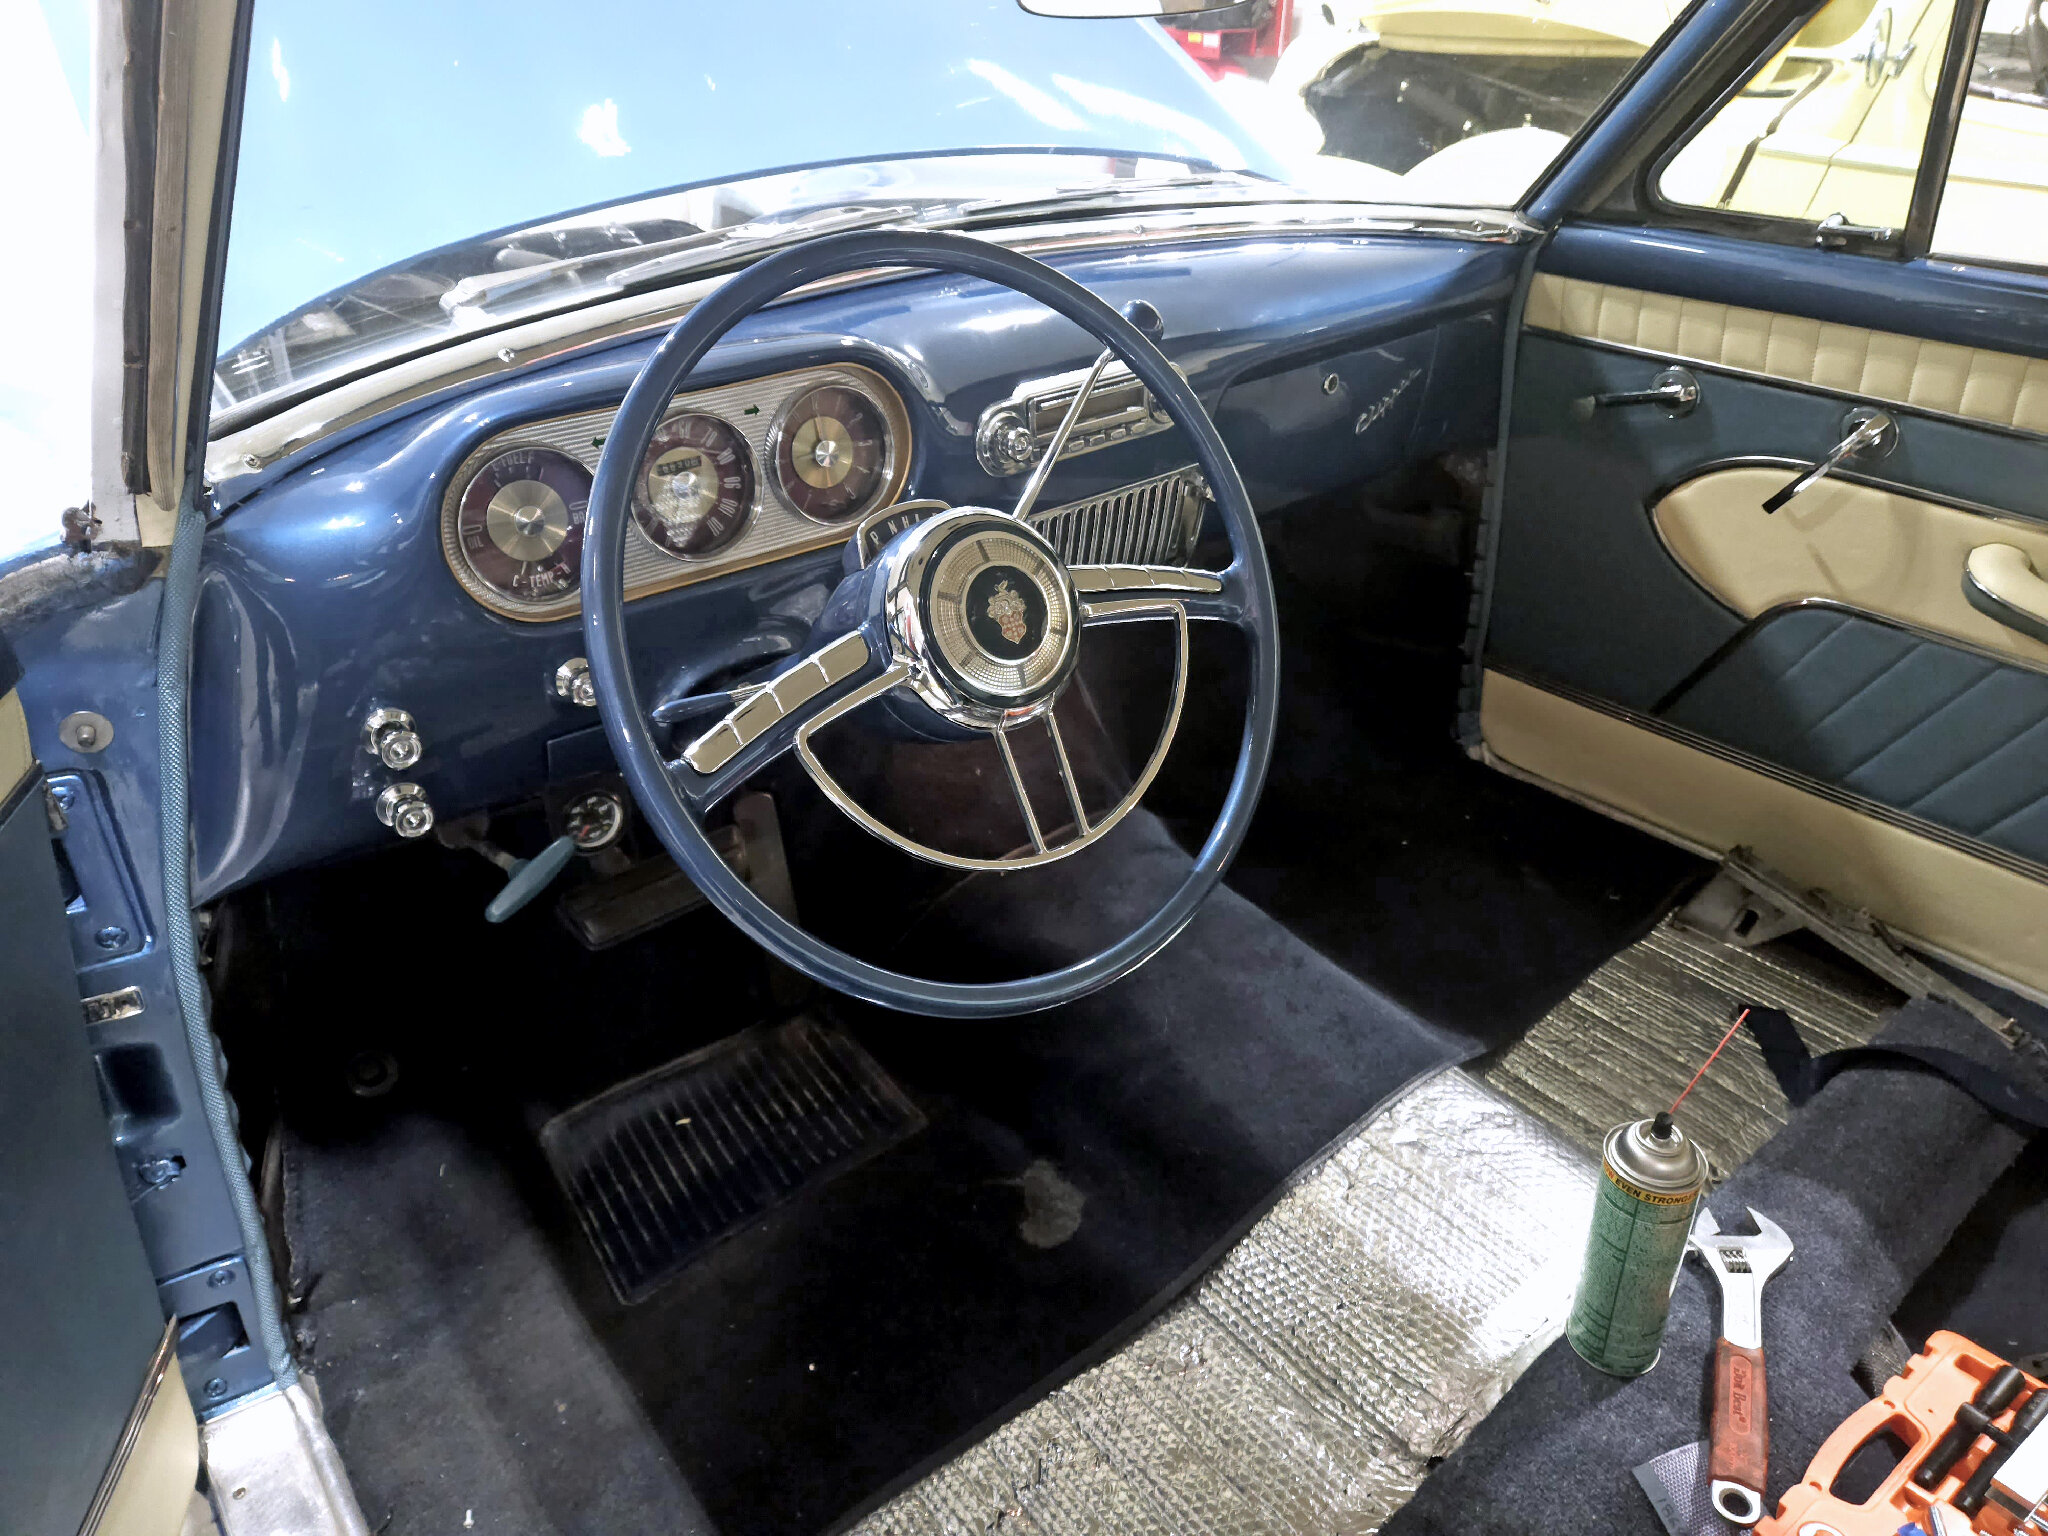 -Kevin
Posted on: 2024/2/25 1:43
|
|||
|
||||
|
Re: KPack's 1954 Panama
|
||||
|---|---|---|---|---|
|
Home away from home
|
Progress!
Just got the shipment notification from SMS today, so my fabric is on the way. Hopefully will be here in a week or so. Also took the seats to the upholstery shop today and put down the deposit. They'll take the seats down and send the frames off to be powder coated in the next couple weeks. I'm on the schedule for the end of March to have them sew the seat covers and get everything put back together. So with any luck I should have everything back and ready to install by beginning to mid-April. Just in time for driving season. In the meantime here's the list of items to tackle: -Finish fitting the rear trim (having interference issues) -Replace door weatherstripping -Remove and rebuild starter -Possibly remove and rebuild fuel pump (to hopefully get rid of the annoying thumping sound) -Fix leaking seals on power steering and transmission, sometime this year
Posted on: 2024/2/26 20:01
|
|||
|
||||
|
Re: KPack's 1954 Panama
|
||||
|---|---|---|---|---|
|
Home away from home

|
For the annoying thumping sound and if you think it's coming from the pump, be sure before sending it off that the arm on it is the proper one. It should have a number stamped into it and I can't tell you what the number should be off-hand but I seem to recall seeing a chart with the information.
Posted on: 2024/2/26 20:19
|
|||
|
All generalities are false.
Once I thought I was wrong but I was mistaken. Don Pierson Packard / IMPERIAL page CA DMV Licensed Vehicle VIN Verification 1951 Henney-Packard 3-Door Long Wheelbase Air Force Ambulance The 1951 Henney-Packard is For Sale! 1954 Packard Patrician 1954 Packard Patrician Parts Car 1956 Clipper Custom Sedan |
||||
|
||||
|
Re: KPack's 1954 Panama
|
||||
|---|---|---|---|---|
|
Forum Ambassador

|
Also be sure to remove ALL brass tubing fitting from the pump ports if you send it off.
Posted on: 2024/2/26 20:22
|
|||
|
Howard
|
||||
|
||||
|
Re: KPack's 1954 Panama
|
||||
|---|---|---|---|---|
|
Home away from home
|
If I pull it off the car I doubt that I will send it out. It was a newly rebuilt unit from Kanter that I exchanged my old pump for. I'll probably just disassemble it and see if I can figure out what's causing the noise. I've rebuilt a couple pumps so I'm not worried about doing it myself .
It's for sure coming from the pump... Just not sure if it's fuel side or vacuum side.
Posted on: 2024/2/26 21:11
|
|||
|
||||
|
Re: KPack's 1954 Panama
|
||||
|---|---|---|---|---|
|
Home away from home
|
It's a miracle....SMS actually shipped my fabric. And it came the next day after they shipped. One of the perks of living in the NW I guess. But they only shipped the blue nylon cloth, and not the ivory vinyl. So still not ready to proceed. But at least the cloth is here and it looks good.
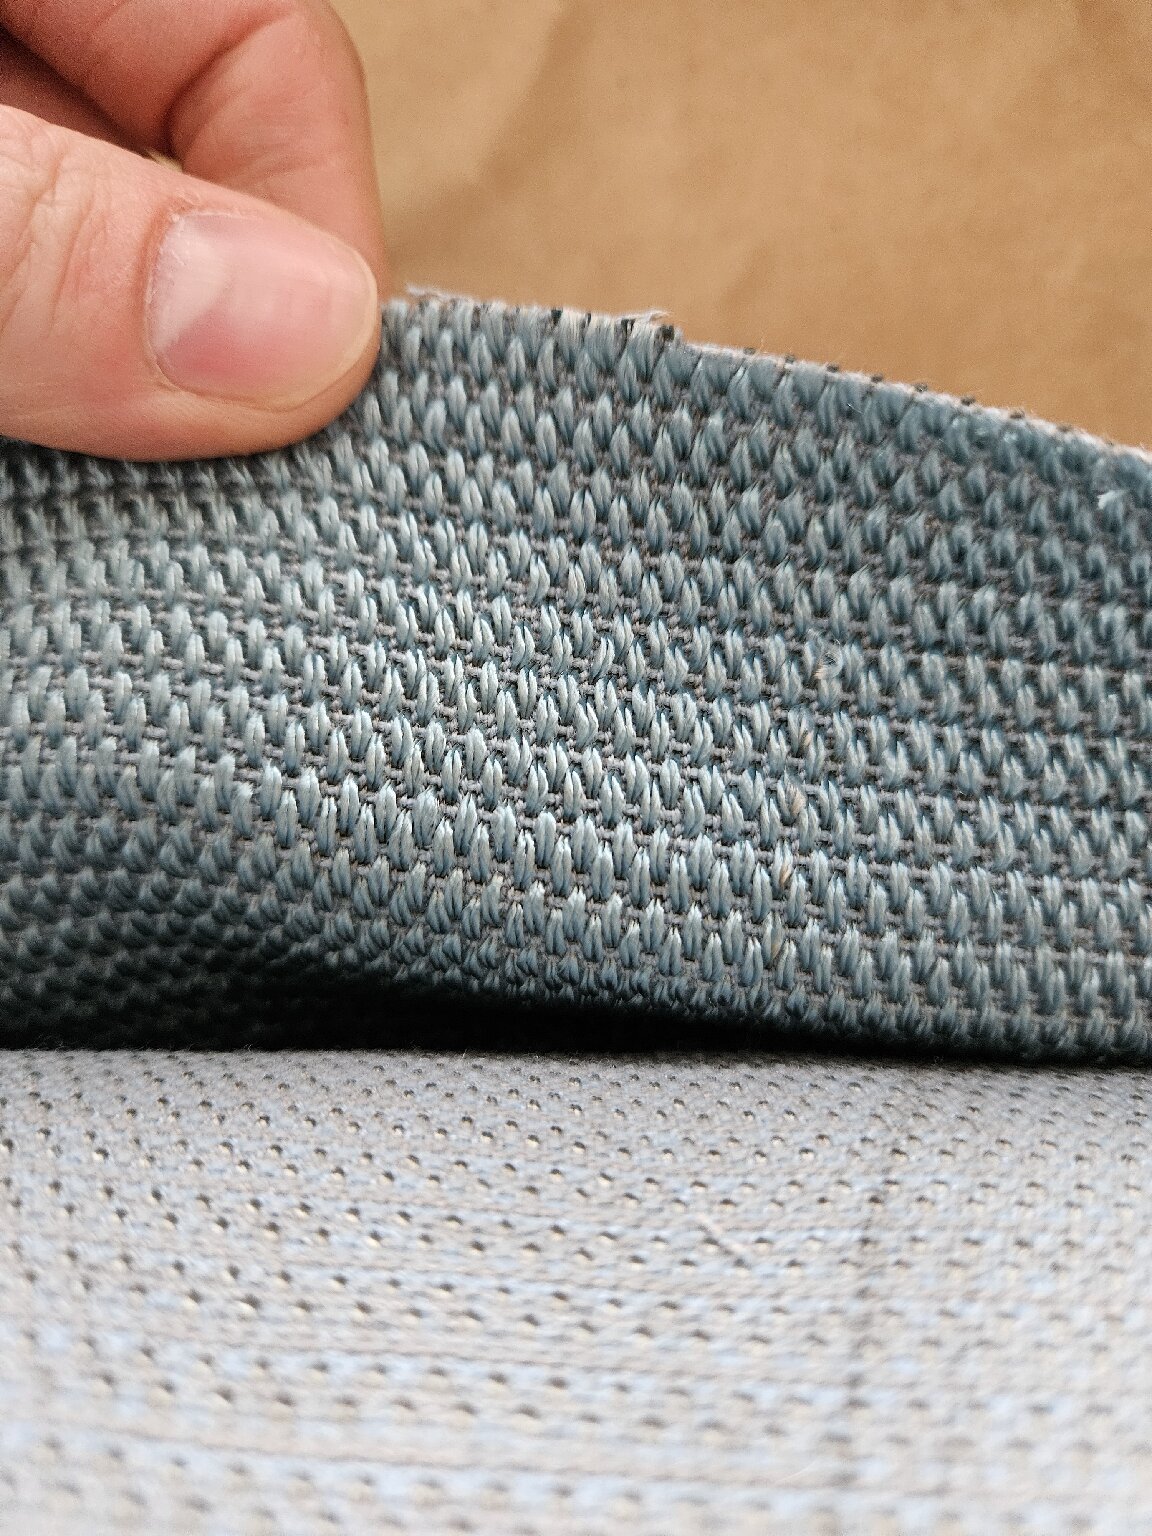 Is it me or does this roll look like way more than 4 yards? I haven't unrolled it to measure yet. 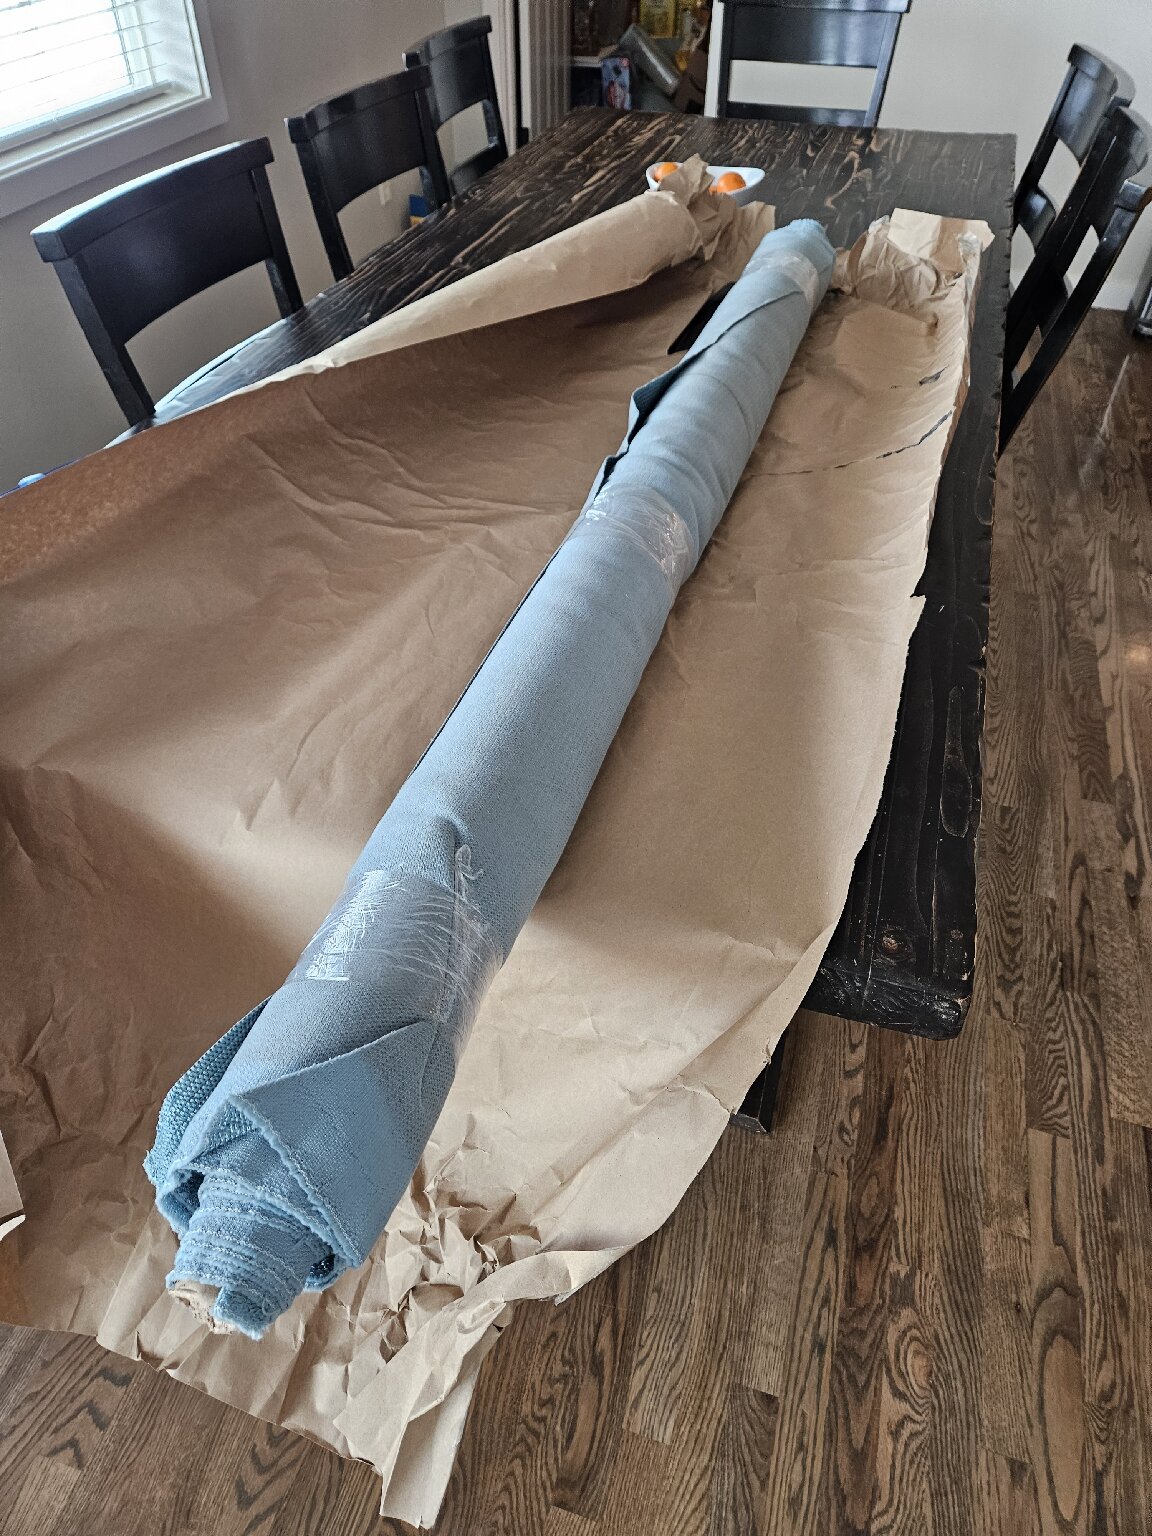
Posted on: 2024/2/27 16:34
|
|||
|
||||
|
Re: KPack's 1954 Panama
|
||||
|---|---|---|---|---|
|
Home away from home
|
Vinyl shipped yesterday, so I should have all the upholstery materials I need to get the seats done. I'm booked with the upholstery shop for the end of the month. Then the seats go back in and the interior should be "done". There will still be a few other things to address here and there, but not much.
While I wait for that to happen I'm moving down the list of other projects. First up is the starter. The car was getting much more difficult to start towards the end of last year. More than half the time I would get a single 'click' when turning the key, then nothing. Pulling the inspection band off the starter and physically moving the armature to a different spot normally got me going again. I couldn't tell if I was dealing with brush problems, solenoid problems, or wiring problems (the wiring by the previous owner to the starter was all messed up....I already corrected that). So the starter needed to come off to investigate, and it looked ugly anyways so I plan to freshen it up. This upper bolt is the devil's work. The solenoid is massive and makes getting to this bolt a real pain. I got it eventually, but involved me laying across the fender and engine with my feet in the air. 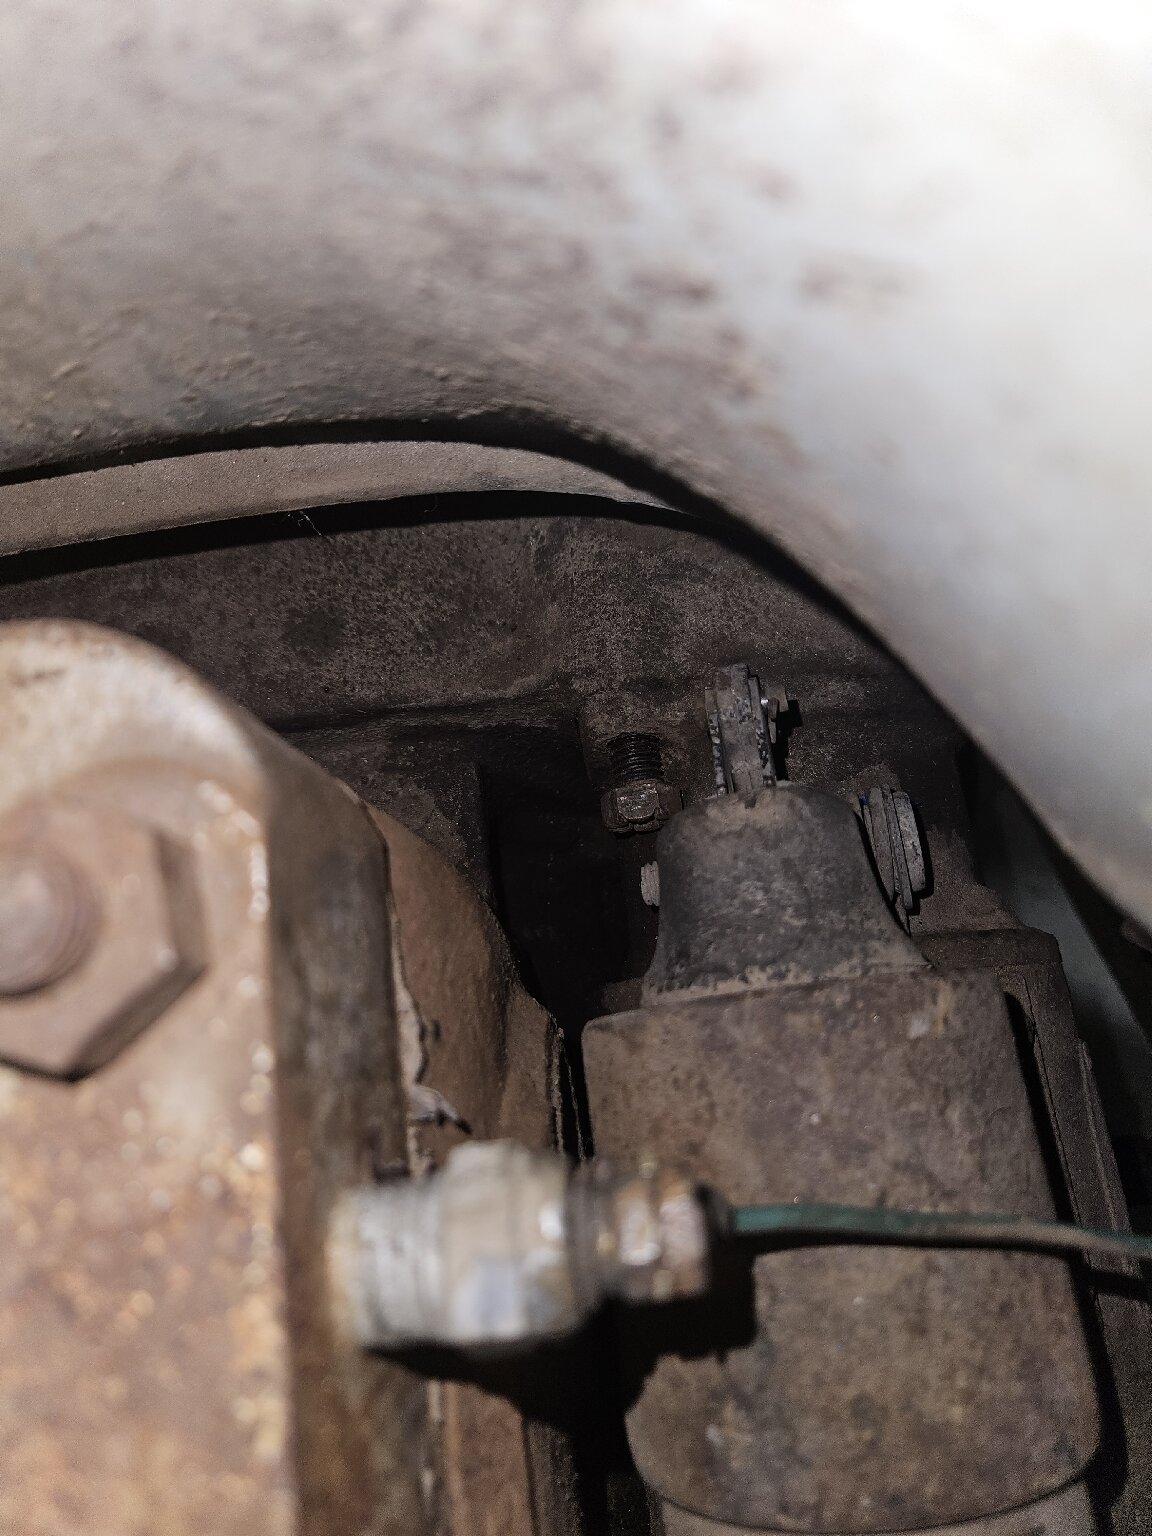 Once that bolt and lower were out the starter lifted out easily. It's much lighter than the starter out of my dad's '38 Super. 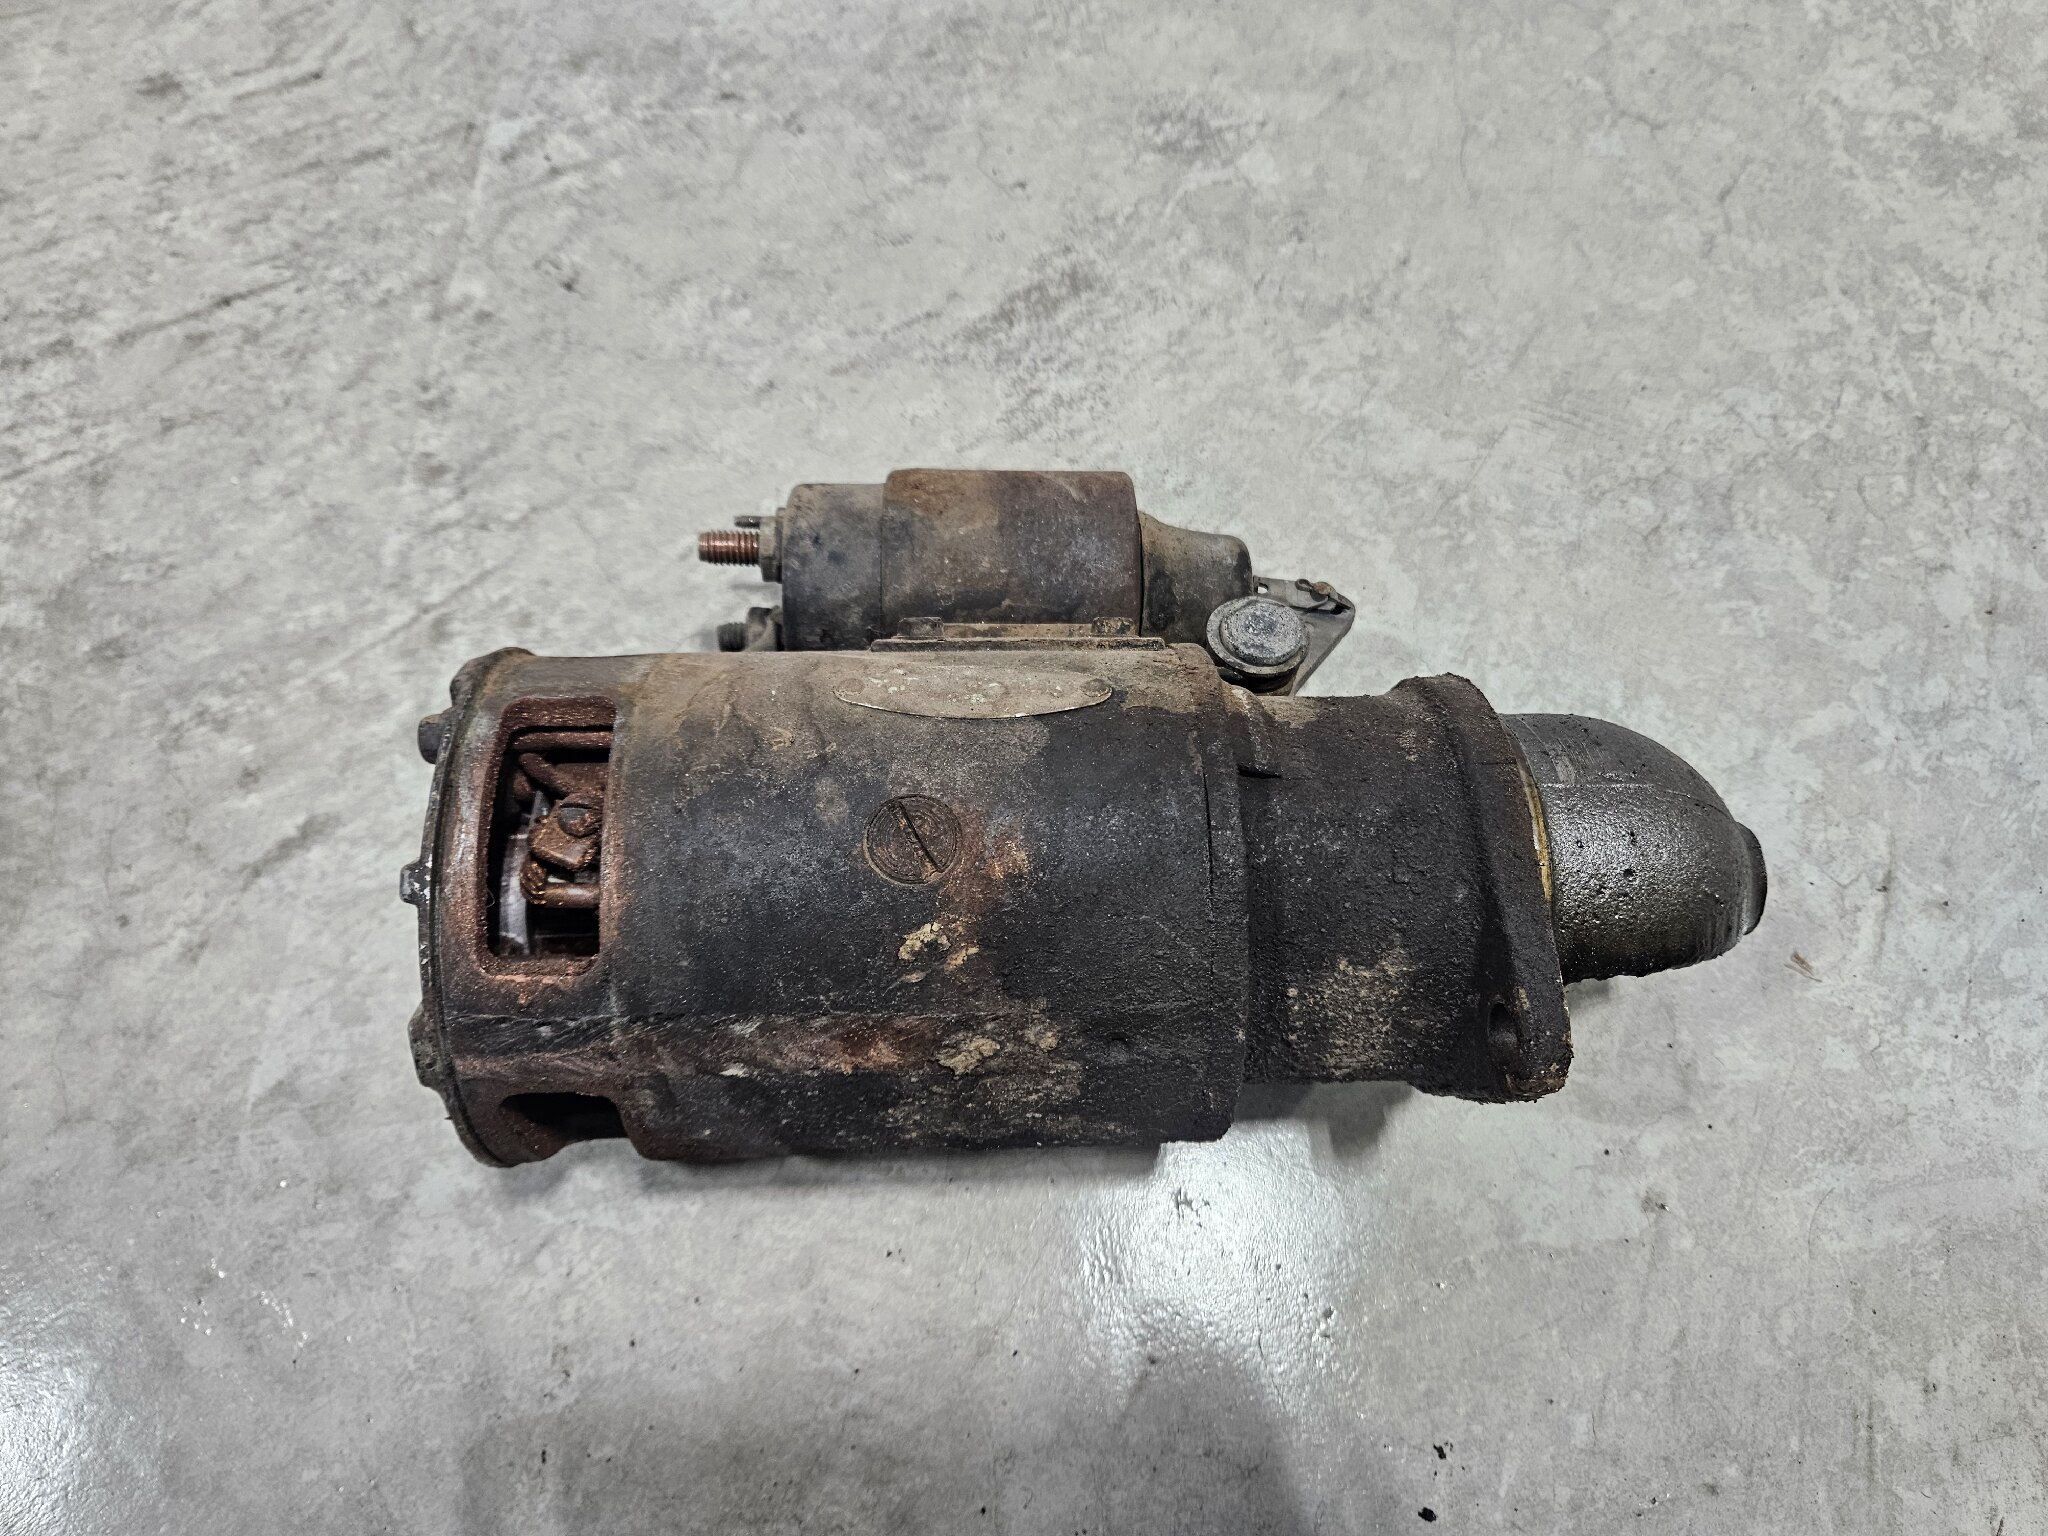 Armature looks okay from what I can tell. Looks like some oil got in somehow, so I will clean that off. The magnets on the housing also look okay, just dirty. 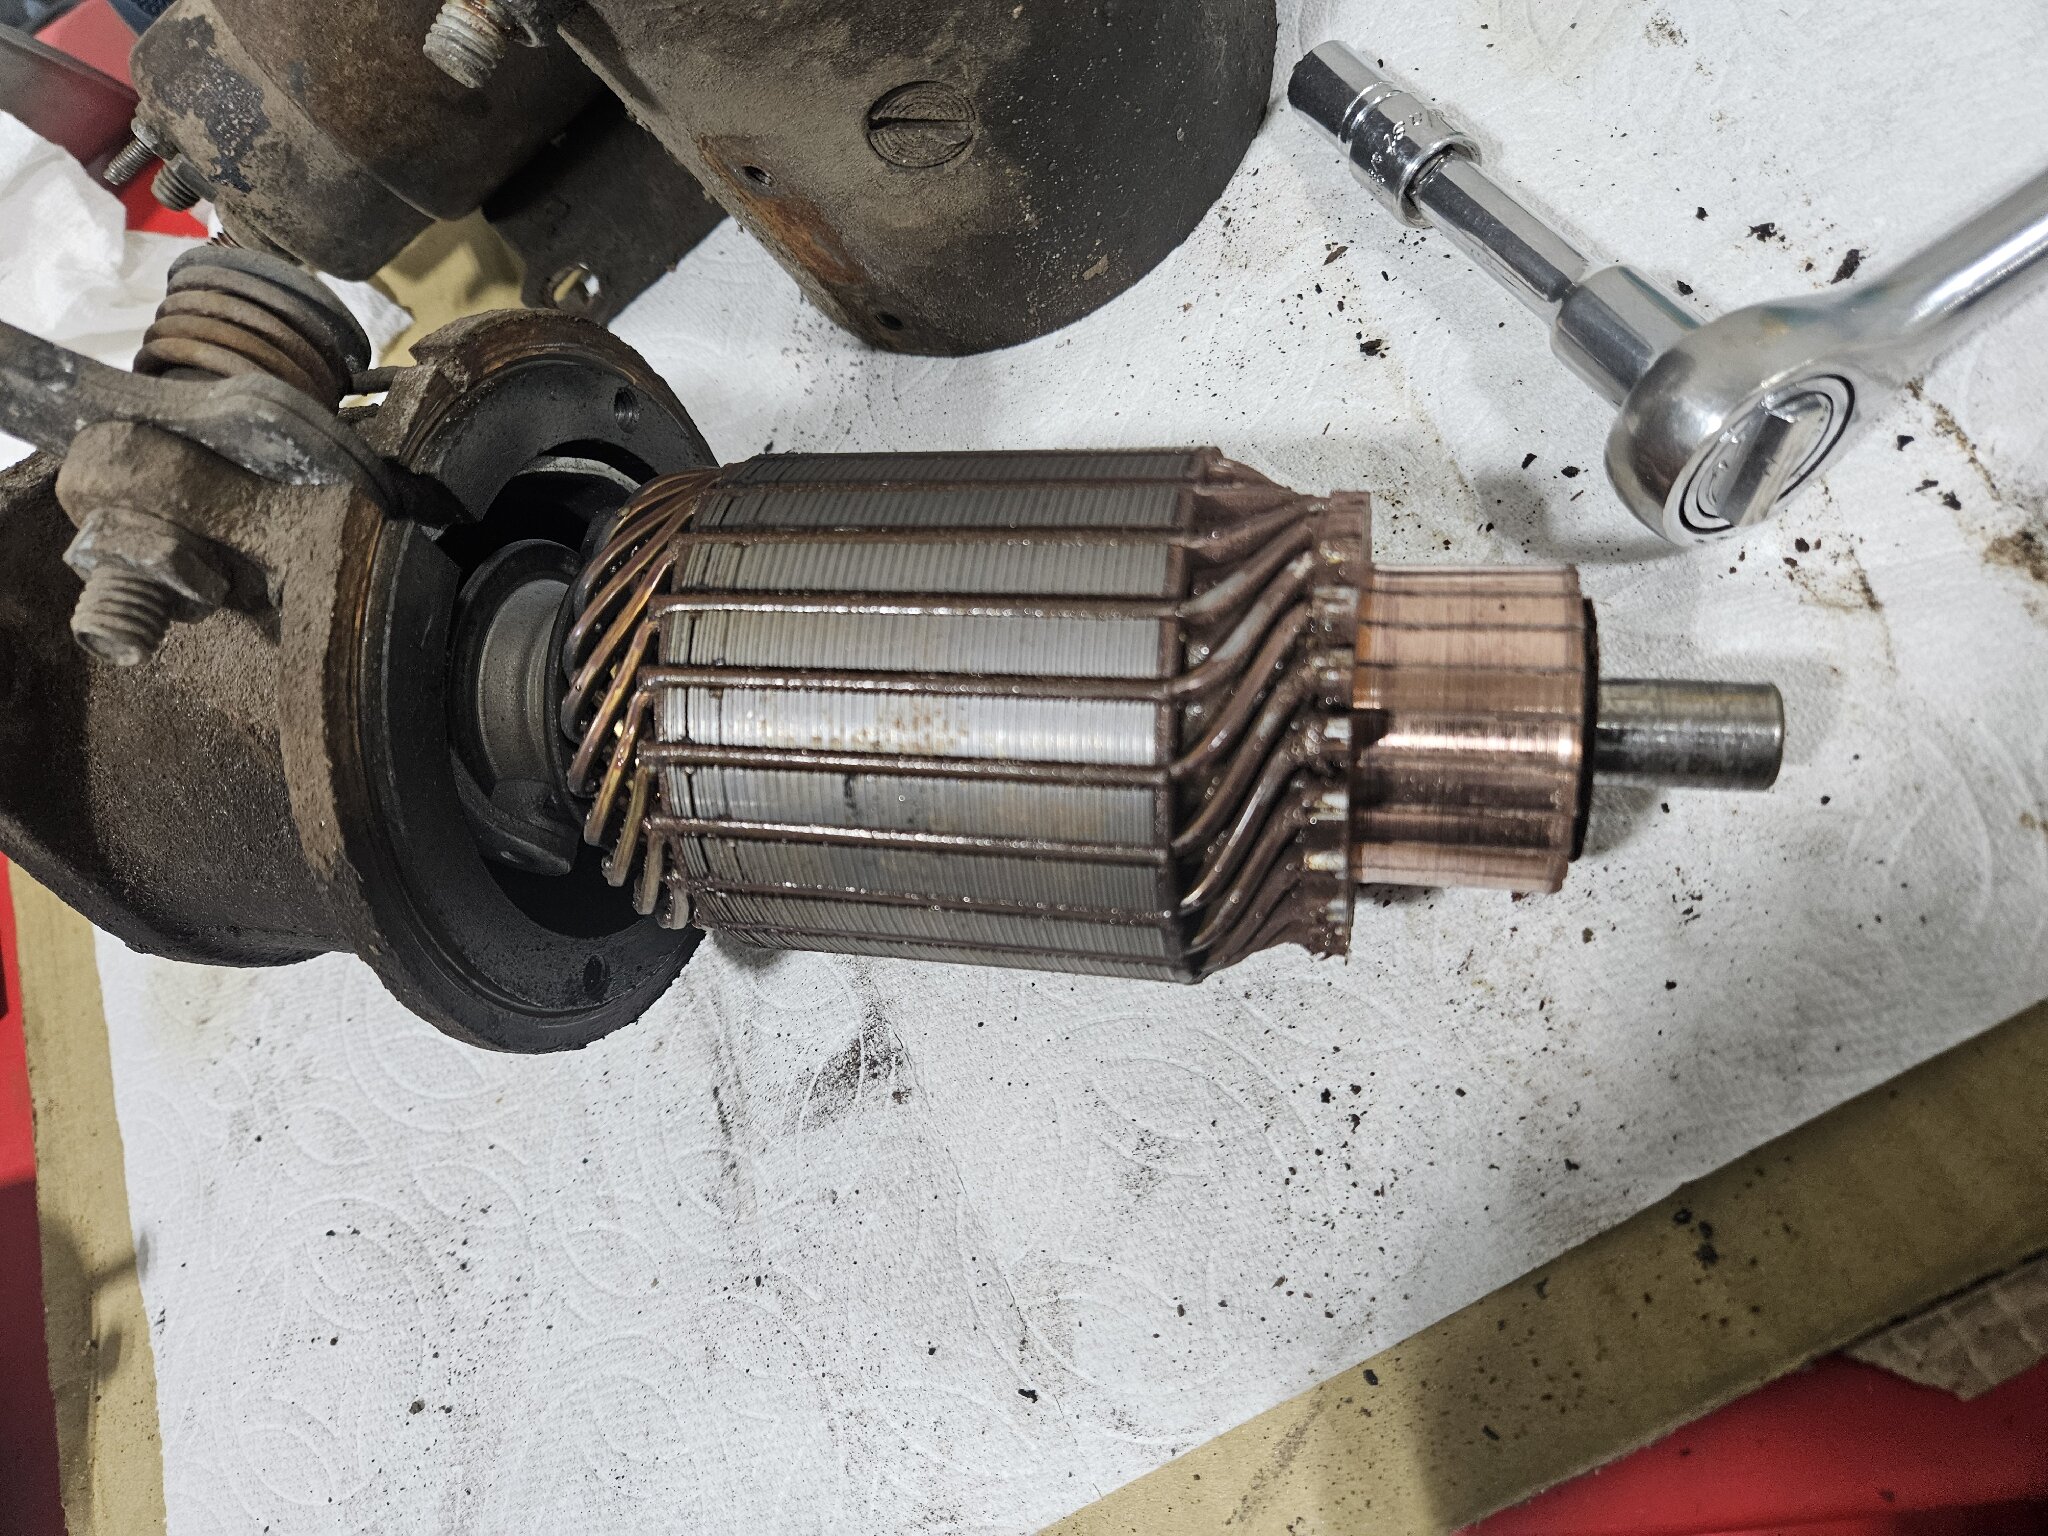 The commutator is worn and the mica undercuts seem to be filled in with copper shavings. Am I good to clean out the undercuts and leave the rest as is? Or do I need to have it all turned on a lathe? 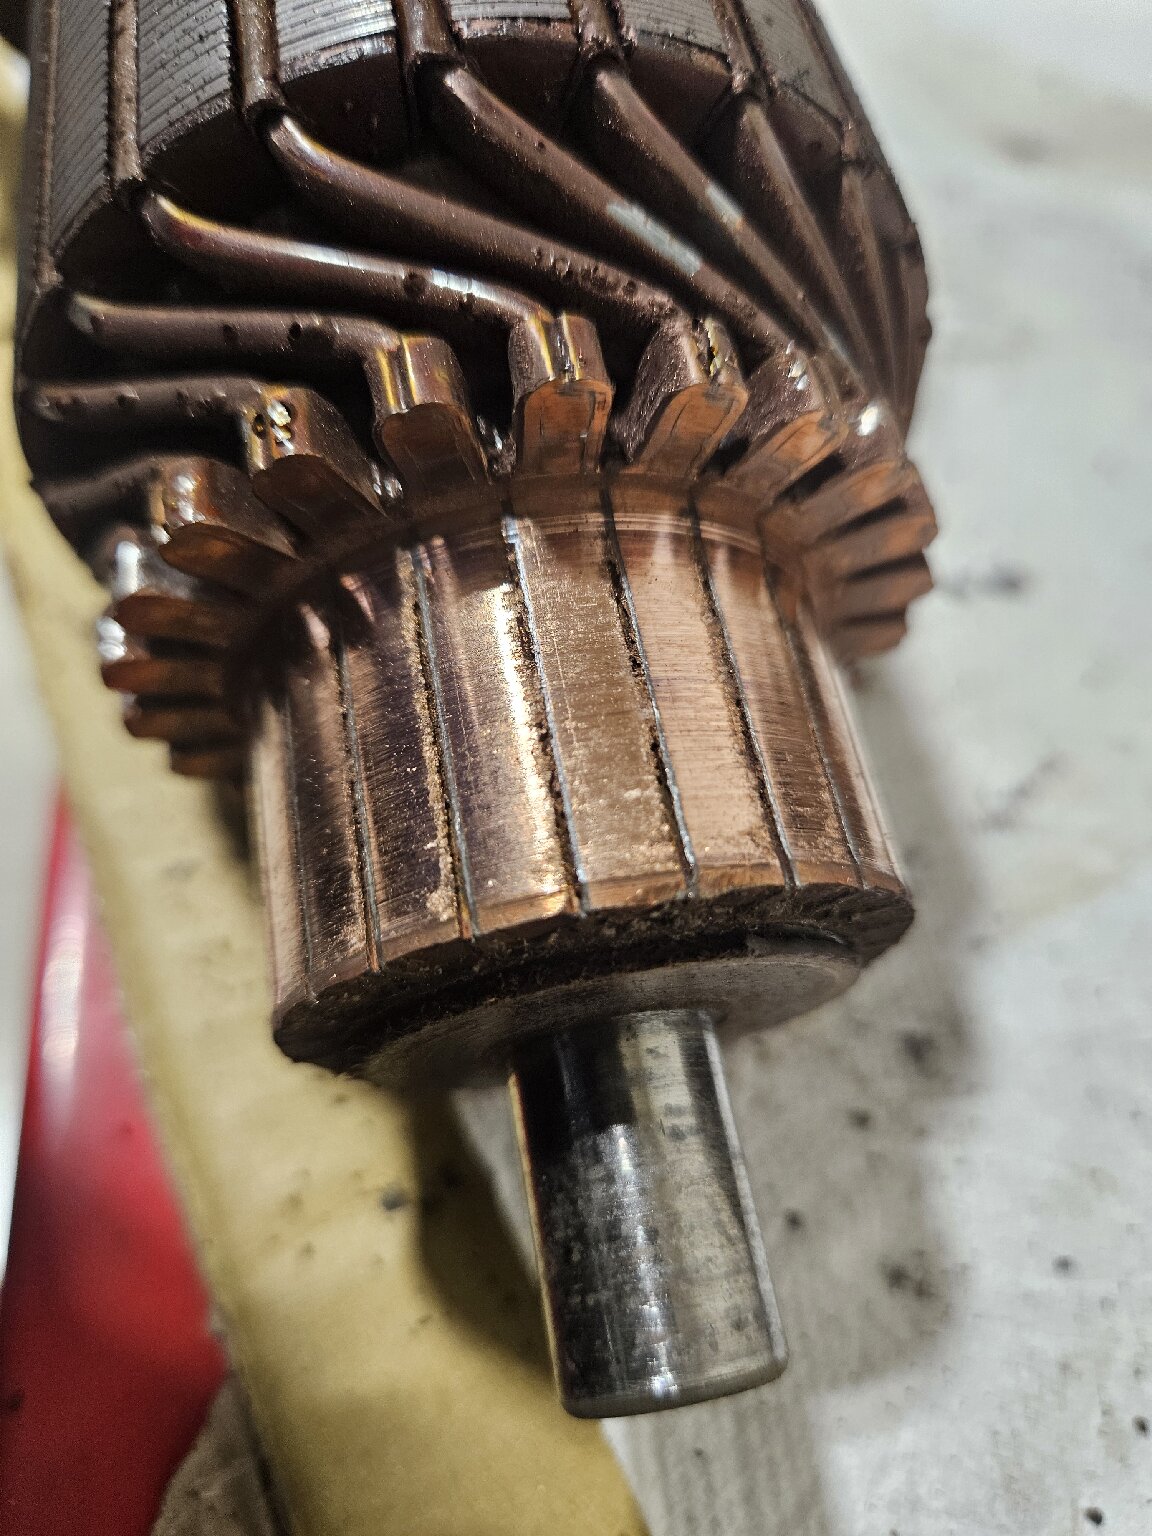 The brushes are worn down to very little. It looks as if they were barely touching the commutator. Some of them have odd curls on the edges of them. I'll be replacing all these as well as the bushing. 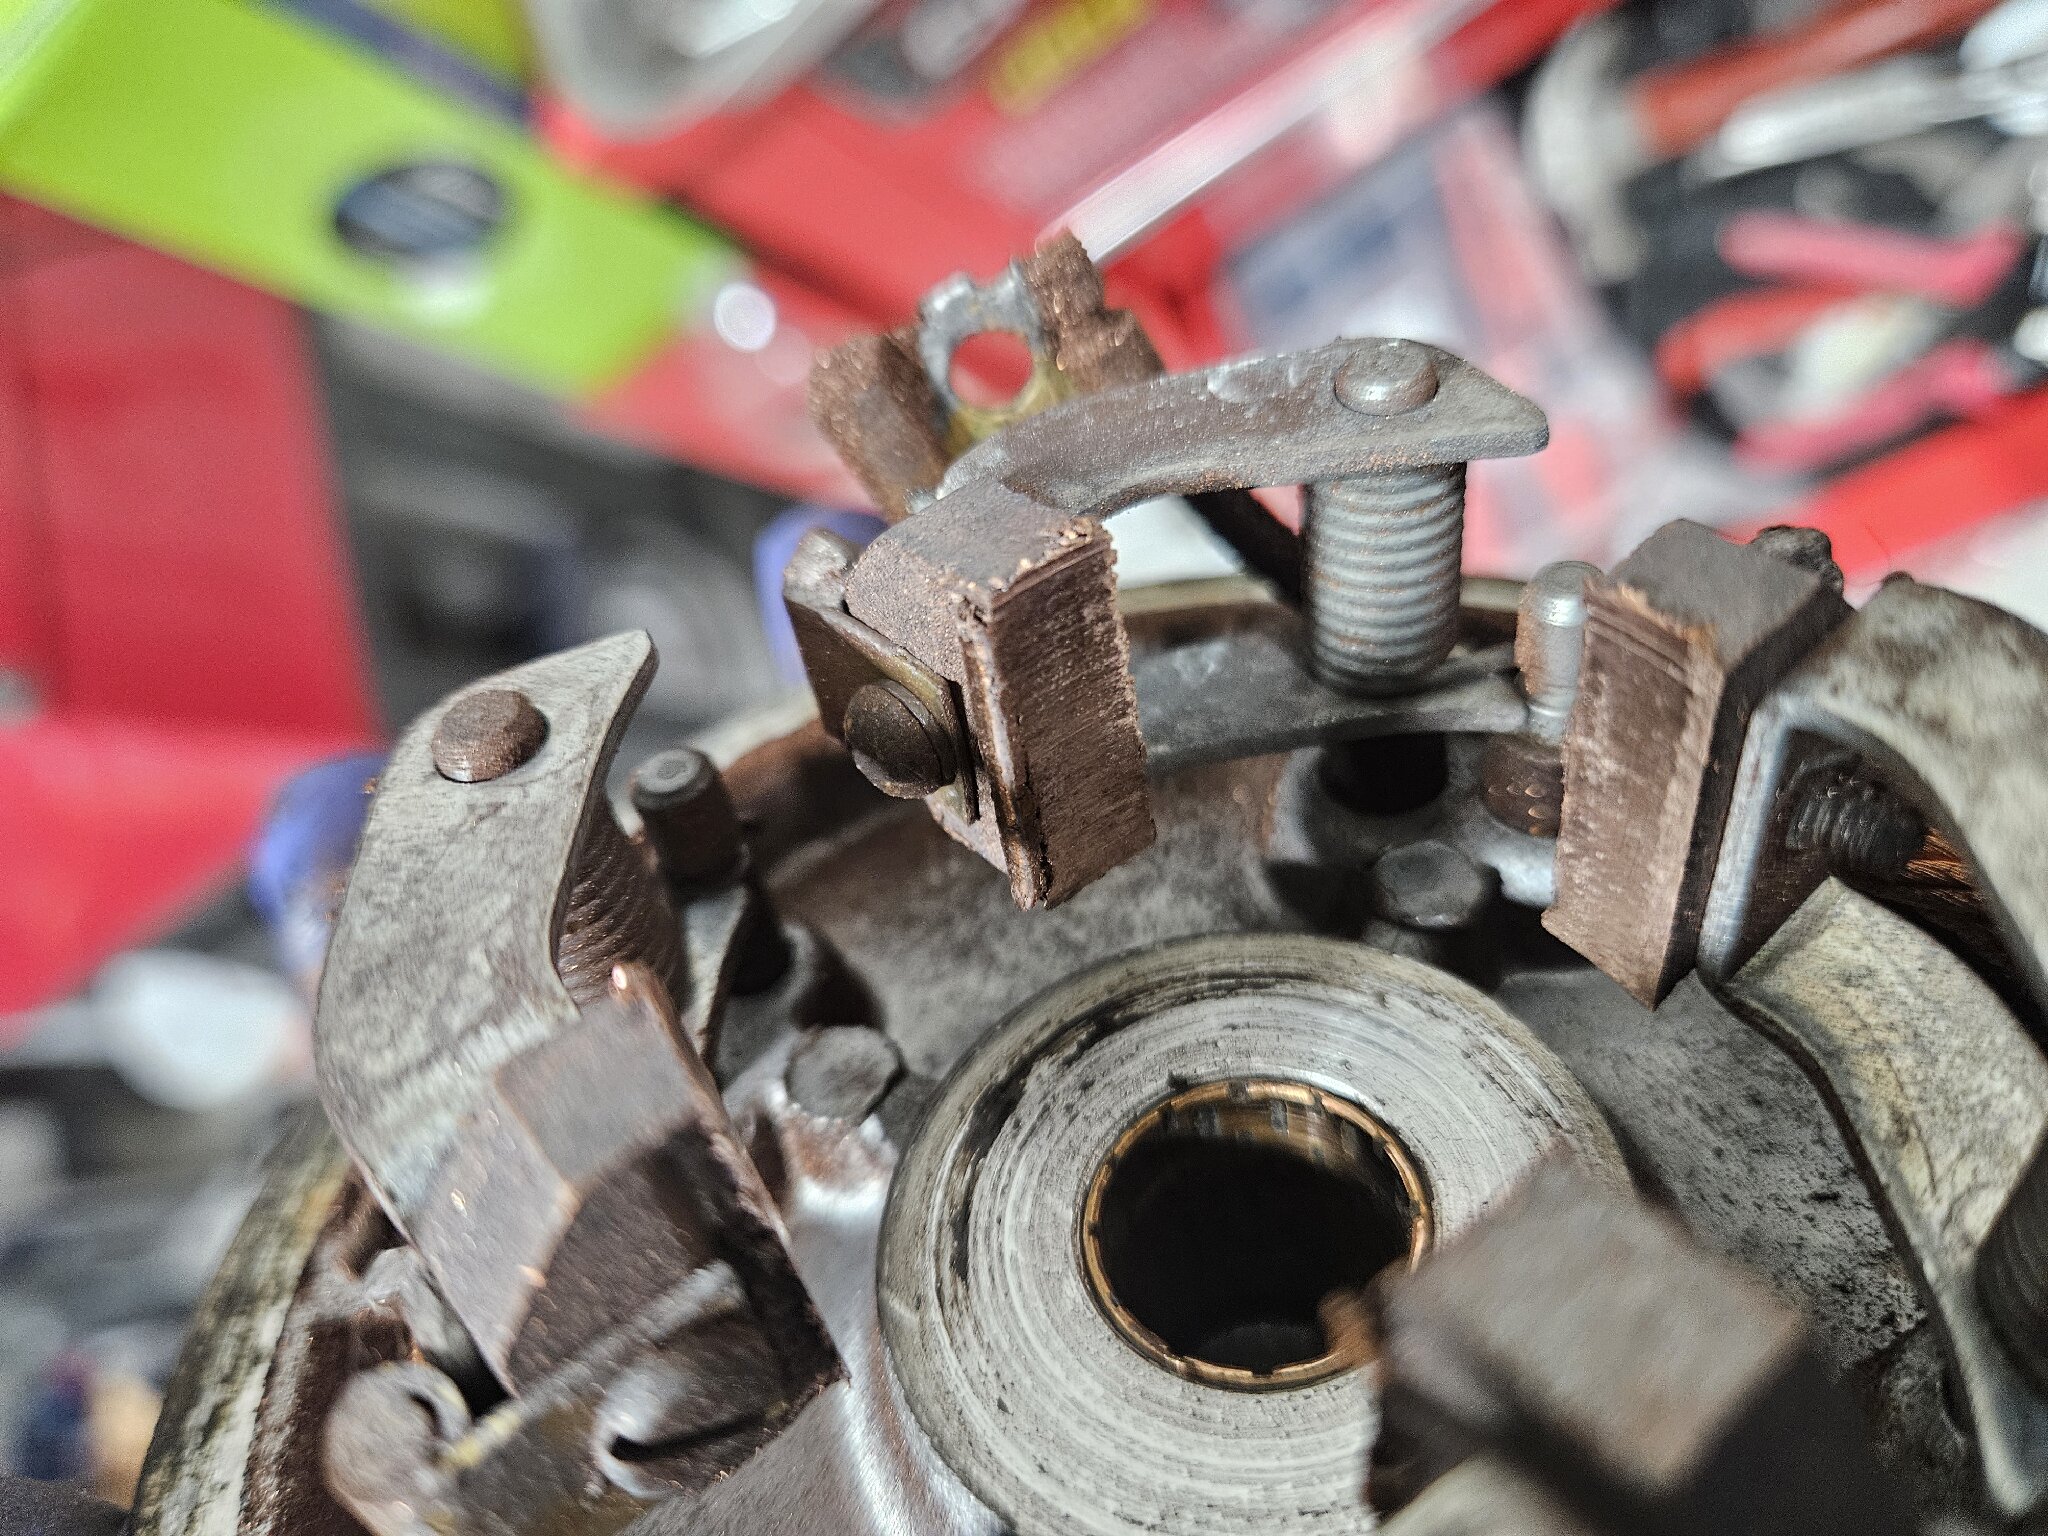 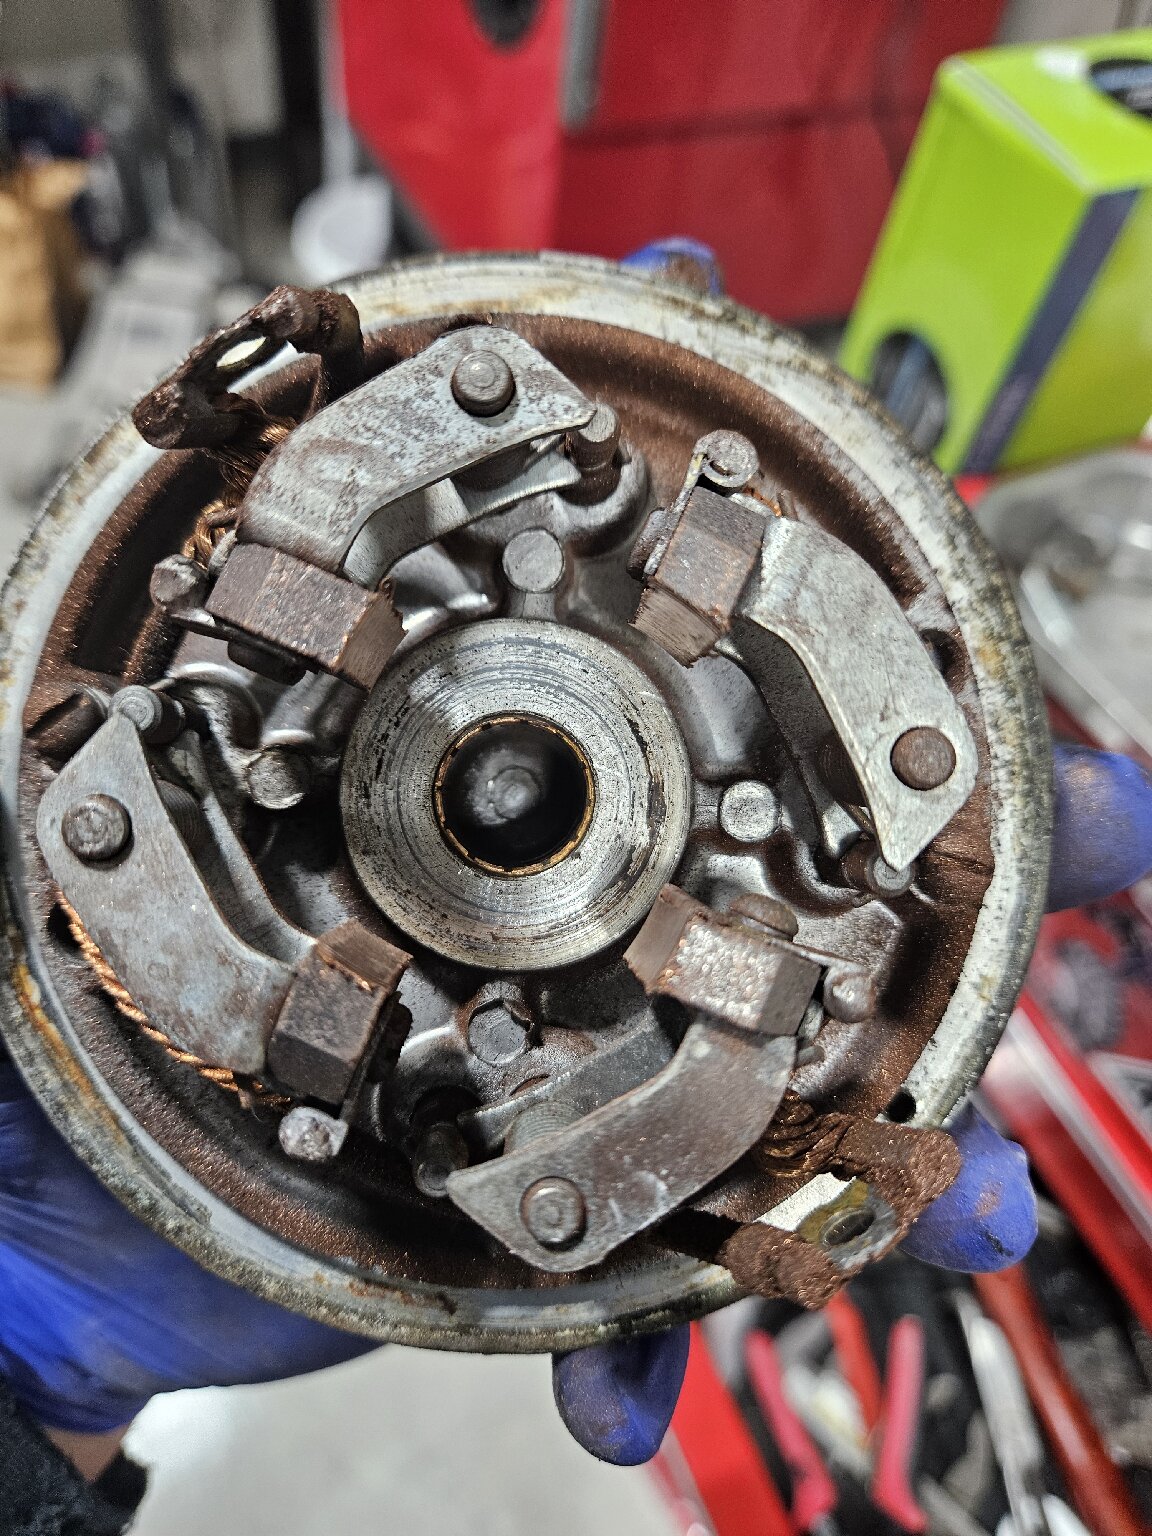 Lastly, there is copper dust everywhere. I don't know if that means anything or not, but it's messy. 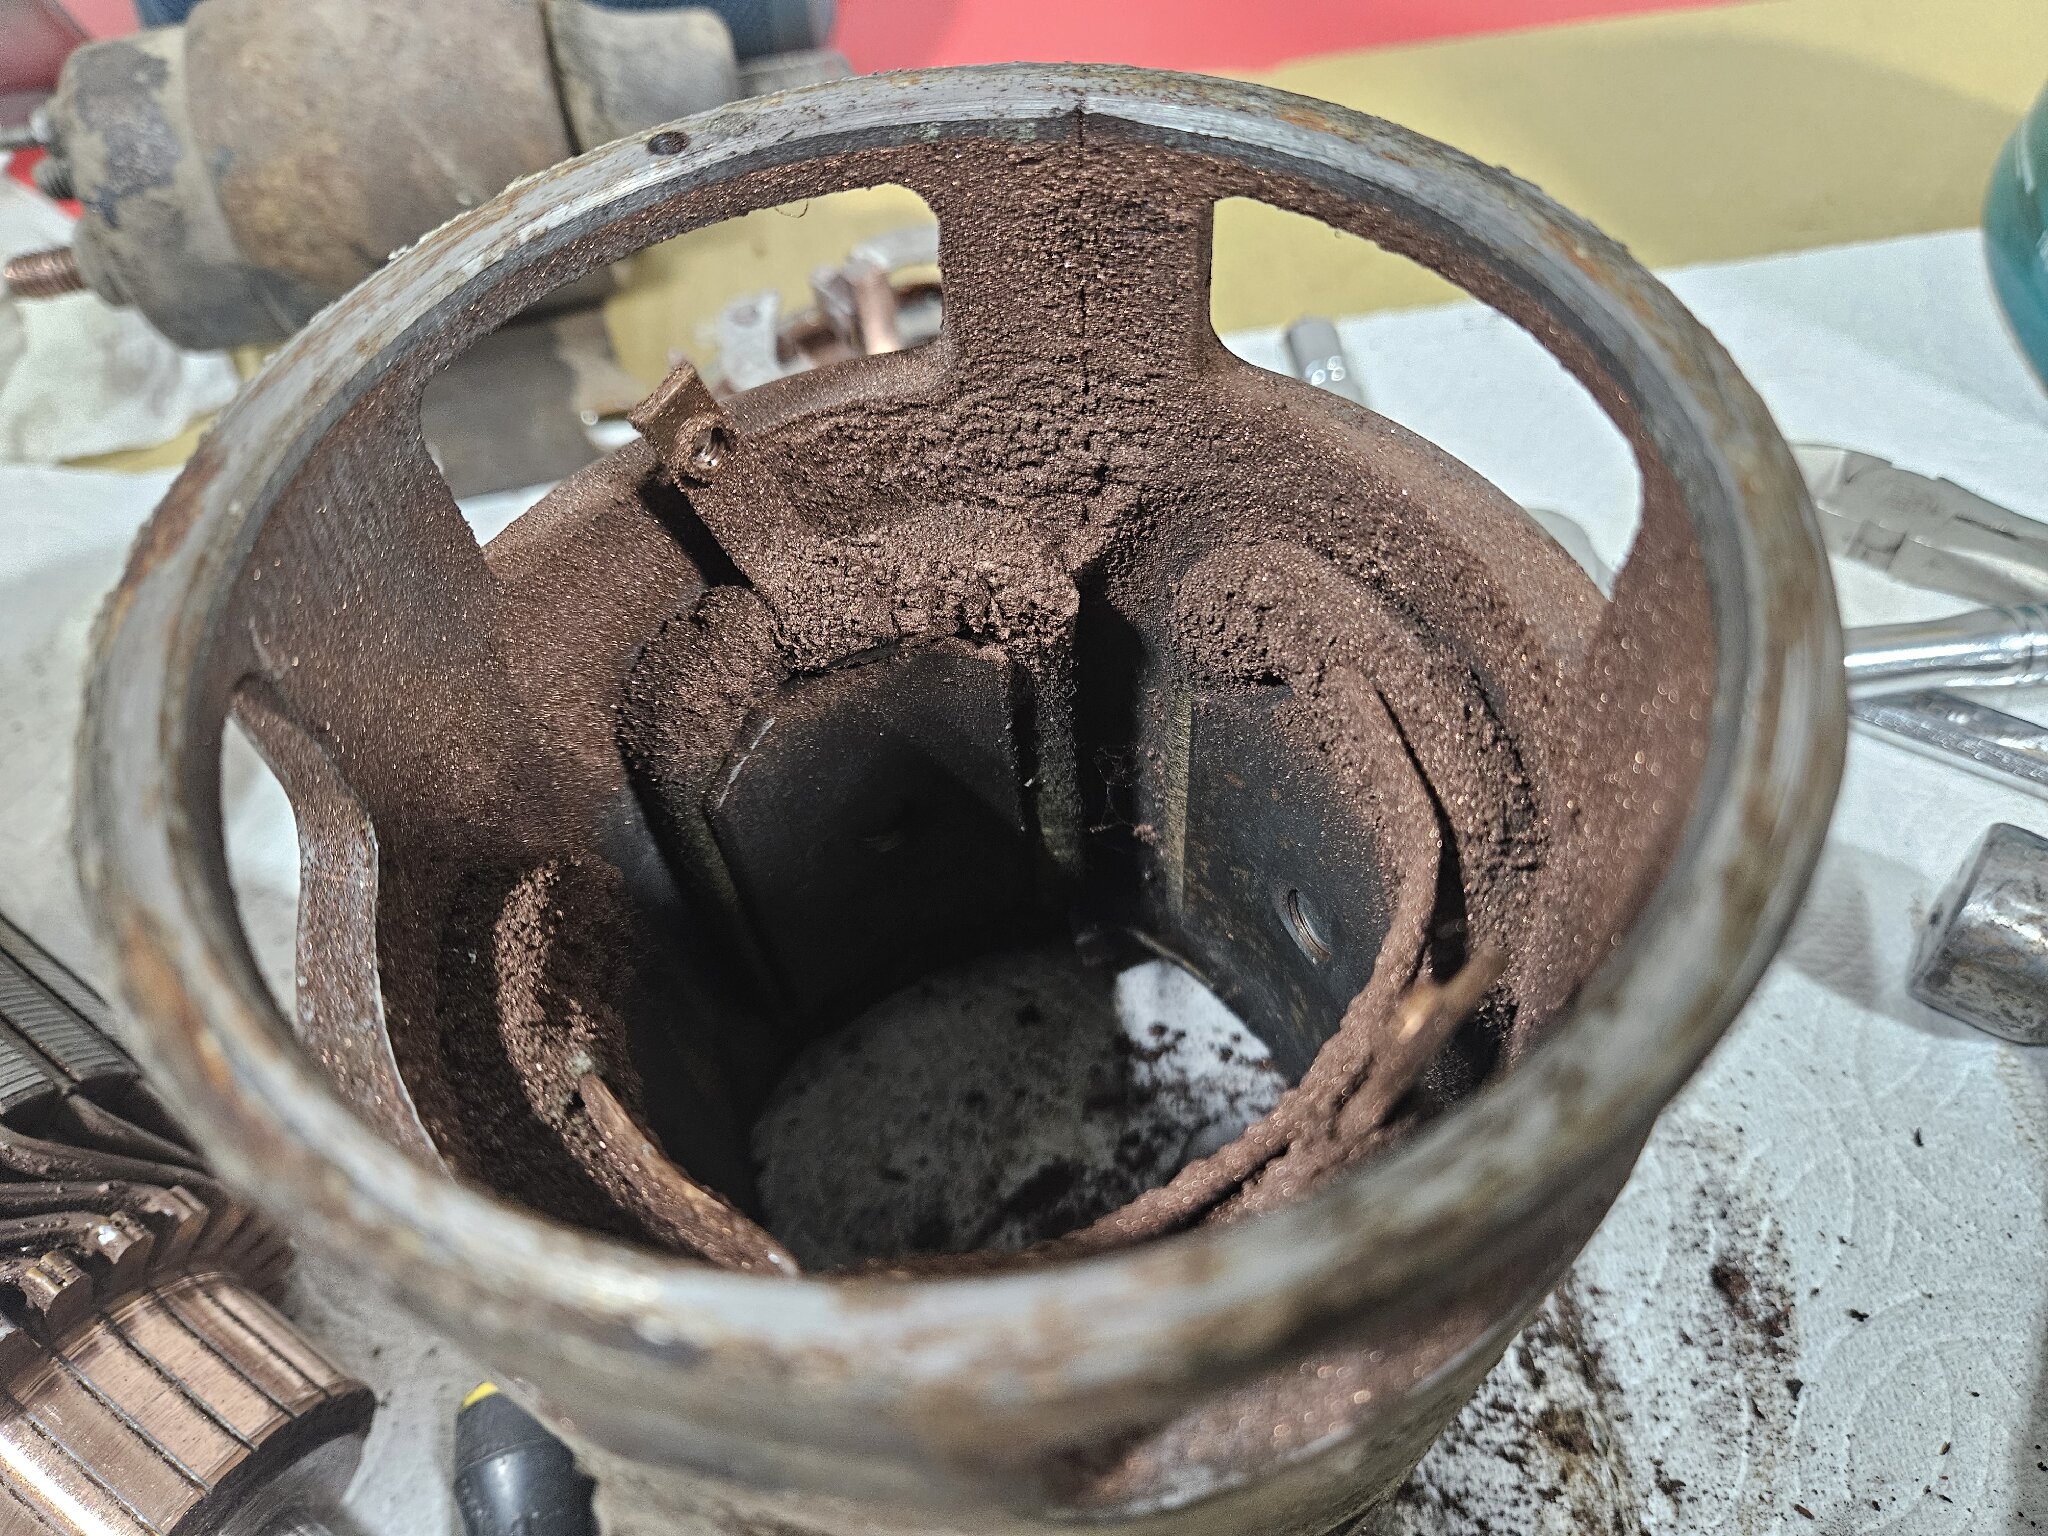
Posted on: 2024/3/7 11:55
|
|||
|
||||
|
Re: KPack's 1954 Panama
|
||||
|---|---|---|---|---|
|
Forum Ambassador
|
And if the problem continues intermittently after the starter is gone thru, don't forget the ign switch. The solenoid pinion shift type starters pull a lot of current thru the minimally sized starter contact in the switch resulting in known failures in 54-6 ign switches. Symptoms are intermittent operation of the switch as a whole which can sometimes be "fixed" by jiggling the key and overall roughness moving between positions. In worst cases the starter hangs on and fails to quit running when key is released.
Here is an example of a typical failure. The small starter contact should have a smooth rounded surface much like the larger ACC, IGN and BAT contacts. In this example there is a hole in the starter contact because it became so overheated it finally melted. The corresponding area on the contact plate was also melted. Attach file:  terminals.jpg (166.50 KB) terminals.jpg (166.50 KB)
Posted on: 2024/3/7 12:44
|
|||
|
Howard
|
||||
|
||||
|
Re: KPack's 1954 Panama
|
||||
|---|---|---|---|---|
|
Home away from home
|
Quote:
This upper bolt is the devil's work. The solenoid is massive and makes getting to this bolt a real pain. I got it eventually, but involved me laying across the fender and engine with my feet in the air. That must have been a sight! Although I didn’t have my feet in the air, I did have to climb into my 1951’s engine compartment recently in awkward and uncomfortable positions when pulling the head and, as I am of a certain age and working by myself, it worried me a little but I got it done.
Posted on: 2024/3/7 13:26
|
|||
|
All generalities are false.
Once I thought I was wrong but I was mistaken. Don Pierson Packard / IMPERIAL page CA DMV Licensed Vehicle VIN Verification 1951 Henney-Packard 3-Door Long Wheelbase Air Force Ambulance The 1951 Henney-Packard is For Sale! 1954 Packard Patrician 1954 Packard Patrician Parts Car 1956 Clipper Custom Sedan |
||||
|
||||


