|
Re: More Floor!
|
||||
|---|---|---|---|---|
|
Home away from home

|
I have a Duronmeter. If anyone would like to send me a sample i can check the hardness. Not sure if your local tire store has a durometer or not.
Posted on: 2008/10/24 16:38
|
|||
|
VAPOR LOCK demystified: See paragraph SEVEN of PMCC documentaion as listed in post #11 of the following thread:f
https://packardinfo.com/xoops/html/modules/newbb/viewtopic.php?topic_id=7245 |
||||
|
||||
|
Re: More Floor!
|
||||
|---|---|---|---|---|
|
Home away from home

|
Quote:
The Shore A hardness of my stuff is measured at 80 + 5. Which seems to be right in line with most of the manufacturers who sell aftermarket poly bushings. From what I can tell, most of them range from the high 70's into the 90's for hardness in Shore A. Hopefully my new homebrew bushings will be better on the road than the old rubber ones that have all deteriorated and squished out of position.
Posted on: 2008/10/24 19:38
|
|||
|
||||
|
Re: More Floor!
|
||||
|---|---|---|---|---|
|
Home away from home

|
You guy's and this project makes me wonder how well this idea would work for suspension bushings. Do they make a pourable polyurethane that's the same kinda stuff as the performace poly bushings you can buy for modern cars?
Posted on: 2008/10/24 19:54
|
|||
|
||||
|
Re: More Floor!
|
||||
|---|---|---|---|---|
|
Forum Ambassador

|
If you can get the specs of what you're wanting to make, this place would probably have it.
http://www.freemansupply.com/LiquidToolingMater.htm
Posted on: 2008/10/24 20:26
|
|||
|
||||
|
Re: More Floor!
|
||||
|---|---|---|---|---|
|
Home away from home
|
I was thinking of performance polyeurethane bushings for all the suspension components on my '37 chassis. Couldn't tell you what the specs would be.
Posted on: 2008/10/24 20:29
|
|||
|
||||
|
Re: More Floor!
|
||||
|---|---|---|---|---|
|
Forum Ambassador
|
Doing a quick google on polyurethane bushings indicates the specs are all over, proprietary for the most part. The few sites that gave a number for suspension pieces were around 85-95 shore A. Some had graphite impregnated, others used a modified flex poly. For motor/trans mounts it was around 75.
One site had universal body mounts that were 85, so seems the Rhino and Flexane is in the ballpark. My suggestion of using silicone molding compound might be too soft, however that website said most rubber mounts are around 60 and to use the poly ones for added rigidity and less body shake. Obviously, they never rode in a Packard. Don't think too much shake there. Did find a chart on one site that gives references for durometer. In your case, it would almost seem that you'd have to get hold of a bushing intended for the purpose and then measure, and make your custom shape for your 37. Attach file:  (15.05 KB) (15.05 KB)
Posted on: 2008/10/24 21:31
|
|||
|
||||
|
Wow, back to work on the Clipper
|
||||
|---|---|---|---|---|
|
Home away from home
|
Well, I'm not proud of the fact that it's been almost a year since I could work on the Packard. Every day, I'd come to work and see it staring at me from the back parking lot. Yesterday, I finally had enough room to move it back inside to review where I had left off.
Well, still dealing with the floors and rockers. I decided to remove the door to get better access for the job ahead. Luckily there weren't any problems. I had it supported from above, so it just swung out of the way once the last screw was removed. I hope that I can get some momentum on this project to keep it moving through the winter. I really want to be driving it on a regular basis next spring and summer. Attach file: (56.25 KB)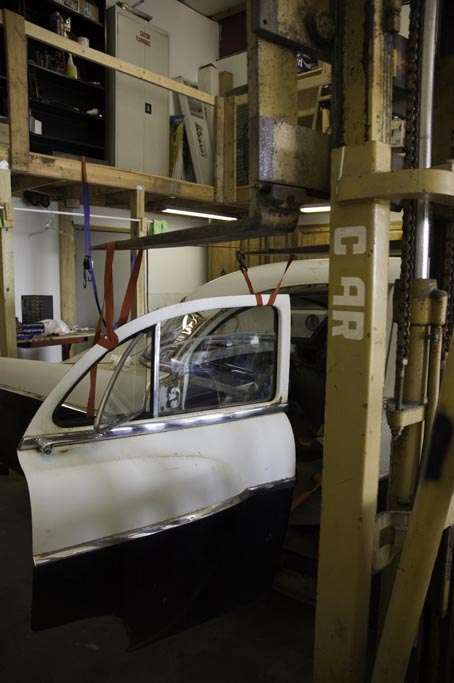 (56.72 KB) (56.72 KB) (53.58 KB) (53.58 KB)
Posted on: 2009/9/17 20:21
|
|||
|
||||
|
New Toys Today
|
||||
|---|---|---|---|---|
|
Home away from home
|
I made a Craigslist purchase today.
Found an ad for some aircraft cleco clamps. Turns out they used to belong to the sellers father who passed away. This combined with the new manual hole punch I recently got will aid in the rust repair I'm knee deep in. I'm pretty happy with the purchase. They run from 1/8 inch up to 1/4 inch and they're all the heavy duty wing nut style with a max force of 300lbs. In all I got 110 clamps for $70. I'll probably never need anywhere near that many, but it was a good deal and I'm bound by a crippling addiction to tools. Attach file: (72.03 KB)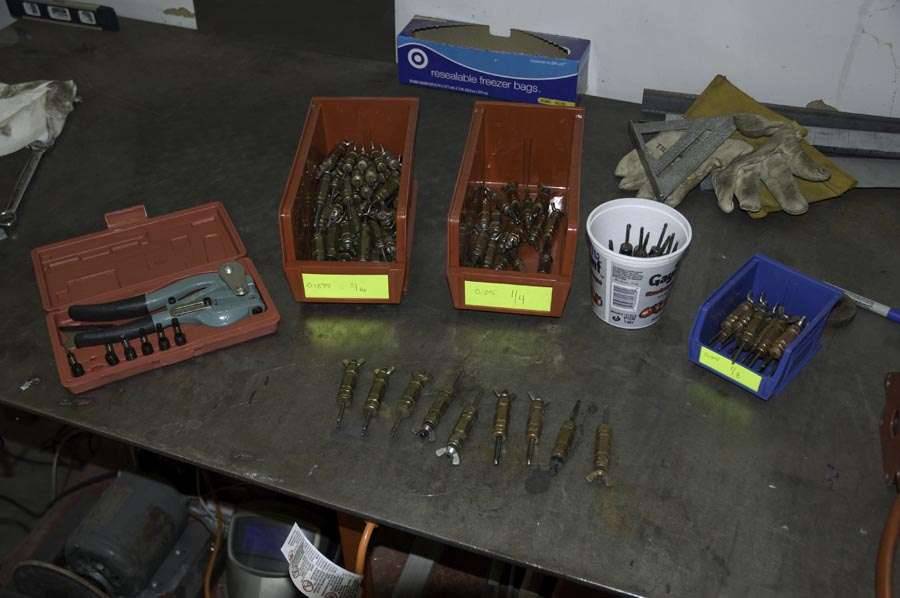 (62.13 KB) (62.13 KB)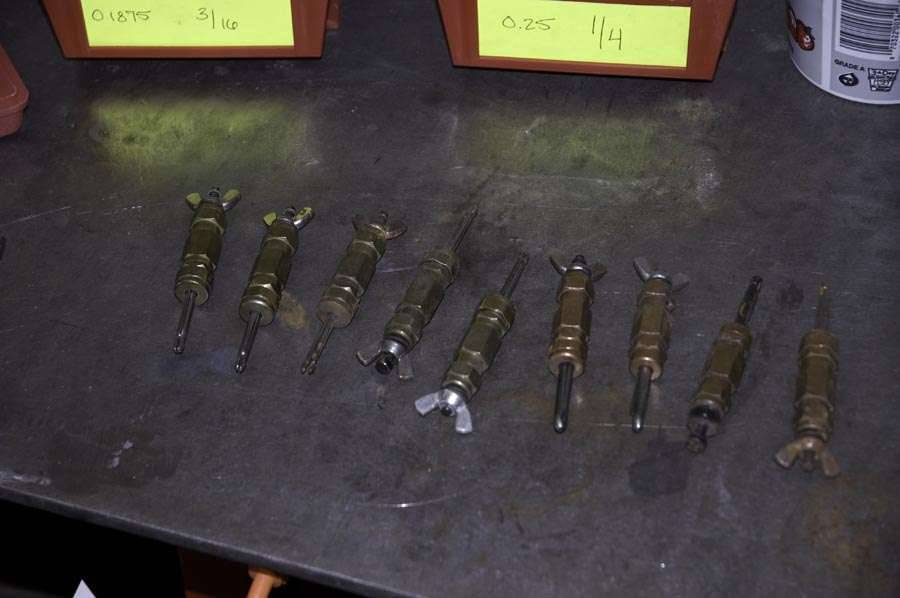
Posted on: 2009/9/23 22:48
|
|||
|
||||
|
Re: Keegan's 55 Clipper Deluxe
|
||||
|---|---|---|---|---|
|
Home away from home
|
Started to take the front clip apart today. I got the hood off without much trouble. I'm going to have to find a better long term storage spot for it.
I moved to the bumper next. I was pleased that only one of the nuts put up a fight. I just had to get out the torch and heat it up. It broke loose quickly and the bumper slid off the front end with out much trouble. The grill was next and it was a little harder. I had to remove the front tires to get at the bolts behind the headlight housing. Then the little bolts in the lower corners. The fight came from the blind bolt that is in the trim and sticks through the fender. It was just spinning and I couldn't get the nut loose. I ended up cutting it off with a sawzall. Even then it put up a fight. Maybe it would have been easier to take the trim off the rest of the fender. Then I'd have had access to the head of the bolt. But I was too angry to think of that option, so I just grabbed the saw. The other small problem I found was not knowing how to disconnect the wiring to the turn signals. So I just cut the wires. Next time the fenders should come off and I'll have better access to the floors under the dash. I'm kicking around the idea of taking the body off the frame. I know it's more work, but in the end it might allow me to do a few extra steps I've been thinking of. More on that later. Attach file: (73.83 KB)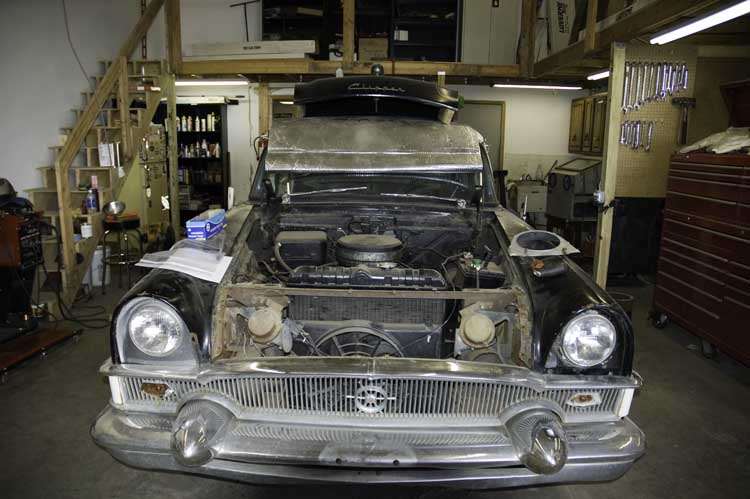 (66.44 KB) (66.44 KB)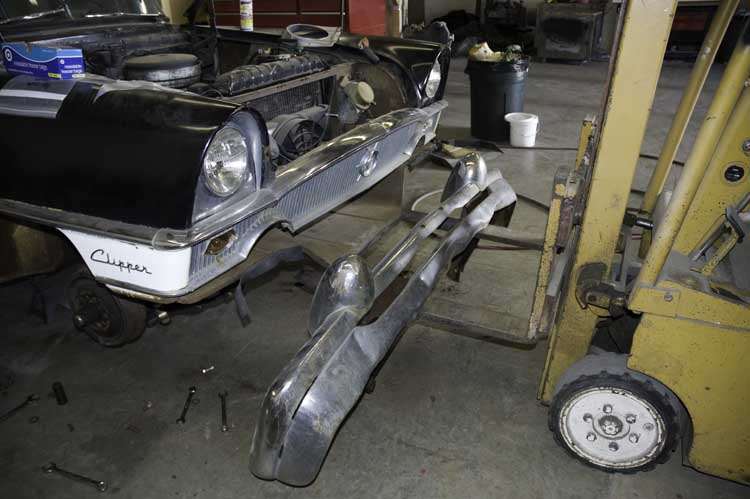 (70.20 KB) (70.20 KB)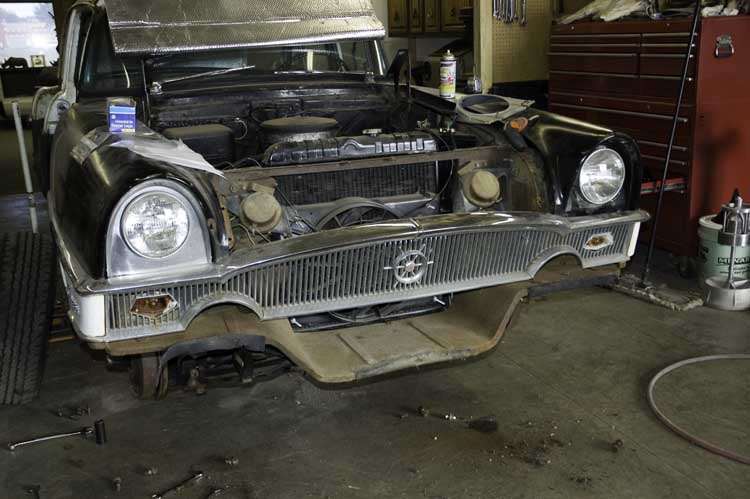 (72.14 KB) (72.14 KB)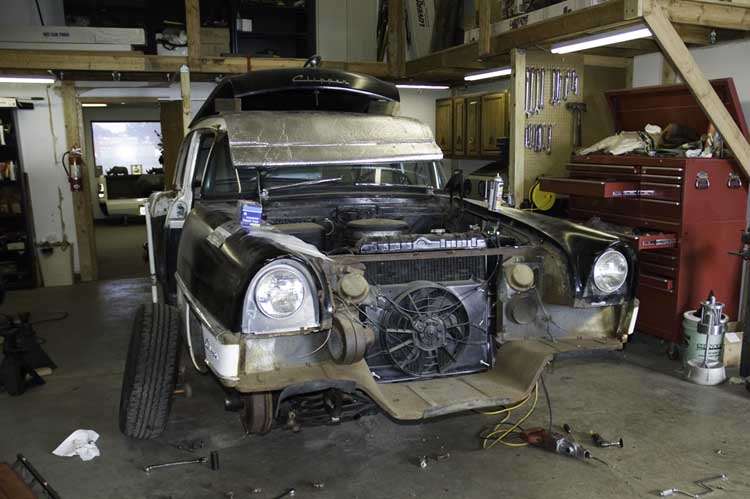
Posted on: 2009/9/29 21:15
|
|||
|
||||


