|
Re: The Duchess Project: 1940 Super 8 Convertible Sedan
|
||||
|---|---|---|---|---|
|
Home away from home
|
If you find yourself going through Dayton, stop on by.
Posted on: 2011/3/29 10:16
|
|||
|
West Peterson
1930 Packard Speedster Eight Runabout (boattail) 1940 Packard 1808 w/Factory Air 1947 Chrysler Town and Country sedan 1970 Camaro RS https://packardinfo.com/xoops/html/modules/newbb/viewtopic.php?topic_id=4307&forum=10 http://aaca.org/ |
||||
|
||||
|
Re: The Duchess Project: 1940 Super 8 Convertible Sedan
|
||||
|---|---|---|---|---|
|
Home away from home

|
Thanks for the invite, West. I always figured 1 hour of repair for every 6 hours of continuous driving. I hope that won't be the case now, but...And I always carried my PI membership roster with me. It came in handy a couple of times.
My last visit to Dayton was in 1954. I stayed and played for a week before moving on to Columbus and Chicago. Be careful what you pray for. I have traveling companions. Joe Attach file:  (26.68 KB) (26.68 KB)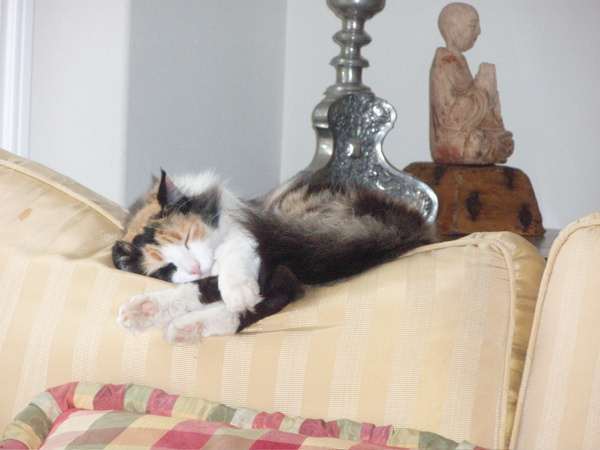 (26.51 KB) (26.51 KB)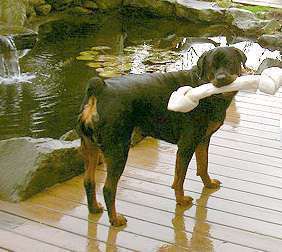
Posted on: 2011/3/29 10:26
|
|||
|
||||
|
Re: The Duchess Project: 1940 Super 8 Convertible Sedan
|
||||
|---|---|---|---|---|
|
Home away from home
|
Yeah. That could be a problem. The first one would become lunch, while the second one would probably kill mine.
I'm not listed in the directory, so you'll have to add my name/number to your list. If you're interested in vintage air planes, the Air Force Museum is here, and is really second to none in the world. Free of charge. Takes at least a day or two to see everything. Attach file: (105.22 KB)
Posted on: 2011/3/29 14:37
|
|||
|
West Peterson
1930 Packard Speedster Eight Runabout (boattail) 1940 Packard 1808 w/Factory Air 1947 Chrysler Town and Country sedan 1970 Camaro RS https://packardinfo.com/xoops/html/modules/newbb/viewtopic.php?topic_id=4307&forum=10 http://aaca.org/ |
||||
|
||||
|
Re: The Duchess Project: 1940 Super 8 Convertible Sedan
|
||||
|---|---|---|---|---|
|
Home away from home
|
You're in the book now, my friend. OK to edit it out. I have it.
Nice looking, right-sized dog, West. Suki does not back down from dogs. Sophie was 5 years old when Suki was introduced to my household. Imagine a 138# Rotty and a little calico nose to nose. When Suki walks by, Sophie puts her head down and turns away. They travel well in the Pacifica, Suki in front, Sophie in back, but I'm getting some large size doggy hiking boots with rubber soles and velcro straps for Sophie, and probably a throw I can strap to the footman loops. We'll do some trial runs, but I may just have a house-sitter care for them while I'm galavanting. I wrote a song for Suki (Making Whoopee for the melody) A little ham. A little cheese. Albacoretuna, if you please. And chop it finer. Ain't Sophie's Diner. It's all for Suki. Give me fresh water. And kibble, too. Make sure my cat box don't smell of poo. When it gets lumpy, I get real grumpy. Not good for Suki. BRIDGE Make sure my cat door's open. I lead a social life. I know it may sound catty, but With me, who needs a wife? Now brush my fur. "O yeah, right there." Just get it right, and I will purr. Your obligation is adoration. And all for Suki. What does have to do with Packards? Nothing unless I need someone to help me push and pull it down the road. Protect me from highwaymen if I have to stop and rest. BTW My business partner flys. Just finishing up building a little ligthtweight one. Taxied it for the first time yesterday during lunch. He also just finished a 53 Chev pickup and won first prize in his class...stock...at a central Oregon hotrod car show two weeks ago. Besides the museum of flight in Seattle, we have 2 here. One in Tillamook on the coast and one in McMinnville at Evergreen Aviation...several warbirds including a spitfire and a 109, plus the Spruce Goose. So we'll see who makes it where first. Joe Attach file: (32.23 KB)
Posted on: 2011/3/29 14:58
|
|||
|
||||
|
Re: The Duchess Project: 1940 Super 8 Convertible Sedan
|
||||
|---|---|---|---|---|
|
Home away from home
|
I'm aware of your fabulous air museums out there, but haven't been to them. I can say this, though. The Air Force Museum makes the Smithsonian look like a nick-nak shop.
Of course, there's a pretty neat Packard museum downtown as well, if you're interested in that sort of stuff. My dog, Lucky, kills wood chucks on a regular basis... or, at least she used to. The chucks have up and left our property forever. She hasn't figured out how to kill raccoons, yet. She's caught plenty of them, but their necks don't seem to break. If she could kill something once a day, she still wouldn't be happy. However, she's as gentle as can be with humans... that said, our lunatic postman started kicking her, and she ended up fighting back.   Attach file: (228.34 KB)
Posted on: 2011/3/29 15:23
|
|||
|
West Peterson
1930 Packard Speedster Eight Runabout (boattail) 1940 Packard 1808 w/Factory Air 1947 Chrysler Town and Country sedan 1970 Camaro RS https://packardinfo.com/xoops/html/modules/newbb/viewtopic.php?topic_id=4307&forum=10 http://aaca.org/ |
||||
|
||||
|
Re: The Duchess Project: 1940 Super 8 Convertible Sedan
|
||||
|---|---|---|---|---|
|
Home away from home
|
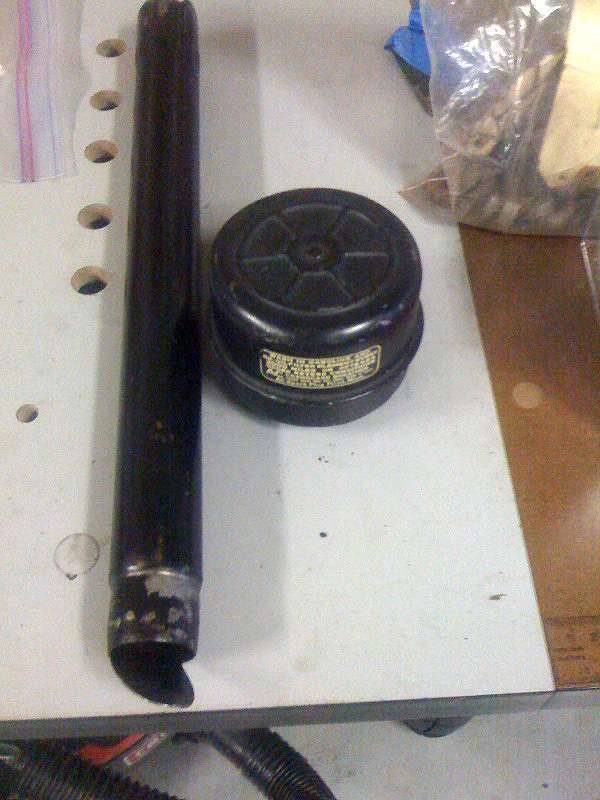
SWAP MEET: I went last week and picked up a few small items from David Moe, Seattle-Packard. I found the jack I was looking for at a Portland booth that specializes or has a lot of tools.
I was also looking for hold-down clamps for the removable center posts. Hard to find because only used on convertible sedans. At David's suggestion I visited the Wescott booth. They're from Damascus, Oregon, pretty much hot rods and Fords. They make the hold-down hooks and brackets for the front bow of 1940 Ford convertibles, but but the hooks themselves are identical to 1940 Packard convertible hooks. They don't make the side clamps, but would if I had a sample. DOOR SILLS. I was looking for these. I had enough for the front, 43 inches each side, but they look awful. I made a few minor repairs and polished them. They look fabulous. David is looking for the a couple of 22" ones for the back. CHROME ITEMS. I started the debate with myself over the wipers. I have vacuum, and with a double action fuel pump, they will work fine, I decided. I have electric ones unrestored that look very ill. Sent the wiper mounts in and the seat adjustment collar which I got from David, mine long gone. DOORS: I started with the rear door stop "strap". These looked really bad, rusted from moisture inside the door. I worked on them quite a bit. At the show I found out David makes them new. I made a leather and canvas cushion for the strap to ride on and added new bumper rubber to stop the back door from swinging forward into the front door. I went through the bags and boxes of door hardware. All the handles had been rechromed. I had done some of the filing myself which gave me a real appreciation for what Oregon Plating does. I added the new plastic from Yesterday's Radio to the escutcheons and made new shafts to hold the new plastic knobs. I used a #5 metric roll-pin 1-1/8 long (all that was available). Set it in my hand drill and put the drill in the vise. Set it in motion and used my dremel tool with a cutting disk to make a slit very close around one end. This is to hold a circular clip which sits inside the end of the handle. I ground off 1/8th in. from the other end, slipped on the teflon washer and dropped some super glue in the knob. Worked well. John Ulrich has the hairpins that are broken on most cars. I thought mine were fine, but they are missing half the pin, so ordered those. His website shows what they should look like. HOLD DOWN CLAMP I finally found the hold down clamp, sort of. Perko makes chrome deckware for boats and sells through marine stores. I bought one and removed the part you press on. They come with a hook, but it's different than the one on the car. And the bracket it's on likewise. I had my bracket and hook. I thought I could use the loop that came with it, but it was too short, so I made a longer one out of stainless rod and polished it. It came out great. OUT IN THE AIR I took the car outside again, this time to the front of the house so I could vacuum out my Brand X. It got a nice airing. THE GRILL. I've been dreading this job, terrified I'd scratch the new chrome in the process of re-riveting each of the grill shutters or scratch the grill housing itself trying to get everything to fit. I wrapped up everything. I didn't take it apart, Oregon Plating did, so it took me awhile to figure out where pieces go and which direction. I had bought a riveting tool from Hanson Rivet to use on my Bill Hirsch shoulder rivets and it worked beautifully. (My friends at the Ace Hardware said you can hit it with a punch to get it started, then with a flat punch) But I liked the way this thing worked and too much was at risk as far as I was concerned. As I added each shutter, I taped it to the one already done at the opposite end and held it like you hold a bass fiddle, resting against my shoulder. Once I got the knack of it, it wasn't bad. After I got a set done I attached it to the frame by taping all the shutters flat to a piece of masonite, then sliding the all the pokers in their holes. Even though there were rubber tips on the ends to prevent chroming them, some poked through and little chrome hairs protruded. I dremeled them off. I took more pictures but they are as bad as these. For me it was an all-day process BUT the patient came through it without a single scratch and is recovering nice. PAINT. This week the Duchess goes to the beauty parlor ...like some women I've known, piece by piece. All the parts go in Wednesday, and the body and chassis after that. I'm excited. Attach file: (48.26 KB)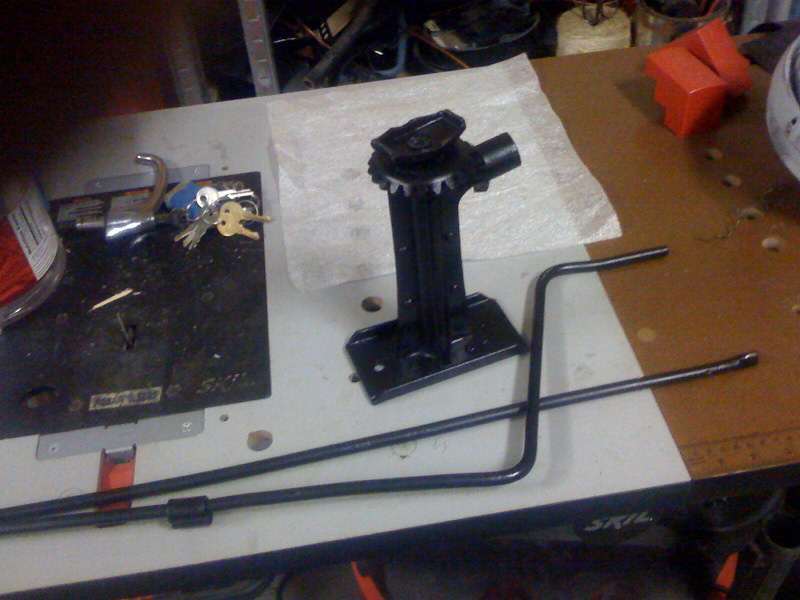 (40.10 KB) (40.10 KB) (52.34 KB) (52.34 KB) (56.21 KB) (56.21 KB)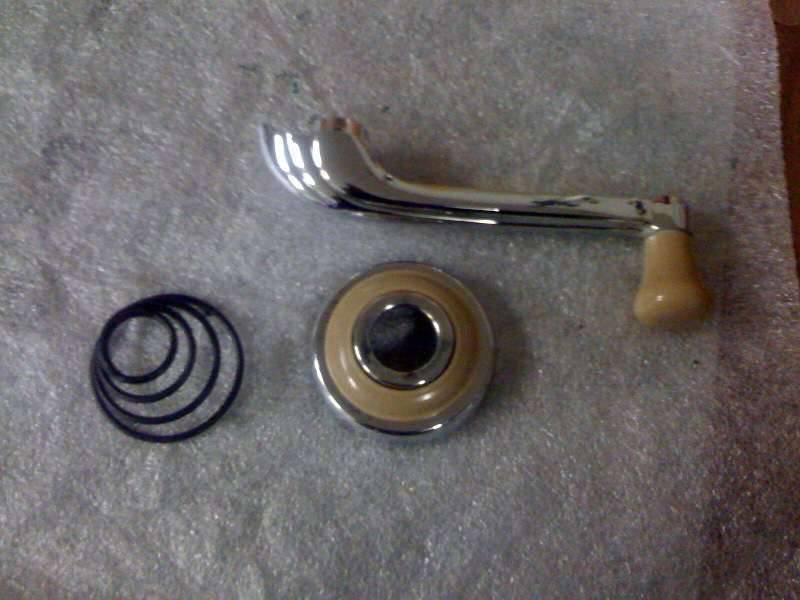 (45.42 KB) (45.42 KB)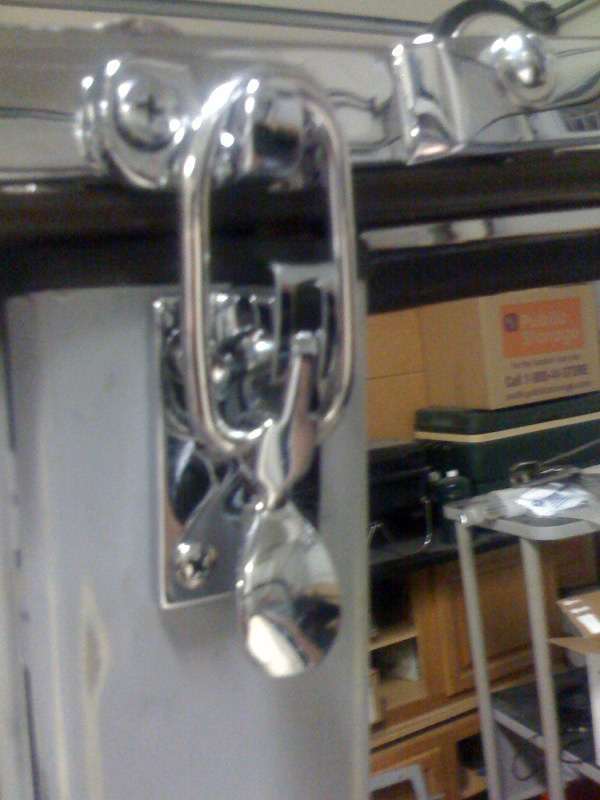 (45.88 KB) (45.88 KB) (57.96 KB) (57.96 KB) (52.93 KB) (52.93 KB) (0.00 KB) (0.00 KB) (47.78 KB) (47.78 KB) (62.06 KB) (62.06 KB) (72.28 KB) (72.28 KB)
Posted on: 2011/4/11 0:43
|
|||
|
||||
|
Re: The Duchess Project: 1940 Super 8 Convertible Sedan
|
||||
|---|---|---|---|---|
|
Home away from home
|
GRILL: The only reason some people choose Packard.
To answer a PM question: The rivets are from Hirsch Automotive hirschauto.com PAC-SR Packard Shoulder Rivets $16 for a pack of 20. I needed 14. The tool is from Hanson Rivet hansonrivet.com. HT-178 Hand Rivet Clincher for 5/32 dia tubular rivets $25. As measured using my pathetic caliper. The tenon diameter is .156 Hanson doesn't mfr these, but using the dimension categories in their catalog, I approximated the size: Packard Grille Shoulder Rivets FLAT .203 .125 .156 .125 .313 .063 SEMI-TUBULAR BRASS Attach file: (88.21 KB)
Posted on: 2011/4/11 9:02
|
|||
|
||||
|
Re: The Duchess Project: 1940 Super 8 Convertible Sedan
|
||||
|---|---|---|---|---|
|
Forum Ambassador

|
Joe, I've certainly enjoyed very much watching this project progress - a very commendable effort on a very worthwhile car. And I can relate to comments about assembling the winterfront, I just helped a friend do the riveting and assembly of his from a 1936 Twelve. Not a one-man job.
PS - your jack looks a bit different than the one shown in the Reedy/Shaub book on Packard jacks for a 1940 senior car.
Posted on: 2011/4/11 9:15
|
|||
|
||||
|
Re: The Duchess Project: 1940 Super 8 Convertible Sedan
|
||||
|---|---|---|---|---|
|
Home away from home
|
Thanks, OD, that comes as a big compliment.
AUTHENTICITY, TEXTURE MATTERS: I don't want to sound ungrateful, because people who support the hobby with parts are a god-send, BUT... It seems a minor amount of research would yield a more authentic replacement product. Case in point, the firewall from one vendor has a sort of vinyl leatherette pattern and the edging is plain. The original is bumpy like pigskin, like a football....and you know today's footballs only mimic pigskin, so the pattern is available. Of course, the replacement hides in the dark under the dash and looks far better than my beta up original. Just saying. Likewise the glove compartment of a 1940 is that taupe brown with a leatherette texture. The replacement I bought is flocked. Flocked? Well, when I run out of things to do on the Duchess I'll use the replacement to cut a pattern for something more authentic. (And I have visions of using the back half of the glove box to ditch all the digital gear, not very authentic, either. ) DOOR FRAME WOOD: The wood behind the rear doors was mostly solid. It appears to be laid in in 1/4 in. tongue in groove (vertically up the middle) layers. The right side screw holes were shot. The screws that hold the dove tail and strikers, totally shot. The big wood screws that hold the rear side metal panels alongside the rear seat rusted and did their share of damage. I read the thread here on drilling them out clean and filling them with dowel. I drilled holes with appropriate size bits and took the bits to Home depot for matching dowel. The left side was too weak, but it was only the top 1/4-in. layer which pulled off easily. I cut a piece of plain floor moulding, because the profile from thick to slim matched the old piece. I notched it and used a dremel router attachment to make the 1/8" groove down the center. But that's all the wood I actually replaced. I also soaked everything in Minwax wood hardener. Maybe in another 70 years someone will still have something to work with. DOOR HANDLES: Again with help from a thread on this site, I bought some 1/6th pins [edit: 1/16th-in.] 3/8" long and took my handles to my son's, John. He used his drill press to drill those tiny holes and we re-assembled the handles which had been disassembled for chroming. We also installed the bobby pins that John Ulrich's website explains are nearly always broken by the time a car is 25-30 years old. These help to the handle level. Mine are so used that they need to be reset. It was suggested that the shaft be heated and twisted, but I should have done that before it went for chrome. On the latch there is a disk that's pressed when the handles are set. If I can release it with my dremel, we'll reset it and tack it. So is our hope against droopy door handles. FIREWALL CABLING. I've been staring at and transferring that piece of rubber I bought from Steele Rubber from receptacle to receptacle designed to seal around the cables and wire conduit on the firewall. Finally tackled that and it came out well. I also added the drain hose from the fresh air vent gutter. I couldn't find any black rubber hose the right size that had the ID matching the OD of the metal vent outlet tube and the OD to fit through the hole in the firewall, except for clear tubing. I bought that and sanded it a bit to dull the sheen, then painted it with black plastic lawn items paint. PARTS TO PAINT SHOP At long last I took two loads of fenders and hood parts, misc items to begin their final stage of prep and painting. The shop uses water-based basecoat (Envirobase PPG) under urethane clear. The color is Blackhawk Gray Metallic, a dark warm (brownish) gray. UPHOLSTERY I also have the upholstery job out to bid. The fellow who started it 5 years ago is too busy to start it right now. So hoping to have prices this week or next. Some of the work done was to make new panels for the front and rear doors, kick panels, rebundle the front seat springs. I don't know if I mentioned this earlier, but no points are taken off for replacing the springs with synthetic foam rubber, but new foam rubber isn't cheap either. And springs feel a lot different than foam because they travel with the weight of the sitter for a more comfortable, easy chair sensation. These seats were made like furniture. I think staying with the springs, even though re-bagging them is more labor. The original foam rubber on top of the springs is real rubber and is still resilient, so it's going back in. I'm sending my vacuum wiper motor to the WiperMan. Attach file: (49.49 KB) (63.66 KB) (63.66 KB)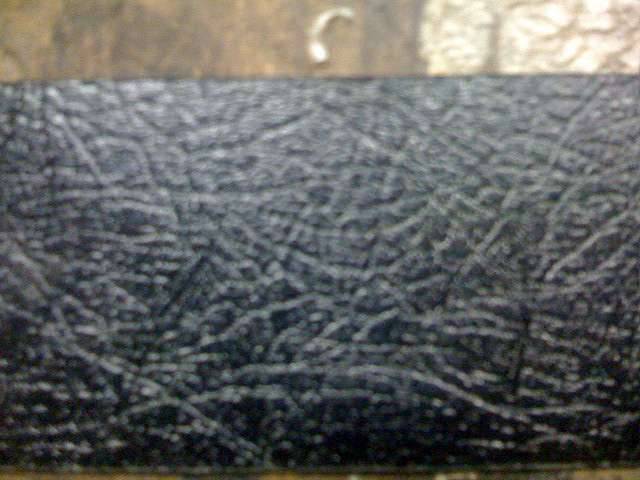 (220.90 KB) (220.90 KB)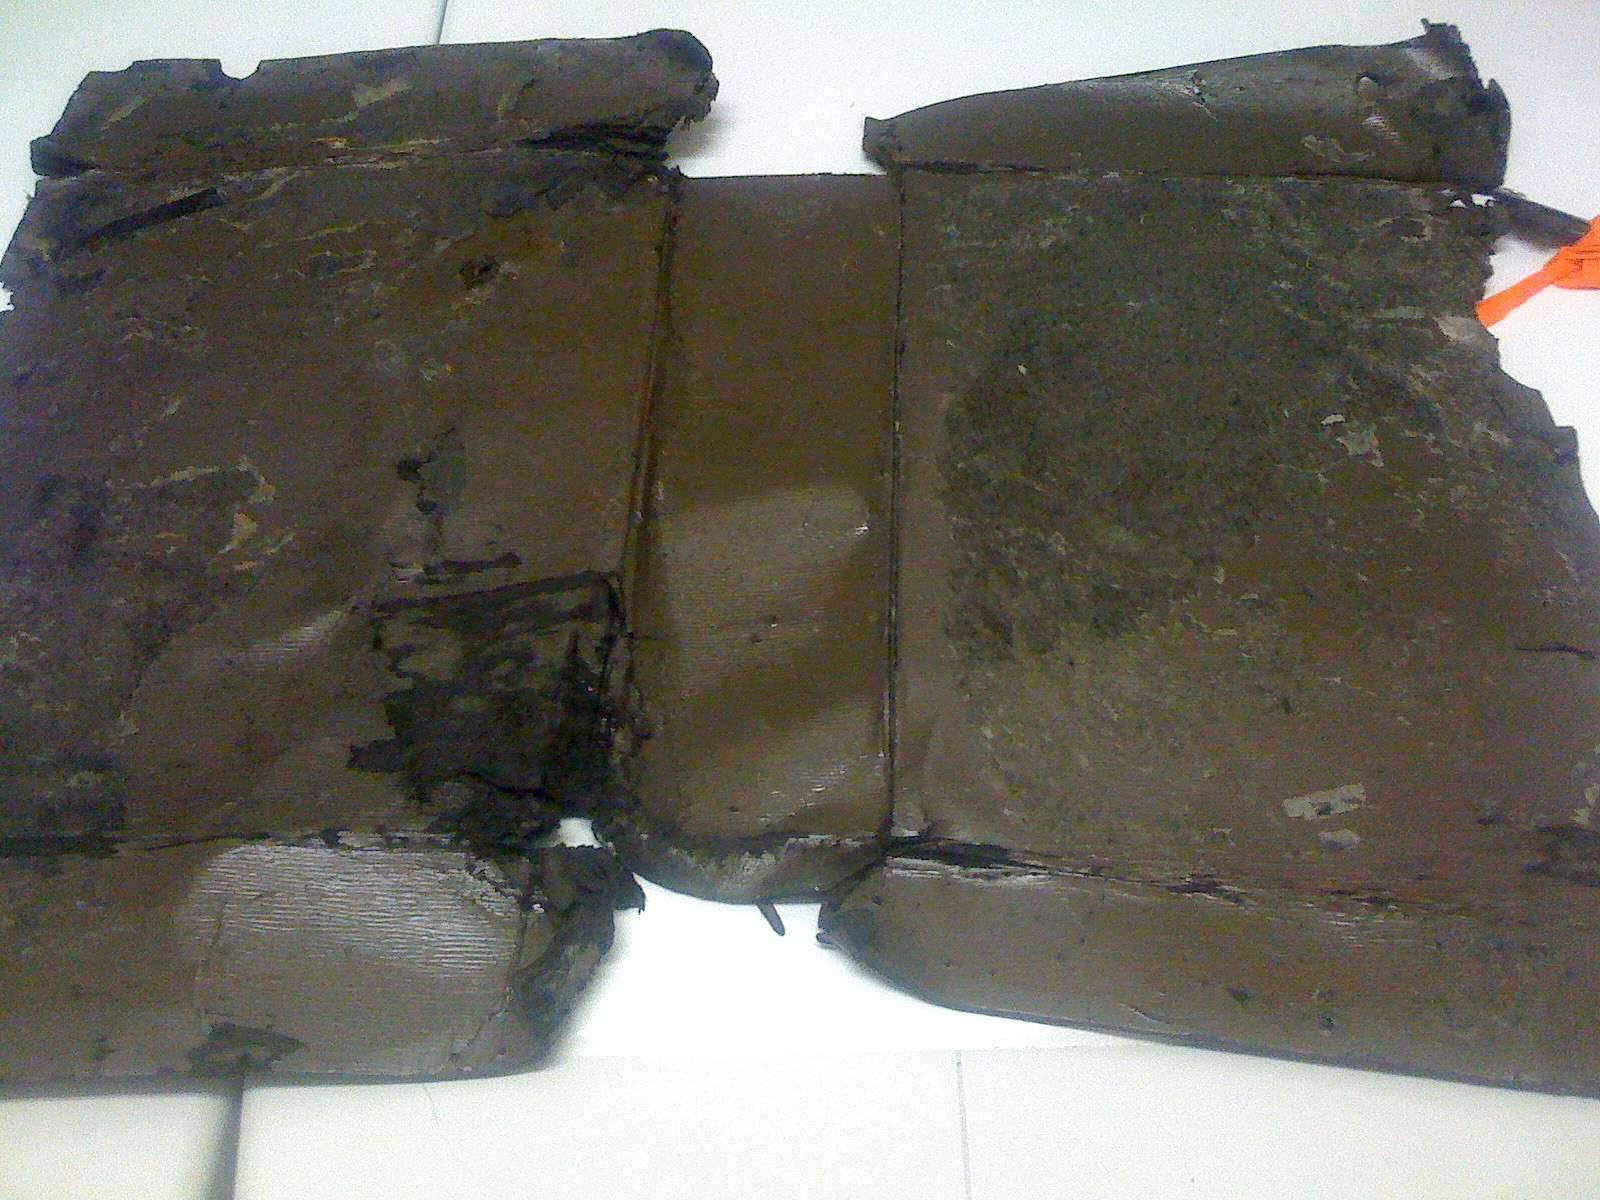 (62.96 KB) (62.96 KB)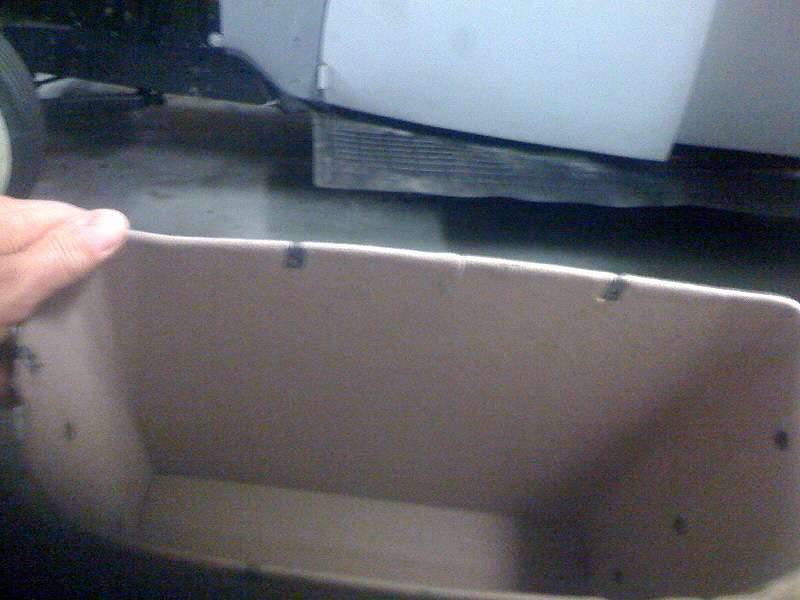 (53.51 KB) (53.51 KB)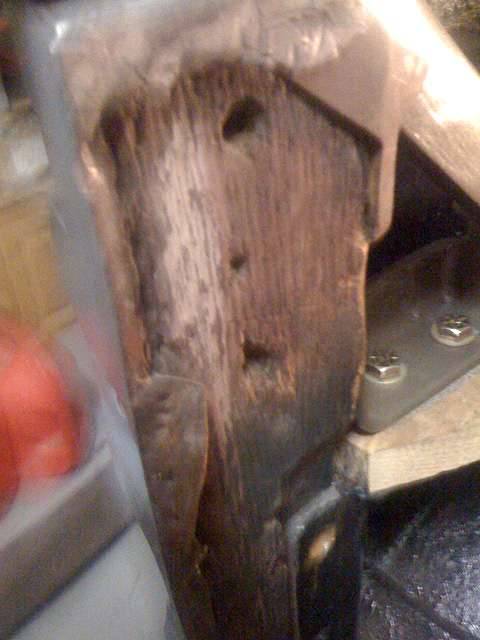 (46.36 KB) (46.36 KB)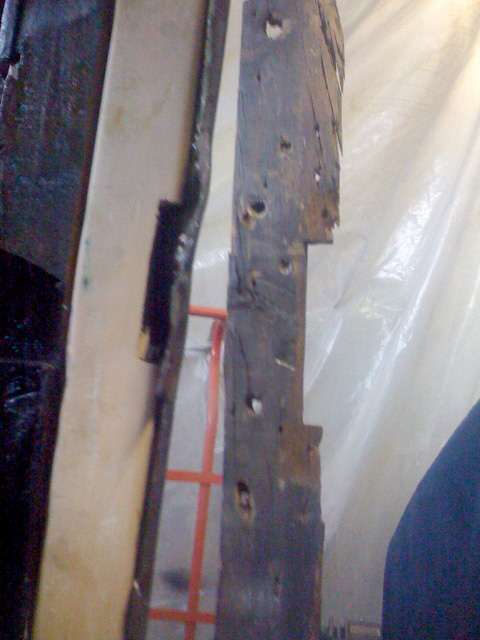 (54.67 KB) (54.67 KB)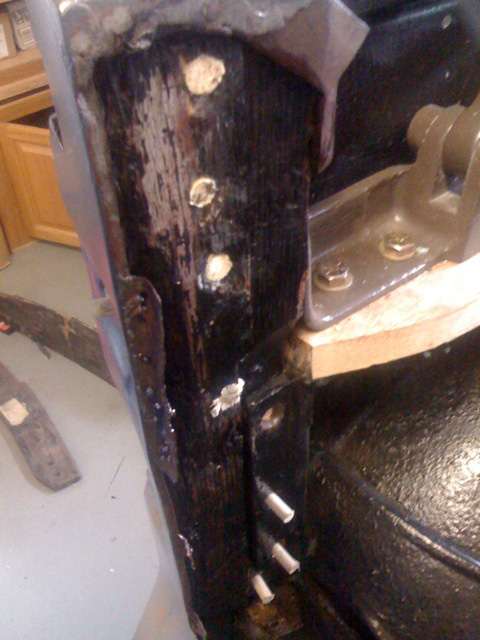 (44.83 KB) (44.83 KB)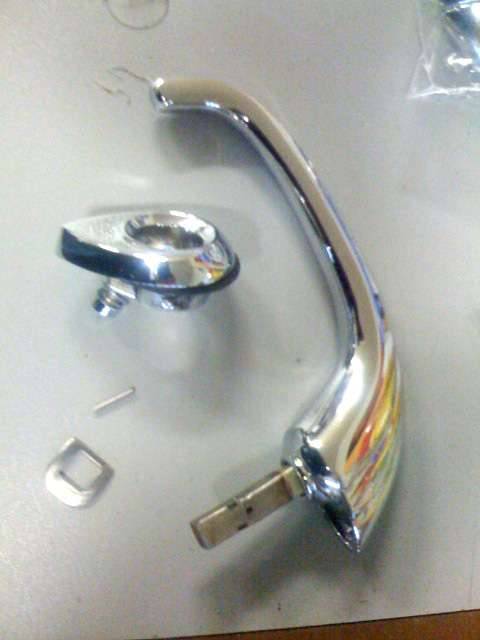 (50.75 KB) (50.75 KB)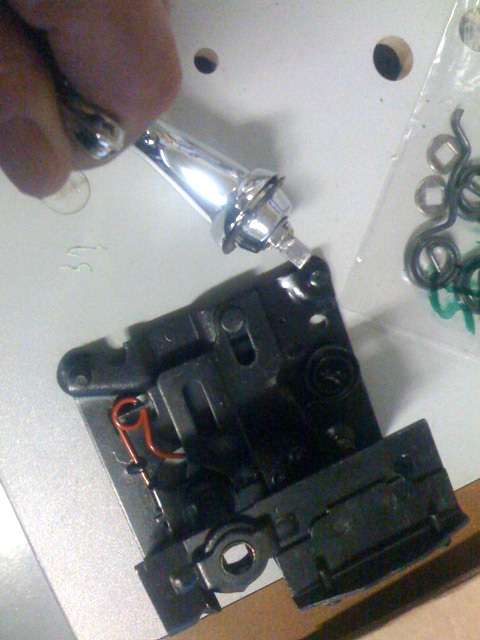 (96.33 KB) (96.33 KB)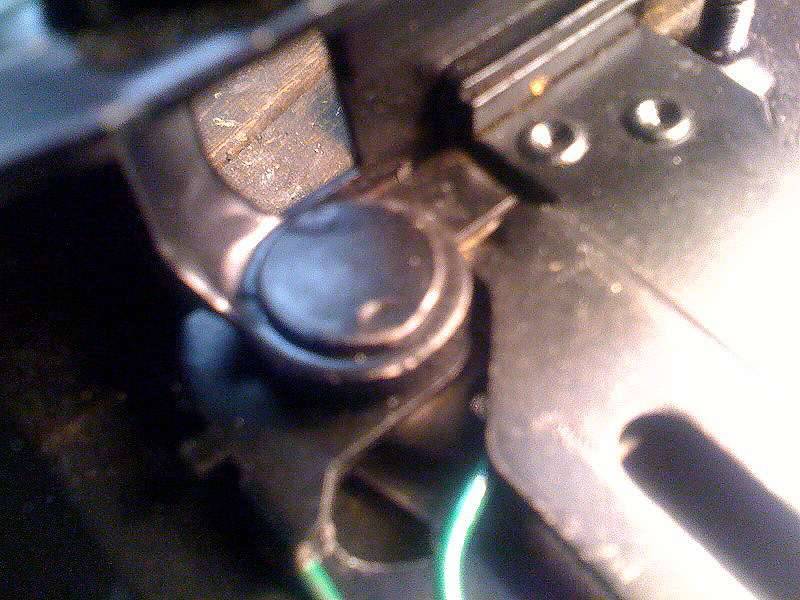 (48.74 KB) (48.74 KB)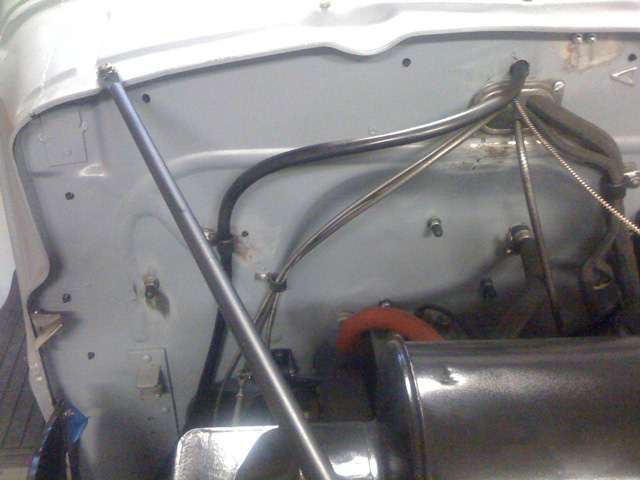 (59.35 KB) (59.35 KB)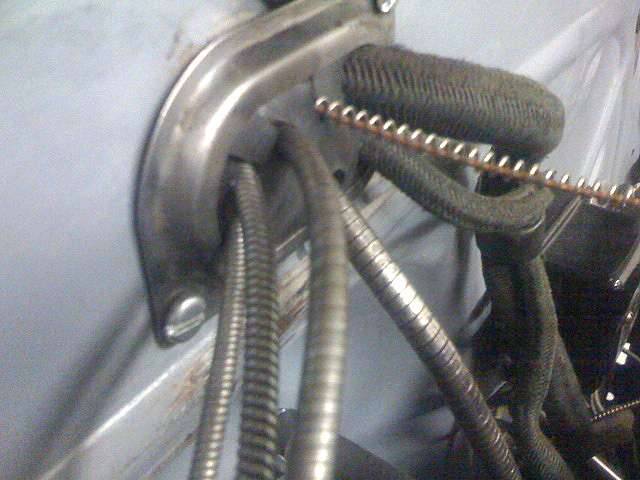 (36.65 KB) (36.65 KB)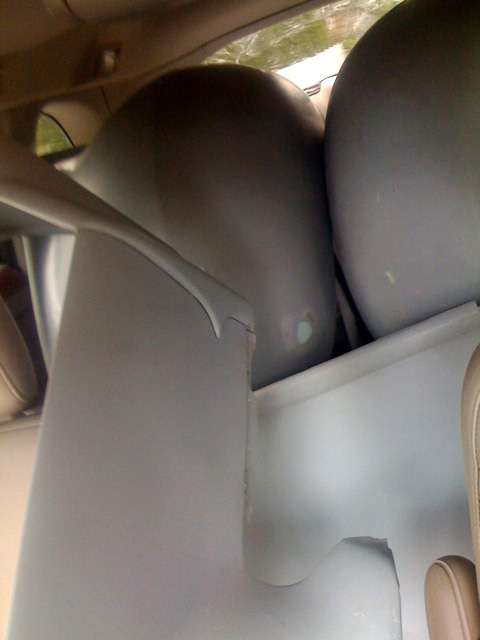 (45.23 KB) (45.23 KB)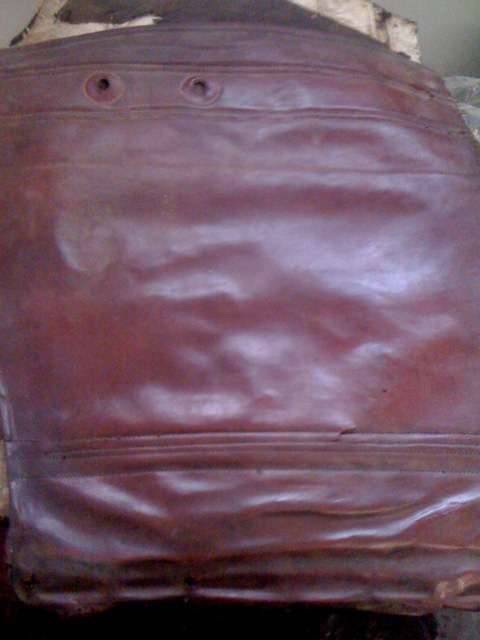 (65.30 KB) (65.30 KB) (63.95 KB) (63.95 KB)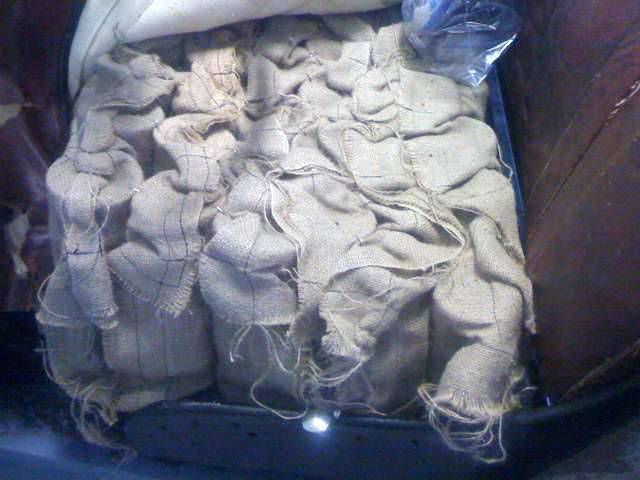 (46.09 KB) (46.09 KB)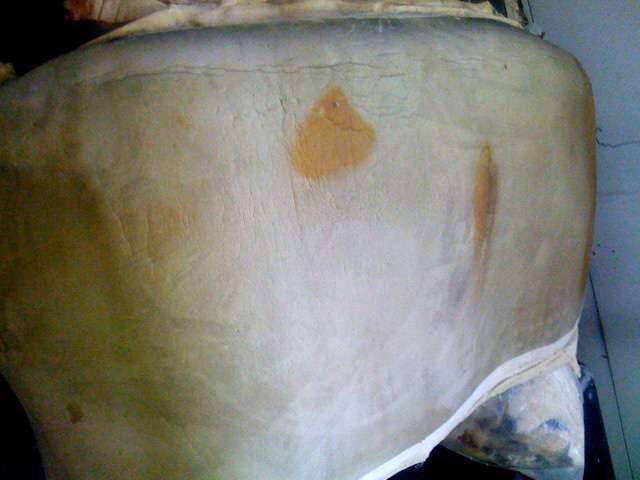 (36.62 KB) (36.62 KB)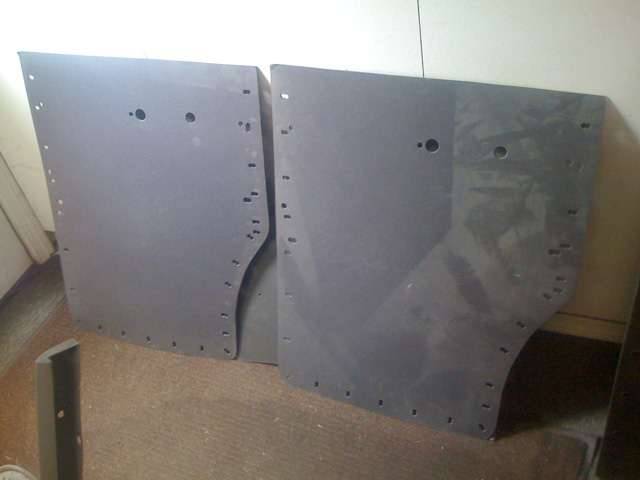 (35.97 KB) (35.97 KB)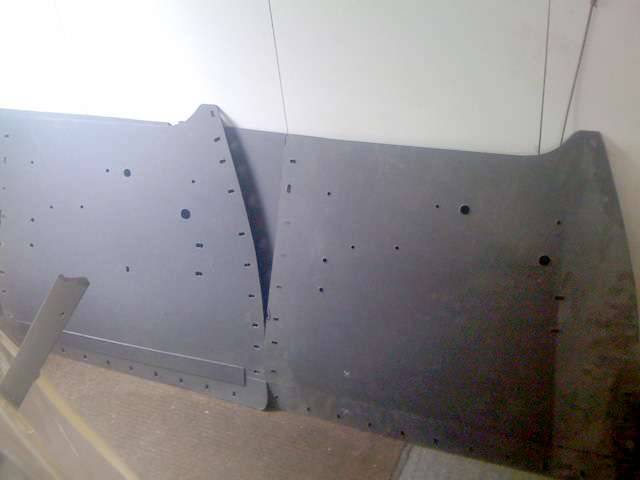
Posted on: 2011/4/25 23:14
|
|||
|
||||


