|
Re: Stewart
|
||||
|---|---|---|---|---|
|
Home away from home

|
I got that stupid rusty door part out this week. I keep forgetting the name of it. It hoods the door handles one. As you can see it came out in pieces.
The steering column is reassembled and set aside for now. That body panel stand that I built has come in handy. First I had both fenders mounted on it, then the hood and truck. Soon I will use it for the doors. I am planning to repair the steering wheel cracks myself with some epoxy. I certainly can not make it any worse than it is now. It has all the usual cracks and shrinkage. Attach file:  DoorParts.jpg (94.36 KB) DoorParts.jpg (94.36 KB)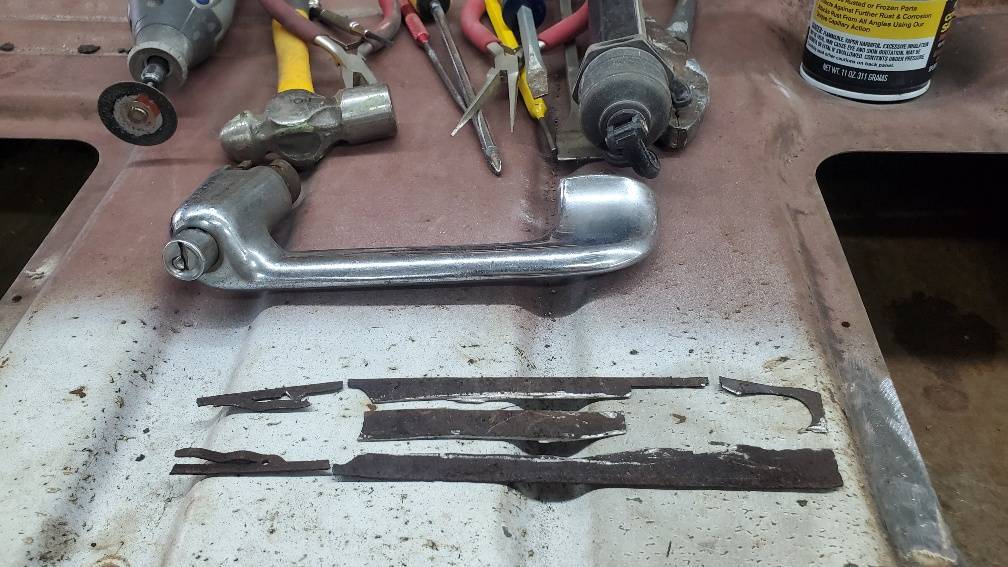 SteringColumn.jpg (73.60 KB) SteringColumn.jpg (73.60 KB)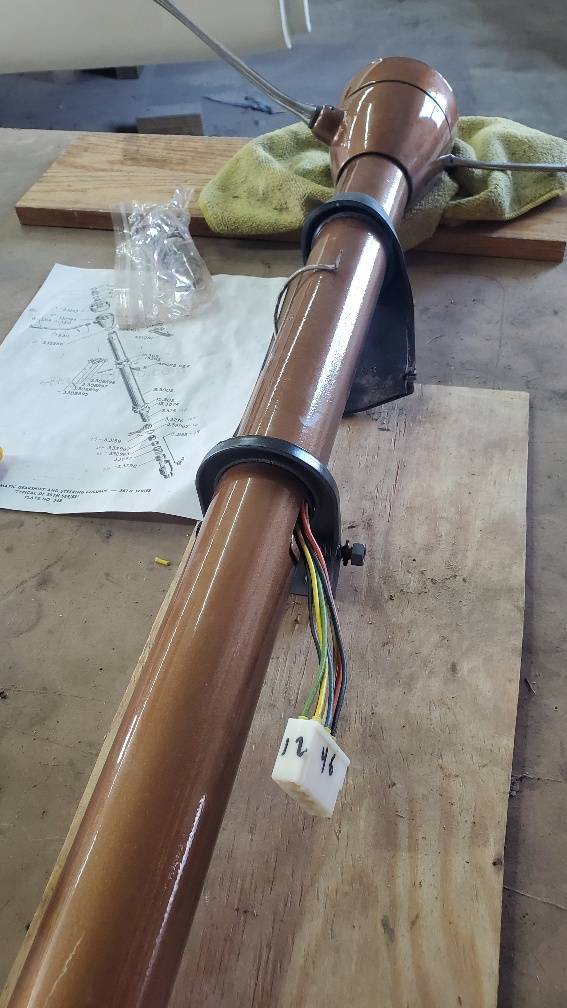 PanelRack.jpg (79.46 KB) PanelRack.jpg (79.46 KB)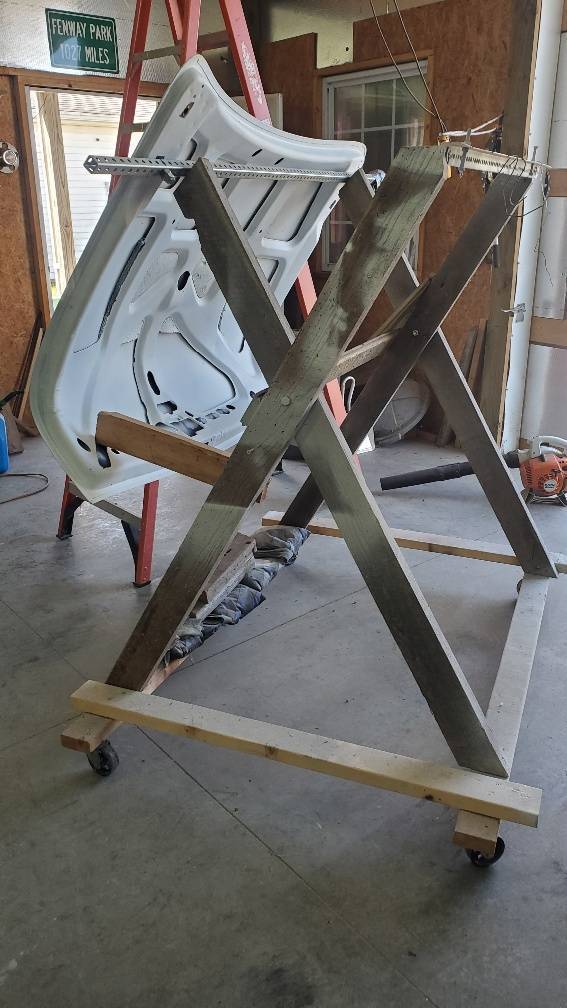 SteeringWheel.jpg (102.16 KB) SteeringWheel.jpg (102.16 KB)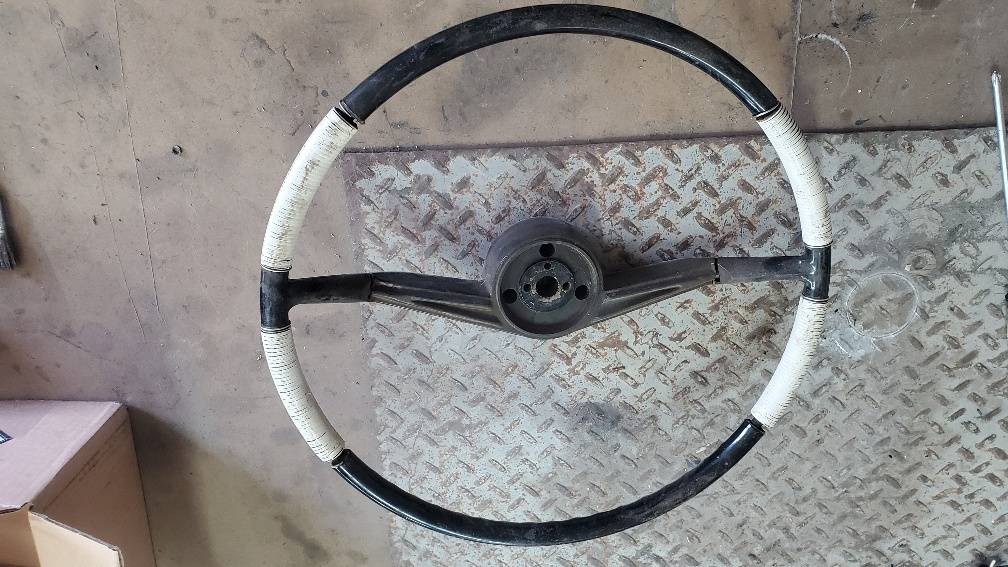 WheelCracks.jpg (72.82 KB) WheelCracks.jpg (72.82 KB)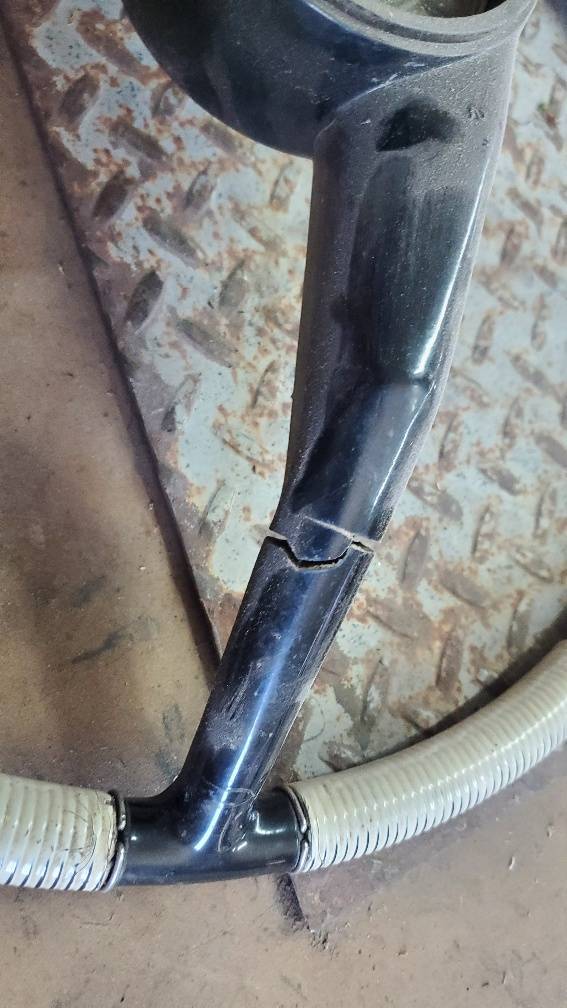 Shinkage.jpg (46.58 KB) Shinkage.jpg (46.58 KB)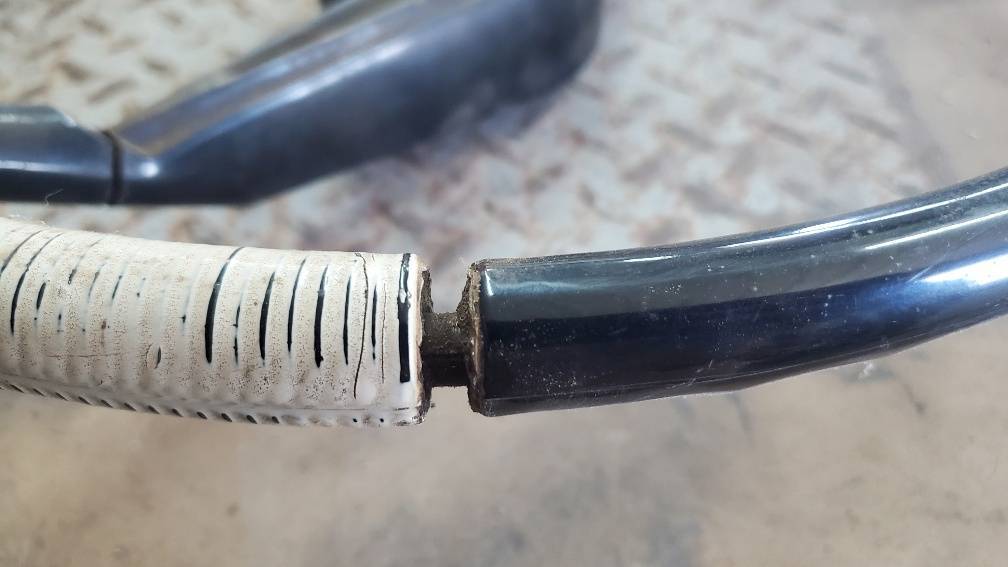
Posted on: 2022/3/26 18:50
|
|||
|
Stewart Ballard
|
||||
|
||||
|
Re: Stewart
|
||||
|---|---|---|---|---|
|
Forum Ambassador

|
There was a good writeup done by Kevin AZ on how he did his 55 wheel.https://packardinfo.com/xoops/html/modules/newbb/viewtopic.php?topic_id=9643&post_id=102686#forumpost102686
Posted on: 2022/3/26 19:25
|
|||
|
Howard
|
||||
|
||||
|
Re: Stewart's 1955 Packard 400
|
||||
|---|---|---|---|---|
|
Home away from home

|
Kevin’s writeup is very good. I used PC 7 do redo the steering wheel on my ’32. I replaced 75% of the material on the outer rim. I did it about one third at a time using the existing areas as a guide. When doing large areas, I let the mixed PC 7 sit for an hour or two (depending on the temperature) to stiffen up. This allowed it to handle without being extremely sticky. Waiting also made it easier to shape and mold in the finger grips. The next day, the new section was sanded in order to shape the grips and the wheel. Then the next third of the wheel was removed completely from the rim and replaced as above. Bad areas were refilled and sanded as needed in order to get a nice looking wheel.
Posted on: 2022/3/27 14:57
|
|||
|
||||
|
Re: Stewart
|
||||
|---|---|---|---|---|
|
Home away from home
|
I received the heater plenum from Quiteride today.
I just now unboxed it so have not taken it out to the shop yet. I am not impressed. I am not even sure it's really for my 400. Does this look right to you folks that know? I fully expected to have to transfer the directional flaps from the old to the new but this has nothing at all to work with. Attach file: 20220411_132458_resized.jpg (59.06 KB)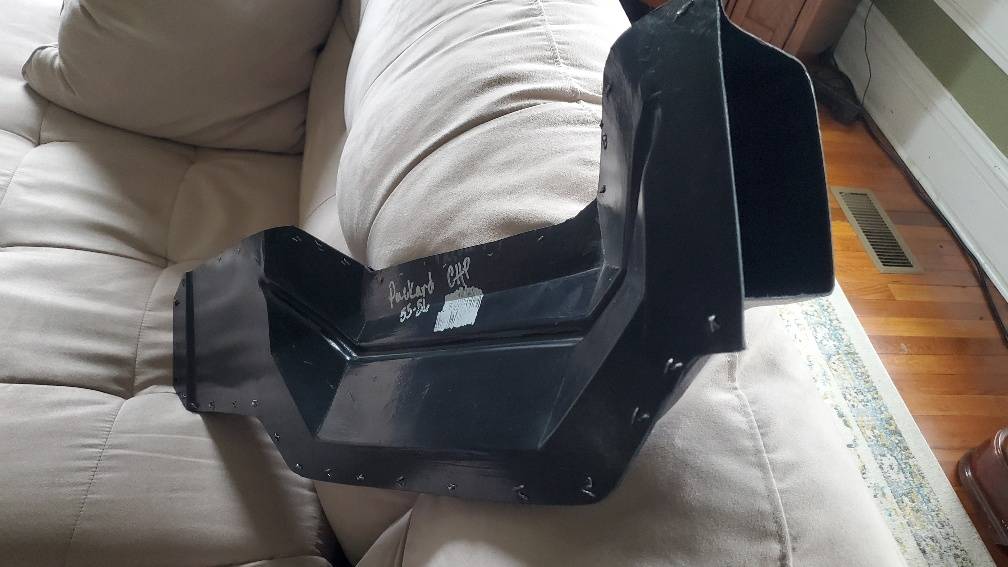 20220411_132439_resized.jpg (57.79 KB) 20220411_132439_resized.jpg (57.79 KB)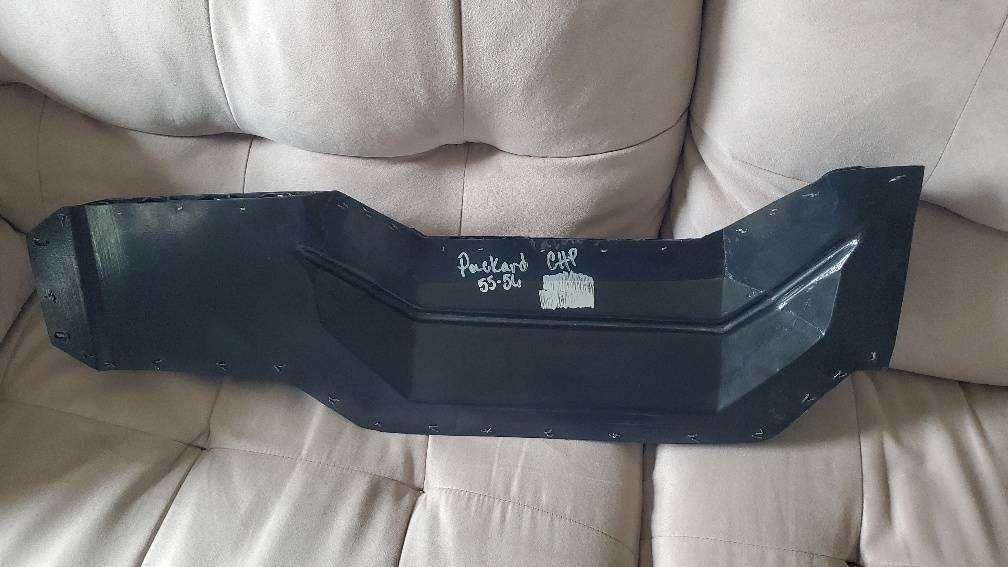 20220411_132432_resized.jpg (59.21 KB) 20220411_132432_resized.jpg (59.21 KB)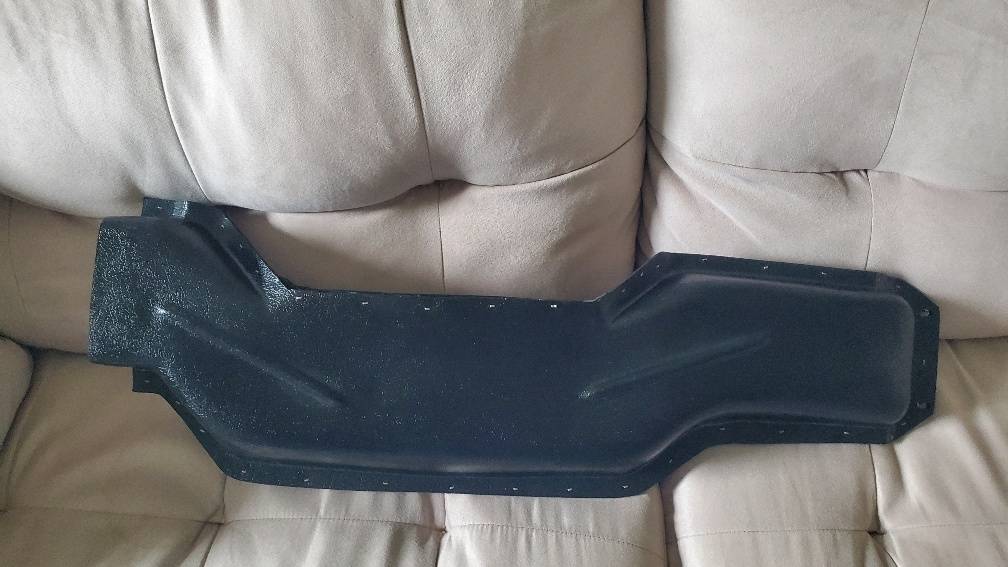
Posted on: 2022/4/11 12:33
|
|||
|
Stewart Ballard
|
||||
|
||||
|
Re: Stewart
|
||||
|---|---|---|---|---|
|
Forum Ambassador
|
I don't think that is going to work for you. Cannot be sure but I think that is the 51-4 duct which is formed to fit over a hump in the firewall and is only a heater plenum.
The 55-6 heater duct is a two chamber affair. As I recall it is about 8" high and 4" deep on the passenger side end which has a portion that forms the distribution section and goes over the heater core air outlet. It tapers to about half that depth by the time it gets to the drivers side. Flat across on both sides with a dividing piece inside about a third of the way down to separate into the defroster and heater chambers. The defroster chamber has two outlets which connect to small 90 degree cardboard ducts that carry air to the channel below the windshield. There is an air control flapper at the passenger side end over the heater core outlet which moves about 90 degrees to select the heat or defrost function. I believe Cli55er was working with someone to make the proper piece but don't know if it was ever completed. Here is what the 55-6 piece looks like. You might need to see if someone on the forum has a parts car or else Mike Dulinski may have one. I believe the front is fiberglass or plastic so is fairly sturdy but the back is cardboard and that can warp and leak or interfere with the flapper valve which I think also has a cardboard section. If you can find one the front can be reused. The back cardboard is stapled on and can replaced or flapper repaired if needed. Attach file: heater plenum.jpg (299.56 KB)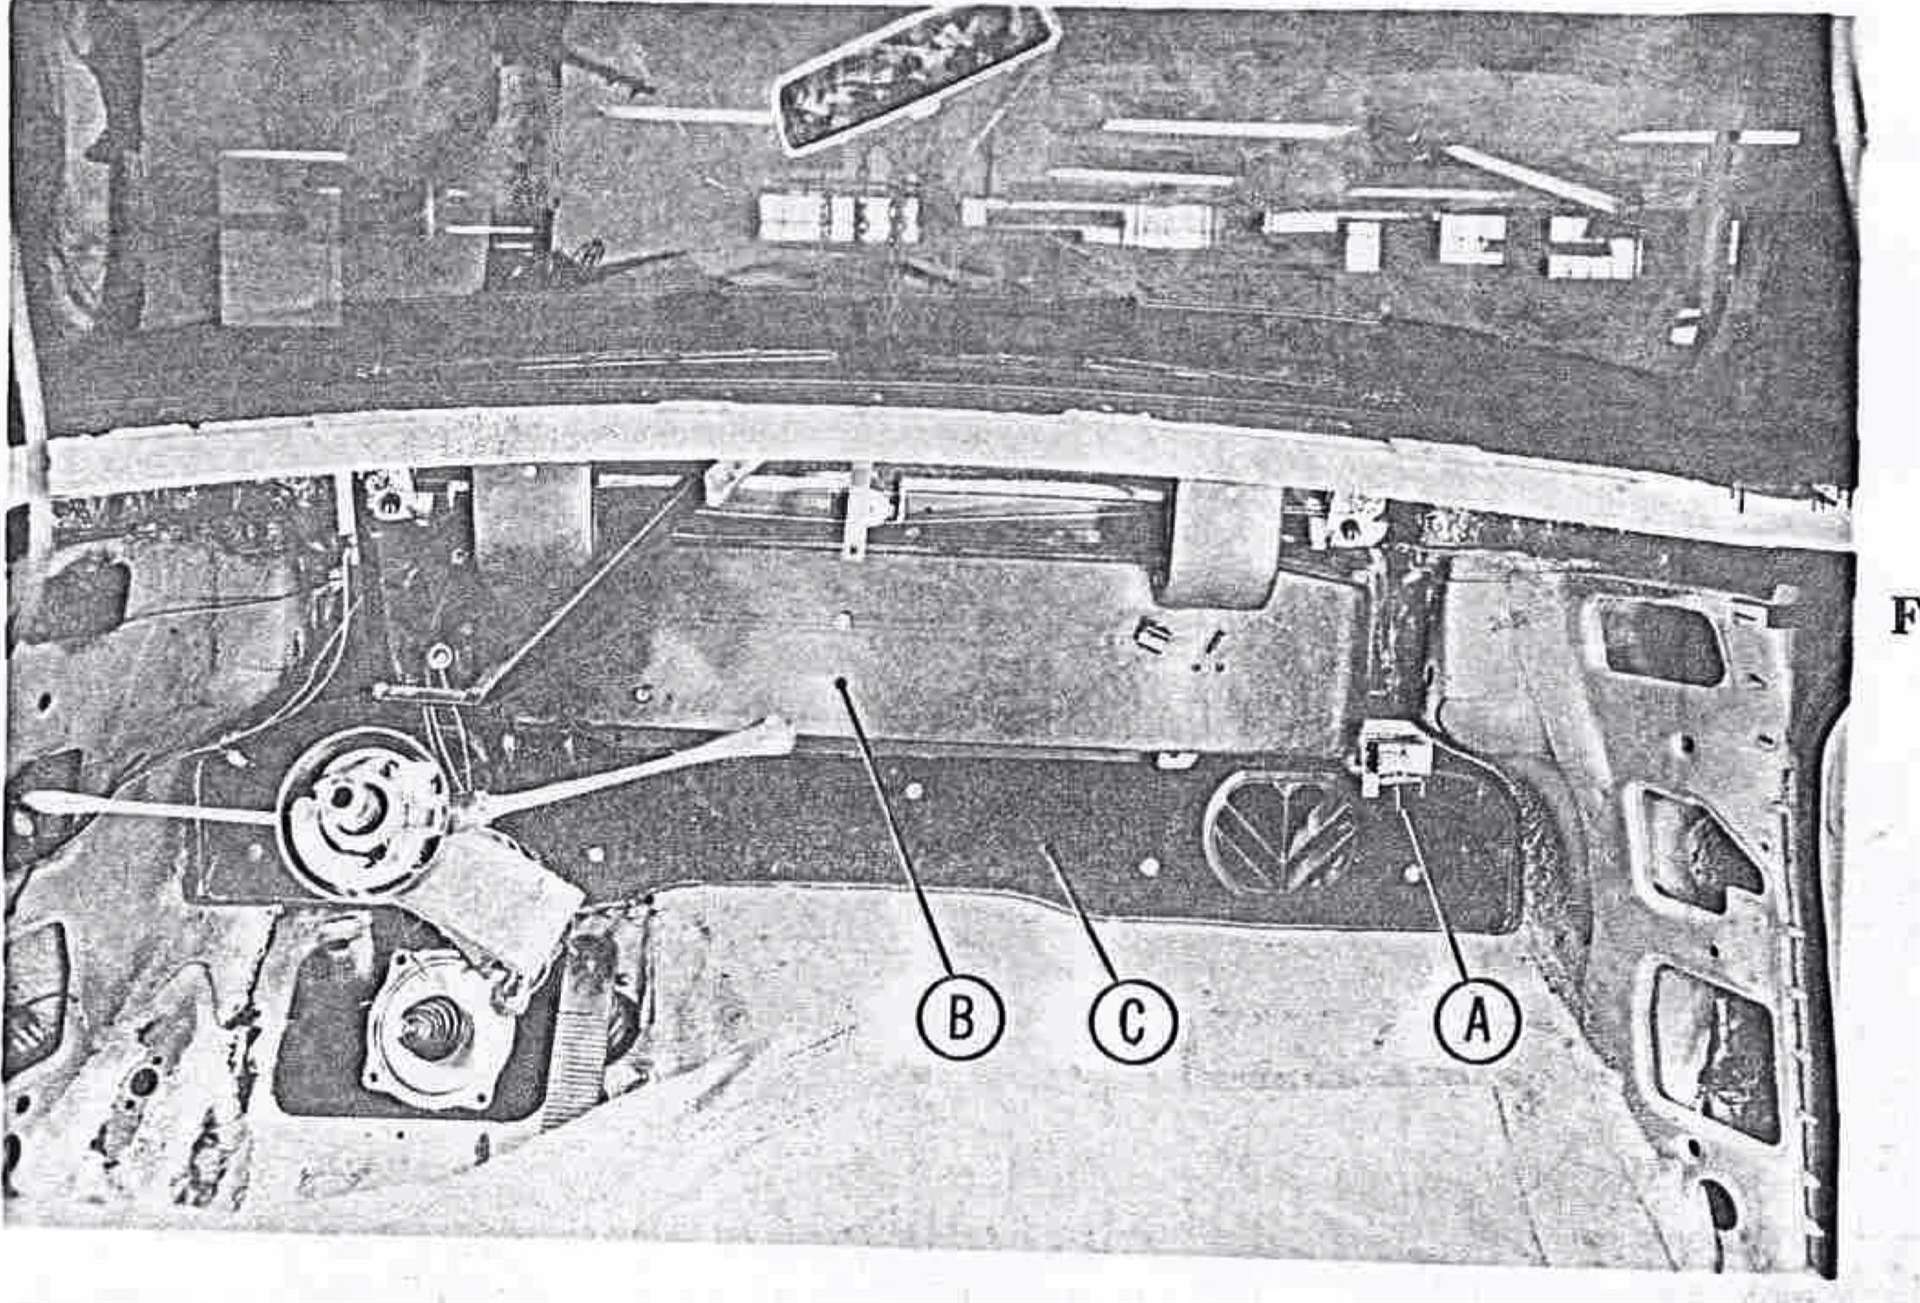
Posted on: 2022/4/11 12:55
|
|||
|
Howard
|
||||
|
||||
|
Re: Stewart's 1955 Packard 400
|
||||
|---|---|---|---|---|
|
Home away from home
|
You are 100% correct Howard.
I looked at their catalog and they sent me the 51-54 plenum. I have left a message and emailed them. I'll let you know if/when I get a response. Thank you.
Posted on: 2022/4/11 16:54
|
|||
|
Stewart Ballard
|
||||
|
||||
|
Re: Stewart
|
||||
|---|---|---|---|---|
|
Home away from home
|
No response yet on the plenum.
Where exactly does this gromet go on the steering column? More importantly, can it be added now that the steering column has been re-assembled? I hate it when this happens. Attach file: gromet.jpg (3.10 KB)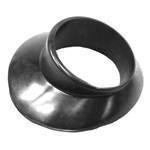
Posted on: 2022/4/11 19:27
|
|||
|
Stewart Ballard
|
||||
|
||||
|
Re: Stewart
|
||||
|---|---|---|---|---|
|
Forum Ambassador
|
I don't think it can go on after the column is assembled. It goes on the inside of the car and pushes against the firewall and another felt ring that seals the larger opening in the sheetmetal. Fits thru the carpet opening to provide a finish look and also another part of dust seal.
Attach file: AC012 copy.jpg (328.71 KB)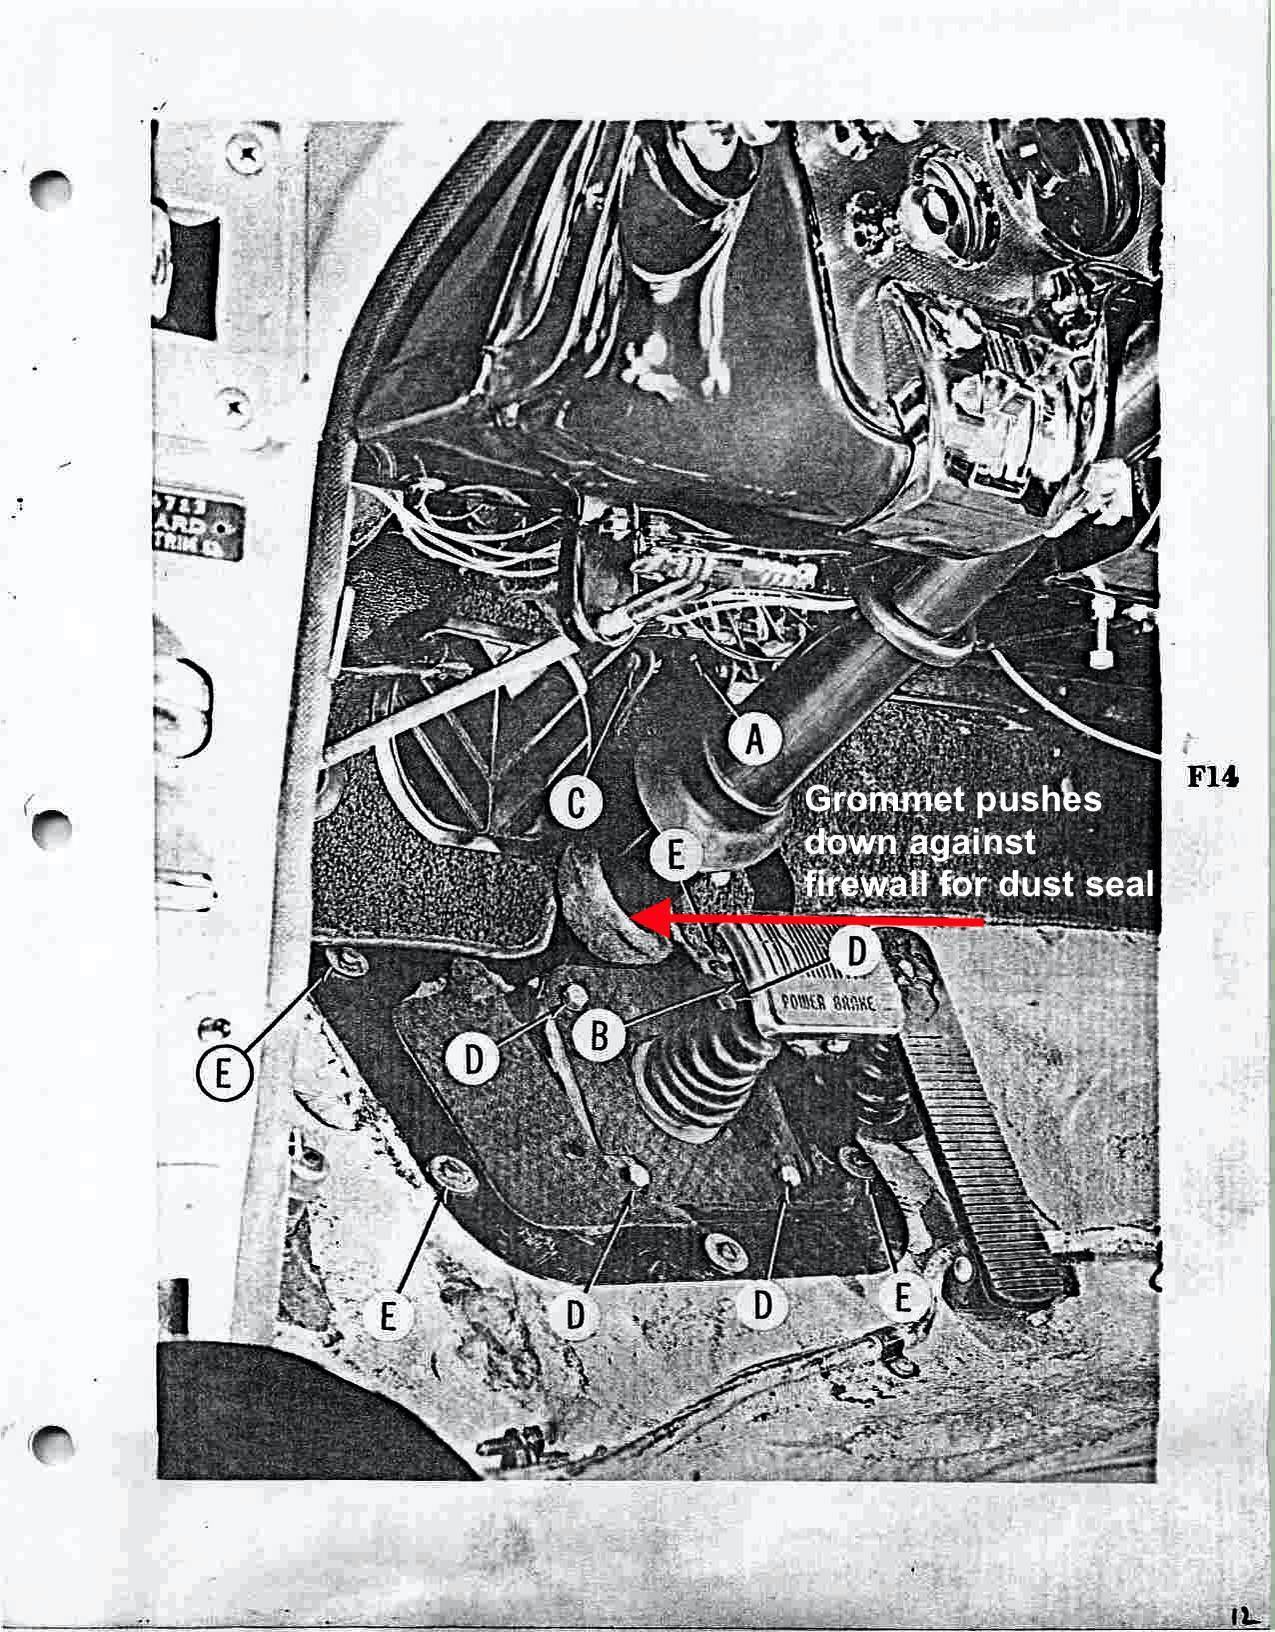
Posted on: 2022/4/11 19:44
|
|||
|
Howard
|
||||
|
||||
|
Re: Stewart's 1955 Packard 400
|
||||
|---|---|---|---|---|
|
Home away from home
|
So, Quiteride called me today.
The "mold" for the 55 & 56 Packard plenums was actually destroyed in some sort of accident in the recent past. A few of you may remember that this is the mold that Henry Greene assisted with a few years back. They created that mod from his plenum. He went over it in detail in his project blog back then. They have the drawings but they said it's going to take 6 months to get a new mold and there was some question about a couple of measurements. I am working with them to get the answers they need, hopefully. I was hoping to get the dash back in place in the next couple months. Can I install the firewall pad and dash/wire harness and then install the plenum down the road.
Posted on: 2022/4/13 20:13
|
|||
|
Stewart Ballard
|
||||
|
||||


