|
Re: BigKev's 1954 Packard Clipper Deluxe Sedan
|
||||
|---|---|---|---|---|
|
Webmaster

|
Well another productive evening at class last night. I managed to get the outside surface of the truck lid completely stripped to bare metal. 40 Grit on a DA made for a quickly take down and leave an almost perfect surface to do the body work on. I need to skim coat a few small section of the lid when I had to pull out a few dings. But other than that it's almost ready for primer. I still need to flip it over and take care of the bottom side which is much worse. Mainly all the old sound deadening material that is coming loose.
I did a blunder move last night. I took the trunk lid into class, I had forgotten to remove the trunk lock assembly at home. So I took it off in class, and thought I had put all the parts (assembly, cylinder, emblem, bezel) back in the truck. So when I got home last night, I was unpacking everything I realized that the cylinder (with the chrome swivel emblem on it) was missing. This was the NOS, perfect cylinder and chrome emblem I found many moons ago. The I realized that I must have left it on one of the workbenches at the college. Ah-crap, I figured it was probably long gone. But as I was one of the last folks to leave last night before they locked up, I figured I would try to see if it was still there this morning. And sure enough, it was still where I left it. Crisis avoided. So note to myself, take everything apart at home. We finally had a chance to test out the Eastwood Concourse HVLP gun last night. This gun is designed to work on only 4cfm at 29psi, and based on that would be perfect for most home compressors. We had it hooked up to the industrial air supply at the college, so I have not had a chance to try it on a low cfm compressor. But it did spray superb. We used it to spray Auto Air-Color water-based sealer on a project truck with a 1.2 tip. Both Jerry my instructor (and who runs a well know shop here in SoCal), and his teaching aid commented that it sprayed surprisingly well and had a great fan pattern. One of them commented that he liked it better than his SATA RP gun as it laid down nice, with almost no overspray, and doesn't use as much product as the SATA RP does. While probably not on the same caliber as a SATA HVLP gun, it is a great gun for the non-professional user, or the professional who needs a 2nd gun and doesn't want to spend $600+ on a SATA HVLP gun. I bought the Eastwood Concourse Deluxe package with 3 tips (1.2, 1.4, & 1.8), a plastic cup, and a teflon coated aluminum cup, digital gauge and I believe it cost around $230. But they have small packages that are cheaper. So far very positive feedback for this gun. The real rest will come Wednesday when we shoot water-based color, and also traditional clear with it. Stay-tuned.
Posted on: 2009/4/28 12:48
|
|||
|
-BigKev
1954 Packard Clipper Deluxe Touring Sedan -> Registry | Project Blog 1937 Packard 115-C Convertible Coupe -> Registry | Project Blog |
||||
|
||||
|
Re: BigKev's 1954 Packard Clipper Deluxe Sedan
|
||||
|---|---|---|---|---|
|
Webmaster
|
Since I have seen the question of fresh air vent flapper seals asked a couple of times I thought I would go ahead and replace mine.
So here is the drivers side vent. I remove the push on clip securing the flapper pivot rod in place on the opposite side of the bellcrank. Then you have the pull the rod out the bellcrank side. This may require a little strength and twisting as my rod was in there pretty good (see picture to understand shape of the rod). Then you carefully pry up all the legs of the staples, and remove them so you can try to reuse them. The two halves of the flapper come apart and you can remove the old seal. Clean up the flapper, repaint, and install the new seal. Replace all the staples, and then reassemble the vent. Touch up paint as needed. I bought my seals from Packard International. Call their main office for pricing. But I think they were like $10-12 each. If you look at the old seal you can see that most of the seal that extended outside of the flapper had already hardened and broken off. That is why the new seal looks a lot larger. Attach file:  (42.92 KB) (42.92 KB)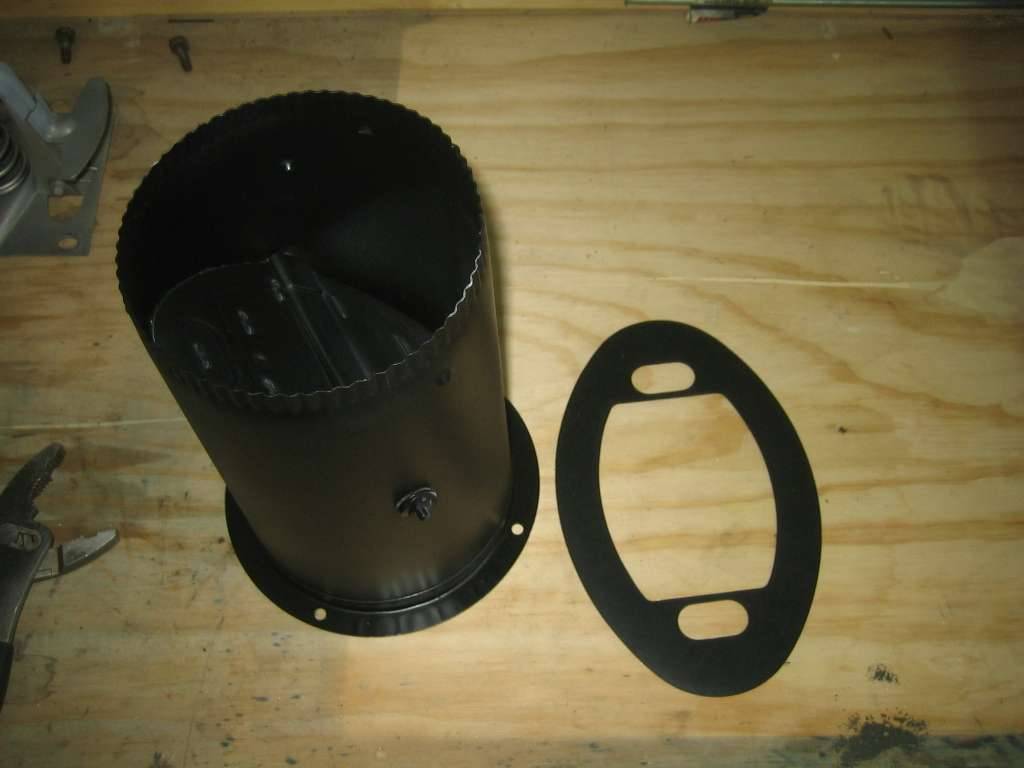 (68.90 KB) (68.90 KB)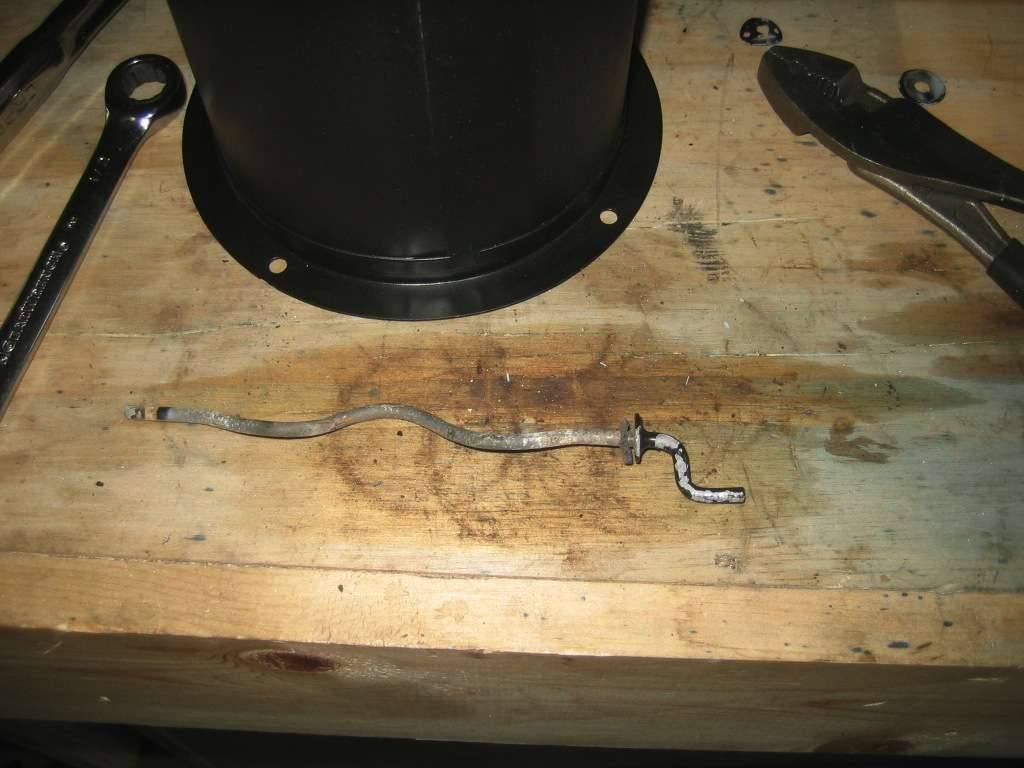 (66.44 KB) (66.44 KB) (49.73 KB) (49.73 KB)
Posted on: 2009/4/28 21:40
|
|||
|
-BigKev
1954 Packard Clipper Deluxe Touring Sedan -> Registry | Project Blog 1937 Packard 115-C Convertible Coupe -> Registry | Project Blog |
||||
|
||||
|
Re: BigKev's 1954 Packard Clipper Deluxe Sedan
|
||||
|---|---|---|---|---|
|
Home away from home

|
Since u did a 12v conversion then what did u do about the starter motor????
Posted on: 2009/5/1 7:43
|
|||
|
VAPOR LOCK demystified: See paragraph SEVEN of PMCC documentaion as listed in post #11 of the following thread:f
https://packardinfo.com/xoops/html/modules/newbb/viewtopic.php?topic_id=7245 |
||||
|
||||
|
Re: BigKev's 1954 Packard Clipper Deluxe Sedan
|
||||
|---|---|---|---|---|
|
Webmaster
|
The original 6v starter motor is in place. I just changed to a 12v solenoid.
If the starter motor ever becomes a problem, then I will just get it redone or find a suitable replacement. But I have found other people that have done this and have never had a problem with the starter motors. But the 6V solenoids tend to burn up and get stuck on when running 12v through them.
Posted on: 2009/5/1 11:45
|
|||
|
-BigKev
1954 Packard Clipper Deluxe Touring Sedan -> Registry | Project Blog 1937 Packard 115-C Convertible Coupe -> Registry | Project Blog |
||||
|
||||
|
Re: BigKev's 1954 Packard Clipper Deluxe Sedan
|
||||
|---|---|---|---|---|
|
Webmaster
|
Back in the garage today to get some work done. First thing I did was finishing bending and installing the new transmission lines. One of the lines was not long enough so I had to couple it with a 6" piece to made it reach. Both Kragen (O-Reileys) and Napa only carried 60" line on 5/16". The top transmission line needs to be 66" long. So I did the coupling at the front by the cooler so it gives me a perfect place to splice in the hoses for a future aux transcooler. Just need to remove the 6" piece and install to hose barb ends when the time comes.
With the transmission lines back on place, I went ahead and reinstalled the radiator. Finally that radiator wont be in the way in the garage anymore. Also along those lines, I reinstalled the hood on the car to get it up off the floor and out of the way. With a fender and trunk lid already off the car, something had to go back on. Since the hood is already in primer, it was time for it to go back on the car for now. Also here is a pic of the trunk lid stripped down. Still working on stripping the bottom side. Attach file: (57.34 KB)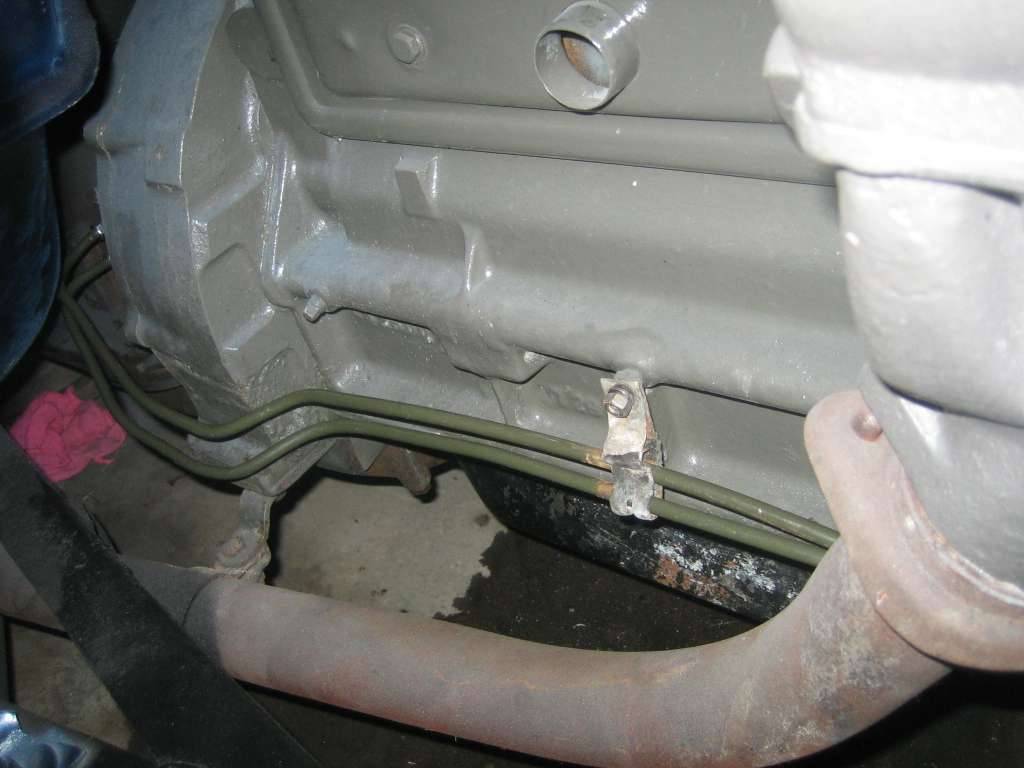 (78.75 KB) (78.75 KB)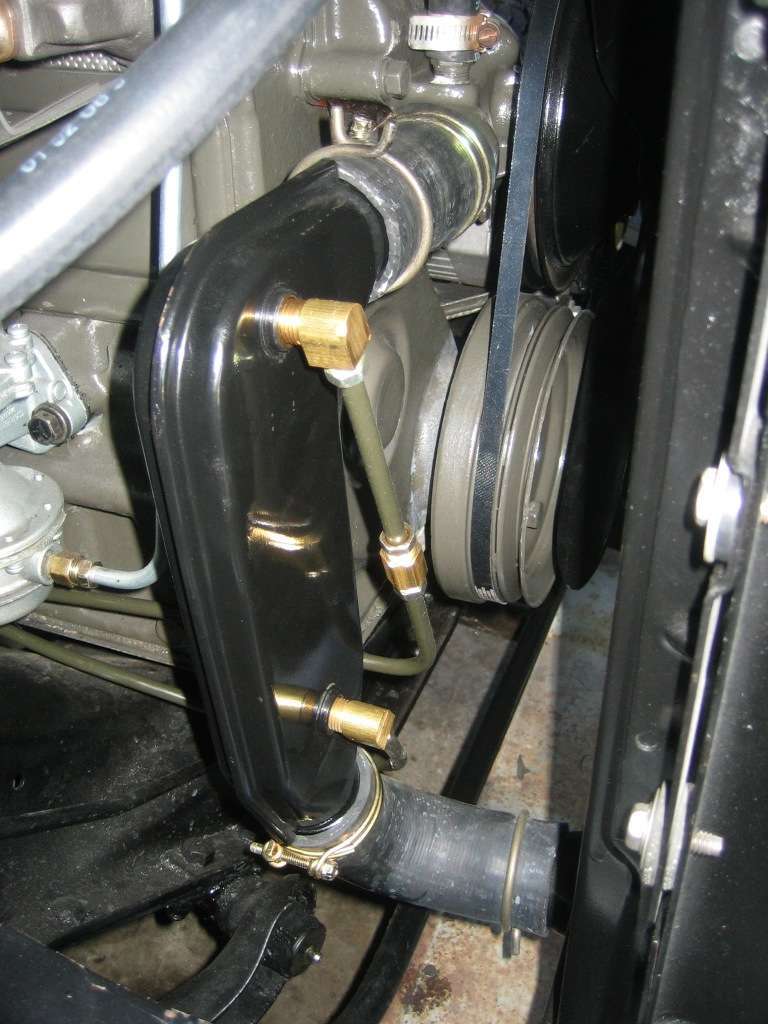 (93.78 KB) (93.78 KB)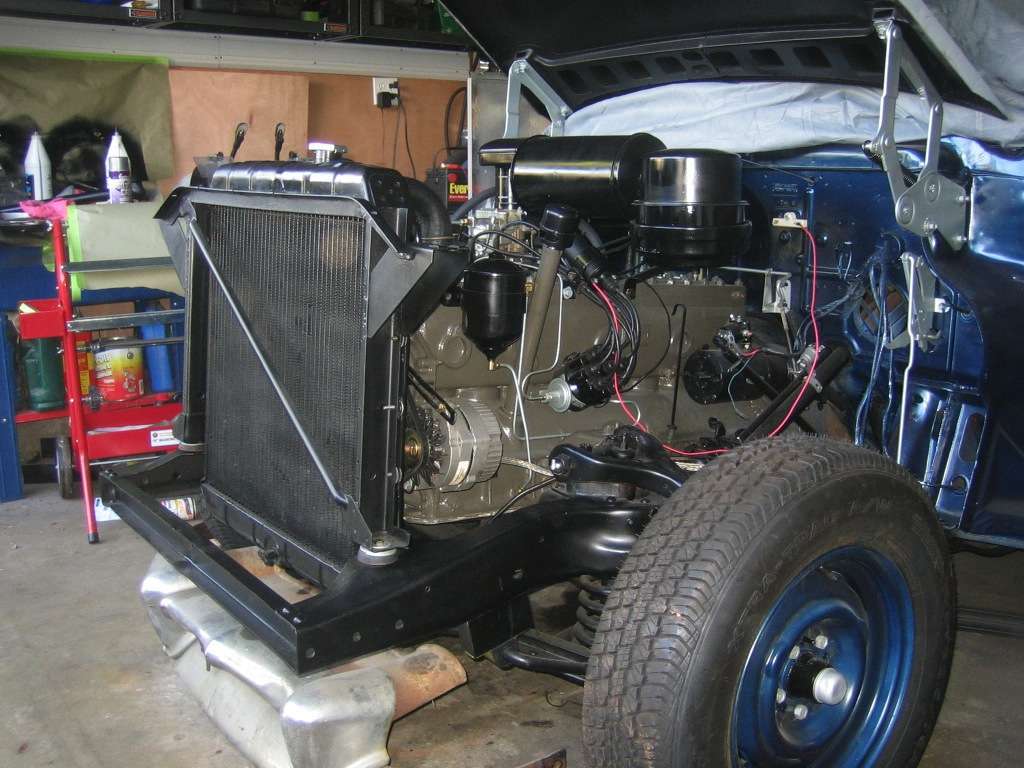 (75.99 KB) (75.99 KB)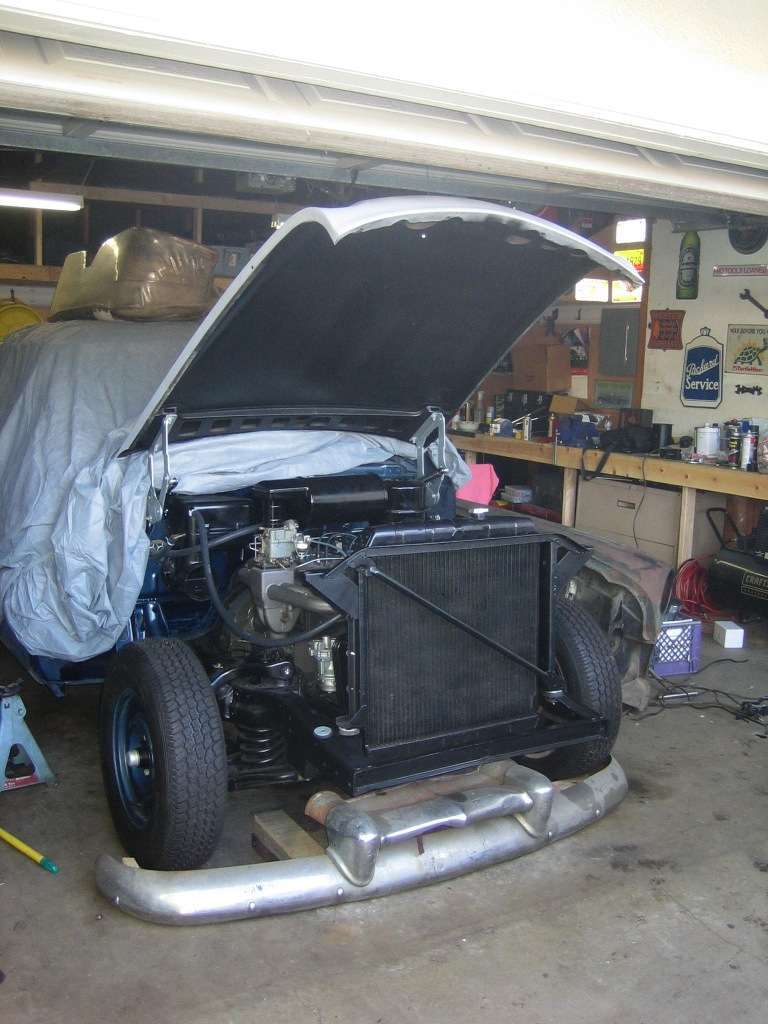 (45.88 KB) (45.88 KB)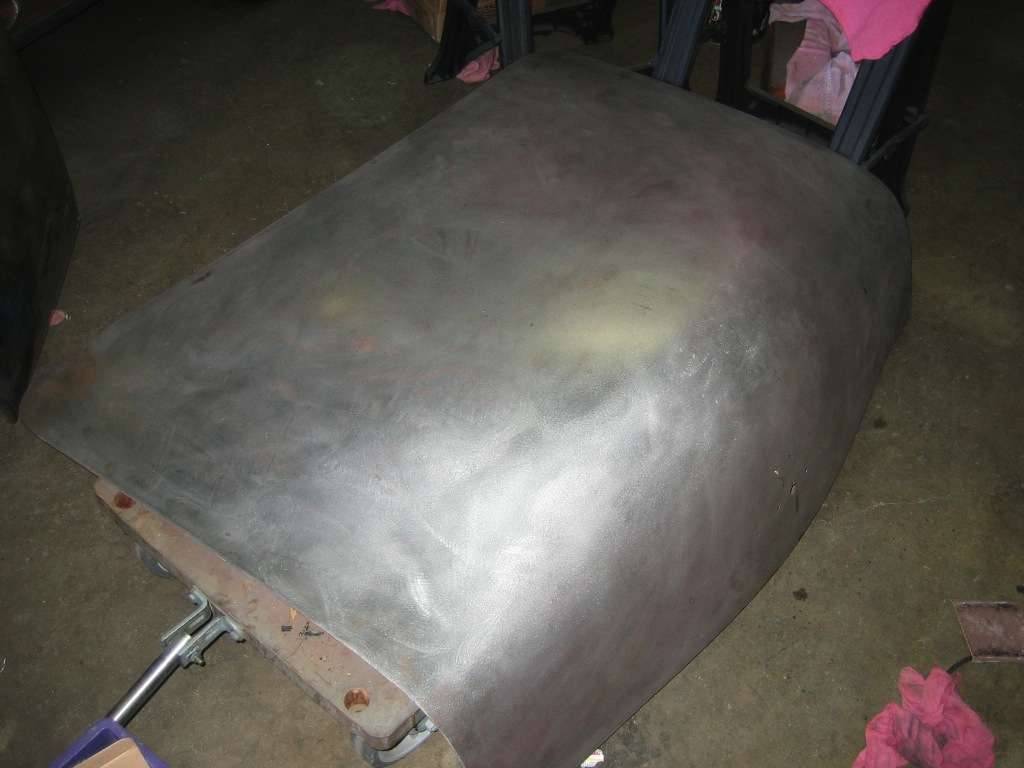
Posted on: 2009/5/3 20:40
|
|||
|
-BigKev
1954 Packard Clipper Deluxe Touring Sedan -> Registry | Project Blog 1937 Packard 115-C Convertible Coupe -> Registry | Project Blog |
||||
|
||||
|
Re: BigKev's 1954 Packard Clipper Deluxe Sedan
|
||||
|---|---|---|---|---|
|
Forum Ambassador

|
Really coming along, there Kev.
Yet, is that an aviation style (worm-gear) hose clamp I see in IMG_4672? (tsk-tsk) 
Posted on: 2009/5/4 6:52
|
|||
|
||||
|
Re: BigKev's 1954 Packard Clipper Deluxe Sedan
|
||||
|---|---|---|---|---|
|
Webmaster
|
Yes, I still need to change that clamp out on the bottom hose. I was using that one as I had a leak at that spot when using the spring style clamp on the old rusted transcooler. It should seal better on the new transcooler. I will replace it before filling the system.
As far as the incorrect top one (hose at water pump), I still need to find the correct style split band clamp. I also need two of the spring style clamps for the heater hoses. Just time and money has not been on my side lately. No school this week as I am off to Atlanta (Norcross) in the morning.
Posted on: 2009/5/4 11:53
|
|||
|
-BigKev
1954 Packard Clipper Deluxe Touring Sedan -> Registry | Project Blog 1937 Packard 115-C Convertible Coupe -> Registry | Project Blog |
||||
|
||||
|
Re: BigKev's 1954 Packard Clipper Deluxe Sedan
|
||||
|---|---|---|---|---|
|
Webmaster
|
I went ahead a installed the correct lower hose clamp and refilled the cooling system. I must say I am not a big fan of those spring style hose clamps. You almost have to have them perfectly on, or they seam to leak. I had to adjust them a couple of times.
Anyone every had an issue with those style clamps? Every car I have seen has had them replaced with modern screw/worm style clamps.
Posted on: 2009/5/4 23:14
|
|||
|
-BigKev
1954 Packard Clipper Deluxe Touring Sedan -> Registry | Project Blog 1937 Packard 115-C Convertible Coupe -> Registry | Project Blog |
||||
|
||||
|
Re: BigKev's 1954 Packard Clipper Deluxe Sedan
|
||||
|---|---|---|---|---|
|
Forum Ambassador
|
I still use them, but I am known to be a stubborn SOB. The hose that goes from the rear of the right head to the Ranco valve is truly a SOB, just like me. By the way that particular hose, although pictured in plate 29E, does not have a group number pointing to it, and I have never found a part number for it.
Attach file: (50.43 KB)
Posted on: 2009/5/4 23:53
|
|||
|
||||


