|
Re: BigKev's 1954 Packard Clipper Deluxe Sedan
|
||||
|---|---|---|---|---|
|
Webmaster

|
Guy,
No new pics as the wife was using the Digicam as she was away for the weekend with friends. I had the same concern about the filter. The filter itself is very heavy glass. But I intend on mounting up it inside the frame rail. Randy mounted his there also and then constructed a shield for it. So i may do the same. He is going to send me over a picture of what his looks like for reference. I was also going to slit a piece of appropriately sized hose, and put it over the outside of the filter to give it a little protection from getting bounced around. I will post some pictures next time I get back underneath there when the new pump arrives. Also I do have the OEM filter that is just ahead of the carb in the engine compartment. This new rear filter is really to catch any additional crud that make come out of the tank in the future. Better to catch it here than have it clog the mesh filter inside the mechanical fuel pump up front. Also this filter is reusable unlike the plastic inline type. So I can unscrew it, rinse out the element, and put it back together. Here is a pic of the type of filter I am using: Attach file:  (5.51 KB) (5.51 KB)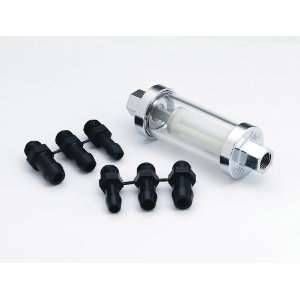
Posted on: 2010/3/29 12:33
|
|||
|
-BigKev
1954 Packard Clipper Deluxe Touring Sedan -> Registry | Project Blog 1937 Packard 115-C Convertible Coupe -> Registry | Project Blog |
||||
|
||||
|
Re: BigKev's 1954 Packard Clipper Deluxe Sedan
|
||||
|---|---|---|---|---|
|
Webmaster
|
Things have been on hold as the State tax man had his hand out this year. But today some minor progress. I stopped by the local Napa at they had the brake light switch for my Clipper in stock for about $9. So tomorrow I hope to get that changed out and the brakes re-bled.
Hopefully after pay day I will be able to get the electric fuel pump that Randy recommended and then I can get all the final details completed so I can get the motor started. Attach file: (19.17 KB)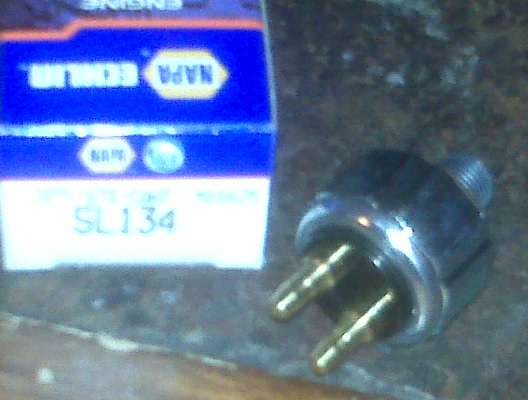
Posted on: 2010/4/9 20:54
|
|||
|
-BigKev
1954 Packard Clipper Deluxe Touring Sedan -> Registry | Project Blog 1937 Packard 115-C Convertible Coupe -> Registry | Project Blog |
||||
|
||||
|
Re: BigKev's 1954 Packard Clipper Deluxe Sedan
|
||||
|---|---|---|---|---|
|
Home away from home

|
on the 55 and 56's with treadle vac that switch can be changed without bleeding the brakes. Did it twice on my 56 Exec. Does your car have Treadle vac or manual brakes????
Posted on: 2010/4/10 6:47
|
|||
|
VAPOR LOCK demystified: See paragraph SEVEN of PMCC documentaion as listed in post #11 of the following thread:f
https://packardinfo.com/xoops/html/modules/newbb/viewtopic.php?topic_id=7245 |
||||
|
||||
|
Re: BigKev's 1954 Packard Clipper Deluxe Sedan
|
||||
|---|---|---|---|---|
|
Home away from home
|
Of course that raises another question:
Is the junction block/stop lite switch for the manual brakes in the same location as TreadleVac 51 thru 56 ???? I only have experience on 55-56 TV cars.
Posted on: 2010/4/10 6:50
|
|||
|
VAPOR LOCK demystified: See paragraph SEVEN of PMCC documentaion as listed in post #11 of the following thread:f
https://packardinfo.com/xoops/html/modules/newbb/viewtopic.php?topic_id=7245 |
||||
|
||||
|
Re: BigKev's 1954 Packard Clipper Deluxe Sedan
|
||||
|---|---|---|---|---|
|
Webmaster
|
The block looks like this:
Attach file: (35.33 KB)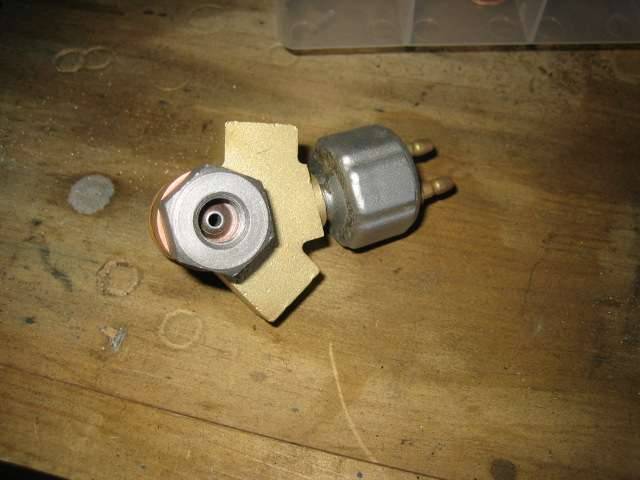 (38.83 KB) (38.83 KB)
Posted on: 2010/4/10 13:46
|
|||
|
-BigKev
1954 Packard Clipper Deluxe Touring Sedan -> Registry | Project Blog 1937 Packard 115-C Convertible Coupe -> Registry | Project Blog |
||||
|
||||
|
Re: BigKev's 1954 Packard Clipper Deluxe Sedan
|
||||
|---|---|---|---|---|
|
Webmaster
|
Small progress today....
I changed out the brake light switch. I found a 1" deep socket works perfectly for removing the old one and installing the new one. So far so good...no leaks. Also the transmission is no longer leaking from the filler tube, so the last tightening did the trick. I also have the electric fuel pump and filter all mocked up and the lines in place. Just need to mount the pump and run the wiring. It will all be tucked up inside the frame rail portion of the wheel arch. Attach file: (30.62 KB)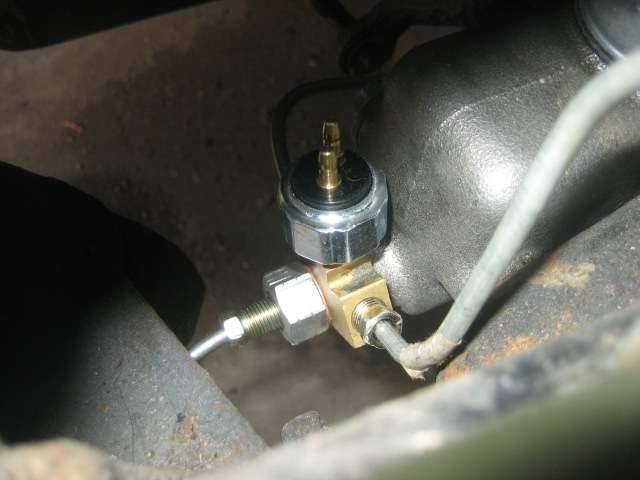 (29.82 KB) (29.82 KB)
Posted on: 2010/4/17 18:04
|
|||
|
-BigKev
1954 Packard Clipper Deluxe Touring Sedan -> Registry | Project Blog 1937 Packard 115-C Convertible Coupe -> Registry | Project Blog |
||||
|
||||
|
Re: BigKev's 1954 Packard Clipper Deluxe Sedan
|
||||
|---|---|---|---|---|
|
Webmaster
|
Well back under the car this morning to finish installing the electric fuel pump. Once I got all the hoses cut to length and the everything in place, then I had to drill a hole in the frame for the fuel pump mounting bolt. I made sure to remove any paint and road grime from the where the bolt passes through the frame to insure a good grounding surface.
Then the pump was bolted into place inside the frame rail. I then added a large terminal to the ground wire and secured it to the mounting bolt with a second nut. Then power wire was the extended, and tape wrapped and goes up over the tank, and follows the fuel sender wire up into the trunk through the stock grommet. I then checked the electrical to make sure the pump would kick on. I then reinstalled all the fuel line clamps and tightened all the fuel fittings. I then touched up the paint where the pump mounting bolt when through the frame to prevent rust. So with all that done I ended up going to the parts store as I needed a few things. I needed to replace the gasket on the oil pan plug as it's been seeping there for years. So I drained the oil, amazing how dirty it was from just sitting. I had changed it about 2 years ago when I dropped the pan. So with plug in hand I was off to O'reilys. There I bought a new gasket (9/16" btw), 8 qts of Shell Rotella, some fuel stabilizer and a 5 gal gas can. Then it was off to the gas station to fill up the gas can at which time I added some stabilizer to keep the fuel from going bad on me. Back at the homestead I went ahead and reinstalled the oil pan plug, and filled the motor up with oil (7 qts). I then put 5 gals of new fresh gas in the tank. I also installed a new oil filter. I then cranked over the engine using the starter to make sure I had oil pressure. I could see the oil quirting into the filter container. So far so good. The oil filter lid was reinstalled. I noticed from cranking the motor it didn't seam to pull any gas up from the tank. So I tried the electric pump and still no gas was pulled up into the glass bowl near the carb. So back under the car. I could see fuel getting pulled into the glass filter near the tank. So I worked my way forward. I broke loose the coupler fitting about midway along the frame rail and I was getting fuel there and it was pressurized. So I retighten that one and moved forward. Then broke loose the when the hardline meets rubber line in the engine compartment and I had fuel there also. So I broke loose the outlet fitting on the fuel pump and it was dry. Hmmm. So off came the pump. I removed the fuel section and I was able to locate the problem. When I put the pump back together, I had installed the bowl gasket 180 degrees off. So this was causing it to block the incoming fuel. So I fixed that, reassembled the pump and reinstalled it back on the car. Cranked the motor a couple times... success! Fuel at the carb filter. So some significant progress made today. Attach file: (39.33 KB)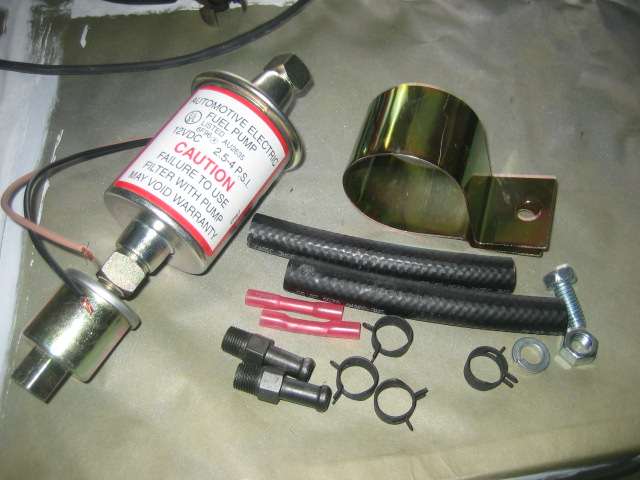 (30.71 KB) (30.71 KB)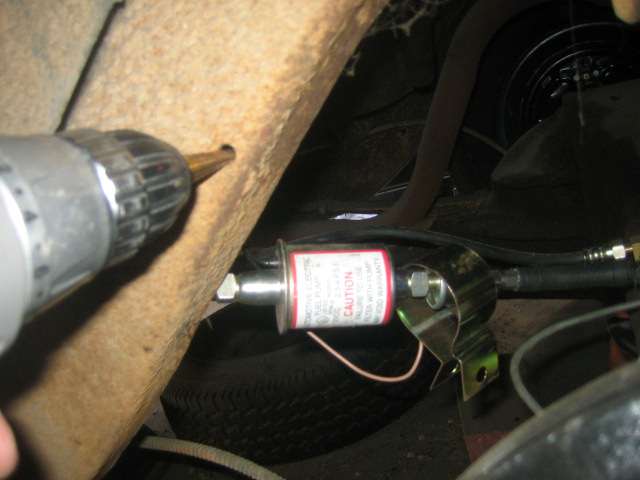 (33.85 KB) (33.85 KB)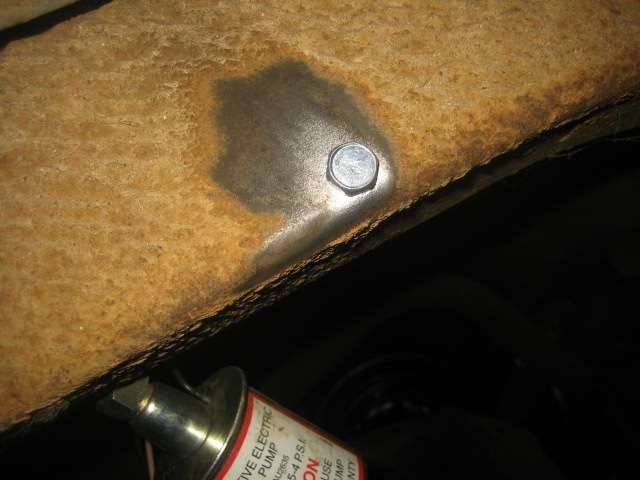 (39.52 KB) (39.52 KB)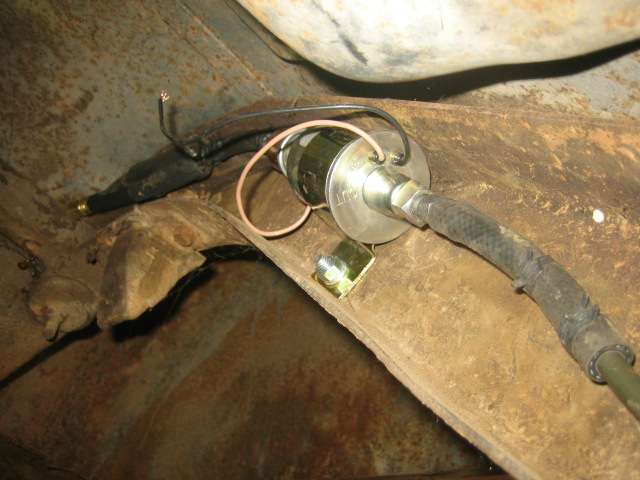 (44.36 KB) (44.36 KB)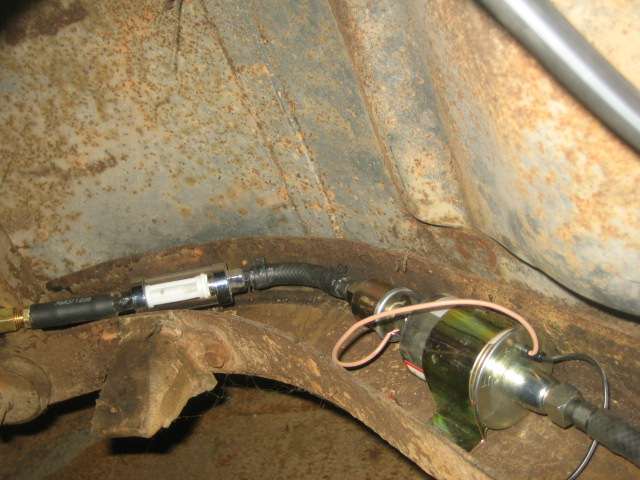 (38.53 KB) (38.53 KB)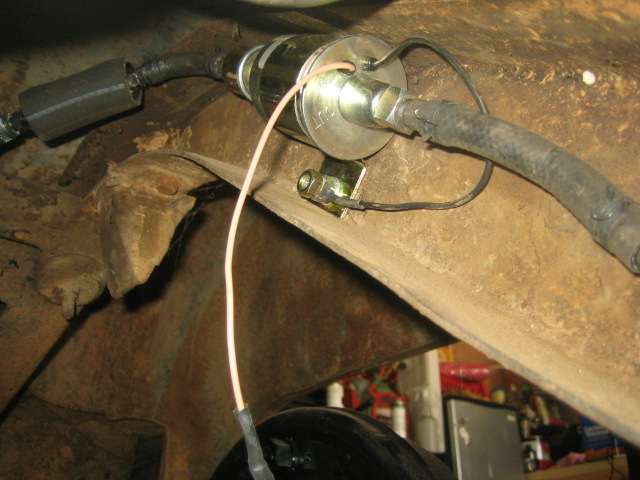 (30.27 KB) (30.27 KB) (36.64 KB) (36.64 KB)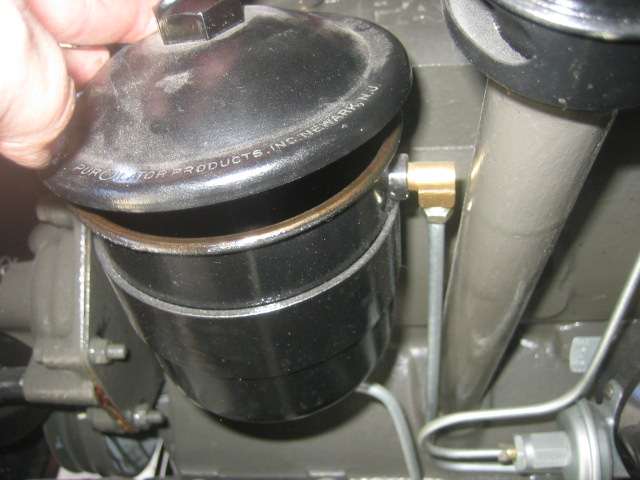 (27.88 KB) (27.88 KB)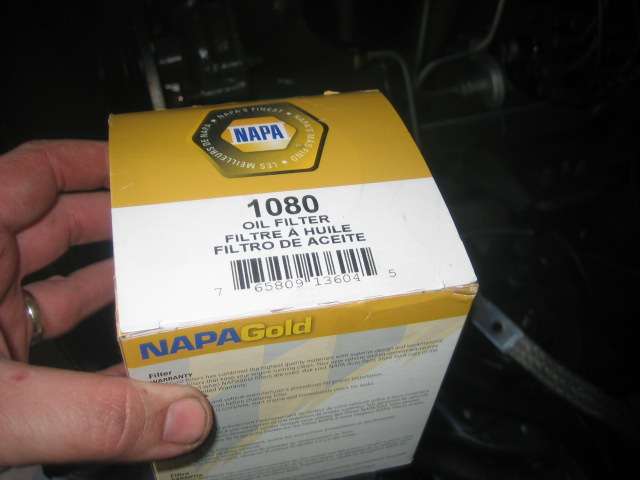 (29.18 KB) (29.18 KB) (31.89 KB) (31.89 KB)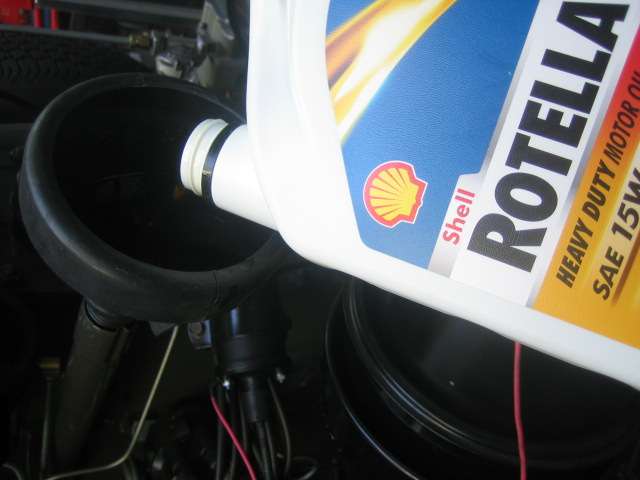 (35.84 KB) (35.84 KB)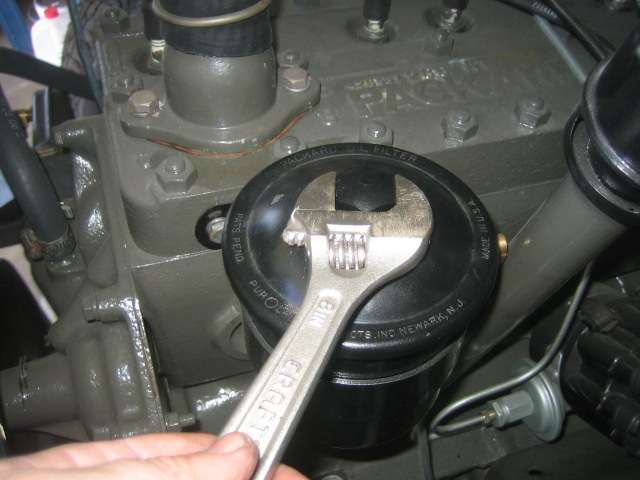
Posted on: 2010/4/18 18:37
|
|||
|
-BigKev
1954 Packard Clipper Deluxe Touring Sedan -> Registry | Project Blog 1937 Packard 115-C Convertible Coupe -> Registry | Project Blog |
||||
|
||||
|
Re: BigKev's 1954 Packard Clipper Deluxe Sedan
|
||||
|---|---|---|---|---|
|
Webmaster
|
Ok more success. I got the motor started!!! (Happy Dance)
This is running off a couple of alligator clips to ballast resistor and then to the coil. So all just temporary wiring. But the motor started on the first shot. I was actually surprised. This running off the mechanical fuel pump. If you look at the video it appears the motor is running/idling fast? like it's racing. Do you think this is just a Carb adjustment? Throttle linkage? I do have the the vacuum port between the carb base and the fuel pump open at this time as I need to replace that hard line. Would that cause the high rpm? I havent timed it yet, so I still need to do that as well. The timing was just statically set when I rebuilt the distributor. I had to kill the motor as it was getting a little smokey in the garage from the penetrating oil that was put down the cylinders when I was freeing the motor many moons ago. I also realize I have an exhaust leak where the down-pipe meets the exhaust manifold. Also I need to replace the exhaust as the rear section is missing just forward of the gas tank. <object width="660" height="405"><param name="movie" value="http://www.youtube.com/v/FdIRoiXZq_8&hl=en_US&fs=1&rel=0&border=1"></param><param name="allowFullScreen" value="true"></param><param name="allowscriptaccess" value="always"></param><embed src="http://www.youtube.com/v/FdIRoiXZq_8&hl=en_US&fs=1&rel=0&border=1" type="application/x-shockwave-flash" allowscriptaccess="always" allowfullscreen="true" width="660" height="405"></embed></object>
Posted on: 2010/4/18 19:04
|
|||
|
-BigKev
1954 Packard Clipper Deluxe Touring Sedan -> Registry | Project Blog 1937 Packard 115-C Convertible Coupe -> Registry | Project Blog |
||||
|
||||
|
Re: BigKev's 1954 Packard Clipper Deluxe Sedan
|
||||
|---|---|---|---|---|
|
Forum Ambassador

|
Hurrah, I share your joy! The high idle speed may just be the fast idle - it's a little cam on the carburetor that raises the idle speed while the choke is closed or partially closed. Take a look at it, it should be obvious and has it's own screw to adjust independent of the regular idle speed.
Posted on: 2010/4/18 19:11
|
|||
|
||||


