|
Re: 51Packard's....51 Packard
|
||||
|---|---|---|---|---|
|
Home away from home

|
A picture of the whole pin may help:
Attach file:  (11.81 KB) (11.81 KB)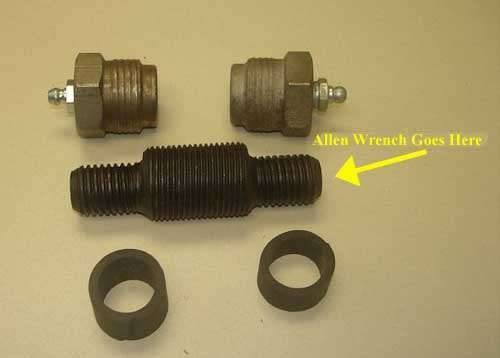
Posted on: 2010/10/4 12:04
|
|||
|
||||
|
Re: 51Packard's....51 Packard
|
||||
|---|---|---|---|---|
|
Home away from home

|
Ahhh...Thank you very much! I definitely know for sure where the alen wrench goes now. With all the crud on the suspension, I feel like an archeologist scraping away rock to find the bone!
Posted on: 2010/10/4 12:43
|
|||
|
[url=h
|
||||
|
||||
|
Re: 51Packard's....51 Packard
|
||||
|---|---|---|---|---|
|
Home away from home
|
10-04-10
More disassembly today. I removed the clip holding the front stabilizer bar by prying it with a screwdriver. I didn't realize there were tabs on it so I broke one. The trick is to lift up or down to release the tabs before prying it. Lesson learned. I wonder if it will be OK with just the bottom lip and one top tab holding it in? That's what I hate about taking things apart that aren't broken. I always break something! Once the bar was gone, the lower suspension was free to swing down. Maxed out my jack and the spring was still stuck in there. Added a 4x4 block and it was enough to swing the bottom down and pull out the spring and shock. Used an allen wrench to remove the top bolt on the steering knuckle. Turned it 8-1/2 times to remove it. Looked down at all the fasteners and realized I had better get them put back on parts before I forget where they go! More scraping. When I was at Walmart, I picked up a degreaser for $2 while looking for oven cleaner. I used that with a wire brush to clean. Working pretty good so far. Makes a mess though when the metal bristles spray dirt all over you! In the muck when I removed the spring, I found two rubber washers and I'm not sure where they go. They are in the last picture. The ones with the metal caps go to the shock, but I can't remember which goes on top and which goes on bottom. Attach file: (156.29 KB)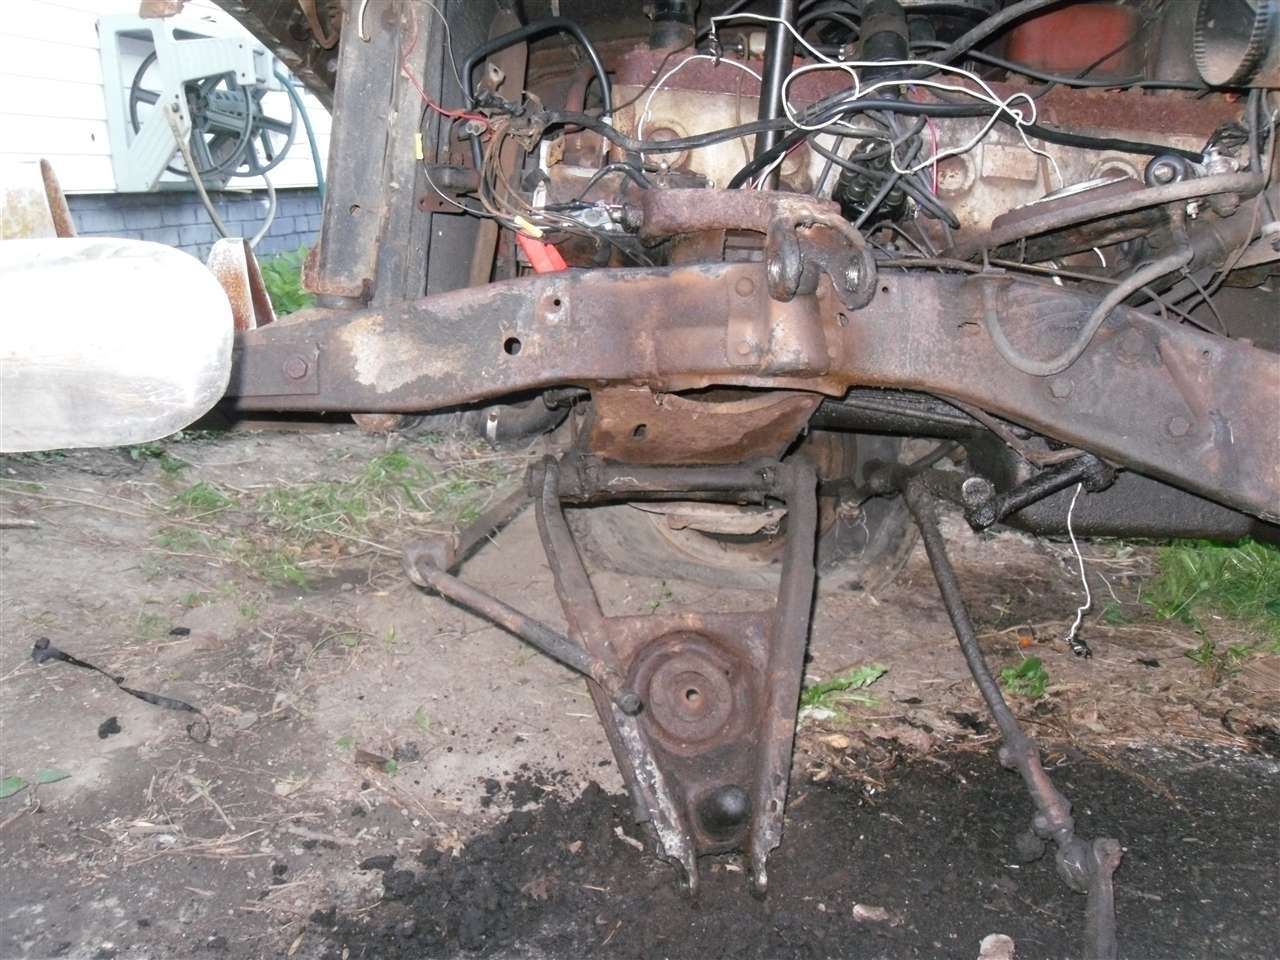 (151.29 KB) (151.29 KB) (180.09 KB) (180.09 KB)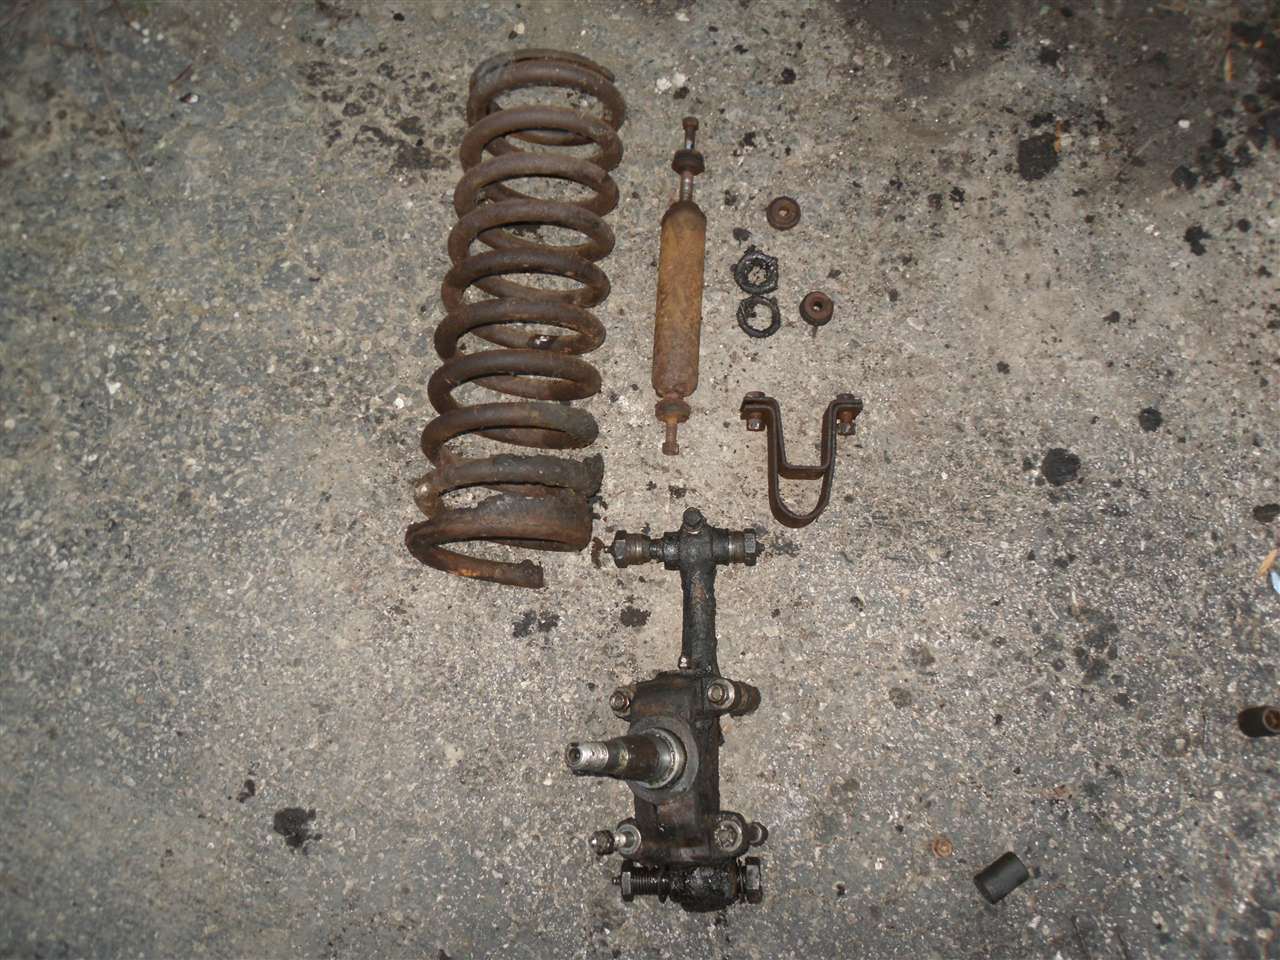 (190.51 KB) (190.51 KB)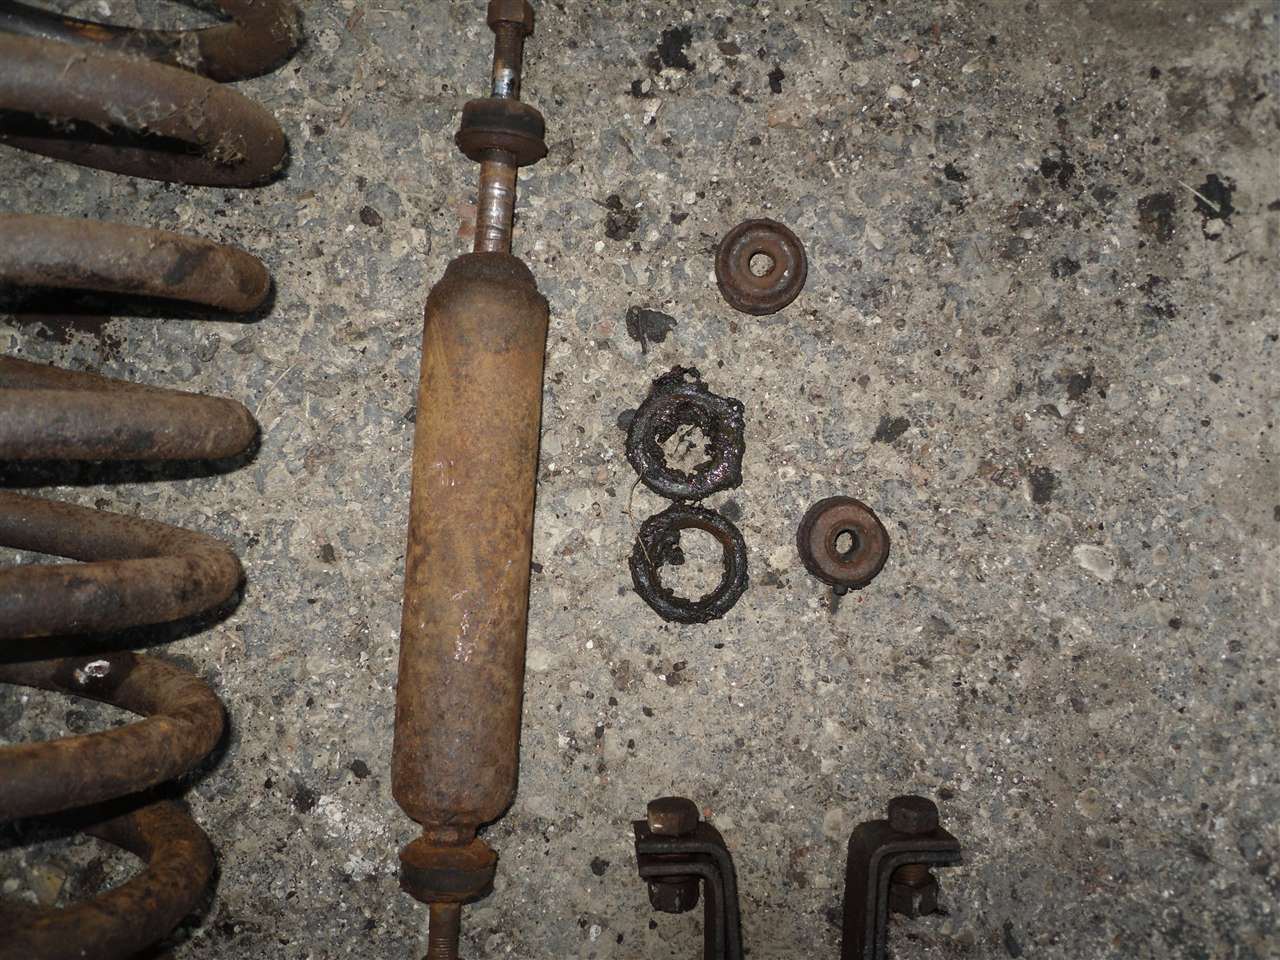
Posted on: 2010/10/4 18:41
|
|||
|
[url=h
|
||||
|
||||
|
Re: 51Packard's....51 Packard
|
||||
|---|---|---|---|---|
|
Home away from home
|
Maybe this is the washer in the pic? Can't tell if it is dirt or a washer? This would be in addition to the spacer that is there. Seems like because of the size, it would either go there or on the bottom bolt of the steering knuckle. I'm pretty sure it does not go their though because I put the nut and metal washers back on it right away.
Attach file: (180.63 KB)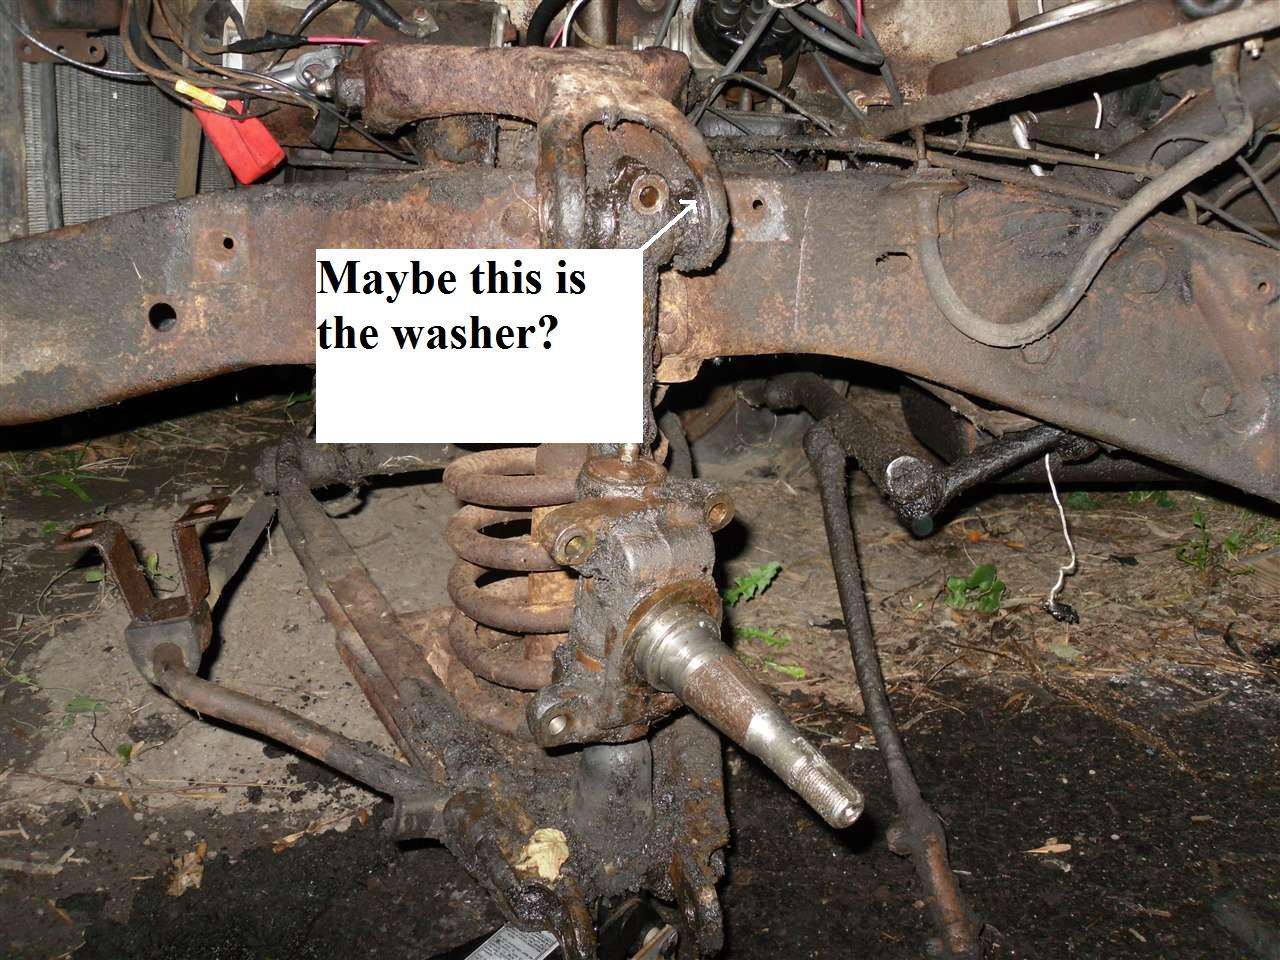
Posted on: 2010/10/4 18:56
|
|||
|
[url=h
|
||||
|
||||
|
Re: 51Packard's....51 Packard
|
||||
|---|---|---|---|---|
|
Forum Ambassador

|
Think the flat ones like shown on the new piece in post 102 are top and round ones look more like the bottom but will defer to advanced wisdom. Parts illustration is 51-4, pict is 55. Think they are the same though.
Attach file: (5.90 KB) (10.03 KB) (10.03 KB)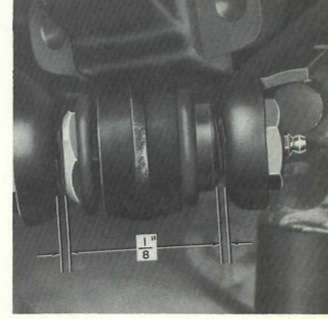
Posted on: 2010/10/4 19:15
|
|||
|
||||
|
Re: 51Packard's....51 Packard
|
||||
|---|---|---|---|---|
|
Home away from home

|
HH56 is correct. The washers that look like an O-ring are the seals for the lower pin.
The seals for the upper pin are like a short section of hose as shown in the picture in post 102
Posted on: 2010/10/5 0:26
|
|||
|
||||
|
Re: 51Packard's....51 Packard
|
||||
|---|---|---|---|---|
|
Home away from home
|
Thanks guys...I need to be more careful with this stuff, especially since most of my work gets done at night with a flashlight!
Posted on: 2010/10/5 7:16
|
|||
|
[url=h
|
||||
|
||||
|
Re: 51Packard's....51 Packard
|
||||
|---|---|---|---|---|
|
Home away from home
|
10-05-10
Removed the upper arm by removing the two bolts on the rear bar. Removed the lower arm by removing the cotter pins and unscrewing the 4 nuts holding it up. I noted that on the left side, there was a metal spacer between the arm and the frame. Now all that is left is the brake line holding the backing plate to the frame. I'll have to clean that more to see how it is connected. Continued to degrease with the cleaner and wire brush. What a mess it makes! All kinds of black dots all over me when I am done. Got most of the spring done and the upper arm. May have to go over it again with brake cleaner before painting. Attach file: (173.52 KB)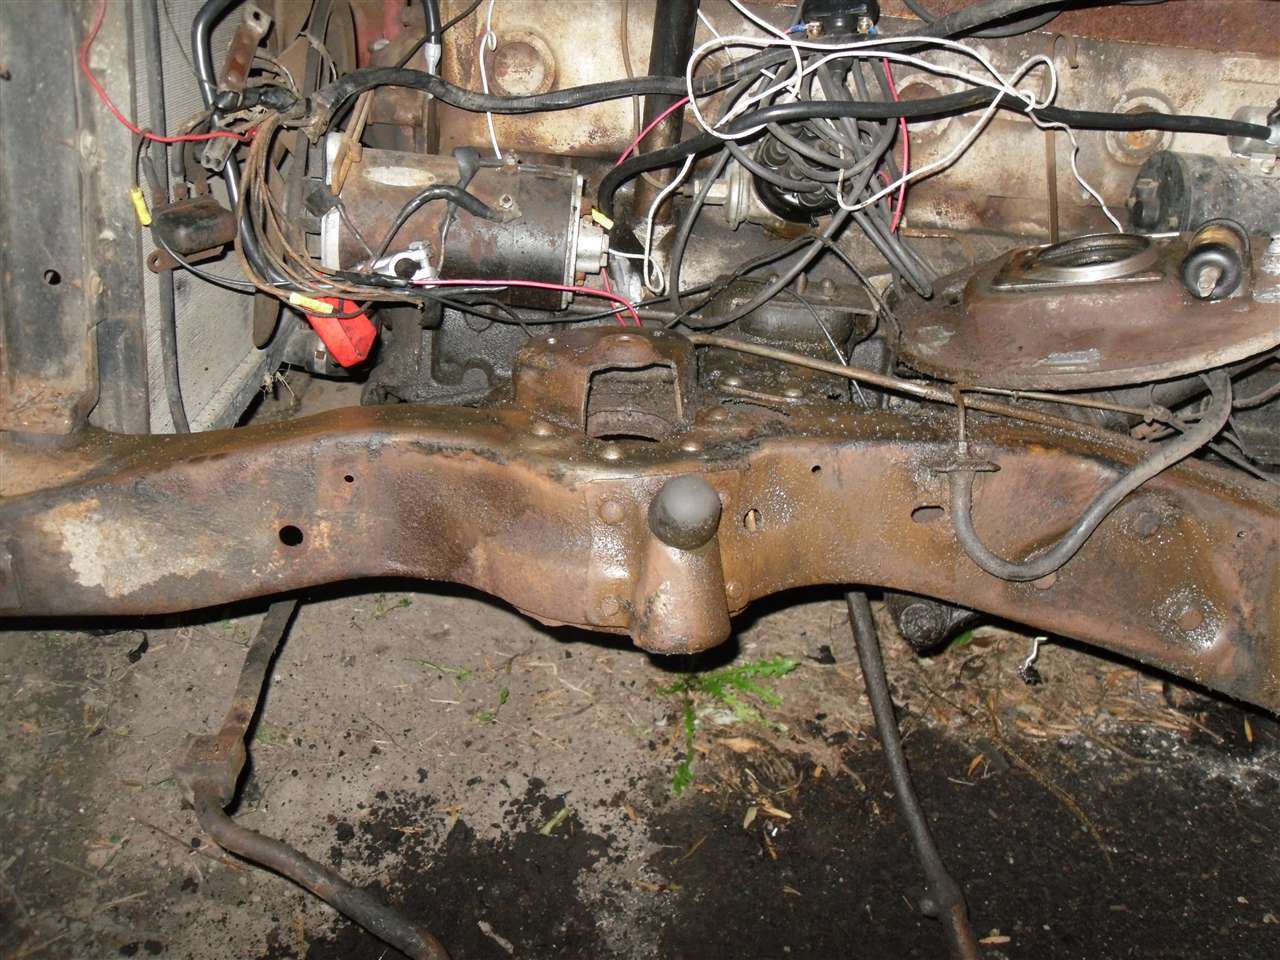 (174.28 KB) (174.28 KB)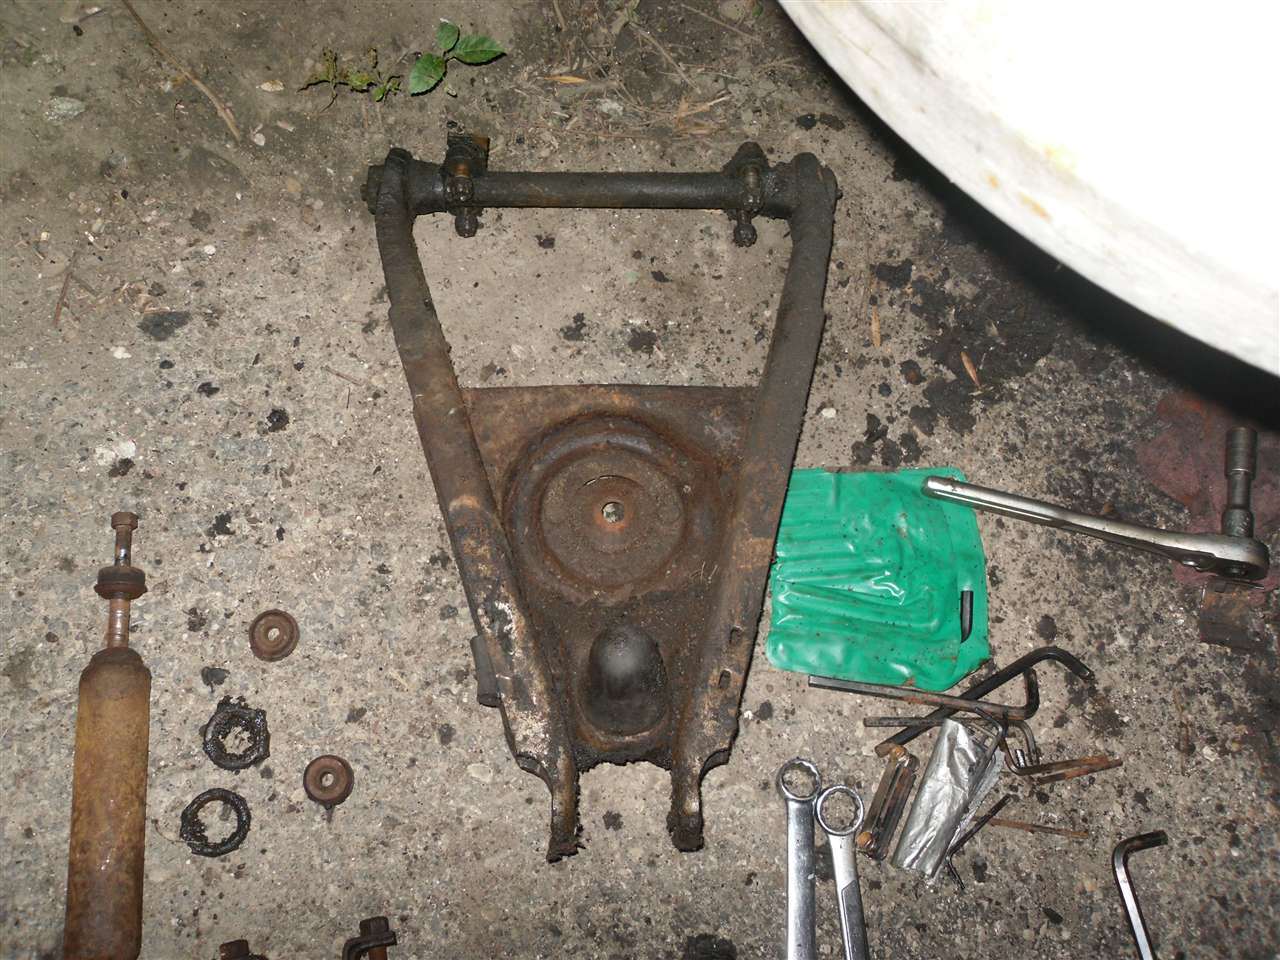 (195.90 KB) (195.90 KB) (251.40 KB) (251.40 KB)
Posted on: 2010/10/5 19:40
|
|||
|
[url=h
|
||||
|
||||
|
Re: 51Packard's....51 Packard
|
||||
|---|---|---|---|---|
|
Home away from home
|
10-06-10
Not much to report. I had no desire to get covered in muck today so I resorted to derusting the upper arm and spring with a wire cup attached to my angle grinder. Both pieces look a lot better. After that, I gave each a coat of Phosphoric acid that I purchased at the hardware store and set it aside to dry overnight. I have not had very good luck in the past keeping rust at bay. This is the first time I am trying this acid technique. I hope it works! Tomorrow I will give it a coat of rusty metal primer and the next day gloss black enamel.
Posted on: 2010/10/6 21:36
|
|||
|
[url=h
|
||||
|
||||


