|
Re: 1940 Super 8 160 Model 1803 Project
|
||||
|---|---|---|---|---|
|
Home away from home
|
Quote:
A very meticulous and knowledgable restorer told me this: "Use ni-rod, but preheat with a rose bud to a dull cherry if possible. Then get on it immediately with the welder. Say prayers, cross fingers and hang a garlic around neck... and sacrificing a chicken wouldn't hurt either. Due to their high carbon exposure exhaust manifolds don't like to be welded."
Posted on: 2011/5/24 10:35
|
|||
|
West Peterson
1930 Packard Speedster Eight Runabout (boattail) 1940 Packard 1808 w/Factory Air 1947 Chrysler Town and Country sedan 1970 Camaro RS https://packardinfo.com/xoops/html/modules/newbb/viewtopic.php?topic_id=4307&forum=10 http://aaca.org/ |
||||
|
||||
|
Re: 1940 Super 8 160 Model 1803 Project
|
||||
|---|---|---|---|---|
|
Forum Ambassador
|
Wind finally permitted painting sundry parts including the starter. Nothing exciting but necessary.
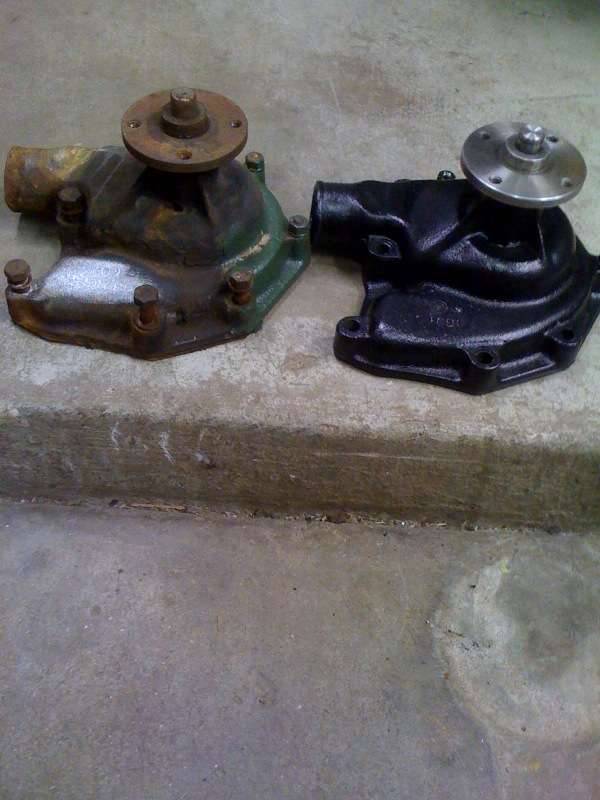
Moved on to addressing an exhaust stud that was in poor shape. Given the terrible state of stock at local parts houses, and length of stud ruling out most if not all local hardware stores, I opted to take a few minutes and make what I needed. Very little challenge in this particular job, but rewarding just the same. More small steps forward. Attach file:  (55.27 KB) (55.27 KB)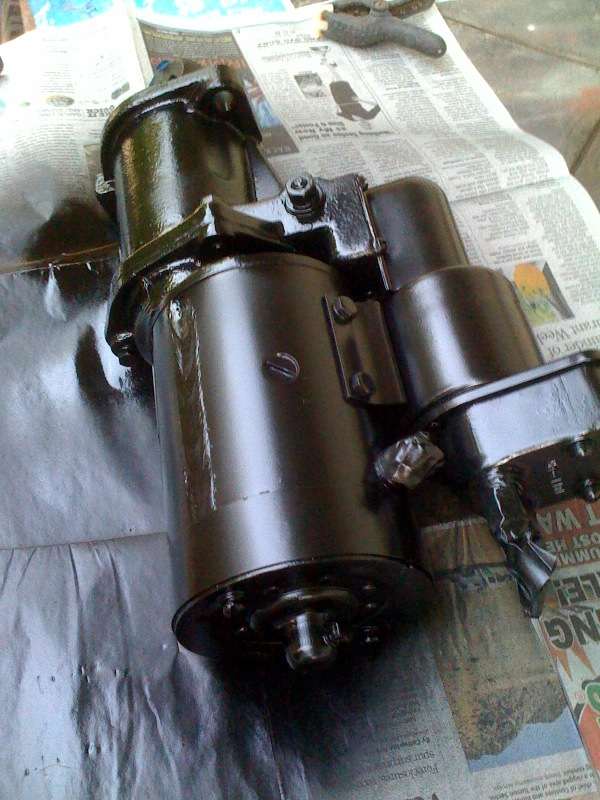 (39.58 KB) (39.58 KB) (49.60 KB) (49.60 KB)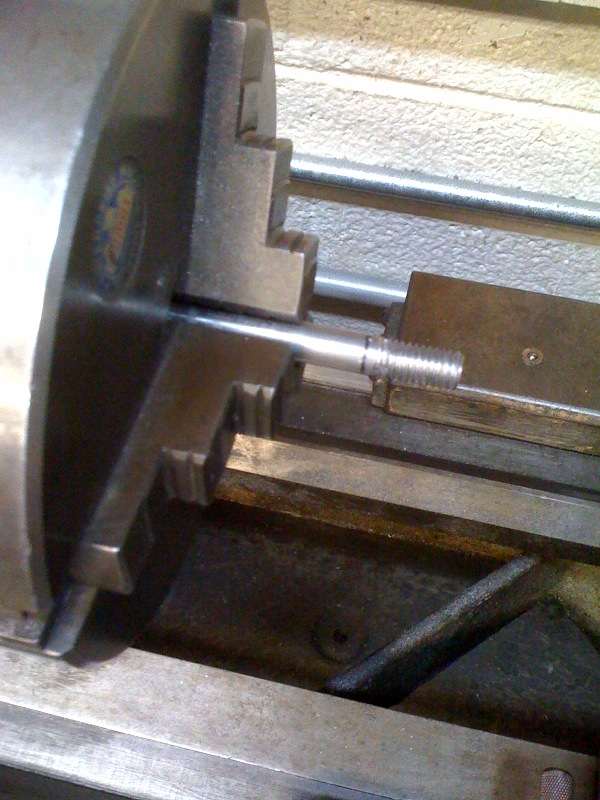 (55.38 KB) (55.38 KB)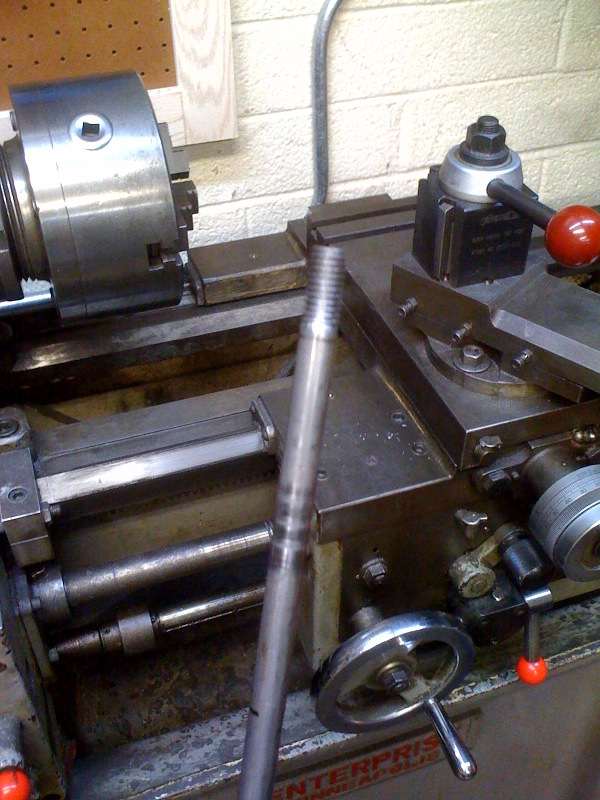 (42.11 KB) (42.11 KB)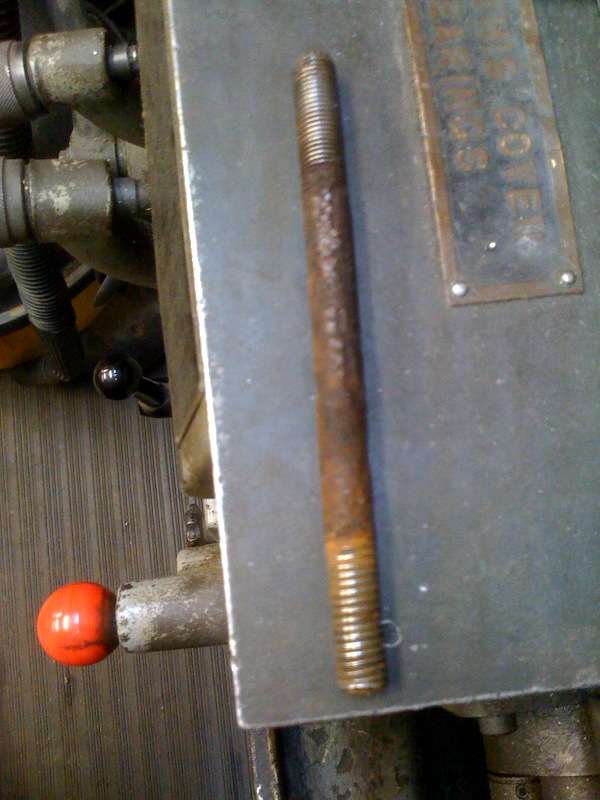 (47.97 KB) (47.97 KB)
Posted on: 2011/5/25 2:00
|
|||
|
||||
|
Re: 1940 Super 8 160 Model 1803 Project
|
||||
|---|---|---|---|---|
|
Home away from home
|
Looks like you're getting it all back together! I'm very jealous of your shop. I did a little bit of machining in college, and am planning to buy a mill and lathe further down the road when Uncle Sam stops telling me to move.
Also good discussion on the exhaust manifold. The manifold on my 115c is also cracked. A local welding shop is going to tig weld it for me; I don't want to braze it myself, and I don't have the skills or tools for a tig job.
Posted on: 2011/5/25 22:04
|
|||
|
1937 120 1092 - Original survivor for driving and continued preservation.
https://packardinfo.com/xoops/html/modules/newbb/viewtopic.php?topic_id=16514&forum=10 1937 115 1082 - Total basket case, partial restoration, sold Hershey 2015 https://packardinfo.com/xoops/html/modules/newbb/viewtopic.php?start=0&topic_id=6550&order=ASC&status=&mode=0 |
||||
|
||||
|
Re: 1940 Super 8 160 Model 1803 Project
|
||||
|---|---|---|---|---|
|
Forum Ambassador
|
Quote:
Ken, you are very kind. All this old junk around here are just things I have gathered in my travels of fixing up old stuff. I enjoy the work. Quote:
West, that makes perfect sense! I am really glad you posted that today in the other thread. Every picture, including the one you and Joe reffered to seemed to indicate the mount was indeed engine color. I think I will go ahead and paint green!
Posted on: 2011/5/27 1:15
|
|||
|
||||
|
Re: 1940 Super 8 160 Model 1803 Project
|
||||
|---|---|---|---|---|
|
Forum Ambassador
|
All pistons were stamped with corresponding numbers 1 - 8. Last weekend I noted that number one was stamped 180 out from the rest. I thought on this over night and had a very sinking feeling. The next morning I looked very closely at the tiny pits in the piston crown and they didn't correspond to the exhaust valve / spark plug location (hottest spot). Did a quick dial bore gauge check and decided the cylinders would be within service limits if new STD pistons were fitted, especially because the replacement pistons run a couple thousandths looser than the OEM pistons.
Phoned up Egge machine and had a brand new set of pistons and modern style rings on the door step in time to fit over the weekend. As I drew #1 out the split appeared on the opposite side of the cam. How reassuring to verify this hunch was indeed correct. I would have never been able to confidently drive the car thinking the split skirt side was acting as the major thrust surface. The cylinders had just a hint of ridge. Normally, I would entrust the rigid hone to quickly and efficiently remove the ridge, but wanting to only remove minimal material I opted to ridge ream. The use of a speed handle expedited the job nicely. Got out the rigid hone for a quick true up pass thru each cylinder. The rear cylinder was a little tough, it is tucked into the firewall pretty well. My buddy john just happened to have some 1/2" hex stock and was kind enough to thread and bring over to make the job a bit easier. Heck, the extension worked great! I was able to hone all cylinders standing on the frame rails and in a comfortable stance. After all cylinders were honed the mic and dial bore gauge reveled cylinder measurements and new piston to cylinder clearances well within service limits. While this was a costly unplanned repair, I am very pleased to have prevented probable future engine damage. Attach file: (45.99 KB)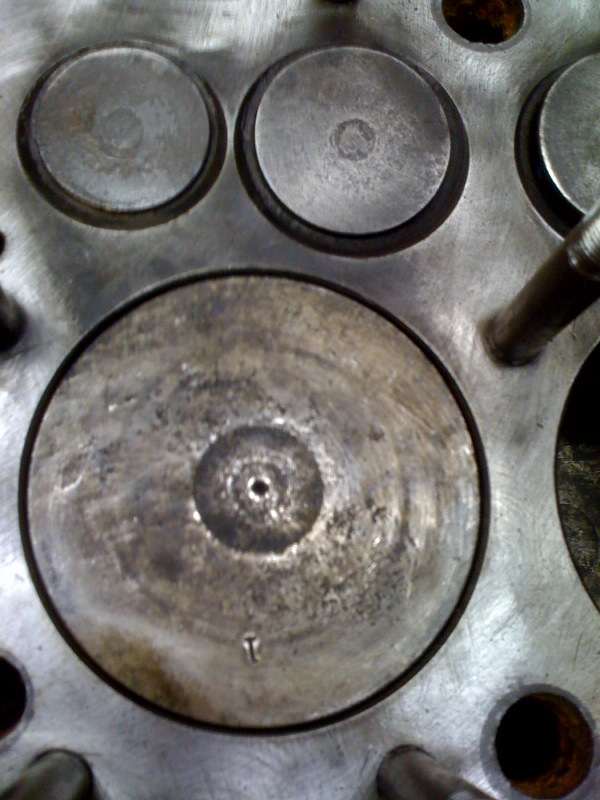 (36.84 KB) (36.84 KB)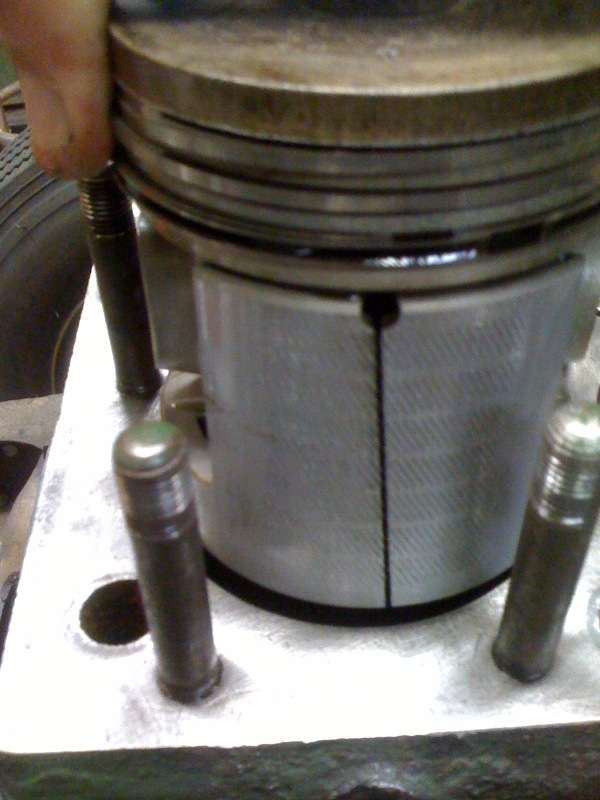 (41.97 KB) (41.97 KB)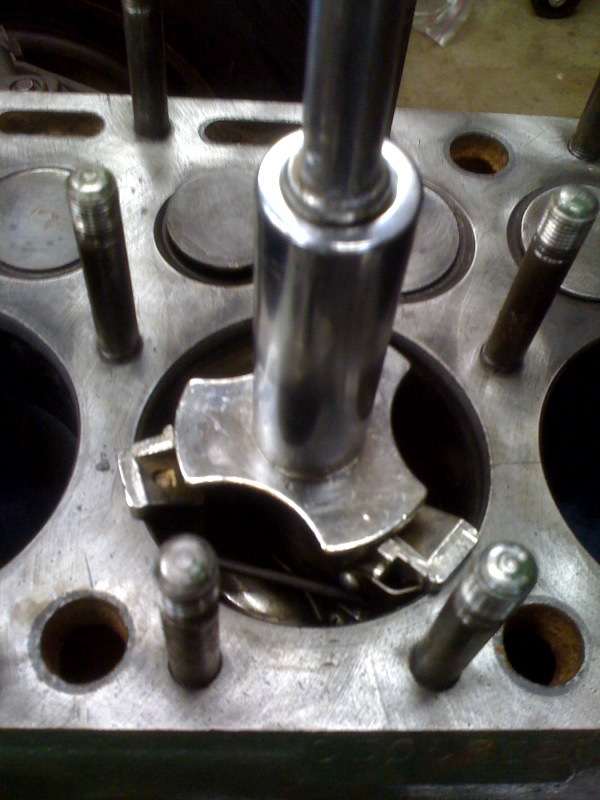 (46.89 KB) (46.89 KB) (54.80 KB) (54.80 KB)
Posted on: 2011/5/29 23:17
|
|||
|
||||
|
Re: 1940 Super 8 160 Model 1803 Project
|
||||
|---|---|---|---|---|
|
Home away from home

|
I'm impressed, Jim. This is the grown-up stuff. I'm just polishing and gluing.
Son John (who rebuilt my engine and who owns Santana Crane and knows this stuff, and will be caretaker of the car in the future) will find this very helpful. Thanks for documenting what you're doing. I think I understand most of it. Joe
Posted on: 2011/5/30 0:33
|
|||
|
||||
|
Re: 1940 Super 8 160 Model 1803 Project
|
||||
|---|---|---|---|---|
|
Forum Ambassador
|
Quote:
Thanks for your kind words, Joe. In reality, you indeed have the tougher job! I am checking in on your project thread multiple times a day to see how you are coming. Perhaps we will have the chance to visit someday. Not any big progress lately. Sourced some rod bearings to replace the ones I am not thrilled with. Did another flush and cleaning on the engine internals. Also ran into a snag with the floating oil pump pickup. It sunk! I will post a want add in the F/S section. If anyone has an extra, please let me know. Attach file: (47.41 KB) (45.43 KB) (45.43 KB)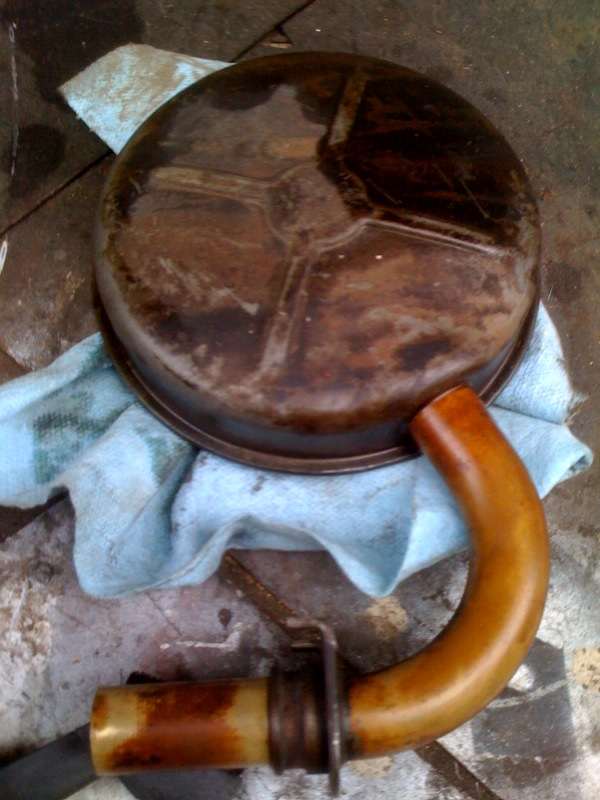 (48.08 KB) (48.08 KB)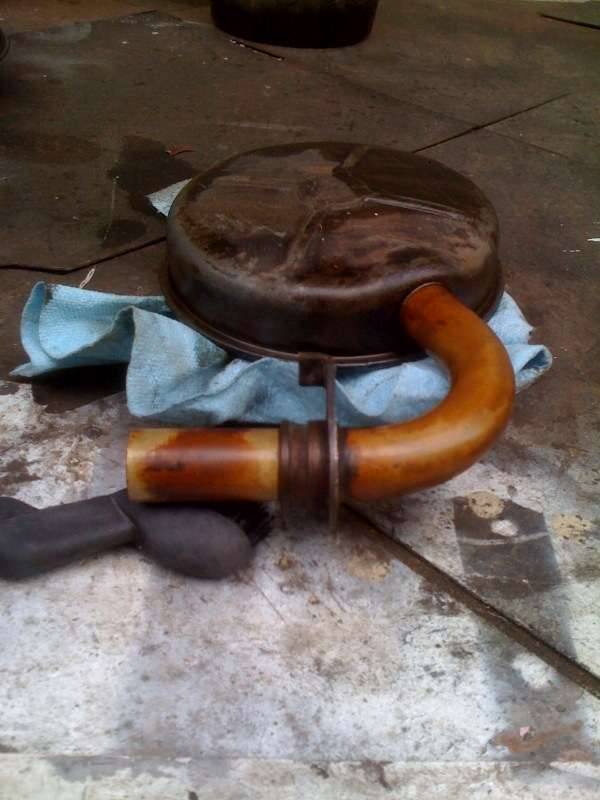
Posted on: 2011/5/31 23:23
|
|||
|
||||
|
Re: 1940 Super 8 160 Model 1803 Project
|
||||
|---|---|---|---|---|
|
Forum Ambassador
|
Thought I would pull the damper off the engine last night. Got home and looked. Realized there was little clearance for a normal puller. Thought on it overnight and came up with a plan using some scrap steel I happen to have on hand.
Not a very attractive tool, but I was very concerned about chipping the edge of the pulley and was determined to make a proper puller that would not risk any damage. It took a while to make, but took about 18 seconds to efficiently remove the damper. Attach file: (46.06 KB)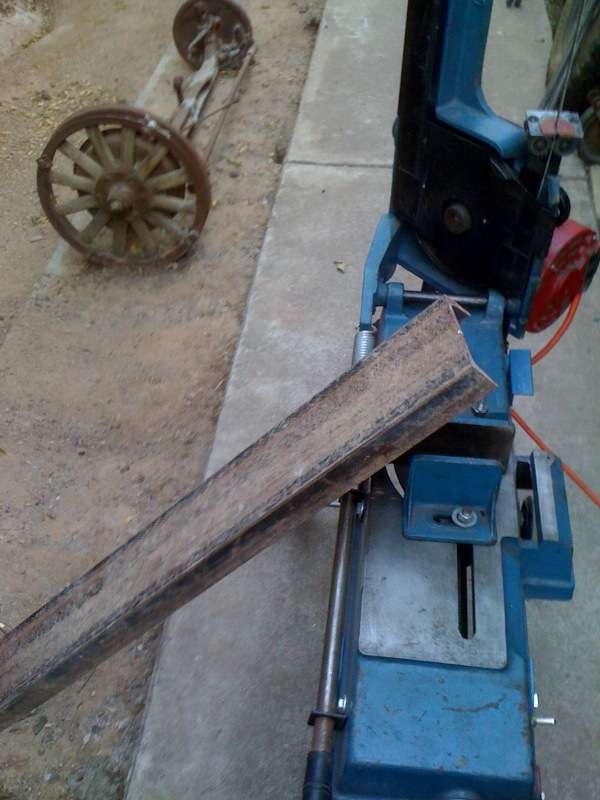 (47.12 KB) (47.12 KB) (46.58 KB) (46.58 KB)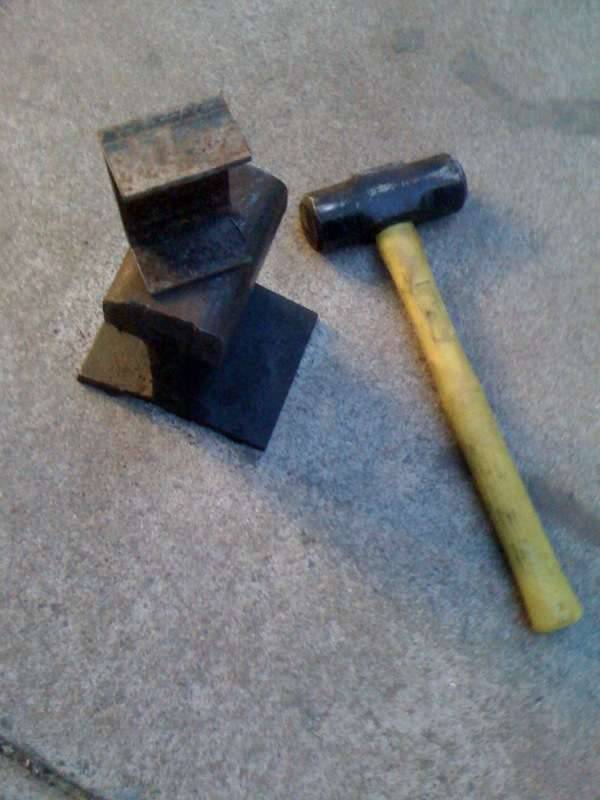 (46.51 KB) (46.51 KB)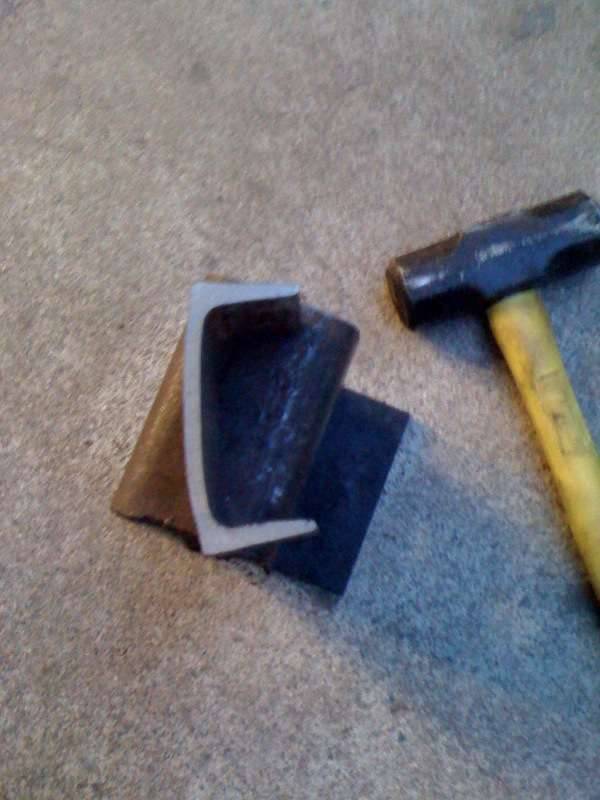 (44.09 KB) (44.09 KB)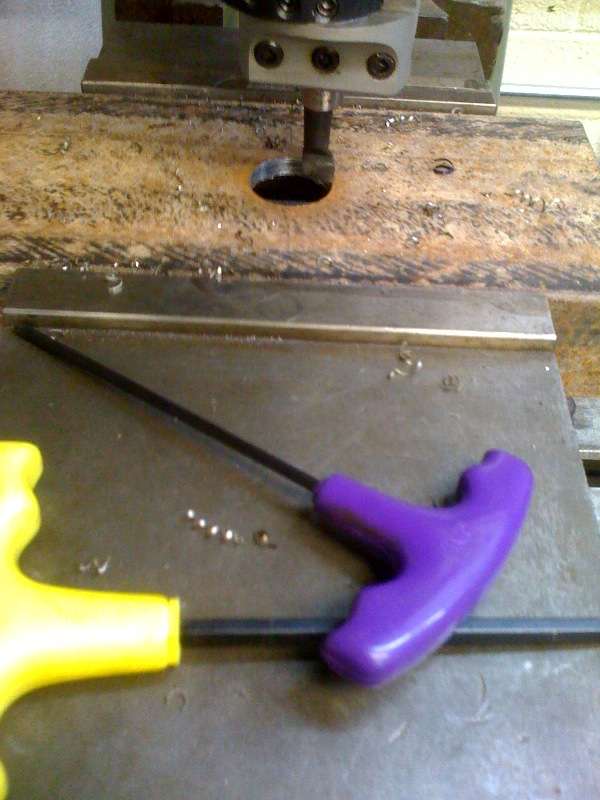 (49.42 KB) (49.42 KB) (48.58 KB) (48.58 KB)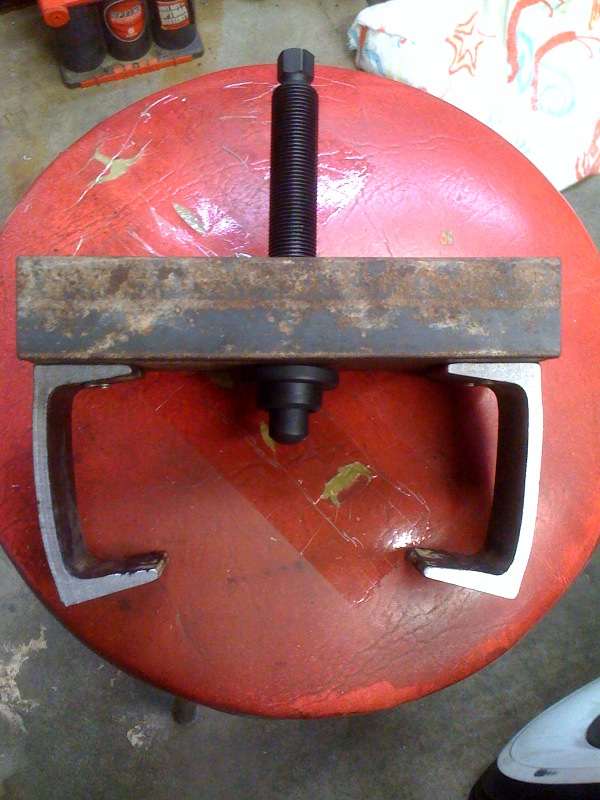 (45.87 KB) (45.87 KB)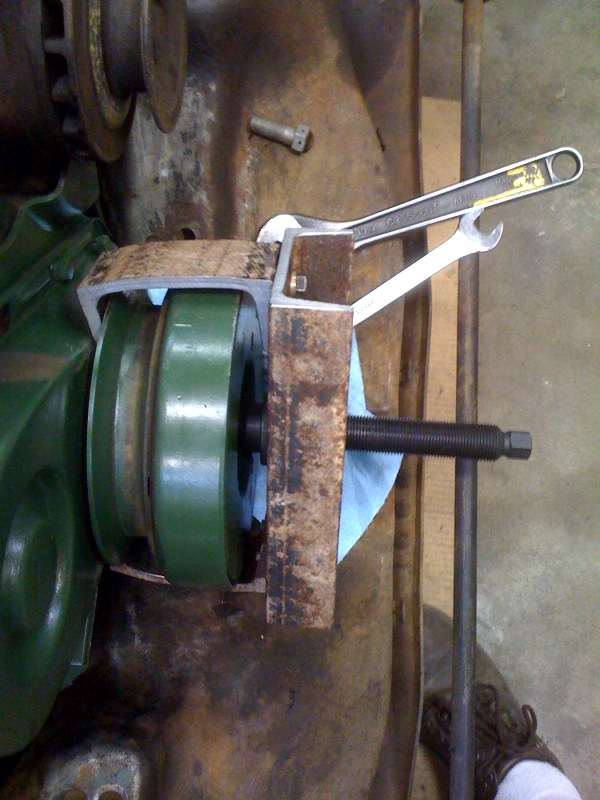 (49.04 KB) (49.04 KB)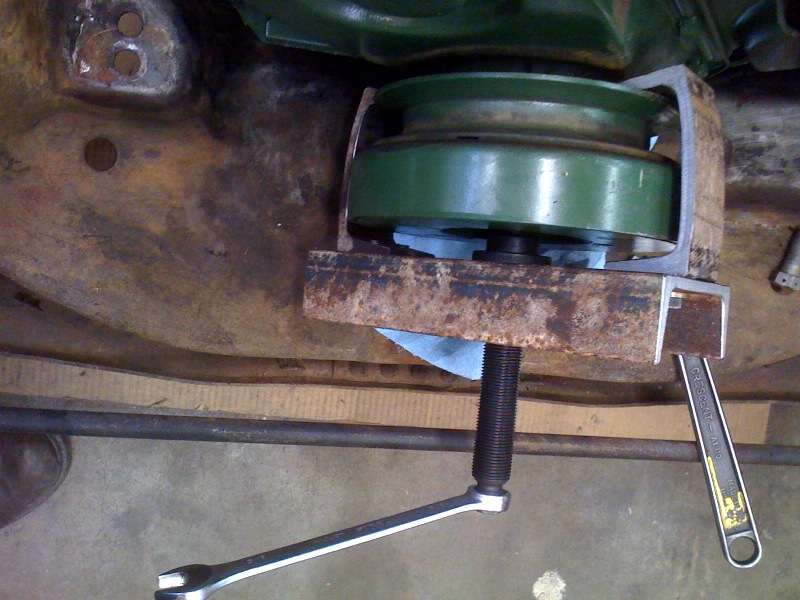
Posted on: 2011/6/3 0:47
|
|||
|
||||
|
Re: 1940 Super 8 160 Model 1803 Project
|
||||
|---|---|---|---|---|
|
Home away from home
|
Only you, Jim. Tools-in-a-minute. Am I going to be rolling before you are?
The loudest noise I ever heard was pulling the rear drums.
Posted on: 2011/6/3 1:05
|
|||
|
||||


