 (1.27 KB)
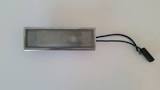
|
Re: How to replace the bulb on the dome light, 1953/1954
|
||||
|---|---|---|---|---|
|
Home away from home

|
There is no plastic on this assembly. The lens is glass and the rim is metal. Gently pry/pull the chrome rim off from the back/ side and the lens rim will come off
Posted on: 2017/5/10 1:37
|
|||
|
||||
|
Re: How to replace the bulb on the dome light, 1953/1954
|
||||
|---|---|---|---|---|
|
Forum Ambassador

|
Here is what Fred is describing. The holes in the rim on the long sides of the glass surround slide over small bumps in the light housing and just need a gentle pry of the entire assy to have them release.
Attach file:  (26.34 KB) (26.34 KB)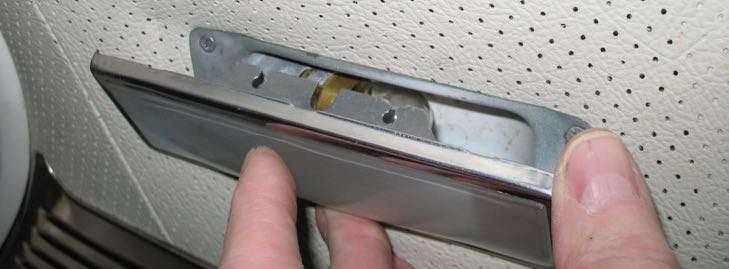
Posted on: 2017/5/10 9:45
|
|||
|
Howard
|
||||
|
||||
|
Re: How to replace the bulb on the dome light, 1953/1954
|
||||
|---|---|---|---|---|
|
Home away from home
|
Dear Howard and Fred,
Thank you for the help! So I was able to pop the cover off (never like to use force on something this old unless I am sure that is the proper tactic) very easily. The light bulb inside was still good, it just needed to be rotated and moved around inside the contacts a little to get rid of surface oxidation. Now the dome light works again! P.S. - Am I correct that the light should only come on when the door switch is turned on or one of the rear doors is opened? That's the way I understand things. Thanks again! Jerome
Posted on: 2017/5/10 19:35
|
|||
|
||||
|
Re: How to replace the bulb on the dome light, 1953/1954
|
||||
|---|---|---|---|---|
|
Home away from home
|
Postscript - I checked the wiring diagram again and I confirmed that it's only supposed to come on either from the switch on the B-pillar or when one of the rear doors open.
Thanks again for being such a great community!
Posted on: 2017/5/10 19:47
|
|||
|
||||
|
Re: How to replace the bulb on the dome light, 1953/1954
|
||||
|---|---|---|---|---|
|
Forum Ambassador
|
Quote:
Am I correct that the light should only come on when the door switch is turned on or one of the rear doors is opened? That's the way I understand things That is correct -- rear dome light operates by rear doors and pillar switch, front courtesy light by front doors and turning headlight switch. On a hardtop I believe all the lights are ganged together and operated by the doors and headlight switch.
Posted on: 2017/5/10 20:02
|
|||
|
Howard
|
||||
|
||||
|
Re: How to replace the bulb on the dome light, 1953/1954
|
||||
|---|---|---|---|---|
|
Home away from home
|
Thanks again very much!
I was able to take the door pillar switch apart and with some careful cleaning and reassembly, get that to work as well! Now, as far as interior lights go, I have one definite problem and one mystery: 1. The headlight switch doesn't turn the courtesy lights up front on. Probably that needs to be taken apart and cleaned. 2. In the wiring diagram it mentions an "ignition switch lamp". Where would that be? I cannot find such a thing. A mystery. Thanks for everyone's help! Jerome
Posted on: 2017/5/11 1:32
|
|||
|
||||
|
Re: How to replace the bulb on the dome light, 1953/1954
|
||||
|---|---|---|---|---|
|
Home away from home
|
Hi Jerome,
The ignition switch lamp is on top of the ignition switch, and turns on when you have the dash lights on. You can access the lamp from the backside of the dashboard. It is in a socket that plugs into the top of the ignition switch.
Posted on: 2017/5/11 5:41
|
|||
|
1953 Clipper Delux Club Sedan, 1953 Caribbean, 1969 912, 1990 Miata
|
||||
|
||||
|
Re: How to replace the bulb on the dome light, 1953/1954
|
||||
|---|---|---|---|---|
|
Home away from home

|
Glad you asked that question. I will check mine this weekend. I hope to have the same outcome!
Posted on: 2017/5/11 6:51
|
|||
|
Even the most difficult situations can be learning situations.
1953 Packard Clipper 1957 Chevrolet BelAir 2004 Chevrolet Corvette |
||||
|
||||
|
Re: How to replace the bulb on the dome light, 1953/1954
|
||||
|---|---|---|---|---|
|
Forum Ambassador
|
Quote:
1. The headlight switch doesn't turn the courtesy lights up front on. Probably that needs to be taken apart and cleaned. The headlight switch has an arrangement that is prone to oxidation and wear. The wipers for the courtesy light switch and rheostat section are made of brass or some metal that oxidizes and corrodes quite easily. That could be part of the issue. Usually the dash lights are the ones that don't work when the switch is dirty but the courtesy lights could be affected if the resistance is high enough. The rheostat wiper is on a plastic isolation sleeve and the courtesy light wiper on the knob shaft. Rivets complete the connection between the terminals and wiper components. If the terminals loosen, the rivets oxidize between the surfaces and connection is poor. Also the corrosion causes a high resistance between the wiper and its contacts. The D shaped holes which turn the wipers are prone to wear so the wipers may not exactly line up as they did when the switch was new. That would affect the courtesy light portion. The headlight switch has essentially 3 positions: at the extreme left the dash and courtesy lights are off. A very slight turn to the right and courtesy lights come on and a slight bit more to the right and courtesy lights go off and dash lights come on at full briteness. Farther turning to right and dash lights dim and are usually too dim to see by the time the knob is half way around. Here are a couple of photos showing components and the area to check. Note the green corrosion on the rheostat side. The courtesy light section is on the other side of the ceramic and is in the same condition. Attach file: (89.96 KB) (28.51 KB) (28.51 KB)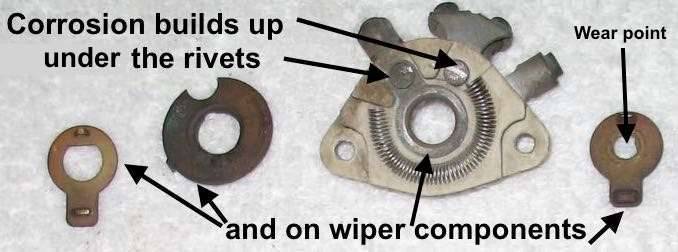
Posted on: 2017/5/11 8:55
|
|||
|
Howard
|
||||
|
||||


