|
Re: 23rd Series Heater Core and Thermal Valve Removal
|
||||
|---|---|---|---|---|
|
Forum Ambassador

|
I don't have photos of the unit in the car with step by step removal photos but here are a couple of the entire heater assy.
Unlike the 51 on heaters, the screws holding the two box halves together are vertical away from the firewall and may all be accessible on the 50 unit so the heater does not need to come off in entirety. If they are, just disconnect the hoses, separate the halves of the box and maneuver the core out. If the screws are not all clear then the entire unit will need to remove so here are some removal guidelines. To remove the heater from the car start by disconnecting the hoses, air duct and the motor electrical wires, Look for any small sheetmetal brackets around the blower area which might be screwed between the firewall and a part of the heater. Not all had extra but there could have been an additional L shaped reinforcement added after production so remove any screws holding a bracket to the firewall if you find one. Move inside the car and remove the screws holding the outer plenum cover to the heater outlet base. You should be able to remove the screws or bend any tabs at the top which might be holding the cover to the sheetmetal base. The defroster ducts and Bowden cables will still be connected. The ducts may be rotten and may break when moved. If you try and save them be gentle. There should be enough slack in the Bowden cable to just set the cover aside. If the plenum portion across the hump has screws attached to the cover they will need to be unscrewed too. Once the cover is clear you should see 4 studs with nuts and washers. One of the nuts may be a bit hard to access but it is doable. The studs hold the heater assy and once the nuts and washers are removed the plenum baseplate should come off. With the studs and base plate removed the heater should be able to lift off the firewall from the engine side. The thermal valve is held to the firewall by a couple of screws. Once the hoses are disconnected from the engine side you will need to move inside and disconnect the Bowden cable and gently remove the sensing bulb and capillary tubes from any clamps between the valve body and the sensing bulb position at the rear bottom of the glovebox. Don't kink the tube while you roll it to a manageable shape or length. Remove the screws holding the valve to the firewall so it can pull out from inside the car.. Working room is tight with the radio and glovebox in place but it is doable. Attach file:  (225.74 KB) (225.74 KB)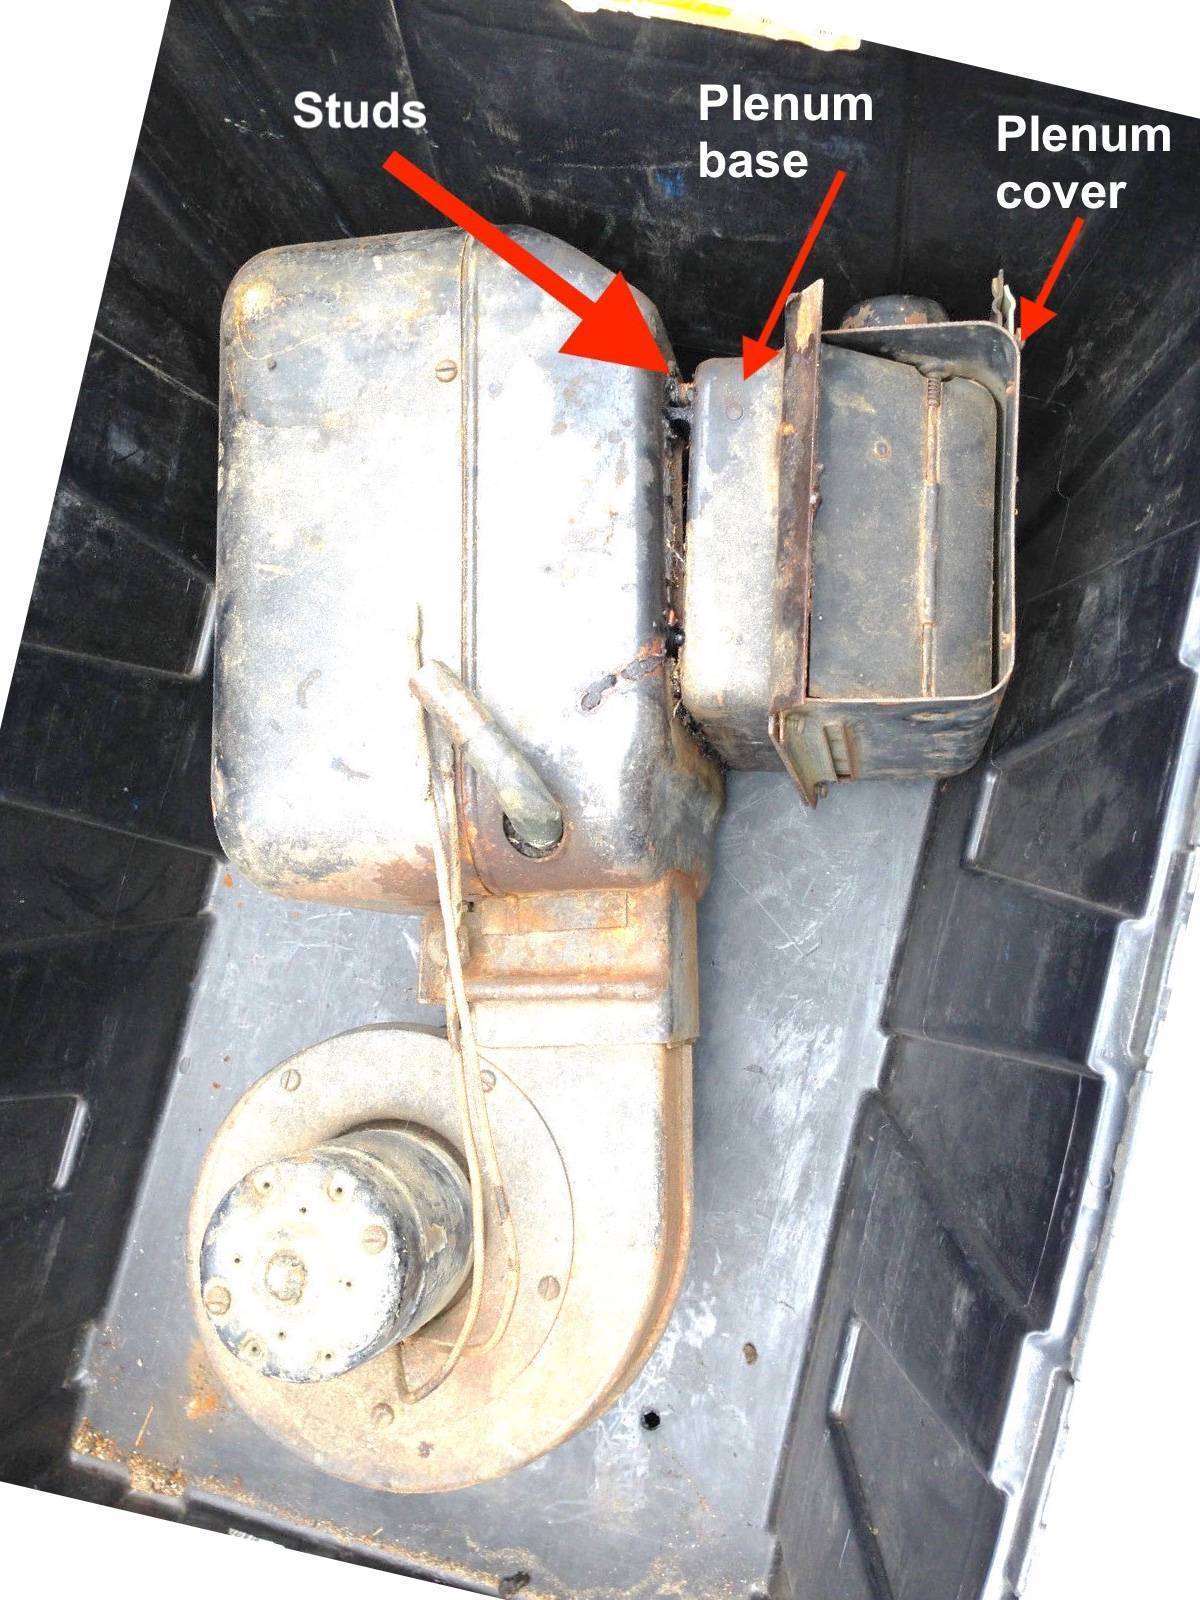 (232.50 KB) (232.50 KB)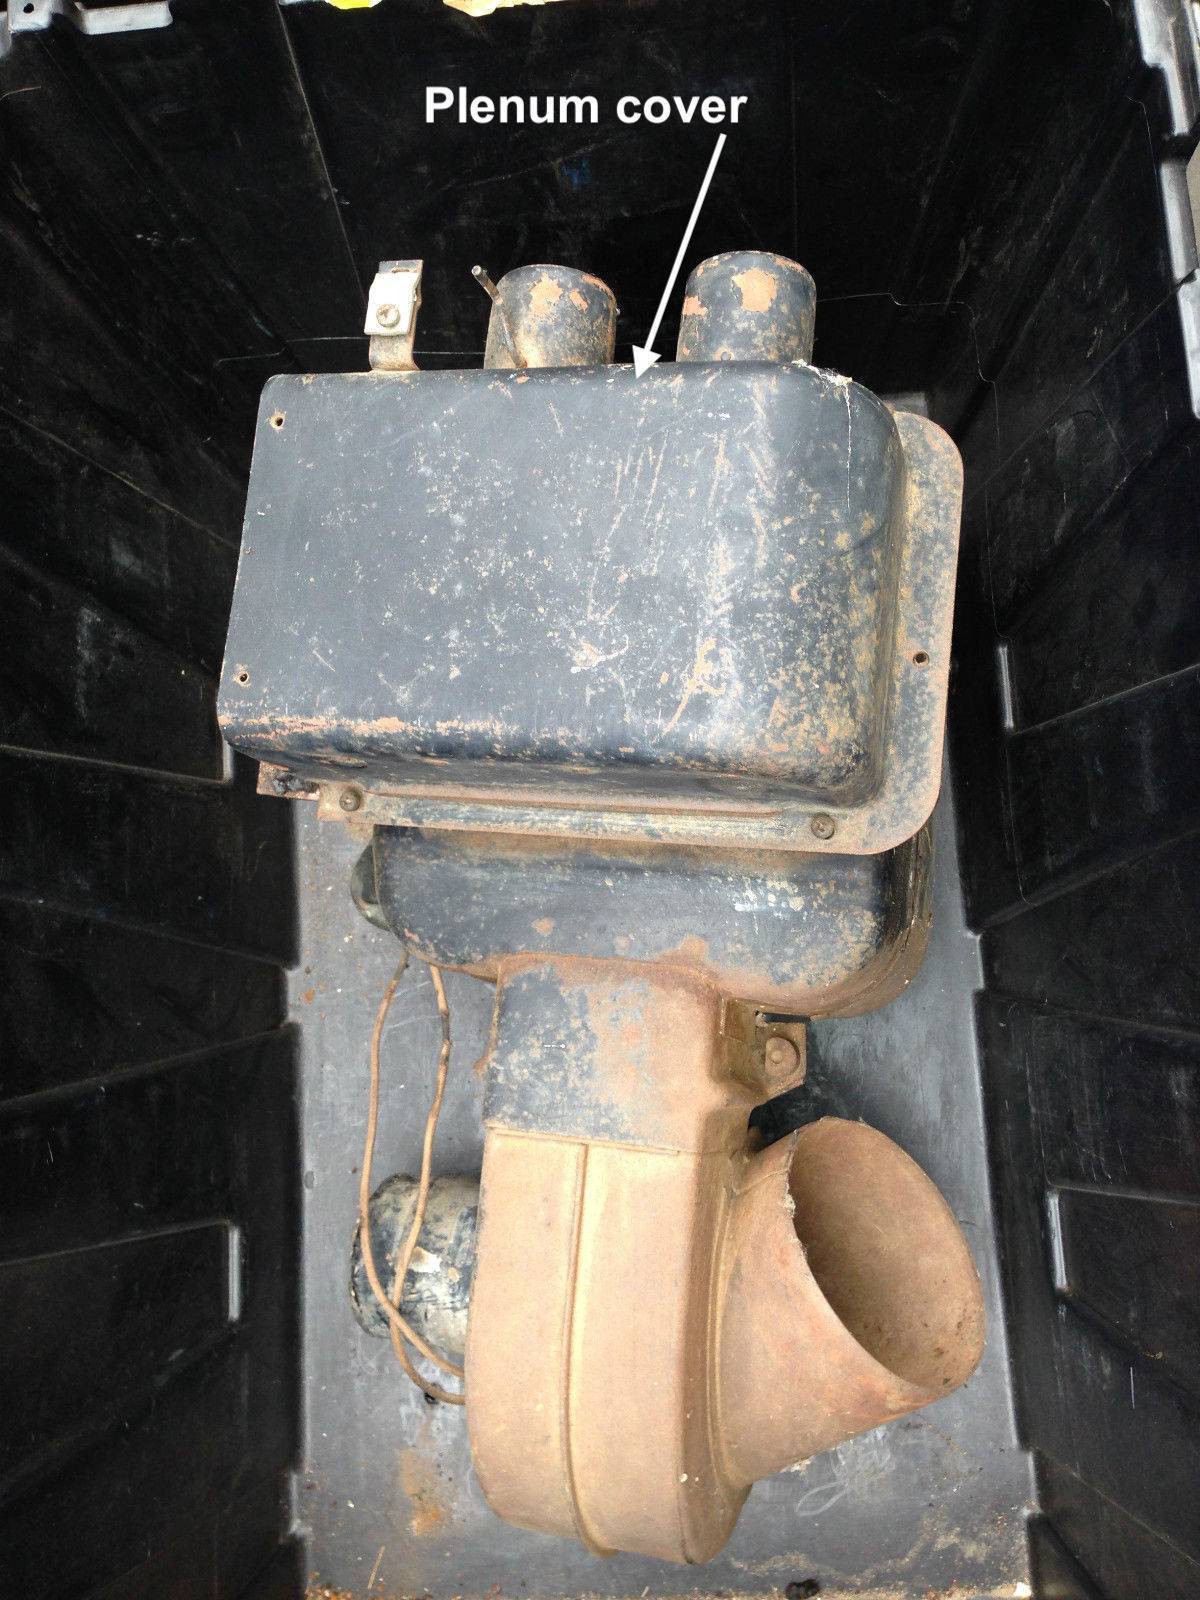
Posted on: 2018/9/18 15:58
|
|||
|
Howard
|
||||
|
||||
|
Re: 23rd Series Heater Core and Thermal Valve Removal
|
||||
|---|---|---|---|---|
|
Not too shy to talk

|
This is helpful. Thanks a lot.
Posted on: 2018/9/18 17:44
|
|||
|
||||
|
Re: 23rd Series Heater Core and Thermal Valve Removal
|
||||
|---|---|---|---|---|
|
Home away from home

|
Hi; I lost a lot of info out of my phone- your number included. I have a couple of 22nd-23rd heaters if you need parts, some already power-coated. not hard to remove from car, take out sheet metal screws on cover under dash- then core and you will see four nuts which are on studs that run through dash. takes more time to undo cables, hoses and clamps. Do you have any interest in the rest of the engine you planed to buy. Dell
Posted on: 2018/9/18 19:57
|
|||
|
35-1200 touring sedan 42-110 convertible coupe 48-2293 station sedan |
||||
|
||||
|
Re: 23rd Series Heater Core and Thermal Valve Removal
|
||||
|---|---|---|---|---|
|
Not too shy to talk
|
Hi Dell,
Thanks for the post. And yes, I still want that engine. I'll contact you offline. G Durgin Oakland, CA
Posted on: 2018/9/18 22:26
|
|||
|
||||


