|
Re: Larry's 1951 Club Sedan Project
|
||||
|---|---|---|---|---|
|
Home away from home
|
Air cleaner / Silencer Restoration
A couple of air cleaners I have were in good condition apart from a few small dents and the need for a coat of paint. They had sat around a few months since being stripped and grit blasted, and some surface rust had set in, so a lot of 'elbow grease' was used to remove this, using 180 / 240 grit paper. It took a few hours, teaching me a lesson about not leaving blasted metal bare for a long period of time. I could easily have given them a spray of light oil (Lanolin) but was too busy getting on with other tasks to notice the rust forming. After as much panel beating as possible I had a few very minor low spots to fill, and considered lead wiping as a method. Noticed that quite a few dents on the coupe had been filled with lead way back - probably in the early years when the dangers of lead fumes were little known. I remember as a trainee telecommunications tech I did a full week of 'Lead Wiping" at the Lineman's training college. (Larger phone cables have a lead outer sheath which needs to be 'plumbed' with Plumbum (what a great word!) to keep water out of the typically paper insulated wires). None of us dozen or so trainees wore a mask of any kind for the entire week. However I decided to use polyester filler instead of lead. U-Pol Top Stop Gold works well, it's my choice for workability and ease of finishing for light / thin builds. (Thick builds require a different U-Pol product). The U-Pol packaging is a great improvement over the old style 'tins' of filler, with an easy-dispense bladder which you can knead and squeeze out enough, then put the screw cap back on - all very easy compared to 'scraping' the stuff out of a tin with a spatula. After all the sanding to achieve the right shape a few coats of combined primer-surfacer were sprayed on and re-sanded, then the acrylic gloss black applied. In the past I had always used separate primer and spray putty but it is worth noting just how much quicker and simpler it is to use the combination product. Especially faster from the viewpoint of when you are rubbing back for the perfect result and get down to bare metal in a few places. Then it was prime those areas again, leave to dry, then respray with spray putty. Now you can just respray with the combo primer- spray putty saving loads of time. The results seem very good with this product. Here is the first application of the filler, it took three applications before all nicks were filled properly.      Here is the end result - immediately after spraying and yet to be cut / buffed for a good shine.   
Posted on: 2010/8/3 18:22
|
|||
|
1951 Packard Club Sedan | [url=ht
|
||||
|
||||
|
Re: Larry's 1951 Club Sedan Project
|
||||
|---|---|---|---|---|
|
Home away from home

|
EasyBeat Repairs
Time to catch up with my project blog posts again after six months' absence. We've been on an extended trip, part of which was occupied spending Christmas with my wife's family in the north of England. We had a White Christmas due to all the snow that fell in early December. Now starting to get some feeling back into the 'extremities' as they slowly thaw!! I reckon snow is a love/hate relationship, and sympathize with anyone who has to spend months with it every year. Lol Now I'm keen as mustard to get into the project again. Here are a few pics of dent repairs done on my '51 Coupe using an EasyBeat machine. Most would be aware of this great method of pulling out dents - but in case you haven't here's the briefest of descriptions. A current passes through the electrode, effectively welding it temporarily to the metal panel, in a way similar to using a spot welder. There is a slide hammer on the unit which jerks the dent and at the same time breaks the weld bond, releasing the electrode from the car's panel. There is also an attachment for this unit that spot welds a number of wire 'clouts' and the pulling action (via a slide hammer) can be spread over a larger area. This is ideal for evenly straightening a crease or groove / scrape along a panel. This method is ideal for the final part of small dent removal, and with care it can get the panel so accurate that it is ready to prime and paint, with usually only the need for a thin build of spray putty. The EasyBeat in place . . .  Pressing the trigger produces a brief high current that welds the electrode to the panel  The final result can be very accurate. No need for applying hammer and dolly which might be difficult or impossible to do.  The low spots can be revealed by lightly sanding with 120-grit over the area, to highlight the depressions. 
Posted on: 2011/3/11 20:13
|
|||
|
1951 Packard Club Sedan | [url=ht
|
||||
|
||||
|
Re: Larry's 1951 Club Sedan Project
|
||||
|---|---|---|---|---|
|
Home away from home

|
Removing bituminous coating from inside surfaces of rear quarter panels - and the case for chemical stripping.
Using scrapers, heat gun, paper toweling soaked in kerosene, then cleaning disks, wire brushes, etc I spent a couple of days getting very dirty and exercising muscles I didn't know I had while cleaning the inside of the rear quarter panels of the Coupe. (I have wondered if any company had ever sold a replacement half-panel for these - it seems many 24th Series Packards rusted out badly in this area). As per the photos, the lower part of the inner panels of the Coupe's rear quarter panels were cut away to allow access, and provide an easier path for removing the bituminous coating of stone-guard / Schutz (or whatever you would like to call it) and the accumulated crud. My sheet-metal man had cut a lot of cancer from out of the lower sections of the rear quarters, and he needed a lot of access to weld in the new hand- fabricated panels. Removing this small section of metal is also necessary for getting to the places where rust might start later on. I wanted to be able to do an A-1 preparation job before I put a ton of primer / sound-deadener and other rust-proofing into the area, then be able to get in there in a few years to check and renew coatings if necessary. Here are a few pics of the cleaned and primed inner quarter panel. Vastly different to how it was! I will apply the schutz later, then fit the cut-away part of the inner panel. This is necessary for strength and bracing as there is not much else to brace the lower part of the pillar. Looking upwards from floor level - most of the old coating and dirt has been removed  The 'Black hole' is just about clean  Showing the new section that was welded in  Primed (etch primer) and ready for the schutz treatment  The lower section of inner panel has been removed to allow access for treatment. It must be replaced to maintain structural strength  A drain tube was added through the new sill, to reduce the incidence of future rust forming. More about this in a future Post.  Primed.  A lengthy and very messy job but ultimately something I needed to do. While it's not my intention to have a showroom finish everywhere or to have a show car that's near perfect, I'd be losing some sleep if I didn't get the 50-year-old gunk, old paint and stone-guard out of the 'normally unseen' areas of the car while I have the chance. It will be nice to have a car that - no matter which panel you look behind - the finish is clean and presentable, with new paint. But the extra effort to do that is probably double or triple that of a simple restoration which doesn't attempt to do the 'behind the scenes' tidy-up. Chemical Stripping? All this hard and dirty work leads me to admit that maybe I should have gotten the body chemically stripped instead of blasted. The extra cost and hassle probably would have been worth it in terms of hours saved. I researched both ideas and there were a few disadvantages to chemical dipping which concerned me a bit. These were (not necessarily in order of importance): twice the cost (initially), transportation costs and time to take the car to a capital city, removal of all dum-dum and any 'special' between-panel insulation (- can it be replaced is the question?), and the application of an anti-rust treatment (usually Lanolin-based) which apparently might (repeat - might) cause a problem for spray-painters. But in retrospect I think the advantages outweigh the disads. In terms of cost, the hours used to clean the areas that grit blasting didn't do (properly) would add up to a few thousand bucks if I was paying someone to do the work. And D200 Packards don't have much inaccessible 'special' insulation between panels, so no problem there. Many later cars do. The Lanolin anti-rust coating has been cited by one person I know as having caused problems for the painter. It was difficult to remove fully. It would be helpful to hear other opinions about the use of Lanolin / other rust inhibitors and how they might have influenced paint adhesion etc. Food for thought. Don't take my word for it, do the research before deciding what stripping method to use.
Posted on: 2011/3/11 21:20
|
|||
|
1951 Packard Club Sedan | [url=ht
|
||||
|
||||
|
Re: Larry's 1951 Club Sedan Project
|
||||
|---|---|---|---|---|
|
Home away from home
|
Great attention to detail, keep up the good work. Have you finished your "drip tray" solution for the quarter window water problem? My '51 has the same issues, and I'm also trying to figure out the best way to permanently solve the problem. I know you asked this already, but I'll repeat it:
"I'd be keen to hear of other methods and workarounds for this problem that have been used by members" I also would like to get some other ideas on this fix.
Posted on: 2011/3/11 22:31
|
|||
|
||||
|
Re: Larry's 1951 Club Sedan Project
|
||||
|---|---|---|---|---|
|
Home away from home

|
There is no easy way to remove old sound deadening tar undercoating and paint. The best answer is to leave it alone. It serves an important function of sound deadening and rust proofing. Nothing you can substitute will do much better and in most cases, will be worse.
The only exception is when you must remove it to do welding or panel beating. In that case I prefer to heat with a propane torch and scrape it off with a putty knife but to each his own. But you only need to scrape it away for 2 or 3 inches away from the weld.
Posted on: 2011/3/12 13:03
|
|||
|
||||
|
Re: Larry's 1951 Club Sedan Project
|
||||
|---|---|---|---|---|
|
Forum Ambassador
|
Lee,
Good to see you back on the tools and as always doing a wonderful job. Any chance she'll be ready for the PACA run to Hill End September 9 to 11? If not, might have to come and harass you on the way home to Sydney to see your '51 in person.
Posted on: 2011/3/12 16:01
|
|||
|
Mal
/o[]o\ ====  Bowral, Southern Highlands of NSW, Australia "Out of chaos comes order" - Nietzsche. 1938 Eight Touring Sedan - SOLD 1941 One-Twenty Club Coupe - SOLD 1948 Super Eight Limo, chassis RHD - SOLD 1950 Eight Touring Sedan - SOLD What's this?  Put your Packard in the Packard Vehicle Registry! Here's how! Any questions - PM or email me at ozstatman@gmail.com |
||||
|
||||
|
Re: Larry's 1951 Club Sedan Project
|
||||
|---|---|---|---|---|
|
Home away from home

|
Hi mt, I've been holding off posting about the 'drip tray' idea until the trays were made and I could take some photos of them in position. They're partly done but still a way to go . . .
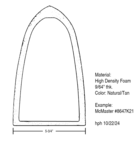
The fix I'm doing should work OK but some might say it's a bit 'drastic', as to get the trays into place, the inner panel (below the window) has to be cut away then welded back in place later. That's not a big job of course, and if you have rust in the quarter panel already then removing this panel makes getting in there very easy. I figure that since mine is already removed it's not a problem. Perhaps if very small trays were used it might be possible to get them into the qtr panel cavity without cutting away at things, but I doubt that's possible. Another thing - because the sills on my car were totally shot, we incorporated a copper tube (silver soldered in place from memory) into the new sills which passes vertically through the bottom of the sill. Intention is to take a short rubber hose from the drip tray to the pipe and this empties the tray. You can see this in pics above . .. An alternative to doing any mod (if there is no major rust popping through the exterior yet) is to just treat the cavity with Dynax S-50 or whatever. So much easier but another problem is we figured the water getting in via dripping from the window above was also seeping through onto the rear floor and that's why the floors were rusted out. Packard knew about this problem as they provided a post-production kit to fix it. See the manual, Section XIX 'Body' page 24 - 'Rear Quarter Water Leaks Club Sedans'. So because of this I thought trays were one answer. We don't reckon Packard's fix will prevent the floor rust - all it does is redirect water a little, but leaves it sitting there to happily rot the car. Here are basic diagrams (originally a PowerPoint drawing) of the tray measurements and design. There's a lot of info missing - e.g. material is aluminium and either 1 or 1.5mm thick if I remember correctly. The trays fit (just) so there is room to reduce the size by a few mm overall to make it an easier fit. Also I made a cardboard template to get the shape of the curved tray sorted. Pleased to provide other info or clarify the design - let me know.  
Posted on: 2011/3/12 19:05
|
|||
|
1951 Packard Club Sedan | [url=ht
|
||||
|
||||
|
Re: Larry's 1951 Club Sedan Project
|
||||
|---|---|---|---|---|
|
Home away from home

|
Yes I agree Rusty - whenever you can leave the sound deadener / stone guard in place that's the best idea. On my car there is quite a bit of surface rust formed under the coatings in some places, like on the inner surface of the turret and also inners of fenders, inside trunk etc. This is still minor but I was surprised that even slight rust could form under those coatings.
In places the coating was loose, missing (old repairs) or very thin. Intention is to re-coat these same areas with new schutz except the turret, where I'll use matting to a larger extent than originally used. (When I removed the original matting there was zero surface rust under it). I think condensation in the turret has been a problem sometime, so now the whole area has been treated so there'll never be a problem there again. It would have been much better if existing coating was all reasonable, would have saved a heap of work!
Posted on: 2011/3/12 19:23
|
|||
|
1951 Packard Club Sedan | [url=ht
|
||||
|
||||
|
Re: Larry's 1951 Club Sedan Project
|
||||
|---|---|---|---|---|
|
Home away from home

|
G'day Mal, thanks for the encouraging comments you always give me. We're certainly planning to get to the Hill End meet but doubtful I'll have the '51 on the road by then. However it will be hopefully getting near to completion.
Would be a pleasure to have you call in on the way!
Posted on: 2011/3/12 19:29
|
|||
|
1951 Packard Club Sedan | [url=ht
|
||||
|
||||


