|
Re: Jeff's 48 Custom 8 Victoria Project
|
||||
|---|---|---|---|---|
|
Forum Ambassador

|
Jeff,
Before getting to Hershey last year my "California swing" included a visit to see Dell and his Packards. An album of photos from the swing are here, with pic's #48 to #65 being of Dell's lovely Convertible.
Posted on: 2013/8/11 22:08
|
|||
|
Mal
/o[]o\ ====  Bowral, Southern Highlands of NSW, Australia "Out of chaos comes order" - Nietzsche. 1938 Eight Touring Sedan - SOLD 1941 One-Twenty Club Coupe - SOLD 1948 Super Eight Limo, chassis RHD - SOLD 1950 Eight Touring Sedan - SOLD What's this?  Put your Packard in the Packard Vehicle Registry! Here's how! Any questions - PM or email me at ozstatman@gmail.com |
||||
|
||||
|
Re: Jeff's 48 Custom 8 Victoria Project
|
||||
|---|---|---|---|---|
|
Forum Ambassador
|
Jeff,
I certainly covered lots of ground, it wasn't just California and Hershey, and just thinking back recently basically everything went so well. There were little glitches here and there but no major snafu's. If you'd like to read more about my experiences as well as see all the pic's I took(there are a lot, a whole lot of them) use this link to my thread of Mal's Hershey trip. And, more!
Posted on: 2013/8/13 1:23
|
|||
|
Mal
/o[]o\ ==== Bowral, Southern Highlands of NSW, Australia "Out of chaos comes order" - Nietzsche. 1938 Eight Touring Sedan - SOLD 1941 One-Twenty Club Coupe - SOLD 1948 Super Eight Limo, chassis RHD - SOLD 1950 Eight Touring Sedan - SOLD What's this? Put your Packard in the Packard Vehicle Registry! Here's how! Any questions - PM or email me at ozstatman@gmail.com |
||||
|
||||
|
Re: Jeff's 48 Custom 8 Victoria Project
|
||||
|---|---|---|---|---|
|
Home away from home

|
Thanks Mal,
I'll check that out as soon as I get a little free time. Jeff
Posted on: 2013/8/13 18:46
|
|||
|
||||
|
Re: Jeff's 48 Custom 8 Victoria Project
|
||||
|---|---|---|---|---|
|
Home away from home
|
As usual, I'm falling behind on my Packard blog again. I'm going to try to get caught up here, since blogs are more interesting if they are about things that are happening now, and not past events. I'm hoping to have the car running by next Sunday, but I make no promises, since it seems that I can't work more than about 30 minutes before I run into another problem.
This chapter is pretty basic: cleaning, de-rusting, and painting parts. Most parts were media blasted in to remove rust and any old paint. Anything that wasn't delicate went into the red cabinet first for a shot of TP Tools "Fast Cut MAX", which is a reddish color abrasive that's more aggressive than sand, and works quite well. The Fast Cut doesn't get into tiny depressions in the metal, so I do a quick second blasting in the black cabinet that contains glass bead. Parts that didn't have significant rust, were non-ferrous, or just delicate-looking were only treated to the glass beads. Most of the hardware and really small items were soaked in Ultra One rust remover. It works really well, though you really have to dry the parts fast to keep them from flash rusting. Even though I cleaned up much of the hardware, I plan to replace the common items with new stuff. I will save the old hardware in case someone wants to do a top notch resto some time in the future. Mostly everything got painted to protect it. I used mainly Rustoleum Professional series paints, along with Eastwood, Duplicolor, Plasticoat, and some odd-balls out of my 30 year spray paint collection. I used a little artistic license to add a bit more color to the mostly black engine compartment. A few items turned out a bit brighter than I expected, and I may have to repaint those later on. I'll see how they look when the hood is back on and it's much darker in the engine bay. May to August 2013. Parts prep and painting. Attach file:  (75.37 KB) (75.37 KB)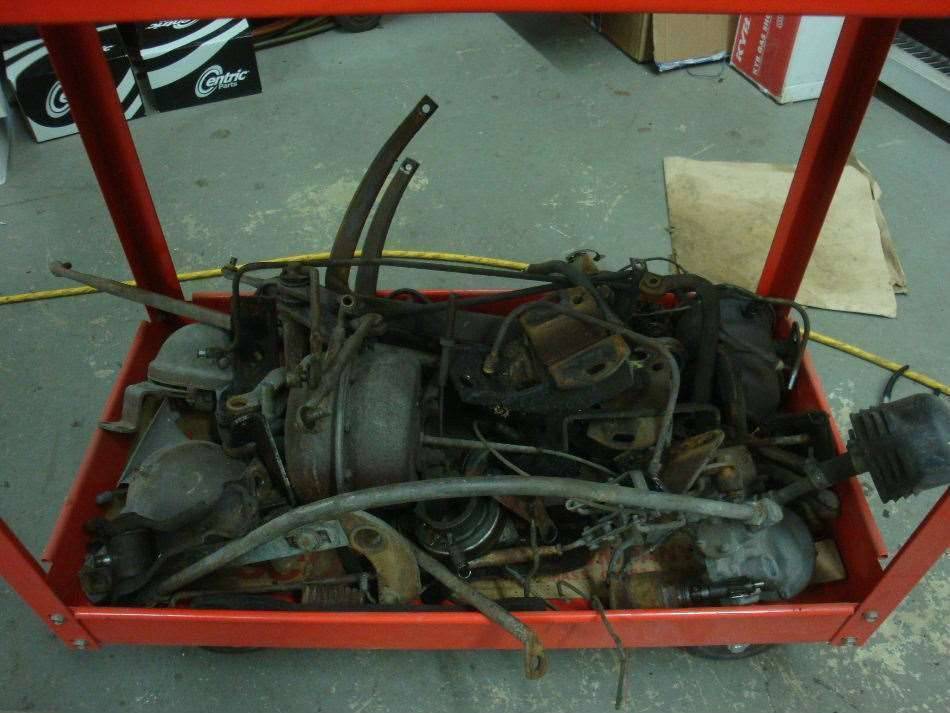 (72.37 KB) (72.37 KB)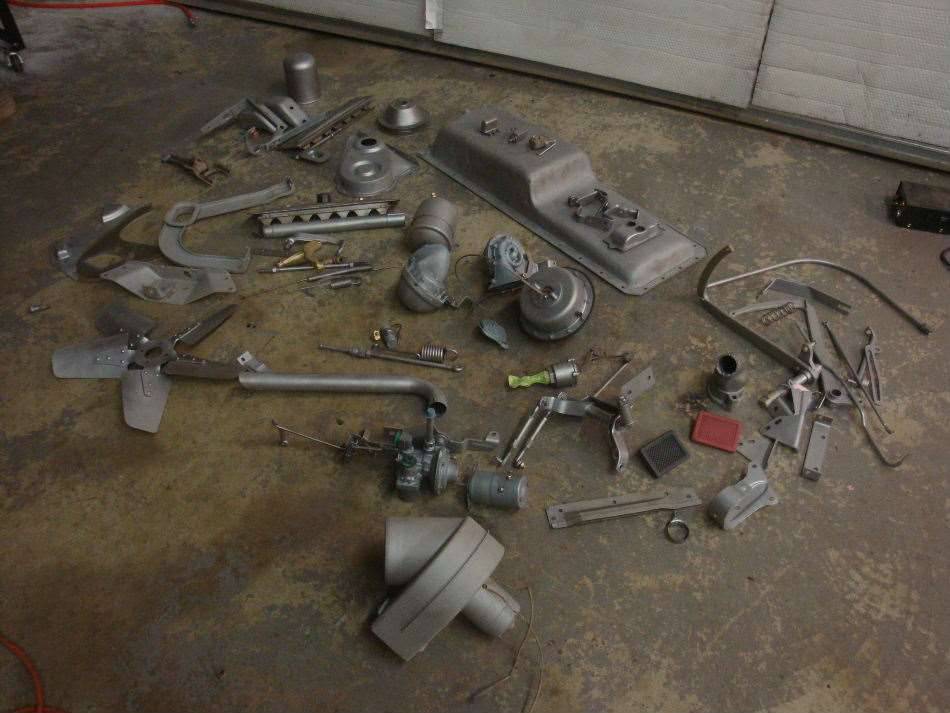 (76.56 KB) (76.56 KB) (53.57 KB) (53.57 KB)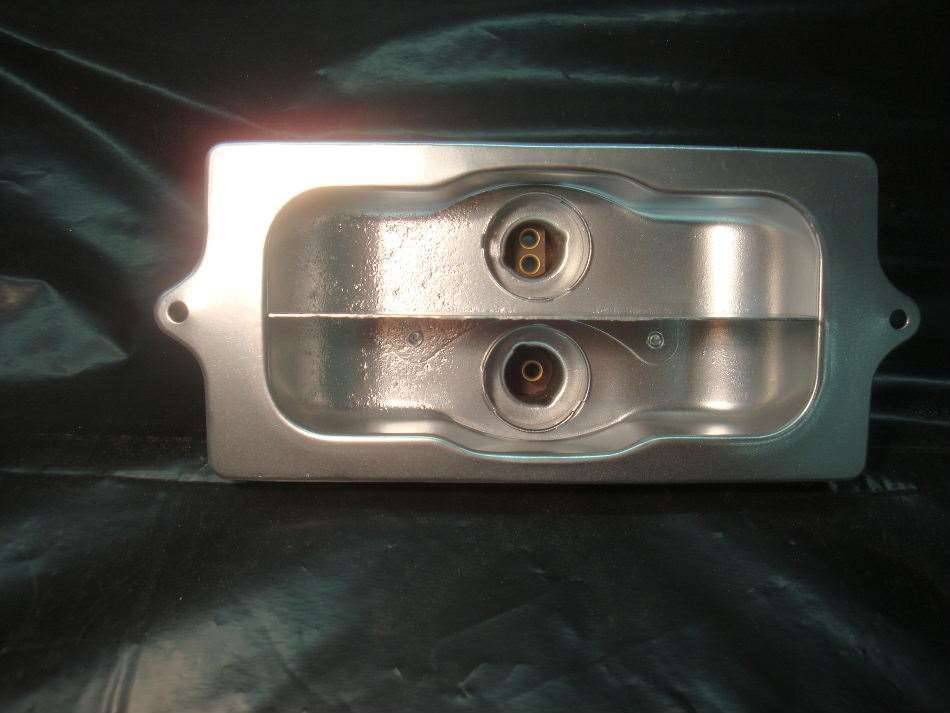 (70.51 KB) (70.51 KB)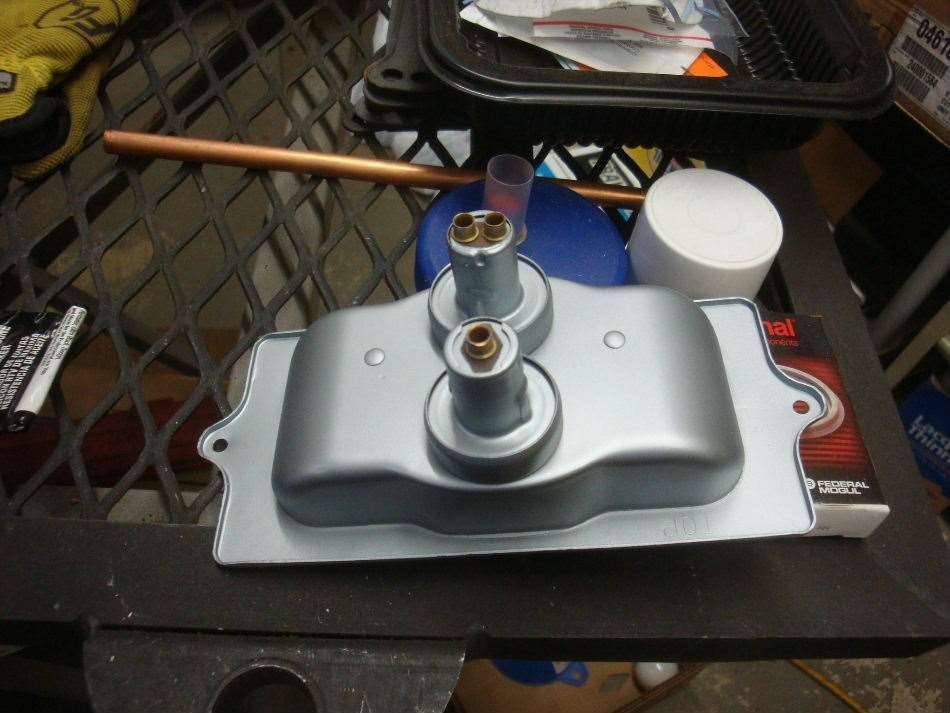 (73.83 KB) (73.83 KB)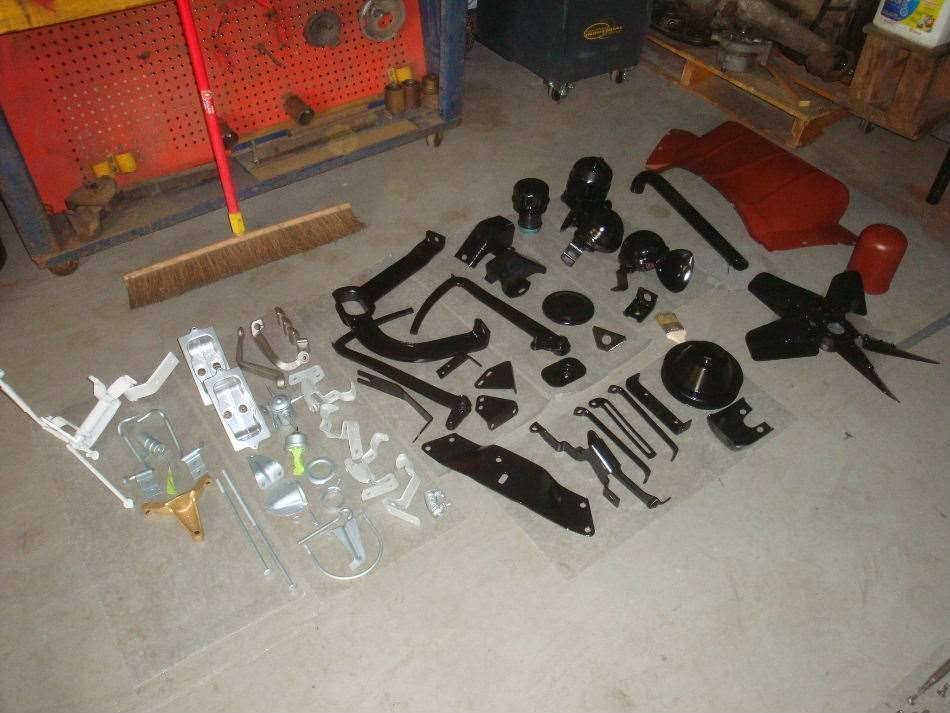 (59.33 KB) (59.33 KB)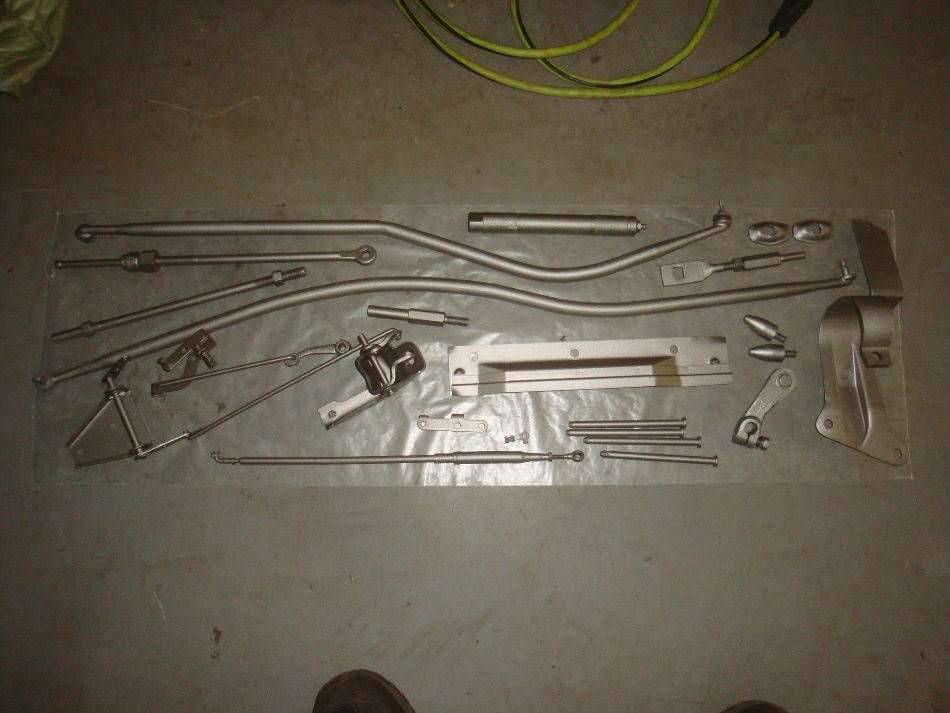 (71.77 KB) (71.77 KB)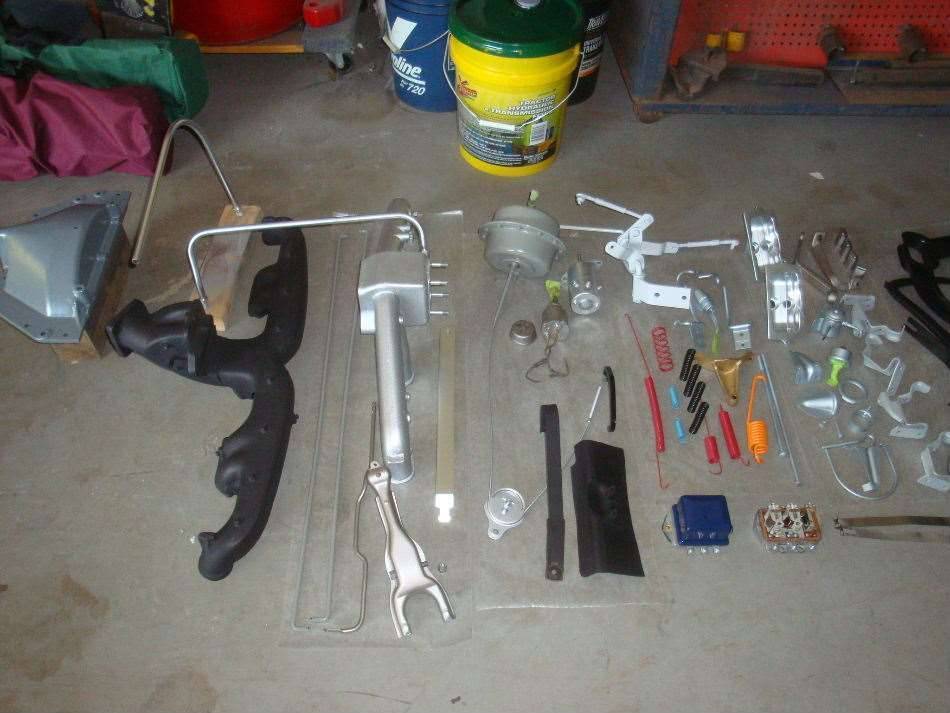 (69.22 KB) (69.22 KB)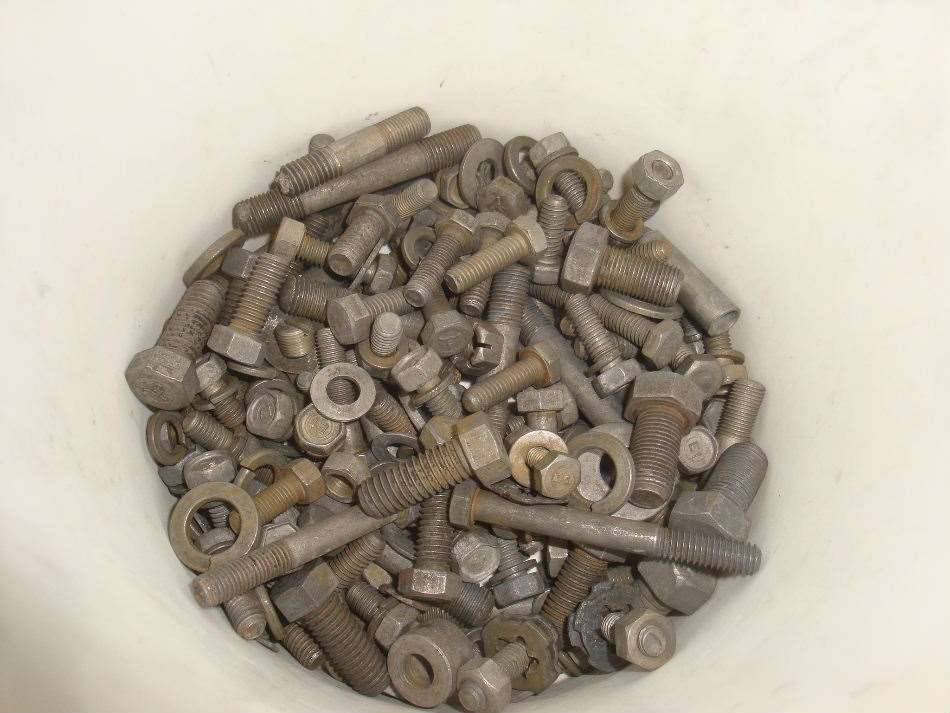 (85.80 KB) (85.80 KB) (93.47 KB) (93.47 KB)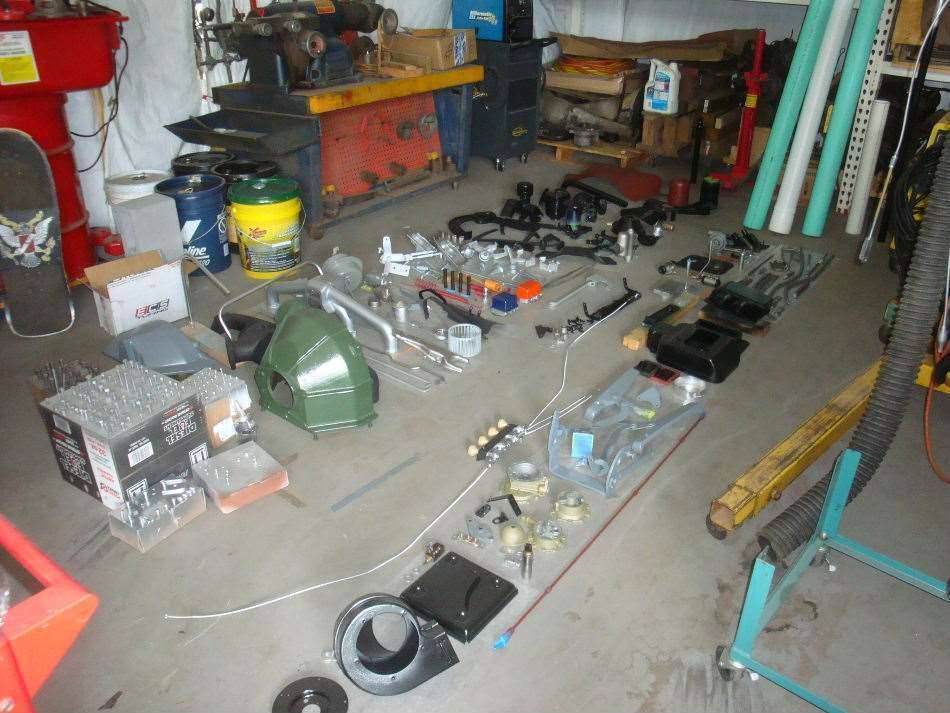 (79.83 KB) (79.83 KB)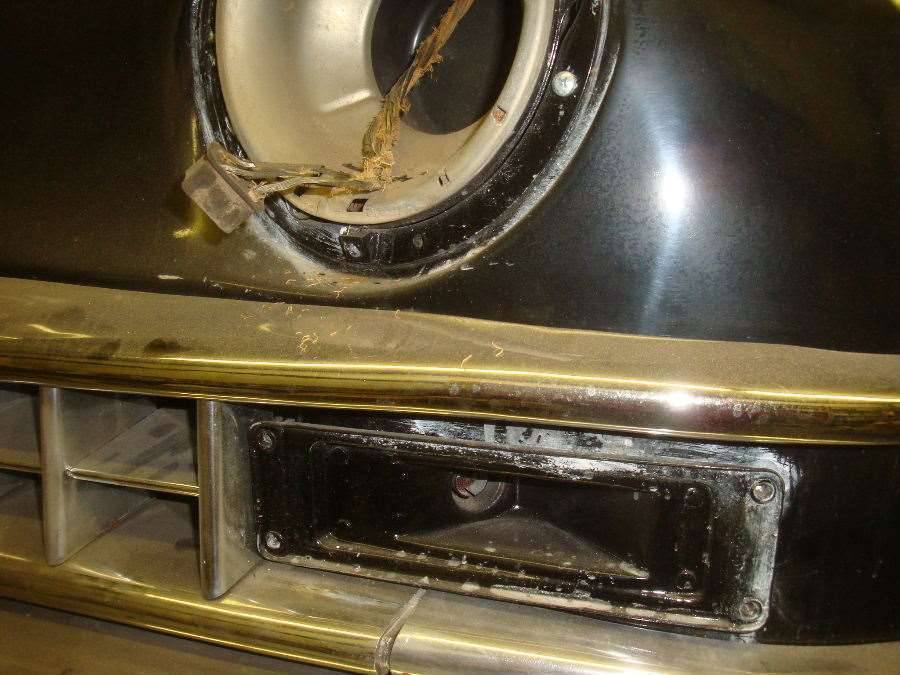 (70.86 KB) (70.86 KB)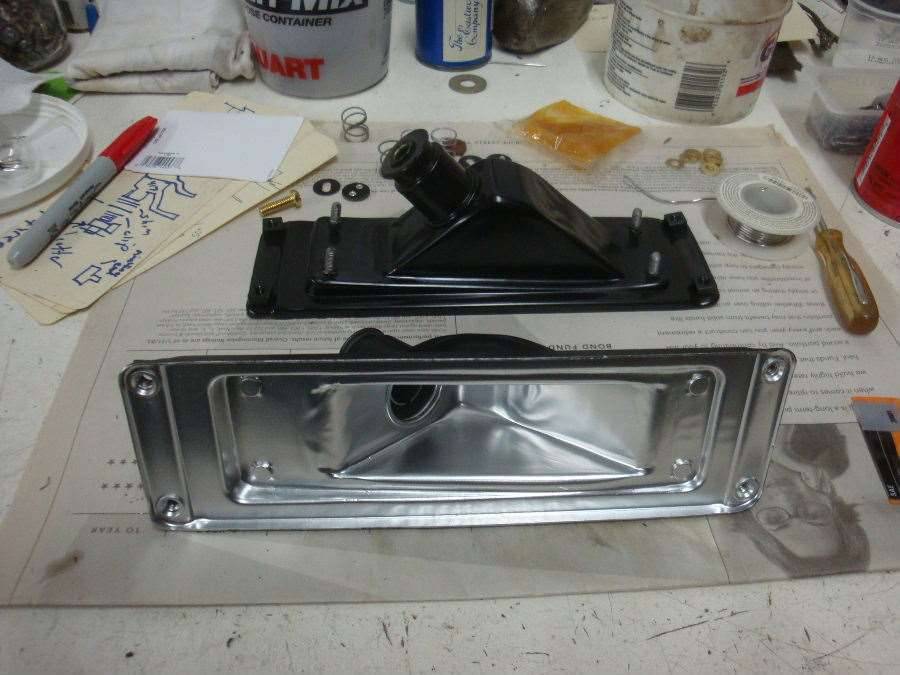
Posted on: 2013/10/6 17:07
|
|||
|
||||
|
Re: Jeff's 48 Custom 8 Victoria Project
|
||||
|---|---|---|---|---|
|
Home away from home
|
the correct color for the 48 custom engine should be gray- i use duplacolor universal gray. front motor mount and intake should be engine color. i think i sent u a picture
Posted on: 2013/10/6 18:32
|
|||
|
35-1200 touring sedan 42-110 convertible coupe 48-2293 station sedan |
||||
|
||||
|
Re: Jeff's 48 Custom 8 Victoria Project
|
||||
|---|---|---|---|---|
|
Home away from home
|
Hi Dell,
I had a feeling that the engine should be gray, but the owner wanted green. I like the green better so it didn't bother me to paint it green. I figured that the engine was painted with all the brackets and things attached, which is why I didn't find any paint hidden underneath where they bolted to the engine. I did read the recent green vs. gray discussion, and this car was probably built too late to be one of the green engine cars. Though one guy said that he had seen green 356's in 22nd cars with the old style patent plate, and that's what this car has. It's interesting that it was important to make engines look so beautiful in the 20's and 30's, but by the late 40's they assembled the whole drivetrain sans carb, distributor and generator, then sprayed on about a half of a coat of the cheapest engine paint they could get. By the way, I did figure out what the mystery holes in the cowl were for. They line up with the upper mounting holes in the firewall insulation pad. Since the steel hydraulic lines were installed before the pad, the pad sits away from the cowl. It appears that the pins were omitted by the factory since they were too short to reach the holes, and they filled the holes with small blobs of sealer. I think they may have stopped punching these holes in the cowl later in production, as I looked at pictures of a light colored car for sale on ebay and it didn't appear to have the holes. Jeff
Posted on: 2013/10/6 20:42
|
|||
|
||||
|
Re: Jeff's 48 Custom 8 Victoria Project
|
||||
|---|---|---|---|---|
|
Home away from home
|
In late June I moved the Packard back onto the lift to finally start the process of putting the car back together. The first new parts to actually be installed on the car were two new axle seals. I figured the grease on the bearings would be pretty well broken down by now, and I was right. Despite the runny old grease, the bearings were still in nice shape. The job was straightforward, though it was tough to get the old seals out of the axle tubes. The old seals certainly look more impressive than the wimpy replacements. It appears that someone did a complete brake job on the car shortly before it was taken off the road, and it looks like they even machined the drums. All I had to do was replace the wheel cylinders and give the drums a quick shot in the blasting cabinet plus a light sanding with 80 grit paper.
I had been very worried about what I would find in the gas tank. There was no gas cap and no fuel door on the car when I got it, and I feared the tank would be full of water and rust, though it didn't smell bad. I was quite pleased to find that the tank is in almost perfect inside, with only a few light rust spots where some drops of water sat on the bottom of the tank. It had over 10 gallons of 1980's vintage fuel in it, and other than a bit of sludge that was at the bottom, the fuel was good enough to use in the lawn mowers when mixed 50/50 with fresh gas. The sending unit didn't fare as well as the tank, but it did clean up nice in the bead blaster, so I'm hoping that it still works. It's one of those oddball King-Sealy units that you can't test with an ohm meter. I dropped the radiator and heater core off at a local radiator repair shop. Other than a big mouse nest in the top tank and a slight leak around the fill neck, the radiator was in good shape. The heater core, not so well. It froze and split apart when the car experienced it's first New England winter. The core needed a new core. That doesn't sound right, but I can't think of any other way to explain it. Attach file: (73.56 KB)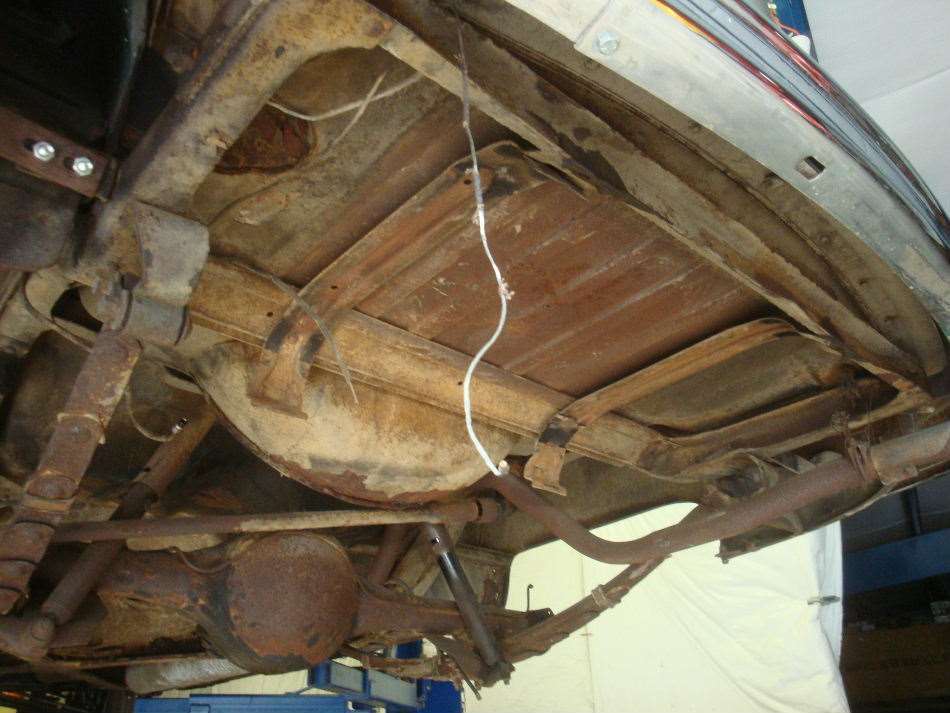 (83.67 KB) (83.67 KB)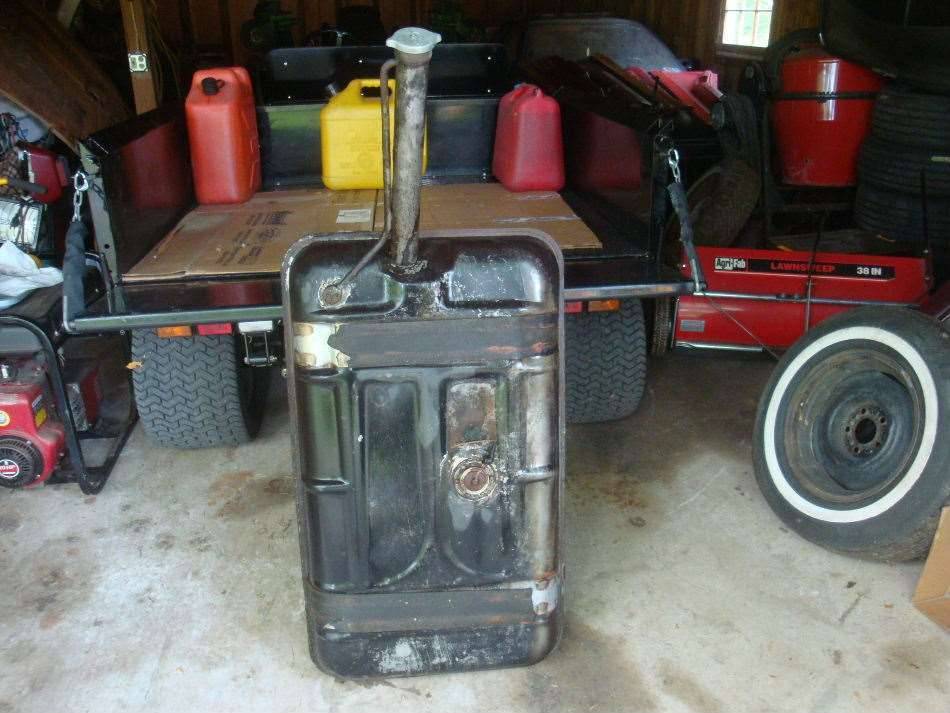 (30.57 KB) (30.57 KB)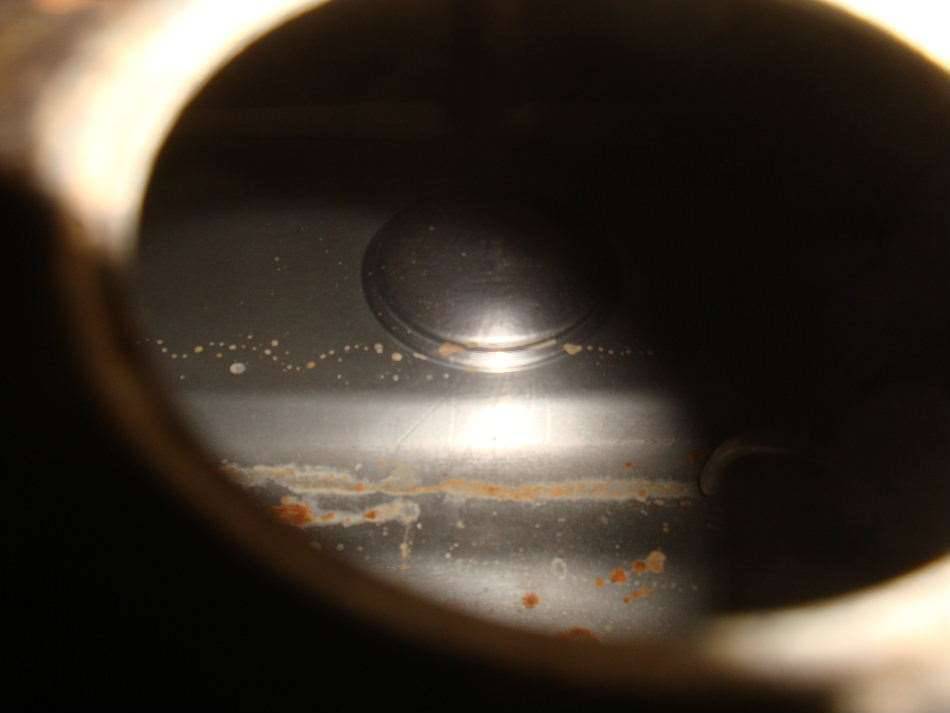 (70.29 KB) (70.29 KB)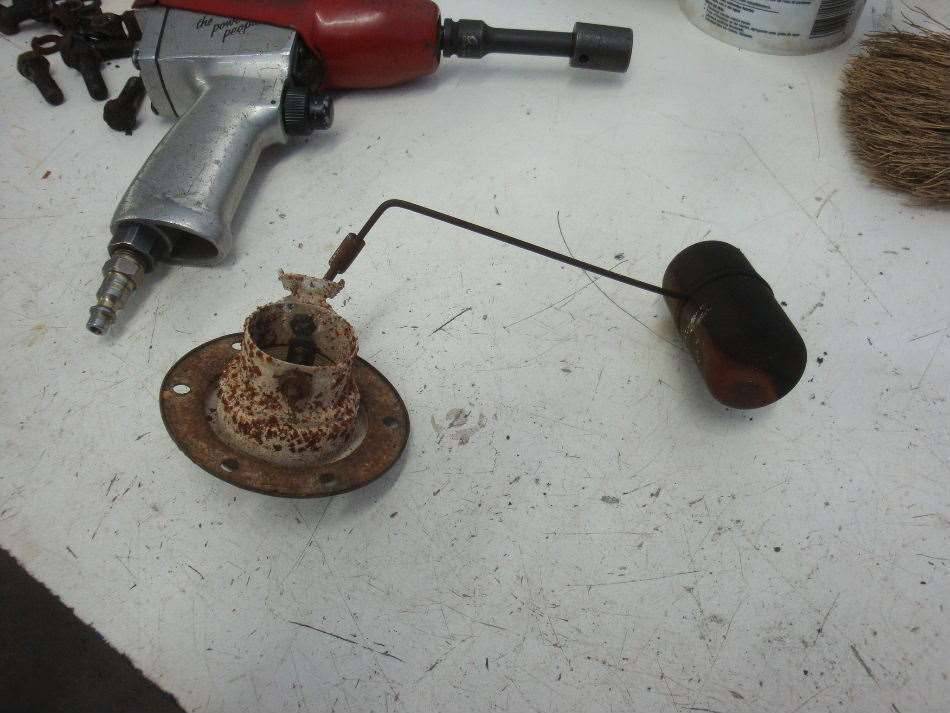 (80.95 KB) (80.95 KB)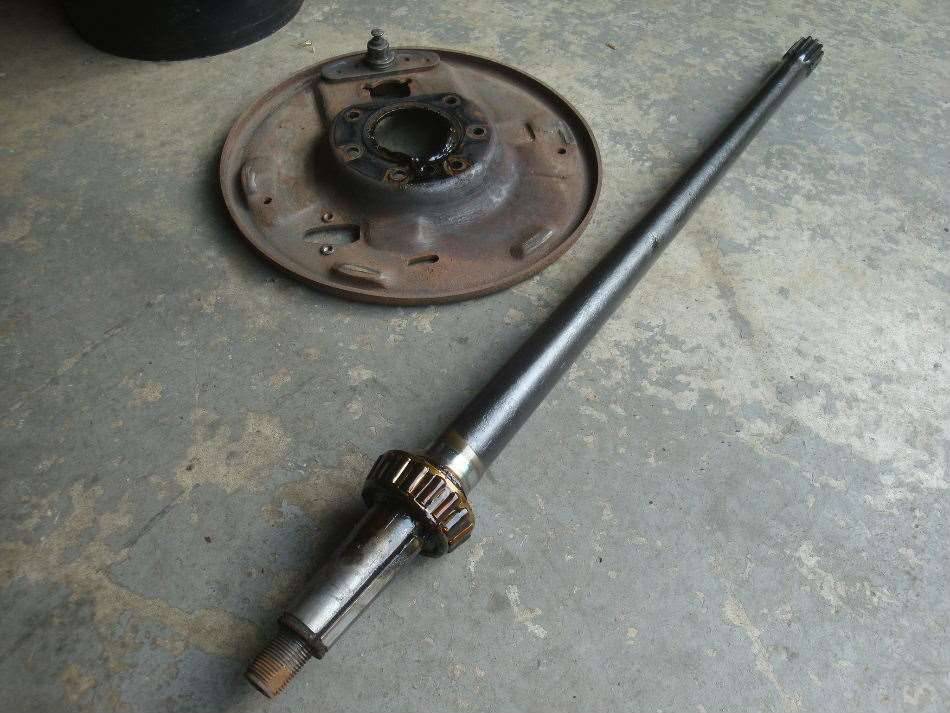 (69.45 KB) (69.45 KB) (66.31 KB) (66.31 KB)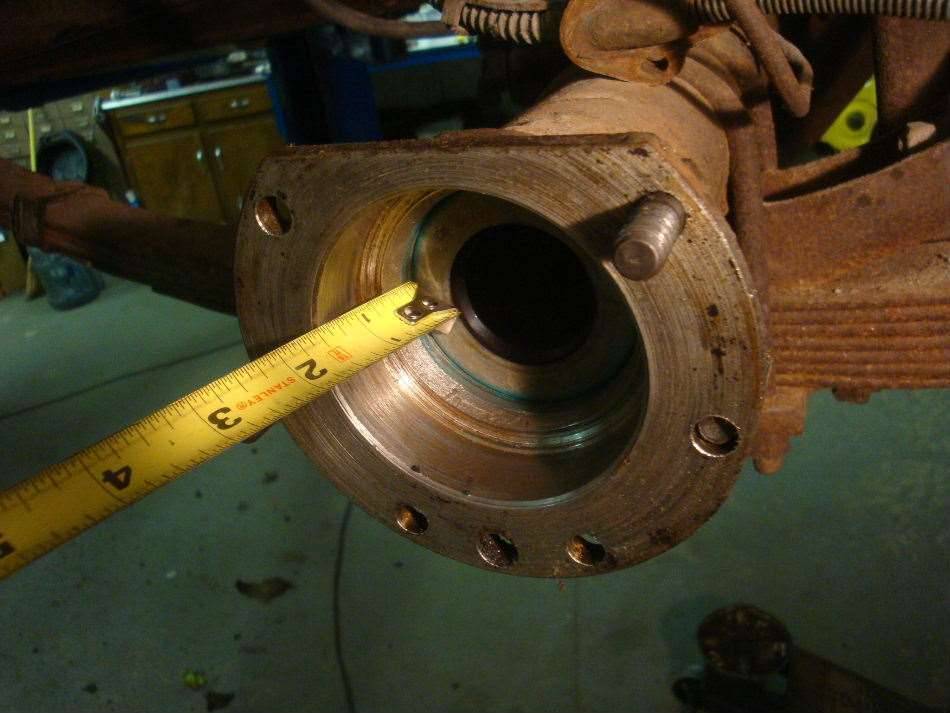 (84.49 KB) (84.49 KB)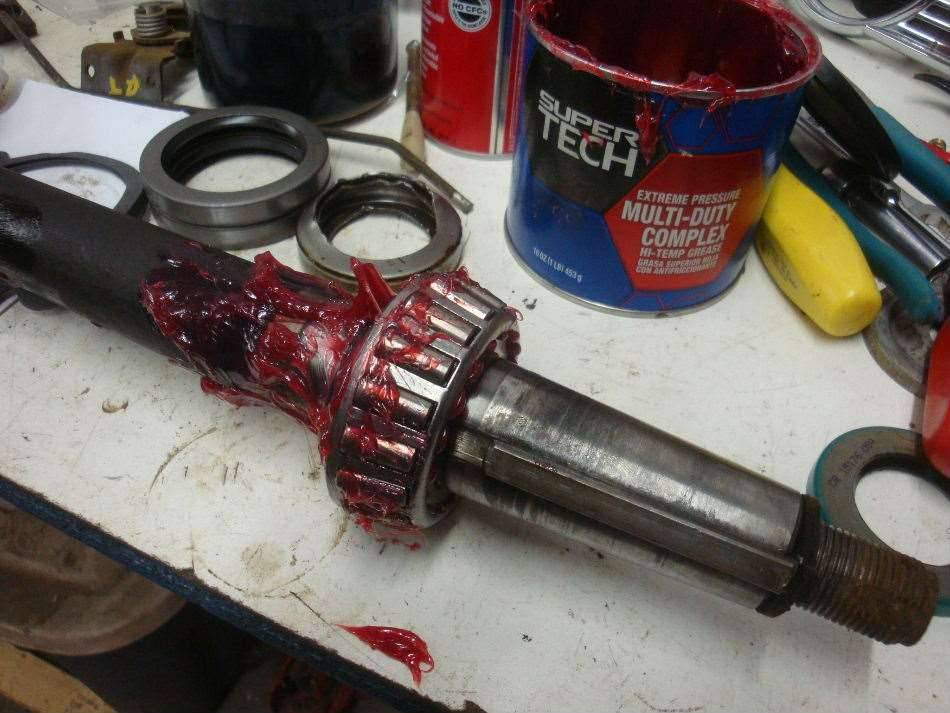 (74.43 KB) (74.43 KB)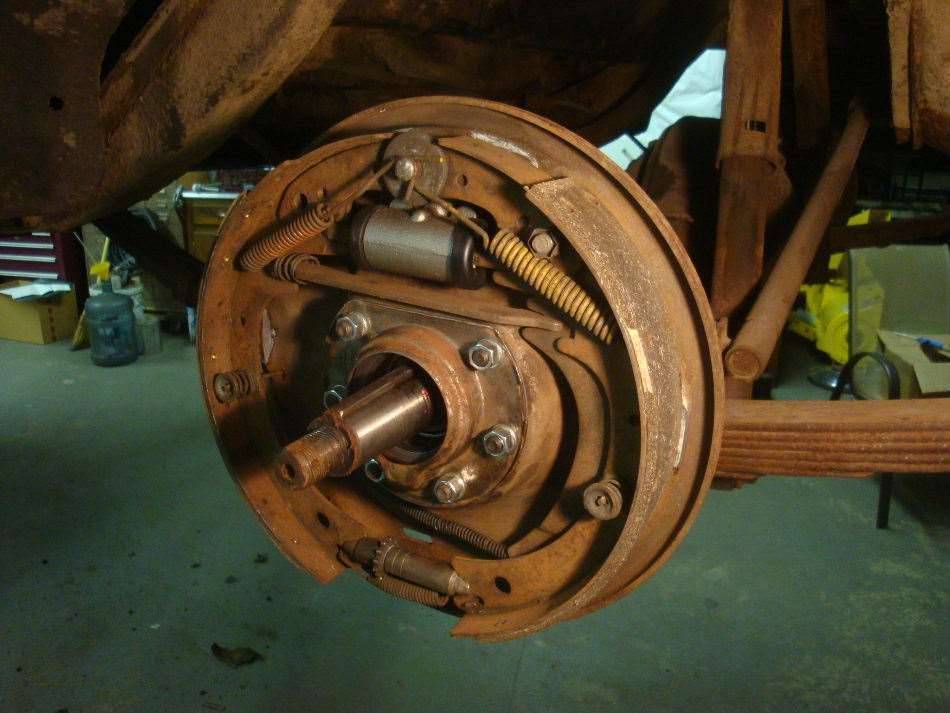 (61.87 KB) (61.87 KB) (97.62 KB) (97.62 KB) (84.54 KB) (84.54 KB)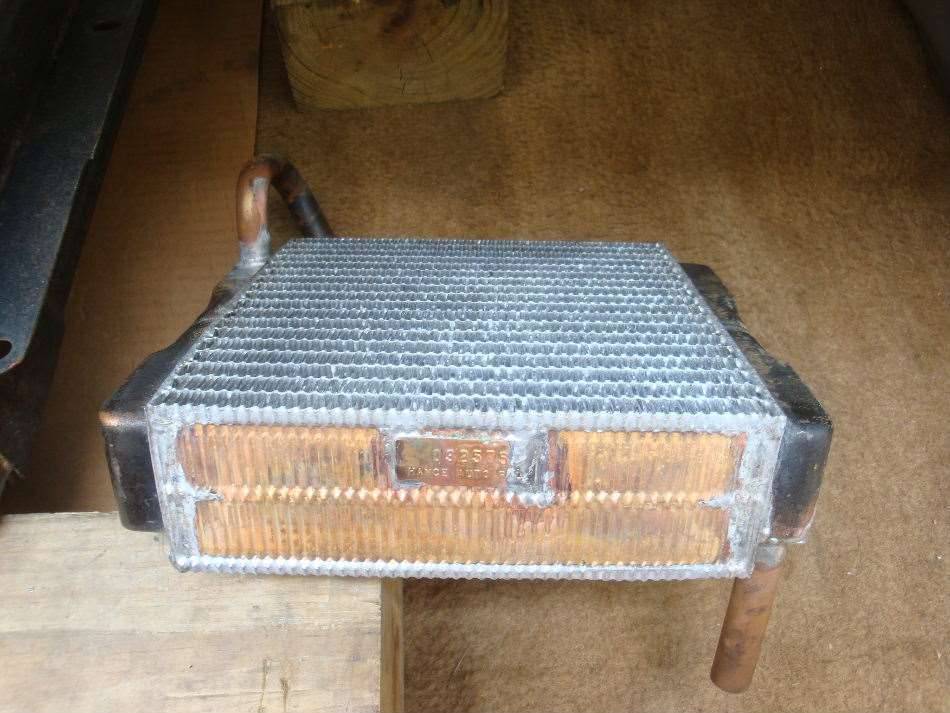
Posted on: 2013/10/6 21:57
|
|||
|
||||
|
Re: Jeff's 48 Custom 8 Victoria Project
|
||||
|---|---|---|---|---|
|
Home away from home
|
I think I'll title this chapter " Dash Disaster". I believe I mentioned that I'm convinced this car was used for years with no top on it, and exposure to the weather really took a toll on the dash. The paint was crazed, with rust forming in all the cracks. The gauge cluster was in really sad shape. The plastic dials were stress cracked and the finish on the gauge faces was faded and failing. Much of the chromed pot metal parts were pitted fairly bad. Due to time and budget restraints, my original intention was to leave the dash as is and just replace the wiring harness. After studying the tight working area up behind the cluster and then noticing that the power window harness ran behind the firewall insulation pad, I decided that it would be best to pull the dash. I then got news that the owner of the car had scored a real nice gauge cluster and center switch panel on ebay, so that sealed the deal that the dash was coming out for refurbishing.
Removal of the steering column and dash was pretty straightforward. The hardest task was removing the screws for the cowl vent cables down behind the fenders. The wiring was so petrified, that I just cut it up into short sections for removal, since you could not bend it at all. The dash assy was disassembled and the paint removed with chemical stripper. Since the dash was too big for the blast cabinet, it got sandblasted outside. I included some pics of my custom, power ventilated sandblasting helmet that's part of my blasting hood. The fan does a great job of keeping my glasses from fogging up, and keeps my face fairly cool. After blasting, I treated the metal with phosphoric acid to kill any residual rust. Next came a coat of self etching primer and a finish coat of PPG black acrylic enamel paint that I had left over from another project. Other than the dash itself starting out as a disaster, the real disaster came when I opened up the box that the new cluster came in. Much of this cluster was as close to mint condition as you could ever hope for, especially the plastic dial lenses. I was horrified to find the speedometer lens got smashed during shipping. The seller had nicely wrapped the cluster and the switch panel separately in bubble wrap, but then packed them in the box with the switch housings pointed towards the dial faces. One of the switches punched right through the speedometer face. So hard, that it dented the outer aluminum ring behind the dial lens and scratched the inner face of the speedometer. This incident, that shouldn't have happened in the first place, turned an easy job into a nightmare. First off, I decided to see if I could salvage the original spedo lens. It had stress cracks in the surface, but not nearly as bad as the clock. I sanded the lens with my DA and 220 grit paper till the cracks were gone, then wet sanded in stages from 400 grit all the way to 2000. I then polished it with plastic polish. The lens looked like new again, though it was quite a bit thinner than it started. All I needed to do now was duplicate the paint inside the numbers, as the original paint had all flaked off. This part seemed like it would be fairly simple, but turned out to be a real problem. I bought glow-in-the-dark paint from United Nuclear. When first applied, it would look great, but as it dried it would shrink a lot and form holes in the bottoms of the numbers. No matter how many coats I applied, the holes would reappear in the same spots. The paint would also turn transparent as it dried. After 5 coats it did glow nice once charged up, but it did not react immediately to UV light like the factory markings did. I had the same issue with the gauge needles. I painted them white first, then applied a few coats of the glow-in-the-dark paint. They would glow after being charged up, but just looked white under direct UV light. It turns out that the paint that Packard used on the gauges isn't just phosphoric, but it's also fluorescent. After investing over 6 hours of labor into the speedometer lens, it was time to admit defeat. I called Max Merritt and ordered up an NOS spedo lens. Though the lens was hopeless, I was pretty sure that I could get the gauge needles to glow correctly. I bought a can of fluorescent yellow paint to paint the needles with. I scraped all the previous paint off the needles, then they got two coats of flat white, a coat of the yellow, and two thick coats of the glow-in-the dark-paint. The needles came out a brighter yellow than original, but they glow real nice under the UV light. I think they look kind of cool in the yellow. The next challenge would be to match the metallic-like look of the outer gauge rings. The new cluster is a 1950, and the gauge faces are a different color than the 1948 gauges. The 1950 spedo ring was damaged beyond repair, plus both 1950 rings had a small hole in the top for the high beam and turn signal indicators. The 1948 dash has the indicators in the chrome bezel, between the dials, therefore there are no holes in the rings. I needed to use the 1950 clock and secondary gauges, so I would have to make the 1948 rings match them. I mixed two different Testors "Metalizer" colors together to get the color that I needed. The color is almost dead-on, though not quite as shiny and transparent as the original finish. I was able to dust on a little paint to hide the scratch that was on the inner spedo face. I painted the entire 1948 spedo face as a backup, but didn't need to use it. I did end up using the 1948 speedometer head, since it was in better mechanical shape than the 1950 spedo. Overall, it turned out to be a huge amount of work that really slowed down progress on the car, though I think all the aggravation was worthwhile. The dash was almost disgusting before, but now it looks great, and it's one less thing that will have to be done when the car reaches Sweden. Saved a lot of money too, having me do it instead of a professional shop. June 2013 to present. Dash Disaster:  Attach file: (68.95 KB)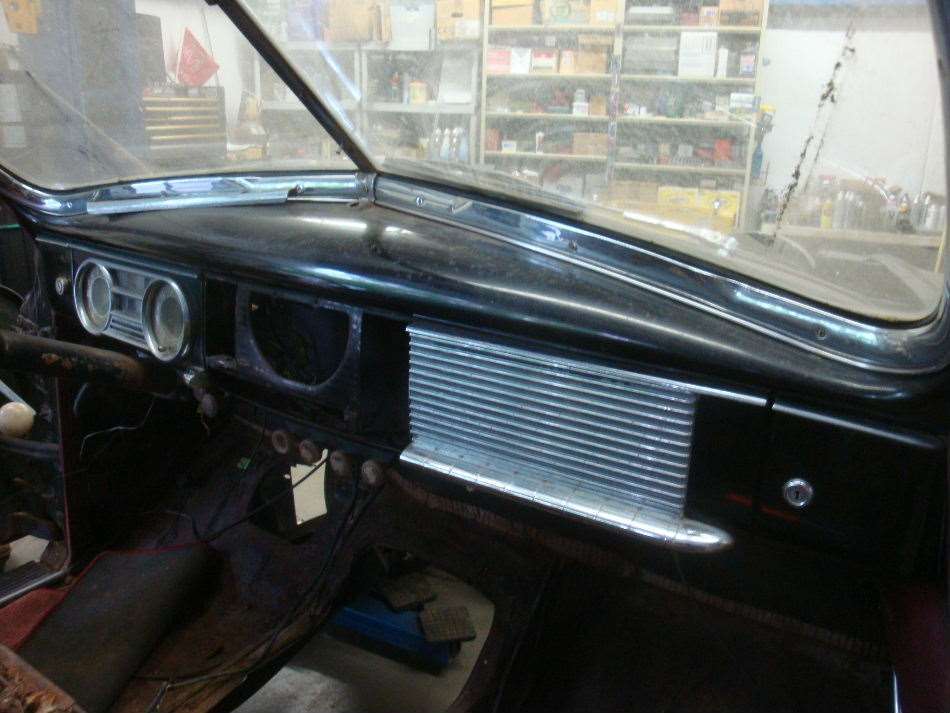 (66.49 KB) (66.49 KB)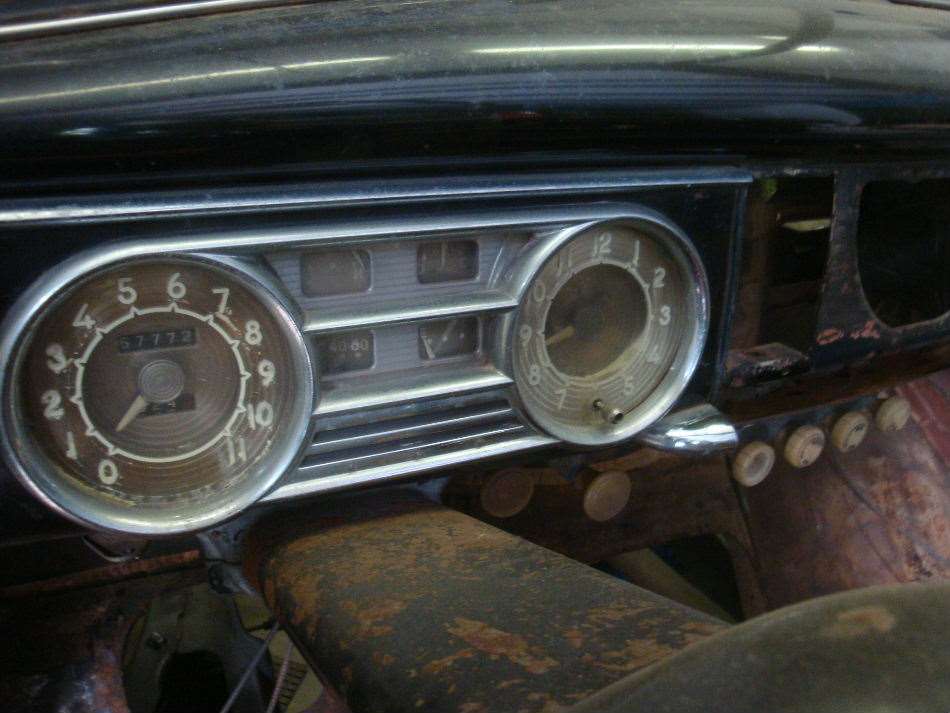 (85.25 KB) (85.25 KB)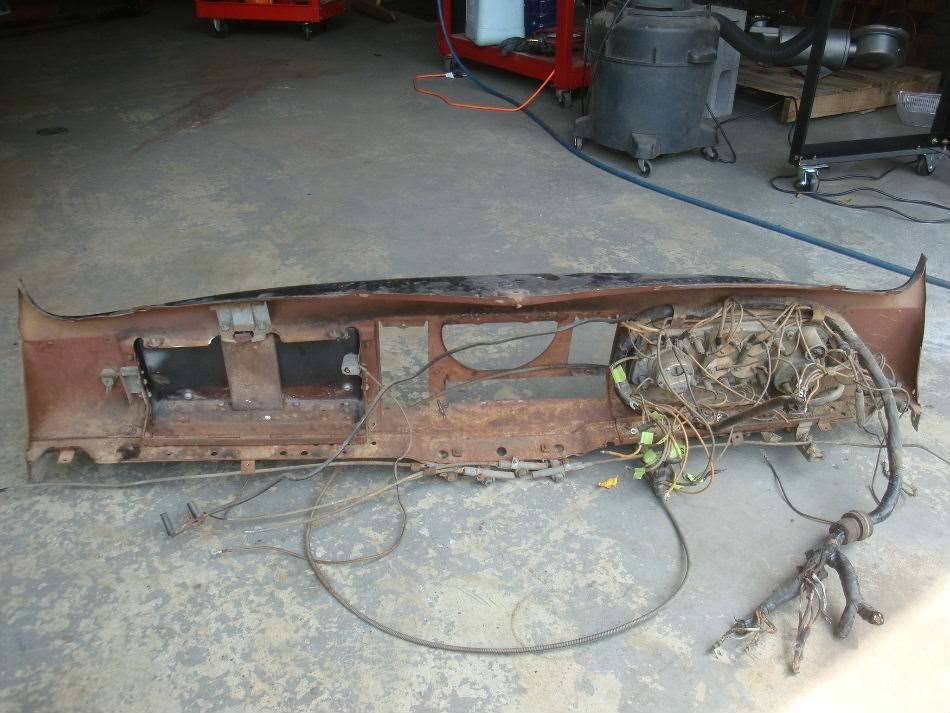 (98.64 KB) (98.64 KB)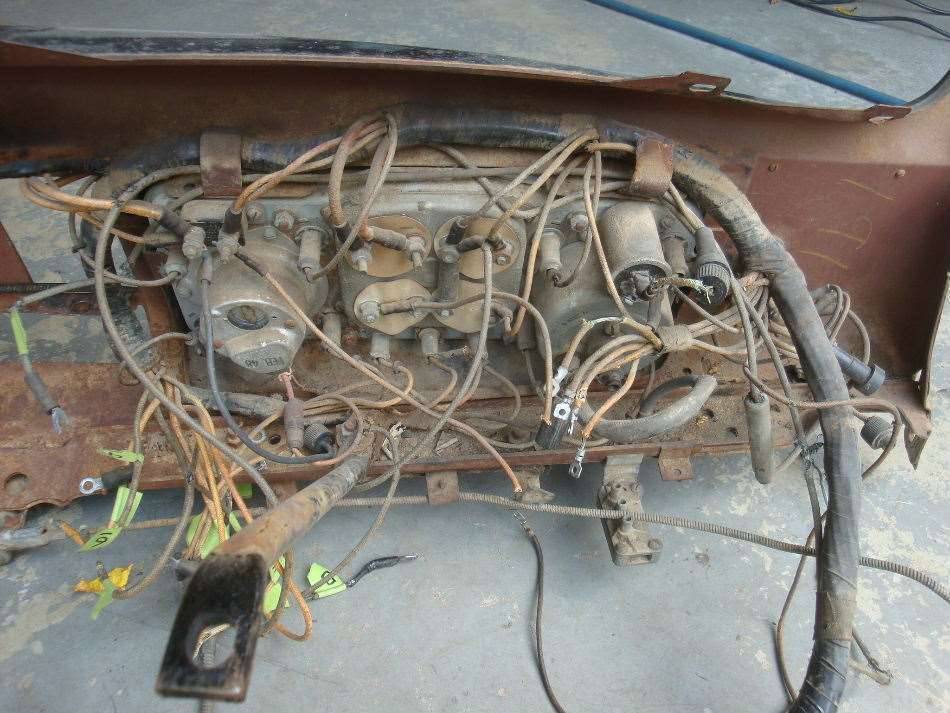 (71.71 KB) (71.71 KB)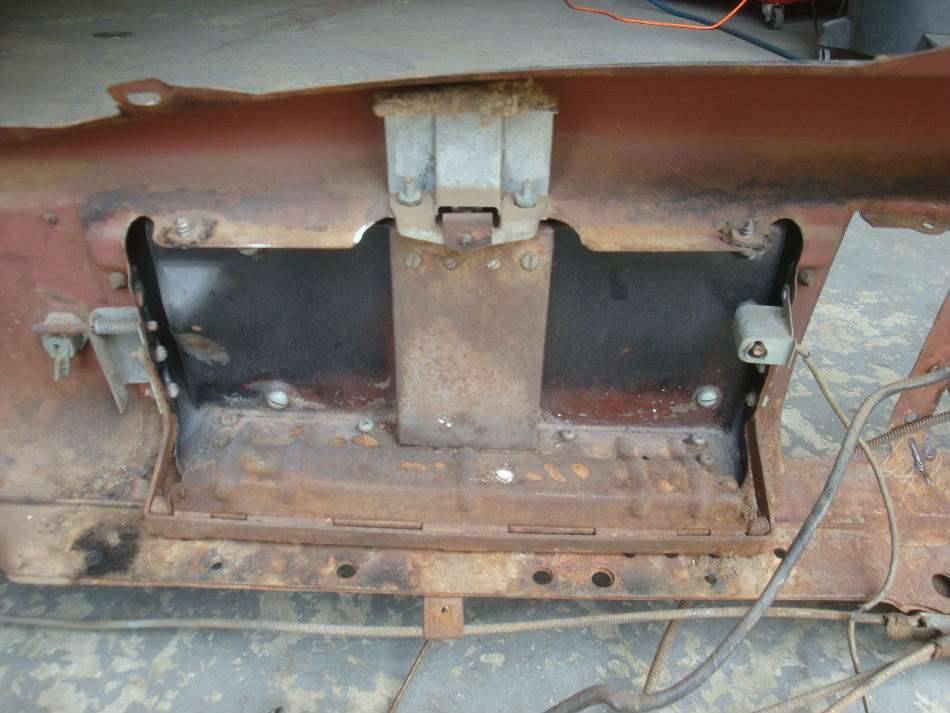 (77.92 KB) (77.92 KB)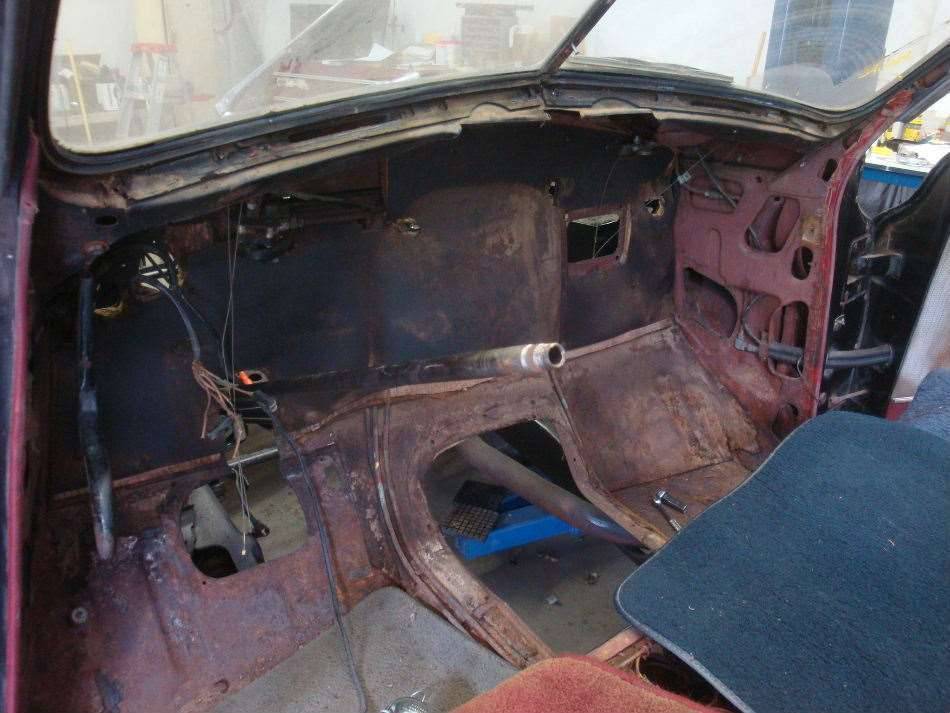 (88.80 KB) (88.80 KB)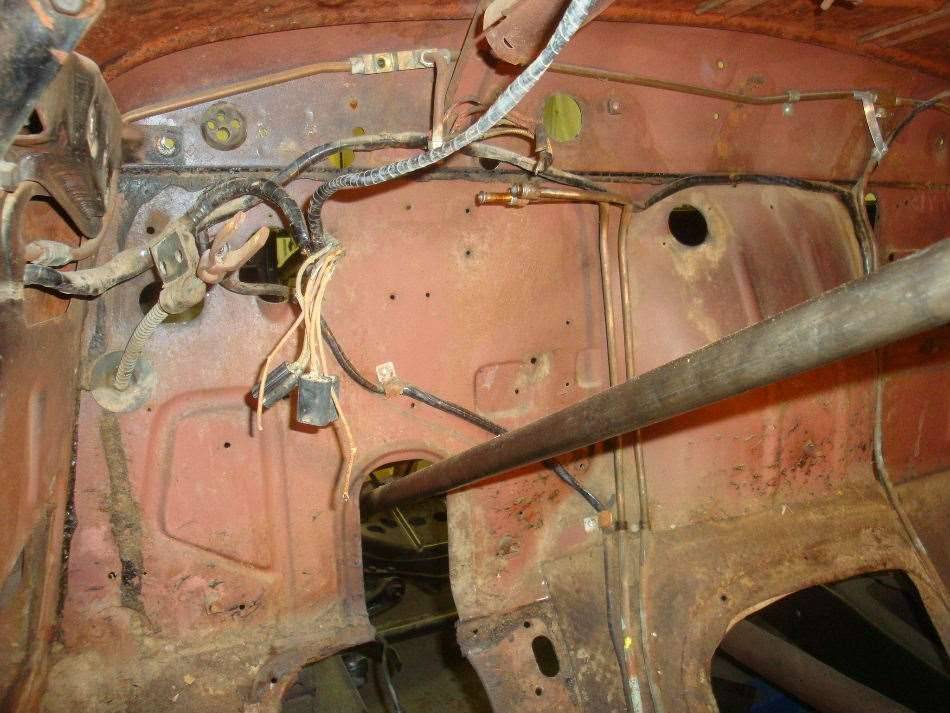 (79.40 KB) (79.40 KB)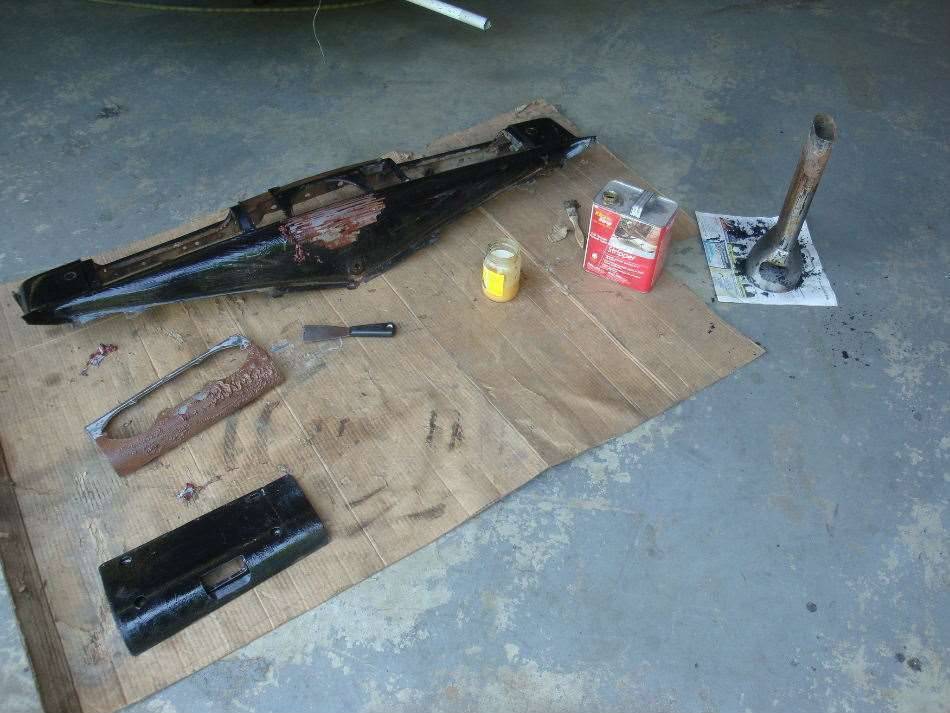 (91.23 KB) (91.23 KB)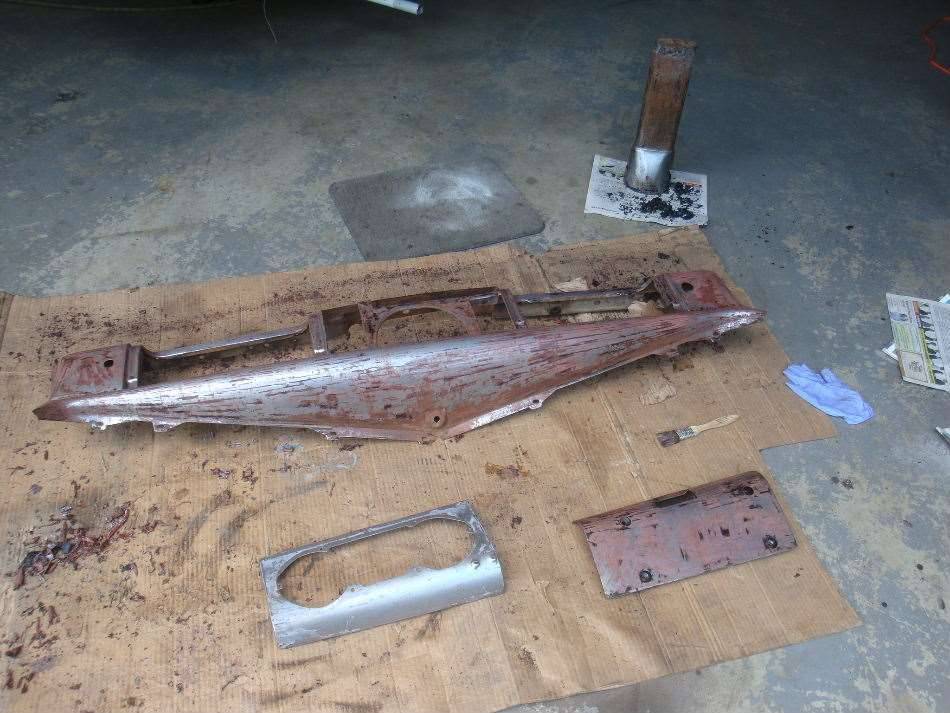 (114.16 KB) (114.16 KB)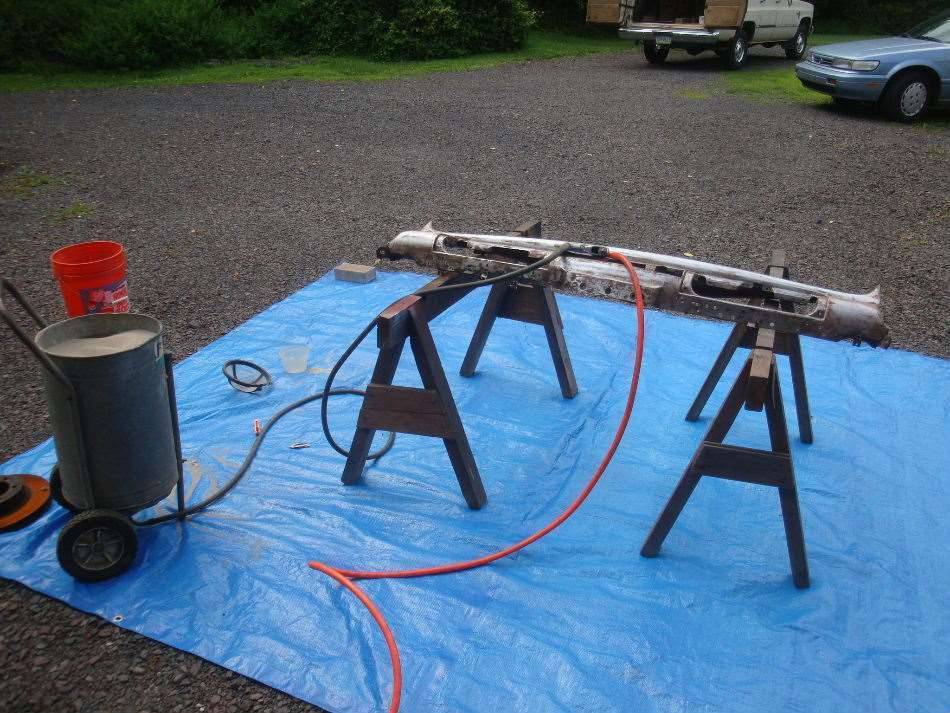 (114.43 KB) (114.43 KB)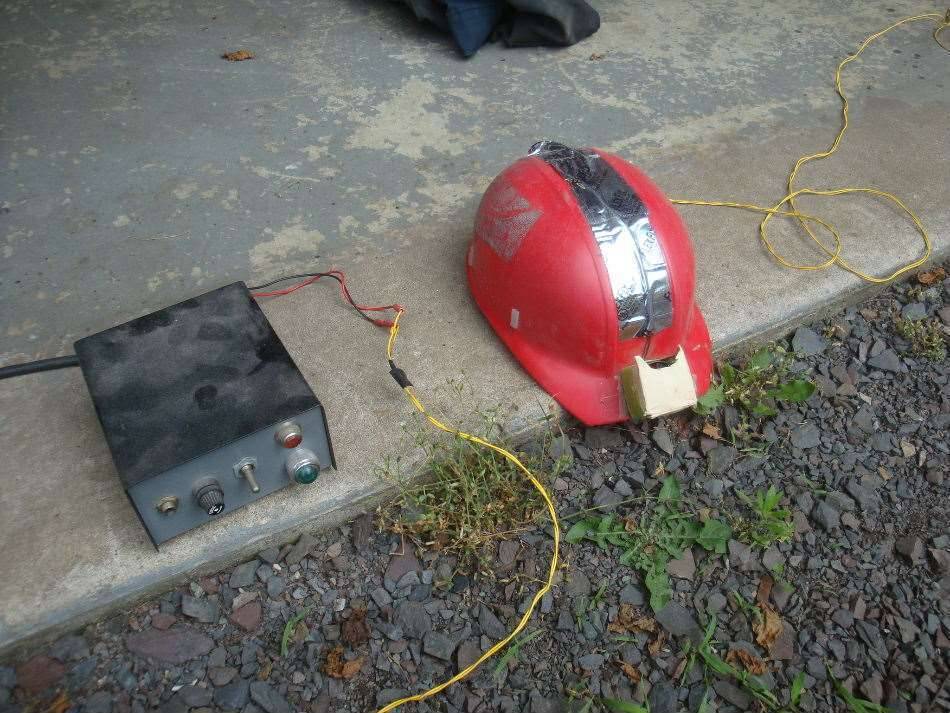 (60.77 KB) (60.77 KB)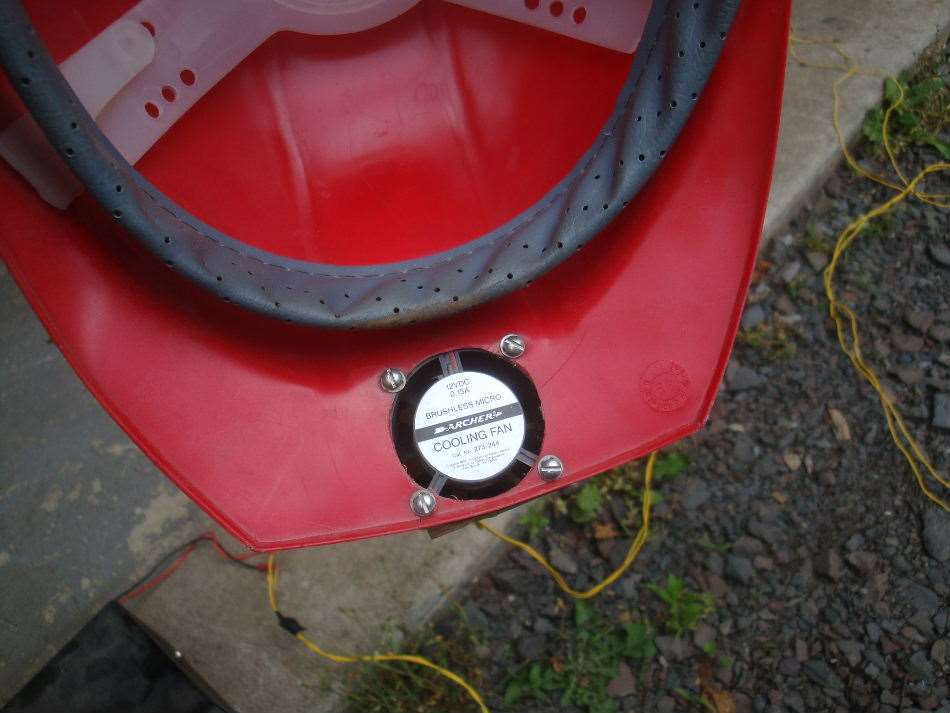 (69.33 KB) (69.33 KB)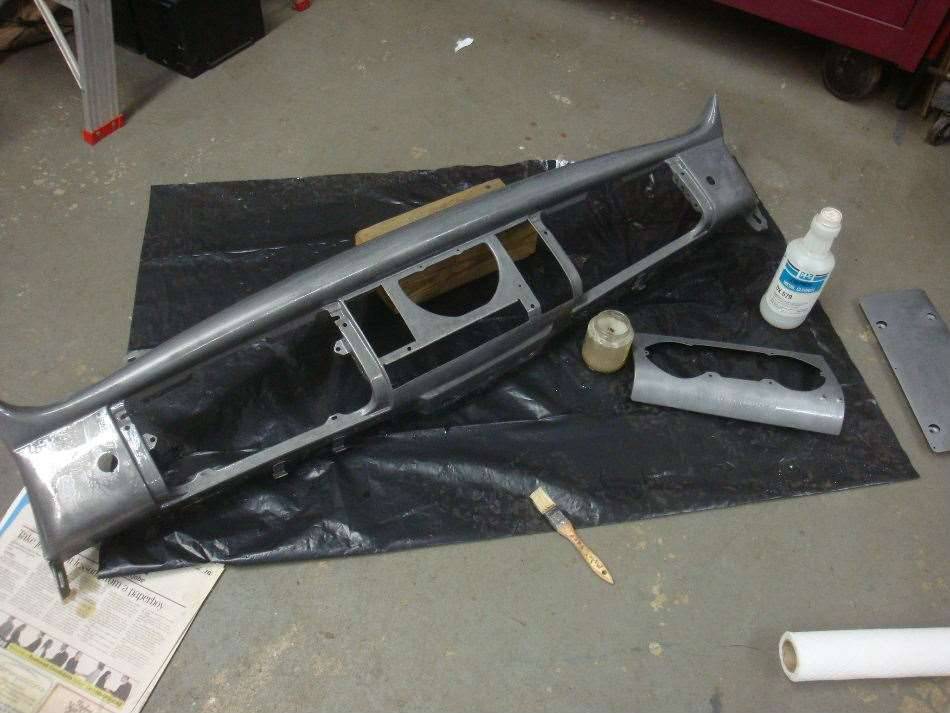 (133.56 KB) (133.56 KB)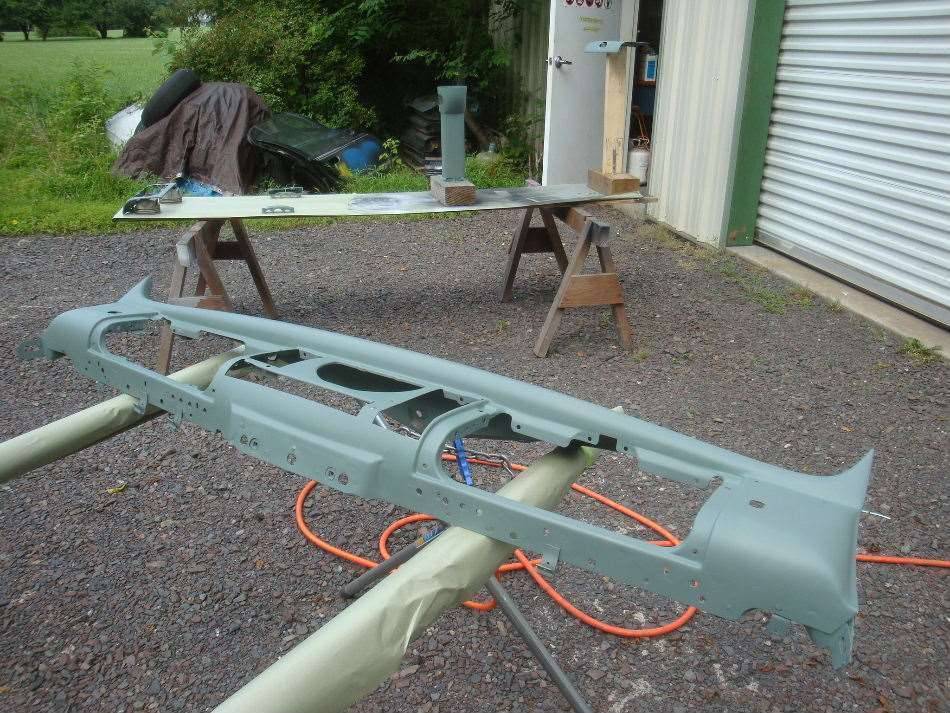 (130.24 KB) (130.24 KB)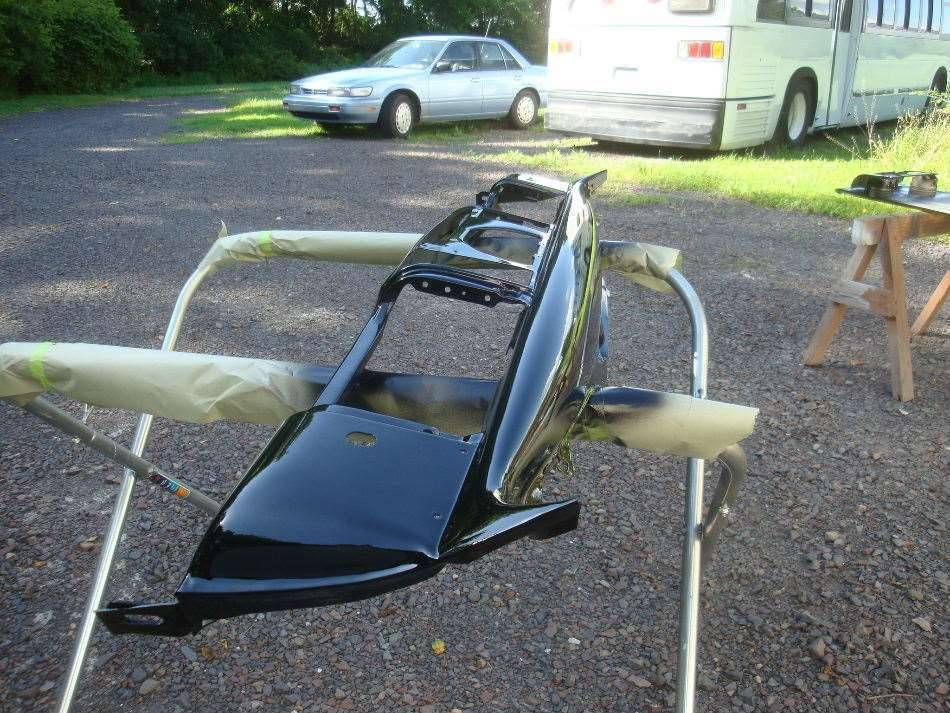 (62.18 KB) (62.18 KB)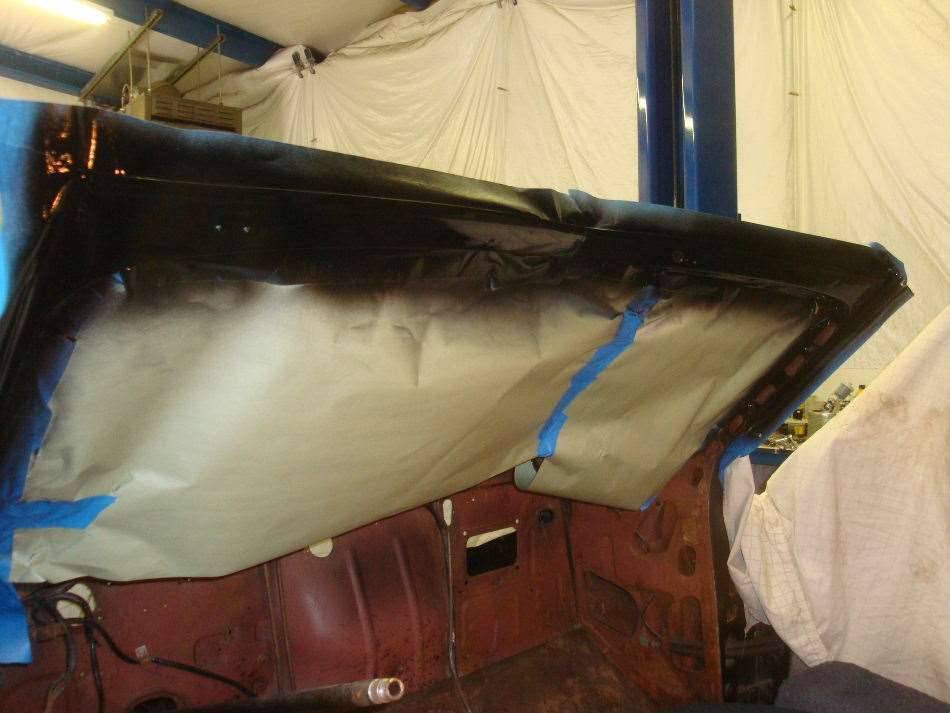 (96.40 KB) (96.40 KB)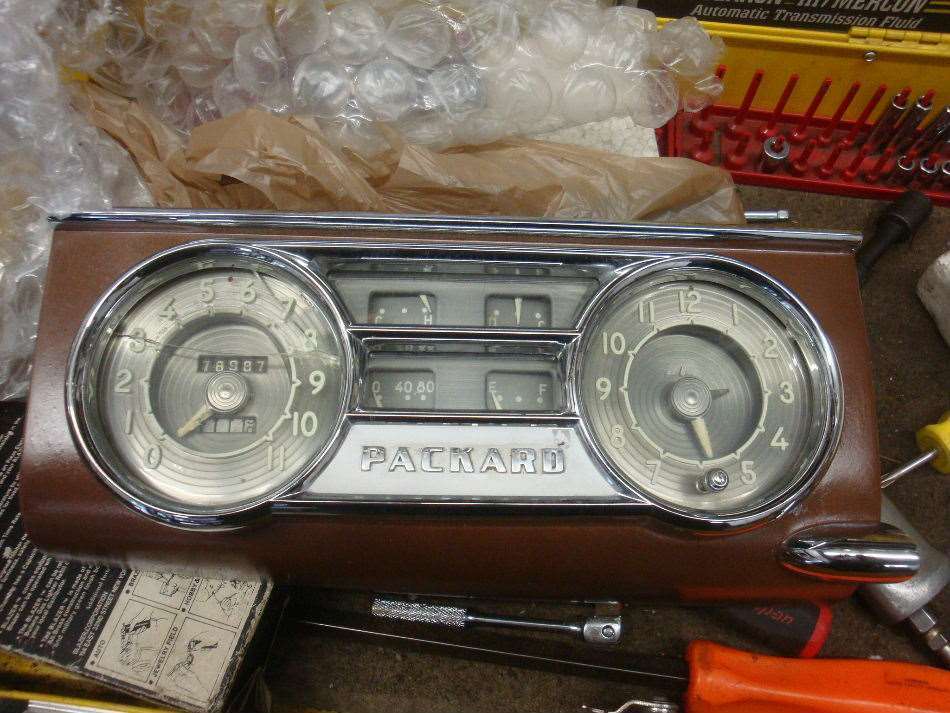 (93.10 KB) (93.10 KB) (60.00 KB) (60.00 KB)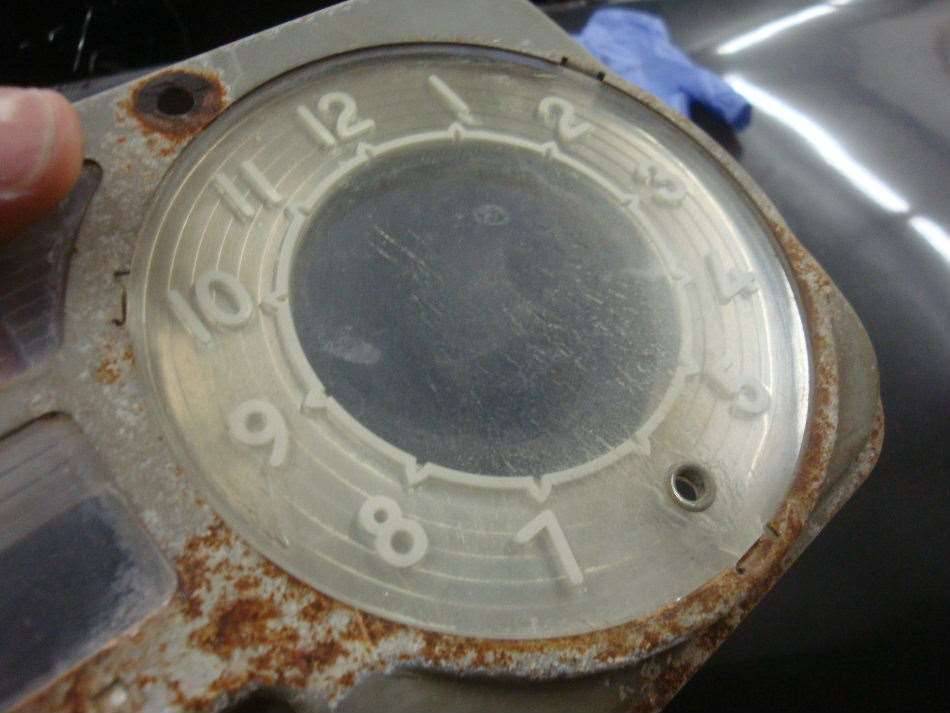 (79.93 KB) (79.93 KB)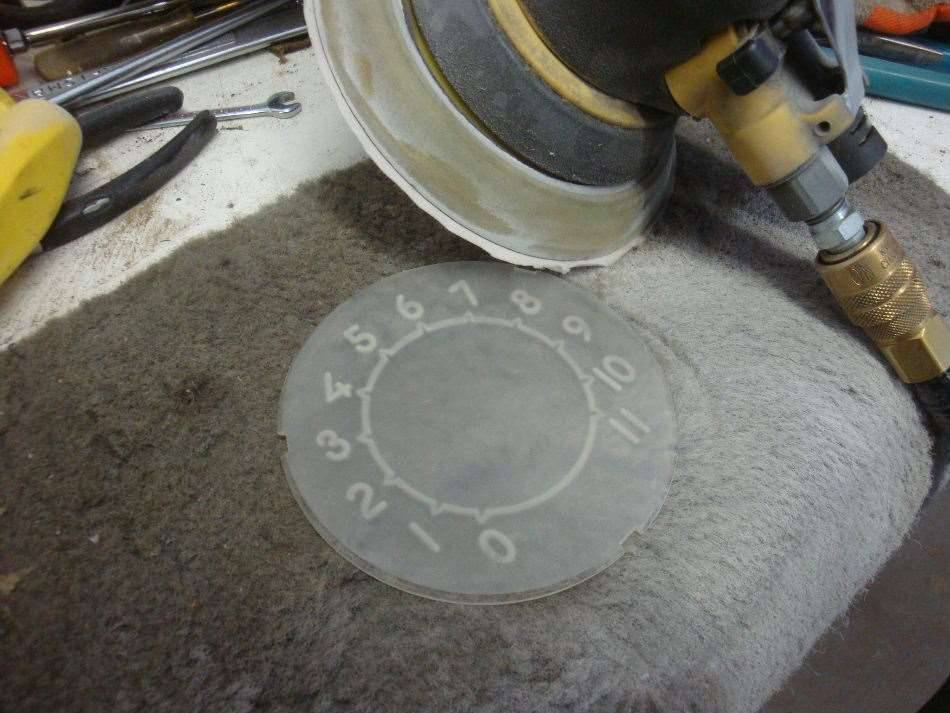 (56.99 KB) (56.99 KB)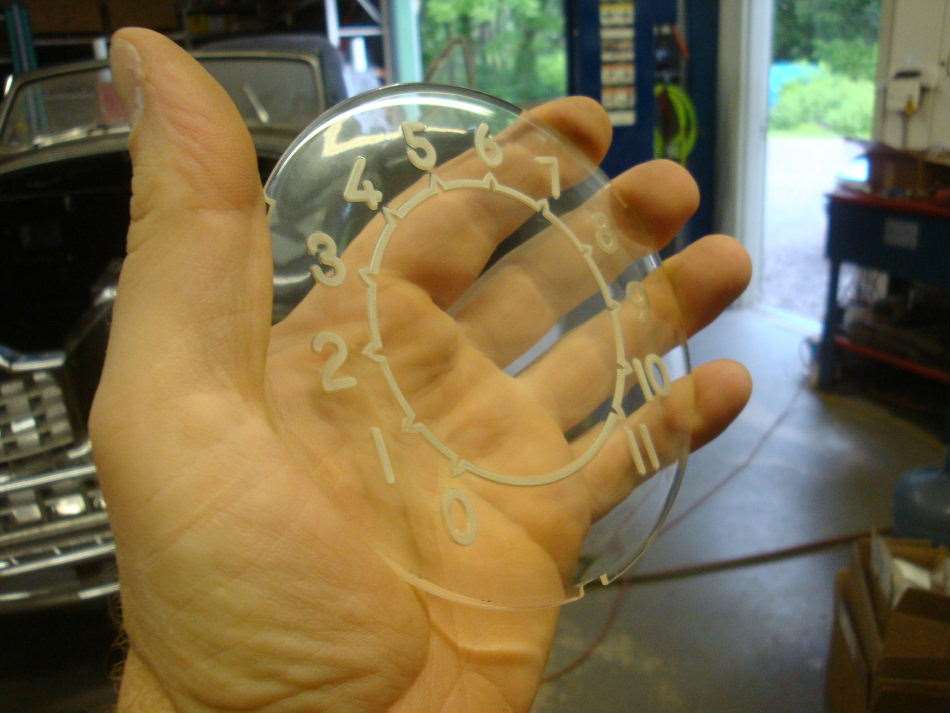 (49.89 KB) (49.89 KB)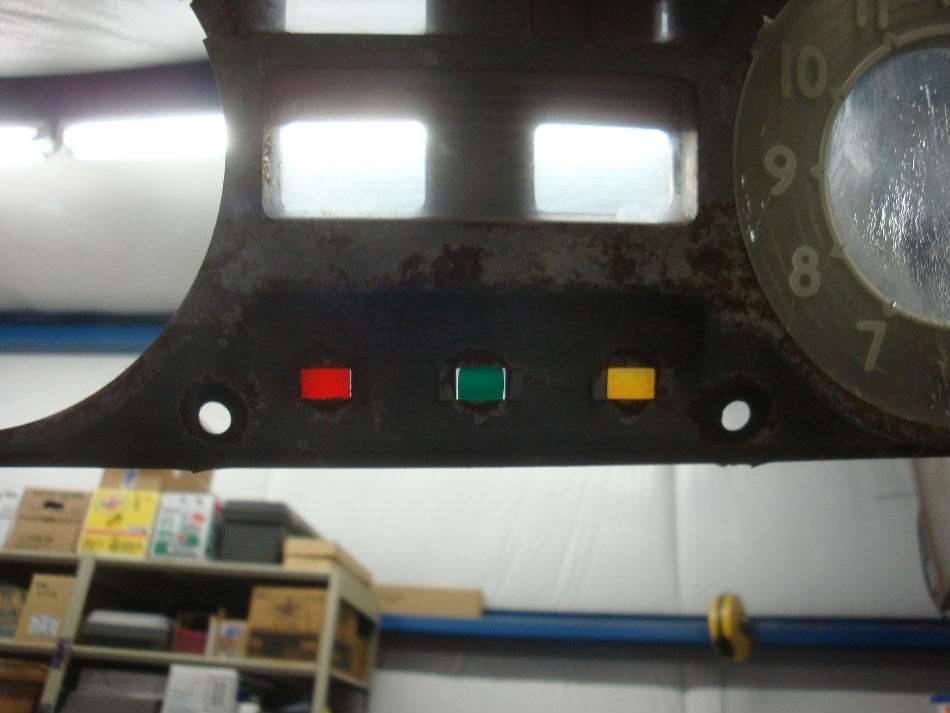 (79.42 KB) (79.42 KB) (98.38 KB) (98.38 KB) (56.93 KB) (56.93 KB)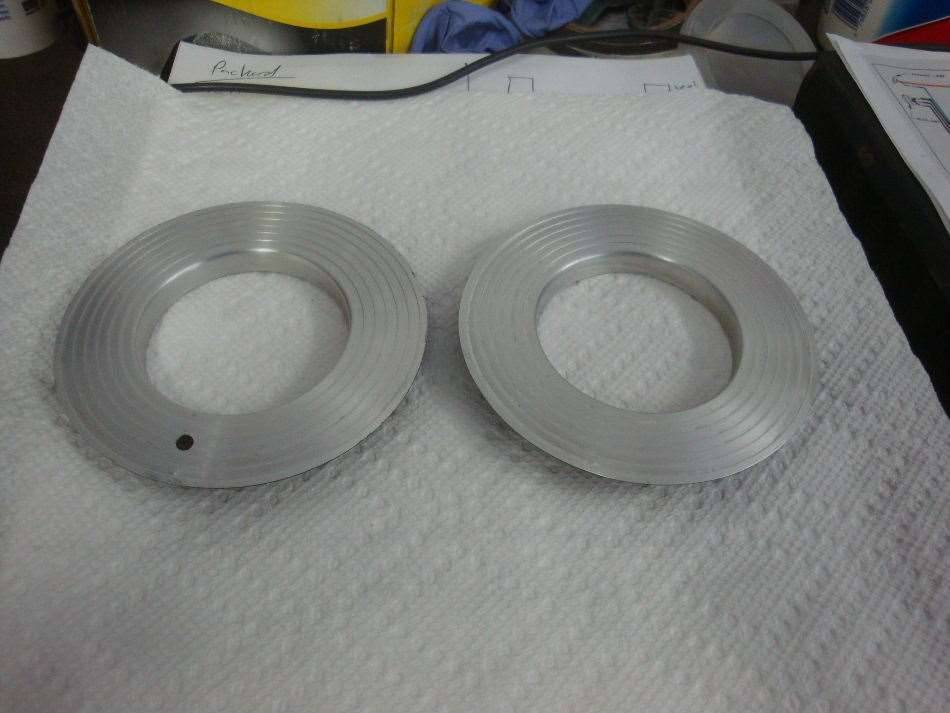 (73.53 KB) (73.53 KB)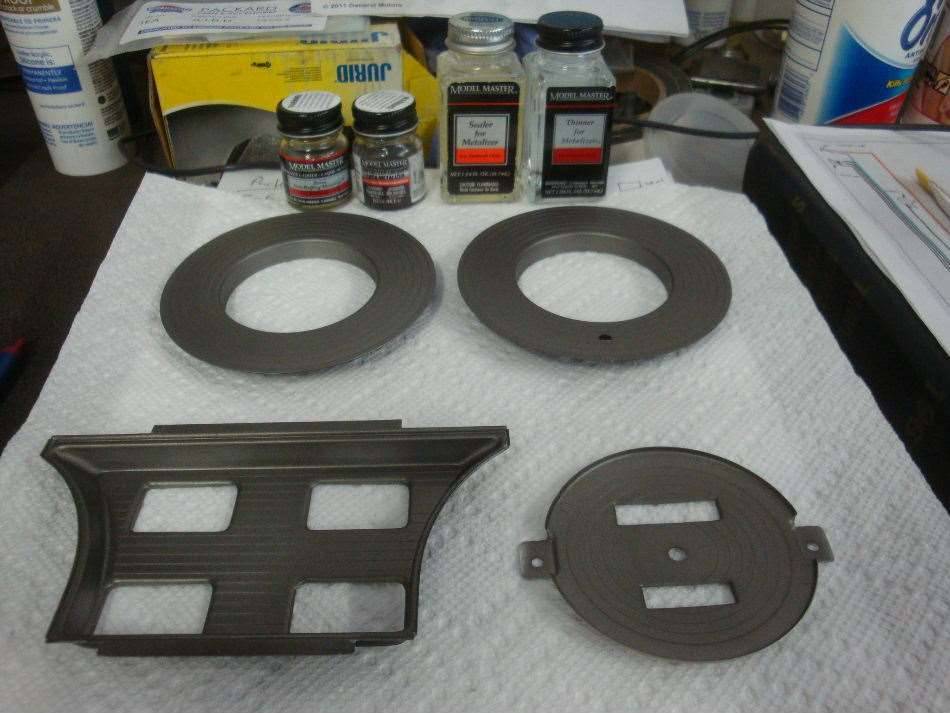 (96.70 KB) (96.70 KB)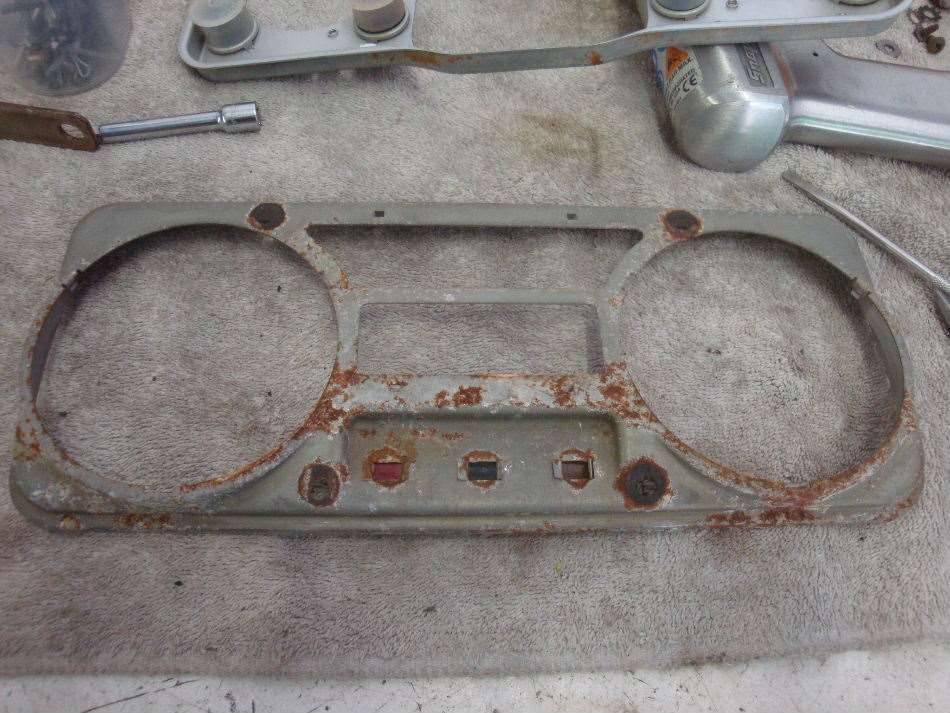 (87.78 KB) (87.78 KB) (73.12 KB) (73.12 KB)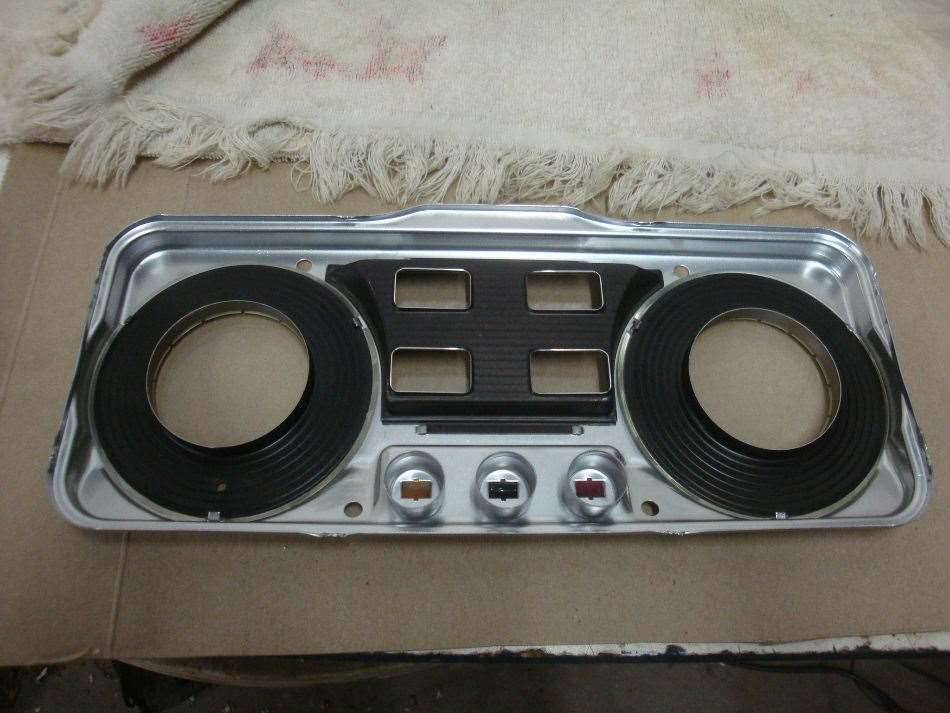 (78.90 KB) (78.90 KB)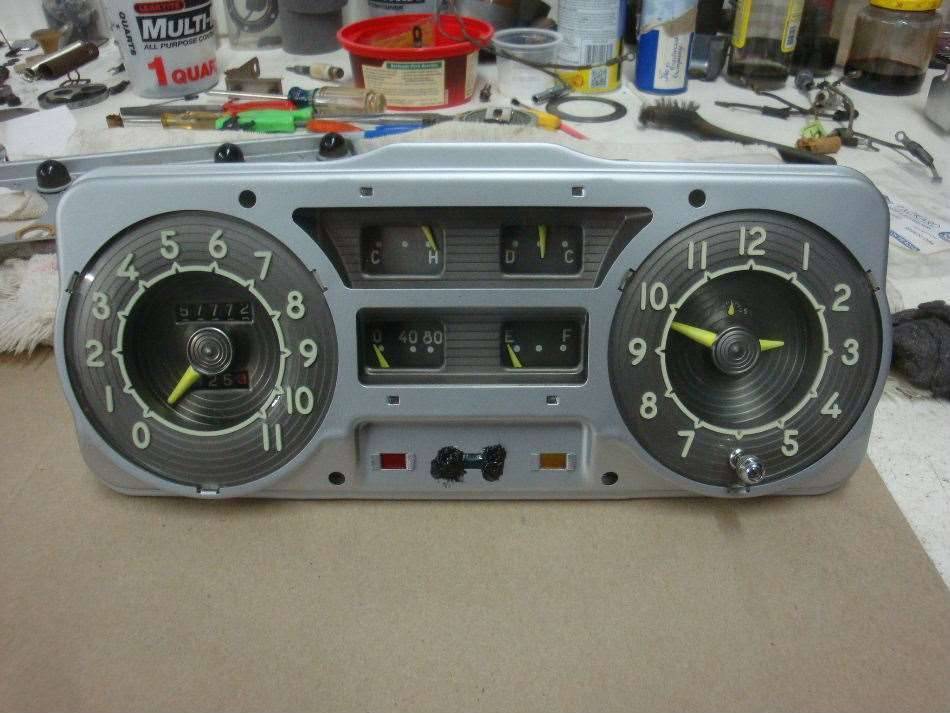 (96.57 KB) (96.57 KB)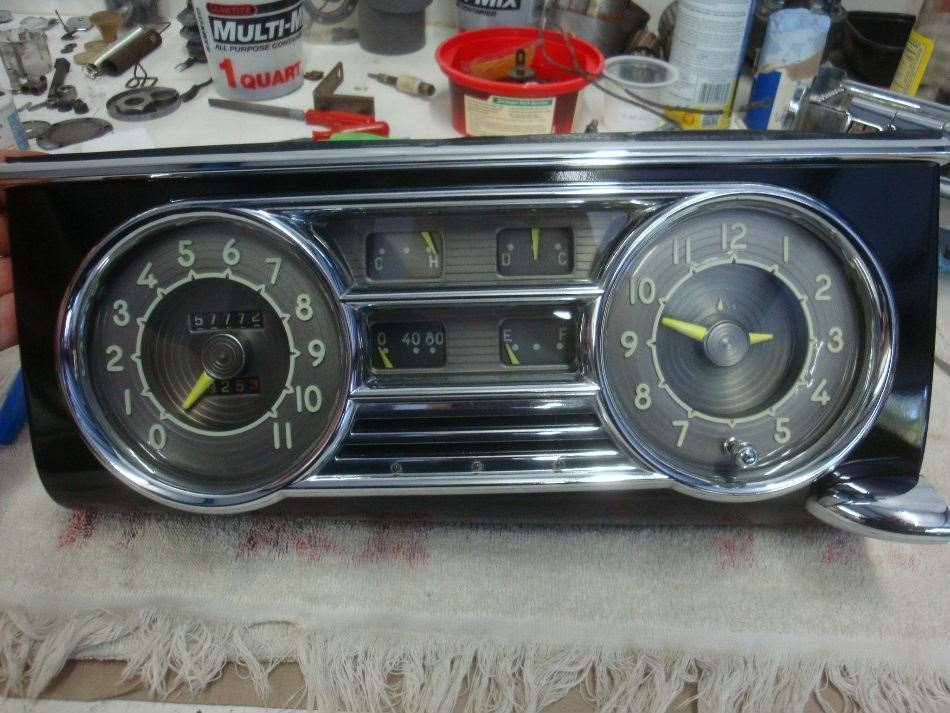
Posted on: 2013/10/11 3:01
|
|||
|
||||
|
Re: Jeff's 48 Custom 8 Victoria Project
|
||||
|---|---|---|---|---|
|
Home away from home
|
Tonight's chapter in the Packard saga is mostly about component restoration. I've been really eager to actually start reassembling the car, but there seems to be an endless list of small jobs to do in order to get everything ready. I spent a lot of time rebuilding switches. For a 65 year old car, this Packard has a lot of switches. Off the top of my head, I believe there are at least 24 of them. Not one switch on the car was working properly. At best they had high resistance, and many had no continuity through the dirty contacts. Luckily, most of the switches are fairly easy to take apart, and are built out of simple components that can be cleaned and greased to make the switch work like new again. There are only two switches that can not be taken apart: the reverse lamp switch and the switch on the overdrive lock-out cable. On both of these I was able to spray electrical cleaner in through the terminal screw holes and work the switch repeatedly to get the contacts to clean themselves. Final testing with an ohm meter was done to make sure I did everything correctly. Like many digital meters, mine will read .5 ohms when the actual resistance is closer to zero. If it was actually .5 ohms, that would be too high.
California dirt road dust had made it's way inside the heater, vent, and wiper control cables, so they were all frozen in place. After bead blasting, I soaked them in kerosene to free them up. I lubed the rack and pinion units that move the cables, and they all work nicely now. The blower motor was cleaned, lubed, and got new wires. I replaced the shaft seal in the Ranco heater valve,and put the heater box together. My overdrive lock-out cable was in rough shape, but $300 for a new one isn't in the budget. Thanks go out to the person who had the idea of using a split collar to re-secure the cable to the housing. I remember reading the post, but forgot who came up with the great idea. I bought a collar from McMaster-Carr, and now the cable works as good as new.  September-October 2013. Component restoration Attach file: (58.90 KB)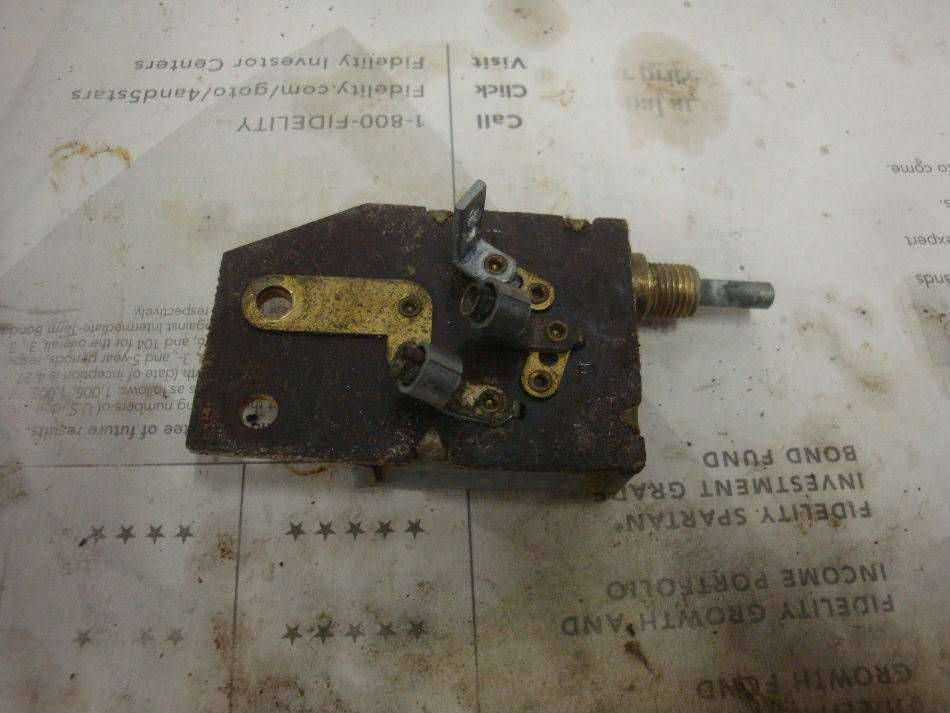 (63.92 KB) (63.92 KB)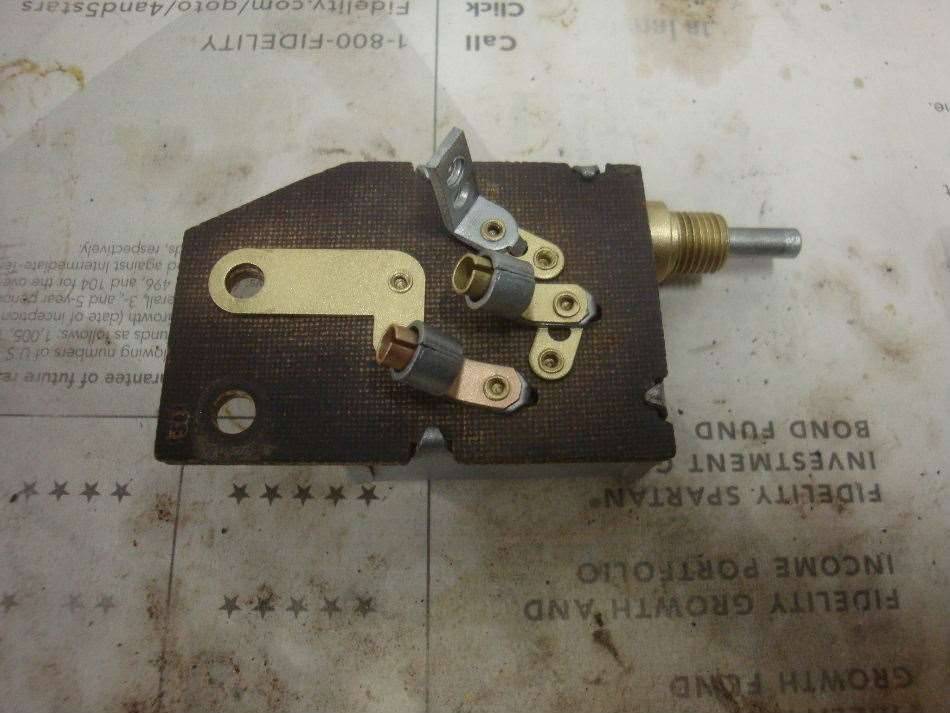 (64.38 KB) (64.38 KB)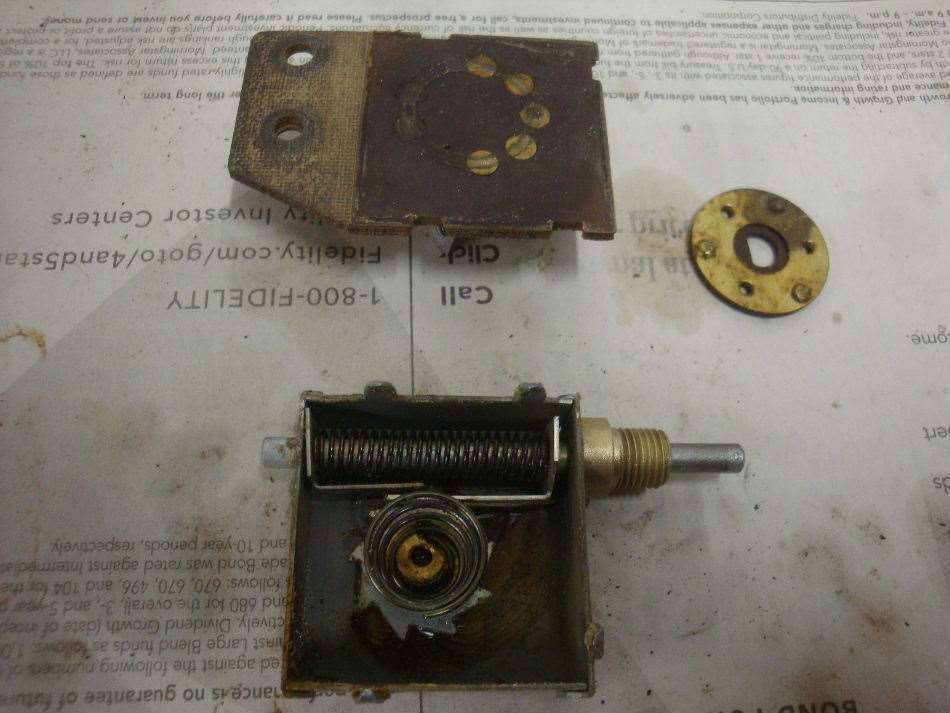 (73.83 KB) (73.83 KB) (69.76 KB) (69.76 KB)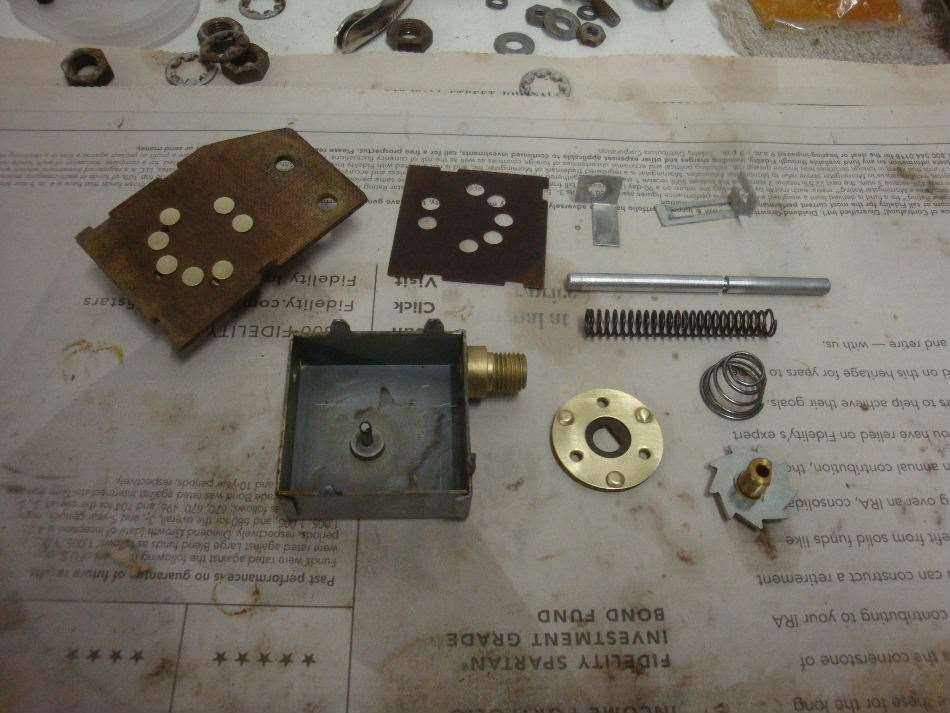 (61.28 KB) (61.28 KB)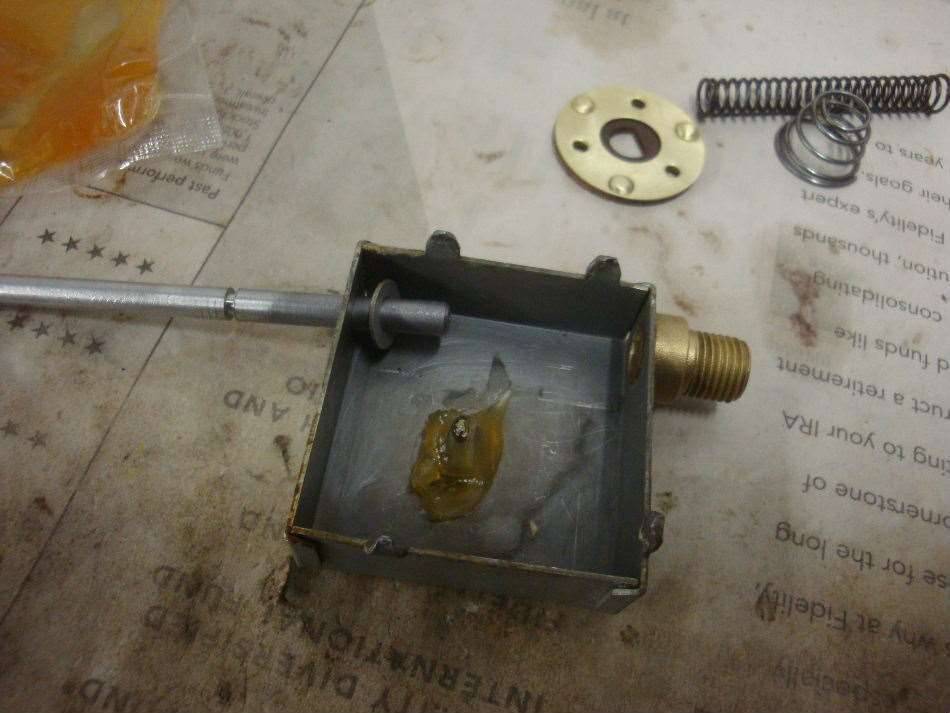 (59.33 KB) (59.33 KB)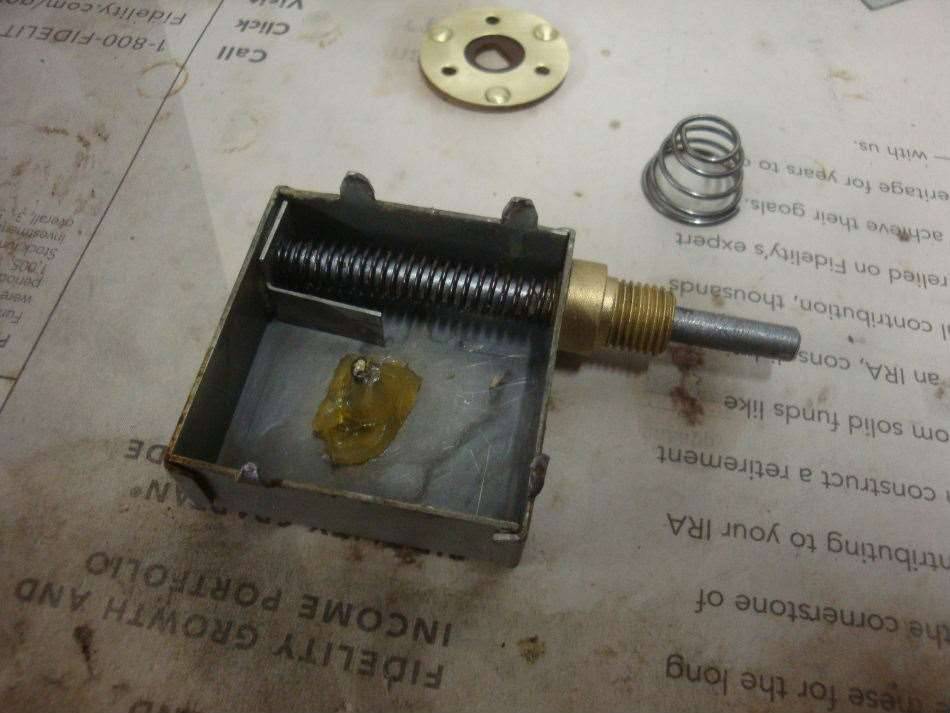 (58.75 KB) (58.75 KB)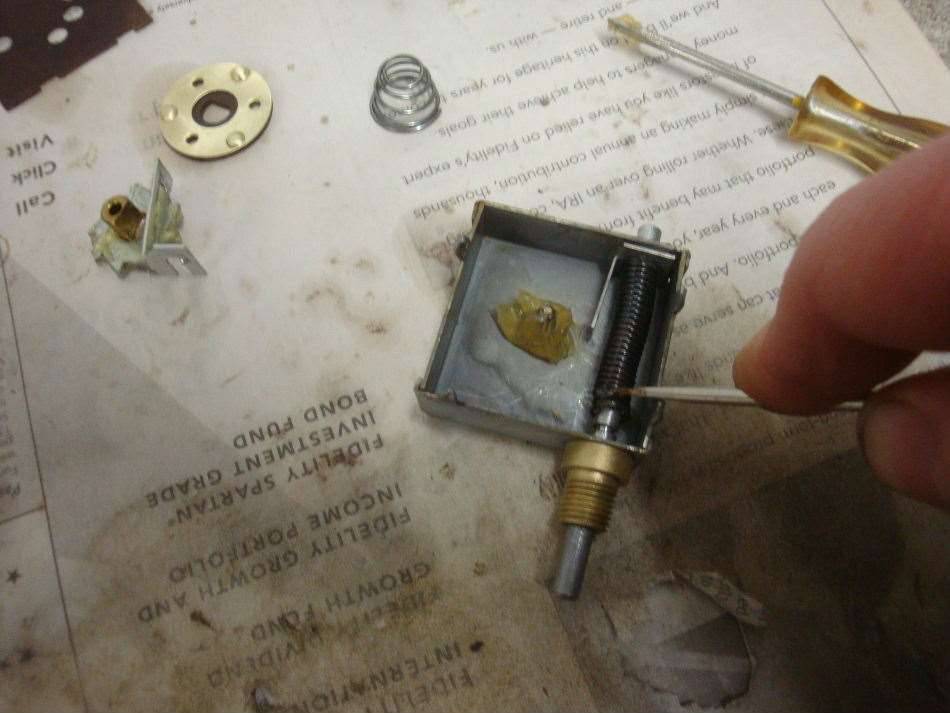 (62.25 KB) (62.25 KB)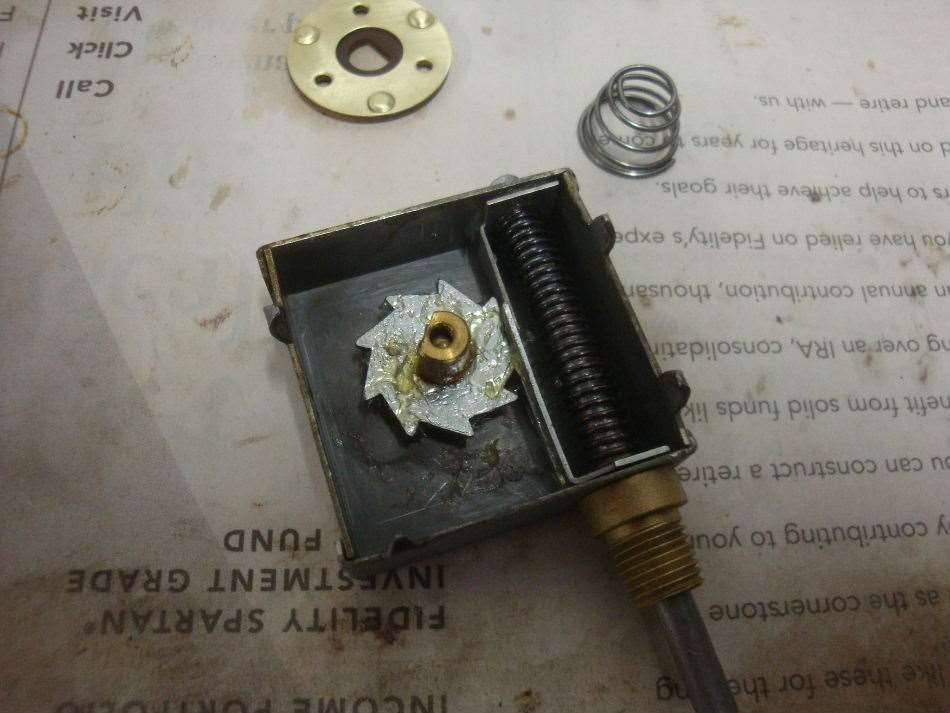 (68.91 KB) (68.91 KB)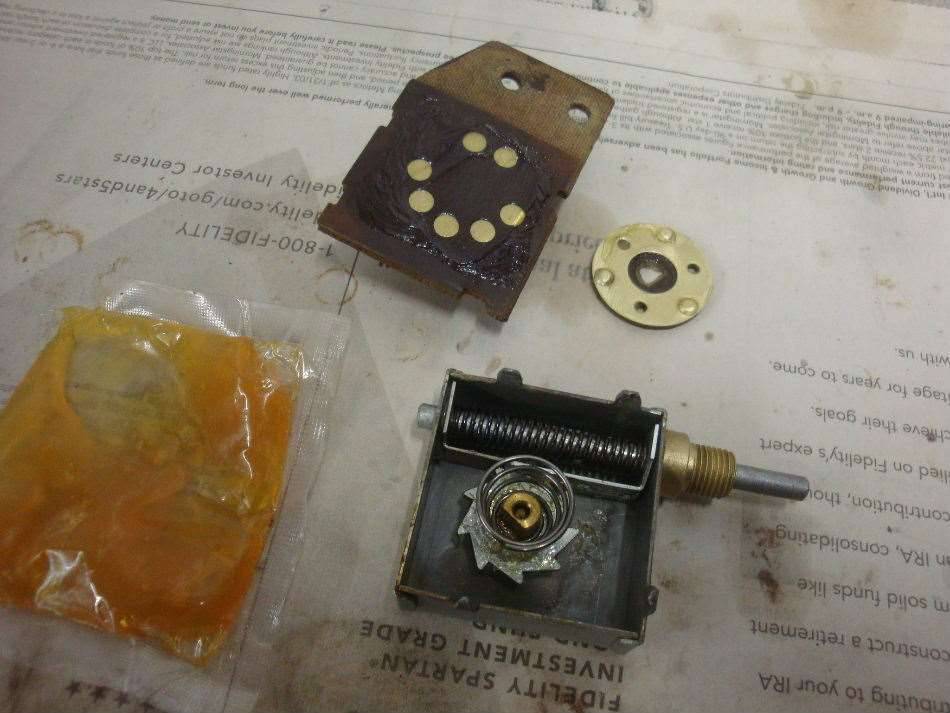 (62.93 KB) (62.93 KB)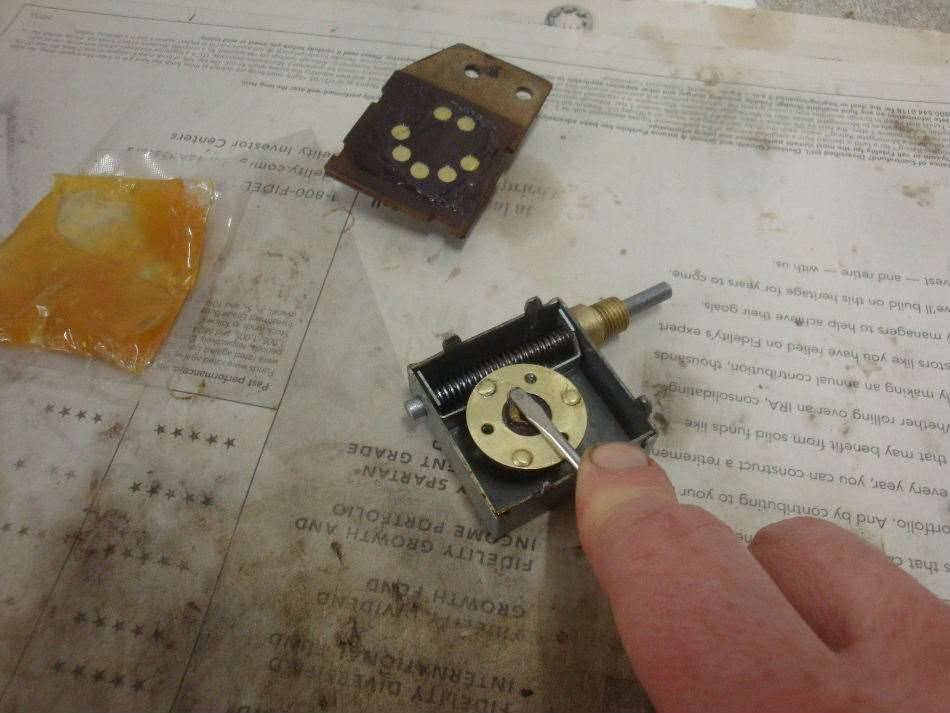 (59.72 KB) (59.72 KB)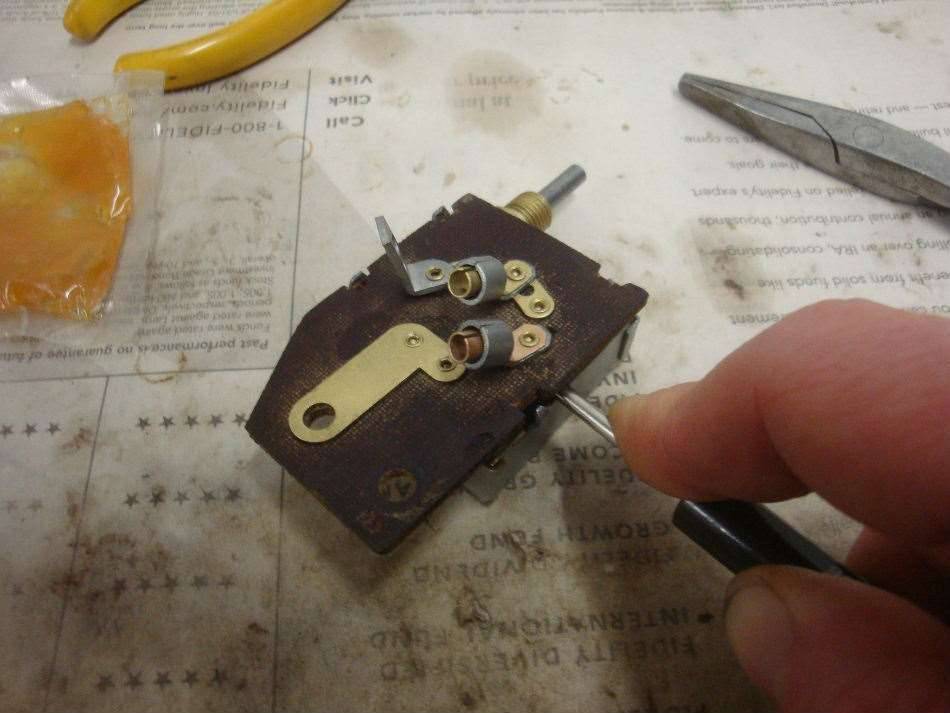 (74.83 KB) (74.83 KB)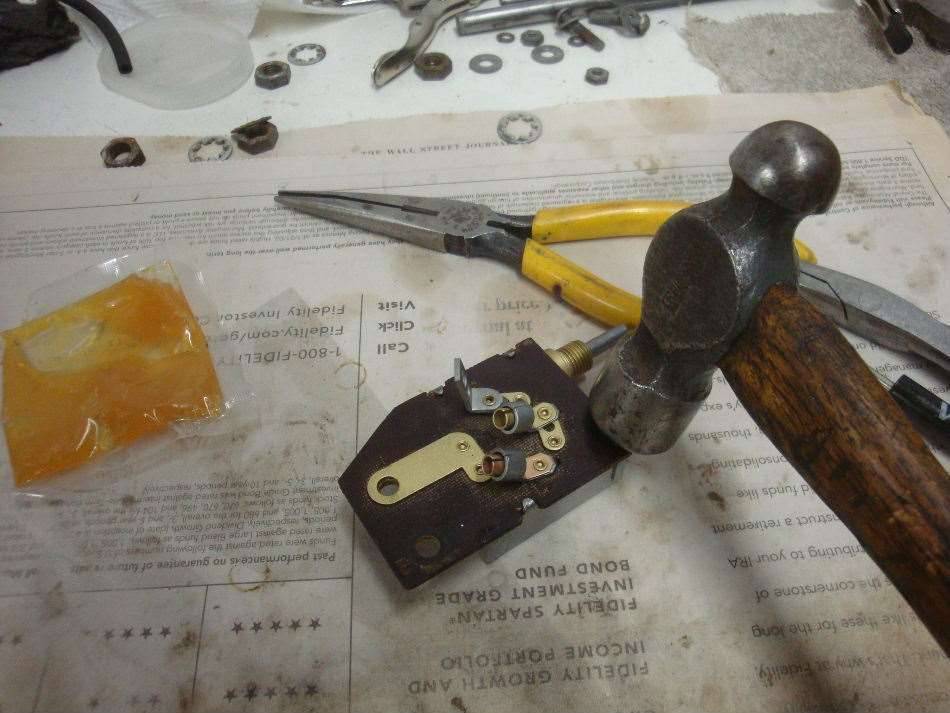 (66.87 KB) (66.87 KB)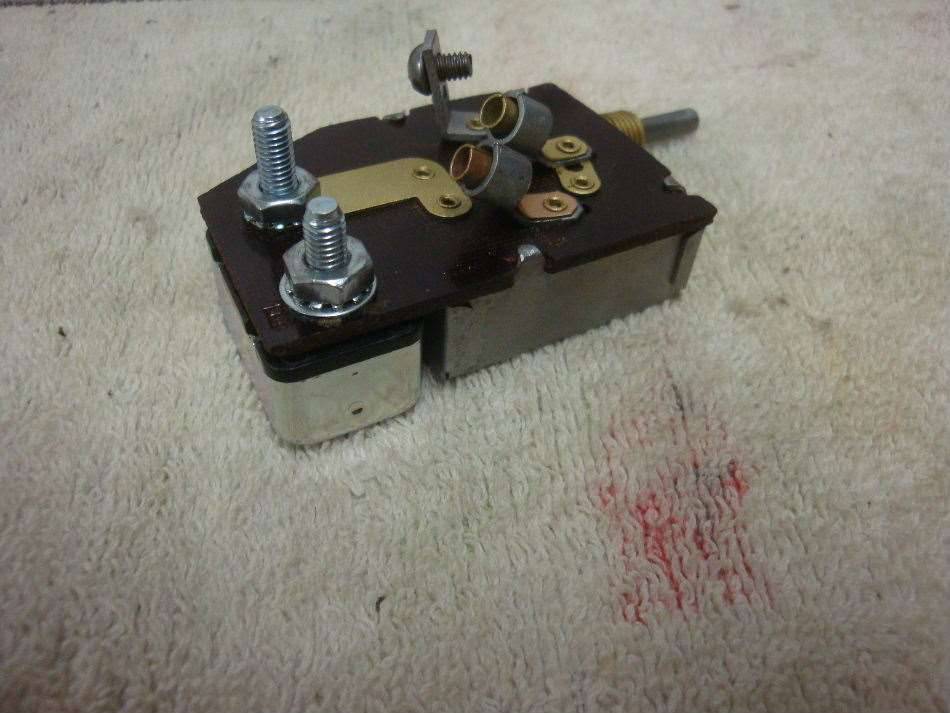 (93.93 KB) (93.93 KB)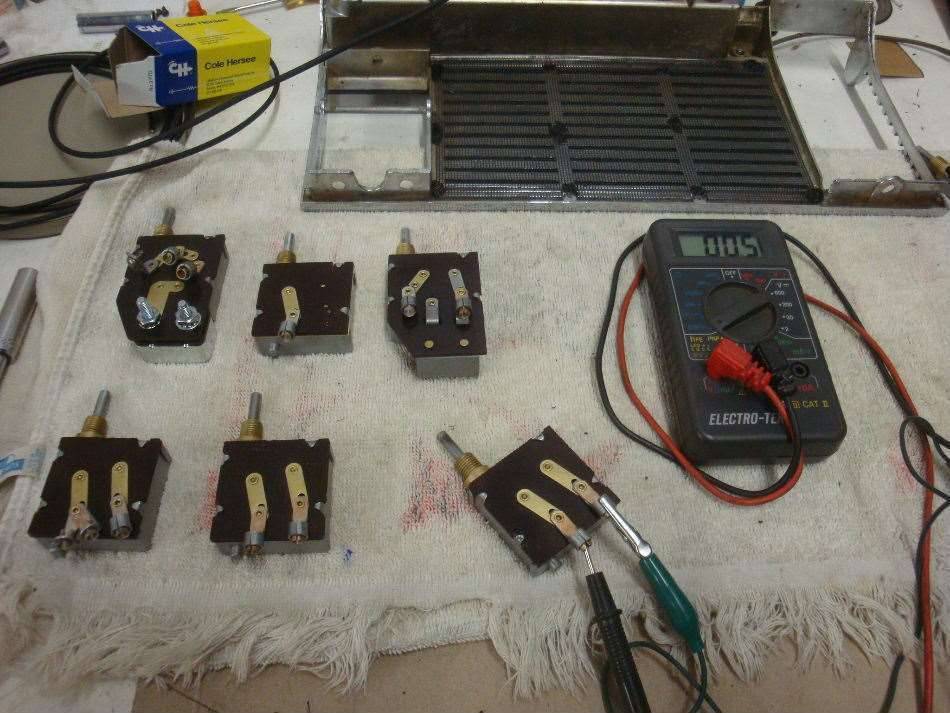 (82.29 KB) (82.29 KB)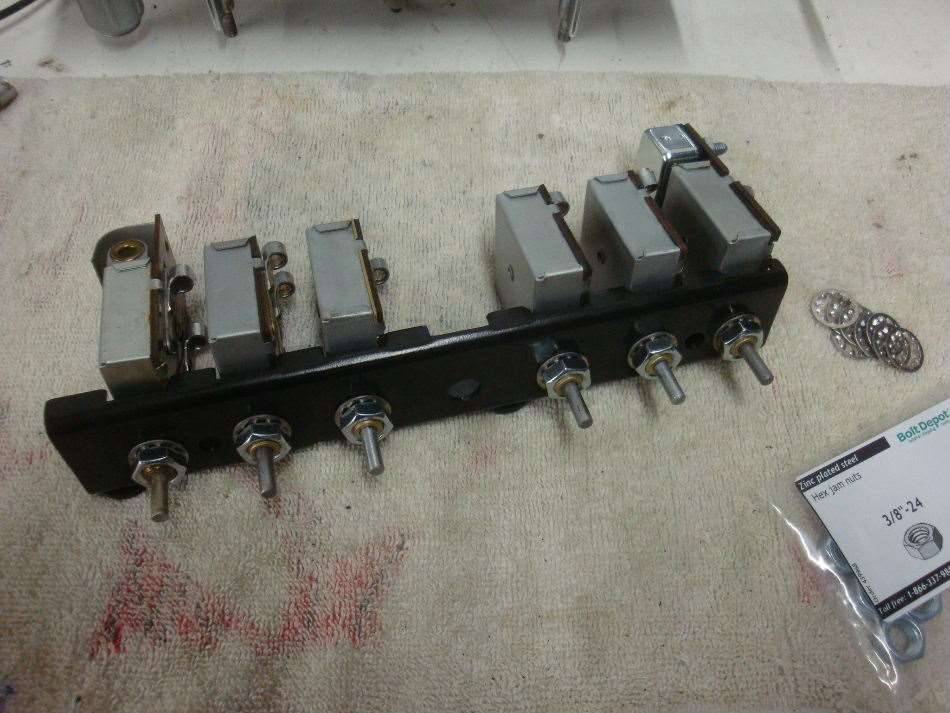 (63.13 KB) (63.13 KB)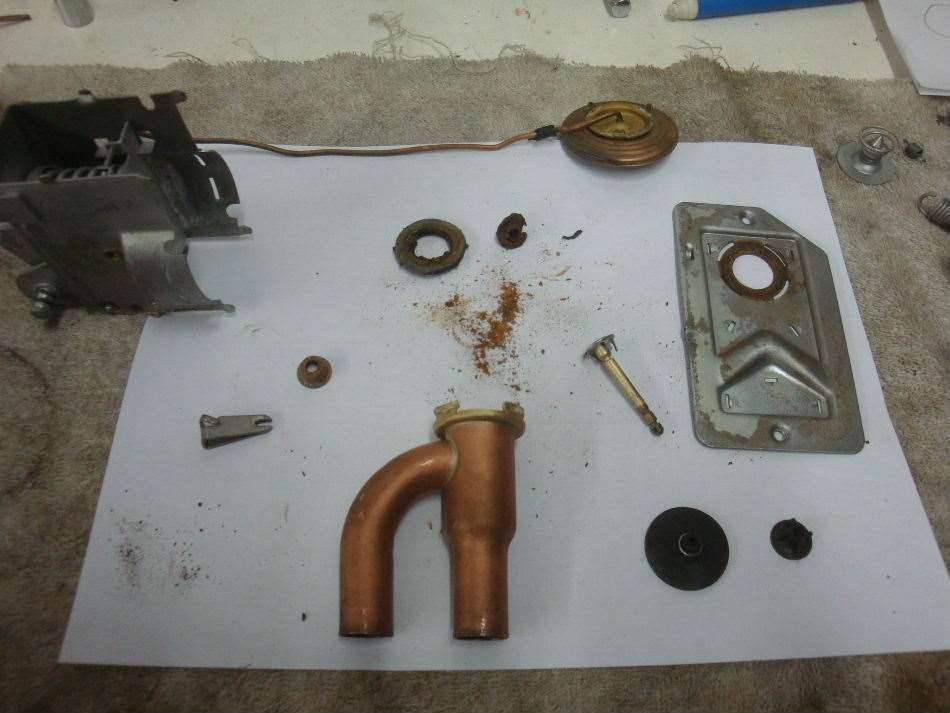 (94.02 KB) (94.02 KB)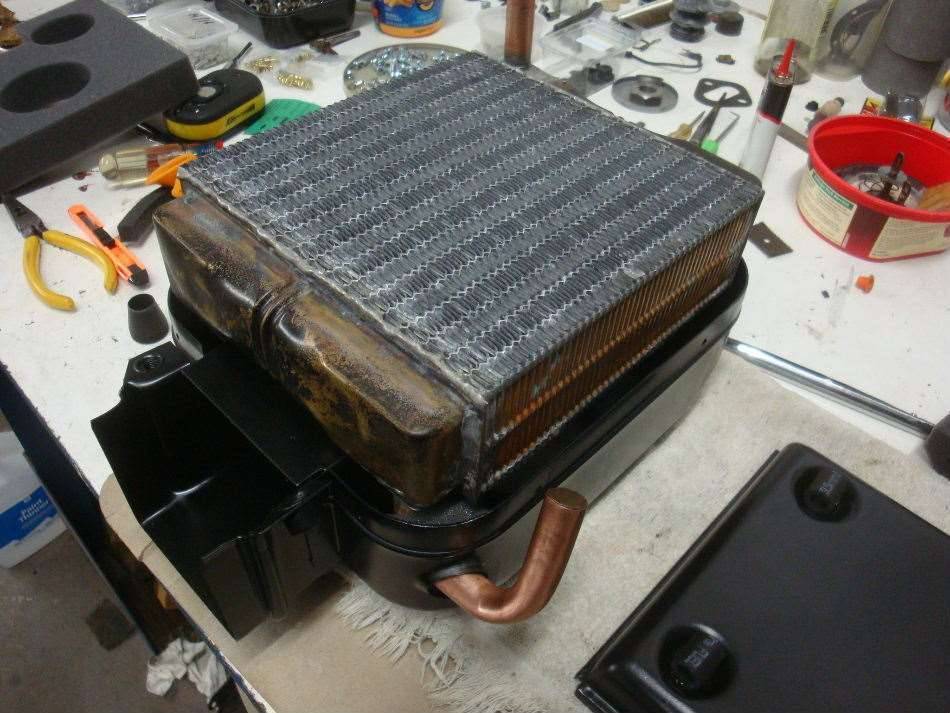 (68.83 KB) (68.83 KB)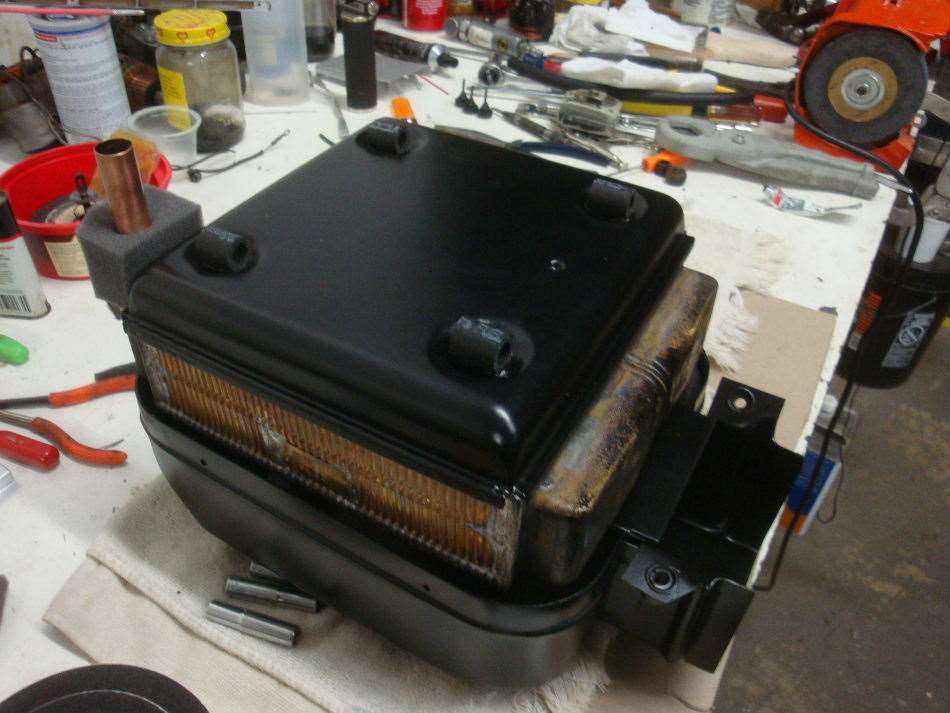 (79.80 KB) (79.80 KB)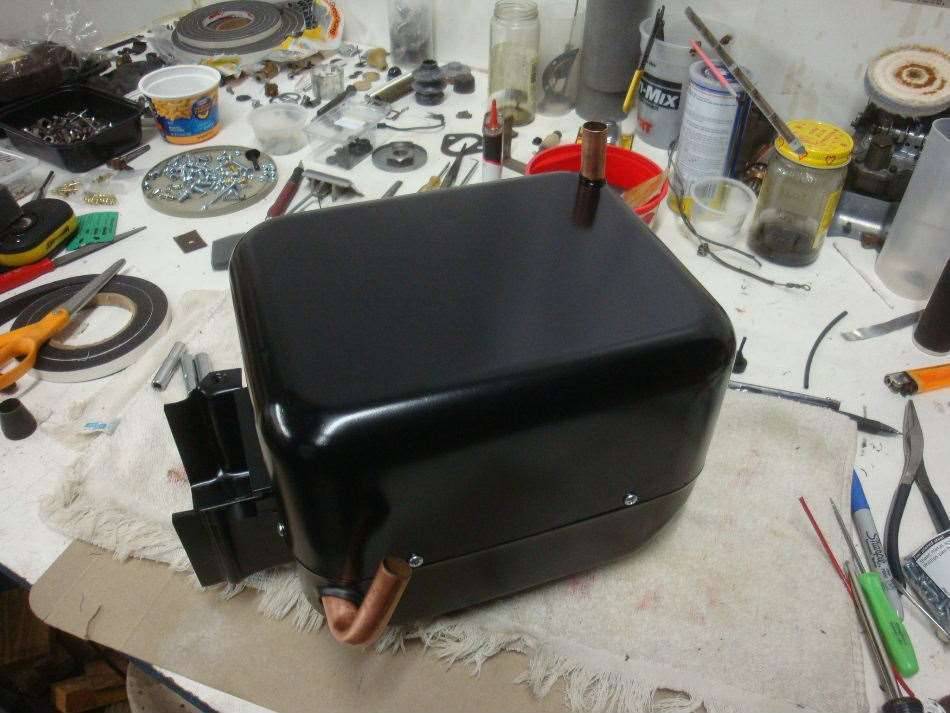 (75.11 KB) (75.11 KB)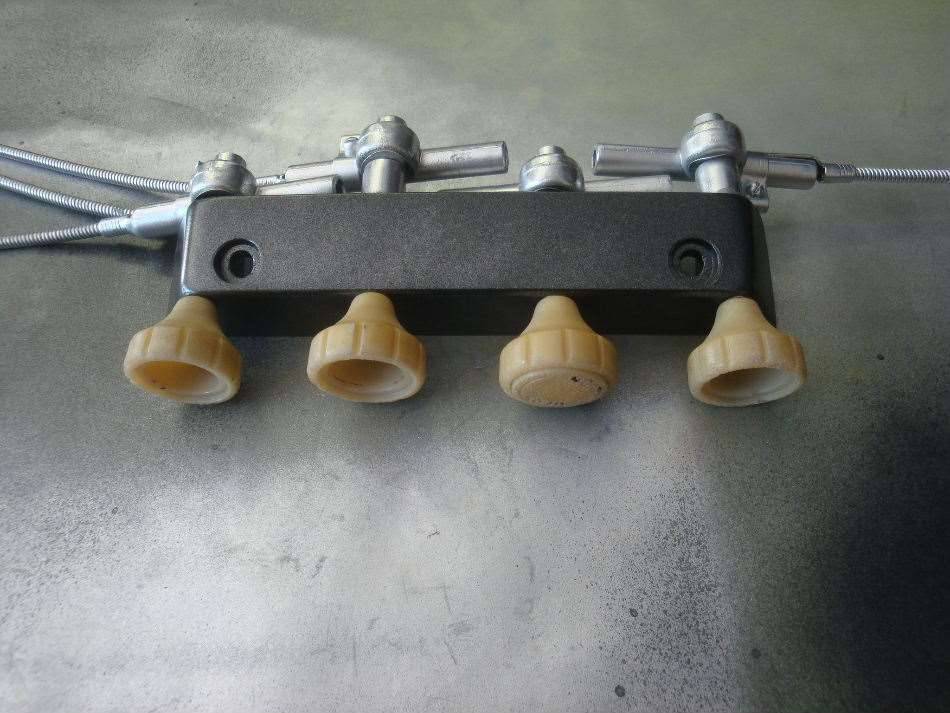 (87.80 KB) (87.80 KB)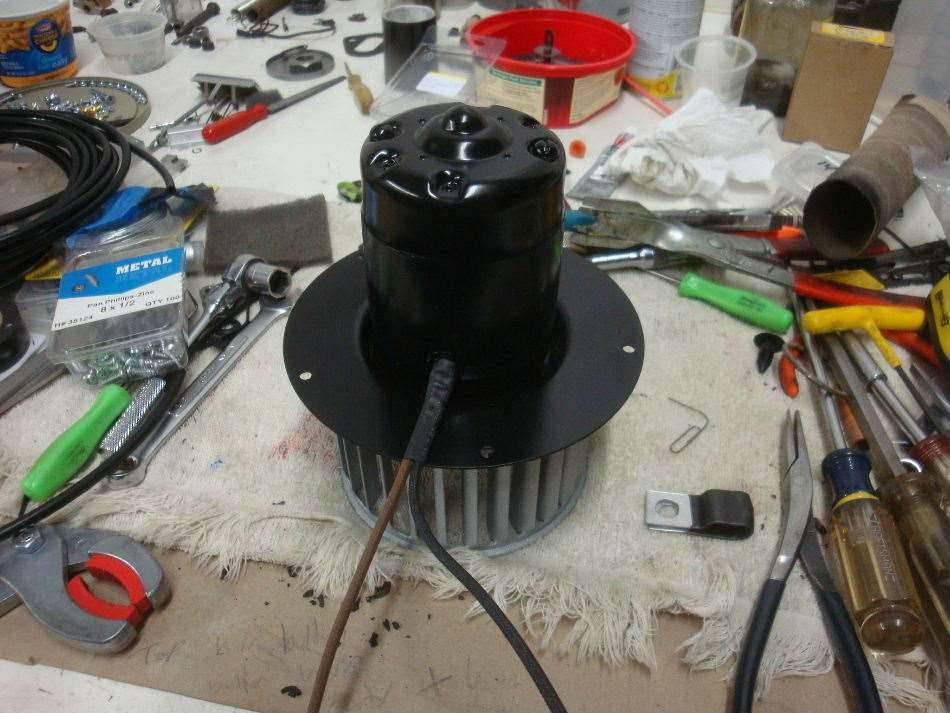
Posted on: 2013/10/20 18:07
|
|||
|
||||


