|
Re: Tim's '55 Patrician
|
||||
|---|---|---|---|---|
|
Home away from home
|
An absolutely beautiful day here in the eastern part of the Commonwealth could not go by without doing some work on the Patrician. The temperatures reached 60 this afternoon and it was a great afternoon for working on a great car!
The Patrician is not coming along anywhere as fast as I had hoped it would. Having my Craftsman 25-gallon air compressor crap out on me was a major PITA and halted work on replacing the left exhaust manifold. Naturally, that is holding up completing the exhaust system. I'm waiting for the arrival of my vacuum tool so I can test the Patrician's fuel line for leaks. I'm hoping that the line tests out alright as I'm really not looking forward to replacing that sucker. Still, by process of elimination, that is one of the few things left on the fuel system that still has to be checked out so that it is once again functional. I've appended a few pictures of the Patrician as she currently sits majestically in my garage. One of these afternoons or evenings when I feel up to it, I'm going to sort out and catalog the collection of various parts that now reside in the Pat's trunk. Attach file:  (92.23 KB) (92.23 KB)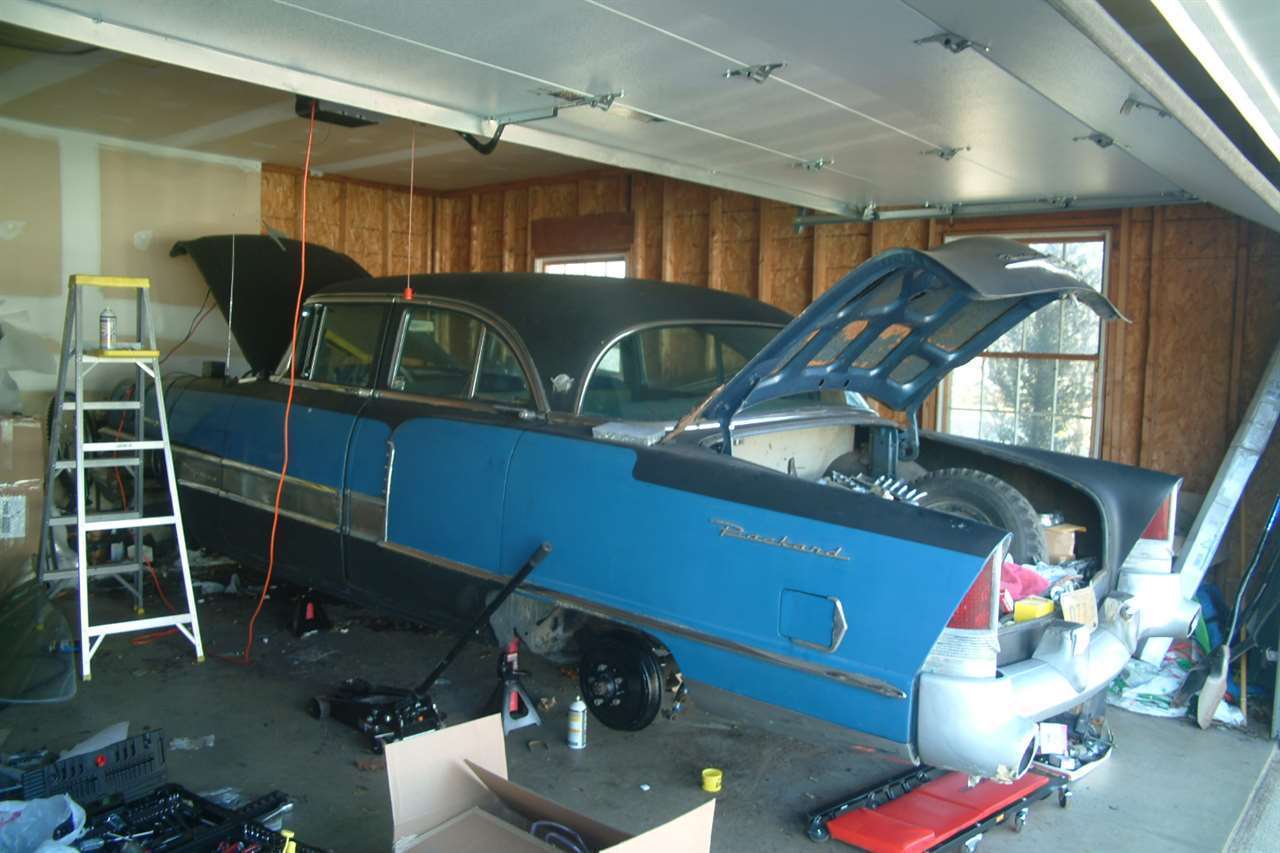 (97.81 KB) (97.81 KB)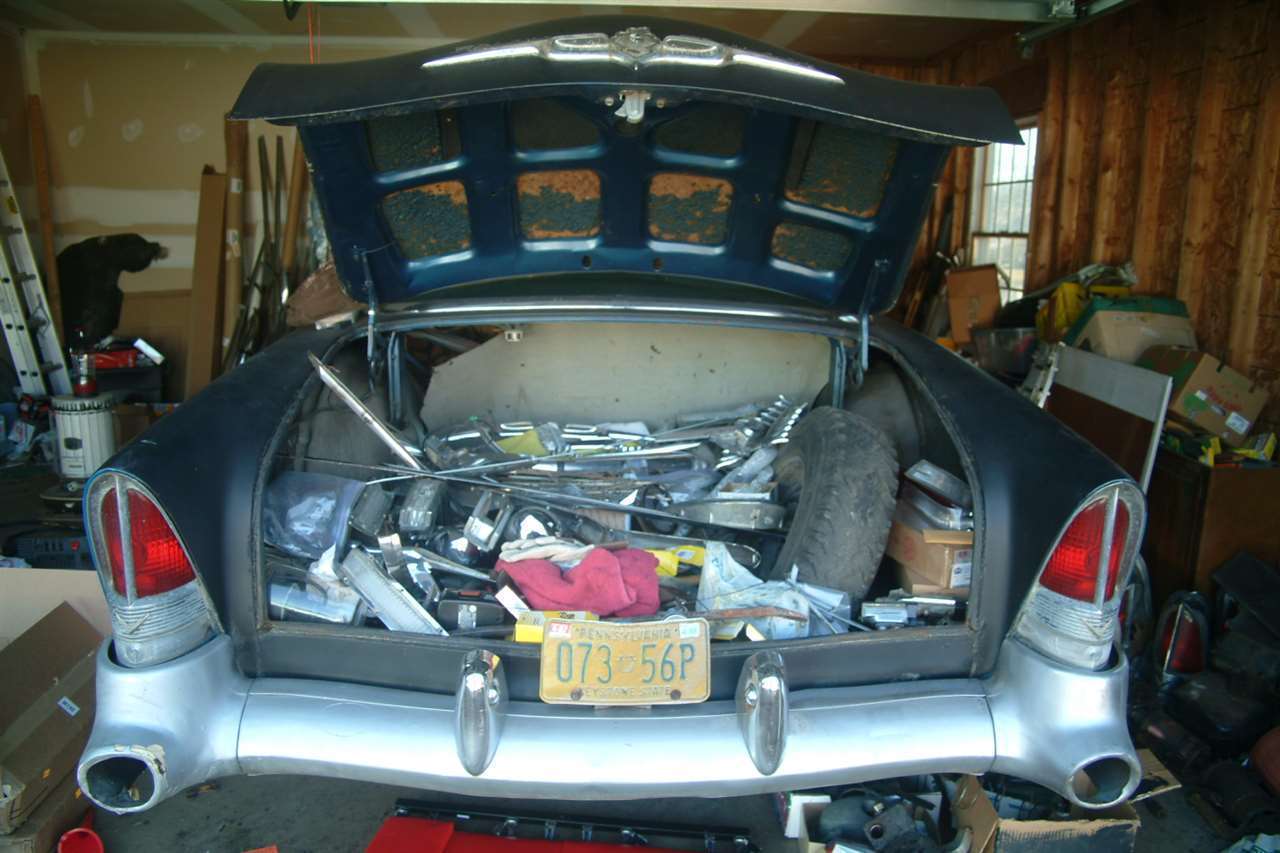
Posted on: 2012/2/22 18:14
|
|||
|
PA Patrician (Tim Wile)
[size=x-small][color=000099][font=Georgia][url=https://packardinfo.c |
||||
|
||||
|
Re: Tim's '55 Patrician
|
||||
|---|---|---|---|---|
|
Home away from home
|
Doing some additional work on the front end of the Patrician led me to an unpleasant surprise. While cleaning crud from some of the power steering components and other areas while the Pat is up on jack stands, I noticed what appeared to be a horribly bent stabiliser bracket on the driver's side. Upon further examination, it became quite clear that the bracket has been bent significantly forward and the end of the stabiliser bar has been disconnected from the driver's side A-arm. Now that I've noticed this little problem, I'm surprised that I haven't noticed it before when I was re-building the brake system. I suppose that I'm guilty of tunnel vision.
Now that I've discovered the problem, the question not turns to repairing it. The first thing that came to my mind was to get a sledge hammer and bang the bracket back into some sort of resemblance of its original shape. In the course of doing that, I would attempt to muscle the end of the stabiliser bar back into the A-arm from whence it has sprung. I suppose a more sophisticated fellow would elect to remove the bracket assembly from the car, then straighten it out or replace it, re-assemble it onto the car while re-attaching the stabiliser bar to the A-arm. I suppose I'll have to think about this over a beer or two before I tackle this latest little bump on the way to returning the Patrician to the road. Anyone who has corrected a similar problem or who has any ideas or suggestions, please enlighten me! Attach file: (97.41 KB)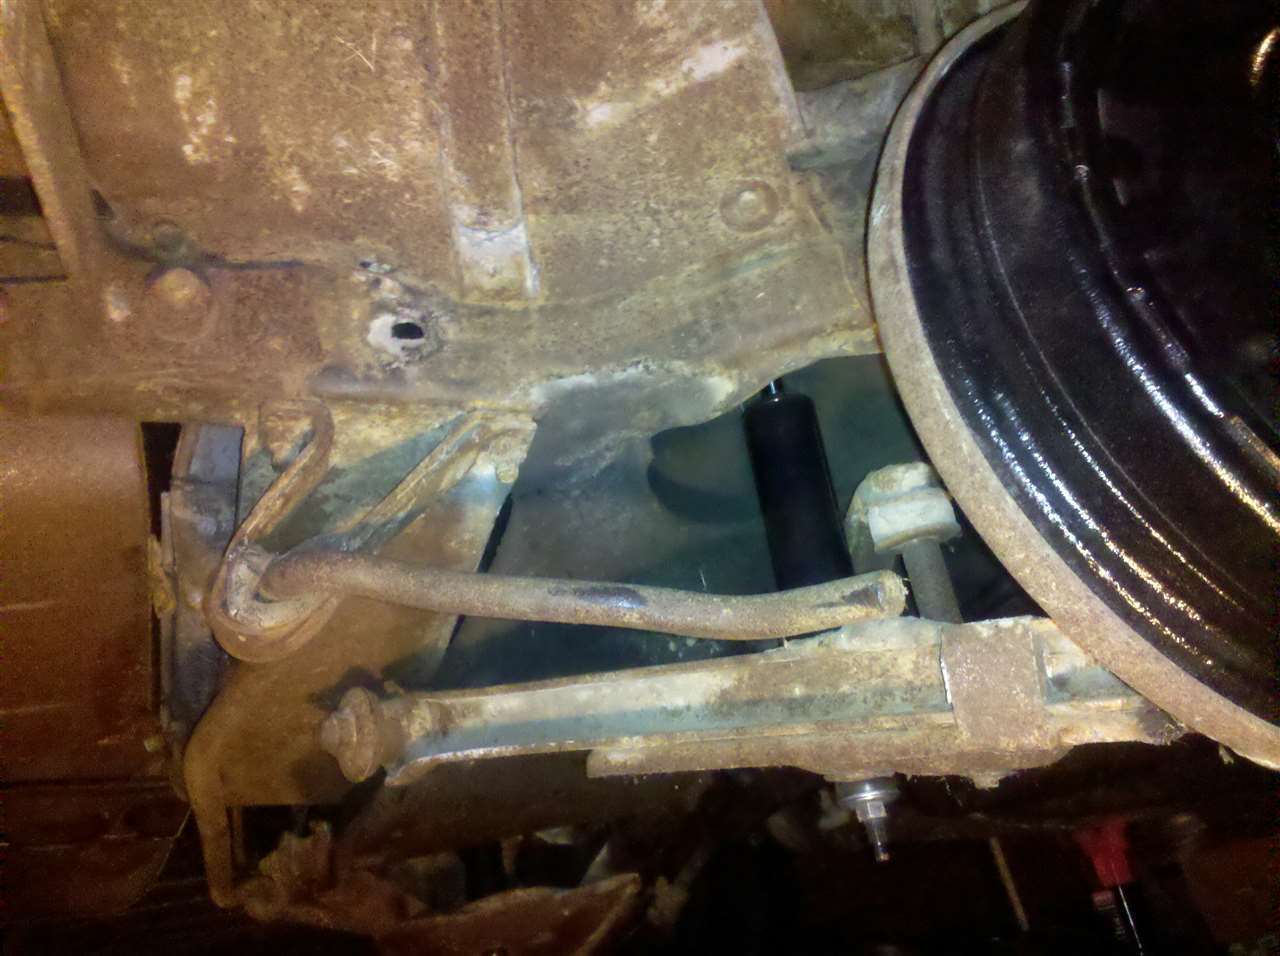 (86.73 KB) (86.73 KB)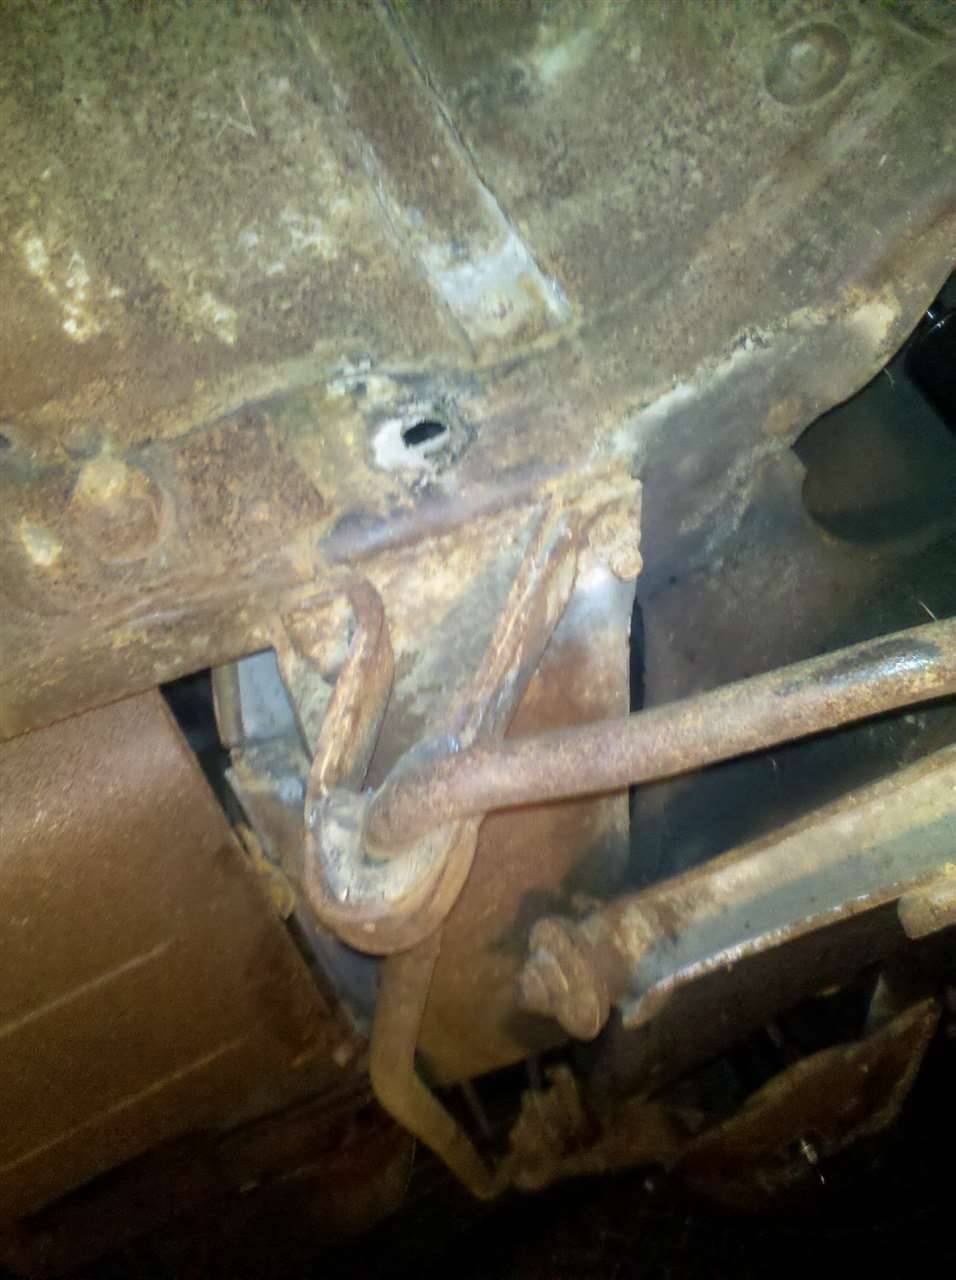 (97.47 KB) (97.47 KB)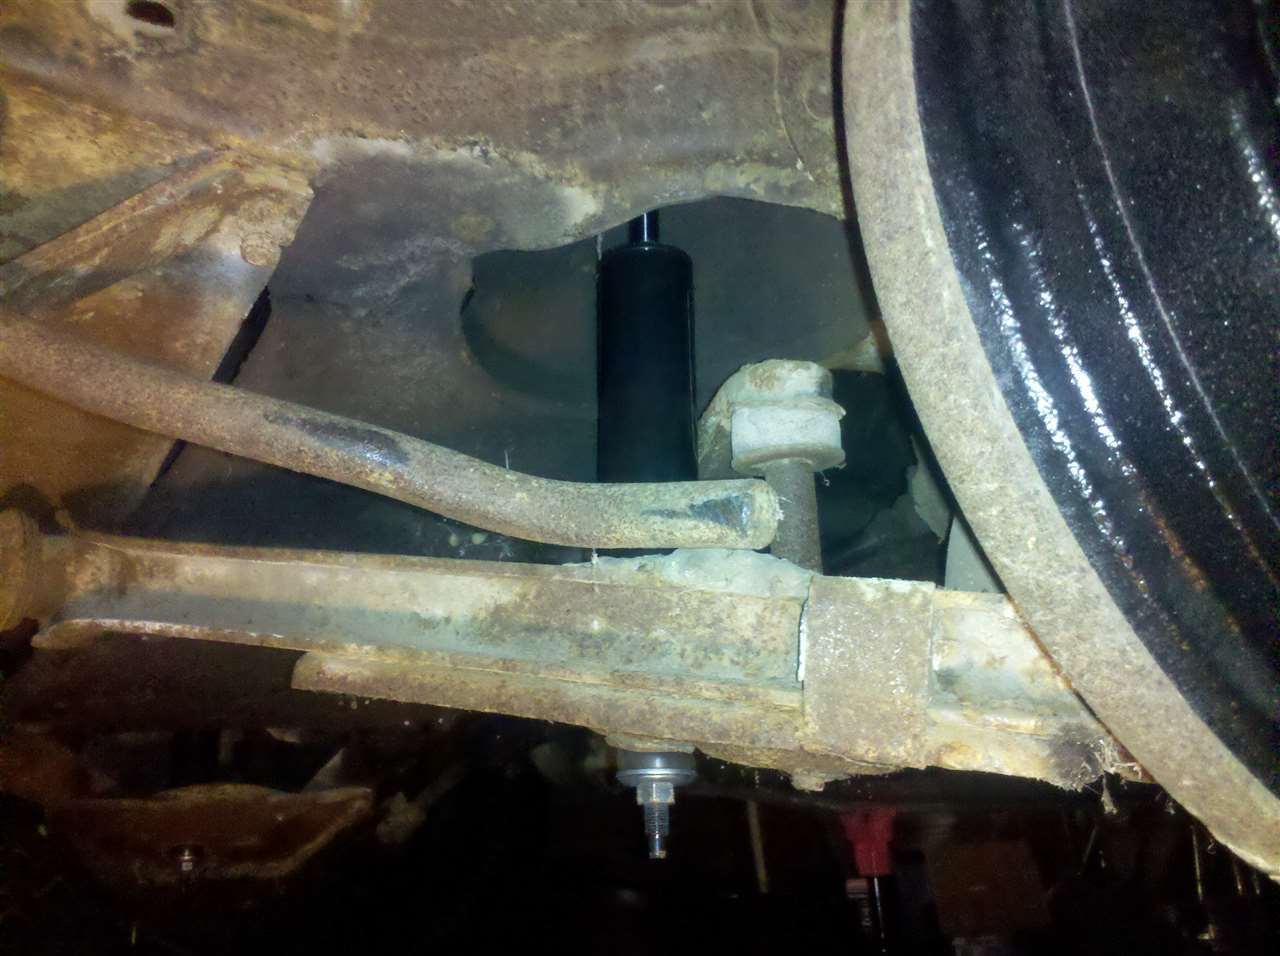
Posted on: 2012/3/3 23:32
|
|||
|
PA Patrician (Tim Wile)
[size=x-small][color=000099][font=Georgia][url=https://packardinfo.c |
||||
|
||||
|
Re: Tim's '55 Patrician
|
||||
|---|---|---|---|---|
|
Forum Ambassador

|
A fairly common problem. Many times caused by someone looking for a convenient place to hook a tow chain--the bracket or the bar is not it in case there were any questions from anyone. Commonly done though because it looks strong and is easy to reach.
Some have straightened the upper brackets and others have bought and modified a more modern universal type bracket. Big Kev has some pictures on his blog for one he used. Steele has the new upper and lower bushings if yours are in sad shape and there is another type herehttps://packardinfo.com/xoops/html/modules/newbb/viewtopic.php?post_id=89861#forumpost89861 As to the clip on lower arm, it can be a PIA to work with. It is a hard tempered spring steel and somewhat brittle. The retaining tangs on the top are prone to break off if not removed and installed with a bit of finesse. Suggest reading thru SC 25 #7https://www.packardinfo.com/xoops/html/downloads/SC/SC-VOL25NO7.pdf on the removal and replacement. Another picture of the tool is in SC 25 #5. Retainer can be serviced without the tool but much easier and less chance of damage to work with one. Fairly easy to make with a regular C clamp and some scrap steel or wood. Just grind the jaw a bit to curve it so it won't slide off the retainer curve and use a thickness of shim material to keep the tangs forward in the slots.
Posted on: 2012/3/3 23:51
|
|||
|
Howard
|
||||
|
||||
|
Re: Tim's '55 Patrician
|
||||
|---|---|---|---|---|
|
Home away from home
|
Hey, Tim.
I think one way to fix that would be to heat it cherry red before whacking with a sledge hammer. The sway bar should be removed first, as you don't want to temper the spring steel, and it looks like you should replace the rubber bushing anyway. I'd use an oxy/acetylene torch set on fricassee. Be careful and watch out for fuel lines, brake lines and wiring! Buon lavoro! Joey Earl
Posted on: 2012/3/4 7:54
|
|||
|
Joey
(?=#=?) "If chrome got me home, I'd for sure still be stuck somewhere." [url=http://pac |
||||
|
||||
|
Re: Tim's '55 Patrician
|
||||
|---|---|---|---|---|
|
Home away from home

|
As crude as it sounds, I recommend doing the first straightening of the bracket on the car as it is conveniently and rigidly fastened down. Have done this many times. You will need quite a good sized sledge or wood splitter to whack it back to near normal position. As the fellow who taught me said: "if you want to shape metal, use a small hammer, if you want to move metal, use a large hammer". I don't heat them as the bracket is mild steel, bends back fairly easily, and I don't need the fire liability.
If desired, you can then remove it and make other small improvements. You will almost certainly need new outer rubbers. An important aspect of installing those spring clips is to press the stabilizer and new rubber into the arm as far as possible so the clip does not have to do it while being installed. Use an extra clamp or large vise-grip to clamp the stabilizer bar to the suspension arm right next to where you are working.
Posted on: 2012/3/4 8:07
|
|||
|
||||
|
Re: Tim's '55 Patrician
|
||||
|---|---|---|---|---|
|
Home away from home
|
As always, I am indebted to the members of this forum for their advice and assistance. I looked at the rubber left in the A-arm and it actually looks rather good, surprisingly enough. The bushing in the bracket is obviously toast. I'll keep the group advised on my progress.
Posted on: 2012/3/4 13:20
|
|||
|
PA Patrician (Tim Wile)
[size=x-small][color=000099][font=Georgia][url=https://packardinfo.c |
||||
|
||||
|
Re: Tim's '55 Patrician
|
||||
|---|---|---|---|---|
|
Webmaster

|
This is what the brackets looked like on my car. They were just nearly bent, but broken. So I went with a more "solid" solution.
Attach file: (114.73 KB)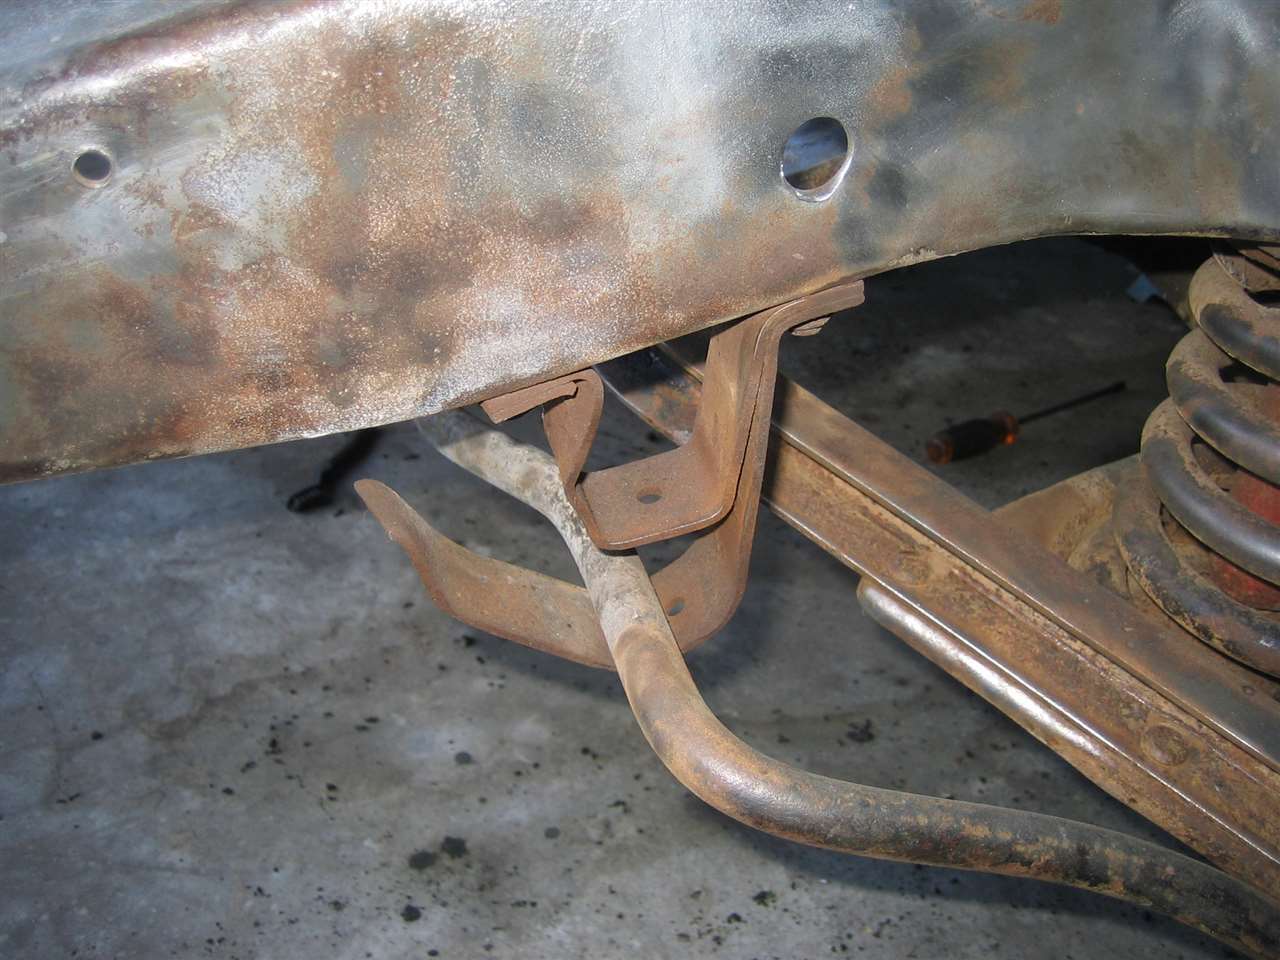 (21.66 KB) (21.66 KB)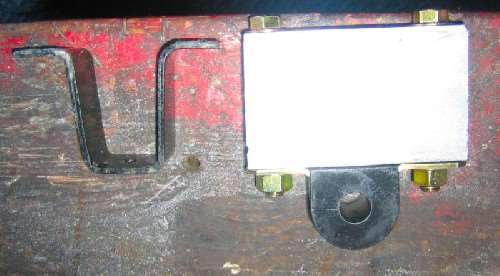 (123.50 KB) (123.50 KB)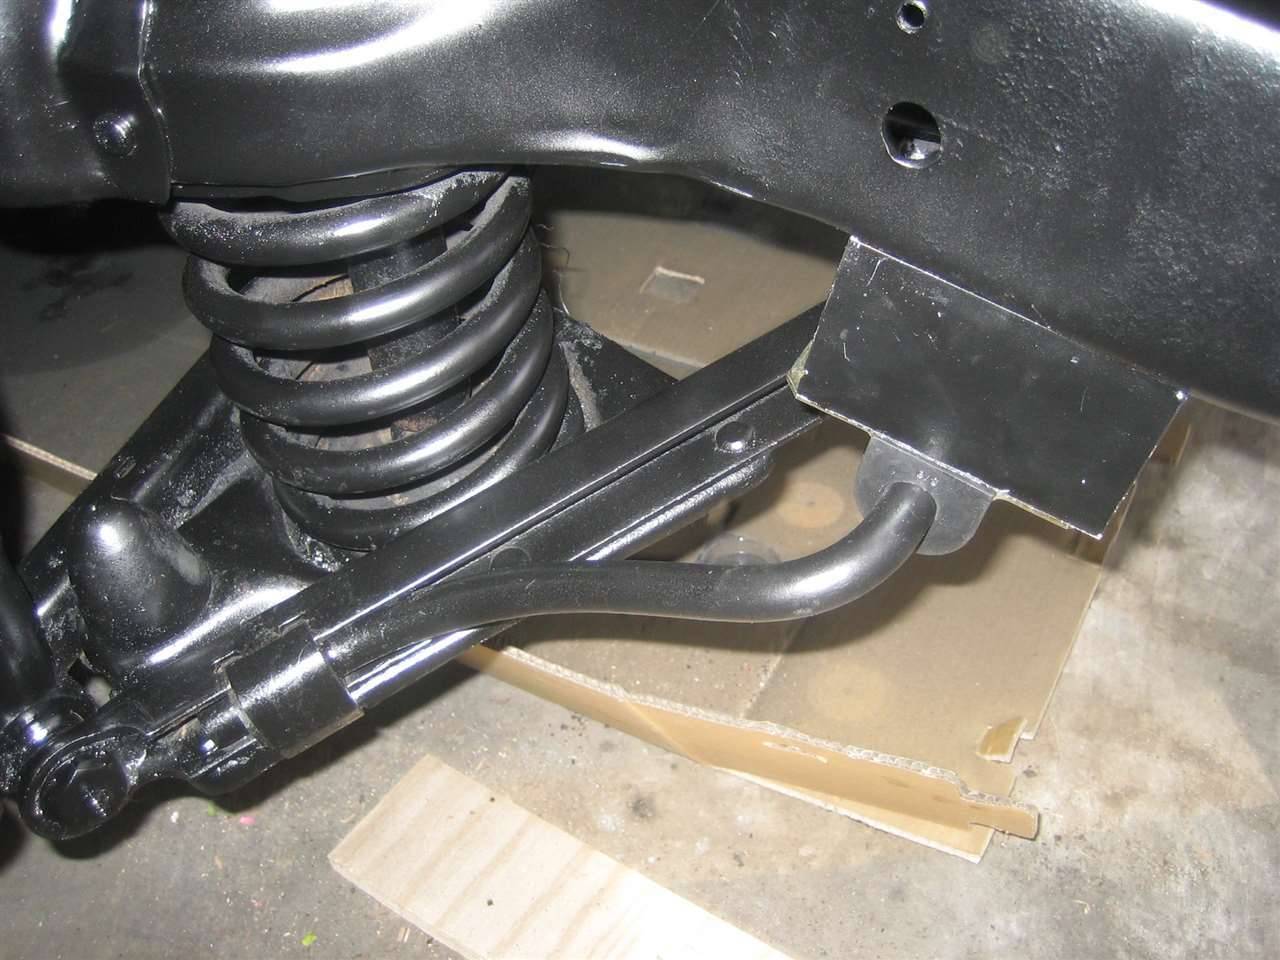
Posted on: 2012/3/4 23:01
|
|||
|
-BigKev
1954 Packard Clipper Deluxe Touring Sedan -> Registry | Project Blog 1937 Packard 115-C Convertible Coupe -> Registry | Project Blog |
||||
|
||||
|
Re: Tim's '55 Patrician
|
||||
|---|---|---|---|---|
|
Home away from home
|
Once again, I am impressed.

Posted on: 2012/3/5 16:28
|
|||
|
PA Patrician (Tim Wile)
[size=x-small][color=000099][font=Georgia][url=https://packardinfo.c |
||||
|
||||
|
Re: Tim's '55 Patrician
|
||||
|---|---|---|---|---|
|
Home away from home

|
That's some awesome work BigKev did on his Clipper!
Here are a couple of pics from the same issue with my 400. We decided to separate the welds, drill and then reassemble; thus compressing the bushing & sway bar into the support. IIRC correctly, is was a day filled with colorful language. Keep up the good fight! Attach file: (56.60 KB) (195.70 KB) (195.70 KB)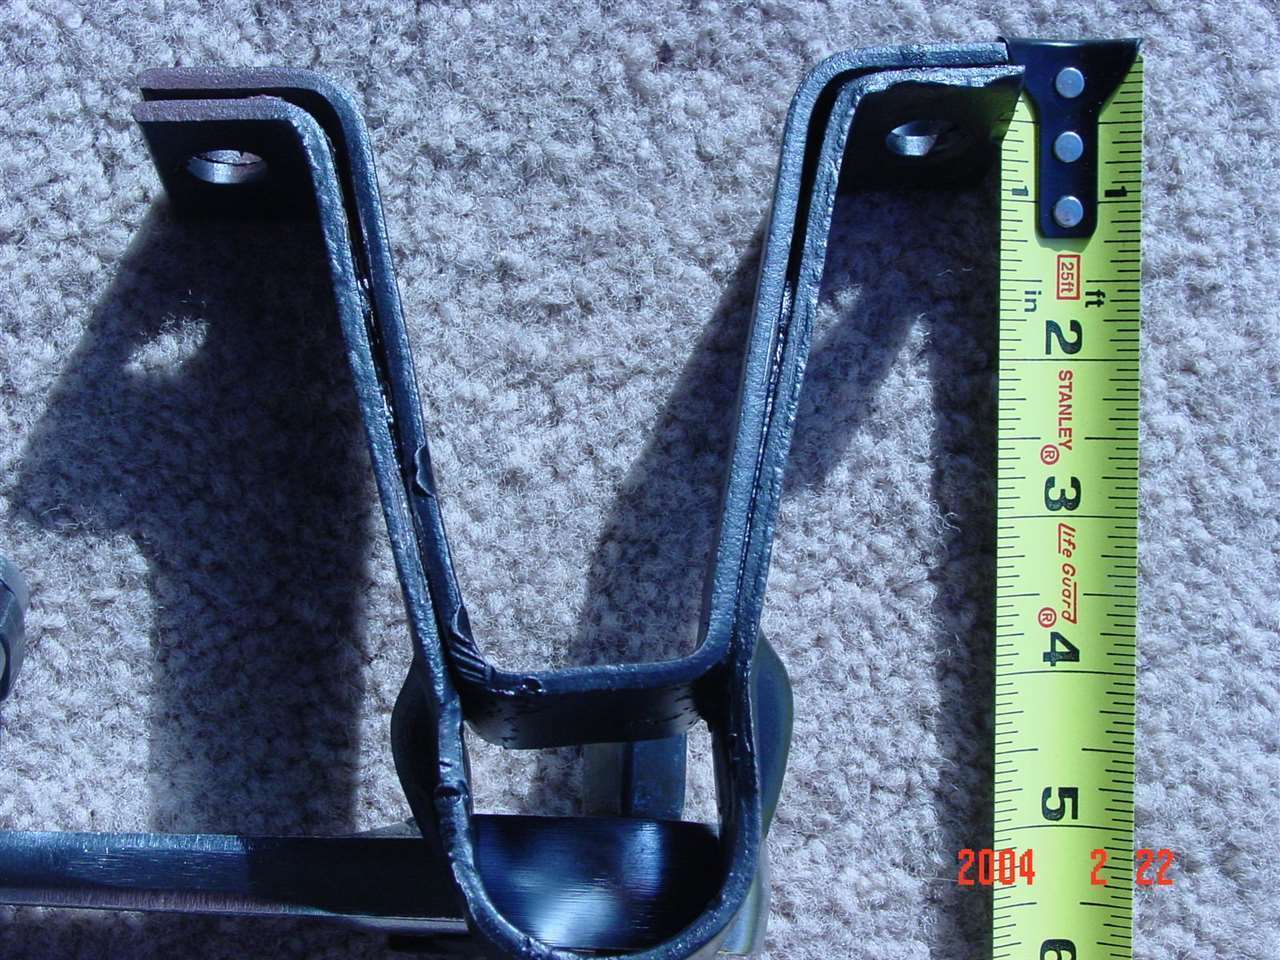 (100.15 KB) (100.15 KB)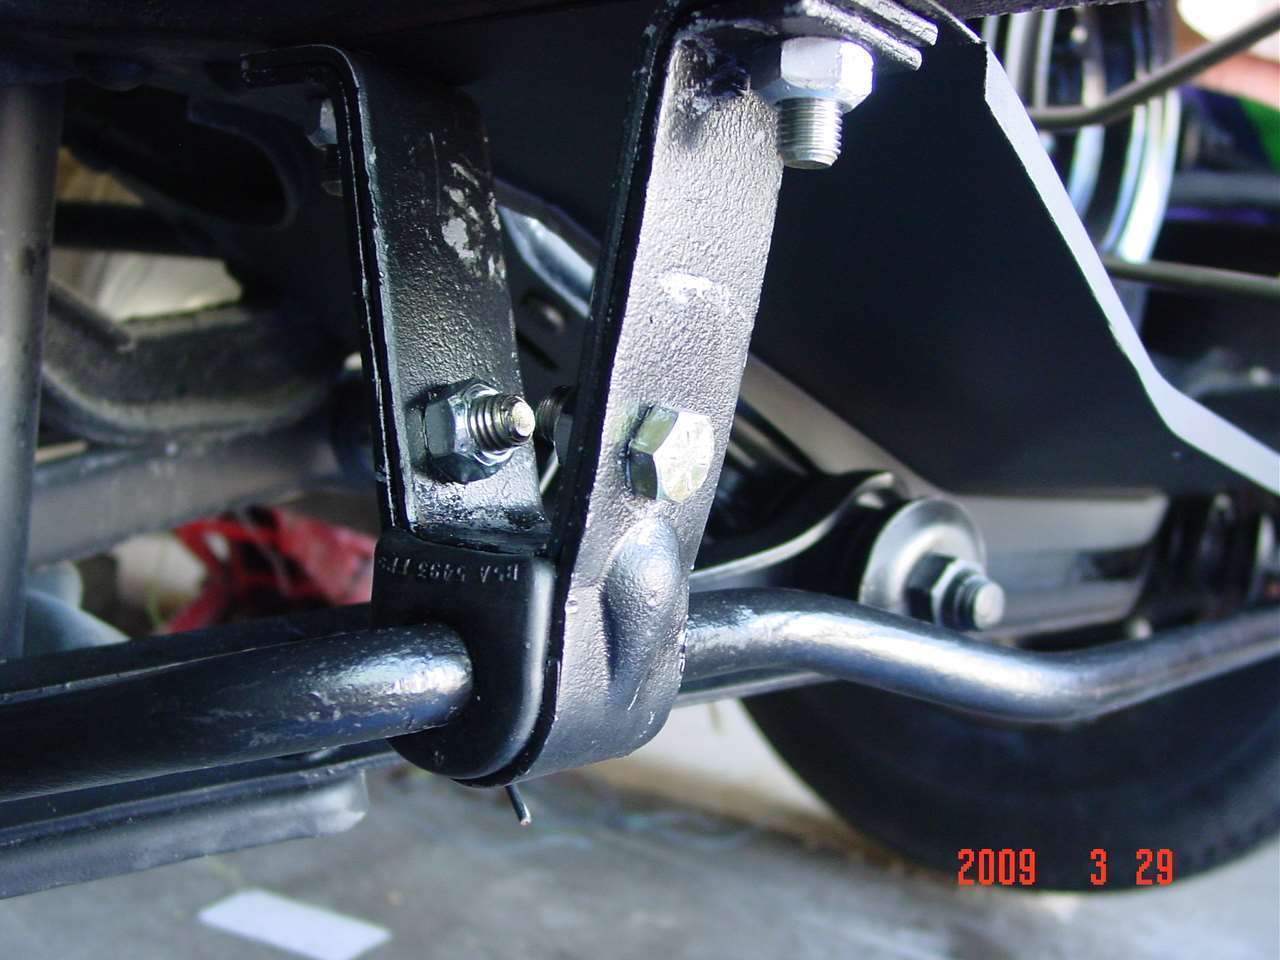 (93.57 KB) (93.57 KB)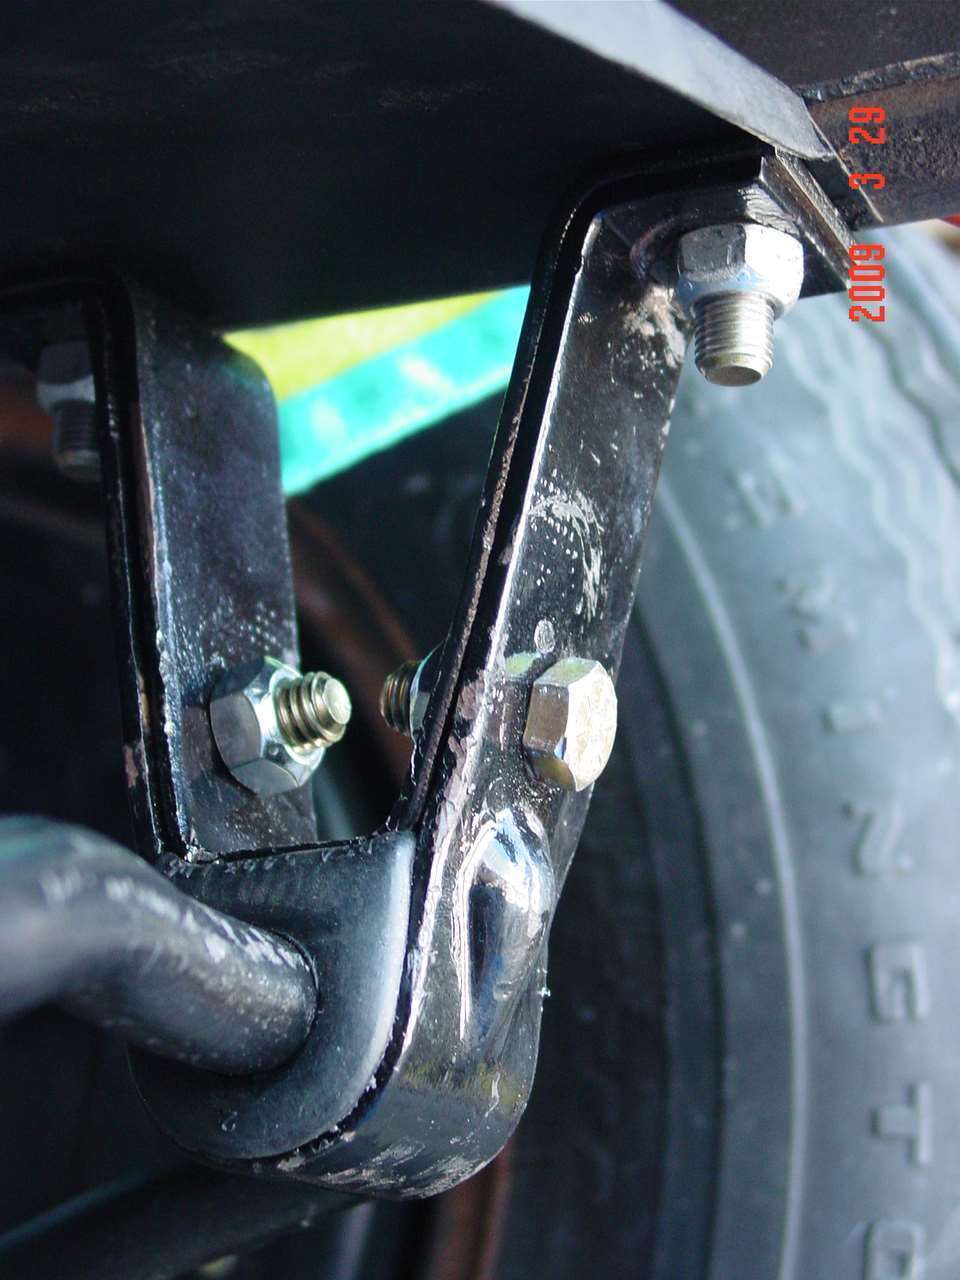
Posted on: 2012/4/1 18:27
|
|||
|
||||


