|
Re: Wade's Workshop
|
||||
|---|---|---|---|---|
|
Forum Ambassador

|
Thursday 24th May 2012
Not a particularly exciting day. More parts cleaning then painting with POR-15. And a trip over to Lee Bros for another lot of nuts and bolts. And John, Wade will be making an oil pump gasket tomorrow. Apparently the thin gasket usually comes only with the rebuild kit, which isn't required, so MBW will swing into action seeing I can't be there tomorrow. Attach file:  (44.84 KB) (44.84 KB)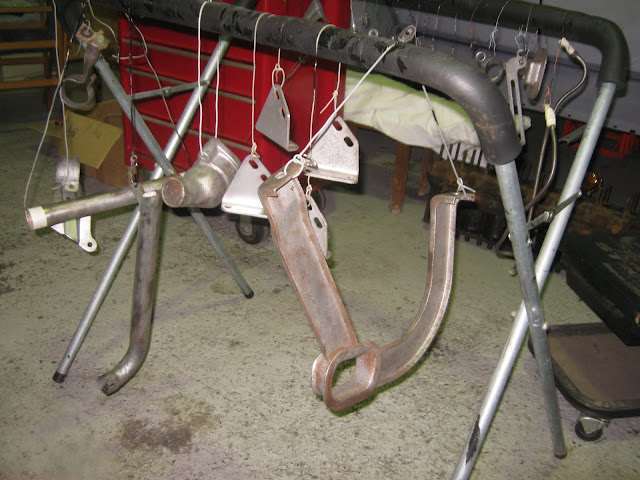 (48.88 KB) (48.88 KB)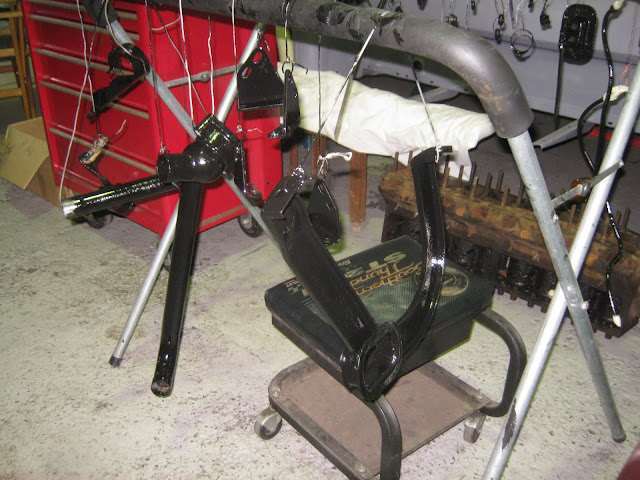 (34.15 KB) (34.15 KB) (29.24 KB) (29.24 KB) (35.14 KB) (35.14 KB)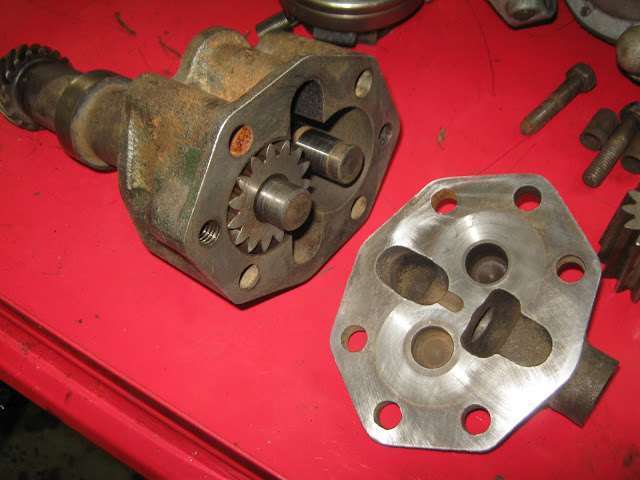
Posted on: 2012/5/24 1:23
|
|||
|
Mal
/o[]o\ ====  Bowral, Southern Highlands of NSW, Australia "Out of chaos comes order" - Nietzsche. 1938 Eight Touring Sedan - SOLD 1941 One-Twenty Club Coupe - SOLD 1948 Super Eight Limo, chassis RHD - SOLD 1950 Eight Touring Sedan - SOLD What's this?  Put your Packard in the Packard Vehicle Registry! Here's how! Any questions - PM or email me at ozstatman@gmail.com |
||||
|
||||
|
Re: Wade's Workshop
|
||||
|---|---|---|---|---|
|
Forum Ambassador
|
Quote:
JW wrote:Mal, You will most likely need to prime the oil pump before starting the engine. I recommend filling the pump gear chamber with a light grease before installing the MBM gasket and cover...Maybe Wade has already thought about this, bet he has... You win your bet, Wade has already thought of this! But it'll be a MBW gasket and not a MBM. Then, taking a step back in time, yesterday you said this: Quote: ...Interesting that you had to use a different clutch release lever to get the new clutch installed when the original one obviously fit before. There is a trick to installing the clutch, and I believe it is described in the service manual. I hope the lighter release lever works on the heavy 11" 356 clutch... Attach file: (22.24 KB)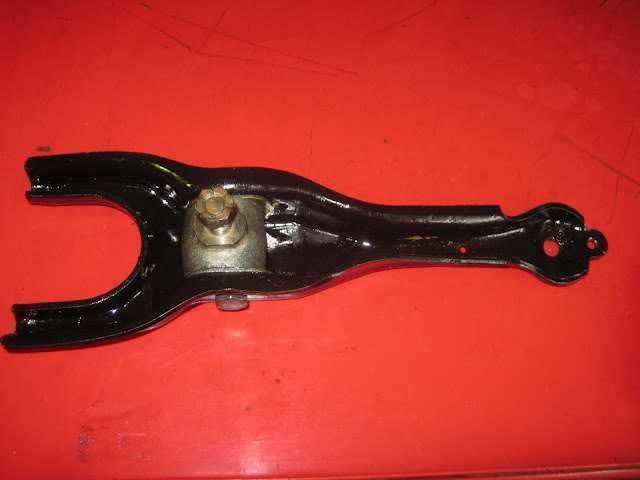 (29.49 KB) (29.49 KB)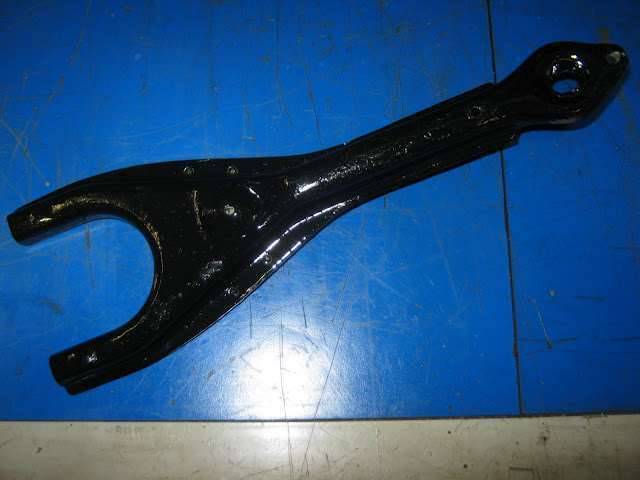
Posted on: 2012/5/24 14:40
|
|||
|
Mal
/o[]o\ ==== Bowral, Southern Highlands of NSW, Australia "Out of chaos comes order" - Nietzsche. 1938 Eight Touring Sedan - SOLD 1941 One-Twenty Club Coupe - SOLD 1948 Super Eight Limo, chassis RHD - SOLD 1950 Eight Touring Sedan - SOLD What's this? Put your Packard in the Packard Vehicle Registry! Here's how! Any questions - PM or email me at ozstatman@gmail.com |
||||
|
||||
|
Re: Wade's Workshop
|
||||
|---|---|---|---|---|
|
Just can't stay away

|
Do you apply POR with a brush or spray?
Posted on: 2012/5/24 21:04
|
|||
|
1939 - 120 ,4 dr / overdrive
|
||||
|
||||
|
Re: Wade's Workshop
|
||||
|---|---|---|---|---|
|
Forum Ambassador
|
Friday 25th May 2012
Didn't expect to get to the workshop today because of donating blood plasma this morning, but the best laid schemes o' mice an' men gang aft agley(see seventh verse!). Was I surprised when I arrived, there were almost enough PACA members for a meeting! Besides Noel, who was delivering another round of parts for the 356, also there were Russ and John, Treasurer and President respectively along with Wade and myself(Secretary)! Wade had disassembled the windchimes and installed some of the parts on the 356. Wade had also fielded a call from Richard, Emily's Dad, and come Monday laden with parts AND tools Emily will be brought back to life. Noel left carrying the 356's carb and rebuild kit and will drop that into Tim at Carburettor Service Co for the professional touch. Quote: Saffron wrote:Do you apply POR with a brush or spray? My answer is, with a brush. Goes on easily and dries to a great finish, dependent of course on preparation and the quality of the surface its being applied to. A word of caution, don't get it on your skin. Gloves and other protective clothing are highly recommended because, once on, it won't come off! Attach file: (32.96 KB)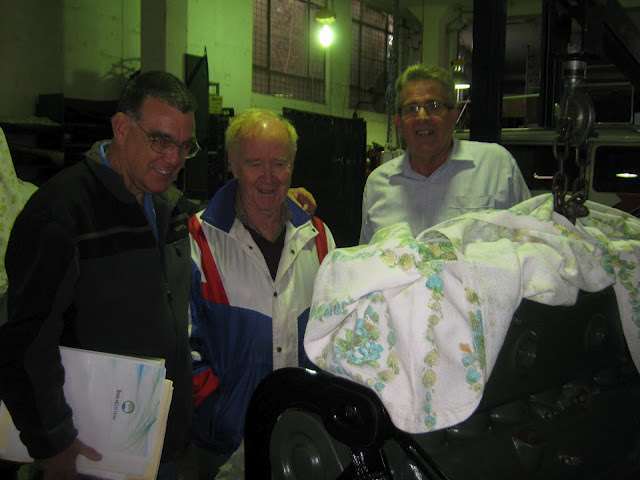 (25.84 KB) (25.84 KB) (38.42 KB) (38.42 KB)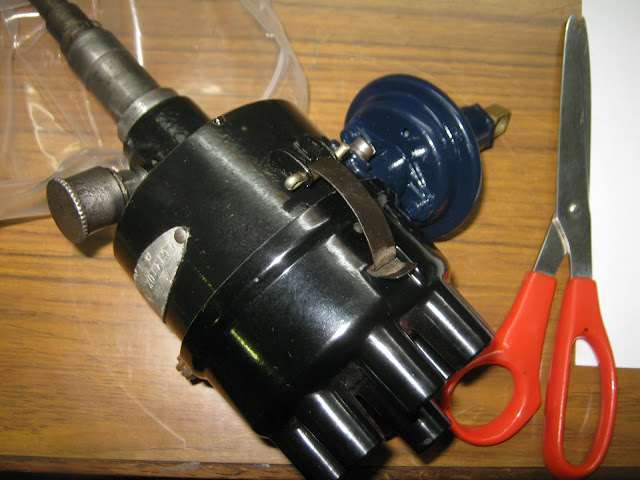 (31.49 KB) (31.49 KB)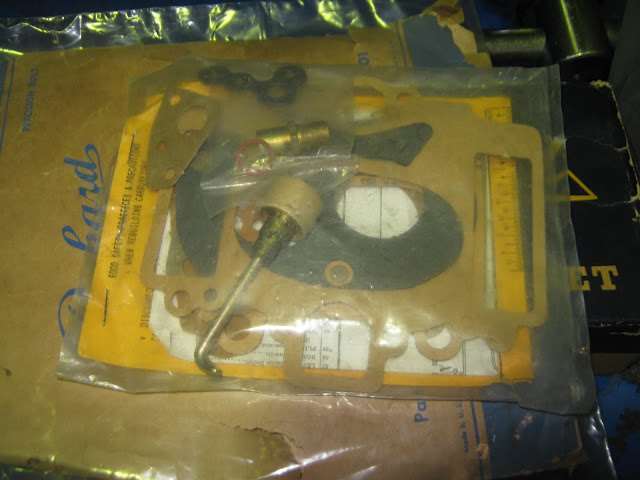 (46.86 KB) (46.86 KB)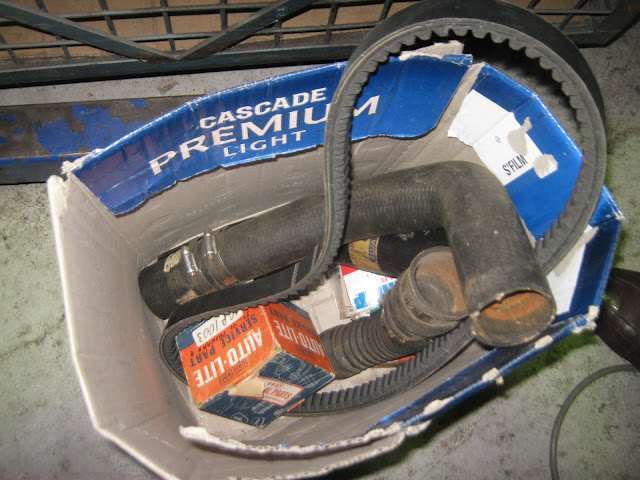 (45.34 KB) (45.34 KB) (42.25 KB) (42.25 KB)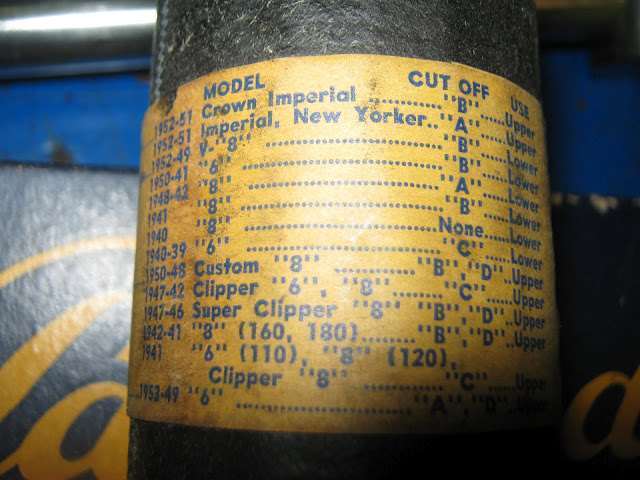 (40.48 KB) (40.48 KB)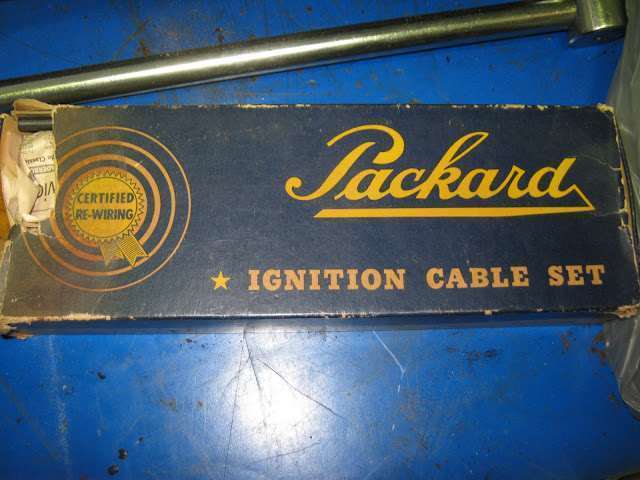 (31.63 KB) (31.63 KB)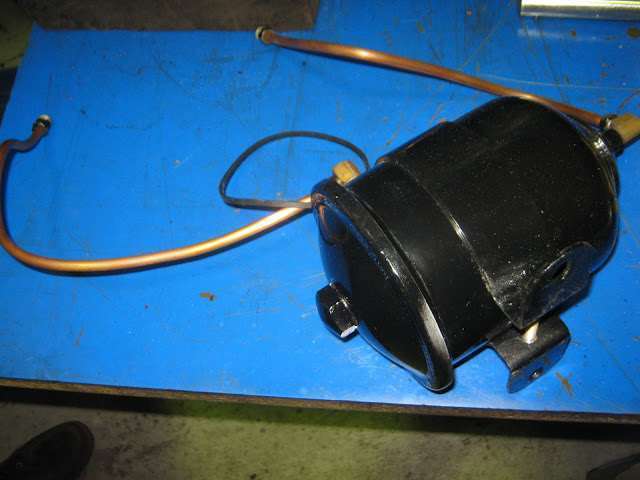
Posted on: 2012/5/24 22:56
|
|||
|
Mal
/o[]o\ ==== Bowral, Southern Highlands of NSW, Australia "Out of chaos comes order" - Nietzsche. 1938 Eight Touring Sedan - SOLD 1941 One-Twenty Club Coupe - SOLD 1948 Super Eight Limo, chassis RHD - SOLD 1950 Eight Touring Sedan - SOLD What's this? Put your Packard in the Packard Vehicle Registry! Here's how! Any questions - PM or email me at ozstatman@gmail.com |
||||
|
||||
|
Re: Wade's Workshop
|
||||
|---|---|---|---|---|
|
Home away from home

|
Quote:
Clutch fork #1 with the needle bearing pivot is the right one for all 356 engines. There is a difference in the lever between the prewar conventional body style and the 1942-49 Clipper based body but I believe the difference is in the part of the lever that is outside of the bell housing. The 1946-50 service manual mentions blocking the 3 release levers in the pressure plate with 3/8" nuts to hold the plate in the released position when removing the clutch but says nothing about doing the same when re-installing. It would seem to make sense to do this when putting the clutch assembly back in as well The release lever has to be installed in the bell housing before putting the clutch and pressure plate back in as there is not enough room to get the lever past the pressure plate housing with the clutch in place.
Posted on: 2012/5/25 0:52
|
|||
|
||||
|
Re: Wade's Workshop
|
||||
|---|---|---|---|---|
|
Forum Ambassador
|
Quote:
 for those insights and references, very much appreciated. The good guys of PackardInfo come through again! Better to get things right now than have a problem down the road. for those insights and references, very much appreciated. The good guys of PackardInfo come through again! Better to get things right now than have a problem down the road.Wade, More work!
Posted on: 2012/5/25 1:00
|
|||
|
Mal
/o[]o\ ==== Bowral, Southern Highlands of NSW, Australia "Out of chaos comes order" - Nietzsche. 1938 Eight Touring Sedan - SOLD 1941 One-Twenty Club Coupe - SOLD 1948 Super Eight Limo, chassis RHD - SOLD 1950 Eight Touring Sedan - SOLD What's this? Put your Packard in the Packard Vehicle Registry! Here's how! Any questions - PM or email me at ozstatman@gmail.com |
||||
|
||||
|
Re: Wade's Workshop
|
||||
|---|---|---|---|---|
|
Home away from home

|
Mal,
Brian beat me the punch. His description is what I recall clipper47 saying is what he had to do to get his clutch installed. (o[]o)
Posted on: 2012/5/25 14:22
|
|||
|
We move toward
And make happen What occupies our mind... (W. Scherer) |
||||
|
||||
|
Re: Wade's Workshop
|
||||
|---|---|---|---|---|
|
Forum Ambassador
|
Monday 28th May 2012
First up today was gathering up the parts, together with the tools, to get Emily back on the road. On arrival first task was to remove all plugs and conduct compression tests, results being #1 = 90, #2 = 95, #3 = 85, #4 = 70, #5 = 100, #6 = 105. Reasonable, except for #4, but not altogether bad for a well used engine and taking "dry" readings. But good enough for the engine to run. Next was getting TDC, done by using a screwdriver on top of #6 exhaust valve, some rotations of the engine using a remote starter switch and there it was. Next was removing Juniors spare distributor, which had been left in situ from our previous attempt, and inserting Emily's rebuilt distributor now TDC was known. New plugs in. Changing over the plug leads to Emily's new distributor cap was the hardest part of it all. Some of the leads just wouldn't streeetch back to the plugs they came from after being inserted into the new cap! Solution was a shuffle of a couple of the leads, worked. Ignition on, a shot of starter fluid and.....nothing. Same again, still nothing. Then the penny dropped, hadn't switched the battery cut-off back on! Then same again, and signs of life, a few kicks and coughs. More kicks and coughs then manual adjustment of the distributor and Emily roared into life, success! With the distributor not tightened down more manual adjustment and the advance was set by Wade's feel and ear. Tightened down the distributor clamp, reconnected the vacuum advance, put the aircleaner back on(it had been removed for startup access) and tidied up the tools and equipment because it was time for a test drive. Out on the road Emily went well, no hesitation, has good acceleration and so well Wade then left the setup as is, didn't want to disturb a good thing. Back at the workshop turned again to the 356. More parts to be cleaned from those Noel brought over on Friday. Did two lots, some for POR 15 finish then some with Noel's Bill Hirsch Packard engine green finish. Included in the later were the front engine mount yoke and the thermostat housing which had been POR 15'd Black last week, rest easier now Noel. While I was doing those tasks Wade was doing some further sorting of parts. Also pressed off the throw out bearing from it's mounting collar because a new bearing is on order. Then Wade cleaned up the surface rust on the 356's spigot shaft and the clutch shaft bearing cover on which the throw out bearing rides, because these have been sitting around for a number of years. Now all nice and clean and shiny. And Noel, you know what I saw today, a '39 push button radio and speaker box. And where were these treasures? Why, in Richard's '39 120 Convertible Coupe, but you knew that didn't you? Attach file: (38.22 KB)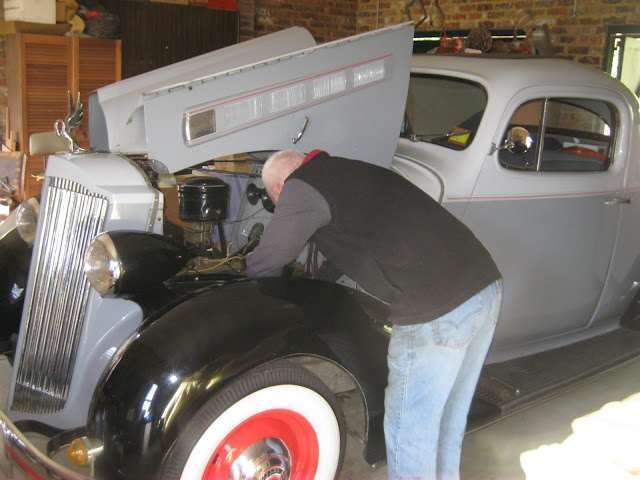 (33.01 KB) (33.01 KB)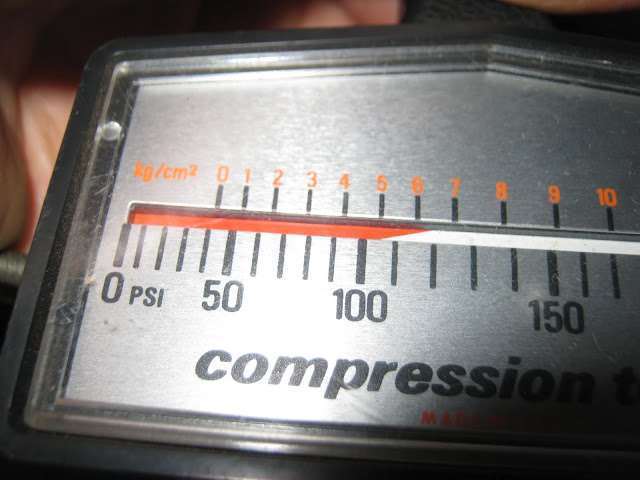 (21.50 KB) (21.50 KB)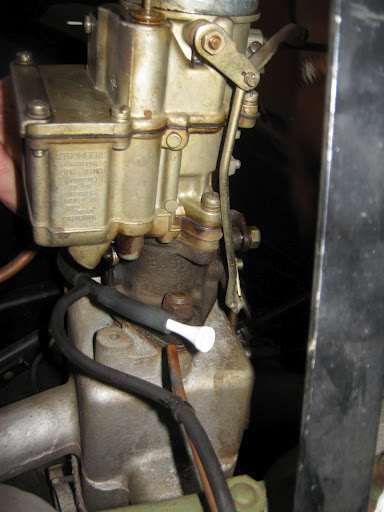 (23.64 KB) (23.64 KB)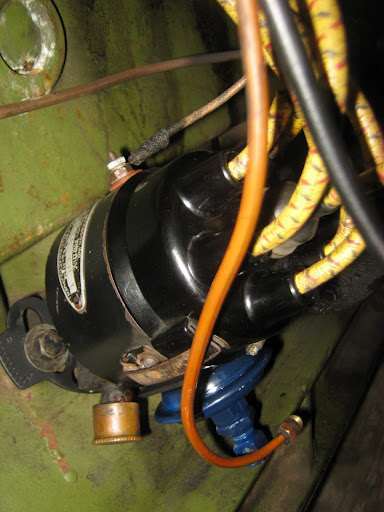 (59.59 KB) (59.59 KB)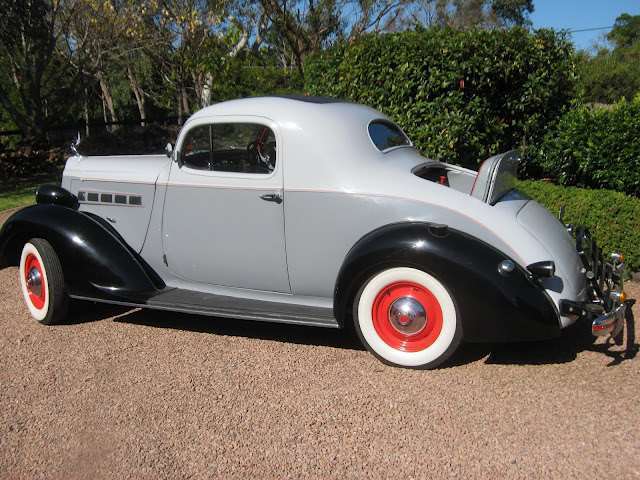 (23.48 KB) (23.48 KB) (37.82 KB) (37.82 KB) (58.10 KB) (58.10 KB) (41.02 KB) (41.02 KB)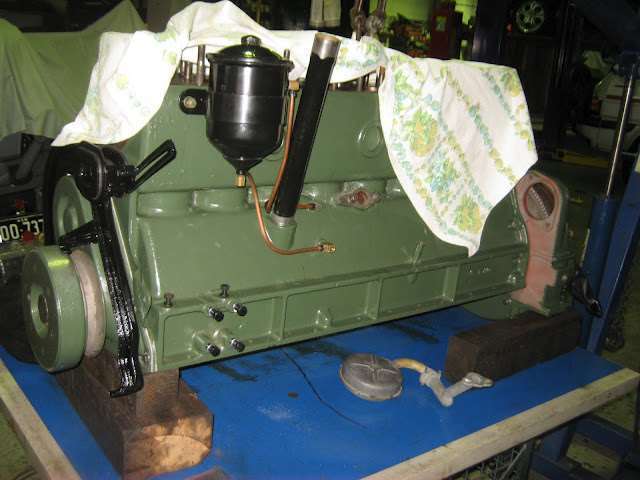 (35.07 KB) (35.07 KB) (33.46 KB) (33.46 KB)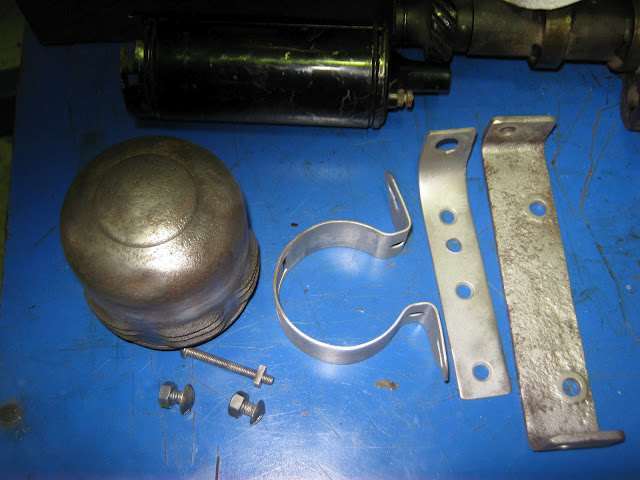 (30.11 KB) (30.11 KB)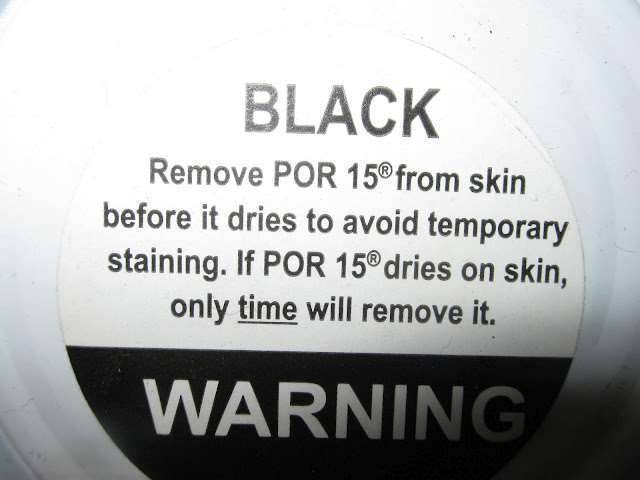 (37.36 KB) (37.36 KB)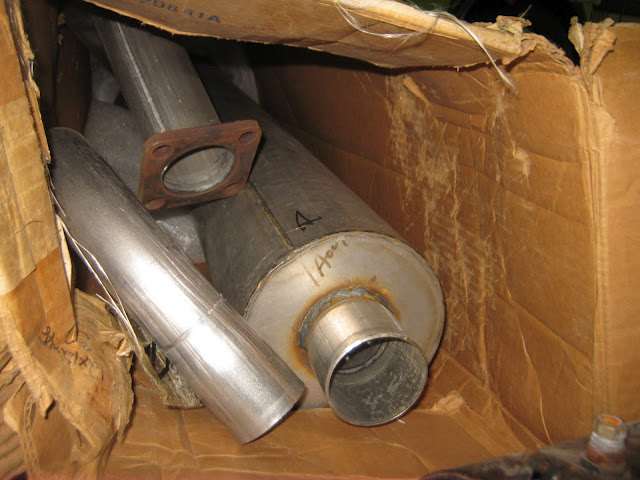 (46.80 KB) (46.80 KB)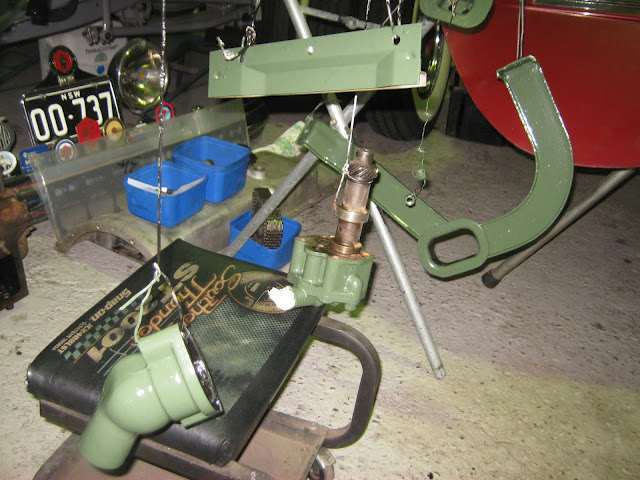 (37.89 KB) (37.89 KB)
Posted on: 2012/5/28 4:13
|
|||
|
Mal
/o[]o\ ==== Bowral, Southern Highlands of NSW, Australia "Out of chaos comes order" - Nietzsche. 1938 Eight Touring Sedan - SOLD 1941 One-Twenty Club Coupe - SOLD 1948 Super Eight Limo, chassis RHD - SOLD 1950 Eight Touring Sedan - SOLD What's this? Put your Packard in the Packard Vehicle Registry! Here's how! Any questions - PM or email me at ozstatman@gmail.com |
||||
|
||||
|
Re: Wade's Workshop
|
||||
|---|---|---|---|---|
|
Forum Ambassador
|
Tuesday 29th May 2012
First up today was painting the 356's intake/exhaust manifolds. A bit of clean up to start with, it had been blasted previously so only needed a touch up and blow and wipe overs. Just used grey exhaust manifold paint on both manifolds, seeing they are bolted together and don't want to break the seal. Quite an awkward piece, big AND heavy! Put it up on the bench with a piece of cardboard on the bench and a thick square block of wood supporting the manifolds. The beauty of this setup was that the manifolds pivoted on their centre and I could spin the manifolds around when painting. Started by holding the manifolds up with one hand to paint the underside. Did this end for end then dropped the manifolds back onto the wooden block. Did the topside, turning as required. Then it was inspection time, a bright light soon showed me that I'd missed plenty of spots! Fortunately was also able to see the underside because I could swing the manifolds out over the edge of the bench, and crouching down inspect and "touch up". Finished and pushed the painted manifolds to the back of the bench. At this stage they look streaky from the paint but once dry turn a uniform dull but pleasant grey like manifolds should. Next I was off to Lee Bros for more bolts and washers. Noel, that box of nuts and bolts you supplied has hardly been touched! Where are all the 356 and '41 Coupe nuts and bolts? At Lee Bros turned out the guy standing next to me knew DavidM who had spoken at their club meeting about 3 weeks previously about the Maxwell's trans Australia crossing. This guy has a Lotus Elan he's been restoring over the last 6 years with a completion date of "soon". The Lotus has had 13 previous owners of which he's been able to track down all but one. What next? Why more cleaning of parts of course. This time the generator and starter motor. Noel tells us they have been checked and found to be good so all we're doing is smartening them up. Of course my preferred cleaning option would be to stick them in the blasting cabinet, but Wade cautions me, nay forbids me, to take this approach. Apparently if I did this, irreparable damage could be suffered. Sorry, I was only trying to find an easy way to do it.  Instead, removed the bands from each, and the solenoid mechanism and a cover from the starter motor. At least some of these parts could benefit from modern technology in their cleaning. The bulk however was by hand using a wire brush and elbow grease and fortunately they cleaned up relatively easily. So tomorrow other commitments allowing, or possibly Thursday, I'll POR 15 them. Speaking of starter motors, it's is a little different to other Packard starter motors I've seen. Having a geared rather than a directly engaging drive to the ring gear. Instead, removed the bands from each, and the solenoid mechanism and a cover from the starter motor. At least some of these parts could benefit from modern technology in their cleaning. The bulk however was by hand using a wire brush and elbow grease and fortunately they cleaned up relatively easily. So tomorrow other commitments allowing, or possibly Thursday, I'll POR 15 them. Speaking of starter motors, it's is a little different to other Packard starter motors I've seen. Having a geared rather than a directly engaging drive to the ring gear.Attach file: (45.46 KB) (34.98 KB) (34.98 KB)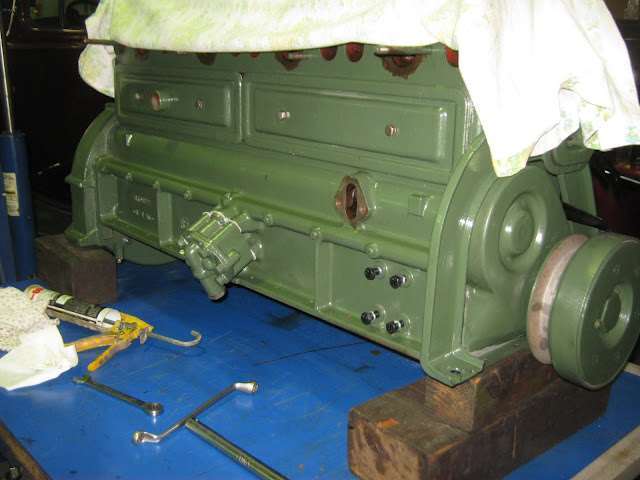 (29.95 KB) (29.95 KB)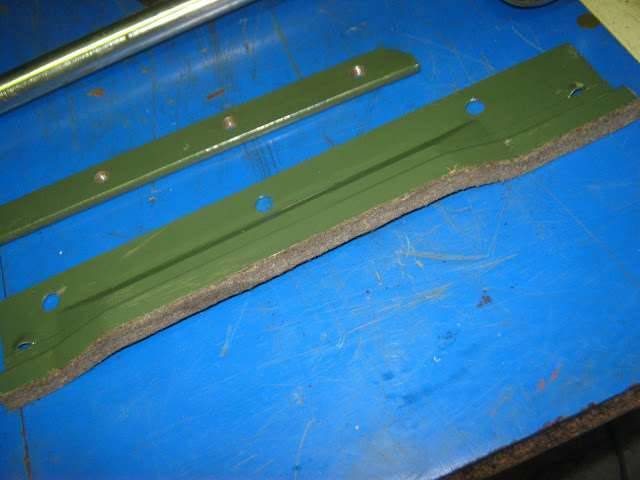 (30.39 KB) (30.39 KB)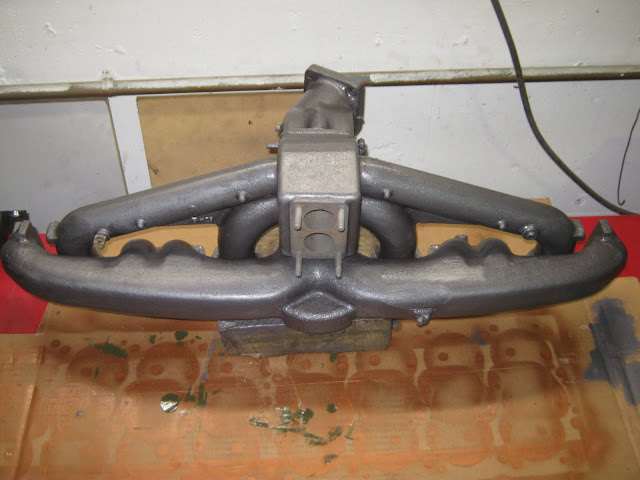 (37.12 KB) (37.12 KB) (41.93 KB) (41.93 KB) (32.03 KB) (32.03 KB) (39.71 KB) (39.71 KB)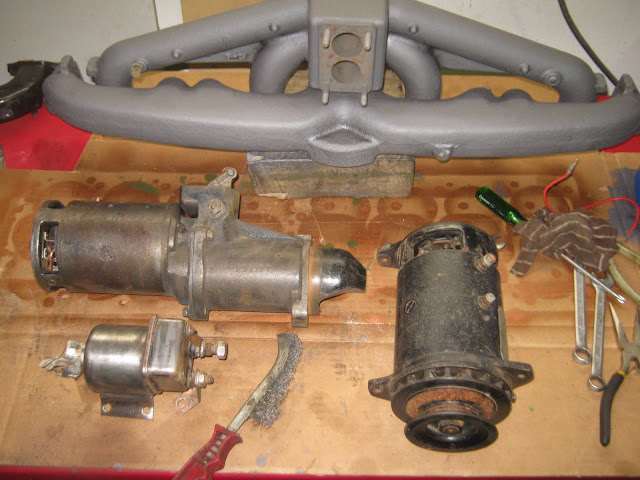 (38.49 KB) (38.49 KB)
Posted on: 2012/5/29 3:05
|
|||
|
Mal
/o[]o\ ==== Bowral, Southern Highlands of NSW, Australia "Out of chaos comes order" - Nietzsche. 1938 Eight Touring Sedan - SOLD 1941 One-Twenty Club Coupe - SOLD 1948 Super Eight Limo, chassis RHD - SOLD 1950 Eight Touring Sedan - SOLD What's this? Put your Packard in the Packard Vehicle Registry! Here's how! Any questions - PM or email me at ozstatman@gmail.com |
||||
|
||||
Register To PostTopic is Locked


