|
Re: Henry's 55 Constellation
|
||||
|---|---|---|---|---|
|
Forum Ambassador

|
will do.
there are 4 mounting points. 2 studs in the middle and 2 screws, one on each side. on the body itself there is a larger hole directly in the middle that allows for the light bulb and connector to pass through. first picture you can see the studs. second you can see how the screws go into the side. there is a special rivot that holds on tot he lens on each side and also acts as a spacer for the screw to clamp down with. here you can also see the lens off the housing. I will take a photo of the body panel when I get home. Attach file:  (107.67 KB) (107.67 KB)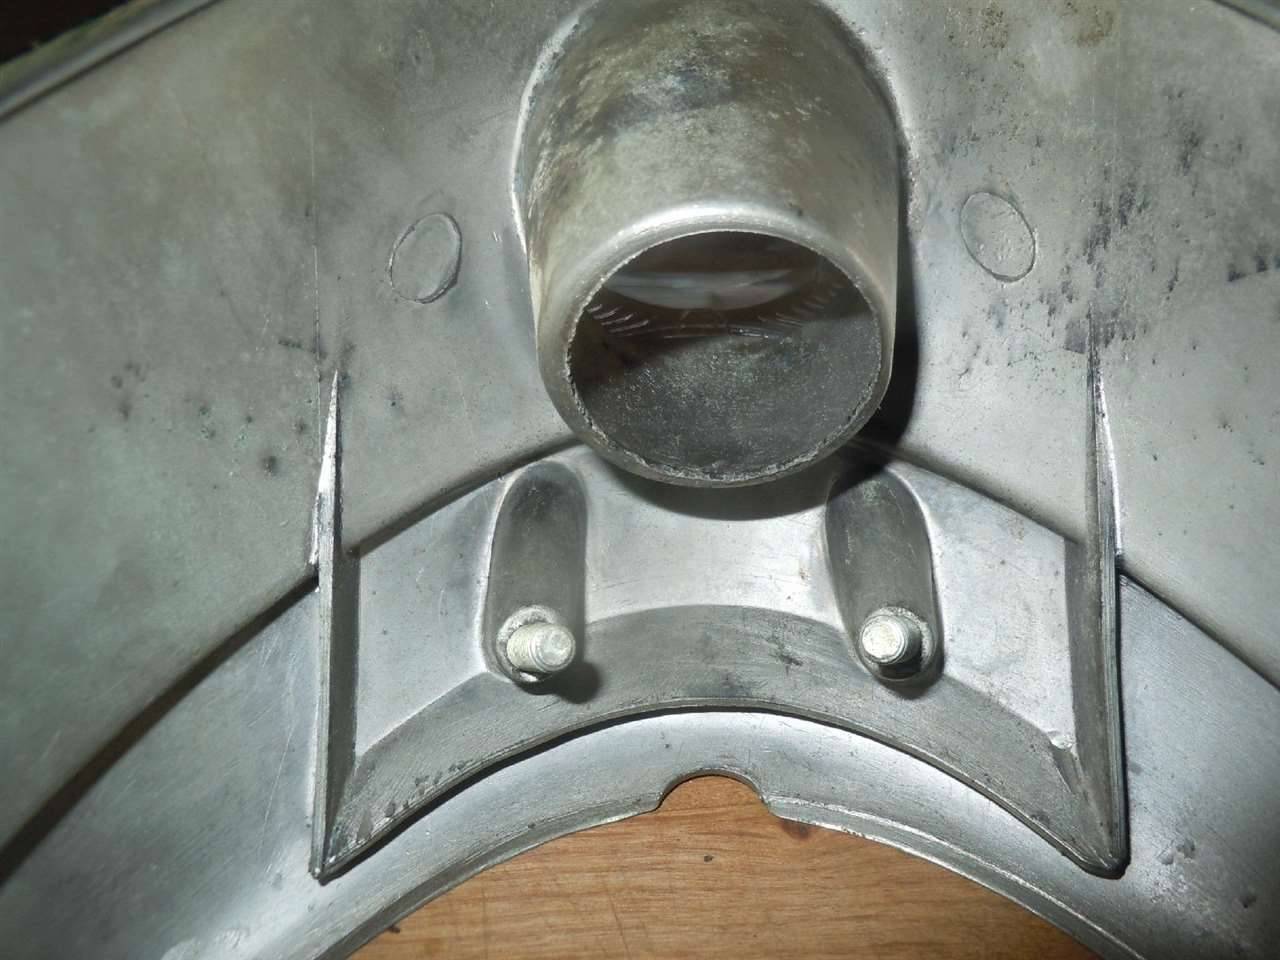 (70.61 KB) (70.61 KB)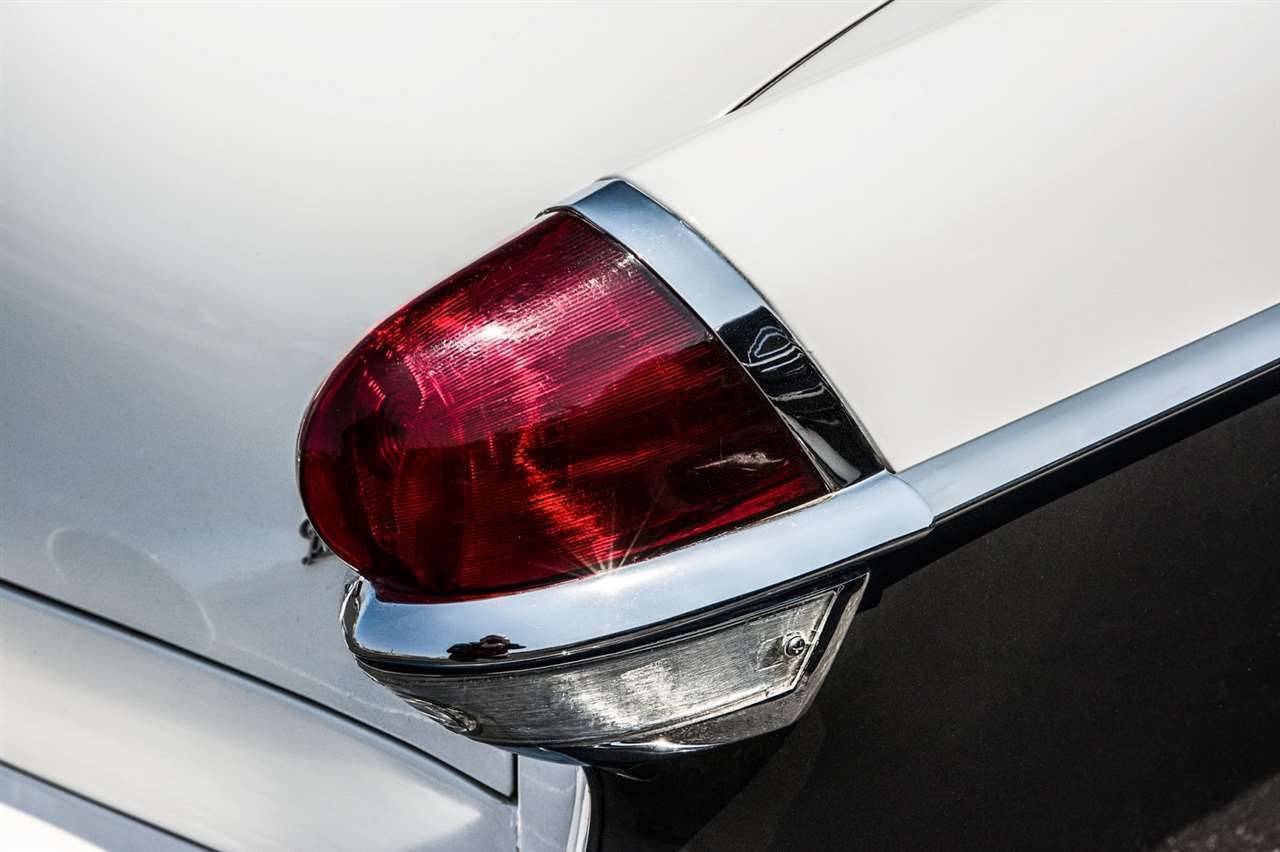 (31.83 KB) (31.83 KB)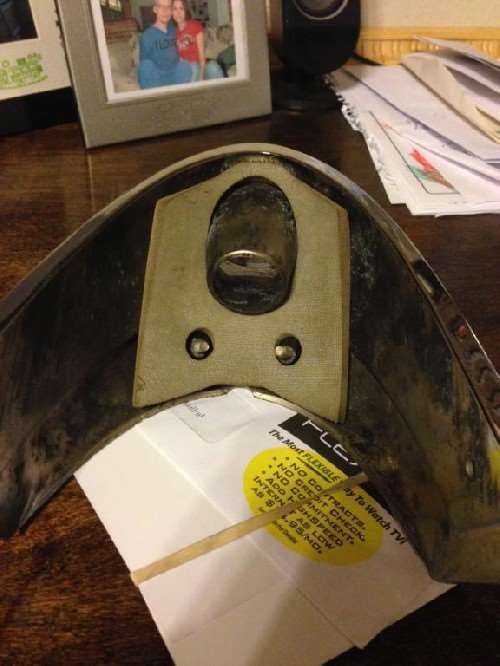 (21.11 KB) (21.11 KB)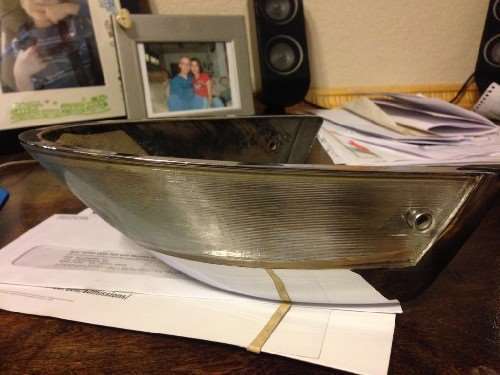 (21.16 KB) (21.16 KB)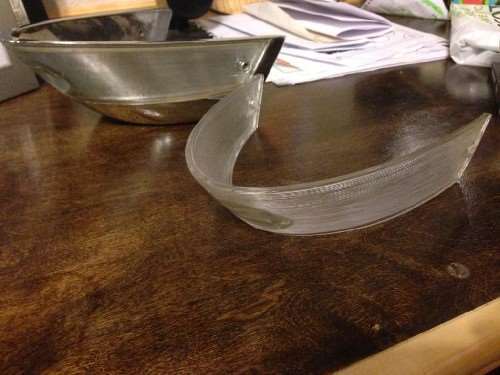
Posted on: 2014/11/7 15:22
|
|||
|
1937 Packard 138-CD Deluxe Touring Limousine
Maroon/Black 1090-1021 [url=https://packardinfo.com/xoops/html/modules/registry/View.php?ID=232]1955 Packard |
||||
|
||||
|
Re: Henry's 55 Constellation
|
||||
|---|---|---|---|---|
|
Forum Ambassador
|
the holes are already there. one big one in the center for the bulb and two small ones below it for the studs. the side ones were self tapping. it was definitely done by the factory, holes are too round.
couple hours and i'll have you a front pic of what the holes look like on my car.
Posted on: 2014/11/7 15:39
|
|||
|
1937 Packard 138-CD Deluxe Touring Limousine
Maroon/Black 1090-1021 [url=https://packardinfo.com/xoops/html/modules/registry/View.php?ID=232]1955 Packard |
||||
|
||||
|
Re: Henry's 55 Constellation
|
||||
|---|---|---|---|---|
|
Forum Ambassador
|
here ya go
Attach file: (50.97 KB)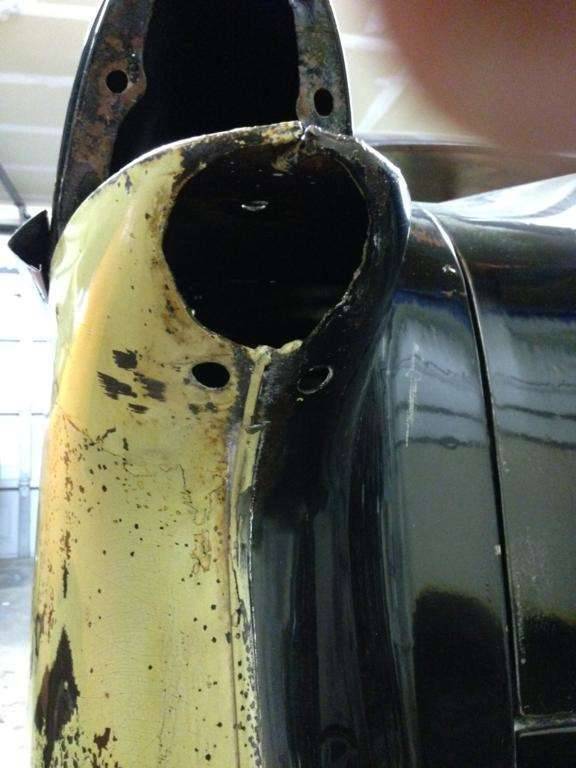 (71.03 KB) (71.03 KB)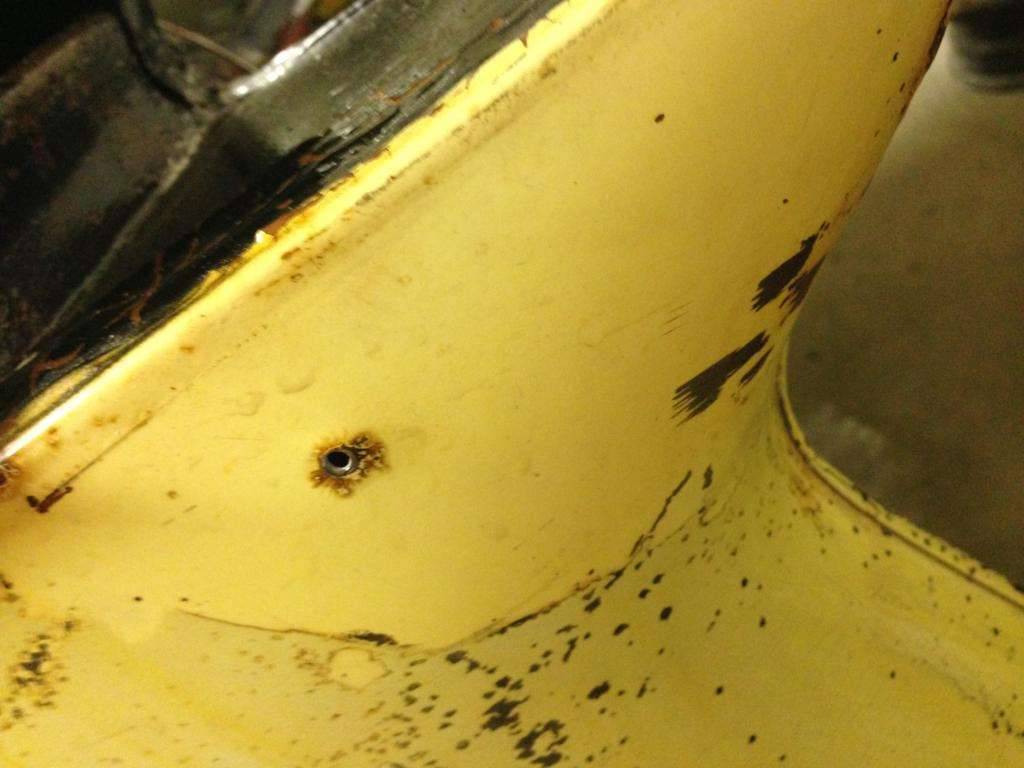
Posted on: 2014/11/7 17:04
|
|||
|
1937 Packard 138-CD Deluxe Touring Limousine
Maroon/Black 1090-1021 [url=https://packardinfo.com/xoops/html/modules/registry/View.php?ID=232]1955 Packard |
||||
|
||||
|
Re: Henry's 55 Constellation
|
||||
|---|---|---|---|---|
|
Forum Ambassador

|
Interesting. Doesn't look impossible to install an integrated light in the field. I've seen several Clippers with the earlier style back up lights that were individual round assys screwed under trunk lid or on fender below the tail lights. Was thinking there must be some reason a factory assy couldn't have been installed on those cars. Was actually thinking the light bezels might have replaced part of the panel instead of just going over it but that is not the case.
Posted on: 2014/11/7 17:24
|
|||
|
Howard
|
||||
|
||||
|
Re: Henry's 55 Constellation
|
||||
|---|---|---|---|---|
|
Home away from home

|
Hi
Thanks for the detail photos showing how the factory added the reverse lights for 1955. Confirms what I suspected, doing otherwise would have been more costly in terms of sheet metal tooling. This also confirms it's possible to add these units to any '54 Clipper if one likes that set-up better and isn't worried about authenticity judging. Looks as a if a hole template, two hole saws, routing the wiring and careful installation and one would have it. Bet some Packard dealers in those year did just that. Steve
Posted on: 2014/11/7 17:45
|
|||
|
||||
|
Re: Henry's 55 Constellation
|
||||
|---|---|---|---|---|
|
Forum Ambassador
|
passenger's side trim is on.
now moving towards mounting the radiator frame, I had the bushing from steele already moons ago. I had to figure out how to replace the spacers though. spacers could have been reused if I cleaned them up and painted them, but I found some bronze bushings at lowes that just happened to be the right size and I cut the tops off with a hack saw. perfect and they wont ever rust again. my problem is mounting the radiator to the cradle. I have seen what Kev and JW have done and have the general idea (although I did buy the wrong rubber washers and will need to go back), but the problem is.....are there supposed to be speed nuts mounted on the radiator cradle where the 1/4" bolt goes through?? I need some good pictures of how the bolts gets attached. I see the holes for the bolts, but I don't see that they are threaded or anything.....soooooo what am I missing here. also...JW/KEV can you guys tell me the size of the toilet bowl bushings?? I guess I didn't see those at lowes...only saw the smaller ones from like faucets and stuff. (ignore the rubber washers I used, but you can see how I'm confused as to how this all mounts up) also mounted a couple of 240v profusion heaters. One 7500w and one 5000w. On high I can get the garage up to 80 when its mid 30s outside. plus....no more stink from my diesel heater. Attach file: (66.76 KB)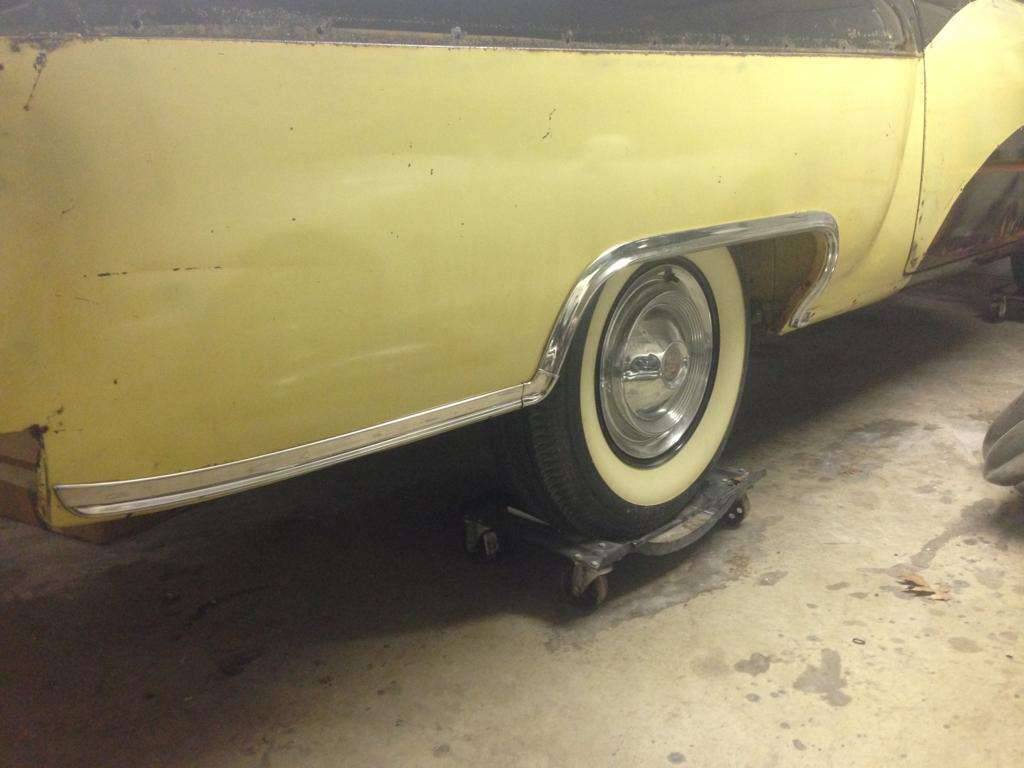 (75.00 KB) (75.00 KB)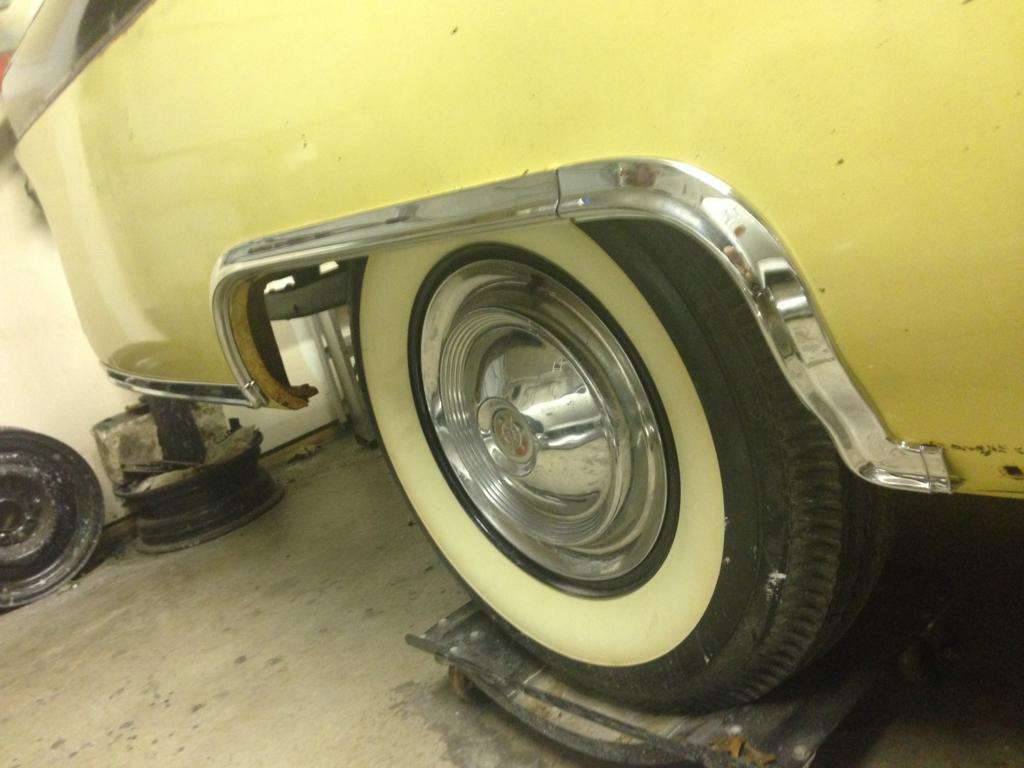 (46.75 KB) (46.75 KB) (50.82 KB) (50.82 KB)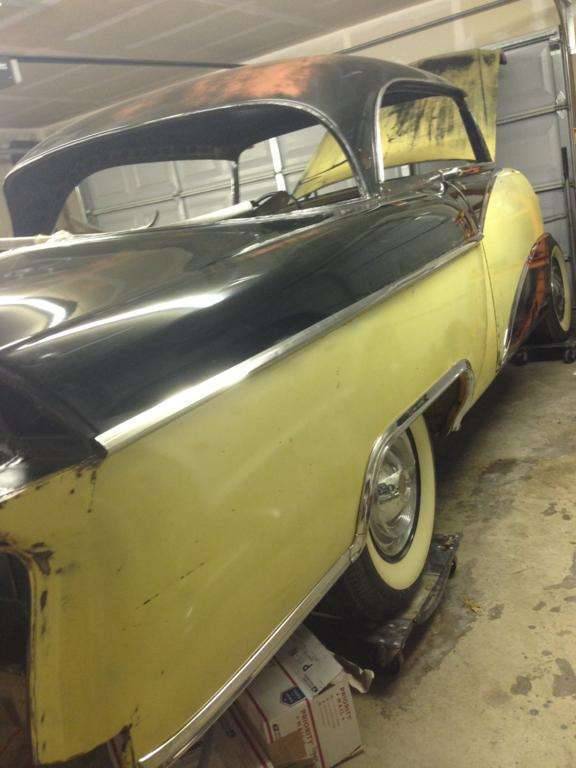 (45.09 KB) (45.09 KB)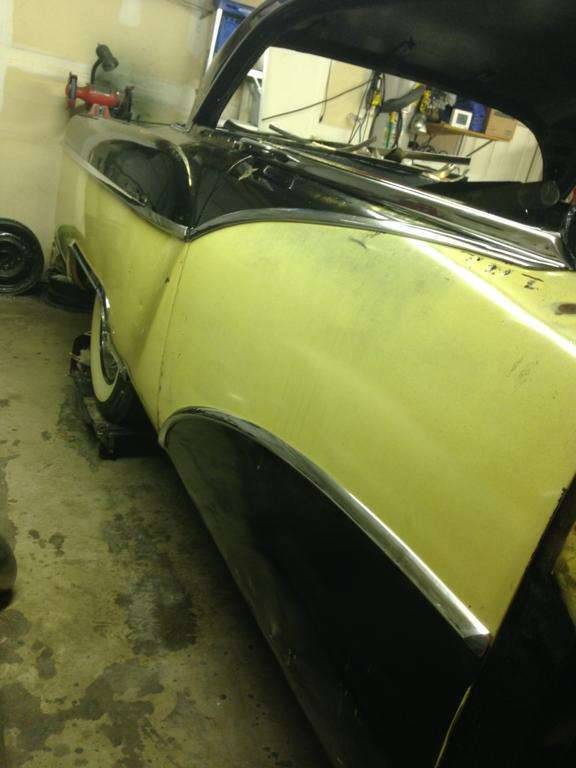 (80.74 KB) (80.74 KB)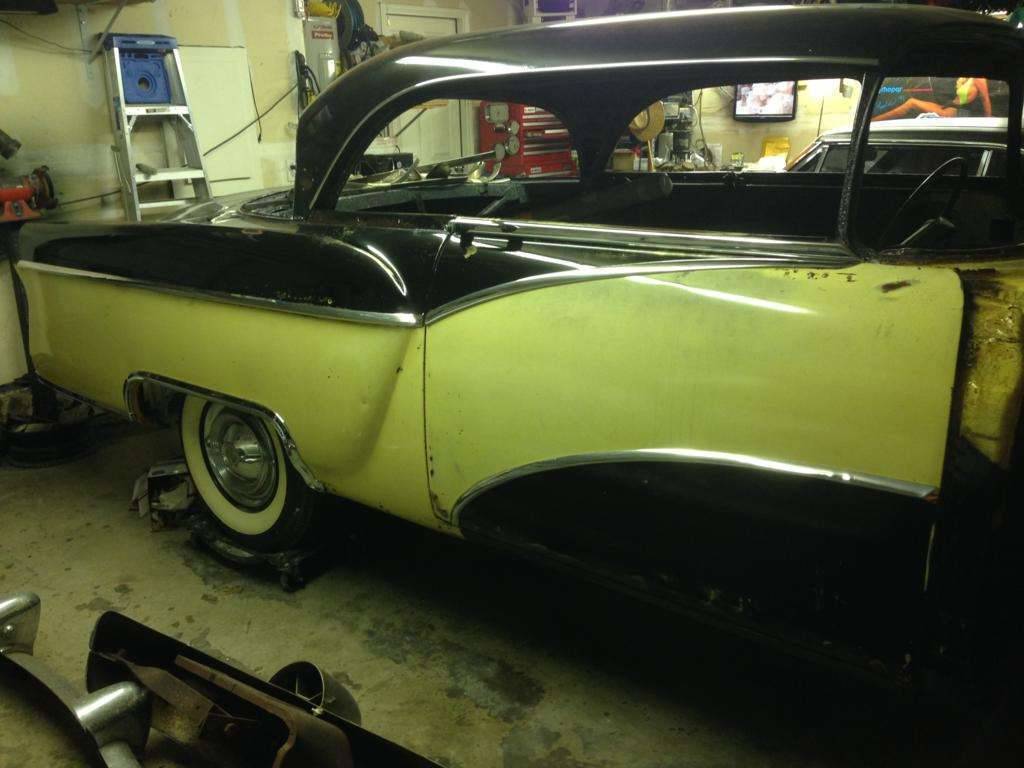 (47.16 KB) (47.16 KB)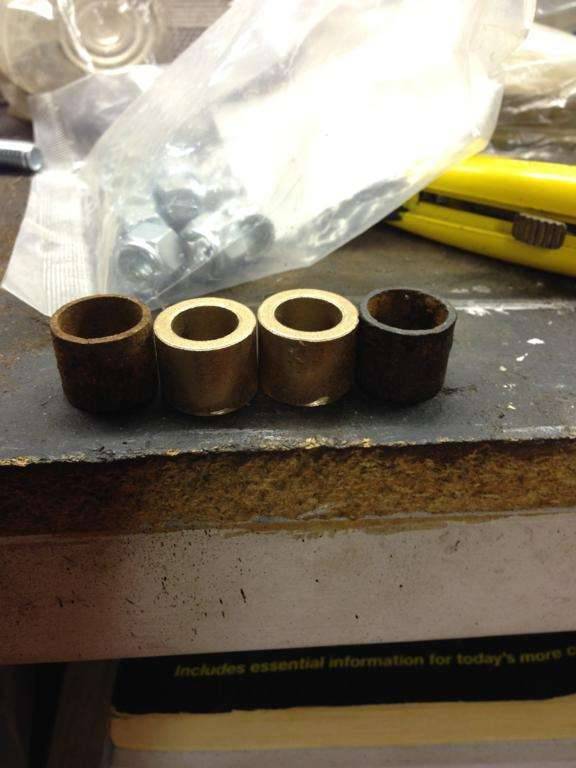 (38.09 KB) (38.09 KB)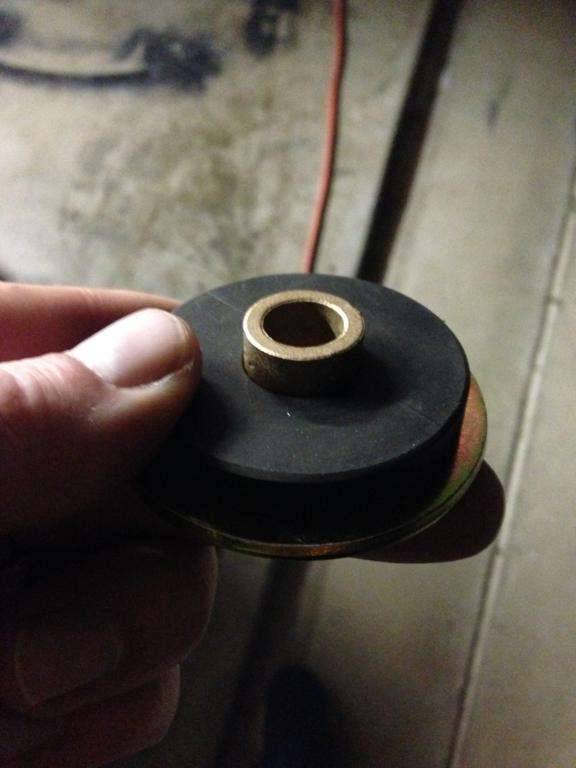 (43.78 KB) (43.78 KB)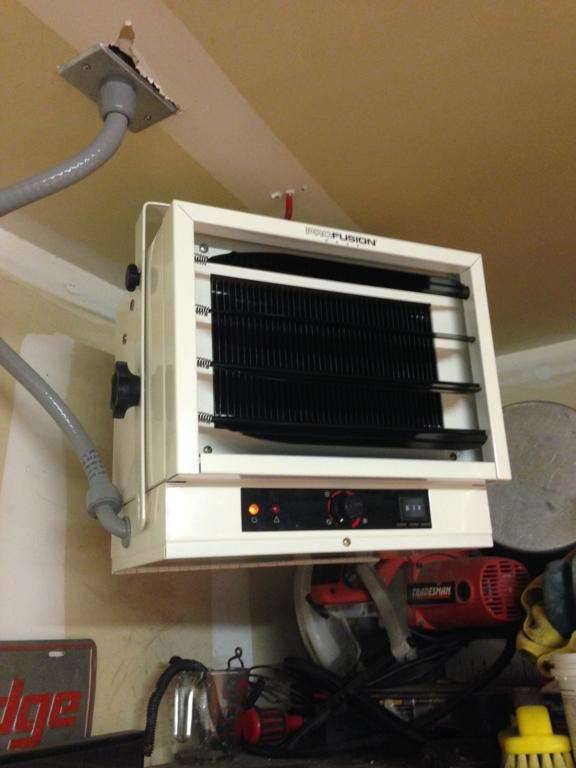 (31.35 KB) (31.35 KB)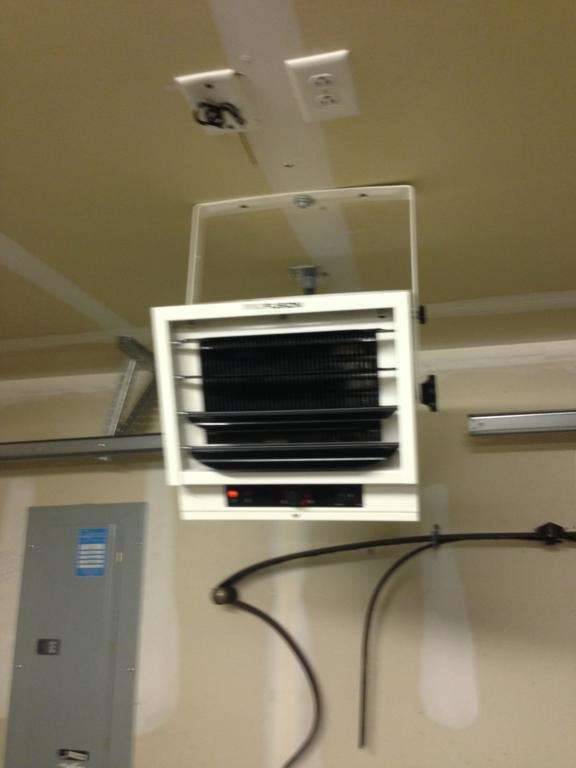 (59.82 KB) (59.82 KB)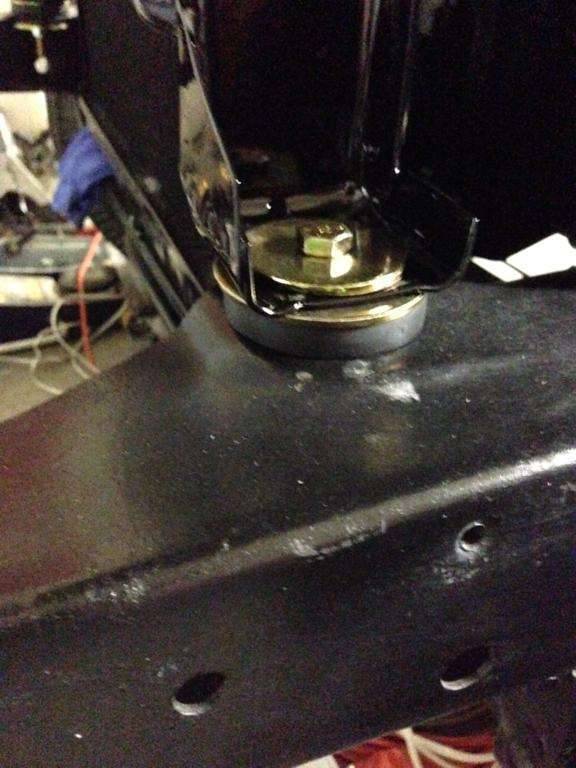 (46.32 KB) (46.32 KB)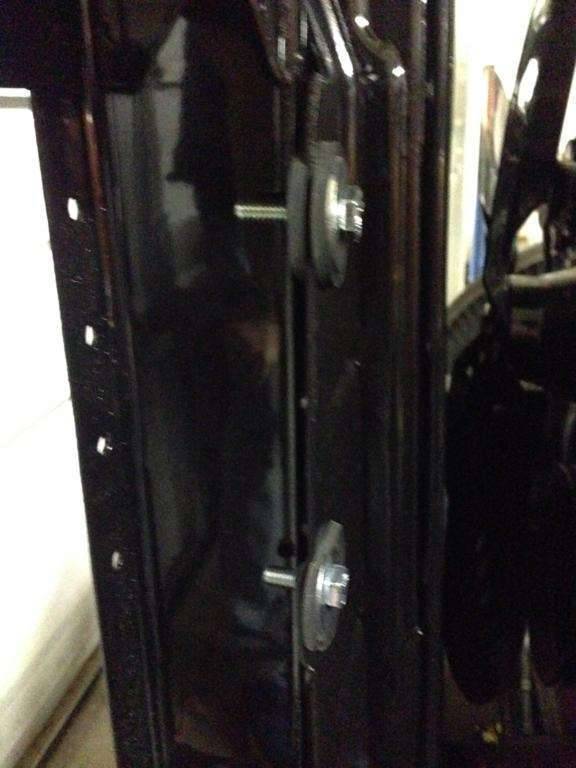 (46.77 KB) (46.77 KB)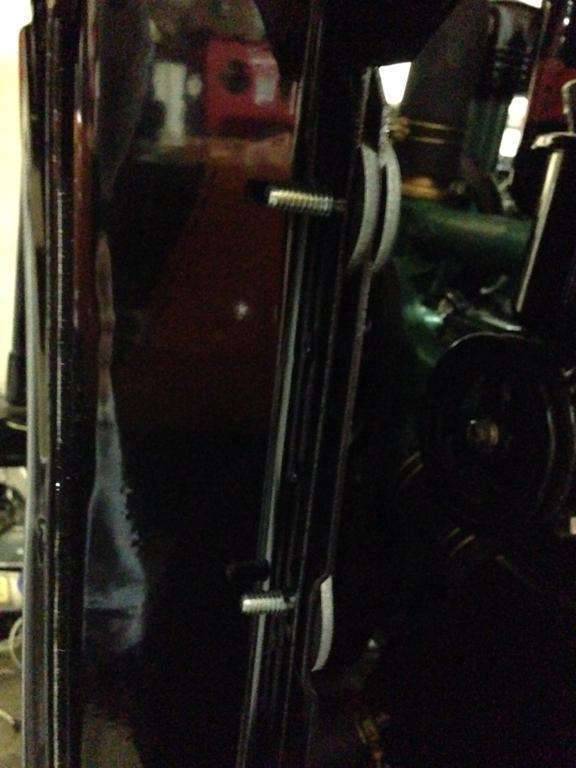
Posted on: 2014/11/29 22:02
|
|||
|
1937 Packard 138-CD Deluxe Touring Limousine
Maroon/Black 1090-1021 [url=https://packardinfo.com/xoops/html/modules/registry/View.php?ID=232]1955 Packard |
||||
|
||||
|
Re: Henry's 55 Constellation
|
||||
|---|---|---|---|---|
|
Home away from home
|
Ha, I hope for mid 30's so I can stay out in the garage all day. Lookin good.
Posted on: 2014/11/29 22:12
|
|||
|
[url=https://packardinfo.com/xoops/html/modules/
|
||||
|
||||
|
Re: Henry's 55 Constellation
|
||||
|---|---|---|---|---|
|
Forum Ambassador
|
Oh, how I admire those heaters but at 27? a killowatt hour for the tier 3 usage rate (which I usually manage to reach) it ruins the whole day just thinking about getting that bill. No firstborn and arms and legs are defective most of the time so I'd have to sell the car instead to pay the blasted thing.
The radiator to cradle screws are hex head self tapping 1/4-20 x 3/4. If you don't see threads, it is likely the thin cradle material has stripped out. It might be possible to use a 5/16 screw but if not, perhaps a clip nut or speednut on the cradle would work. I think the distance to the edge is not too great so you can find one with a distance measurement that would work but not sure about thickness of cradle -- although McMaster does have some wide panel selections. Attach file: (17.63 KB)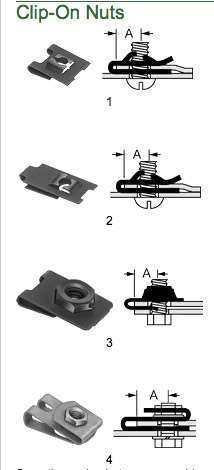
Posted on: 2014/11/29 23:00
|
|||
|
Howard
|
||||
|
||||
|
Re: Henry's 55 Constellation
|
||||
|---|---|---|---|---|
|
Home away from home

|
Henry, just went out in the garage and looked at the radiator mounting. The cradle on my Clipper has four holes (2 on each side) tapped for 1/4" coarse thread. I cut short lengths of 5/16" fuel line tubing. Length was determined to have the two toilet tank washers being slightly compressed when the bolt is tight. Don't remember the specific tank washers I bought at Lowe's, but they are a common item. I'll look at my project blog and see if anything more comes to light.
(o{}o) Looked at the project blog, but nothing new popped out. Here is the linkhttps://packardinfo.com/xoops/html/modules/newbb/viewtopic.php?topic_id=7272&viewmode=flat&order=ASC&type=&mode=0&start=40 Please note I did not bother with the cradle mounting to the frame, so can't comment on that part. The NOS lower stainless trim looks great. Glad it went to you.
Posted on: 2014/11/30 11:49
|
|||
|
We move toward
And make happen What occupies our mind... (W. Scherer) |
||||
|
||||


