|
Re: Adventures with a 1955 Clipper
|
||||
|---|---|---|---|---|
|
Home away from home

|
For Autolite, vertical is correct.
Posted on: 2011/6/13 16:40
|
|||
|
||||
|
Re: Adventures with a 1955 Clipper
|
||||
|---|---|---|---|---|
|
Just can't stay away
|
JW,
Great job, I'm following your thread with interest... do you have the outer dimesions (L x W) of the battery hold down bracket my car is missing the original and I would like to attempt to fabricate a replacement, I'm away from home at the moment so can't measure anything for reference. Big kev, Do you have a contact for PI SoCal region regarding the replacement ducting... I just re-installed mine recently and it's shot in quite a few places, I never imagined that stuff would be available again... Thanks, Dave UK.
Posted on: 2011/6/13 16:45
|
|||
|
||||
|
Re: Adventures with a 1955 Clipper
|
||||
|---|---|---|---|---|
|
Webmaster

|
Dave,
You can find the information here, you want the 5" ducting: https://packardinfo.com/xoops/html/modules/newbb/viewtopic.php?topic_id=1703&start=10 Just let Gary know I sent you, he is a good guy. He also gets a pretty decent discount on Steele Rubber products as well if anyone is looking for something.
Posted on: 2011/6/13 17:20
|
|||
|
-BigKev
1954 Packard Clipper Deluxe Touring Sedan -> Registry | Project Blog 1937 Packard 115-C Convertible Coupe -> Registry | Project Blog |
||||
|
||||
|
Re: Adventures with a 1955 Clipper
|
||||
|---|---|---|---|---|
|
Home away from home

|
Quote:
Dave, UK --- The Clipper is not at home right now, but it will be next week. I can get battery measurements at that time. Big Kev --- Thanks for the info on the flex vent hose. Mine are in very good condition and I decided to use them. I am sure others will find this source valuable. Thanks for the tip. (o{I}o)
Posted on: 2011/6/13 21:52
|
|||
|
We move toward
And make happen What occupies our mind... (W. Scherer) |
||||
|
||||
|
Re: Adventures with a 1955 Clipper
|
||||
|---|---|---|---|---|
|
Home away from home
|
Hello All,
This is the second part of the the last garage session. This one covers the radiator installation. While doing other work, I had it cleaned by the same radiator shop that re-cored the one on the '47 Clipper. The guys at the shop said they could not take the tanks off to rod the core, but they would give it a good soaking and flushing. The radiator looked to be unobstructed, but I wanted to have it cleaned while it was off of the Clipper. There was a renegade piece of silicone in the top, but it was removed by turning the radiator upside down and shaking it out. After getting the cleaned radiator back from the shop I painted it with a thin coat of black semi-gloss lacquer. I used lacquer instead of enamel so as not to impede heat transfer. The way Packard mounted the radiator to the cradle is innovative. Packard used a shoulder bolt and rubber bushing fastening method to reduce vibration through the radiator. The radiator mountings consisted of a large steel washer, two specially shaped rubber washers, and a special shoulder bolt. Over the years these parts got lost and/or left off. Installing these parts somewhat complicates the installation process and the flat rate "mechanics" did not want to be slowed down fiddling with them. They just simply bolted the radiator directly to the cradle. Packard listed replacement mounting parts in a kit, but these radiator mounting kits are no longer available from your local Packard dealer. Searching around for a substitute, I remembered Kev talked about a system he put together for his '54 Clipper. I PM'ed Kevin and he said to use rubber washers for mounting toilet tanks. I easily found these rubber washers at my nearby Lowe's. Thanks, Kev. I cut some 5/16" steel tubing just slightly shorter than the thickness of two of the toilet washers. This will allow a regular 1/4" mounting bolt to be tightened down and slightly compress the rubber washers. The short tubing acts like the shoulder on a shoulder bolt. The slight compression secures the radiator and will allow it to flex in its mounting - as the Packard engineers intended. I used Corbin hose clamps to secure the radiator hoses. Here are the NAPA numbers for the hoses: lower hose - 7884; upper hose - 7463. The upper hose was cut from a preformed multiple curved hose. The lower hose, I believe, did not require any cutting. It was on the car and replaced the original hoses and transmission cooler when Ross converted the Clipper to a manual shift transmission. A spring was in the upper hose when I took the Clipper apart. I inserted the spring in the lower hose where it is needed. A 13 lbs pressure cap is specified, but I used the 7 lbs cap that came with the car, as it seemed to be working. Lastly, I installed the top splash shield. This went on easy enough, and adds a nice finished look to the car. The previous owner had it powder coated in glossy black. Nice. Next time I'll finish up, well almost (recall my comments on the voltage regulator and battery), with converting the oil bath air cleaner to use a modern pleated paper type. Dave, no Packard parts were permanently changed in this modification. Take care. (o{I}o) Attach file:  (41.83 KB) (41.83 KB)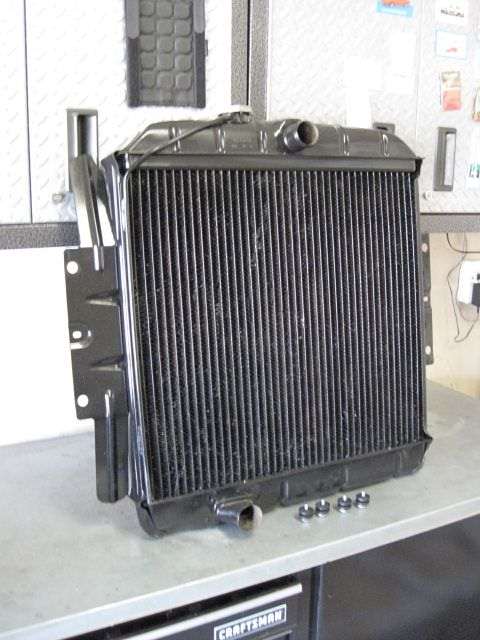 (26.39 KB) (26.39 KB)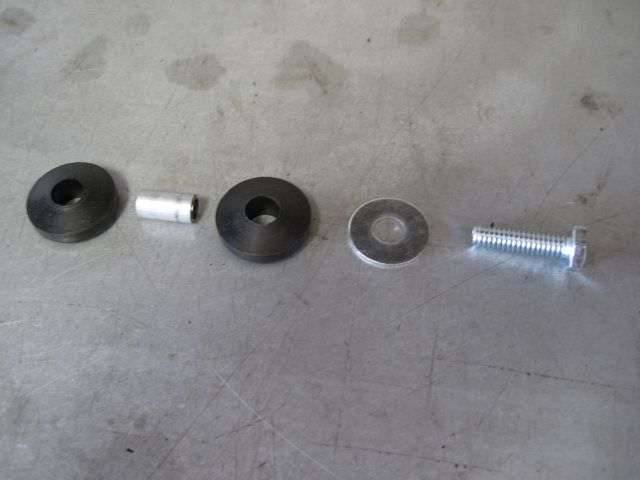 (29.50 KB) (29.50 KB) (43.46 KB) (43.46 KB)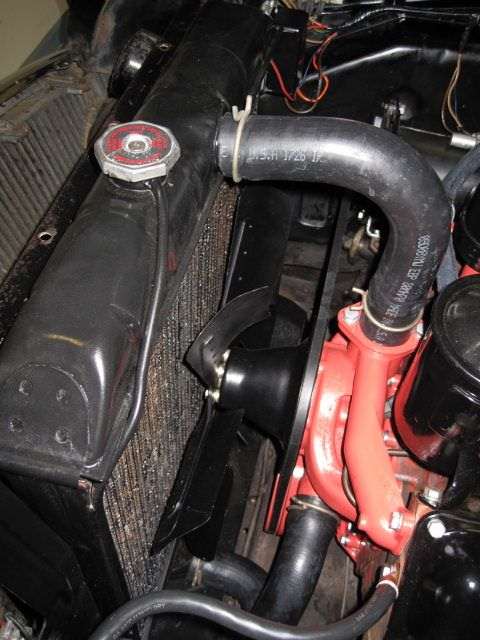 (35.14 KB) (35.14 KB) (47.44 KB) (47.44 KB)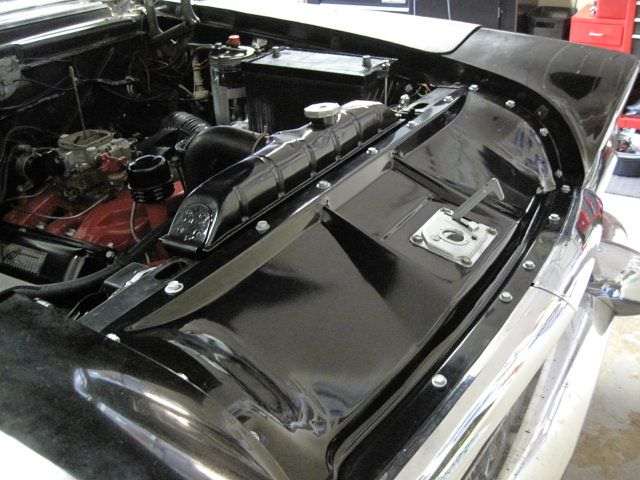
Posted on: 2011/6/15 18:56
|
|||
|
We move toward
And make happen What occupies our mind... (W. Scherer) |
||||
|
||||
|
Re: Adventures with a 1955 Clipper
|
||||
|---|---|---|---|---|
|
Webmaster
|
JW,
Glad those washers worked for you as well. Sometimes when parts are not available, you have to improvise! Who would have thought that toilet repair parts could be used to fix a Packard! 
Posted on: 2011/6/15 22:54
|
|||
|
-BigKev
1954 Packard Clipper Deluxe Touring Sedan -> Registry | Project Blog 1937 Packard 115-C Convertible Coupe -> Registry | Project Blog |
||||
|
||||
|
Re: Adventures with a 1955 Clipper
|
||||
|---|---|---|---|---|
|
Home away from home

|
PMCC probably ordered their washers from a toilet manufacturere too.
Posted on: 2011/6/15 22:58
|
|||
|
VAPOR LOCK demystified: See paragraph SEVEN of PMCC documentaion as listed in post #11 of the following thread:f
https://packardinfo.com/xoops/html/modules/newbb/viewtopic.php?topic_id=7245 |
||||
|
||||
|
Re: Adventures with a 1955 Clipper
|
||||
|---|---|---|---|---|
|
Home away from home
|
Hello All,
Continuing with another productive day in the garage. One of the last tasks was to get the air cleaner on the car. Earlier I had refinished the outside and converted it from an oil bath type to one with a modern pleated paper replaceable filter element. The first photo shows the original configuration with the base on the right, the filter element in the middle, and the top cover on the left. The filter element is filled with shredded Kapok, same material used in some life jackets. Oil bath air cleaners are very efficient at cleaning the air. My objection with this type of air cleaner is that they must be serviced. The servicing involves cleaning out the base of the oil, and the dirt that has been deposited there. In addition the Kapok filter element must be cleaned with solvent and dried with compressed air or allowed to drain dry. A large container and a large amount of cleaning solvent are needed to do the job properly. Overall, it takes a lot of work to get this job done, plus it creates a mess that needs to be cleaned up. All that is required using a modern pleated paper element is to simply replace the dirty paper element and dispose of the old one. There are many owners who enjoy this periodic servicing as part of the experience of driving and enjoying a vintage Packard. I admire them for their dedication, but chose to do something different. The conversion is not detectable from the outside and looks completely authentic. The air cleaner can be converted back to an oil bath type in about as long as it takes to talk about it. I made a narrow large diameter gasket out of gasket paper to seal the bottom of the new unit to the base of the air cleaner housing. I used a short piece of tubing to use in the space between the top of the new filter top and the original cover. I could have used some threaded ?" rod to replace the original threaded rod, and a wing nut to hold down the new filter, but decided to use the spacer instead. More efforts involved getting the starter and new battery cables installed and changing the engine oil. I overhauled the starter while it was off of the car. I had the commutator end turned and undercut; installed new brushes and a drive-end bushing; and then repainted it. This Auto Lite starter only has two brushes. Every starter I can remember has had four. Anyone reading this know why? The small wire leads connected to the starter solenoid switch are to ease the installation process. One of the switch terminals on the switch is not accessible until the starter is loose and can be turned. Holding a 30-pound starter with one hand while disconnecting an uncooperative wire while lying on my back is difficult for me. The leads allowed me to put up the starter and connect the wires after. Plus, it will make removing the starter easier. The engine oil I used in all my Packards is the Classic Car Motor oil. It is a multi-viscosity 15W-40 oil with lots of zinc and additives that are needed for the older flat tapped engines. The oil is made by DA Lubricants. It can be obtained from the Indiana chapter of the Classic Car Club of America in 12-quart case lots. The shipping charge is the same for two cases as for one, so stock up. The Clipper was not ready to go to Salado as I had planned. Too many things still remaining to get done and not enough time left. I may drive the '47 Clipper Custom Super Touring Sedan. If I do it will be its first showing there. Previous years I have taken the '37 Six Convertible Coupe. This past week, I had also been concentrating on getting over 50 information labels ready that will go on the windshields of Packards on display at Salado. This is a job I volunteered for and enjoy. It is a lot of work concentrated into the last days before the meet. Pre-registrations are not finalized until the mid-part of the week before the meet and there are changes, additions, and deletions up to the day of the meet. I will be taking a supply of blank labels to be filled in by hand for those who register at the meet. What I enjoy about the job is getting an advance in seeing who will be attending and what Packard(s) they will be bringing. Also it is a good feeling seeing all the cars displaying my labels. The next time I pick up the story will be after I returned from Salado. Until then, I'll leave you with this last image. Packarding ain't necessarily a pretty sight, especially in my garage. Take care. (o{I}o) Attach file: (34.11 KB)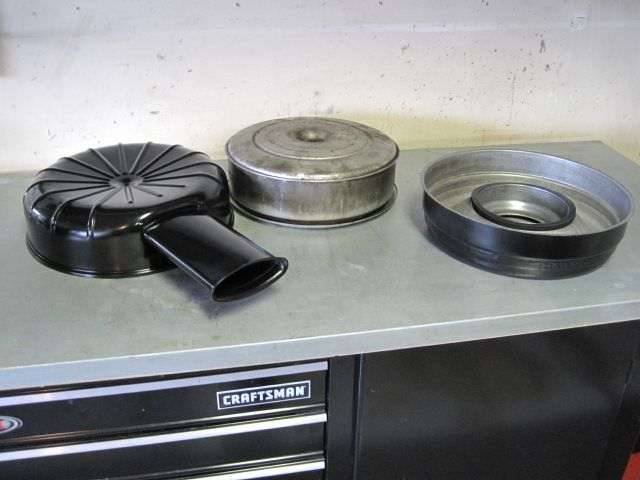 (32.90 KB) (32.90 KB) (46.64 KB) (46.64 KB)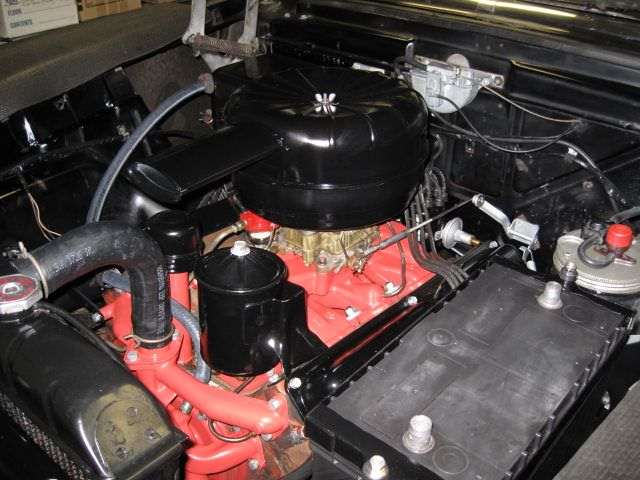 (34.03 KB) (34.03 KB)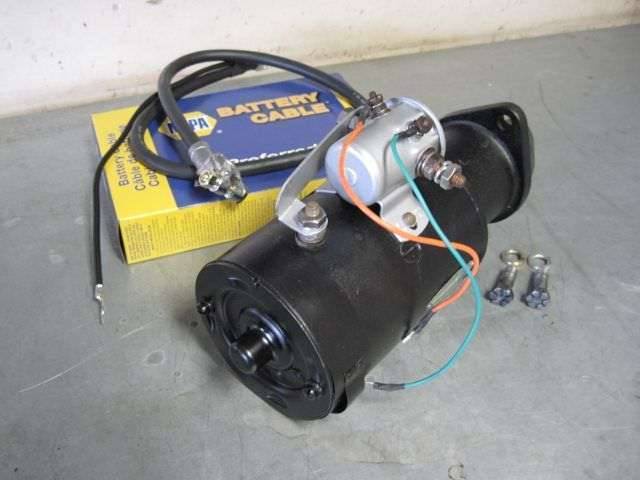 (33.83 KB) (33.83 KB)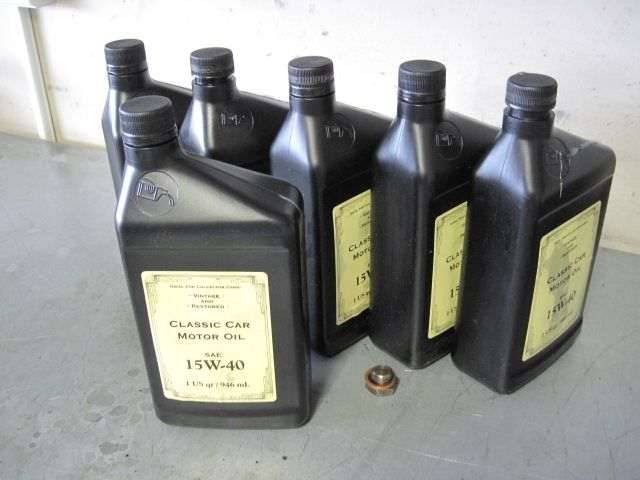 (33.83 KB) (33.83 KB)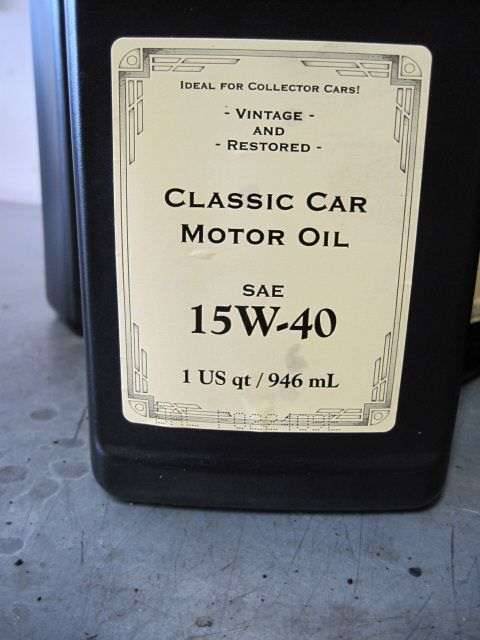 (40.50 KB) (40.50 KB)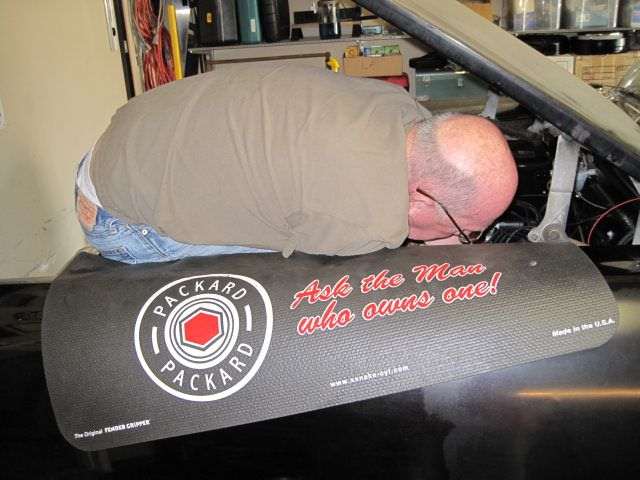
Posted on: 2011/6/17 10:56
|
|||
|
We move toward
And make happen What occupies our mind... (W. Scherer) |
||||
|
||||
|
Re: Adventures with a 1955 Clipper
|
||||
|---|---|---|---|---|
|
Forum Ambassador

|
why are you going to salado??? that was in April....
Hank
Posted on: 2011/6/17 11:04
|
|||
|
1937 Packard 138-CD Deluxe Touring Limousine
Maroon/Black 1090-1021 [url=https://packardinfo.com/xoops/html/modules/registry/View.php?ID=232]1955 Packard |
||||
|
||||


