|
Re: Henry's 37 Limousine
|
||||
|---|---|---|---|---|
|
Forum Ambassador

|
the armature has a paper (could be leather) thrust washer at the end.. you can see my finger touching it in the picture. parts book says this is 1/32" thick and it looks it to my naked eye. the metal thrust washer is only seniors, so saith the parts book anyways.
the end play is minor....but only after i remembered to replace the felt in the cup at the end with the brushes. no idea where the original went, but it was missing. probably in my tank of cleaner. i stuffed some new felt down in there and magic it was perfect. oiled the felt and i'm good. but to that end i dont even see the need for the paper washer at the end. if the armature is allowed to sit right on the metal where the bushing is....then the bottom of the brush spring holders touches the armature and would not allow it to spin. this is why i looked in the parts book and according to it I was only missing the felt at the tip of the grease cup that holds the bushing. then again....I could be wrong. good idea on the brushes, so many was to do it i'm sure. i wish i had thought of that. all a means to an end though. can anyone take a pic of their grease cup, because i swear to you mine had this seal on it before i cleaned it with the wire brush on the bench grinder. maybe it was just hardened up grease from years and years, but to that point i dont see why it would have that wave washer on those holding tabs at the bottom....why not just threads the whole way....makes no sense to me. either way its not hurting anything i suppose and will serve to keep grease from squeezing out the threads when tighening it.
Posted on: 2016/11/10 17:38
|
|||
|
1937 Packard 138-CD Deluxe Touring Limousine
Maroon/Black 1090-1021 [url=https://packardinfo.com/xoops/html/modules/registry/View.php?ID=232]1955 Packard |
||||
|
||||

|
Re: Henry's 37 Limousine
|
||||
|---|---|---|---|---|
|
Home away from home

|
As I recall there is a non-metallic piece in the grease cup location you are talking about. Hard to believe it would have come apart, but anything could have happen in the intervening decades.
My experience is, that in the starters from this era, the thrust washers are made of a thin piece of leather. Others here may be able to add more. (o[]o)
Posted on: 2016/11/10 23:22
|
|||
|
We move toward
And make happen What occupies our mind... (W. Scherer) |
||||
|
||||
|
Re: Henry's 37 Limousine
|
||||
|---|---|---|---|---|
|
Forum Ambassador
|
iphone backup corrupt, lost 80% of my pictures. boooo!!
still had these to post though. you can see how far away the end of the armature sits since i put the felt in. but looking at the parts book...there is nothing there other then metal washer for the models different then 138....and the fiber washer which is what mine has. you can see the felt at the end and the top of the bushing in that one picture before i put the oiler back on. starter is done otherwise. no real way to test it. guess i could use some jumper cables to the battery. a better view of the grease cup for the distributer. idk if that is right, but thats how its going back on in my car. paid a visit to the machine shop. block decked, bored, and honed. no studs broke during removal. still have to remove the ones on the side. these pics were after installation of new valve guides. now that everything came in from Kanter, progress is being made. a bit of confusion on the piston rings, but we are sorting that out. since i lost my pictures, maybe someone with a spare 4006 starer can take the inspection cover off and snap a pic of how everything looks in there compared to mine. Attach file:  (30.48 KB) (30.48 KB)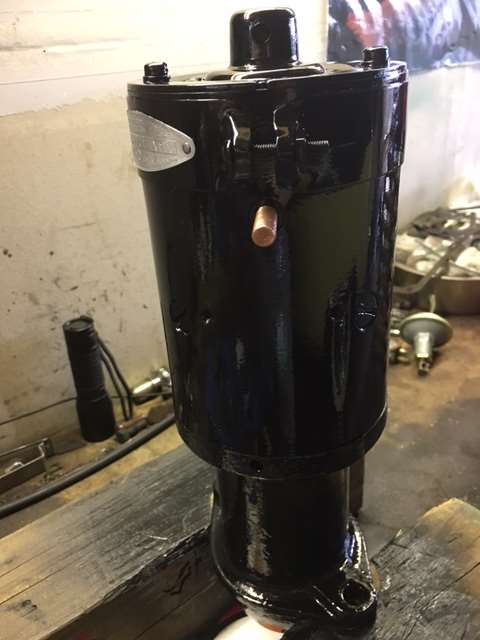 (30.38 KB) (30.38 KB)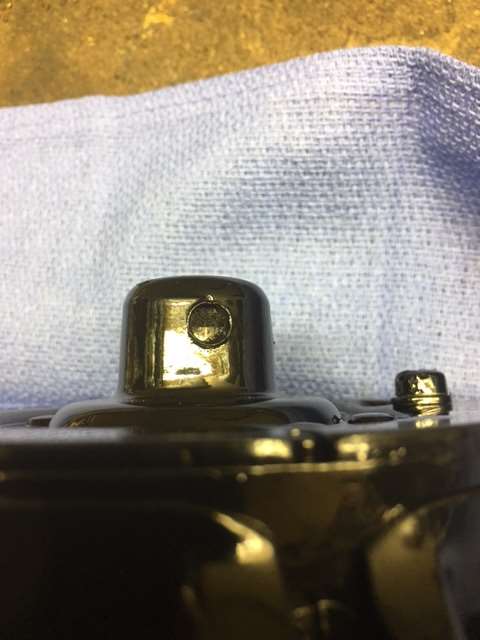 (41.11 KB) (41.11 KB)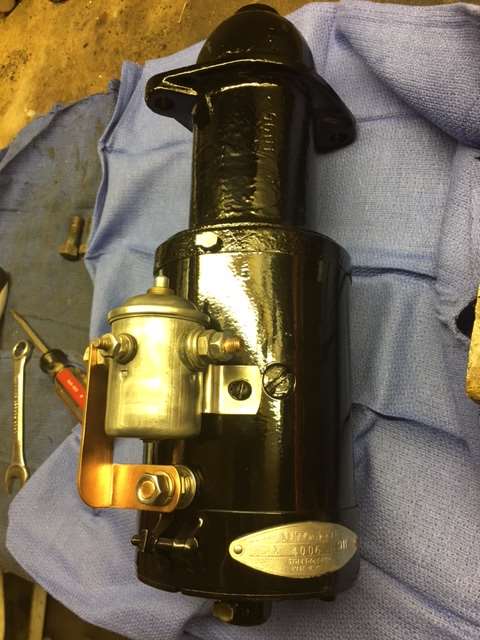 (37.13 KB) (37.13 KB)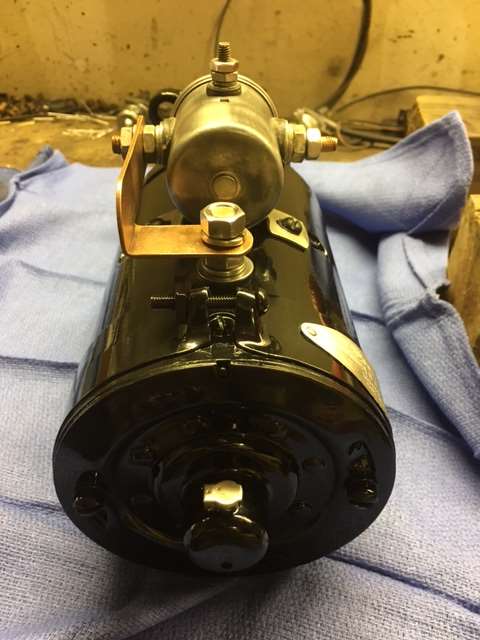 (32.86 KB) (32.86 KB)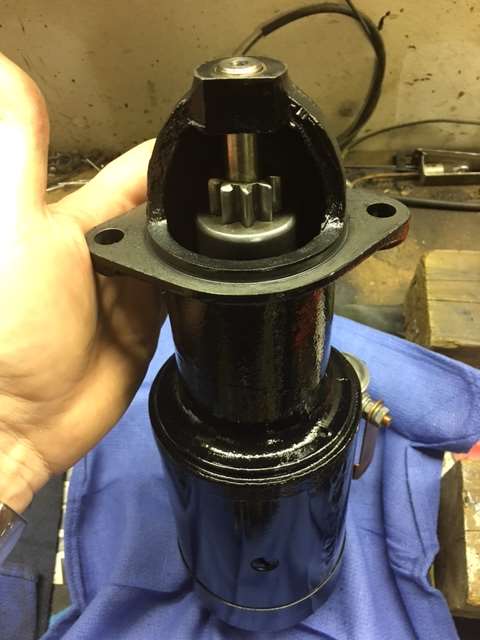 (28.14 KB) (28.14 KB)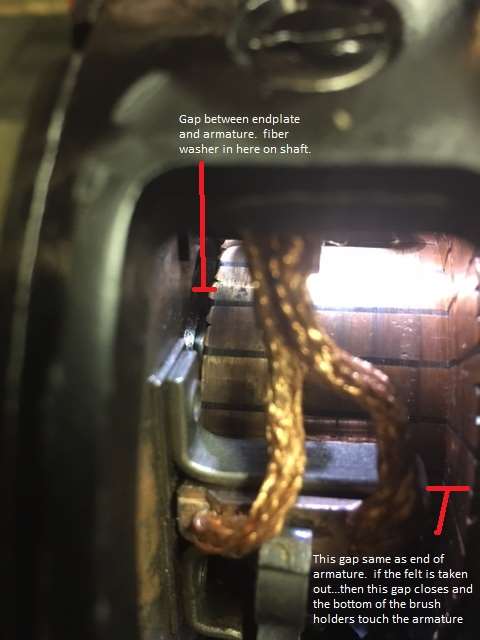 (29.31 KB) (29.31 KB)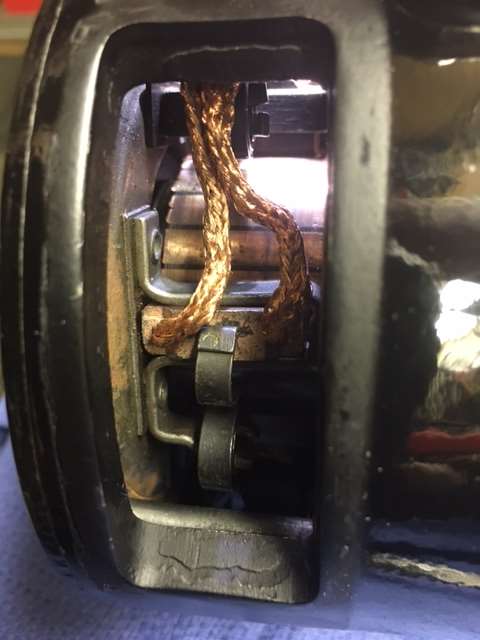 (40.91 KB) (40.91 KB)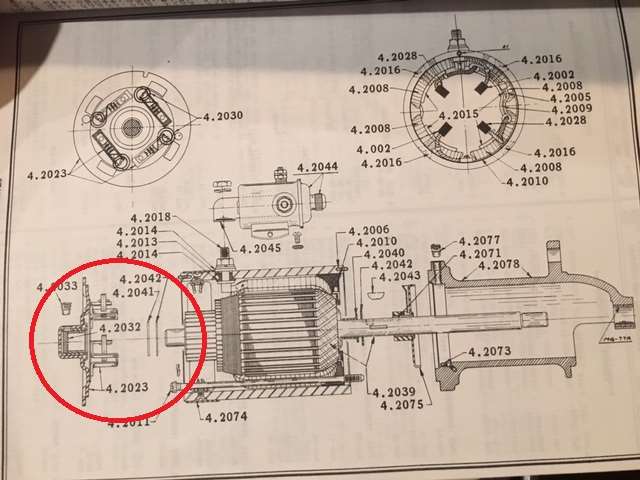 (23.78 KB) (23.78 KB) (19.87 KB) (19.87 KB)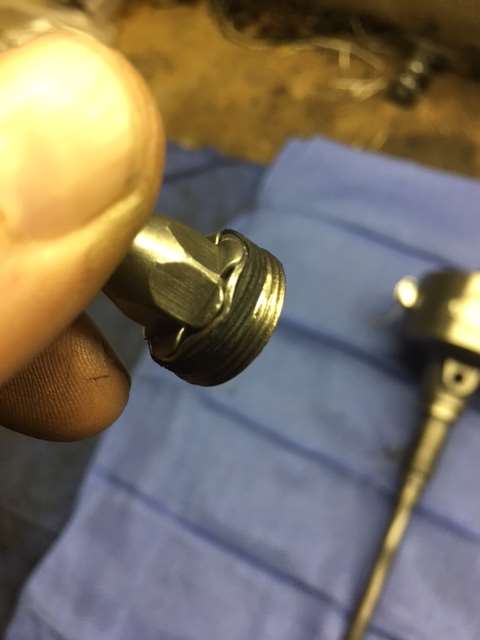 (33.90 KB) (33.90 KB)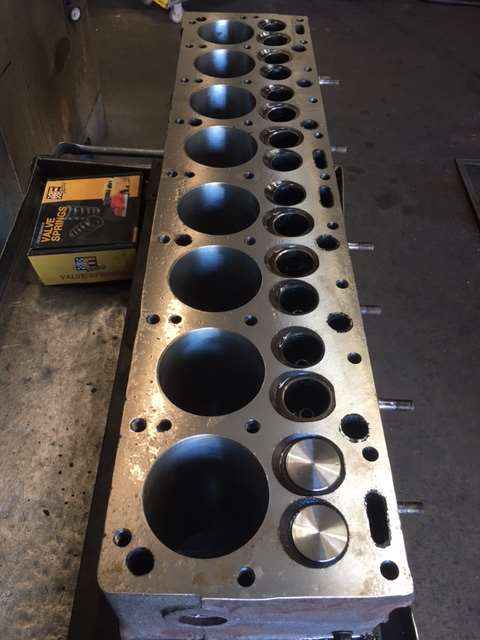 (46.40 KB) (46.40 KB)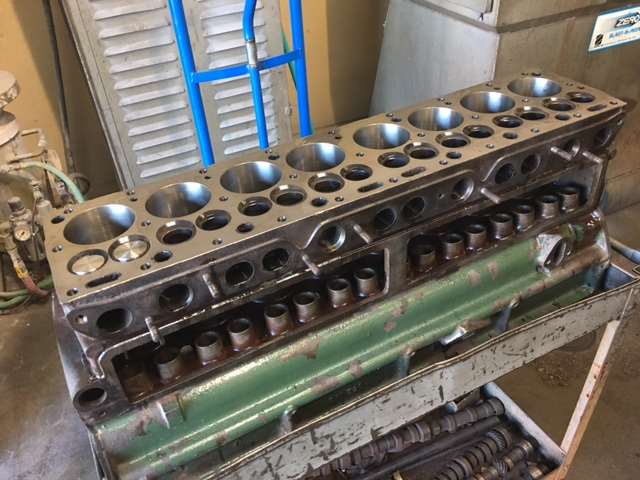
Posted on: 2016/11/14 16:28
|
|||
|
1937 Packard 138-CD Deluxe Touring Limousine
Maroon/Black 1090-1021 [url=https://packardinfo.com/xoops/html/modules/registry/View.php?ID=232]1955 Packard |
||||
|
||||
|
Re: Henry's 37 Limousine
|
||||
|---|---|---|---|---|
|
Forum Ambassador
|
Turned off from posting here. still not really into it much, but i'm forcing myself because I'm trying to not let one person ruin my fun. thats all i have to say about that.
motor has been back for some time. i tried to get as much done as i could before my ablation. the ablation turned out okay, the aftermath has been a journey in recovery to say the least. here are some pictures of what i have been up to. machine shop didn't have a way to keep the intake and exhaust manifold together to deck them. so becuase there were several large pits in the surface of the matting surface in the exhaust manifold. i heated it.....welded it....and ground it by hand and eyed it. if it was sealing before this it should be good enough to seal now expecially since it is much flatter then before. red arrows in pictures show my welding. 90 amp wire flux welder, very clean sand blasted manifold and good heat before welding. don't really have much more to talk about. meh... Attach file: (35.79 KB)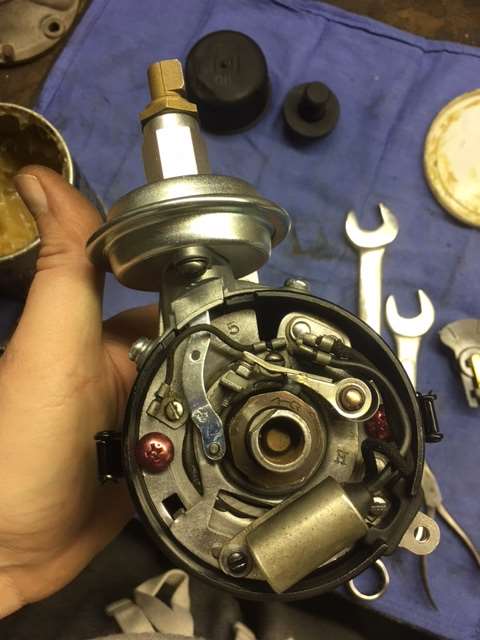 (33.25 KB) (33.25 KB)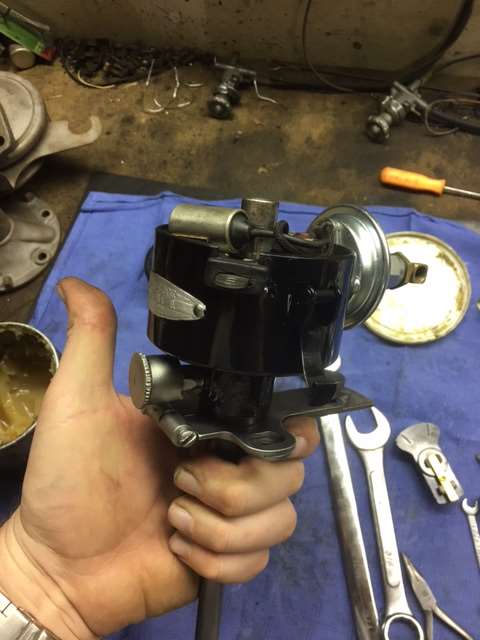 (44.67 KB) (44.67 KB)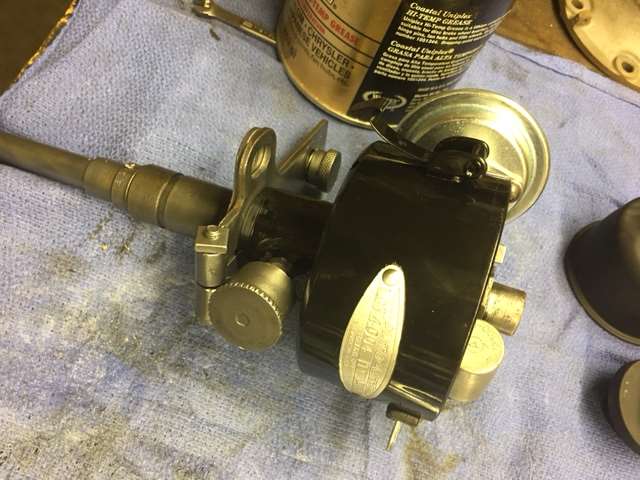 (43.10 KB) (43.10 KB)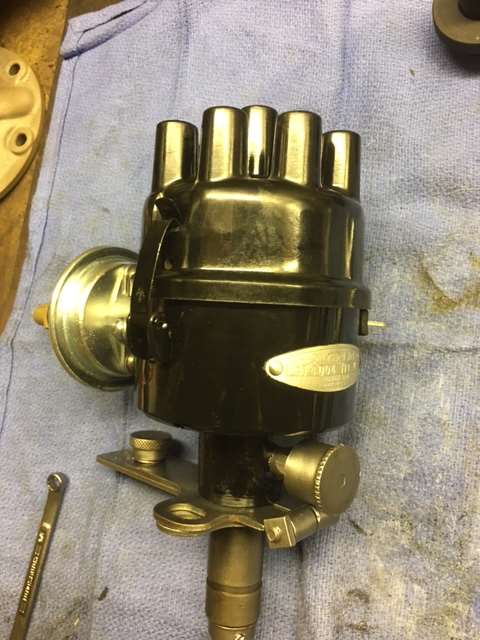 (47.35 KB) (47.35 KB) (22.94 KB) (22.94 KB) (28.19 KB) (28.19 KB) (30.88 KB) (30.88 KB)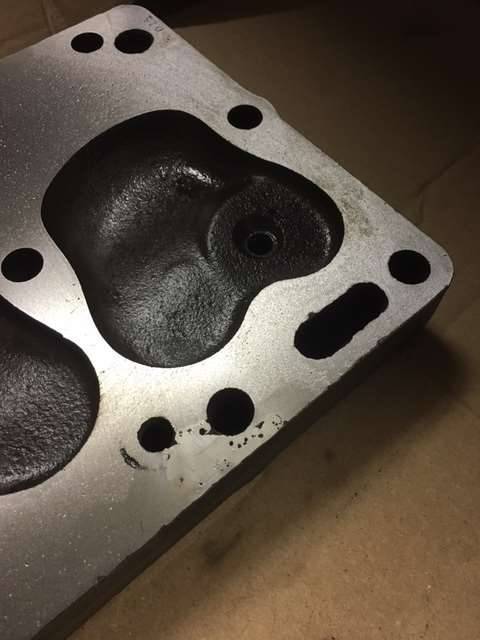 (25.96 KB) (25.96 KB)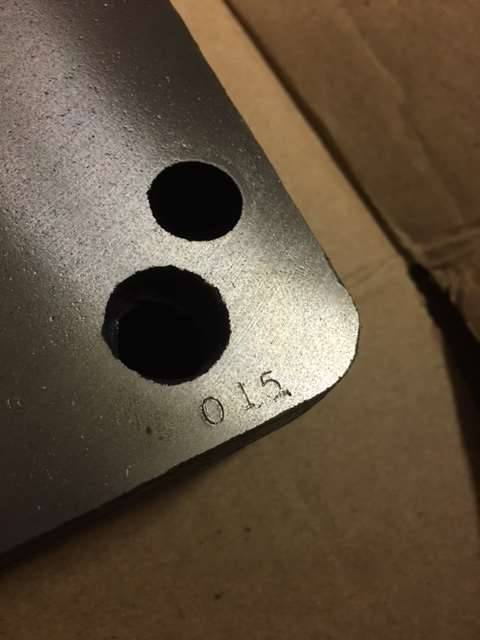 (32.91 KB) (32.91 KB)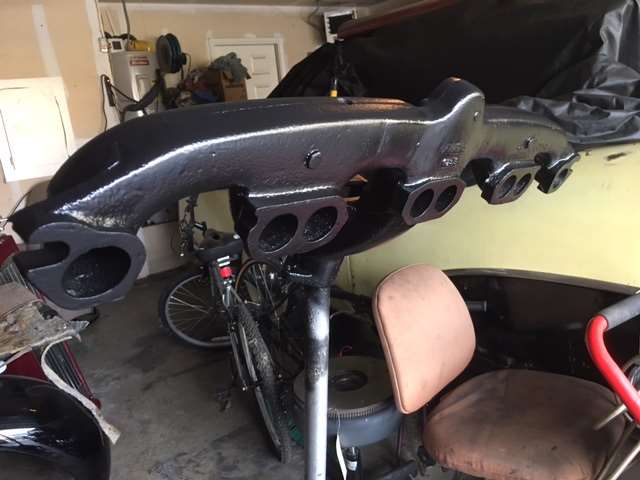 (30.62 KB) (30.62 KB) (34.05 KB) (34.05 KB)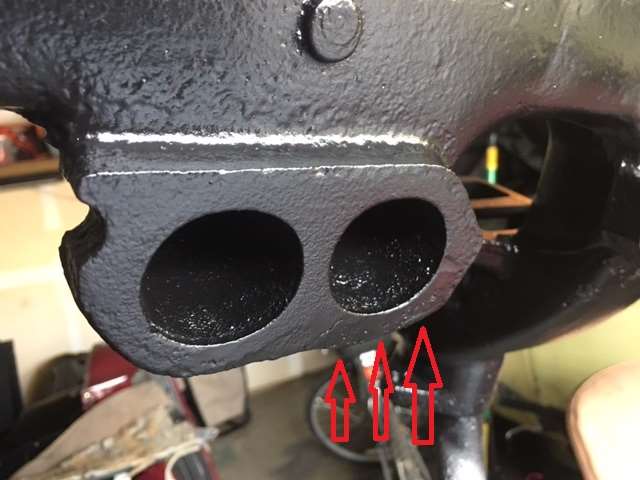 (47.31 KB) (47.31 KB)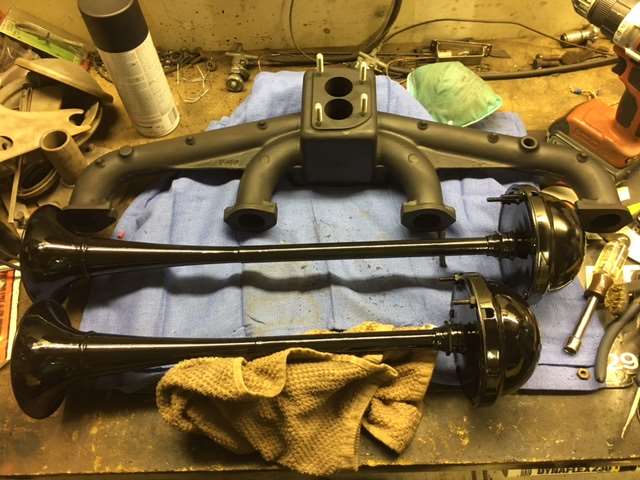 (41.74 KB) (41.74 KB)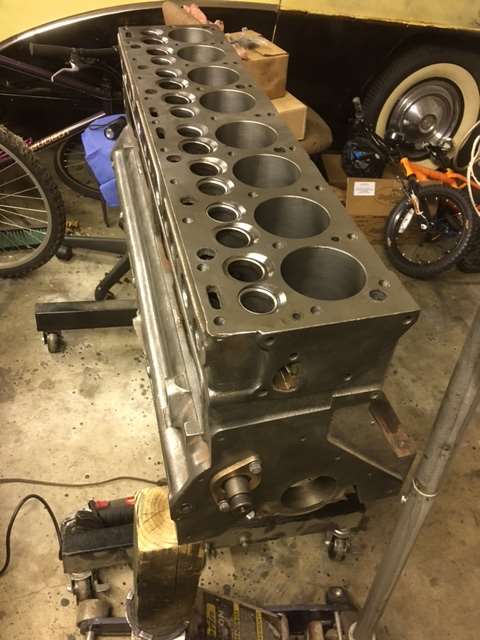 (33.84 KB) (33.84 KB)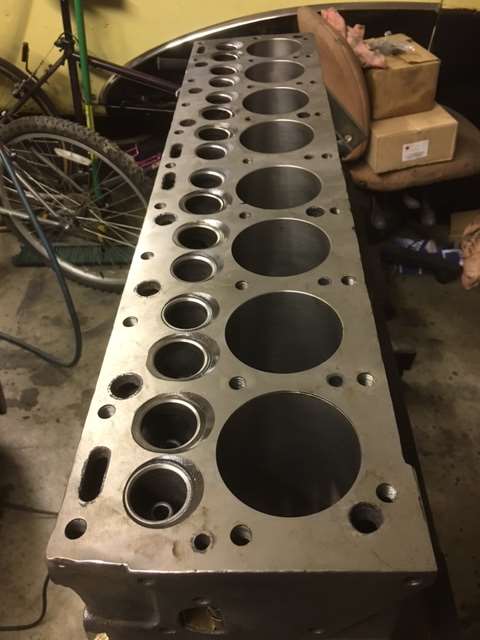 (42.83 KB) (42.83 KB)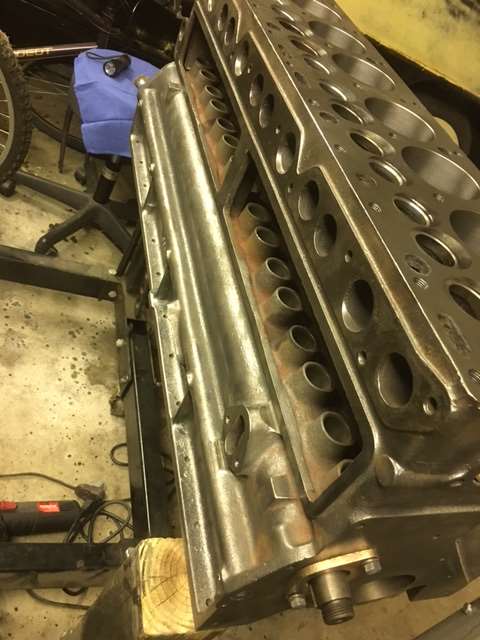 (35.15 KB) (35.15 KB)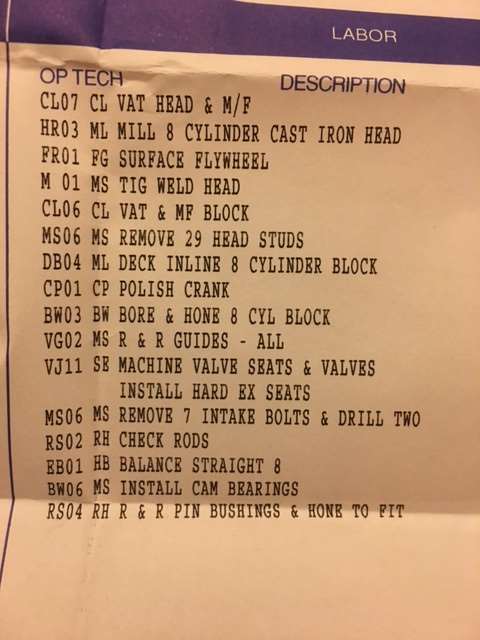 (31.94 KB) (31.94 KB)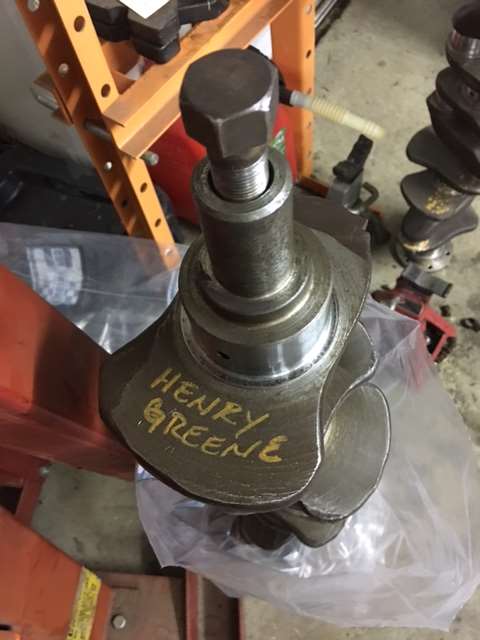 (37.72 KB) (37.72 KB)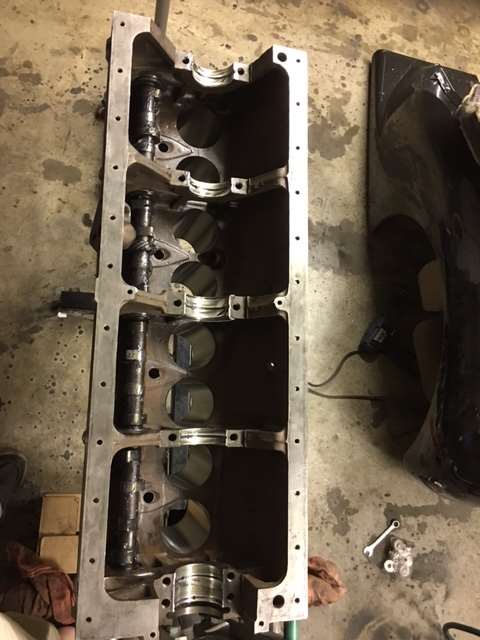 (34.37 KB) (34.37 KB)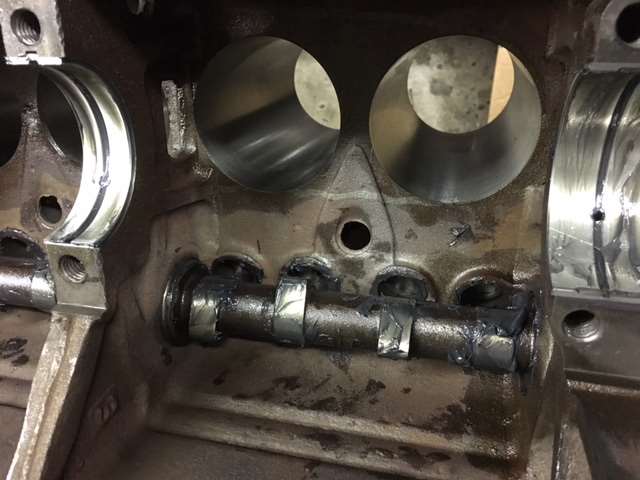 (48.69 KB) (48.69 KB)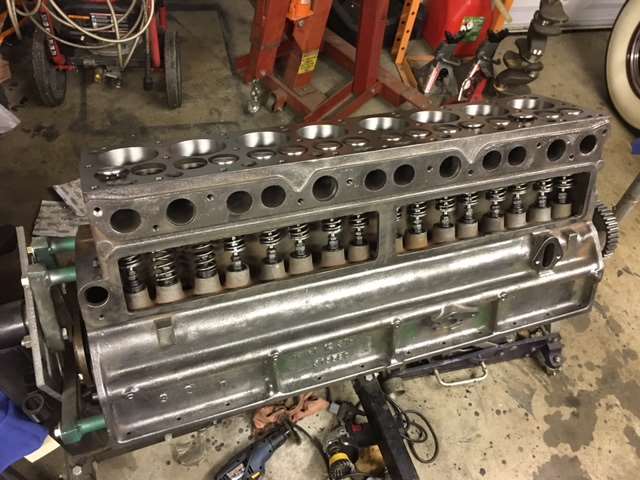 (42.85 KB) (42.85 KB)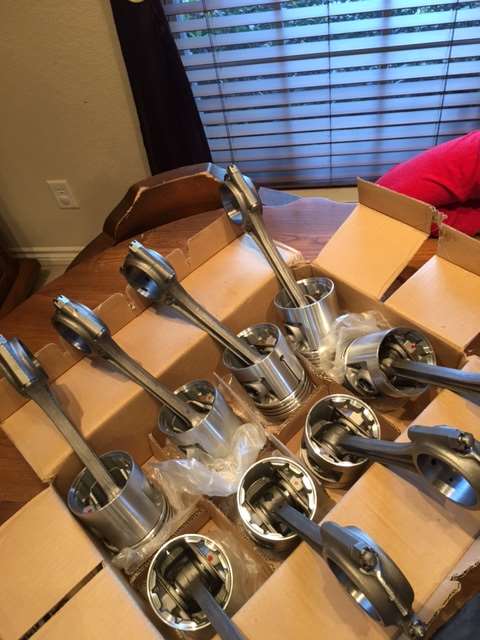 (39.62 KB) (39.62 KB)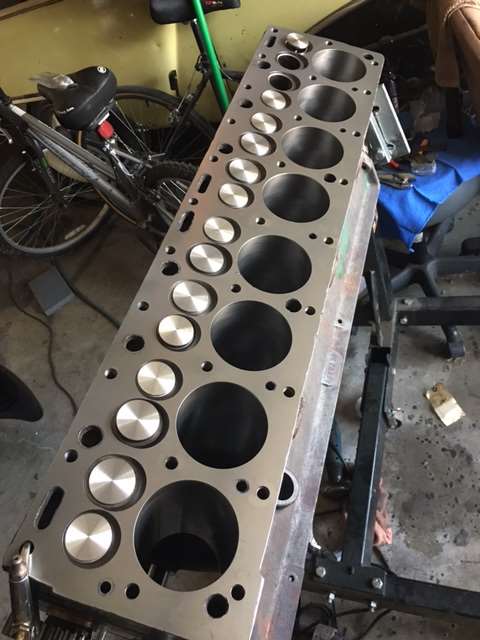 (33.27 KB) (33.27 KB)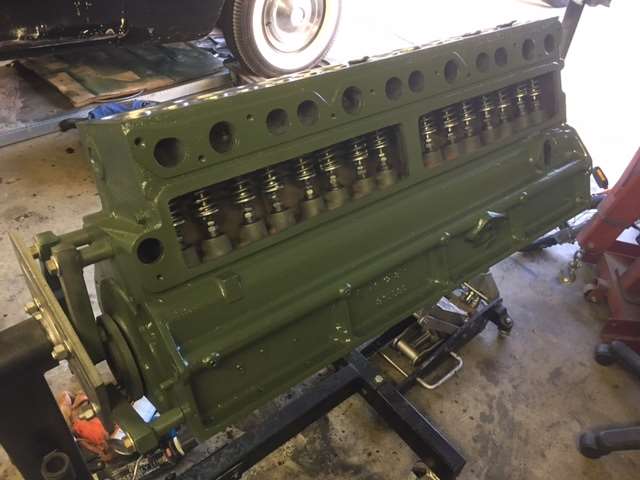 (31.51 KB) (31.51 KB)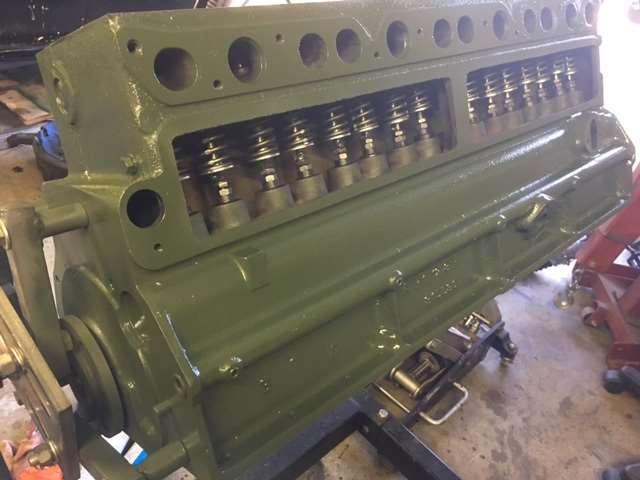 (47.13 KB) (47.13 KB)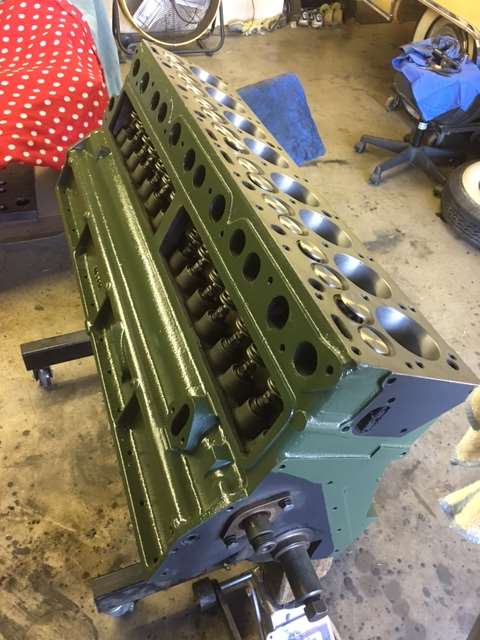 (35.08 KB) (35.08 KB)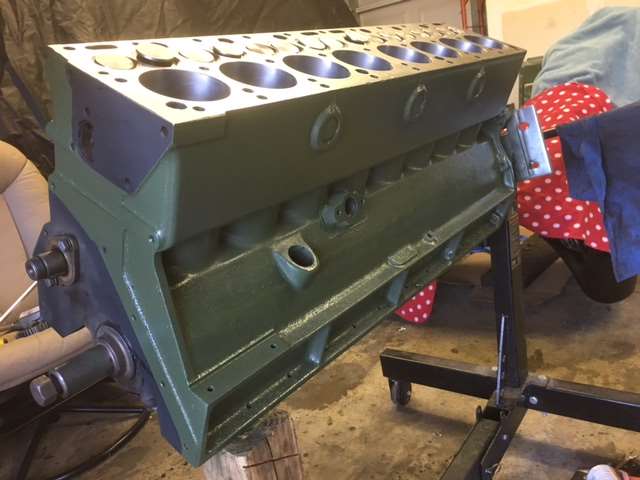 (22.23 KB) (22.23 KB)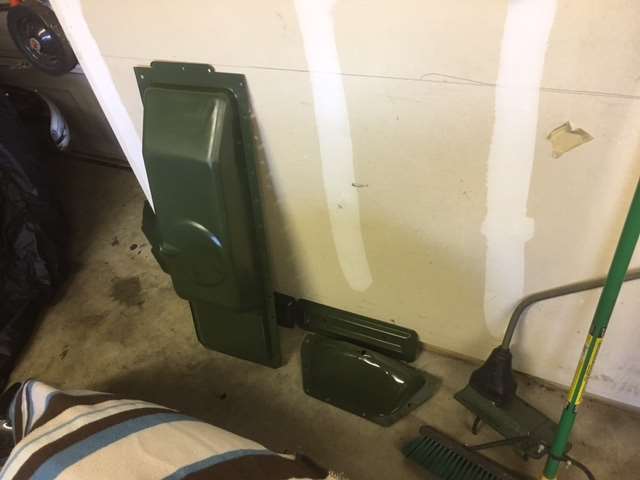 (37.81 KB) (37.81 KB)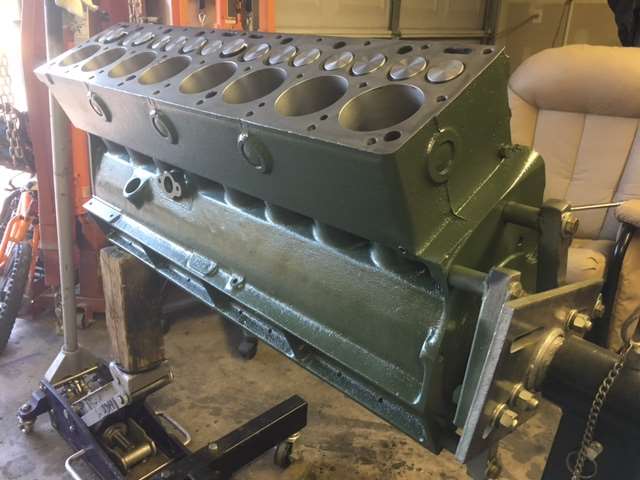 (31.73 KB) (31.73 KB)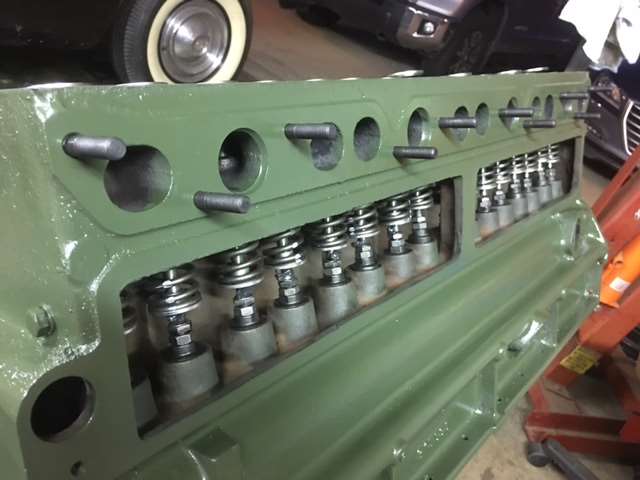
Posted on: 2016/12/8 12:33
|
|||
|
1937 Packard 138-CD Deluxe Touring Limousine
Maroon/Black 1090-1021 [url=https://packardinfo.com/xoops/html/modules/registry/View.php?ID=232]1955 Packard |
||||
|
||||
|
Re: Henry's 37 Limousine
|
||||
|---|---|---|---|---|
|
Forum Ambassador

|
Thanks for the update, I enjoyed following along and it looks like nice work going on. One comment though, on your pix of the generator armature, it appears that the mica needs to be undercut between the segments. Old-school method was to do so using a broken-off hacksaw blade, followed by removal of any burrs with a light pass of an abrasive or polishing cloth. Typical specification is that the mica should be undercut about 1/32".
Posted on: 2016/12/8 12:43
|
|||
|
||||
|
Re: Henry's 37 Limousine
|
||||
|---|---|---|---|---|
|
Forum Ambassador
|
quick correction...its the starter not the generator. i understand what you are saying and i actually saw this when i polished the armature with fine grit sandpaper. also the brushes are sitting deeper in their keepers indicating armature wear. eventually it will wear beyond service, but i made the decision to leave as is since the car wont be driven much. A new armature and drive wasn't really in the cards.
good news though...the starter is super easy to get in and out for repairs and as long as I have a good hill to push it down and drop the clutch it'll start. just ask "let the ride decide" i did test the starter motor after figuring out that one of the keeper bolts was grounding out. lets just say this starter motor will not have problems turning this motor over....it spins like a freaking crazy fool! and at WAY more rpm then it will ever see in service. thanks for the sharp eyes though!
Posted on: 2016/12/8 13:02
|
|||
|
1937 Packard 138-CD Deluxe Touring Limousine
Maroon/Black 1090-1021 [url=https://packardinfo.com/xoops/html/modules/registry/View.php?ID=232]1955 Packard |
||||
|
||||
|
Re: Henry's 37 Limousine
|
||||
|---|---|---|---|---|
|
Home away from home

|
Henry,
Work worthy of a watchmaker.
Posted on: 2016/12/8 13:40
|
|||
|
||||
|
Re: Henry's 37 Limousine
|
||||
|---|---|---|---|---|
|
Forum Ambassador
|
started installing the head studs from Max yesterday. i used Red thread locker/sealant. that should be good enough.
smear on thread locker....insert stud in and out a few times to really get it good on the threads in the head....double nut the end and tighten down....let sit for a few minutes till the thread locker turns darker color where it pooled at the top....then wipe off....done. I'm sure there are tons of other ways to do it and other products to use on the threads. put on 6 on each end and 3 in the middle....cold out there last night. then i sat the head down and spun the cam slow to see if it lifted up. no lift and once the head gasket is on it will lift higher, which is good because after i put the acorn nuts on...they bottomed out without the headgasket. hopefully the headgasket lifts it up enough that i can torque the nuts down or i'll need new deeper nuts, which is odd cause these are pretty deep and pointed more then most i've seen. the nuts are from industrial depot and are polished SS. the washers are SS from zoro tools. Attach file: (43.99 KB)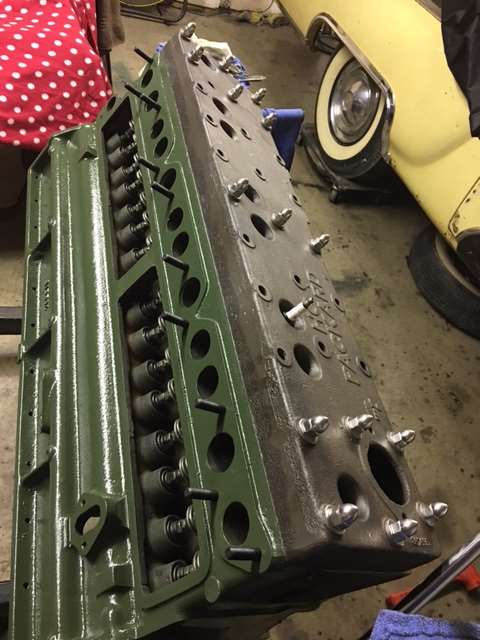 (37.61 KB) (37.61 KB)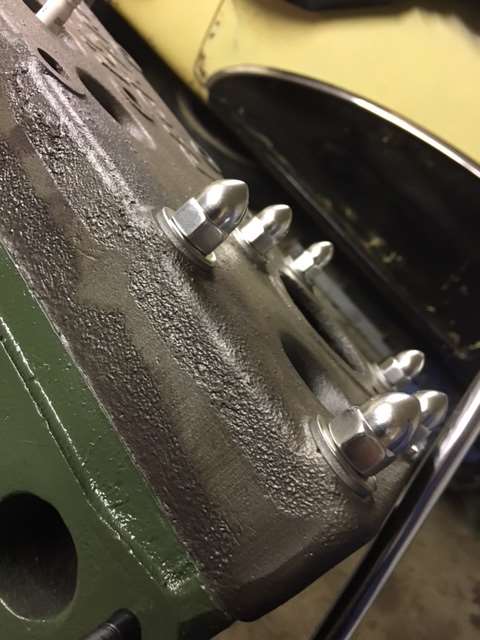 (32.68 KB) (32.68 KB)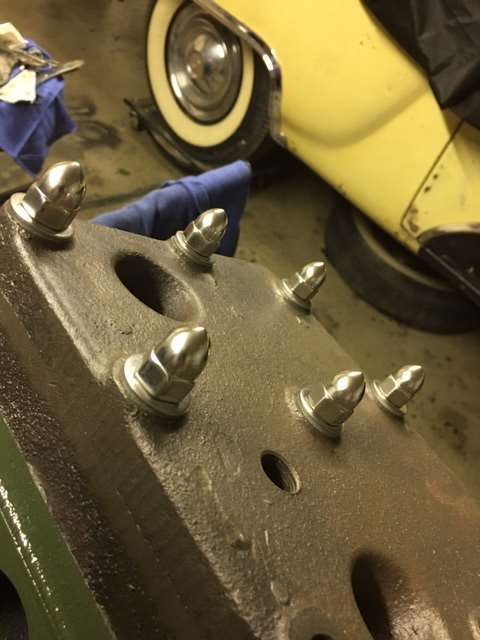
Posted on: 2016/12/9 10:33
|
|||
|
1937 Packard 138-CD Deluxe Touring Limousine
Maroon/Black 1090-1021 [url=https://packardinfo.com/xoops/html/modules/registry/View.php?ID=232]1955 Packard |
||||
|
||||
|
Re: Henry's 37 Limousine
|
||||
|---|---|---|---|---|
|
Forum Ambassador
|
hopefully the headgasket lifts it up enough that i can torque the nuts down or i'll need new deeper nuts,
Just use a thicker washer; for thick washers I prefer those stainless aircraft quality washers where the sides are ground flat and parallel to within a pretty tight specification. Several thicknesses available, if you don't find them elsewhere try MSC.
Posted on: 2016/12/9 10:38
|
|||
|
||||


