|
Re: Wade's Workshop
|
||||
|---|---|---|---|---|
|
Forum Ambassador

|
Friday 29th October 2010
First thing this morning was a trip over to ABC Bearings for modern seals and bearings for Mat's '34 and the '36 120 water pumps. But before doing that Wade showed me the box of parts we were taking for comparison and measurement purposes. These comprised the '34's water pump body, impeller shaft(minus impeller) and one of the removed bearings, while for the 120 it was the body and the shaft with the impeller still pressed on. Took one look at the impeller and was gobsmacked! For one thing it is brass and for another it's, for want of a better phrase, a work of art, a mechanical marvel, a labour of love or maybe it's a combination of all three? The impeller is hand made, meaning it's made out of brass with fitted brass impeller blades fitted and screwed into slots on the impeller plate together with additional retaining plates. My description doesn't do it justice, hope the pic's tell a better story. Anyway at ABC did the '34 pump first and settled on the same ceramic seal Wade used in Big Red because there wasn't a compact enough seal to fit the larger shaft in the '34. The bearings were easy but learned something about the bearings that had been in the pump. Dennis took one look at them and said they were a "looser" bearing, ie there was more clearance built into the bearing, these usually being used where something is slightly out of alignment! So instead of the "loose" bearings we replaced them with standard clearance bearings. Dennis was also taken by the brass impeller 'creation'. The 120 pump also will be modified for a modern ceramic seal but for 1/2" shaft diameter instead of the 5/8" for the '34. And the brass bushing in the nose of the pump housing is being replaced by two sealed ball bearings. On the weekend Wade will measure housings/bearings/seals/shafts and draft some drawings to accompany the parts when they go to Stan for machining next week. Once back at the workshop cleaned up the parts off the 120 pump which Wade had dis-assembled yesterday. Wade had also cleaned up the front of the '34's block in readiness for the water pump once it's rebuild is complete. And surprise, Gina dropped into the workshop and she too was impressed by the 'creation'. I for one would like it for a desk ornament or paperweight rather than be hidden away in a '36 Packard 120B water pump! Wade then proceeded onto some cosmetic touchups on the '34, hope Mat likes and approves of them. First was the front number plate bracket, what was there certainly wasn't befitting of a Packard! While Wade has a front number plate bracket off his '34 at this point of time he's not sure whether he's using that or not so he didn't go in that direction. Instead there was another home made bracket he had and after some measuring, bending and drilling it now approximates the '34 bracket in form, much more more befitting of the '34. I had to leave before it was finished being installed but it certainly will be better than the rattly concoction that was there before. The other item in the beautification program was a spare pair of used chromed front frame rail ends, well that's what I call them, that Wade has. These should clean up OK, not show quality by any means, but certainly better than the missing ones there. It is interesting though that one appears to be made from pressed steel and the other is a casting, twice as thick and twice as heavy. Just as I was leaving the workshop, grandfatherly duties again it's been a fairly family focused week, had a call from Chris, Starliner. Chris is replacing the WWW tyres on his '54 Clipper Super Club Sedan ready for road worthiness and the guy at the tyre fitters said the old tyres are still OK so Chris was asking if I knew of anybody who might be interested in them? I didn't offhand and suggested that, besides retaining one for a spare, he advertise them in the PACA club magazine "The Packardian" where members can place ads for free and the next issue is about ready to be prepared for print. Best thing about this deal is that the tyres are free to a good Packard home! So you read it here first PACA members, and if you want Chris's contact number send me a PM and I'll advise.  And just had a thought, doesn't happen often at this age, about a couple of '50's owners who might be interested so I'll send them an email. And just had a thought, doesn't happen often at this age, about a couple of '50's owners who might be interested so I'll send them an email.Attach file:  (22.58 KB) (22.58 KB)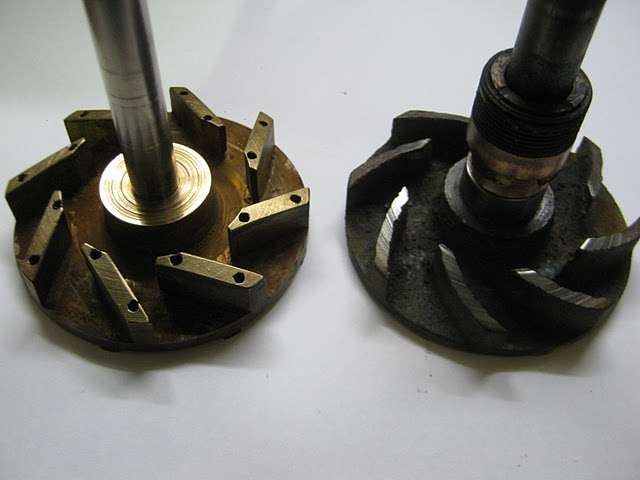 (13.20 KB) (13.20 KB)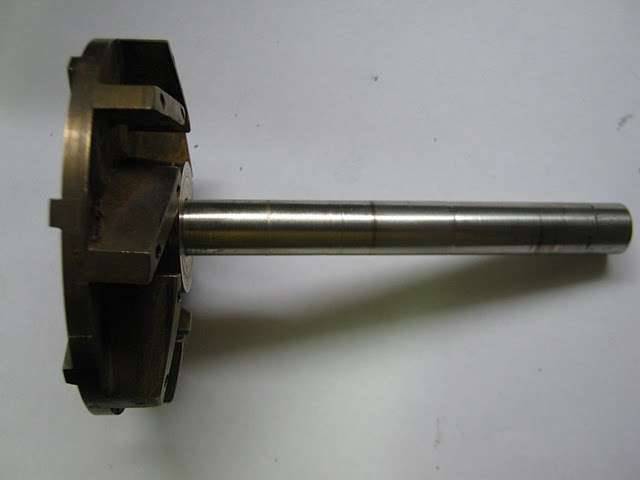 (20.09 KB) (20.09 KB)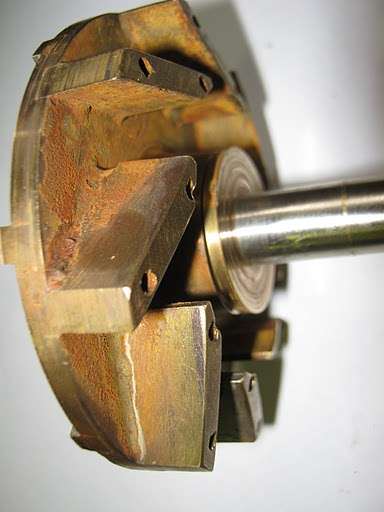 (30.47 KB) (30.47 KB)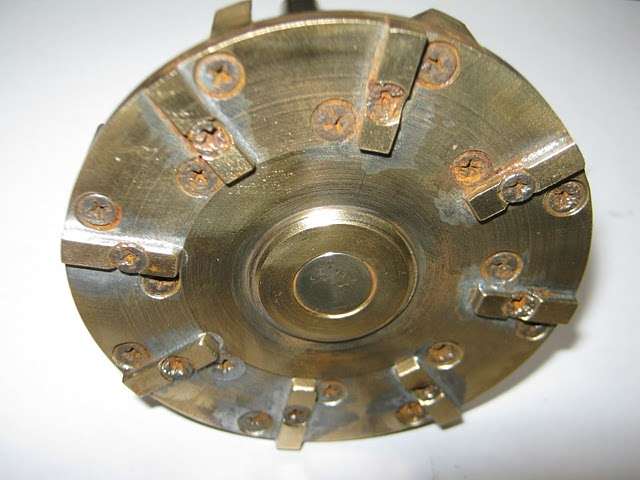 (35.27 KB) (35.27 KB)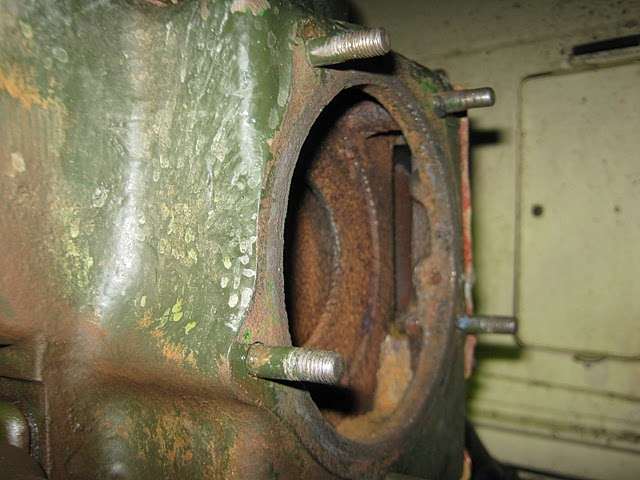 (44.55 KB) (44.55 KB)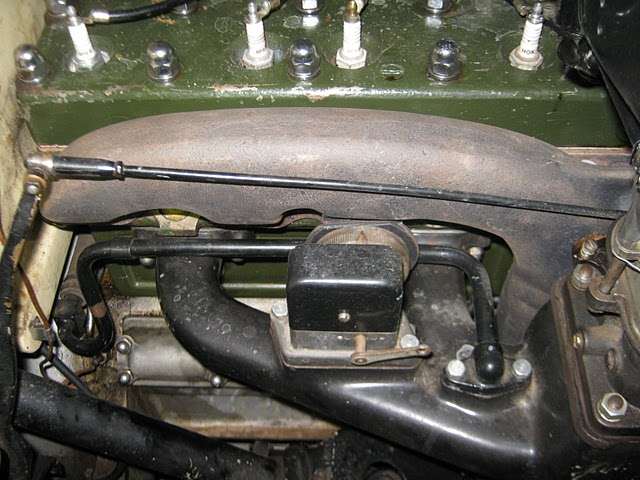 (37.65 KB) (37.65 KB)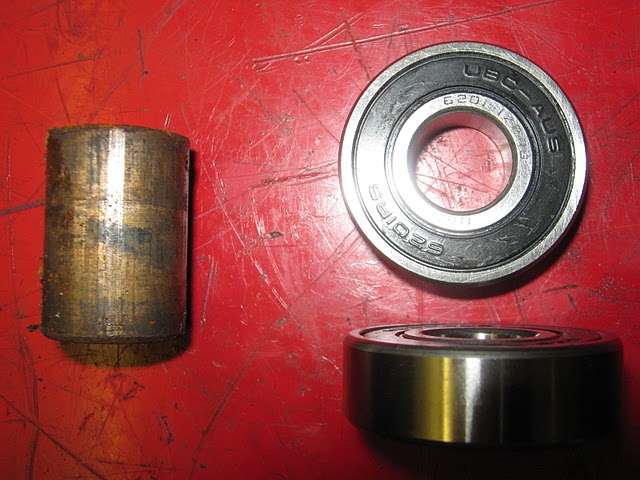 (31.58 KB) (31.58 KB)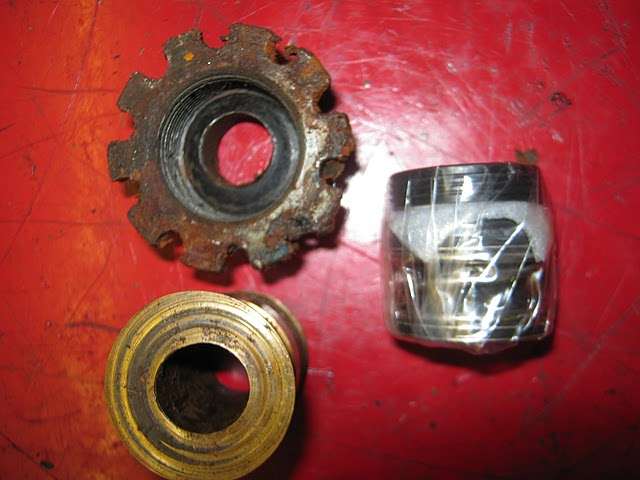 (22.30 KB) (22.30 KB)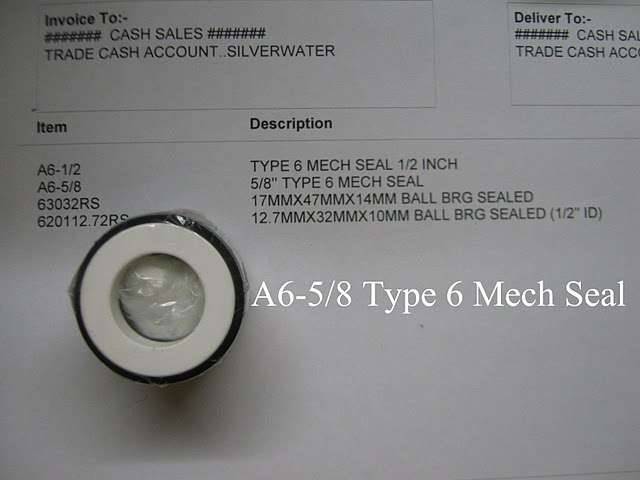 (26.54 KB) (26.54 KB) (24.53 KB) (24.53 KB)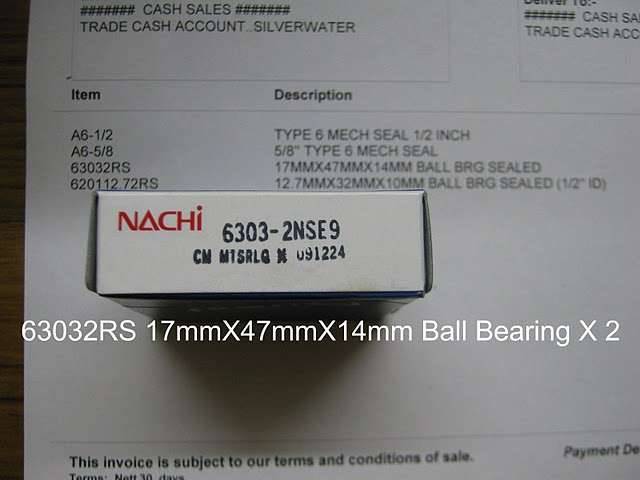 (23.40 KB) (23.40 KB)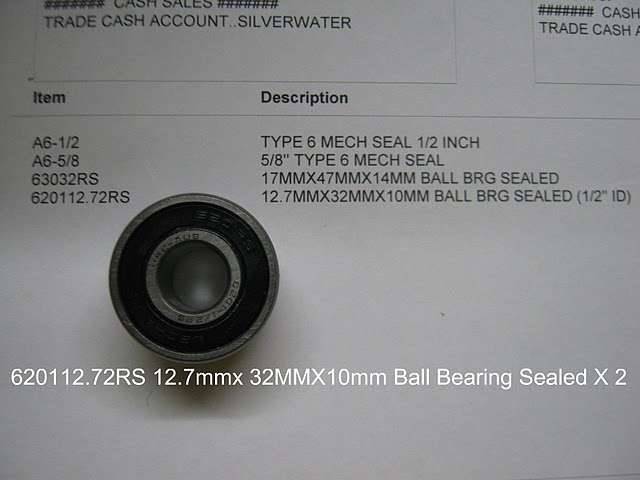 (29.65 KB) (29.65 KB)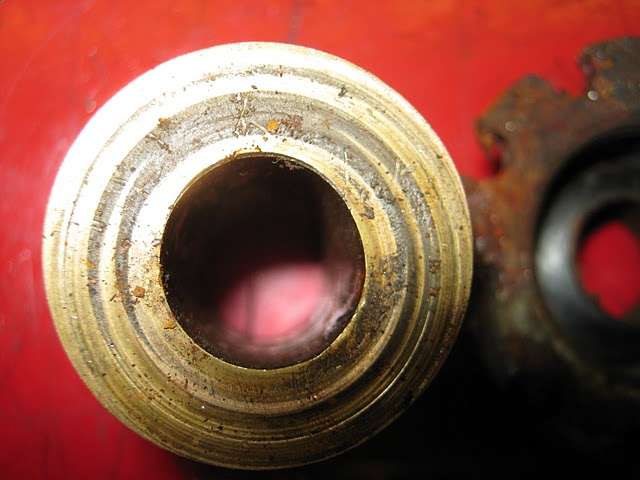 (33.94 KB) (33.94 KB) (36.47 KB) (36.47 KB)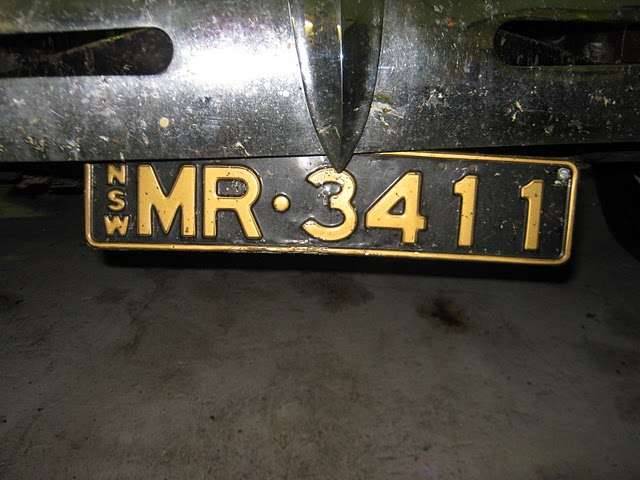 (48.50 KB) (48.50 KB)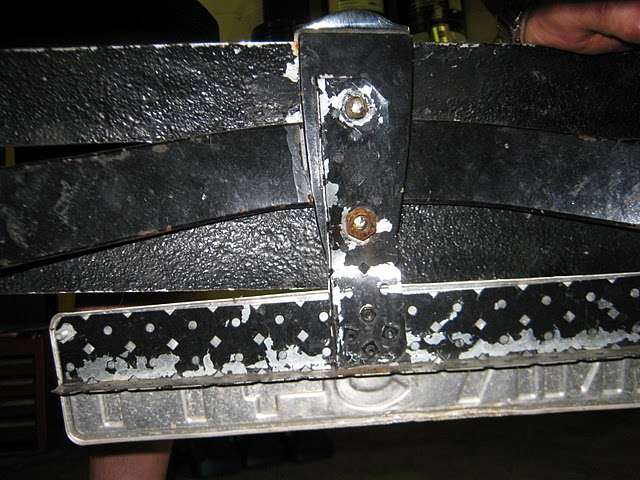 (35.79 KB) (35.79 KB)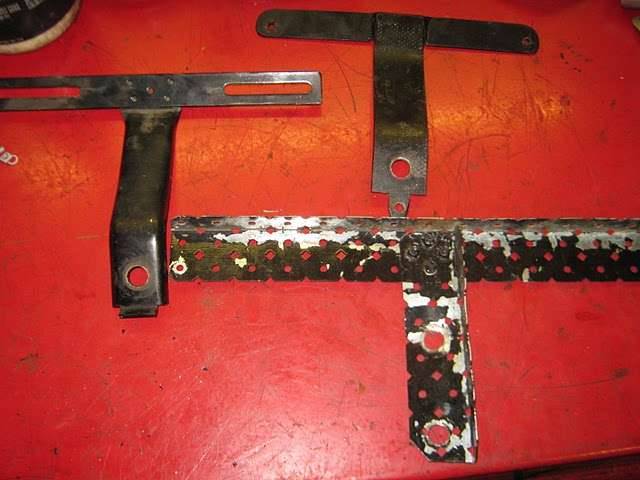 (46.38 KB) (46.38 KB)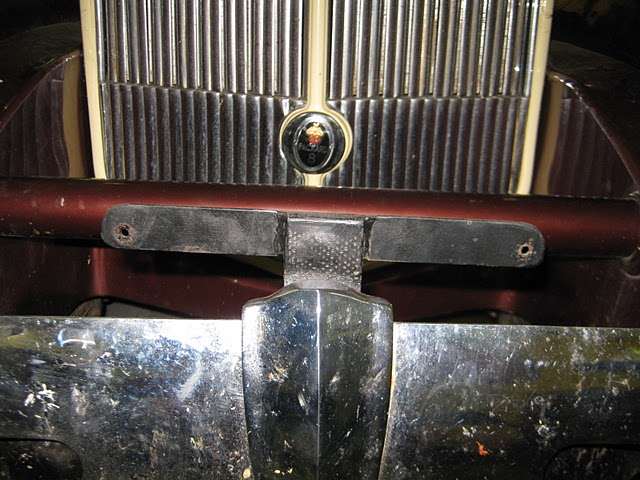 (31.00 KB) (31.00 KB)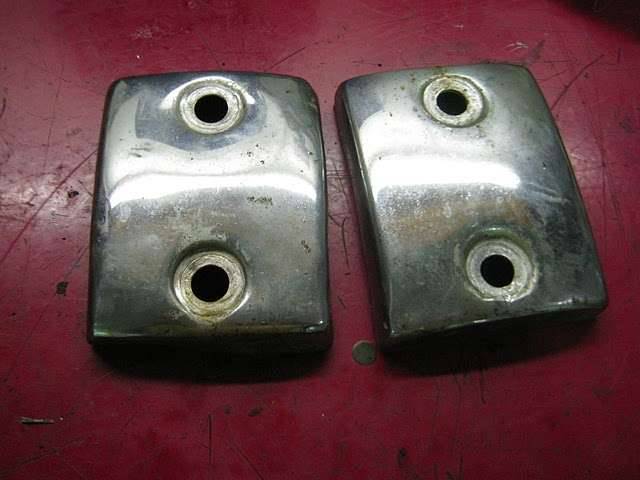 (29.20 KB) (29.20 KB)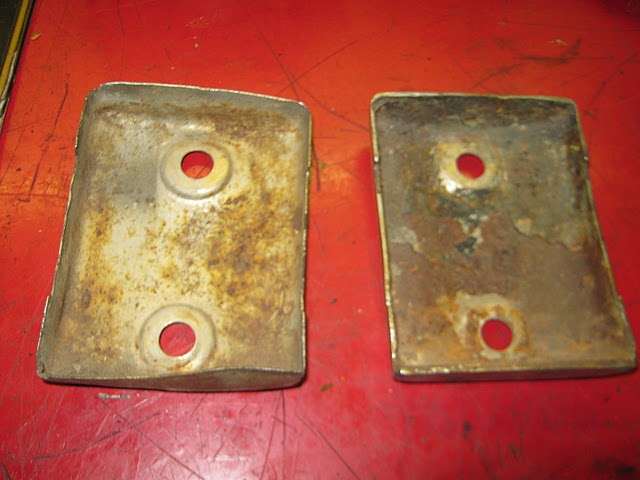 (42.46 KB) (42.46 KB)
Posted on: 2010/10/29 3:35
|
|||
|
Mal
/o[]o\ ====  Bowral, Southern Highlands of NSW, Australia "Out of chaos comes order" - Nietzsche. 1938 Eight Touring Sedan - SOLD 1941 One-Twenty Club Coupe - SOLD 1948 Super Eight Limo, chassis RHD - SOLD 1950 Eight Touring Sedan - SOLD What's this?  Put your Packard in the Packard Vehicle Registry! Here's how! Any questions - PM or email me at ozstatman@gmail.com |
||||
|
||||
 So I'll drop that down on Tuesday when we get back to Aus. The front number plate bracket looks very nice. Got the new Alternator as well so that should be nice.
 |
Re: Wade's Workshop
|
||||
|---|---|---|---|---|
|
Just can't stay away
|
Quote:
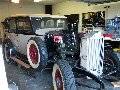
Mal, The key words above are "looks the same" Unfortunately, several parts often look alike, but do indeed have small differences. We respect to manifolds, I wouldn't know where to begin to look for differences. The parts manual for 1933-1936 lists several different manifolds I did not look into if mine has a part number stamped anywhere. Here are a few photos of the manifold on my car currently. Also shown is a page from the 1933 Packard Parts Book https://packardinfo.com/xoops/html/modules/article/view.article.php?337 Seems to leave more questions than answers Attach file: (46.19 KB)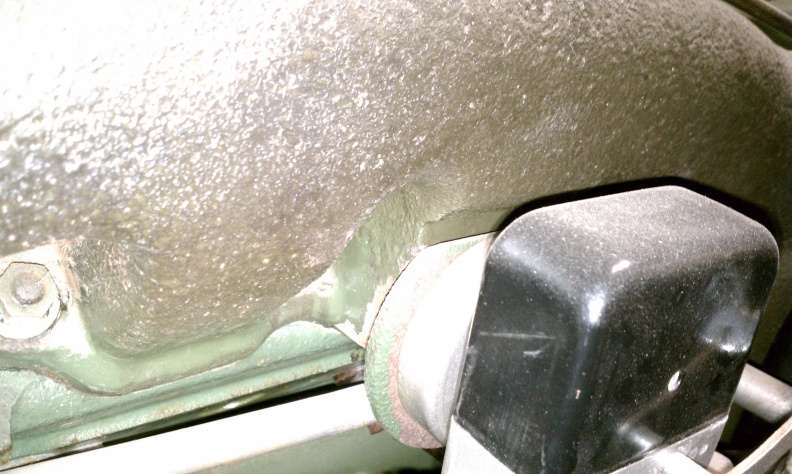 (40.37 KB) (40.37 KB)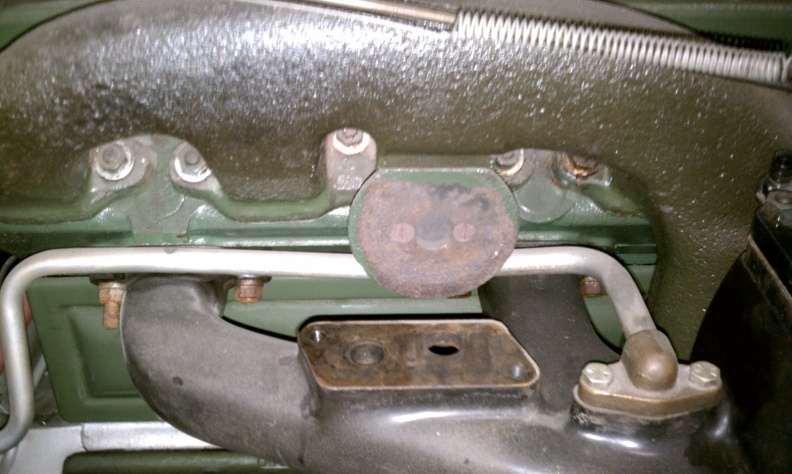 (125.03 KB) (125.03 KB)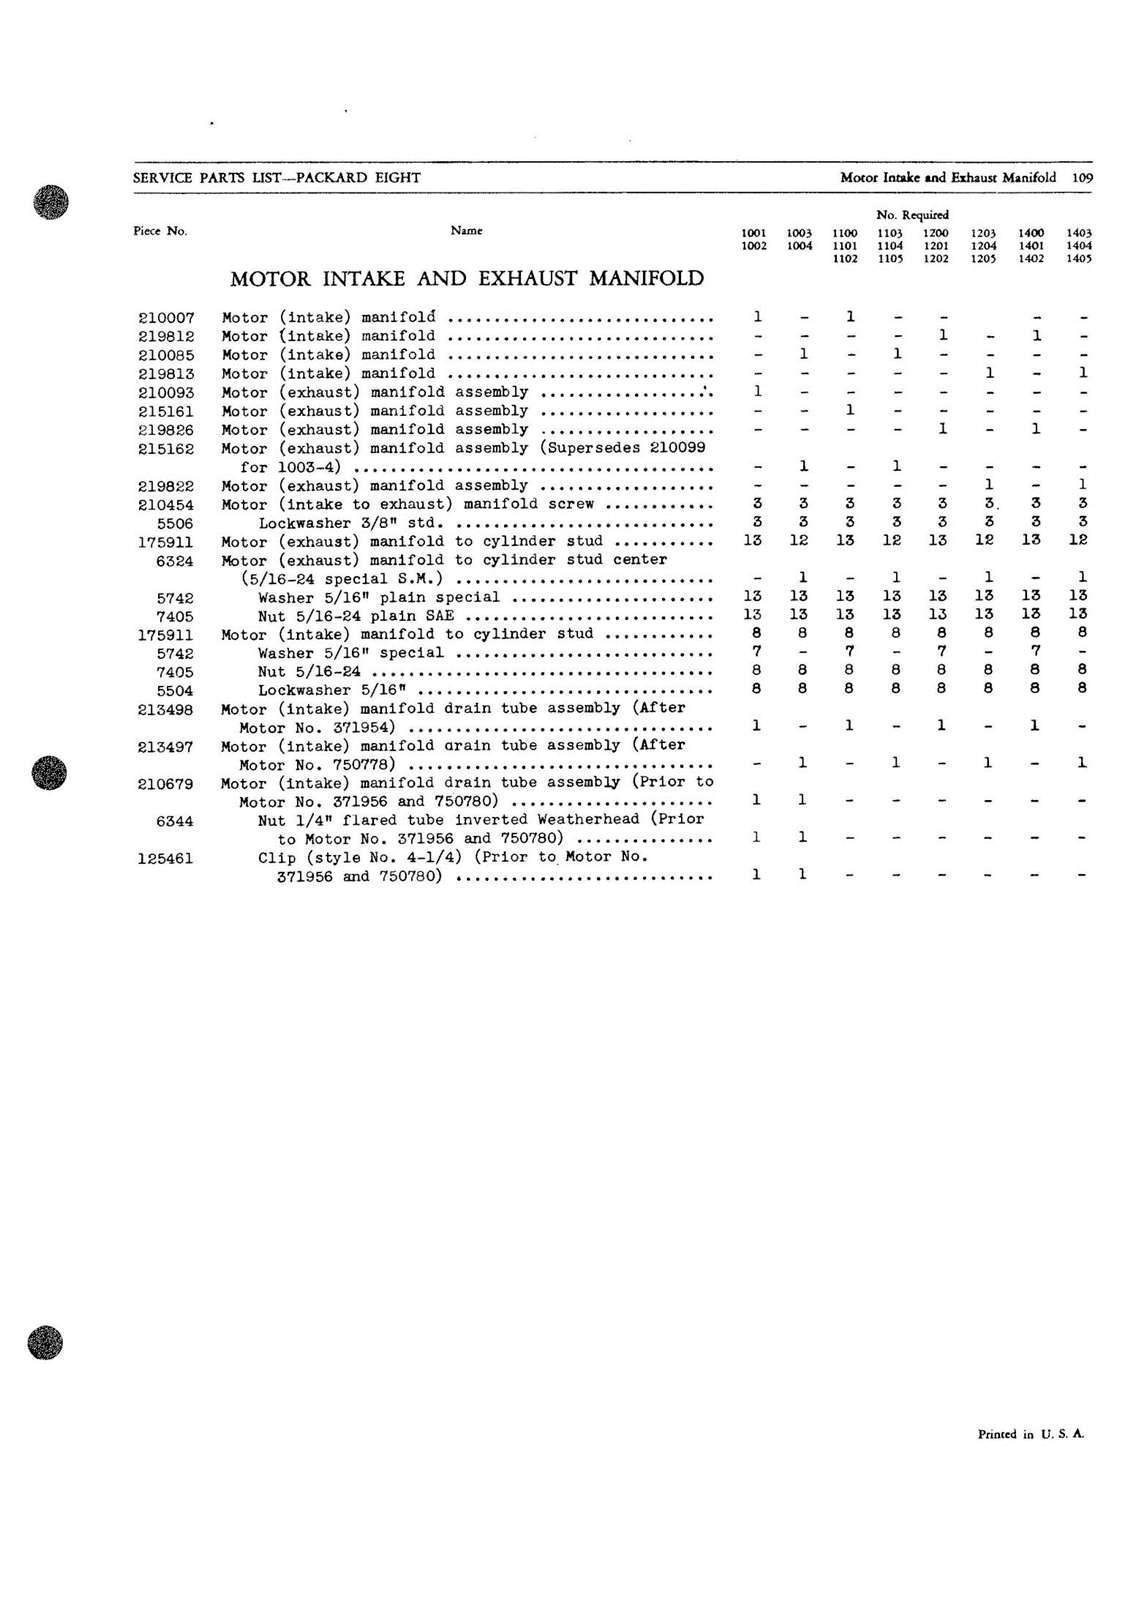
Posted on: 2010/10/30 21:59
|
|||
|
||||
|
Re: Wade's Workshop
|
||||
|---|---|---|---|---|
|
Forum Ambassador
|
Quote:
packard34 wrote:.....I got the parts for the waterpump yesterday that Wade needed. I've referred this info onto Wade. See you on Tuesday! Hobbs,  for the comments and pic's, hopefully will help in the identification stakes. for the comments and pic's, hopefully will help in the identification stakes.
Posted on: 2010/10/30 22:59
|
|||
|
Mal
/o[]o\ ==== Bowral, Southern Highlands of NSW, Australia "Out of chaos comes order" - Nietzsche. 1938 Eight Touring Sedan - SOLD 1941 One-Twenty Club Coupe - SOLD 1948 Super Eight Limo, chassis RHD - SOLD 1950 Eight Touring Sedan - SOLD What's this? Put your Packard in the Packard Vehicle Registry! Here's how! Any questions - PM or email me at ozstatman@gmail.com |
||||
|
||||
|
Re: Wade's Workshop
|
||||
|---|---|---|---|---|
|
Forum Ambassador
|
Monday 1st November 2010
Another late start at the workshop. Those granddaughters sure are demanding, but what can you do? Found Wade had been working on the '34, his '34 that is! Had glued some rubber edging around the outer firewall in preparation for putting it back into the '34. The next task was to finish the new caneite layer that goes between the outer firewall and the inner one. The major work on the caneite had been done a few months back but a number of holes remained to be located and drilled as well as creating a channel for the drain tube from the cowl vent. This entailed a number of on, locate and mark holes, off, then on, locate and mark, off, on, etc, etc sessions. It also entailed, at times, Wade inside the body while I held the caneite against the inner firewall while Wade located and marked holes. Finally all holes had been located, drilled and touched up where required. That left the channel for the drain tube. Wade was leaning to just cutting a slot in the caneite but I suggested we try to cut/carve/whatever a channel to accommodate the tube. A trial fit appeared to confirm a channel was possible so then I had to devise a means of doing what I'd proposed. Thought of using a Stanley knife or maybe a grinding bit in an electric drill but then ended up using a large round file. Said to Wade just before I started that if the file didn't work we'd revert to his Plan A of cutting a slot because I wasn't that confident it would work. Needn't have worried, it worked like a charm! Because the caneite is soft, using the file laid almost flat, a groove was very easily started. From there it was just a matter of progressively filing the groove deeper and wider. A number of trial fittings of the tube along the way to check, adjust and achieve the width and depth required of the channel and we were in business. Glad it worked, not often an idea of mine is adopted and most importantly works! With a slot about 80% of the way done the middle of the caneite it would have been very delicate to handle. As it was, the caneite was placed on the inner firewall, the drain tube threaded through from the top, and there it sat reasonably snuggly in place. Wade inserted the metal sleeves in the holes in the bottom corners of the caneite which are for the bonnet(hood) catches. Then the outer firewall was slipped into place. Now when I say "slipped into place" I'm taking a bit of literary licence in using that term. Because of the "lip" at the front of the cowl, the firewall is slipped up and behind the "lip" and then lowered and swung back to fit the sides in. Required some persuasion to get it all to fit together but didn't require the firewall to be taken off to resize or relocate holes in the caneite so we did something right there. With the firewall in place, Wade had contemplated using a couple of large bolts to temporarily hold the upper corners where the radiator stays are anchored. Instead, when the time came he used the cast iron oil pressure and vacuum fittings which are located in the upper part of the firewall. Worked well too, although they are temporary for this particular task. To locate the lower part of the firewall the bonnet(hood) catches were then installed and securely tightened because they are there permanently. A couple of times Wade referred to Mat's '34 for visual confirmation of things but in the main relied on the extensive file of pic's he'd taken during dis-assembly. And Wade tell me that all going well he hopes to get the body onto the chassis later this week, probably Saturday. This will be a significant milestone in The Fossil's restoration progress. Left Wade trying to contact Stan, couldn't raise him earlier, so he could drop in Mat's '34's water pump for the machining required. Attach file: (12.55 KB) (29.74 KB) (29.74 KB)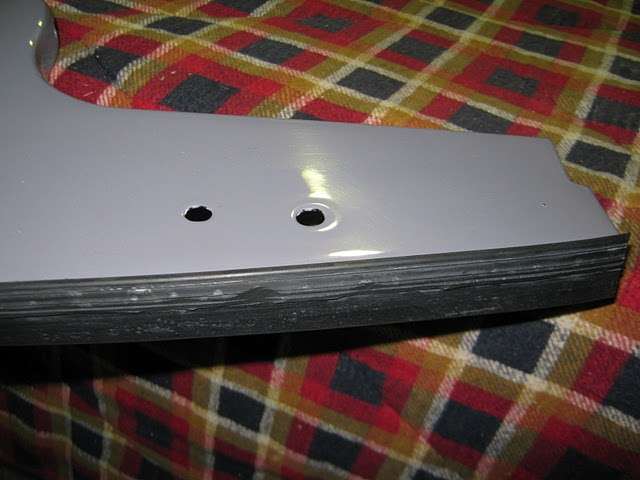 (28.16 KB) (28.16 KB)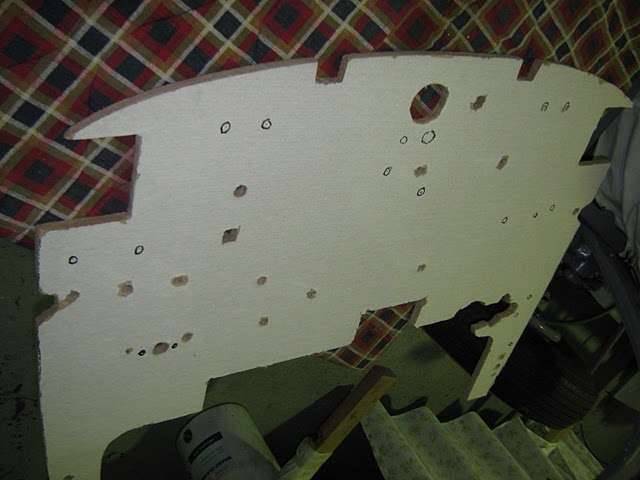 (32.71 KB) (32.71 KB) (27.90 KB) (27.90 KB)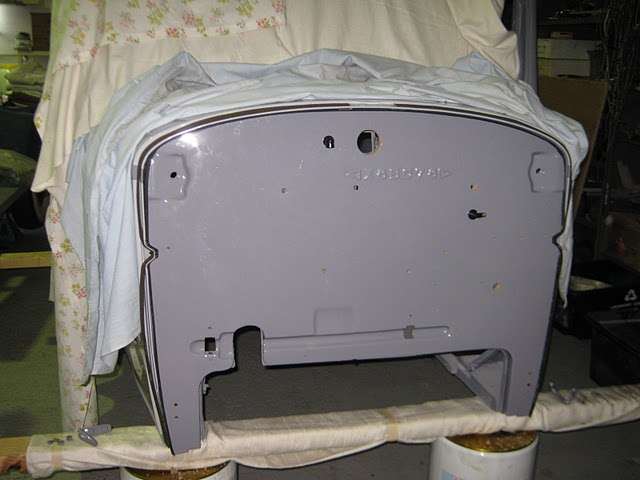 (28.44 KB) (28.44 KB)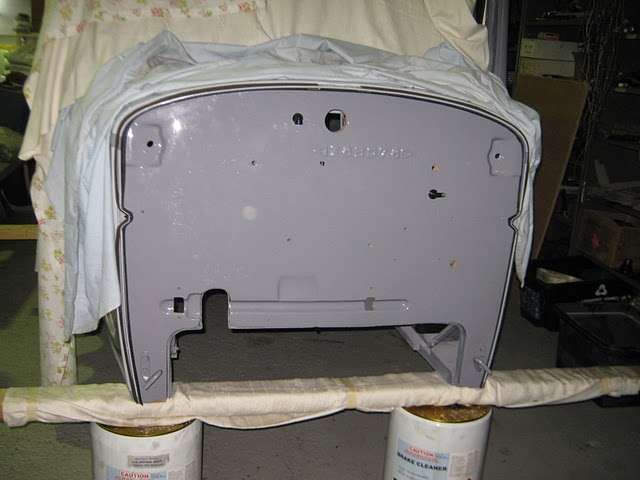 (40.25 KB) (40.25 KB)
Posted on: 2010/11/1 1:09
|
|||
|
Mal
/o[]o\ ==== Bowral, Southern Highlands of NSW, Australia "Out of chaos comes order" - Nietzsche. 1938 Eight Touring Sedan - SOLD 1941 One-Twenty Club Coupe - SOLD 1948 Super Eight Limo, chassis RHD - SOLD 1950 Eight Touring Sedan - SOLD What's this? Put your Packard in the Packard Vehicle Registry! Here's how! Any questions - PM or email me at ozstatman@gmail.com |
||||
|
||||
|
Re: Wade's Workshop
|
||||
|---|---|---|---|---|
|
Forum Ambassador
|
Tuesday 2nd November 2010
"The race that stops a nation" that's the moniker applied to the Melbourne Cup Australia's premier horse race. Happens the first Tuesday in November every year with this years being the 150th running! Enough of the Australiana lesson for today and on to the more usual Packard presentation. Wade phoned me in the morning to advise he wouldn't be at the workshop until later in the morning because of another commitment but could I be there in case Mat arrived? Of course I could, so spent my time perusing some old magazines that Wade is passing on to PACA members. Among the magazines was one from 1981, I think, which contained an ad which caught my eye. The ad was by Joel Ray, Patrician Industries/Packards1, advertising Packard parts for sale. Shortly thereafter Wade arrived and we turned to his '34, The Fossil. Still a few things to be done before the '34's body and frame are mated together, one of which was re-installing the right side cowl vent door. The left side vent door had been re-installed back on the 23rd June and finally the time had come to tackle the right side. Besides once the body is back on, with steering column and other things to contend with, it wont be as accessible so now was the time. The right side hinge had posed a problem at the time with the hinge loops on the body not permitting passage for the hinge pin. Wade had cleaned out the hinge loops on the vent door itself but because of the close confines hadn't been able to do so for the body loops. Today the body hinge loops needed to be cleaned out and a number of small round files were the first choice for clearance work. However because of the difficulty in operating the small files effectively this approach didn't produce the desired result. Turned to a more primitive method in an effort to clear what was thought to be paint buildup, hammering an "implement" through the hinge loops to remove the buildup. The "implement" was a long thin bolt of the same diameter as the hinge pin. The top hinge loop wasn't a problem so the "implement" started its work on the second hinge loop. Progress was slow, but it was progress, and to ensure the "implement" didn't get stuck and present another problem it was backed out from time to time. Coming through the second hinge loop the "implement" pushed a wad of paint out before it. Same again for the third and last hinge loops and a test fit of the hing pin proved successful. The hinge pin and all hinge loops were given a coating of grease and with me inserting the vent door from outside the cowl and then holding it in place Wade inserted the hinge pin. And what do you know, it works! All that remained was to couple up the arm and spring connecting the vent handle to the body. And just when Wade was tightening up the little nut and bolt holding the arm and spring, Mat, the owner of the other '34 in the shop arrived! Mat had arrived in Sydney about 7:30am and in the time between touching down at the airport and arriving at the workshop, about 3 hours later, he'd been busy. Besides collecting his luggage, which had grown from the two bags he'd taken with him to four on his return(lot of Packard parts in there!) he'd picked up his daily driver and visited his '55 Caribbean at a paint shop in western Sydney. Wade was able to show and explain what had been done or remained to be done on Mat's '34. Mat in turn provided stories of his time in the US, and is already talking about going back next year! He then produced a new Delco-Remy 6V Negative ground alternator and some new seals for the water pump and the sump plug. The alternator looks interesting but even more interesting is, how is it going to be mounted? Because the water pump is away being machined, Wade dropped it into Stan yesterday afternoon, any ideas as to where and how it will be mounted will wait until it returns and is mounted on the block again together with the pulley and fan which are all factors for consideration. Mat did say he had a guy who could fabricate a bracket so, once a decision and design is settled on, that will certainly help. And in case you're fretting about this development, Mat does have a '34 generator he picked up in the US but it needs rebuilding. Attach file: (17.49 KB)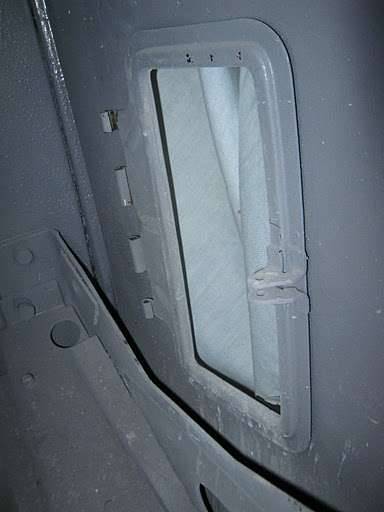 (16.21 KB) (16.21 KB)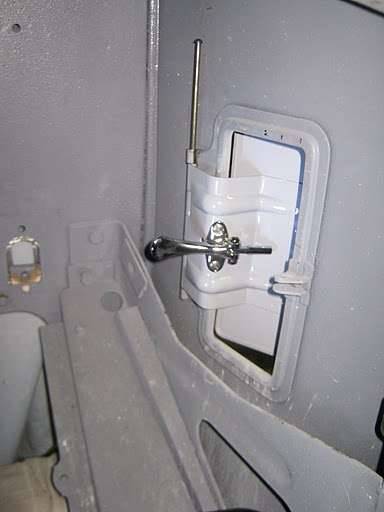 (16.16 KB) (16.16 KB)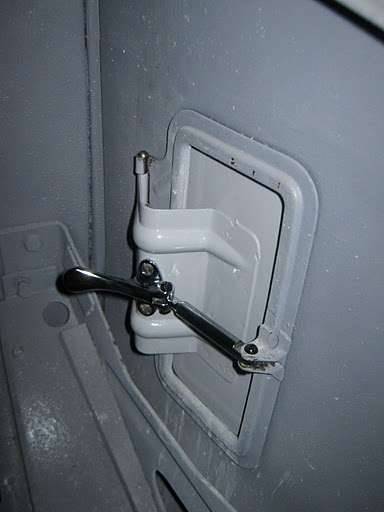 (10.85 KB) (10.85 KB)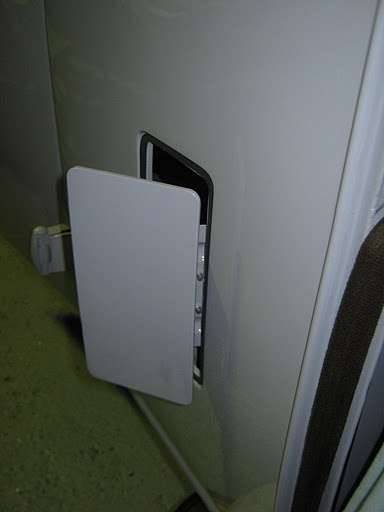 (14.67 KB) (14.67 KB)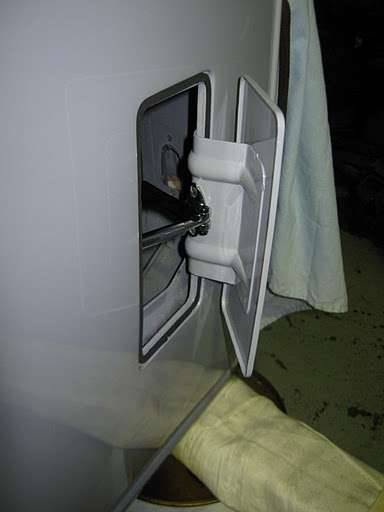 (32.74 KB) (32.74 KB) (33.79 KB) (33.79 KB) (32.29 KB) (32.29 KB)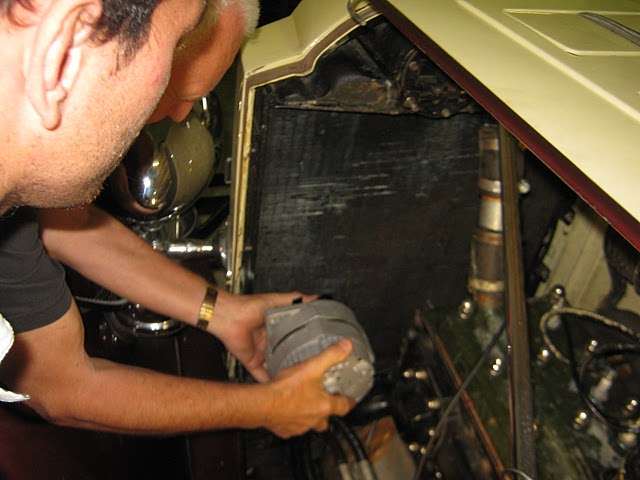 (18.83 KB) (18.83 KB) (35.66 KB) (35.66 KB)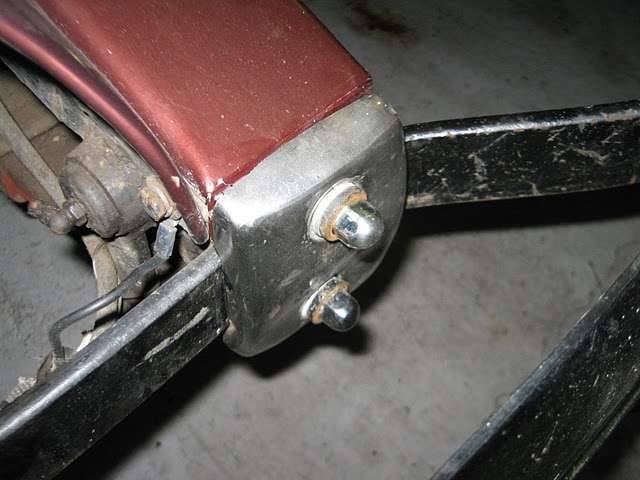 (29.56 KB) (29.56 KB)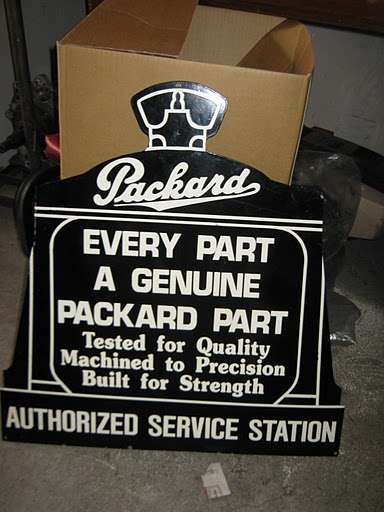 (38.04 KB) (38.04 KB)
Posted on: 2010/11/1 23:44
|
|||
|
Mal
/o[]o\ ==== Bowral, Southern Highlands of NSW, Australia "Out of chaos comes order" - Nietzsche. 1938 Eight Touring Sedan - SOLD 1941 One-Twenty Club Coupe - SOLD 1948 Super Eight Limo, chassis RHD - SOLD 1950 Eight Touring Sedan - SOLD What's this? Put your Packard in the Packard Vehicle Registry! Here's how! Any questions - PM or email me at ozstatman@gmail.com |
||||
|
||||
|
Re: Wade's Workshop
|
||||
|---|---|---|---|---|
|
Home away from home

|
WHAT??? You guy's don't get Hershey with almond bars down there? That right there is a staple of Eric's diet!
(And if I don't stop soon I'll be going by the moniker "BigEric", lol!)
Posted on: 2010/11/2 10:27
|
|||
|
||||
|
Re: Wade's Workshop
|
||||
|---|---|---|---|---|
|
Forum Ambassador
|
Wednesday 3rd November 2010
More work on 'The Fossil' today. First was the long hinged piece that screws in at the top of the windscreen and to which the windscreen frame mounts. Needed to work out which way it goes in, finally solved by looking at the holes in both the piece and the body where it mounts. Then was freeing up the piano hinge which runs the width of the piece because it was painted with the hinge and pin in place. Some working the hinge back and forward, in sections because it very loooong, and it was OK. Then finding the 22 brass screws required, this piece had been removed by the panelbeater and not Wade. And while Wade ran a tap through 20 of the 22 holding threads in the body(the other 2 were were tap inaccessible), I cleaned up the screws. Screwed into place the piece, now with the benefit of now being held firmly by all 22 screws, swings out and back fairly easily. Next was installing a pull wire for the wire for the radio aerial. The aerial in a '34 is actually the 'chicken wire' in the roof insert and before things went too much further with the body Wade wanted a pull wire in place for when the actual wire will be installed later. First cut a wire coat hanger and straightened it. Then fed it down inside the right side A pillar, little bit of bending and jiggling required. Then attached the pull wire by first roughing up the lower end of the coat hanger and wrapping the end of the pull wire around it. Then using plastic tape, taped the pull wire and wire coat hanger together. With me gently pulling the coat hanger and Wade guiding the lower taped together end, by feel alone as there was no way to see what was going on in the bottom of the pillar. Soon met an obstacle but with "fingers" Wade moving the coat hanger a little bit one way we got it through. Progress up the pillar continued slowly and regularly until we were just about there. Then hit another snag, but under Wade's direction of bending the section of the coat hanger closest to the snag point and a little more back and forwards, it came through that too. Wade then snipped off that end of the pull wire, close to the end of the coat hanger. In order to put the coat hanger away, the end of the pull wire needed to be taken off. Thought I had would have to unravel the plastic tape, but no, all it required was a gentle tug! A lot less than I'd been using to pull it up through the A pillar! Another matter to be attended to, and which came to Wade's mind when he bumped his head against it while under The Fossil's dash, was the main cowl vent specifically the sealing rubber for it. Wade has a rubber seal from Steele's, but it doesn't fit! It's just too big, in both width and height. Fortunately with Mat's '34 handy, checked that and lo and behold, the seal there isn't fixed to the cowl itself but to the vent lid instead. What a good idea, So it was off to Grippy Rubber where a length of 18mm X 6mm adhesive backed rubber strip was purchased for the job, and cutting and fitted instructions supplied gratis. Back at the workshop cut, trimmed and pressed the strip into place then left Wade to it. Daughter and granddaughters again, what can you do.Attach file: (28.17 KB)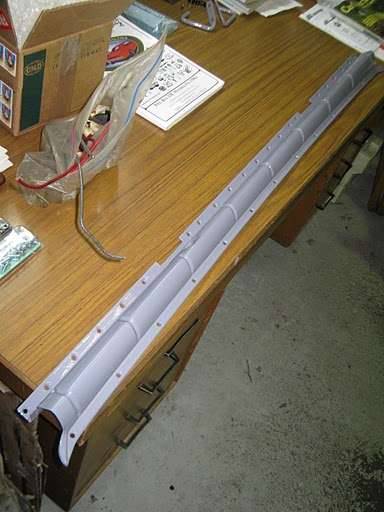 (29.33 KB) (29.33 KB)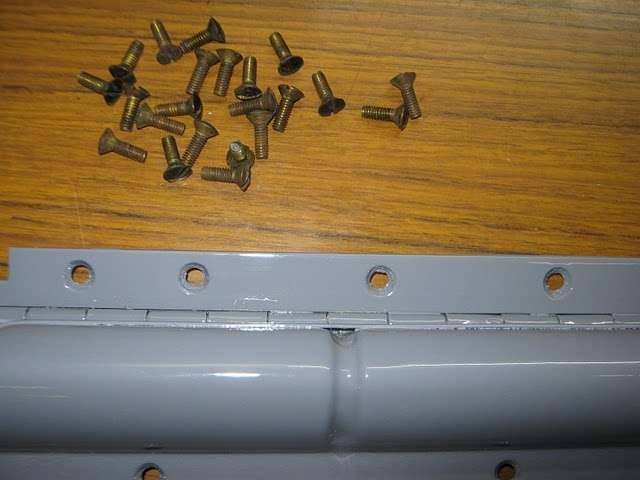 (28.51 KB) (28.51 KB) (17.27 KB) (17.27 KB)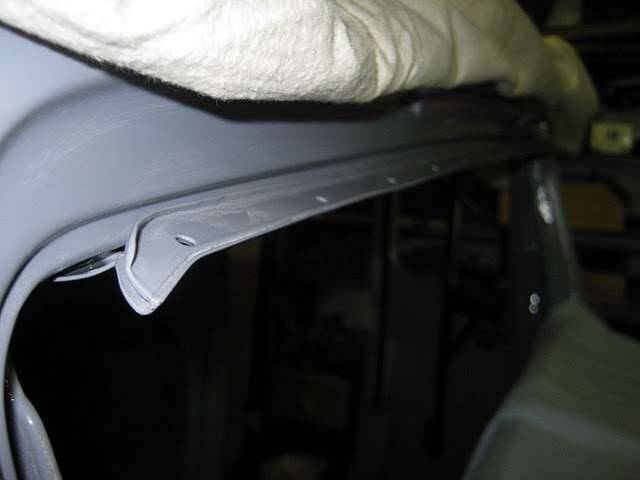 (32.06 KB) (32.06 KB)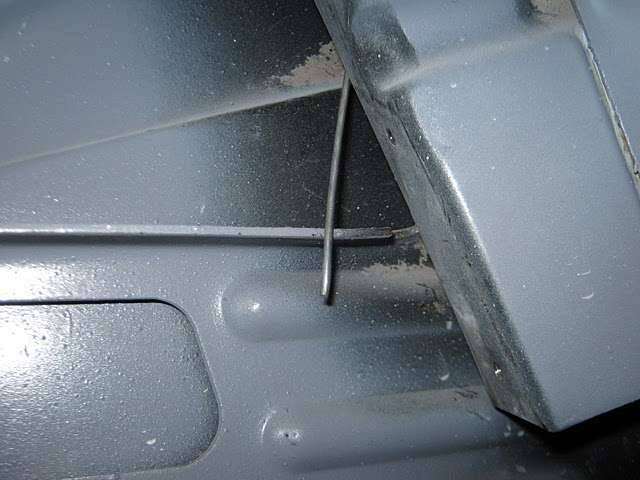 (13.95 KB) (13.95 KB)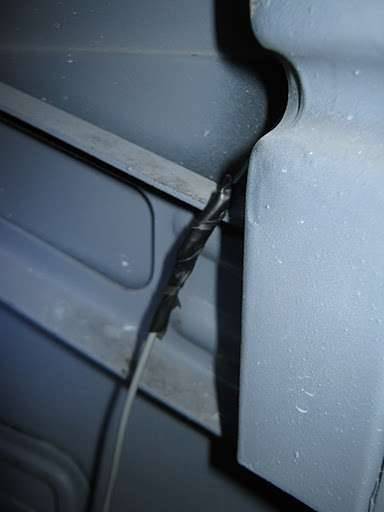 (33.62 KB) (33.62 KB)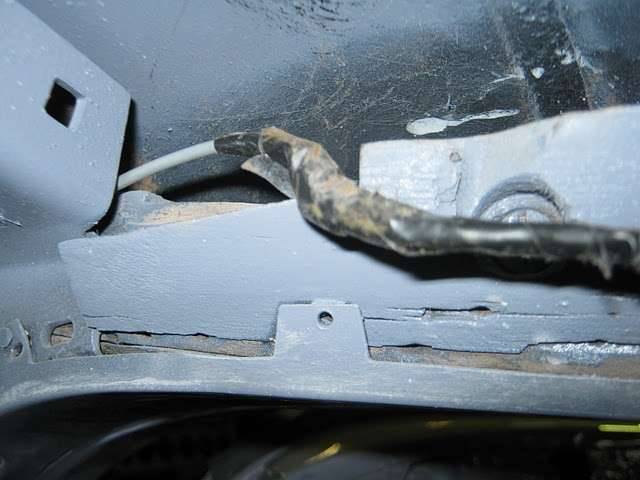 (31.03 KB) (31.03 KB)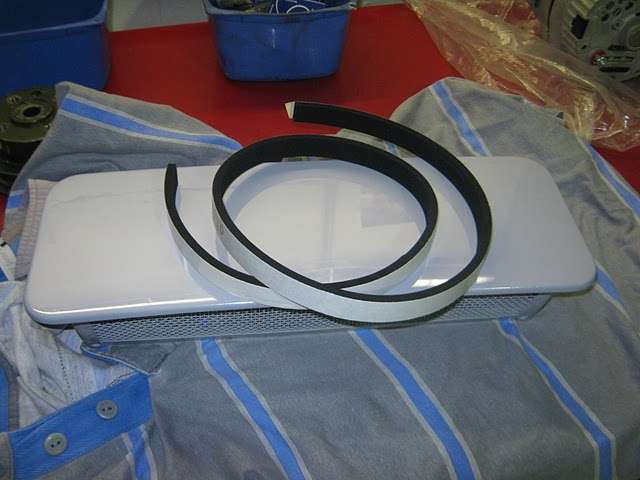 (31.66 KB) (31.66 KB)
Posted on: 2010/11/3 3:10
|
|||
|
Mal
/o[]o\ ==== Bowral, Southern Highlands of NSW, Australia "Out of chaos comes order" - Nietzsche. 1938 Eight Touring Sedan - SOLD 1941 One-Twenty Club Coupe - SOLD 1948 Super Eight Limo, chassis RHD - SOLD 1950 Eight Touring Sedan - SOLD What's this? Put your Packard in the Packard Vehicle Registry! Here's how! Any questions - PM or email me at ozstatman@gmail.com |
||||
|
||||
|
Re: Wade's Workshop
|
||||
|---|---|---|---|---|
|
Forum Ambassador
|
Thursday 4th November 2010
No granddaughters today, just Packards and a step up in the Packard world too, but more of that later. Yesterday Wade had continued with the cowl vent for The Fossil, installing the vent together the opening/closing mechanism in the car. Only problem was he had about four attempts to do so but couldn't get the gaps fpr the vent edge to the cowl right. The side gaps were fine but the front gap was about twice the width of the rear gap. So now that I was in attendance, standing on a plastic milkcrate for observation purposes, Wade adjusted things twice, the first of which saw little improvement while the second reversed the gap disparity. Then a third time, and it was spot on. To ensure the vent didn't move while Wade tightened everything up I then heavied the vent using my not inconsiderable weight to hold it in place, hence my use of the milkcrate, to gain a height advantage. All tightened up, then a little grease applied to the mechanism for smooth operation. Next, preparations for the body to be united with the chassis continued. The inside of the body had been used to store the side and rear glass as well as the assembled windscreen and all that needed to be relocated prior to the move. As well as that the woodgrained dash and a coupe of small panels had been accommodated on the roof, suitably protected. Wade has a couple of trolleys, one of which is stainless steel and had been used as temporary parts for the various Packards which have passed through the workshop over recent times. All it had left on it was the accelerator pedal linkage for The Fossil as well as some old wires, New spaces found for the linkage and wires, a clean up and the trolley was pressed into service. That done it was then time to adjust the positioning of the 2 by 4's presently supporting the body on top of 20 litres drums. Jacked the body up fore then aft and moved the timber and drums accordingly and as a result the body now has a wheel standing attitude with the front higher than the rear. The other side to this equation is the chassis, which also required attention prior to reunion, timing of which is expected to be Saturday afternoon when John's hoist should be free. The chassis needed to be dropped down from the jackstands under the rear axle and the ramps and blocks of wood under the front axle. Back on the workshop floor it was then time to give it a spring clean, from the firewall area back. Over the course of it sitting in this position it had picked up a covering of dust. Tried blowing it off with compressed air, but that failed, so it was back to the old proven method of rag in hand. Wasn't any more that could be done to that '34 so turned to the other '34. Never would have thought I'd ever utter a phrase like that but there it is, amazing! Not much that can be done to Mat's, until the water pump is back from machining, except remove the idler pulley setup welded to the front motor mount. Initially it was thought that this would have to be done in the '34, but closer inspection on my part, showed it was welded only to the centre retaining hub of the mount. By placing a wide, deep block of wood on the jack the front of the engine was slightly raised to 1), take the strain off the front engine mount and 2), to support the engine while the mounting hub was being relieved of the cancerous growth upon it. Then out came the hub, angle grinder readied, and that's when Barry arrived. Barry had come down from Tamworth to pick up the hot tanked aluminium heads, that right its plural, because the heads are off his '38 Twelve. He's rebuilding the engine, although it was supposedly rebuilt by a US Packard restoration specialist for the previous owner with many, many thousands of dollars of receipts for the work done. If or what was done is just a disgrace because Barry is now completely rebuilding it. Barry had one of the rods and pistons with him that came out of the engine, the one where the piston was 63 grams heavier than the other 11 pistons in the engine! And how did they address that? Not by obtaining another piston of the correct weight, or by removing the excess weight from the piston itself. Weight removal was done by grinding weight off the connecting rod instead! I believe the letters V & H, or maybe it was H & V, or was it HIV, figure prominently in the name of the restorer of Barrys '38 Twelve, but seeing that rod and piston wouldn't encourage me to use them. Another story Barry told me was about a battery hold down that had been fabricated for the Twelve. It was so shoddy Barry threw it away then later found a bill for its fabrication of $840, he now wishes he'd kept the bracket as "evidence". But enough of the venting, Barry also delivered intake and exhaust manifolds, 4 barrel carb, air cleaner, linkages and lines for Michaels '54 Convertible, all correct, one year only and almost impossible to find items. Now Michael will be able to return his '54 to the breathing system it should have. And another item was the water pump off the Twelve, for Wade to rebuild. After Barry's departure then returned to the Mat's '34's idler pulley removal. This was accomplished using an angle grinder with a cutting blade and slicing through the welds. Then cleaning up the dags with a grinding wheel, no metal was really lost in this process, as Wade tried to stay within the welds for the separation process then grind through what was left of them back to the metal of the hub. Hub then back on '34 and jack removed from under sump. Next and last was the Twelve water pump. Seeing we've had a number of water pumps over recent weeks it was interesting to see this one and how it compared to the others, a 120 and a '34 standard eight. First thing I noticed, when I put the Twelve pulley down next to the '34 pulley was the size difference. Then when Wade measured the shaft it was 20mm in diameter, more than 3/4"(19.05mm). From memory, I think the 120 is 1/2" while the '34 is 5/8". My last observation was the sheer size differential between the shaft and impeller of the 120 against those of the Twelve. After removing the bearing retainer plate, the grub screw holding the impeller, and the key for the pulley the impeller was pushed off the shaft and then the bearings and shaft pushed out of the water pump housing. The bearings were then pushed off the shaft and we made a beeline for ABC Bearings for new bearings and a modern seal. Attach file: (19.17 KB)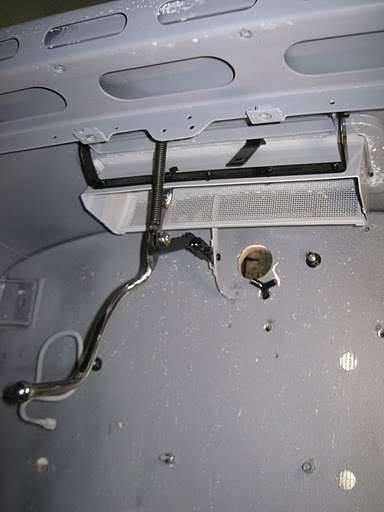 (11.69 KB) (11.69 KB) (12.89 KB) (12.89 KB)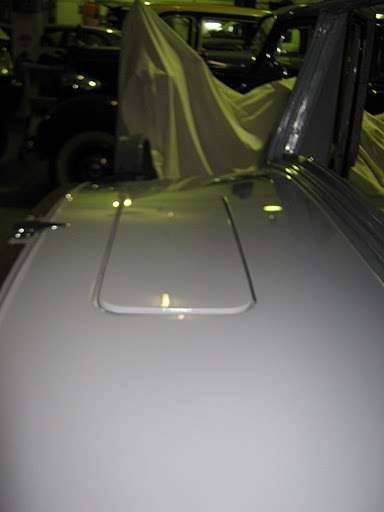 (30.31 KB) (30.31 KB)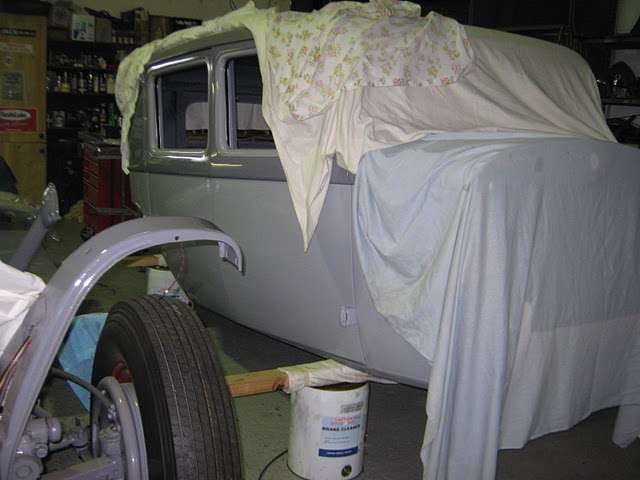 (38.98 KB) (38.98 KB)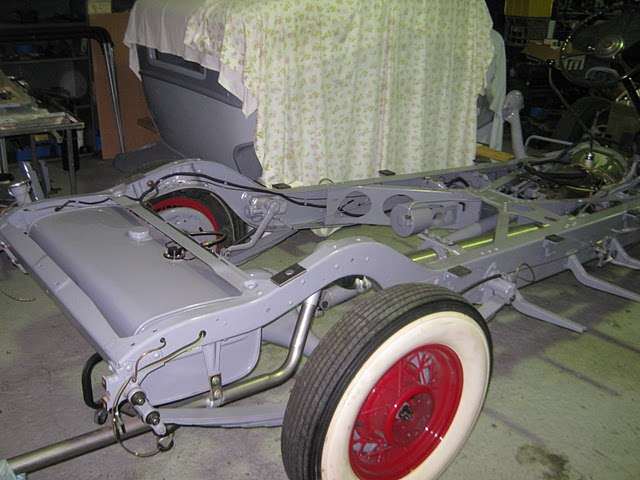 (35.28 KB) (35.28 KB)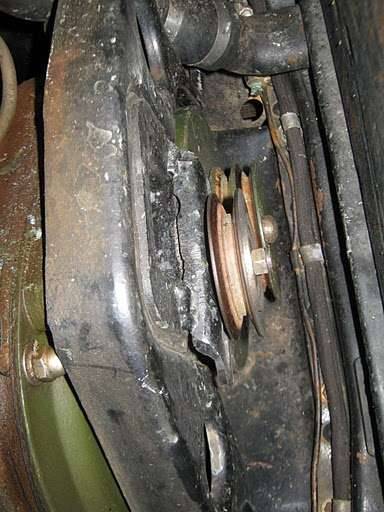 (35.47 KB) (35.47 KB) (33.94 KB) (33.94 KB)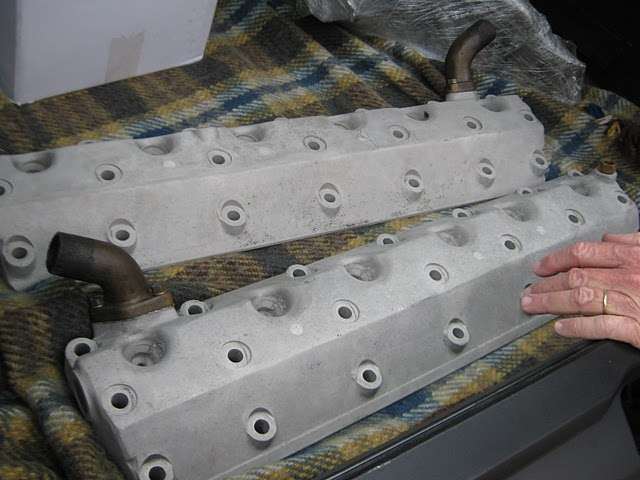 (40.13 KB) (40.13 KB)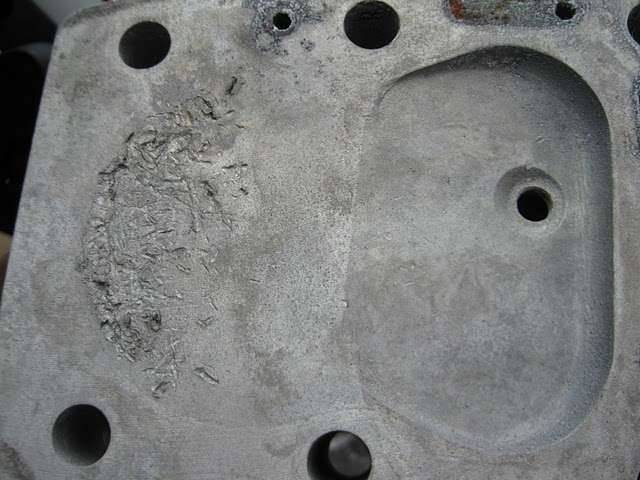 (34.26 KB) (34.26 KB)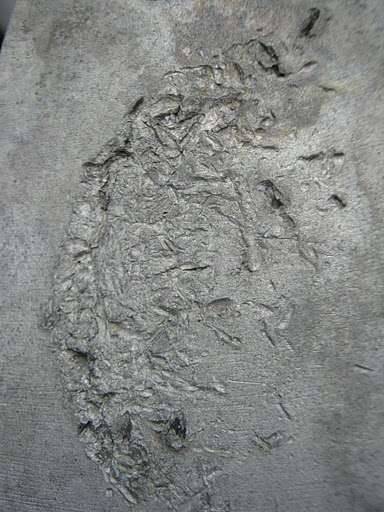 (26.63 KB) (26.63 KB)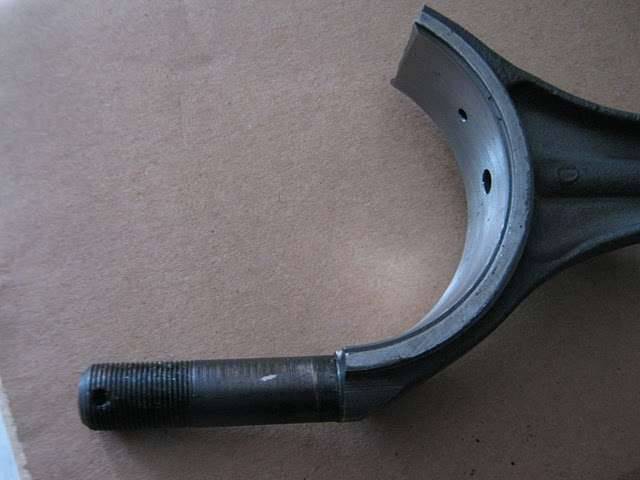 (22.83 KB) (22.83 KB) (35.71 KB) (35.71 KB)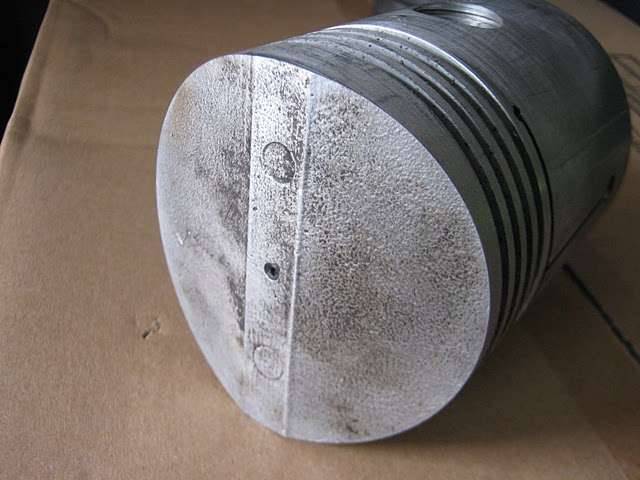 (29.47 KB) (29.47 KB)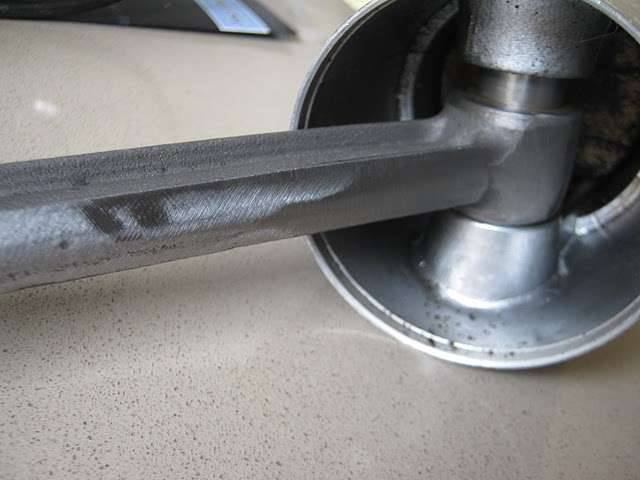 (38.00 KB) (38.00 KB) (34.92 KB) (34.92 KB) (33.78 KB) (33.78 KB)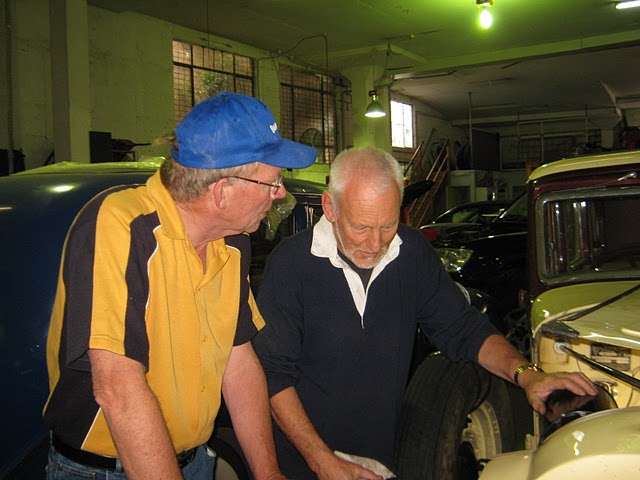 (34.30 KB) (34.30 KB)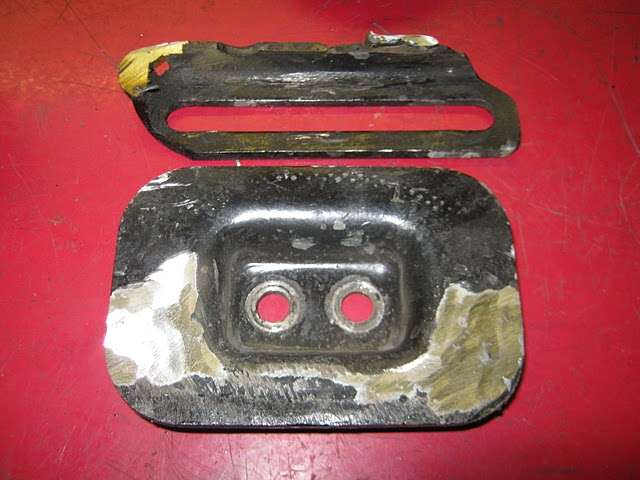 (31.10 KB) (31.10 KB) (17.39 KB) (17.39 KB)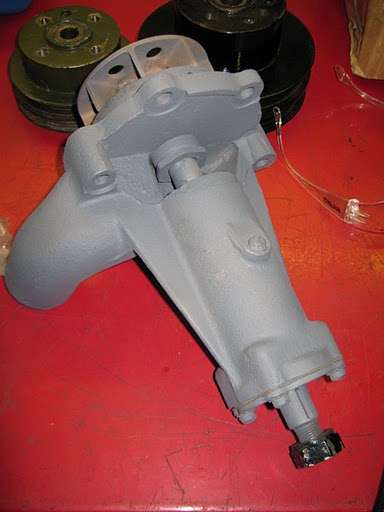 (25.72 KB) (25.72 KB)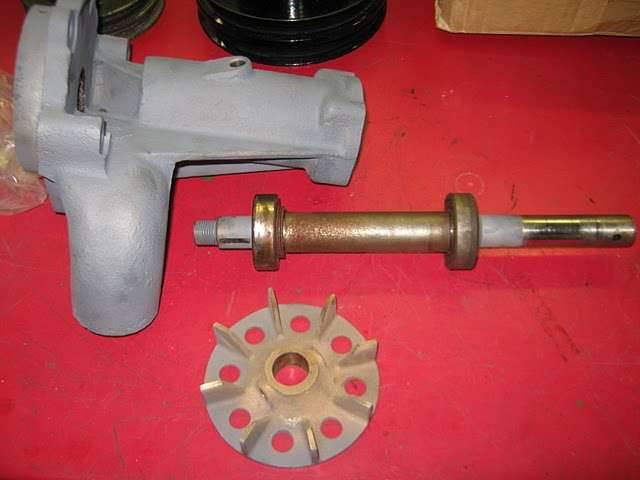 (20.52 KB) (20.52 KB)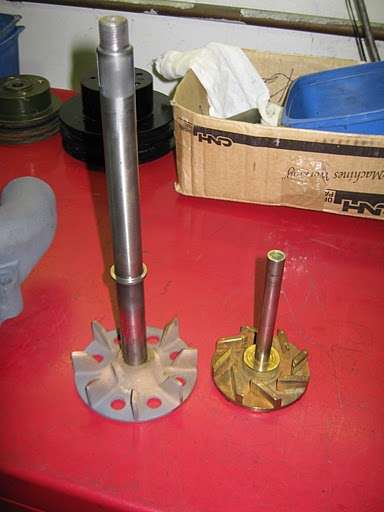 (20.92 KB) (20.92 KB)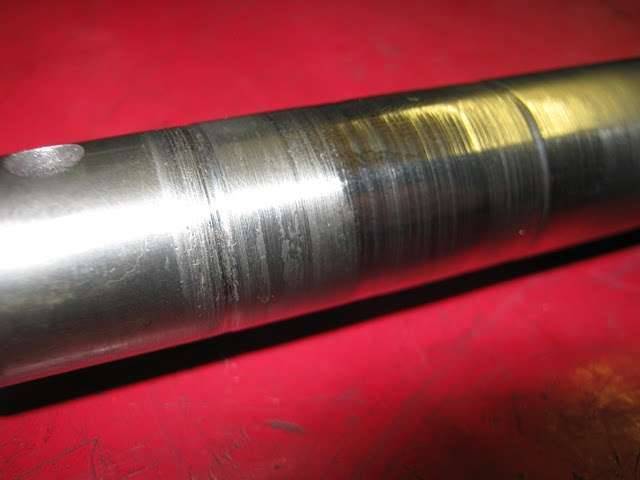 (32.17 KB) (32.17 KB) (15.99 KB) (15.99 KB)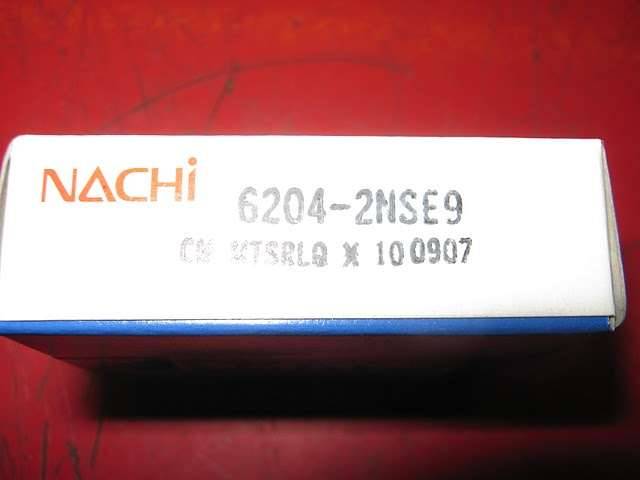
Posted on: 2010/11/4 5:06
|
|||
|
Mal
/o[]o\ ==== Bowral, Southern Highlands of NSW, Australia "Out of chaos comes order" - Nietzsche. 1938 Eight Touring Sedan - SOLD 1941 One-Twenty Club Coupe - SOLD 1948 Super Eight Limo, chassis RHD - SOLD 1950 Eight Touring Sedan - SOLD What's this? Put your Packard in the Packard Vehicle Registry! Here's how! Any questions - PM or email me at ozstatman@gmail.com |
||||
|
||||
|
Re: Wade's Workshop
|
||||
|---|---|---|---|---|
|
Forum Ambassador
|
Friday 5th November 2010
Must have spent all of 5 minutes at the workshop mid morning, dropping in to give Misty a bone and to pick up a computer from Wade. Gave me the chance to see the "engineering" drawing Wade drafted yesterday for Twelve water pump machining purposes. Then later in the morning had a call from Pepepackard, who amongst other things told me he has an old US made Allen engine analyser. Pepe, does it look like this one currently on aBay? And speaking of water pumps, received an email from Mat about the eBay water pump he bought which turned out to be for a 120, Mat also said this "....Let me know if this any use to you and I'll drop it off next time I'm down...." - very generous. Description for the pump Mat bought included "Just what your car needed! Original Water Pump Assembly (Bushing Type) replacement for 1935-37 PACKARD. With original and (mostly) complete box!" Attach file: (18.74 KB) (24.17 KB) (24.17 KB)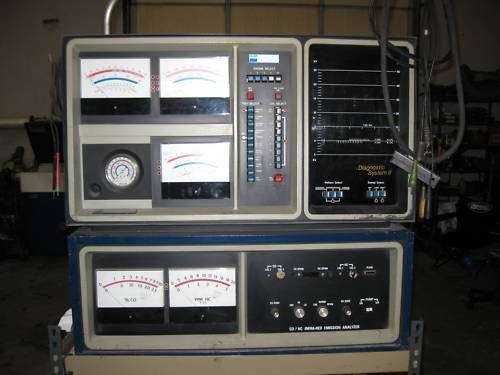 (38.82 KB) (38.82 KB)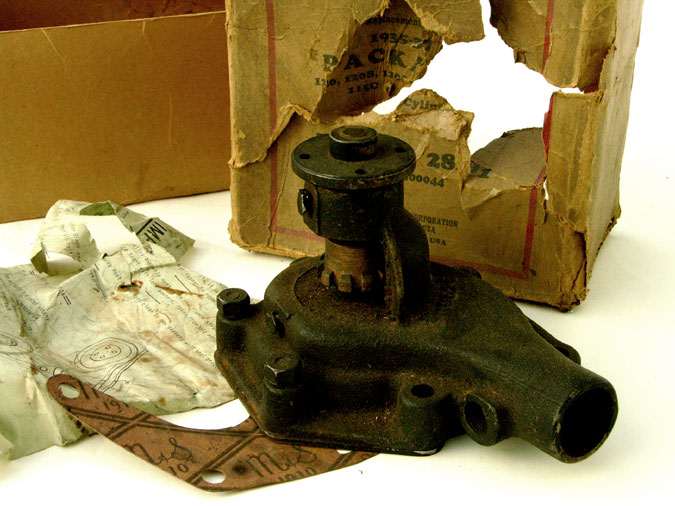 (38.33 KB) (38.33 KB)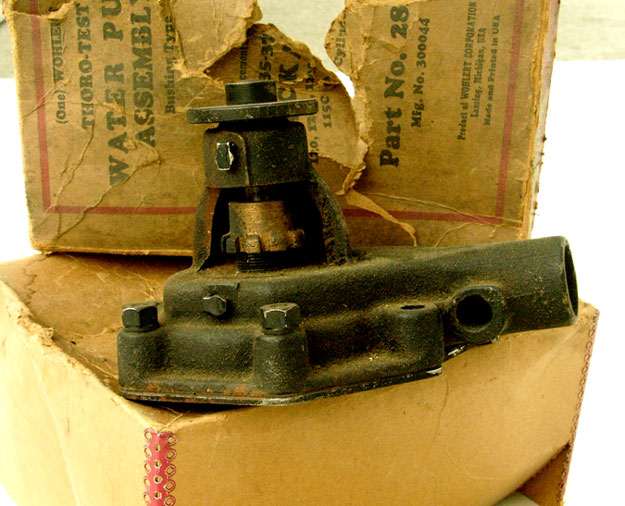
Posted on: 2010/11/5 1:26
|
|||
|
Mal
/o[]o\ ==== Bowral, Southern Highlands of NSW, Australia "Out of chaos comes order" - Nietzsche. 1938 Eight Touring Sedan - SOLD 1941 One-Twenty Club Coupe - SOLD 1948 Super Eight Limo, chassis RHD - SOLD 1950 Eight Touring Sedan - SOLD What's this? Put your Packard in the Packard Vehicle Registry! Here's how! Any questions - PM or email me at ozstatman@gmail.com |
||||
|
||||
Register To PostTopic is Locked


