|
Re: The Duchess Project: 1940 Super 8 Convertible Sedan
|
||||
|---|---|---|---|---|
|
Home away from home

|
Once again, thanks, Howard.
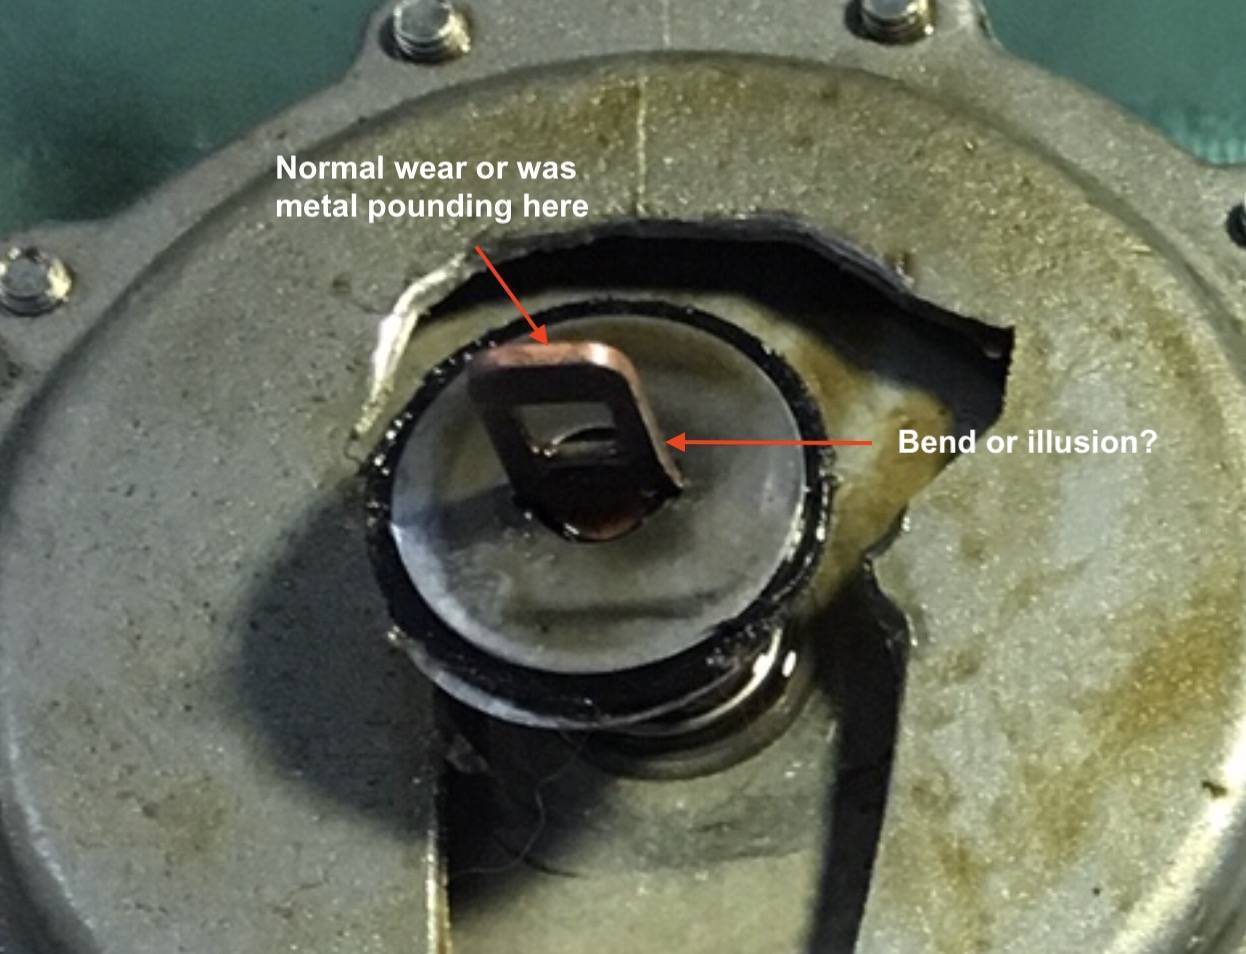
FUEL PUMP: That top section was totally loose, and as soon as the pump tipped from loosening the mounting screws it fell off and hit the concrete garage floor. Probably that did it. It's also interesting that there appears to be a chunk actually missing. Not one connection was loose, I can assure you of that. I will have to check where I bought it. It could have had a hairline crack to begin with that worked its way open. It's been in there for 9 years and it was removed and reinstalled with the engine rebuild in 2016/7. DISTRIBUTOR: If anyone has replaced bushings for an Autolite IGT-4103 with parts from McMaster-Carr, could you point me there. Do I want a drill bushing? I will search Literature and Manuals for something Autolite in the meantime to find bushing specs. KICK-DOWN SWITCH: I have to figure out what to change to get my passing gear working again since the previous (current) set-up blocks the accelerator from giving me full throttle. You have to click pic to get proper orientation. The screw and head is temporarily removed. Attach file:  (180.90 KB) (180.90 KB) (212.28 KB) (212.28 KB)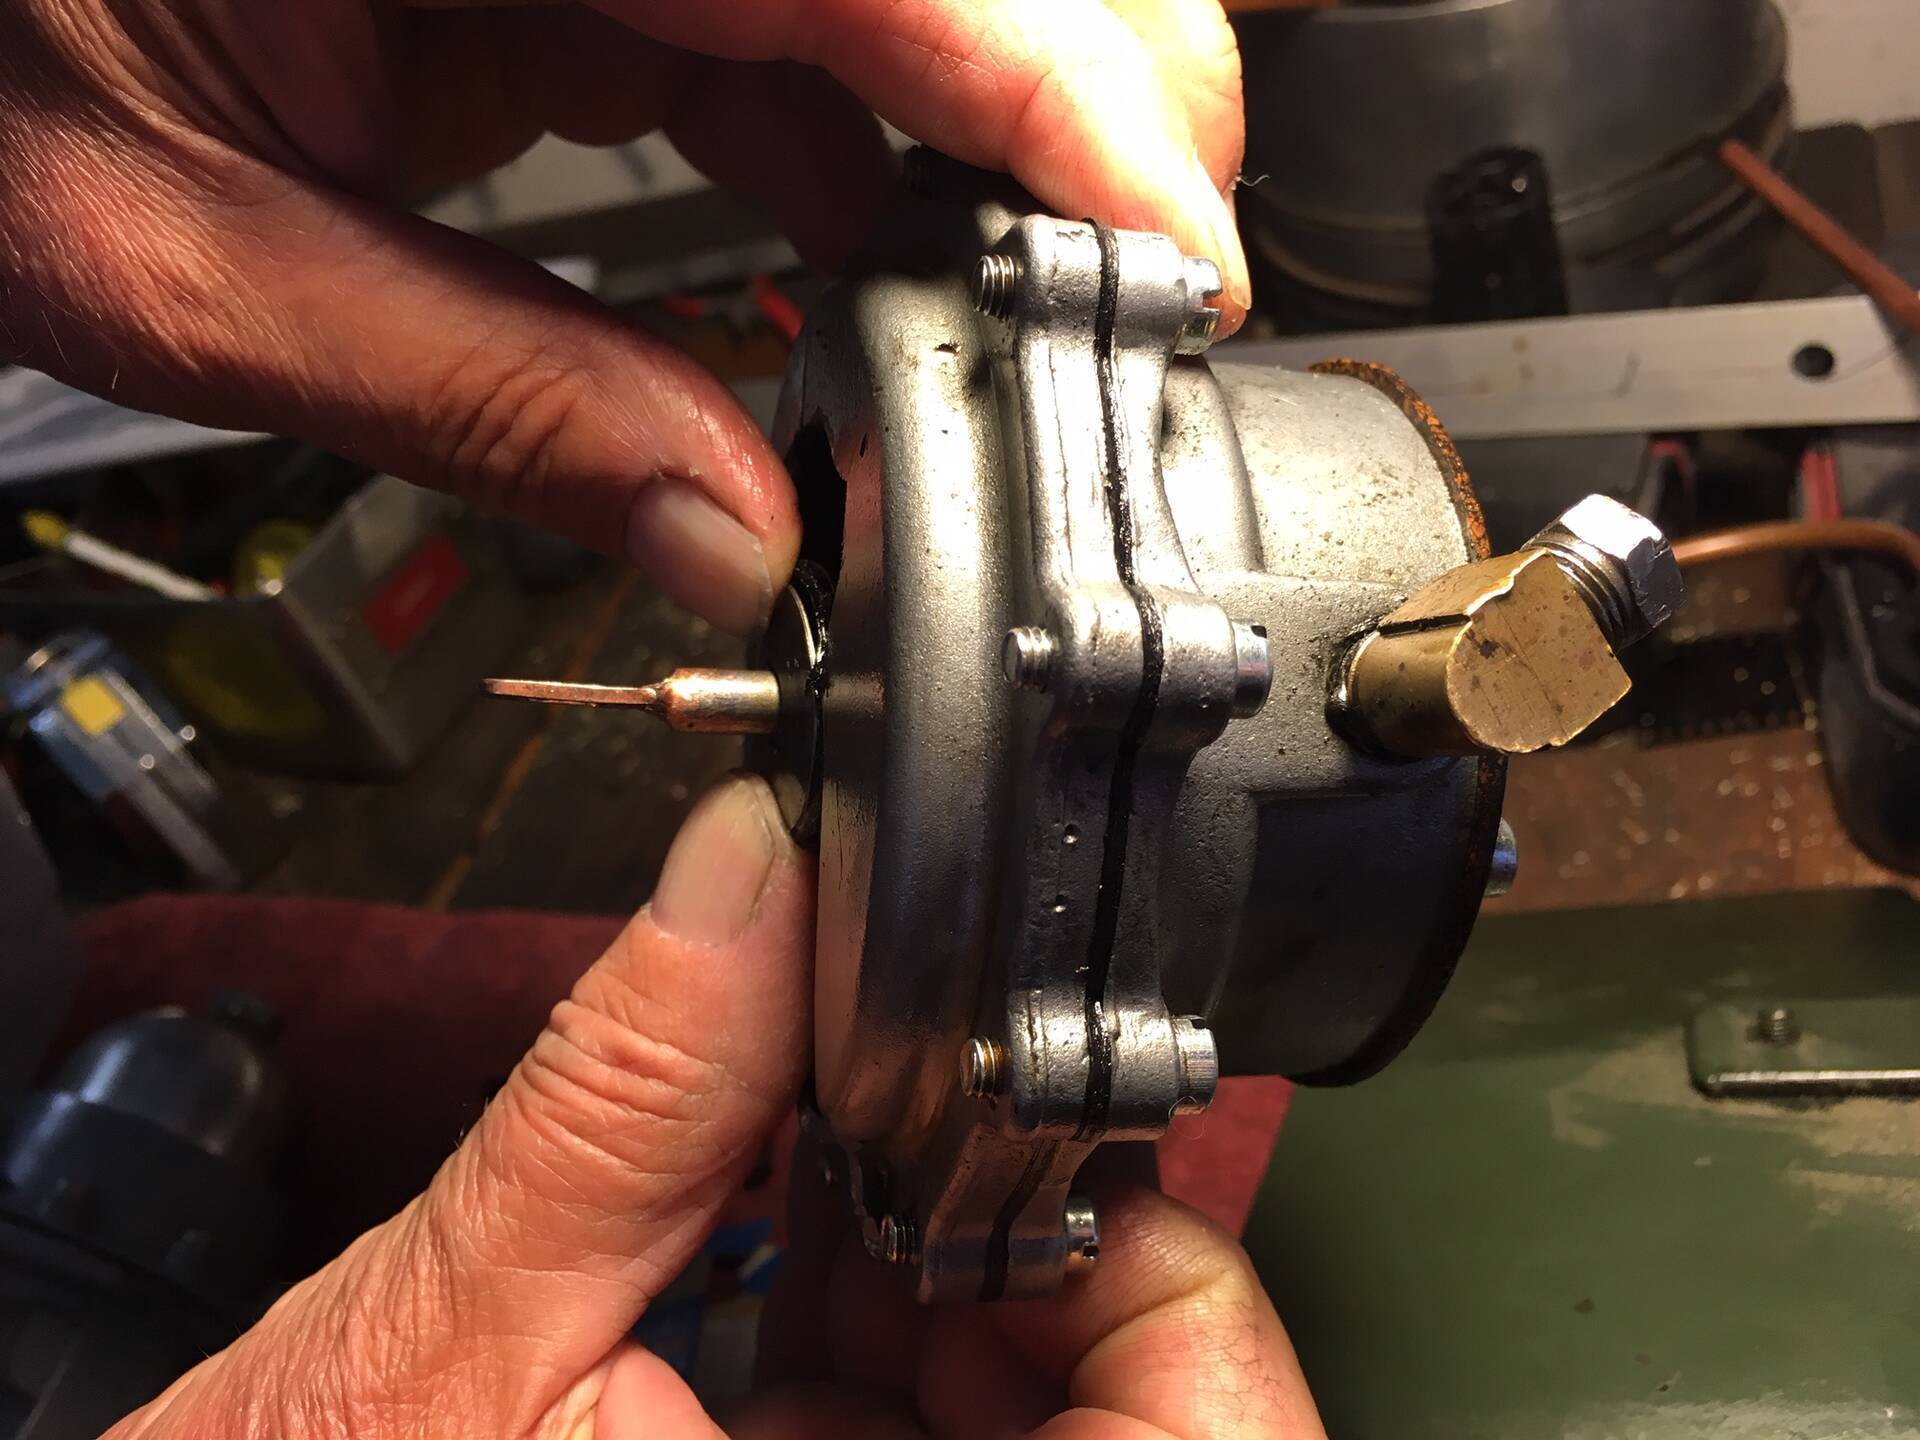 (269.18 KB) (269.18 KB)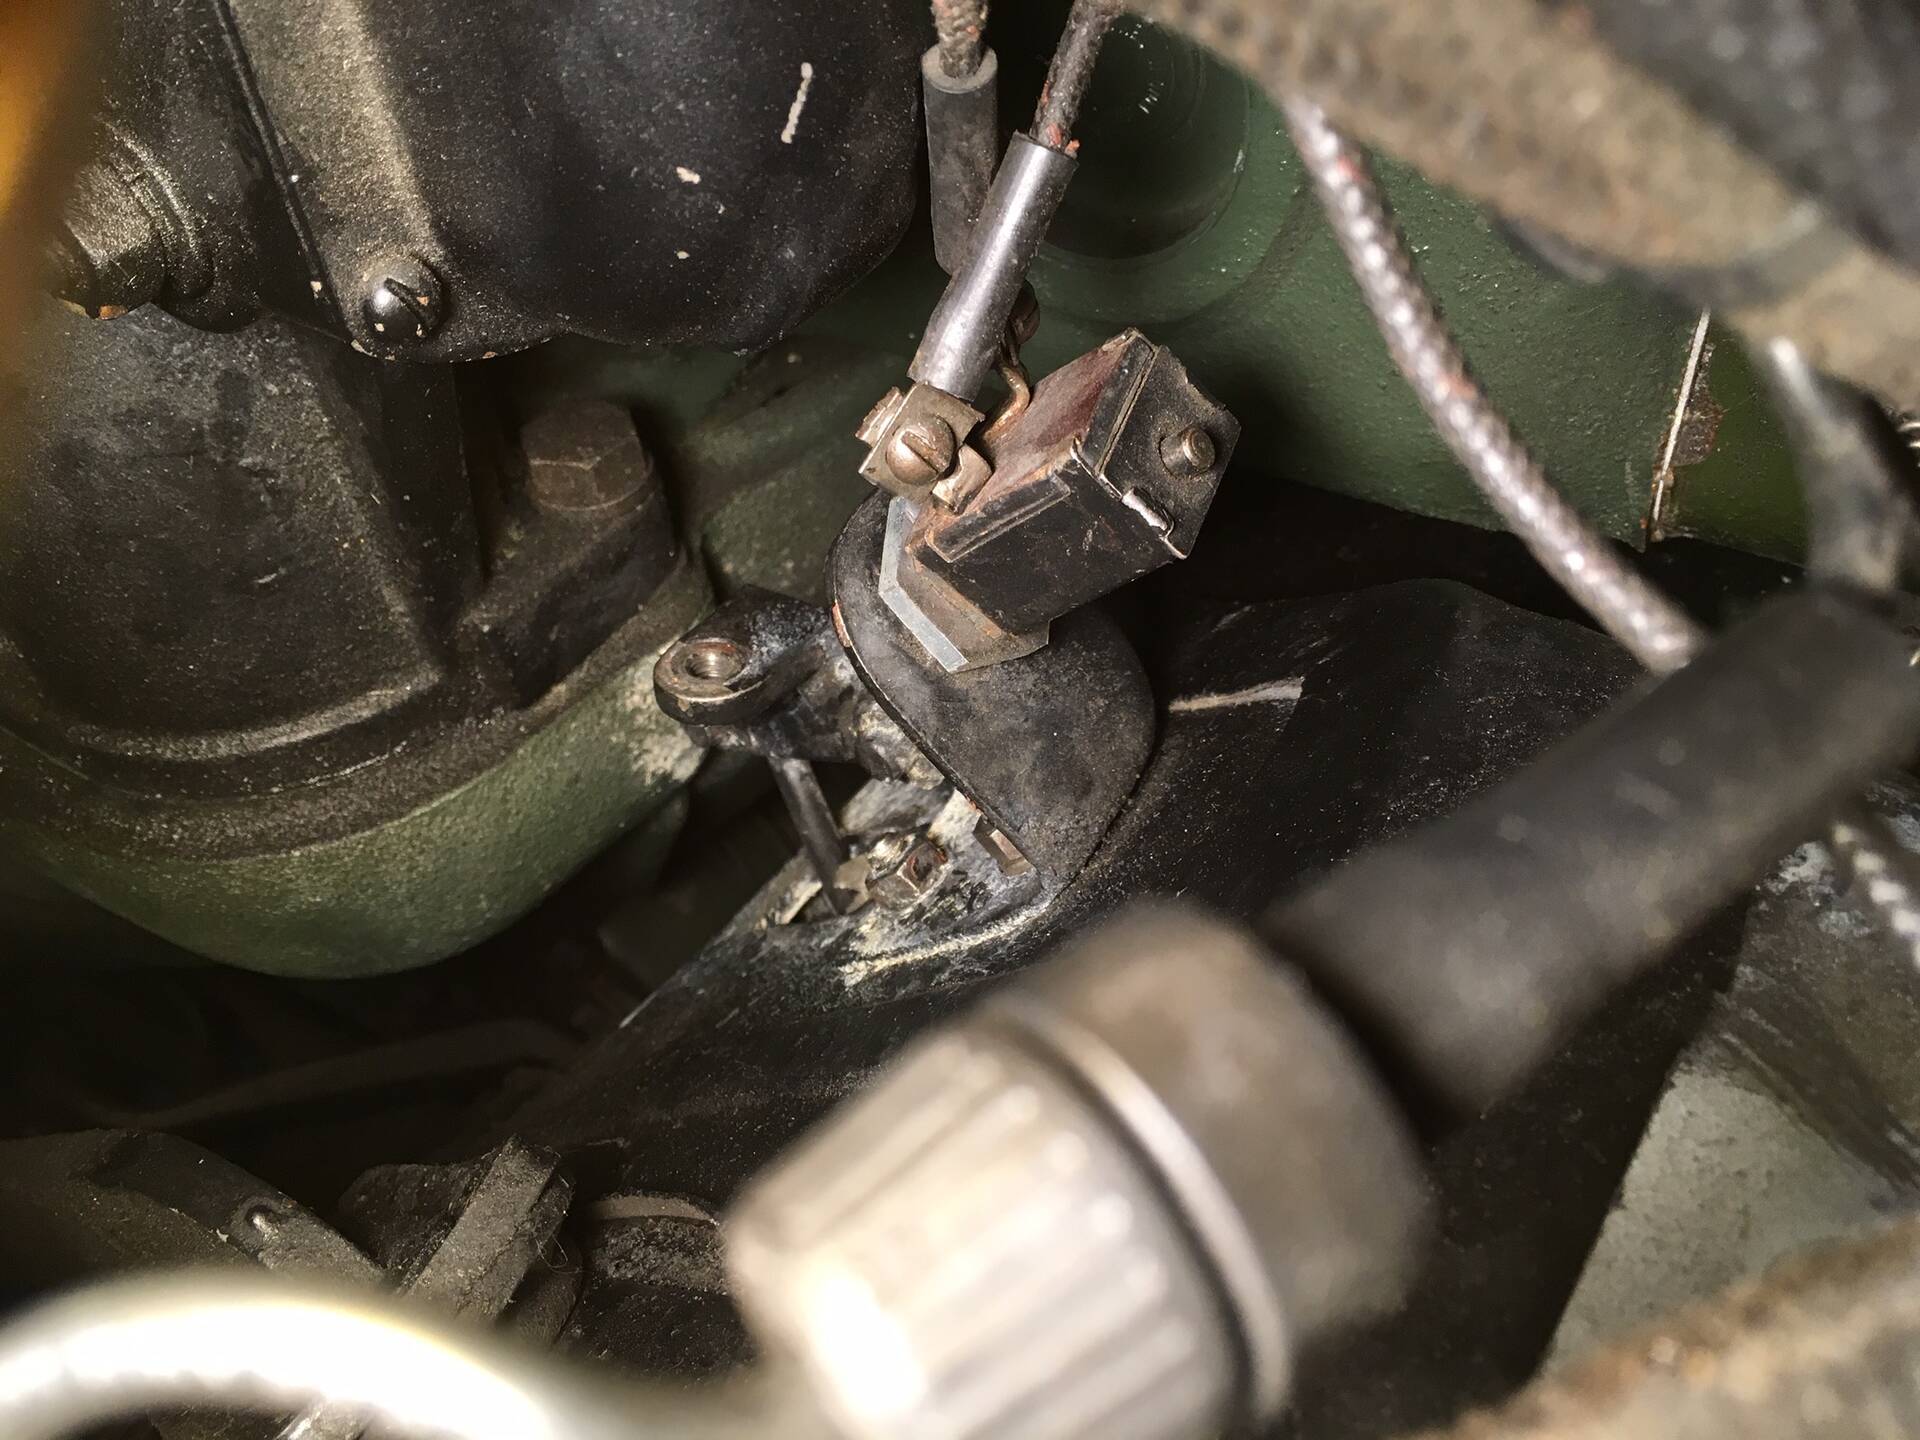
Posted on: 2019/6/30 20:23
|
|||
|
||||
|
Re: The Duchess Project: 1940 Super 8 Convertible Sedan
|
||||
|---|---|---|---|---|
|
Forum Ambassador

|
Joe: FYI, this article has been around for a while. It should answer most of your questions about rebushing that type distributor.
https://www.packardclub.org/forum/viewtopic.php?f=14&t=860
Posted on: 2019/6/30 20:39
|
|||
|
||||
|
Re: The Duchess Project: 1940 Super 8 Convertible Sedan
|
||||
|---|---|---|---|---|
|
Just can't stay away

|
Do not use drill bushings as they are hardened for drilling in jigs, etc.(that's why they are called drill bushings)Most, if not all distributor bushings are brass or bronze.
Posted on: 2019/7/1 9:59
|
|||
|
||||
|
Re: The Duchess Project: 1940 Super 8 Convertible Sedan
|
||||
|---|---|---|---|---|
|
Home away from home
|
Thanks, Convert(ible?),
I ordered the bushings recommended in the above article, plus a new breaker plate. KICKDOWN: The kickdown mounting bracket on the car is an L shape. The one in the owner's manual diagram has 2 bends, not one. I started to remove it. 2 screws to the fire wall, cotter pin holding on the tip of the accelerator pedal... and then a big rivet. The kickdown is an integrated part of the linkage that runs behind the head to the passenger side and is attached to the fire wall there. So it won't as simple as I thought to change it. FUEL PUMP: The bushing/insulators/sleeves for the mounting screws are about .04" thick (ID .36 to let the screw through and .40 to fit inside the mounting holes of the pump. What found was a K&S Precision Metals #8136 Round Brass Tube. I cut of two 3/4" lengths. Maybe it shouldn't be brass, but it fits perfectly and I think that better than nothing at all. I also picked up new fittings for the new pump coming Wednesday. Attach file: (50.19 KB)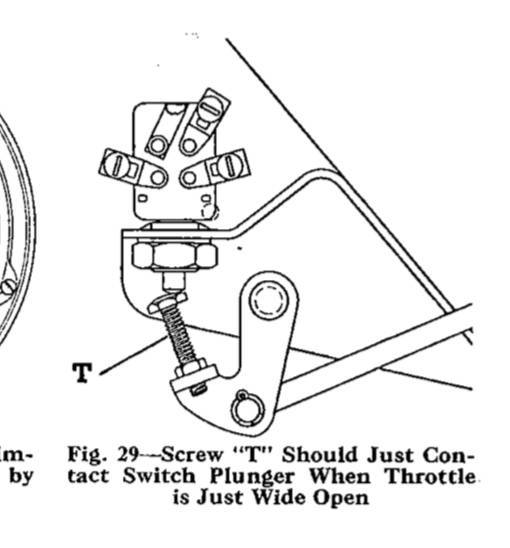 (31.90 KB) (31.90 KB)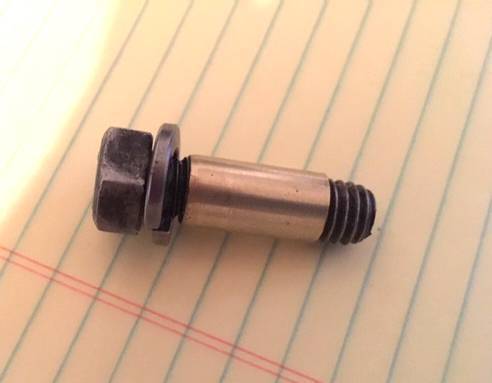
Posted on: 2019/7/6 23:59
|
|||
|
||||
|
Re: The Duchess Project: 1940 Super 8 Convertible Sedan
|
||||
|---|---|---|---|---|
|
Forum Ambassador
|
Ideally the sleeves should be non-metallic, the purpose was to inhibit the transfer of heat from the block to the pump. If you ever decide to redo it, there are plenty of choices of non-metallic tubing for the sleeves.
Posted on: 2019/7/7 8:13
|
|||
|
||||
|
Re: The Duchess Project: 1940 Super 8 Convertible Sedan
|
||||
|---|---|---|---|---|
|
Home away from home
|
Thanks, Dave. I was so proud of myself, but at least I discovered the answer...not a bushing-like insulator stand-alone part, but a tube whose ID and OD meets spec, and then can be cut to the 3/4" length.
I haven't installed it yet, and the pump won't be here until Wednesday, so I'll do some tube shopping. But what material would have been used? It would almost be paper thin to work. Rubber tubing? (Modern: Nylon? Plastic?) In the parts book, there's a listing for a Bail and Screw. The mounting screws aren't illustrated. Is a bail an insulator? In jewelry, a bail holds/retains a gem. Anyway there's no clue on specs here because the references are to AC part numbers. In the double action pump illustration, I can see how the fuel component is pretty well sealed off and why, perhaps, gas it wasn't spewing fuel when it broke in half. But it also shows how it might have leaked oil from the engine from the rocker arm opening. Attach file: (66.85 KB)
Posted on: 2019/7/7 9:42
|
|||
|
||||
|
Re: The Duchess Project: 1940 Super 8 Convertible Sedan
|
||||
|---|---|---|---|---|
|
Forum Ambassador

|
When I made my bushings I used a high temp garolite rod from McMaster but probably the regular rod would work as well. At 335F the high temp rod is rated roughly 100 degrees higher than regular and price wasn't too much more so I opted for the extra.
I doubt the pump and bushing ever gets even exposed to the regular rated temp being positioned that low on the block and in the airflow so not sure high temp is necessary. The originals were a phenolic or bakelite and paper composition. No idea what temp those are rated but garolite or the fiberglass epoxy resin compositions seems to have taken the place of the old paper formulations.
Posted on: 2019/7/7 12:06
|
|||
|
Howard
|
||||
|
||||
|
Re: The Duchess Project: 1940 Super 8 Convertible Sedan
|
||||
|---|---|---|---|---|
|
Home away from home

|
Joe, If I recall correctly, a complete fuel pump insulation kit consists of the afore mentioned sleeves, a non-metallic washer which goes under the cap screw flat metal washer, and a thick gasket which fits between the pump and the block. With all these parts in place the pump is fully insulated from the engine. All of this can be made with easily obtained materials from vendors or maybe even a local hardware store. Also, the shield between the pump and exhaust manifold is important to keep heat off of the pump.
I Always enjoy your postings but sympathize with your problems. Your positive attitude is a big plus in getting through the issues presented.
Posted on: 2019/7/7 12:34
|
|||
|
We move toward
And make happen What occupies our mind... (W. Scherer) |
||||
|
||||
|
Re: The Duchess Project: 1940 Super 8 Convertible Sedan
|
||||
|---|---|---|---|---|
|
Forum Ambassador
|
On those that didn't use a metallic lock washer under the bolt head, I've often seen cross-drilled bolt heads which were secured via cross-wiring to each other. No doubt someone else will recall the years and models this applies to, the clue would be the drilled bolt heads.
Posted on: 2019/7/7 13:20
|
|||
|
||||


