|
Re: wood patterns 526
|
||||
|---|---|---|---|---|
|
Home away from home
|
thanks for the photos, every bit helps. I just edited my original post, as it left too much to the imagination. the main coach has seen a huge amount of dry rot. Two of the doors came off, after opening, with just the aid of gravity!
Posted on: 2010/3/4 17:23
|
|||
|
||||
|
Re: wood patterns 526
|
||||
|---|---|---|---|---|
|
Home away from home

|
Ray,
I have some information that may help with the renewal of the woodwork in your 526. If you let me have your e-mail address I will scan it and send it to you. David. Sydney Australia
Posted on: 2010/3/5 2:08
|
|||
|
||||
|
Re: wood patterns 526
|
||||
|---|---|---|---|---|
|
Home away from home
|
Posted on: 2010/3/5 8:00
|
|||
|
||||
|
Re: wood patterns 526
|
||||
|---|---|---|---|---|
|
Home away from home

|
Ray, I am glad you received the sketches. I have replaced all of the wood in 3 1920 cars, (1922 Sport, 1929 Roadster and 1929 Sedan) I have only basic woodworking skills, it takes a long time and can be very frustrating when there are problems like getting the doors to fit properly. The following are a few thoughts that might help.
If there is rust in the body this will need to fixed first. Typically the lower edges of doors, scuttle and tub rust away. This must be cut back to sound metal and new metal shaped welded in to return the metal to its original shape. The first step with the wood is to make the 2 main pieces that run along each side of the base. From memory you need 1 ?" thick timber about 8-9" wide the full length of the car body , hopefully there is enough old wood to give you the correct thickness. You will need fully seasoned good quality timber, not the timber you would get at an ordinary timber yard (at least not here in Australia, I guess its similar in US) The shape of these bottom pieces is obviously critical. Hopefully the old rotten wood will still be able to give you a profile. If not you will need to get the shape from the metal work. Once you have those 2 bottom runners cut and in place with the cross pieces in place you have a base to start working on the upright members. Try to gain the correct shape from the old timber where ever possible. I used a marine 2 part glue for all joints (along with screws) the glue needs to have a gel consistency so that it is gap filling, especially necessary if the joints are not perfect. Getting perfectly fitting joints is difficult, joints are generally not square to each other. You will need a woodcutting band saw. I also used a wood rasp extensively for getting the various pieces to fit up to the shape of the metal. Other tools you will need are wood chisels, planes etc When fitting the individual pieces to the metal I sometimes rubbed grease onto the inside face of the metal then when you offer the new piece the grease will mark the points of contact which can then be shaved down. This is a slow process before the piece fits to the metal shape well. It's a big job I was working when I did mine (retired now) and so I only worked on it weekends when time permitted and it took a couple of years per car. Getting doors to fit well is especially time consuming. I wish there were clear guidelines but it more a case of figuring out a way top make each piece. The structural wood around the windows in the doors (not the interior decorative trim) is particularly difficult to fit and I found it necessary to cut the metal in order to get the new wood in place. The metal then had to be re-welded using a heat shield to protect the wood. I hope others can add some further tips. Good luck with it.
Posted on: 2010/3/6 17:10
|
|||
|
||||
|
Re: wood patterns 526
|
||||
|---|---|---|---|---|
|
Forum Ambassador
|
On PACA's run to the Vintage Motor Garage yesterday one of the vehicles undergoing restoration in the workshop is a '26 333 Holbrook aluminium bodied Limo. It had been cut down into a Ute(pickup) many many years ago and all that was left of the body was the radiator shell, bonnet(hood), scuttle(cowl), front pillars and doors(aluminium skinned) and some of the woodwork. The owner was able to find a divider window seat back panel which is being incorporated into the body. He also managed to obtain a dimensioned drawing for the body, as well as some pictures of a similar car now restored. That's all the restorer has to work with but he's doing a good job with what he's got to work with.
Attach file:  (52.42 KB) (52.42 KB)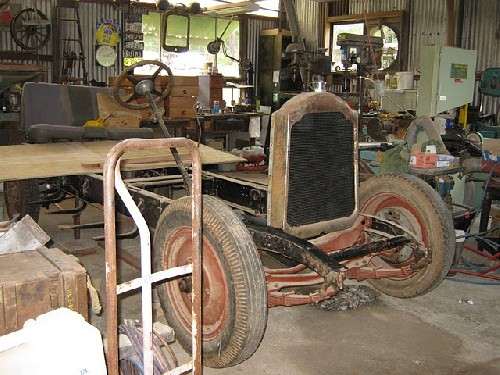  (41.86 KB) (41.86 KB)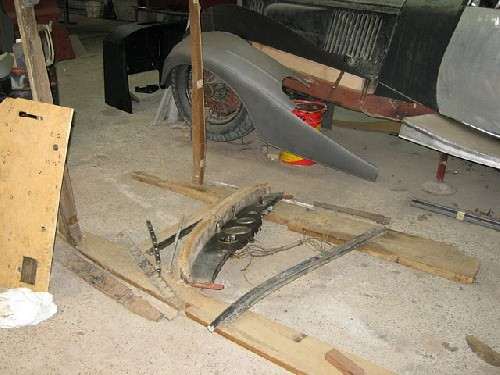  (38.16 KB) (38.16 KB)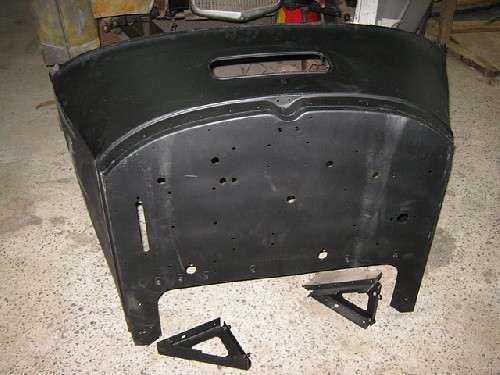  (39.79 KB) (39.79 KB)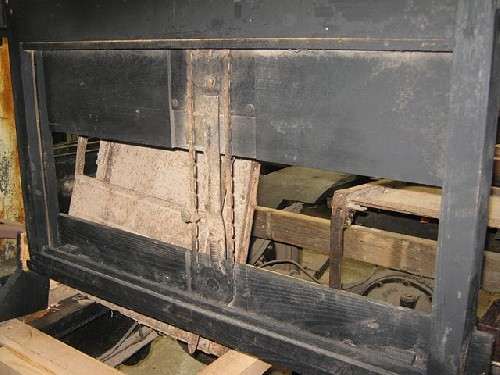  (36.81 KB) (36.81 KB)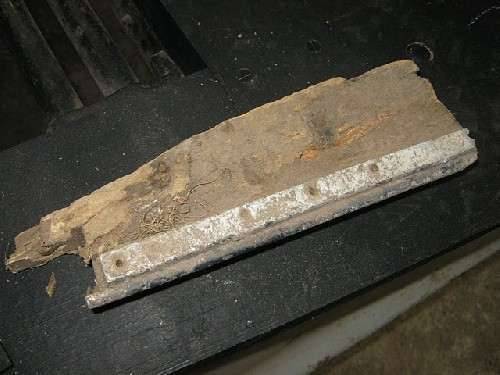  (31.04 KB) (31.04 KB)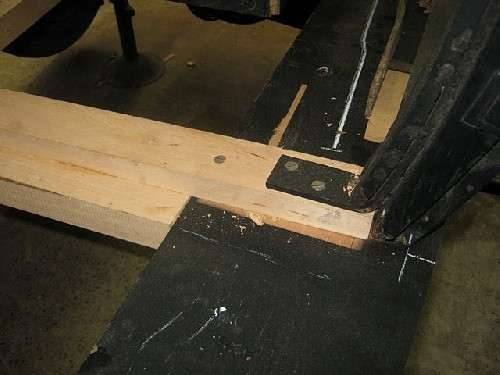  (48.16 KB) (48.16 KB)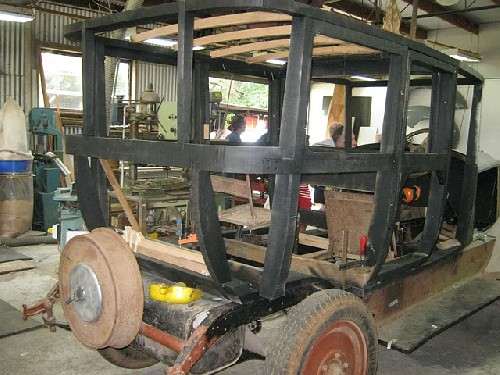  (46.86 KB) (46.86 KB)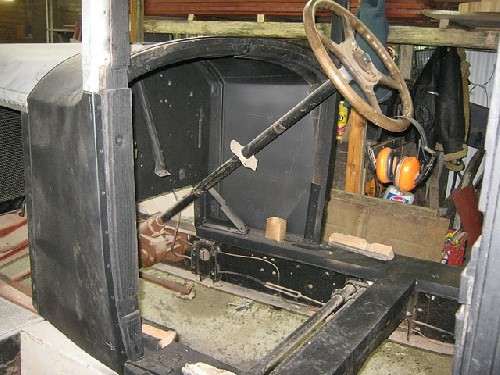  (46.78 KB) (46.78 KB)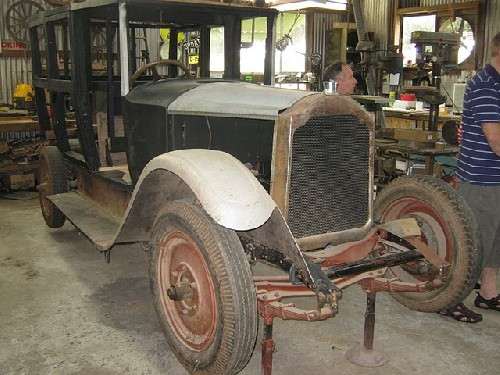
Posted on: 2010/3/6 22:24
|
|||
|
Mal
/o[]o\ ====  Bowral, Southern Highlands of NSW, Australia "Out of chaos comes order" - Nietzsche. 1938 Eight Touring Sedan - SOLD 1941 One-Twenty Club Coupe - SOLD 1948 Super Eight Limo, chassis RHD - SOLD 1950 Eight Touring Sedan - SOLD What's this?  Put your Packard in the Packard Vehicle Registry! Here's how! Any questions - PM or email me at ozstatman@gmail.com |
||||
|
||||


