
|
Re: KPack
|
||||
|---|---|---|---|---|
|
Home away from home

|
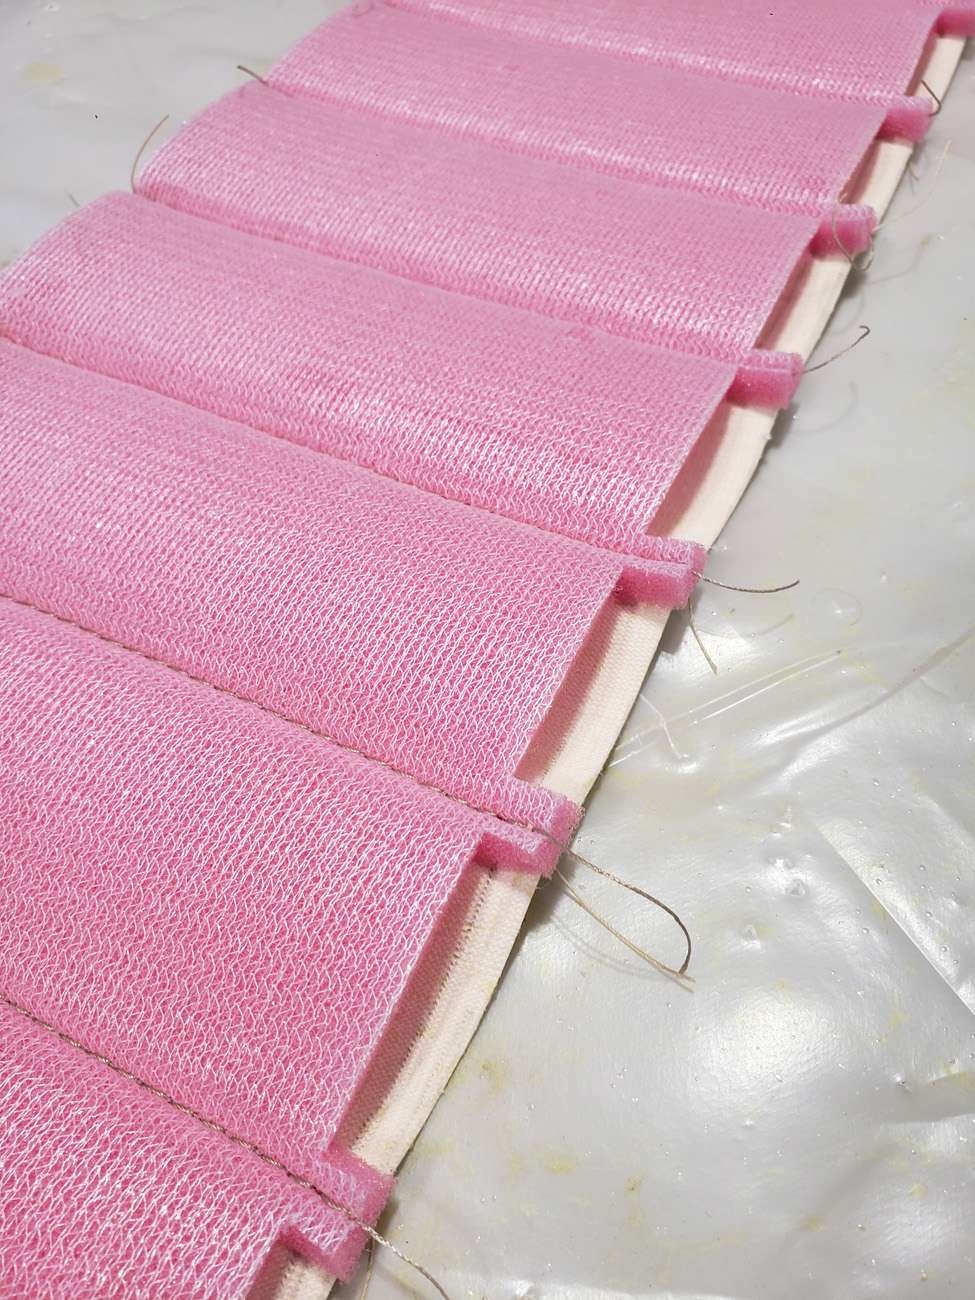
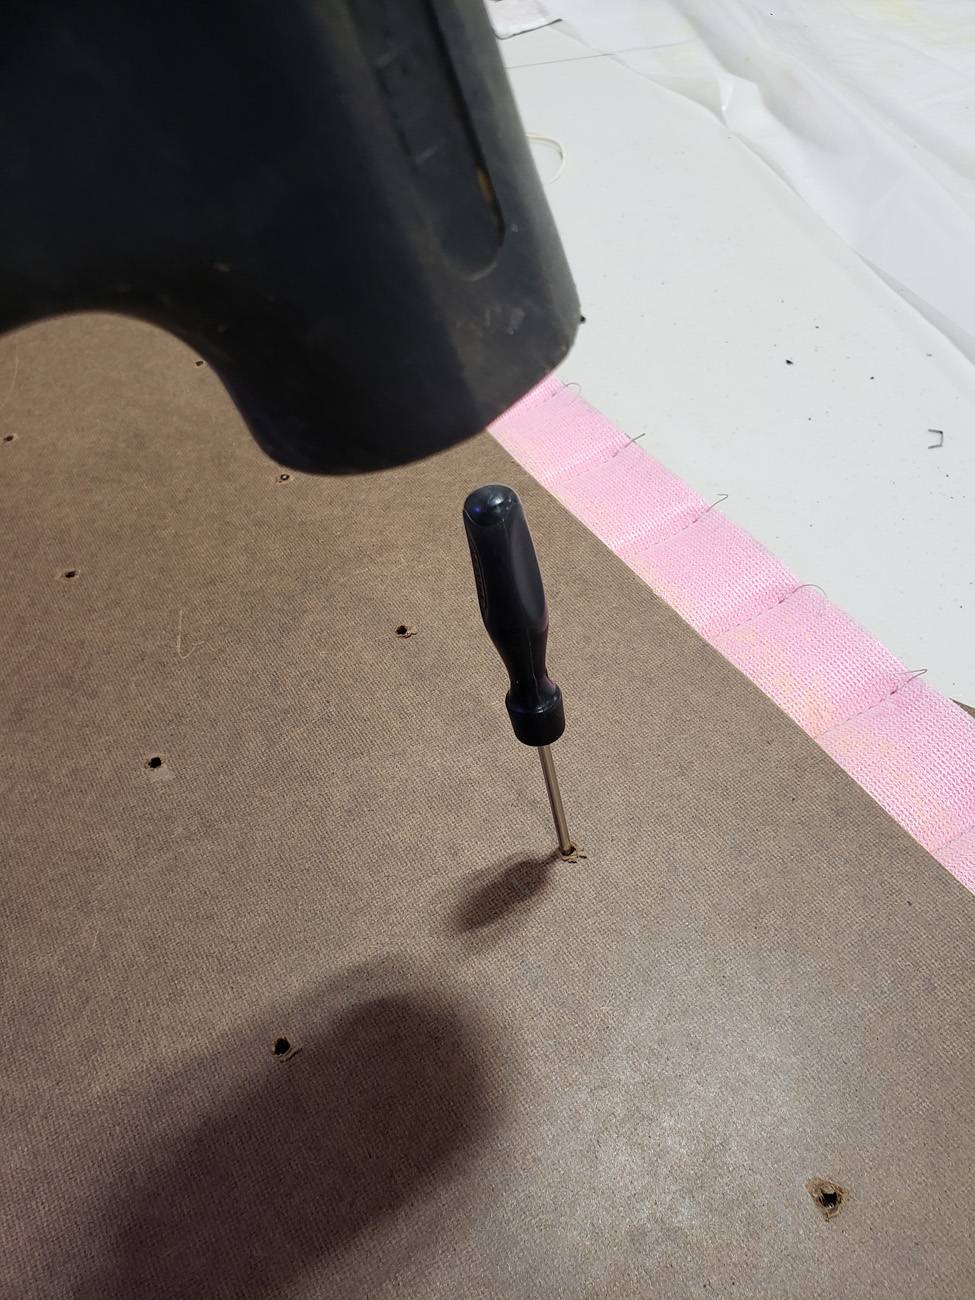
13.) With the center line marked, place staples on each sewn seam to hold the thread. I used a stapler from Arrow, with T50 1/4" staples. They will poke through the back a bit, but that's not a problem.
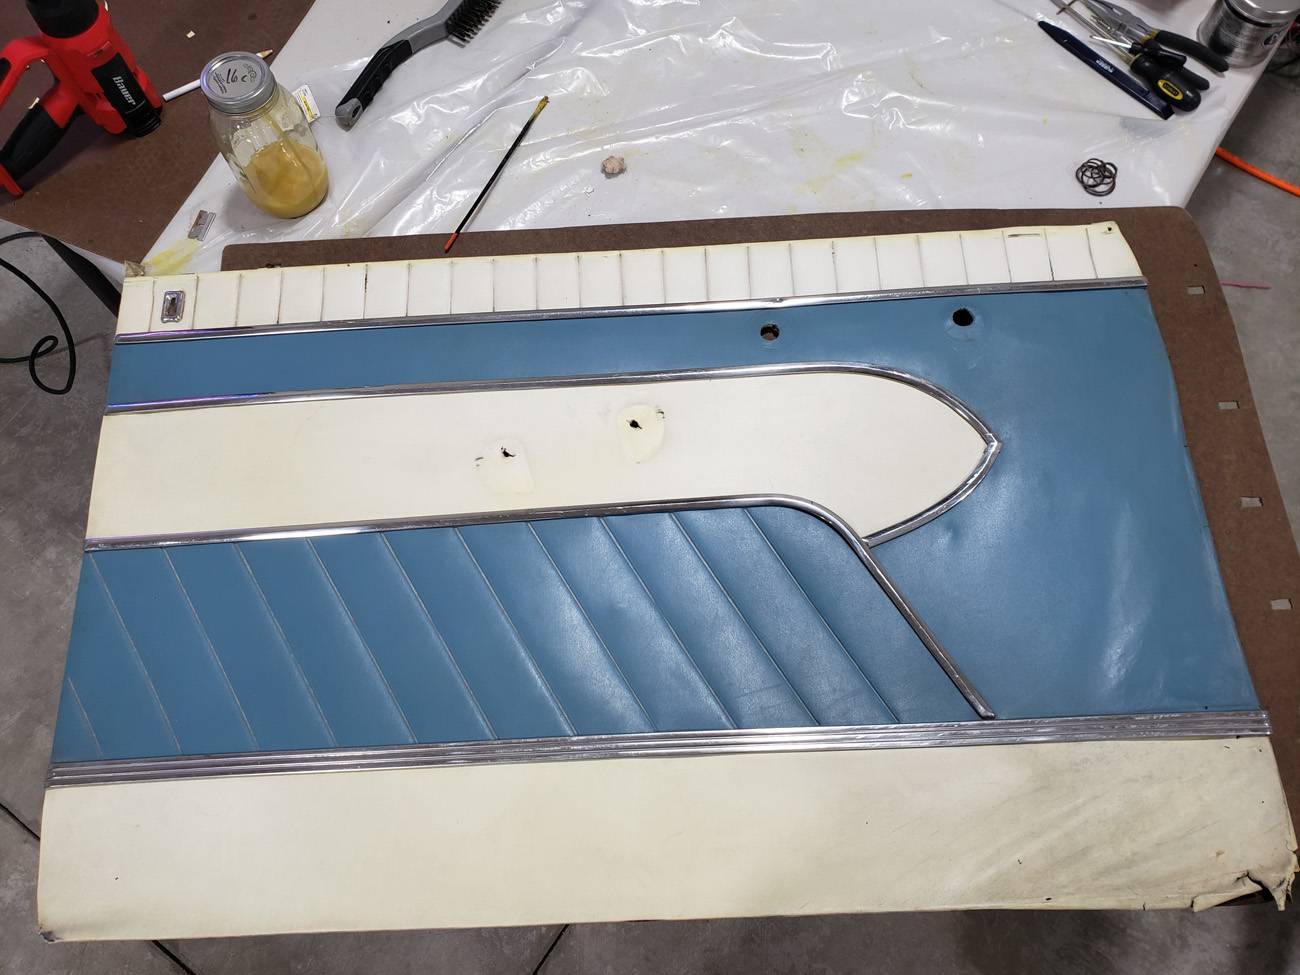
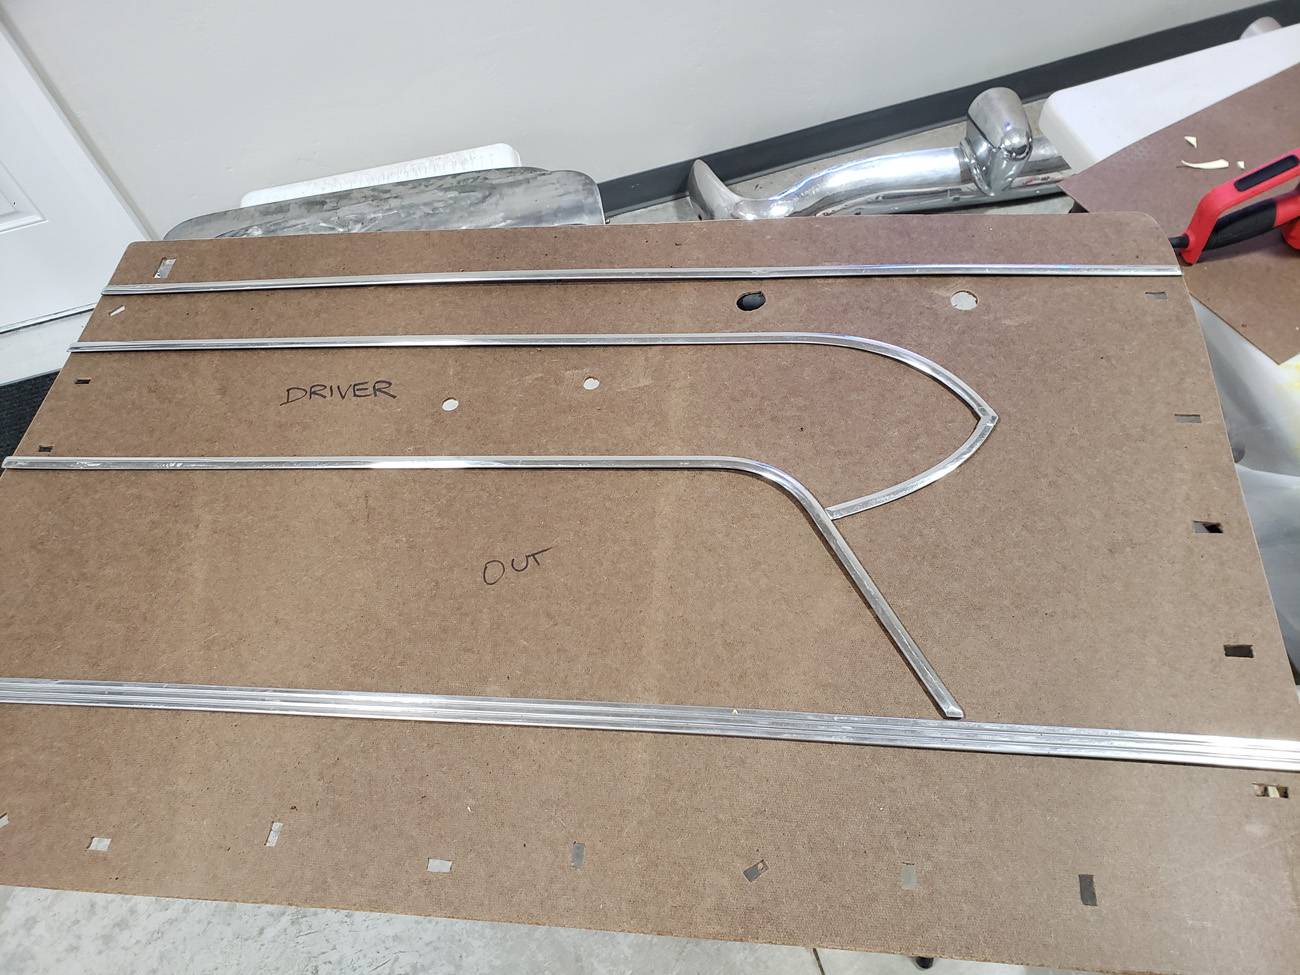
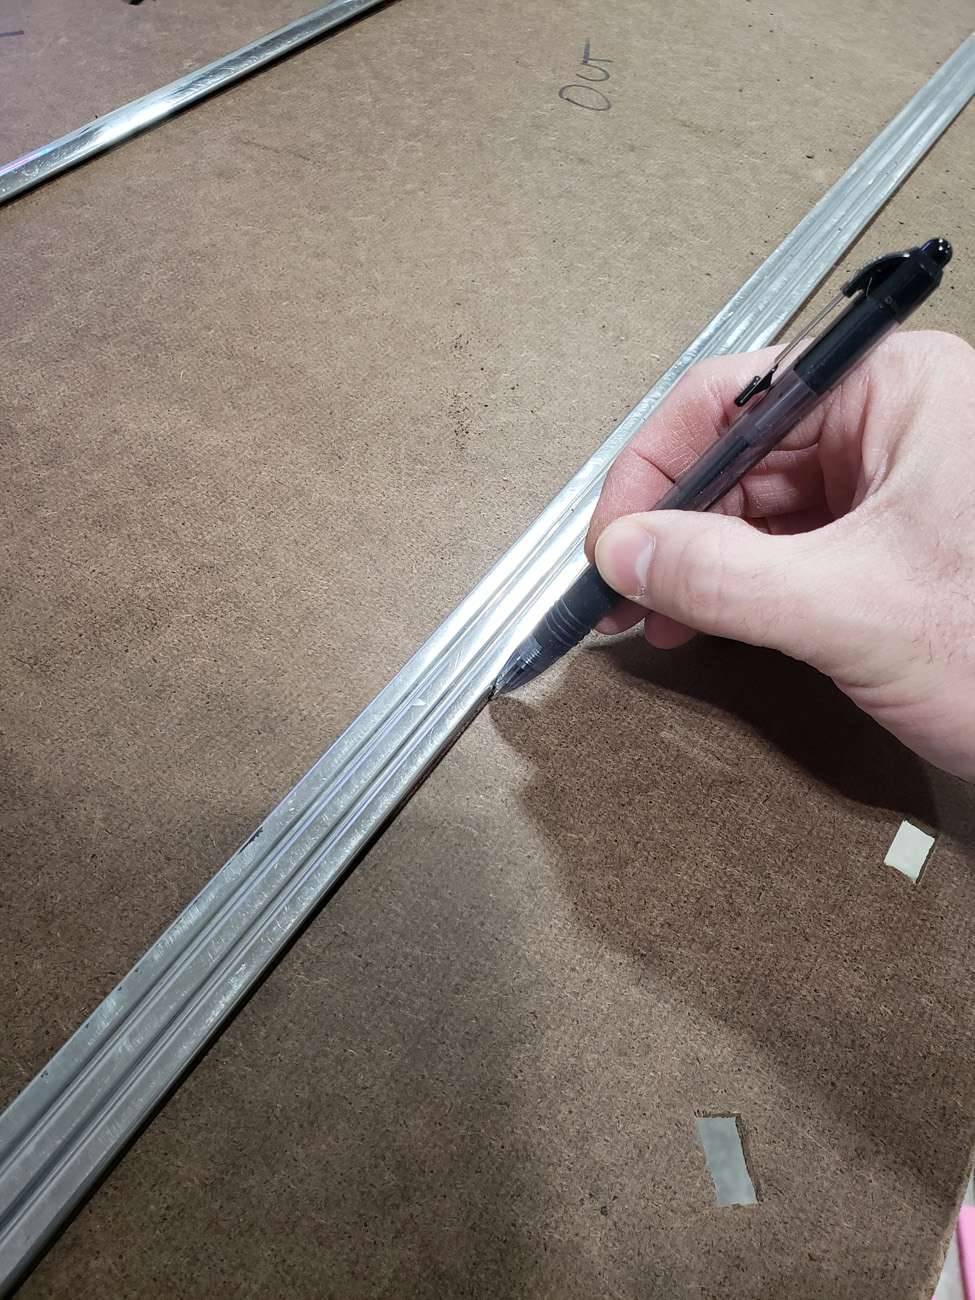
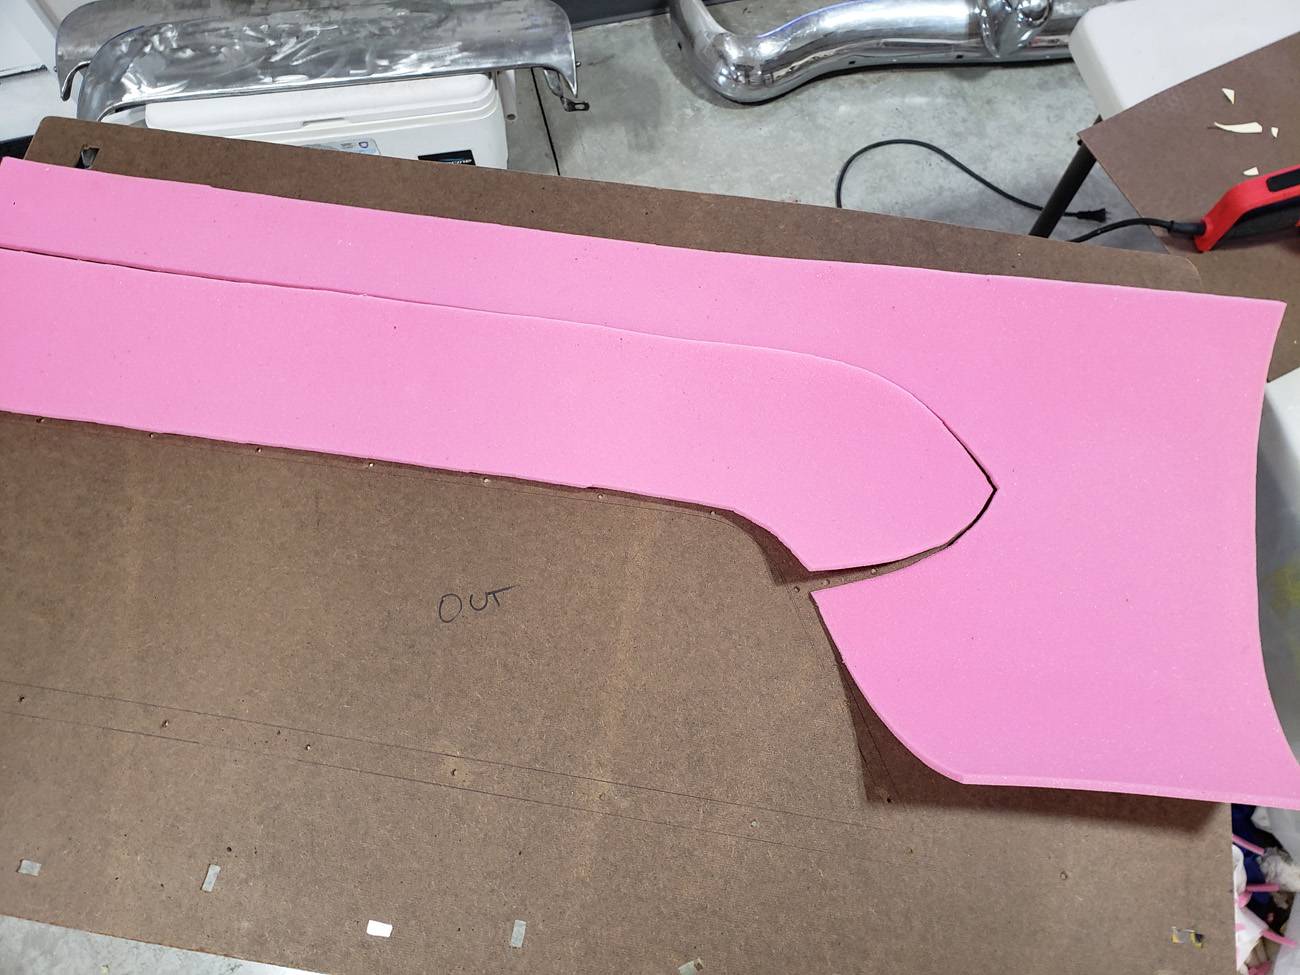
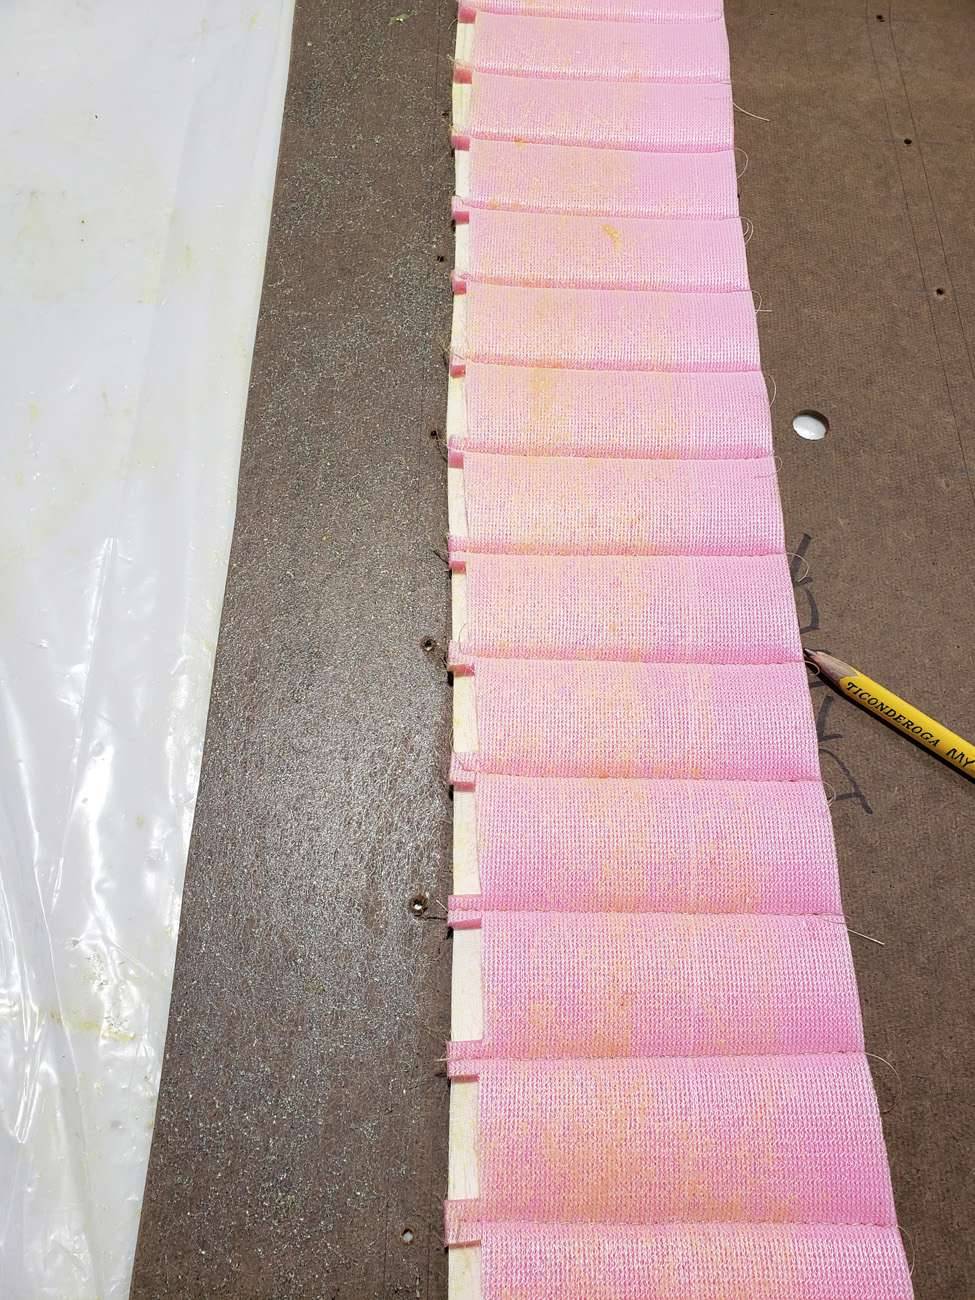
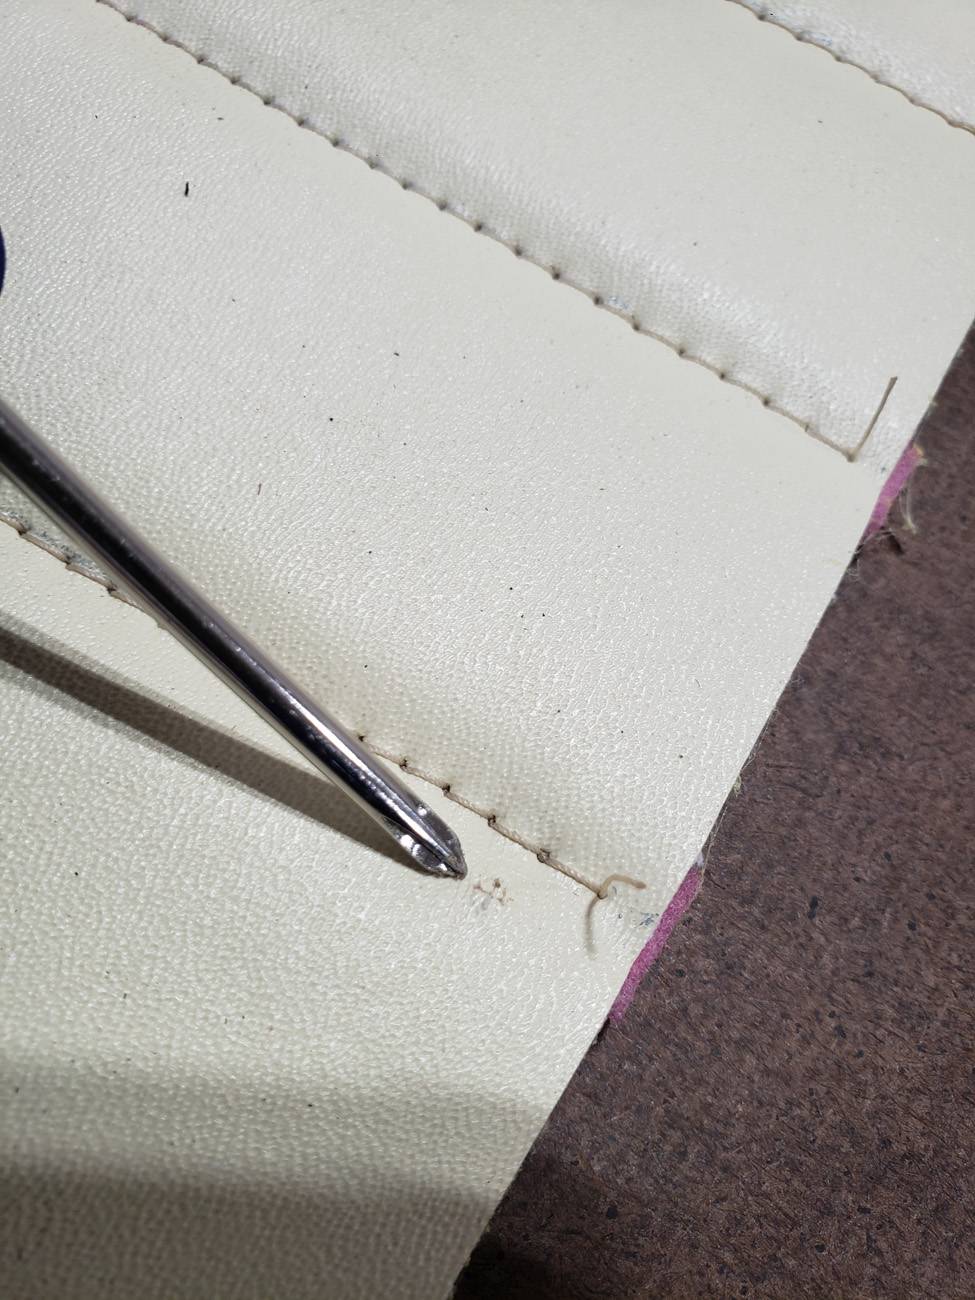
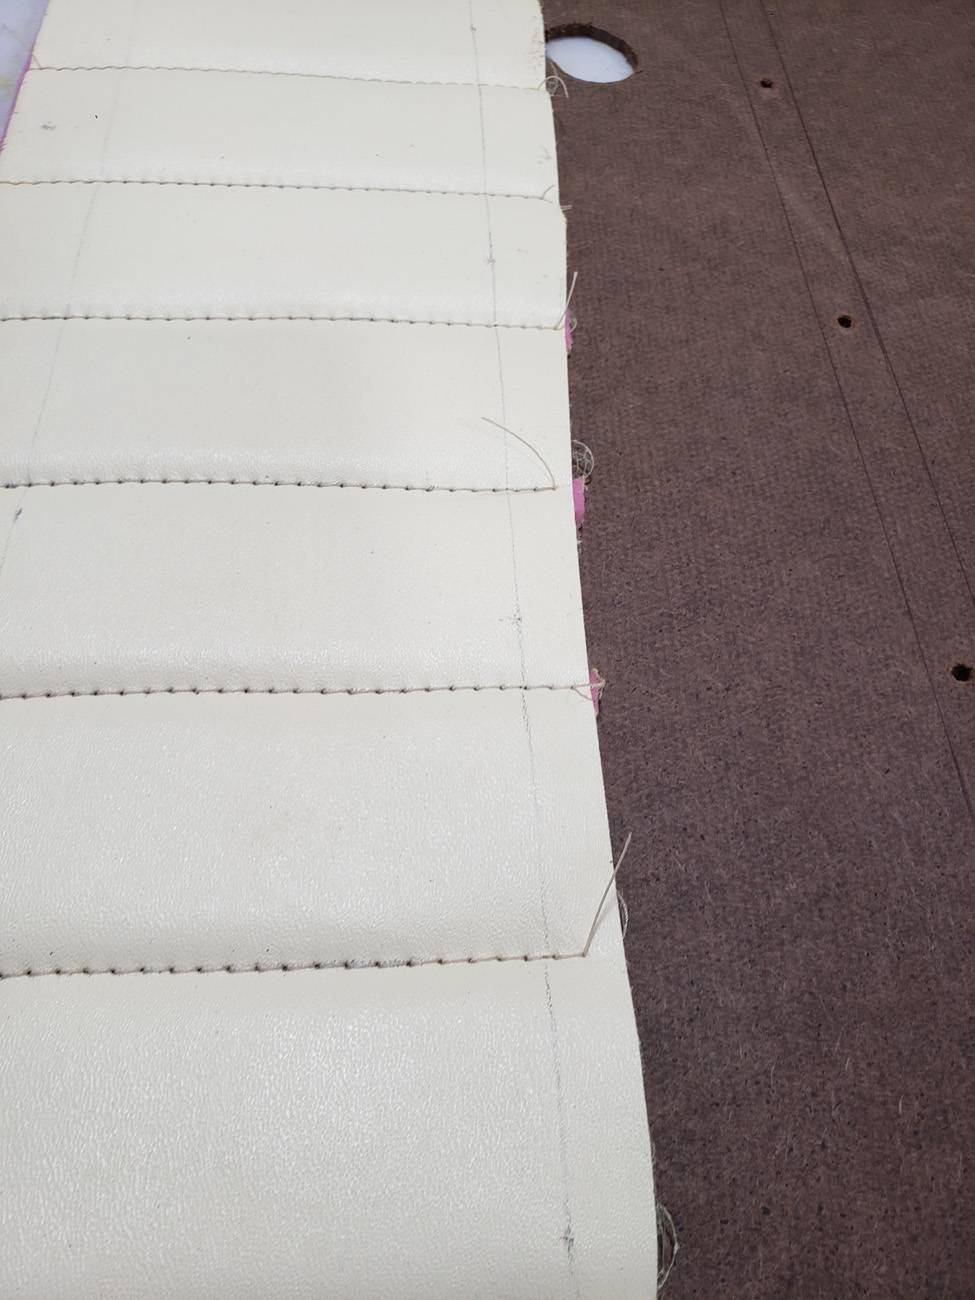
14.) Here you can see everything is stapled cleanly. 15.) Trim off the excess foam and vinyl. With the staples holding the threads we don't have to worry about the stiches unwinding. 16.) Now we spray adhesive for the next two panels. Spray on the board as well as the backs of the foam. Let flash then attach. I cut my foam a bit large in all directions in order to allow me room to trim off. 17.) I carefully trimmed some of the foam away to expose the stainless mounting holes. It's okay if the foam is within the marks traced for the stainless trim. The trim will push the foam down some. 18.) I glued the next panel down as normal. The vinyl is cut large in all dimensions, again to give me room to trim. 19.) With the vinyl glued in place, flip the door panel back over to the rear, and punch all the trim mounting holes again. Flip it back to the front side, mark the center line. 20.) Staple in a few spots along the center line and trim the excess vinyl. Note that I did not staple the lower border, since I still have the next panel that needs to go there. I will staple both at once. 21.) With the first two panels in place, stapled, and trimmed, the first piece of stainless can go on. Carefully guide the mounting tabs through the holes you punched. Then push hard with one hand on the stainless from the front, and bend the tabs with the other hand. The tighter you can get the tabs, the better the final look will be. Part 3 next..... Attach file:  13 - Staples applied to each seam on centerline.jpg (117.50 KB) 13 - Staples applied to each seam on centerline.jpg (117.50 KB)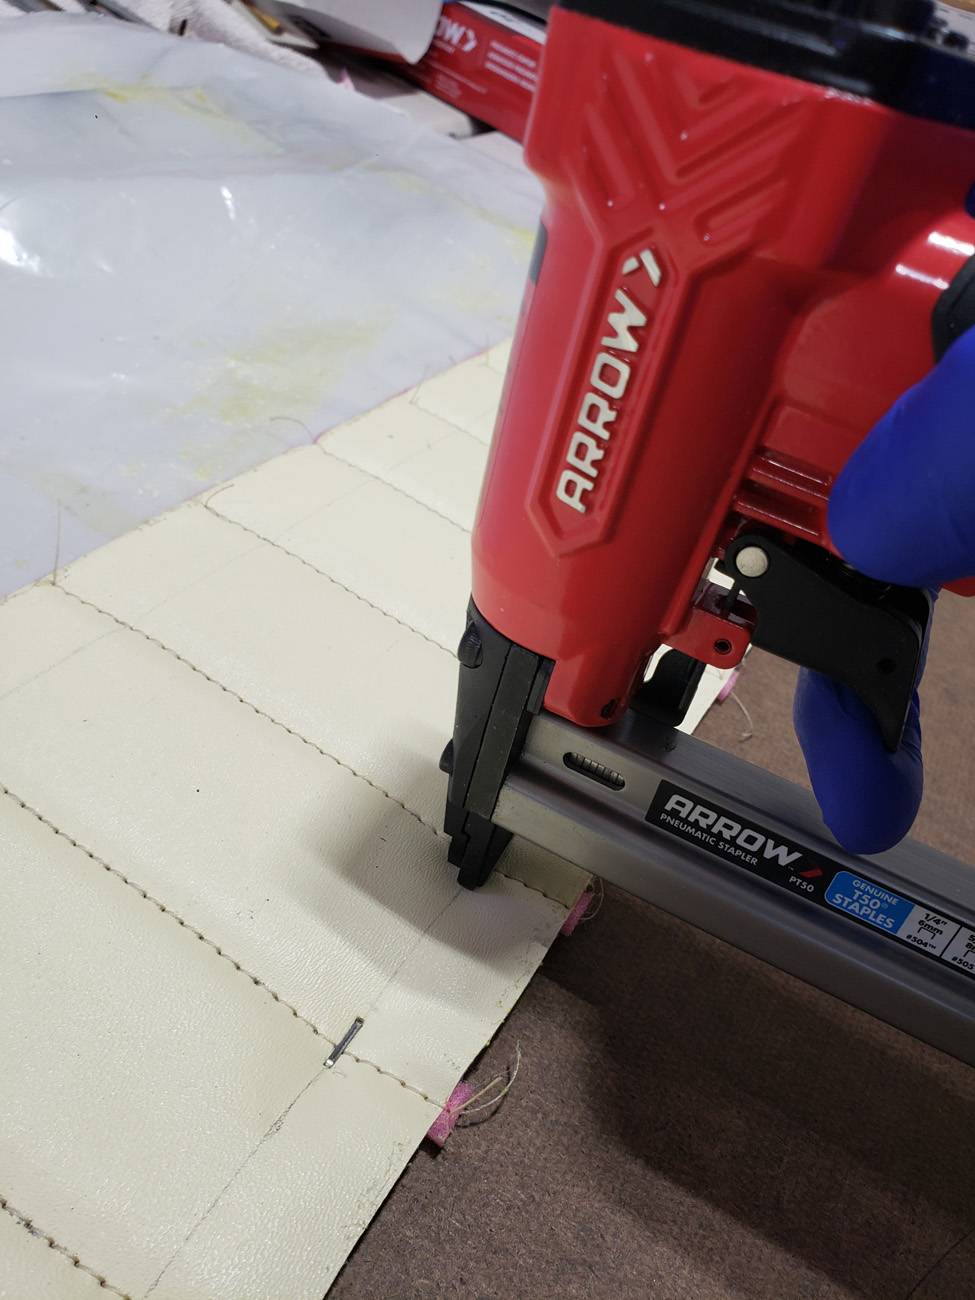 14 - Staples completed.jpg (123.92 KB) 14 - Staples completed.jpg (123.92 KB) 15 - Excess trimmed.jpg (157.25 KB) 15 - Excess trimmed.jpg (157.25 KB)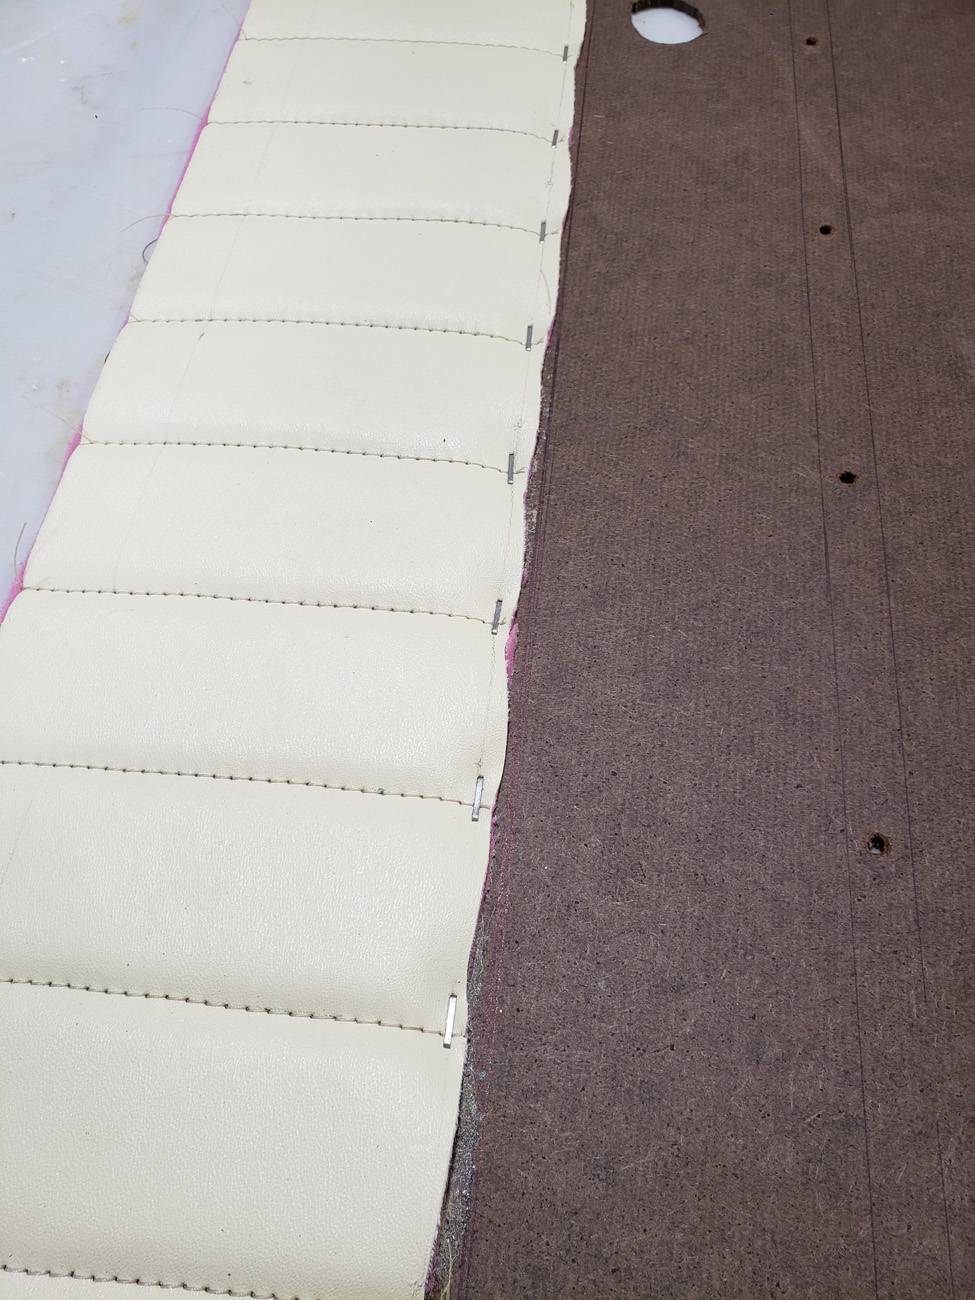 16 - Gluing the foam for the next panels.jpg (122.81 KB) 16 - Gluing the foam for the next panels.jpg (122.81 KB)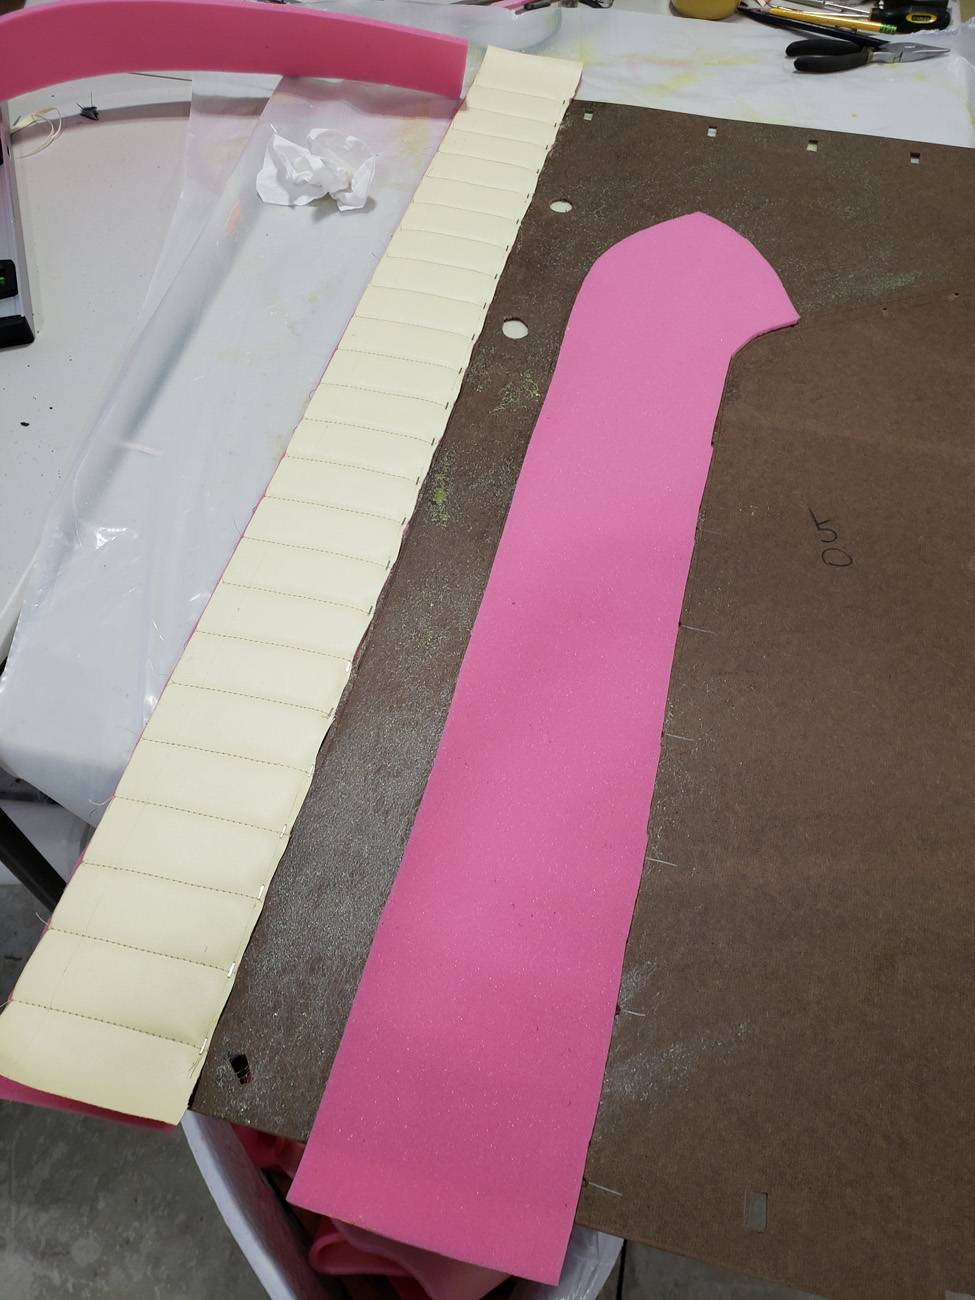 17 - Removing excess foam.jpg (174.08 KB) 17 - Removing excess foam.jpg (174.08 KB)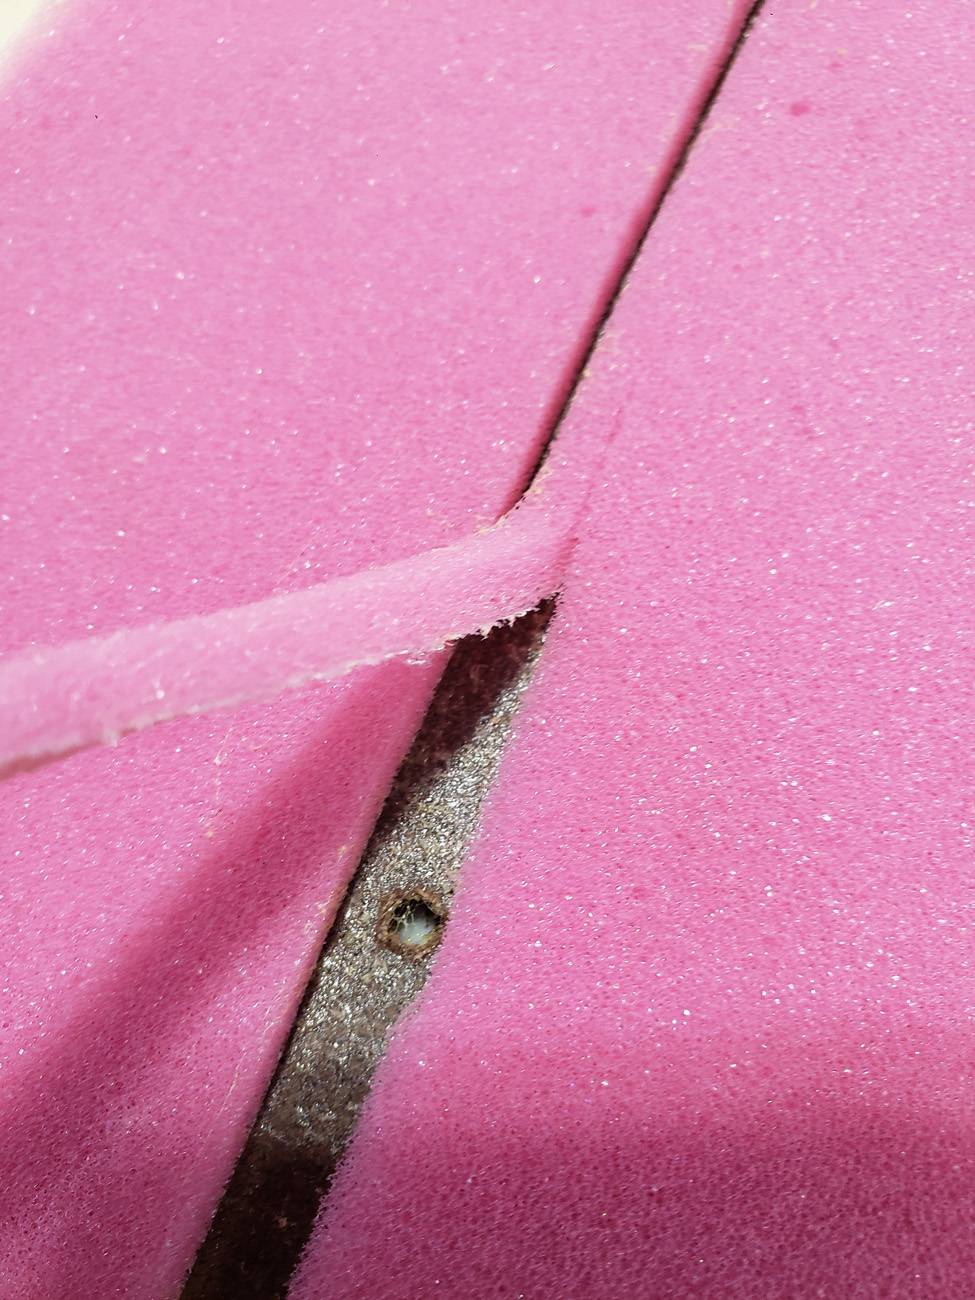 18 - Next panel glued in place.jpg (128.84 KB) 18 - Next panel glued in place.jpg (128.84 KB)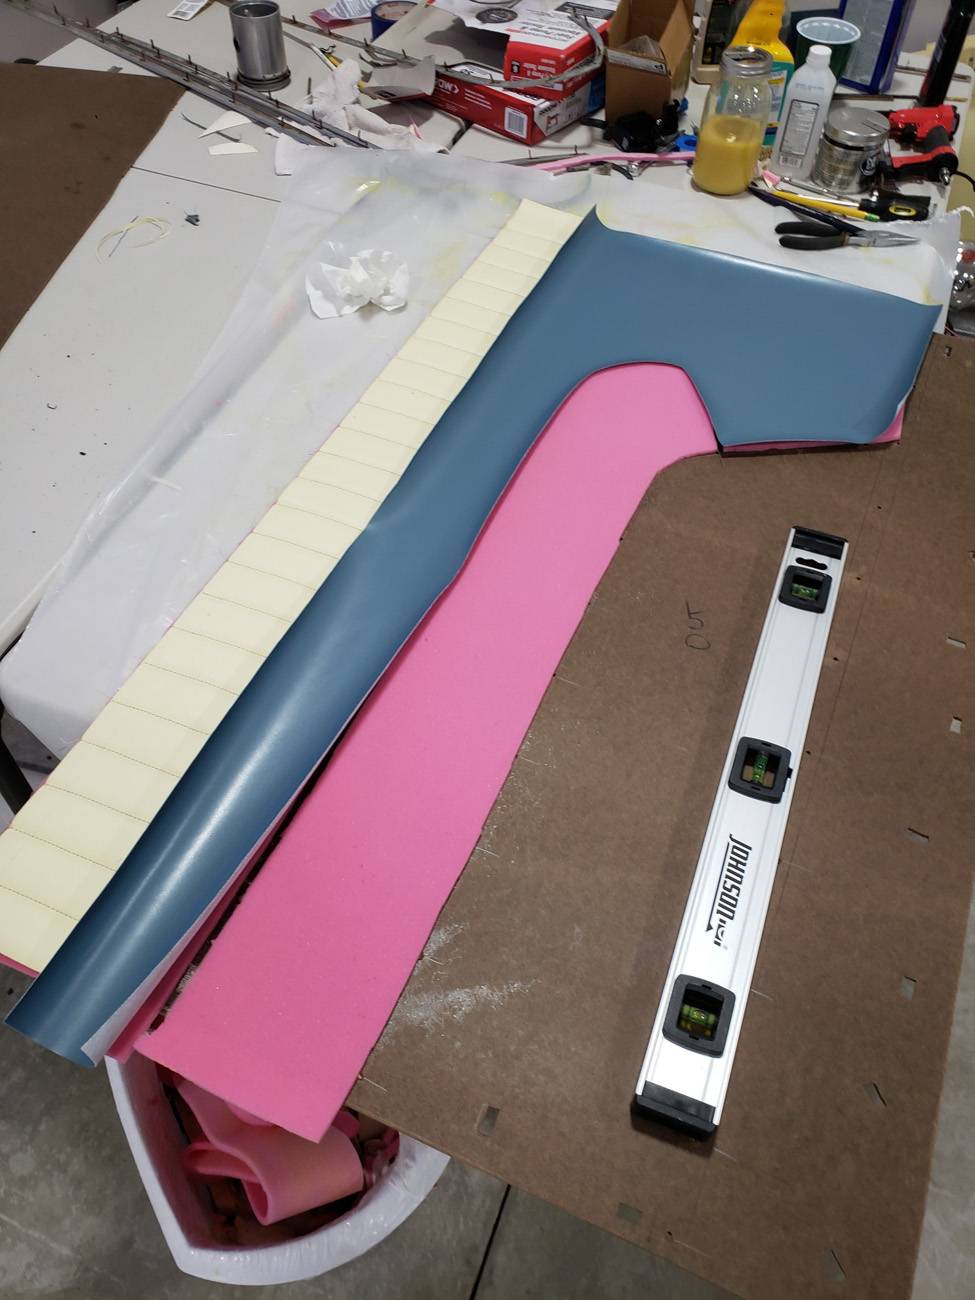 19 - Trim holes marked.jpg (156.30 KB) 19 - Trim holes marked.jpg (156.30 KB)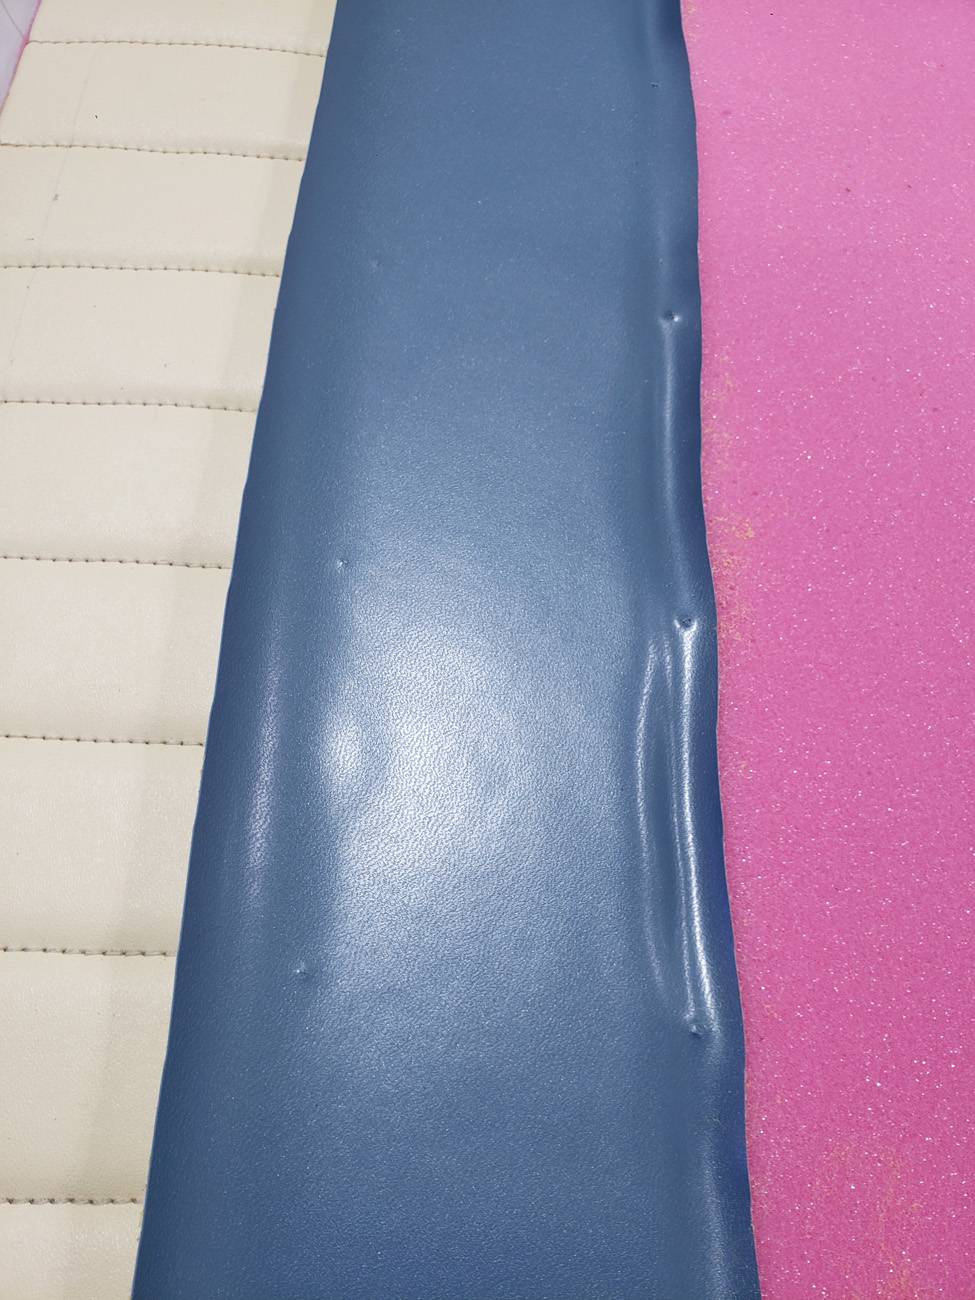 20 - Trimmed and stapled.jpg (136.24 KB) 20 - Trimmed and stapled.jpg (136.24 KB)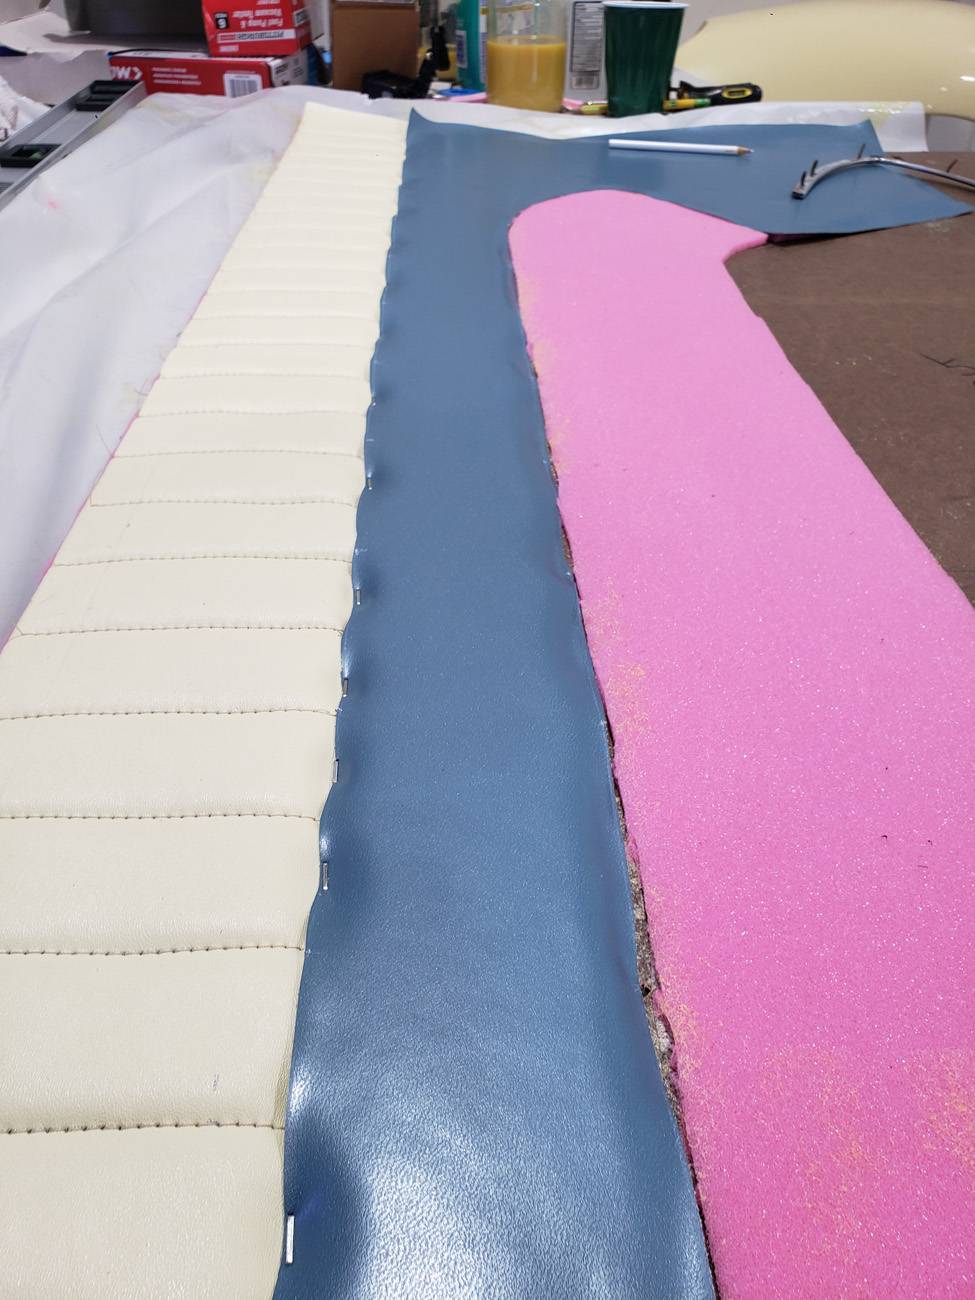 21 - First stainless trim installed.jpg (134.48 KB) 21 - First stainless trim installed.jpg (134.48 KB)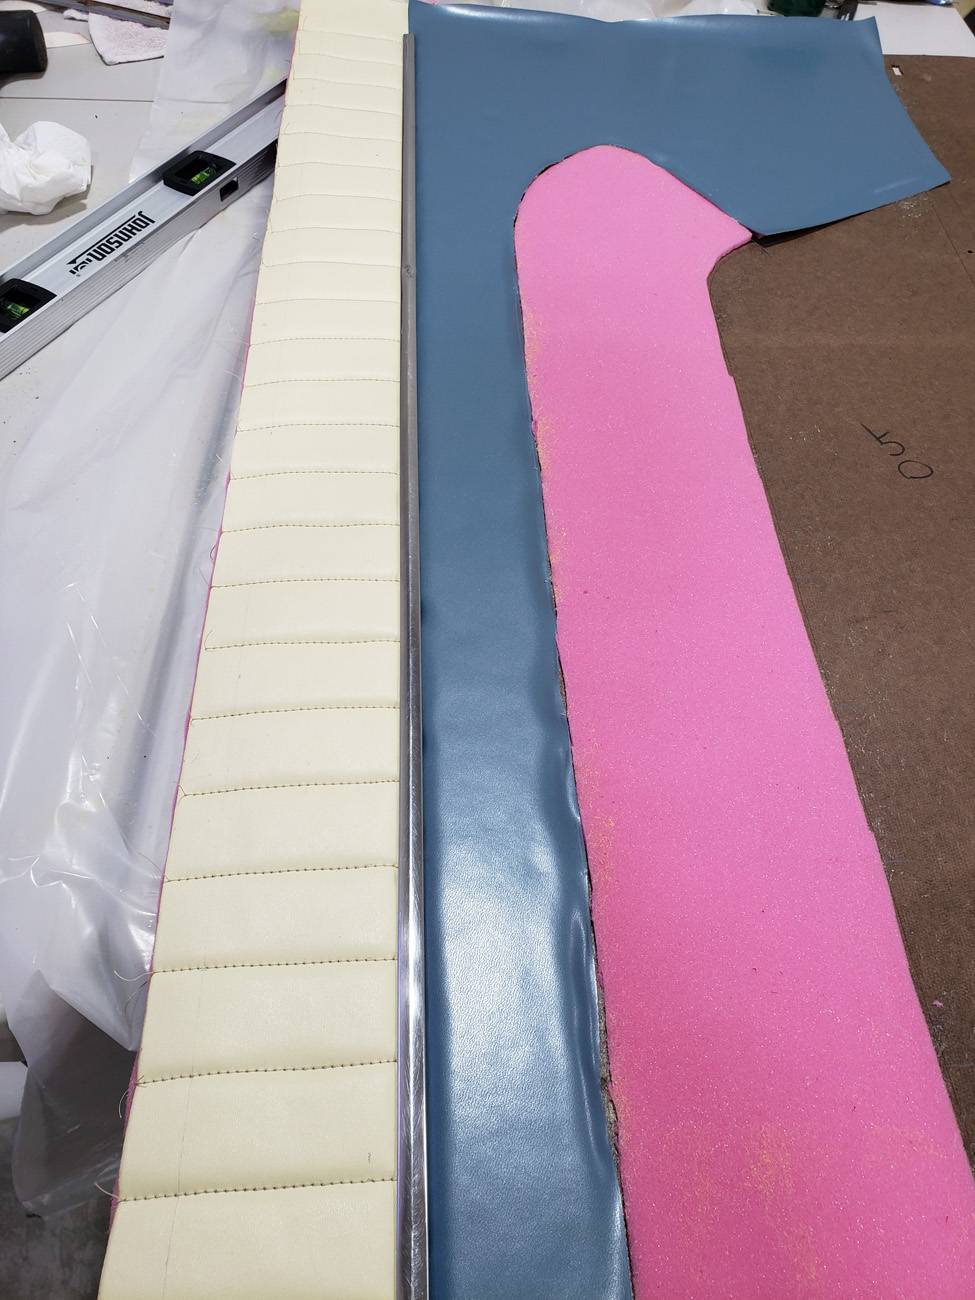
Posted on: 2023/4/9 14:45
|
|||
|
||||
|
Re: KPack
|
||||
|---|---|---|---|---|
|
Home away from home
|
22.) The same steps are taken for the next vinyl panel. Glue, mark mounting holes, staple, trim, mount the stainless.
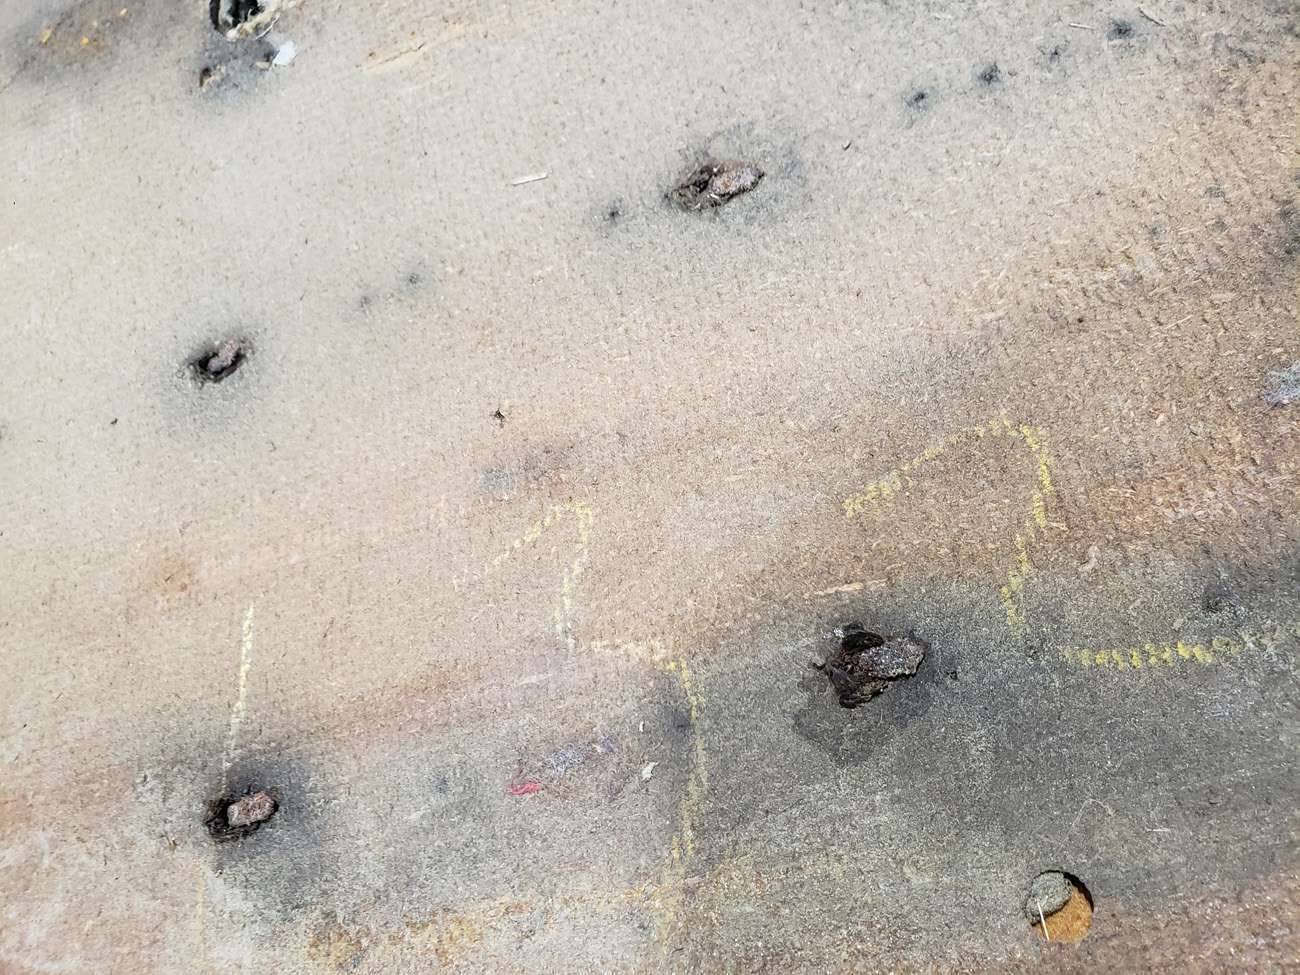
23.) The curved area at the front of the stainless took special attention to make sure the contours of the vinyl matched the stainless. You can see how the stainless tucks in nicely when mounted tightly, giving a pleasing slightly puffed look. 24.) The second pleated panel is next. Again glue the panel as before but stretch the panel end-end in order to make the pleats tight. Mark the mounting holes as before. Staple on each seam right on the stainless center line. Pull tightly on the seams while stapling. 25.) Trim the excess foam and vinyl then install the next trim as before. 26.) Now we do the lower panel. Glue the foam and vinyl as before, mark the holes and draw the centerline. Trim the excess as before. 27.) Mount the lower stainless. The front of the door panel is now completed. 28.) Time for the back of the panel. Flip the panel over and you will see all the excess foam sticking out. 29.) Now trim the excess foam off. On the upper pleated panel the pleats will continue over to the back. Trim the scrim foam as before without touching the stiches. Trim all the other foam to the edge of the hardboard. 30.) With all the foam trimmed off, we are ready to glue the edges. Spray glue on the excess vinyl and the inside 1-1.5" of the hardboard. Let flash then pull hard on the vinyl and wrap it around the edges. Start at the center of the panel and work outward. Do the corners last. My corners are mediocre, but acceptable. I recommend watching YouTube videos of professionals doing it. 31.) Staple the critical areas (corners, stitches, and seams between vinyl layers. Then trim the excess vinyl with a razor blade to make everything even. 32.) The panel is now done (besides marking and mounting the lock trim). Side by side vs the old panel the difference is easy to see. The new panel looks much nicer. The pleats on the new one mirror the original nicely and the colors are good. The new panel is thicker due to the foam, but still looks right. Attach file: 22 - Next panel and trim installed.jpg (80.69 KB)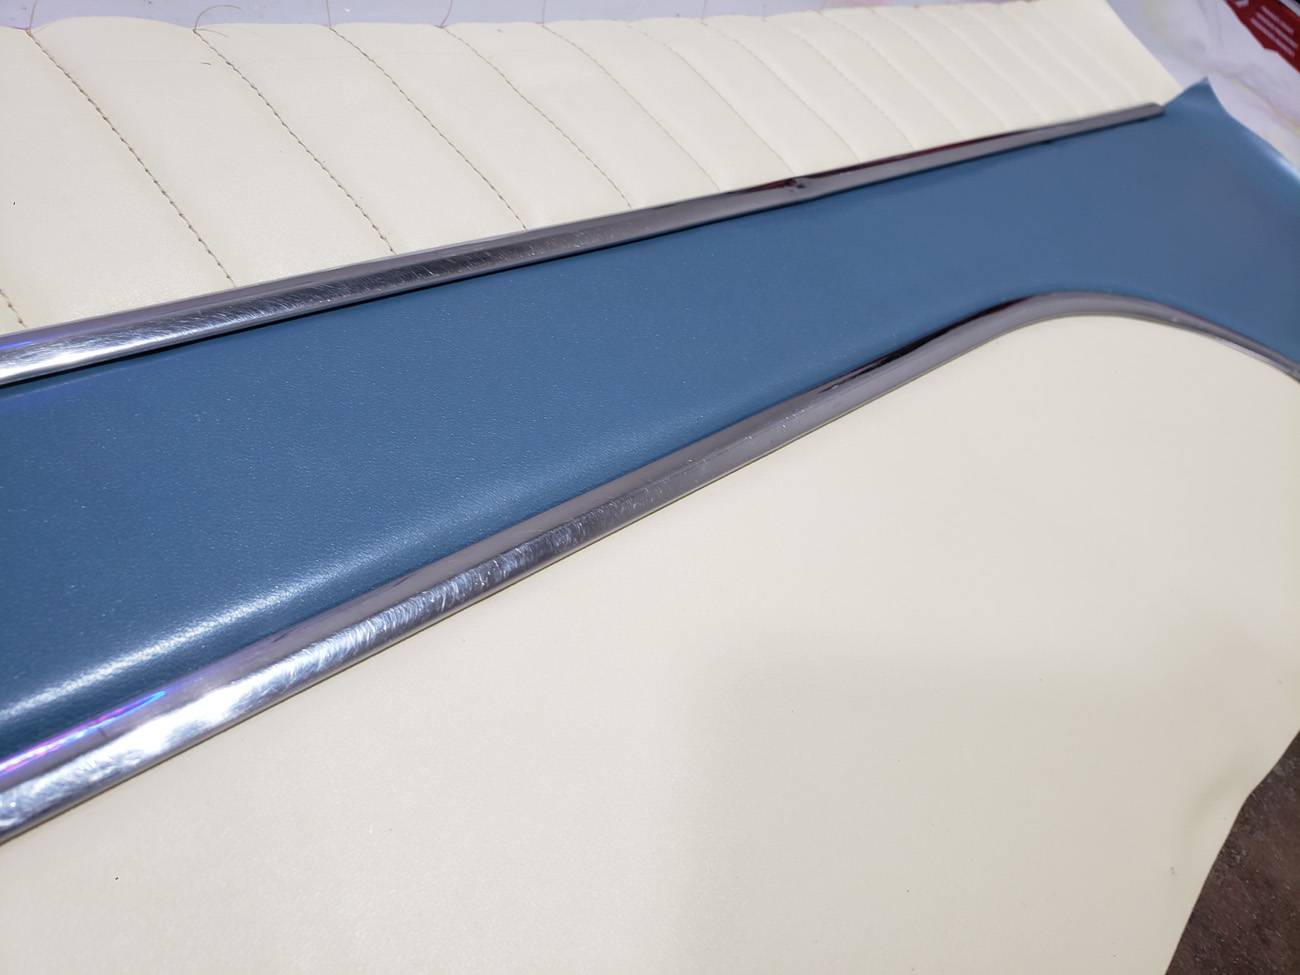 23 - Close up of curved trim.jpg (118.82 KB) 23 - Close up of curved trim.jpg (118.82 KB)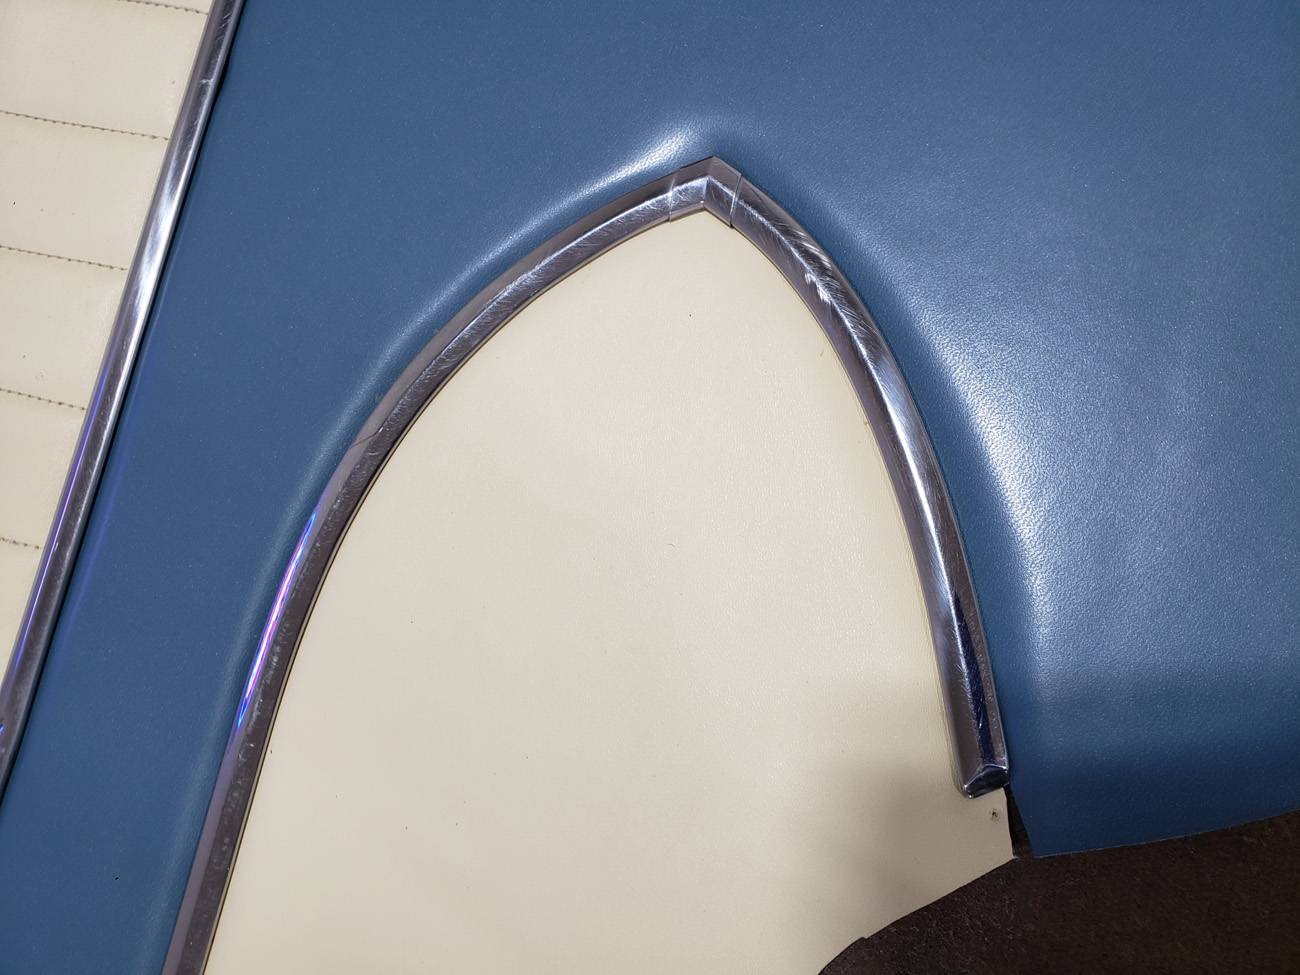 24 - Blue pleated panel glued, marked, and stapled in place.jpg (90.46 KB) 24 - Blue pleated panel glued, marked, and stapled in place.jpg (90.46 KB)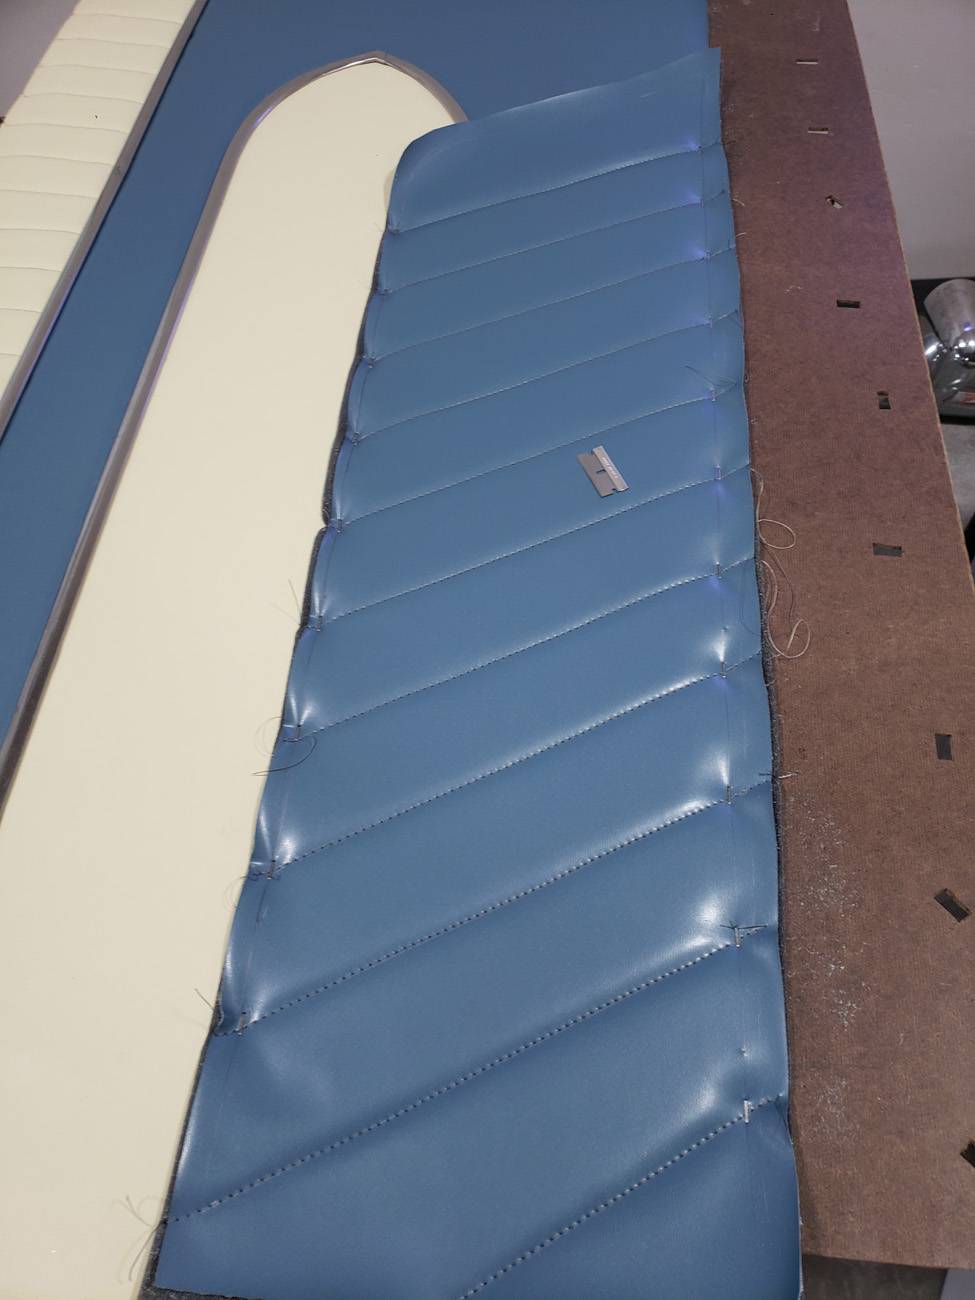 25 - Excess trimmed off and next stainless trim installed.jpg (134.97 KB) 25 - Excess trimmed off and next stainless trim installed.jpg (134.97 KB)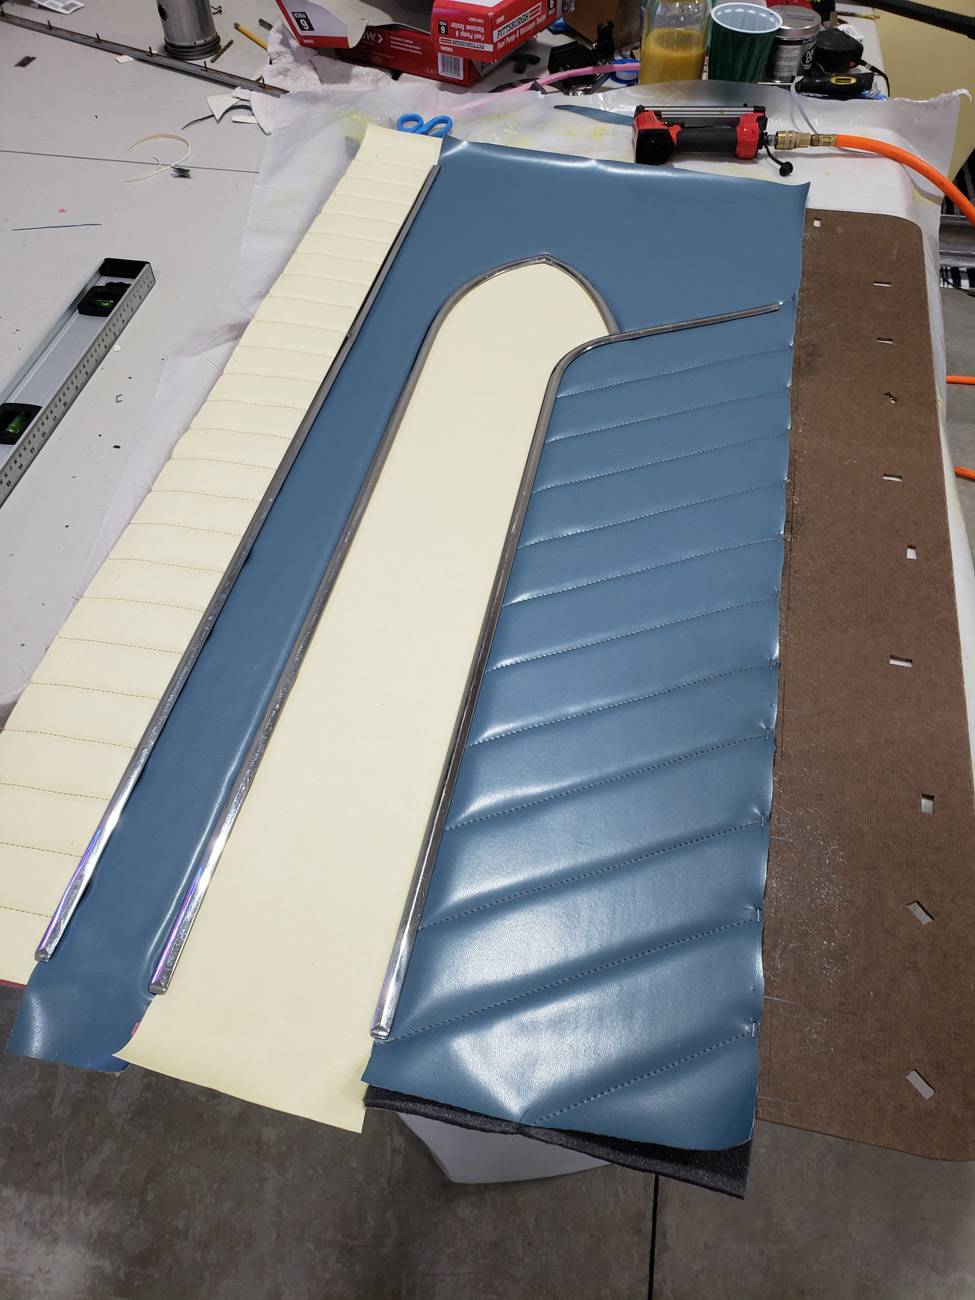 26 - Final vinyl panel glued, trim holes marked.jpg (130.61 KB) 26 - Final vinyl panel glued, trim holes marked.jpg (130.61 KB)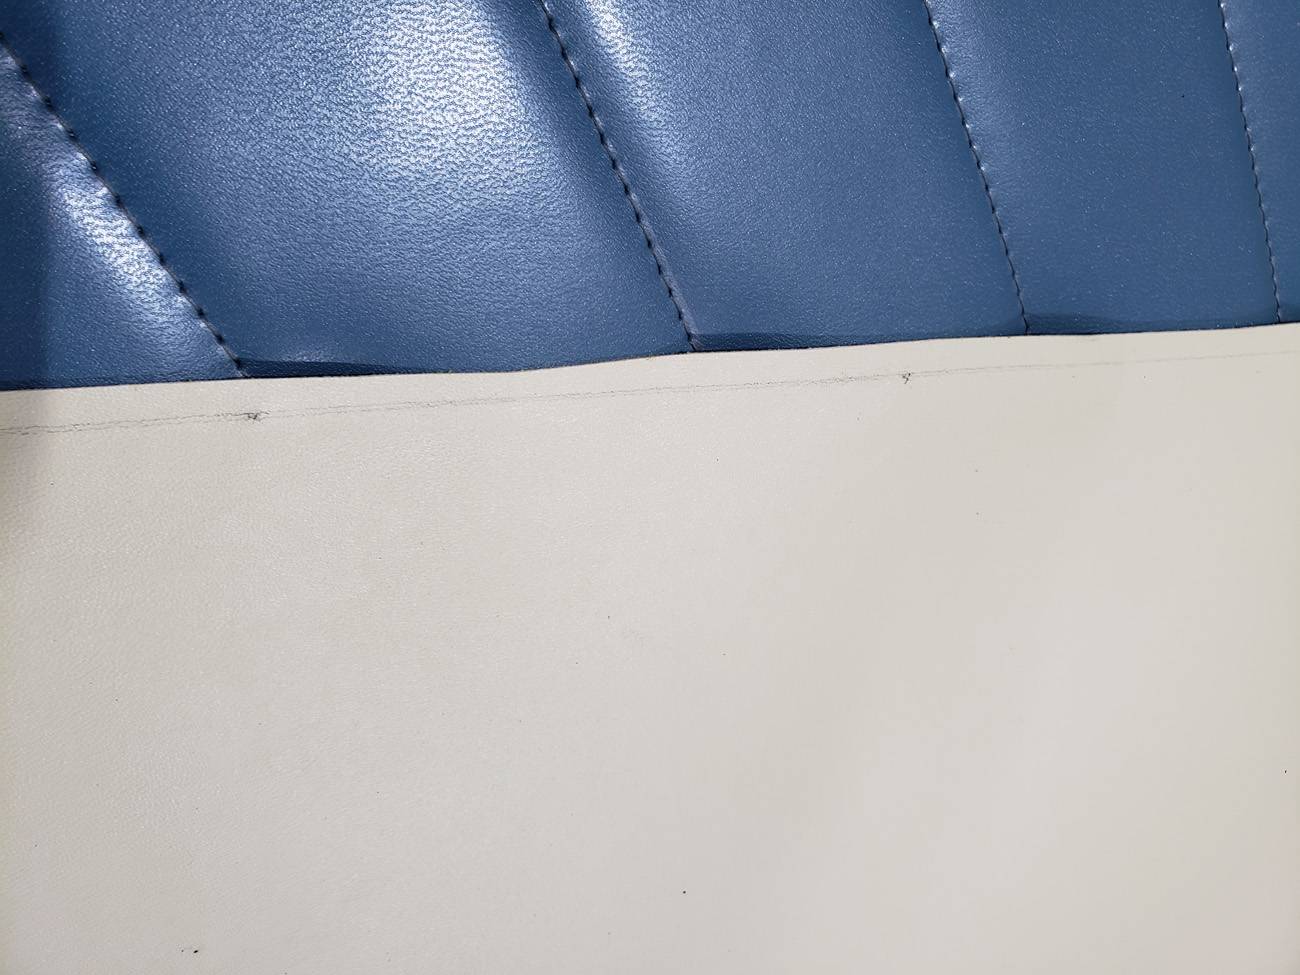 27 - Front of door panel completed.jpg (127.12 KB) 27 - Front of door panel completed.jpg (127.12 KB)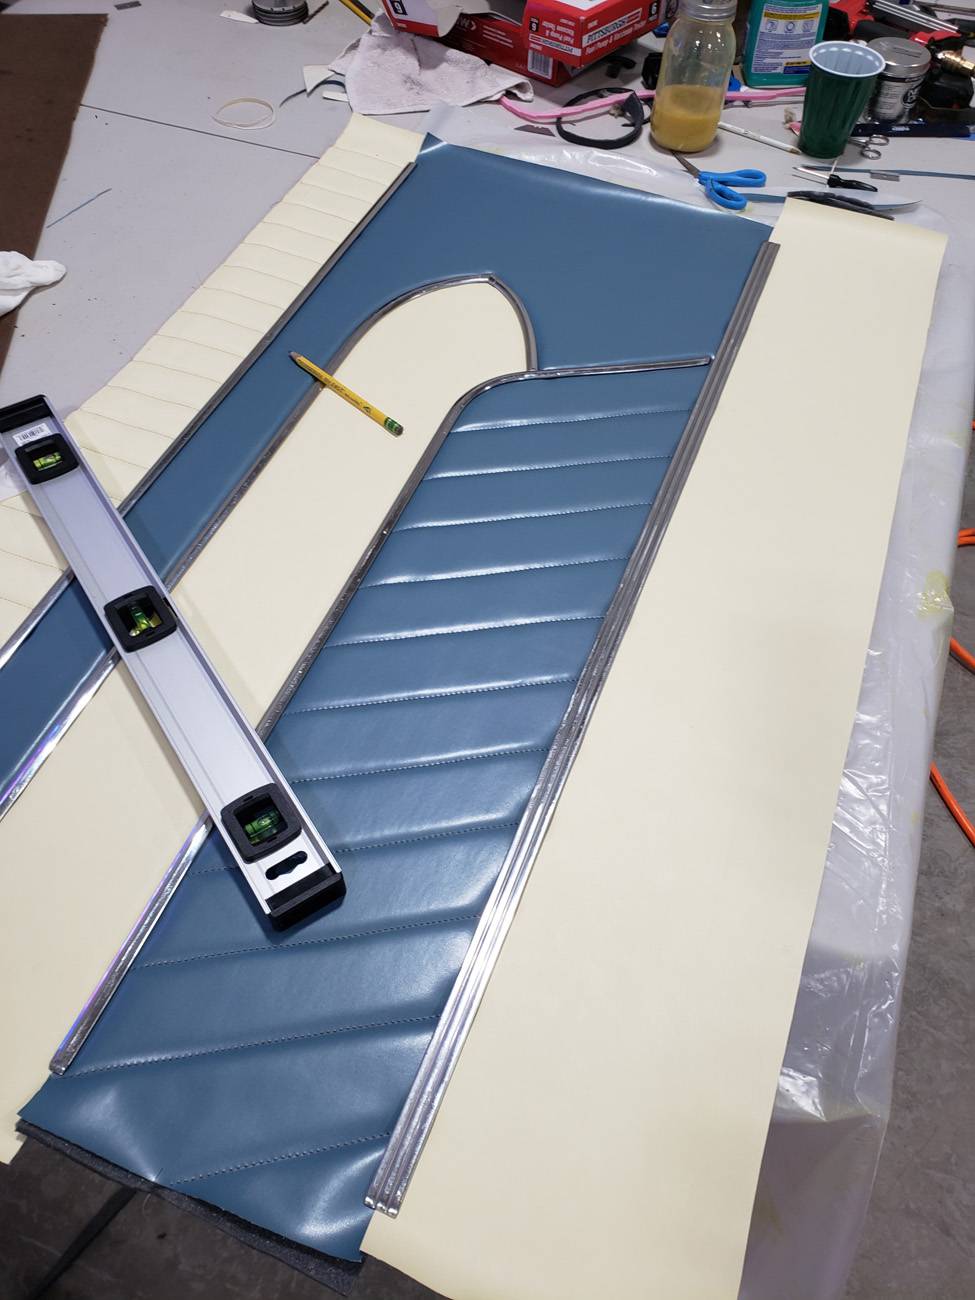 28 - Flip door panel over and begin trimming excess foam.jpg (142.45 KB) 28 - Flip door panel over and begin trimming excess foam.jpg (142.45 KB)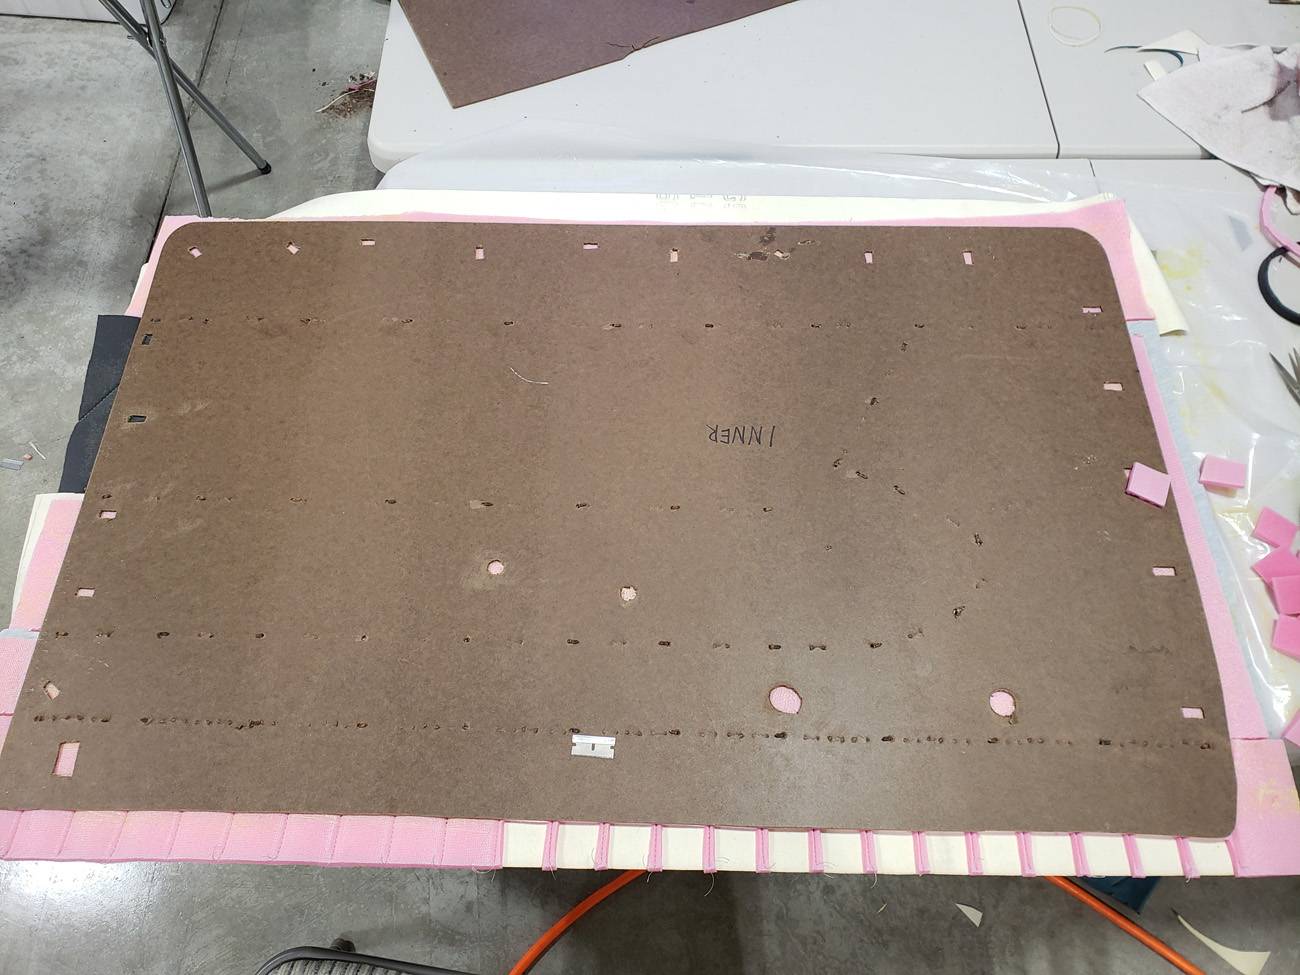 29 - Excess scrim foam trimmed.jpg (148.03 KB) 29 - Excess scrim foam trimmed.jpg (148.03 KB)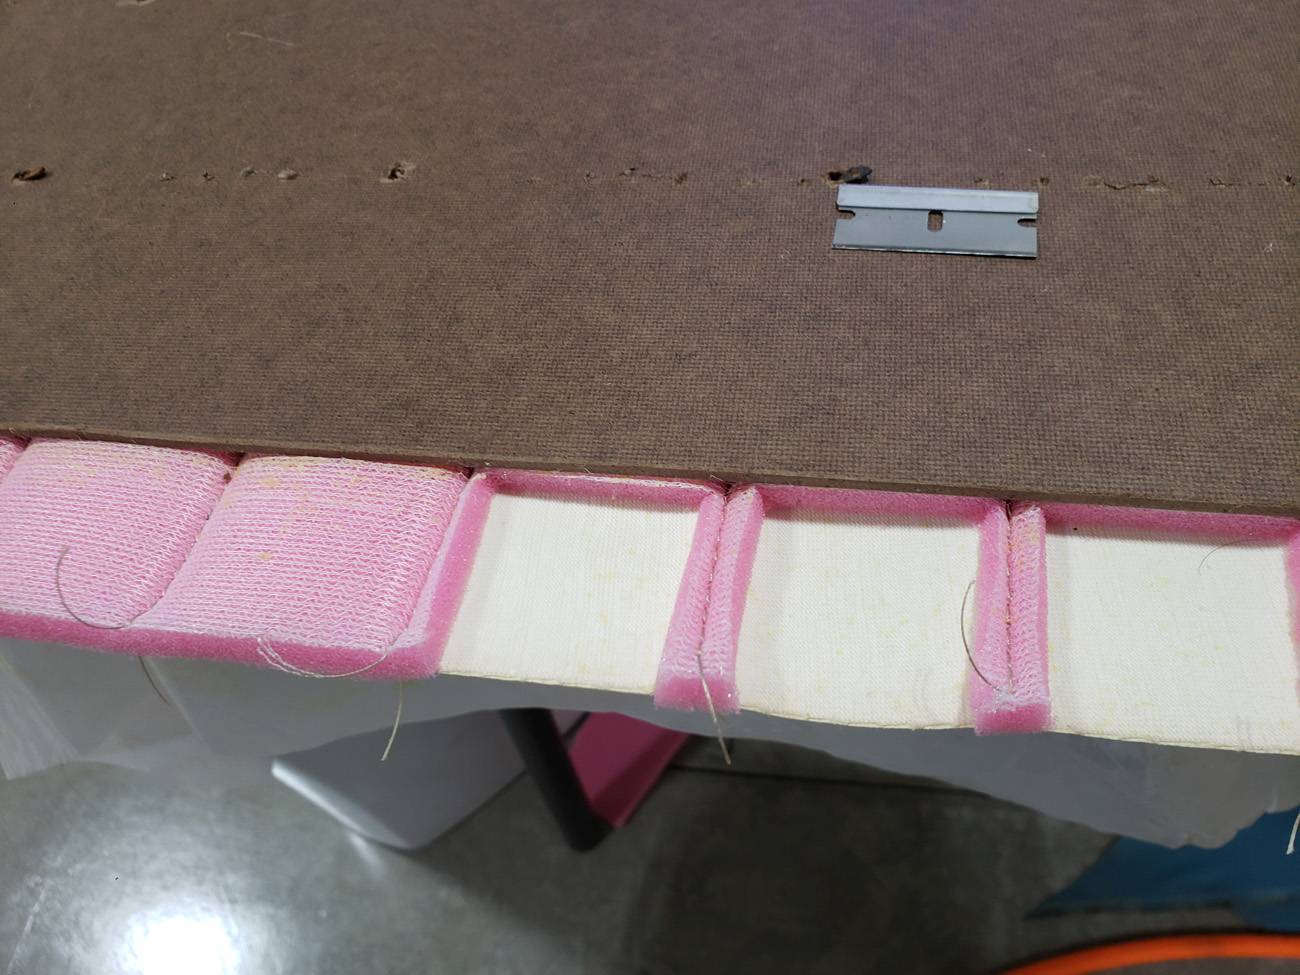 30 - All foam trimmed, ready for glue.jpg (134.94 KB) 30 - All foam trimmed, ready for glue.jpg (134.94 KB)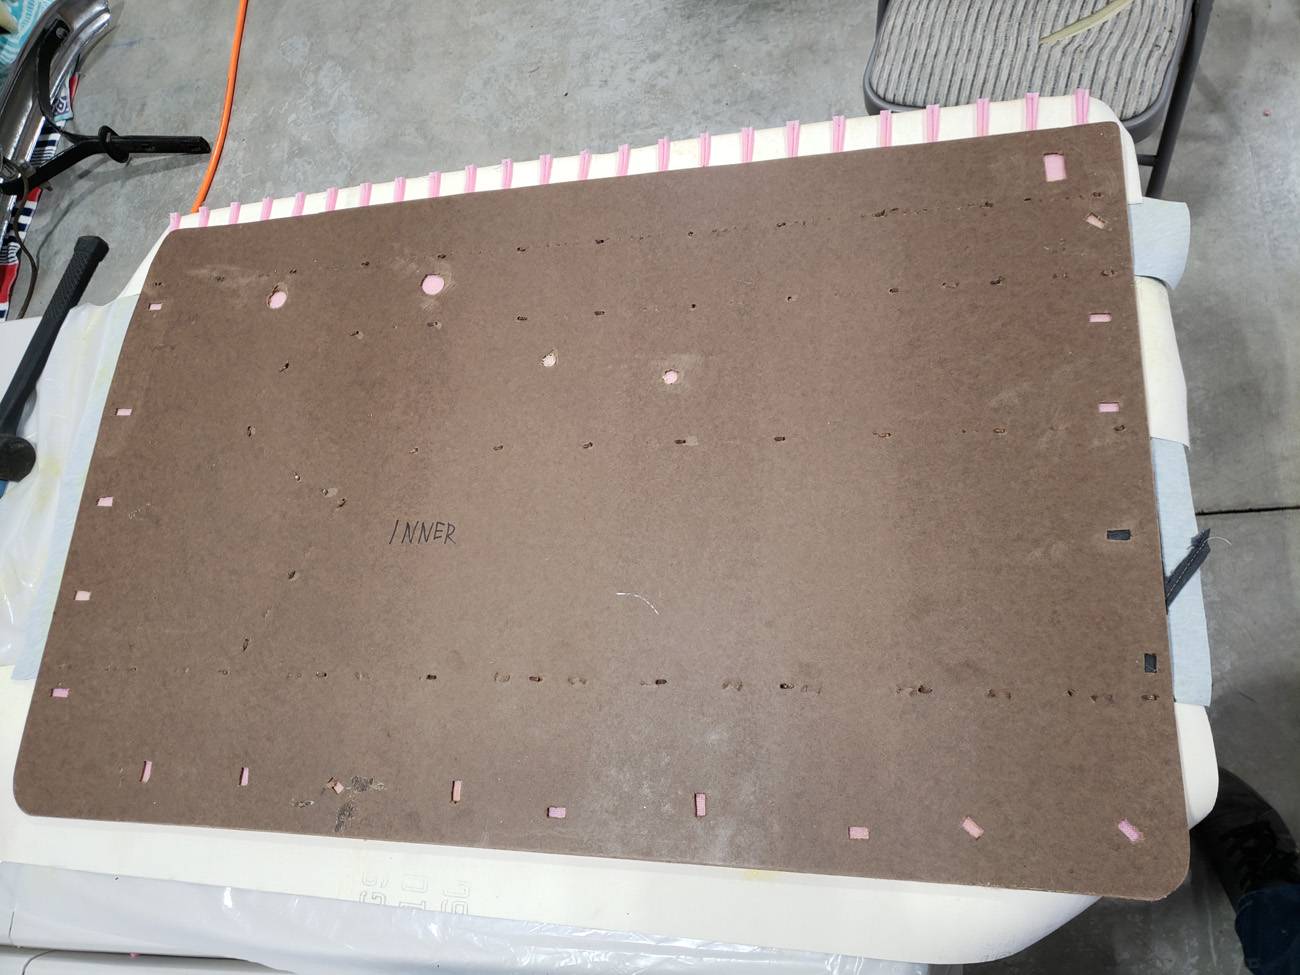 31 - Vinyl folded over and glued in place.jpg (127.26 KB) 31 - Vinyl folded over and glued in place.jpg (127.26 KB)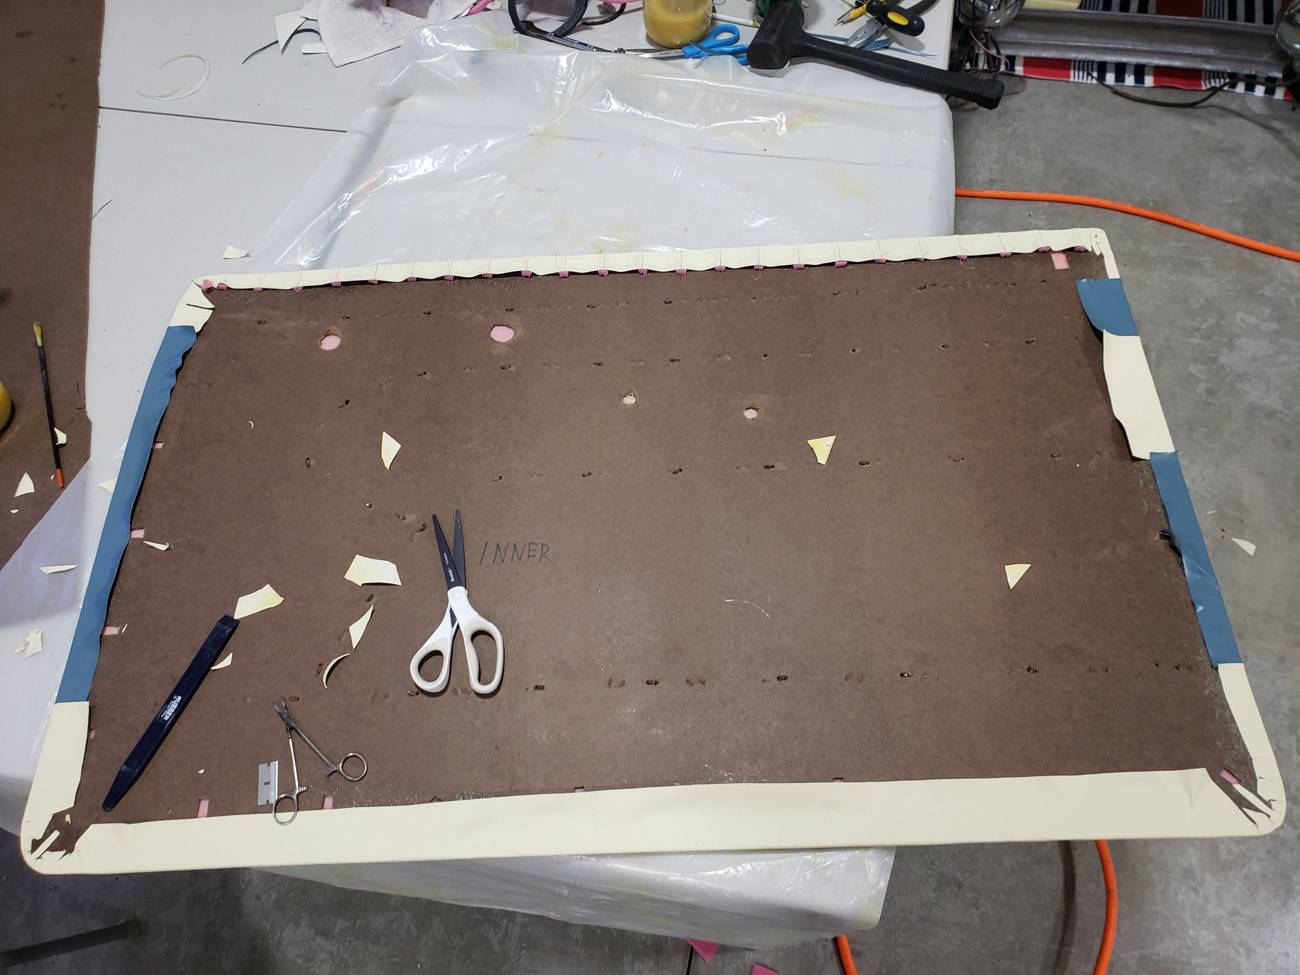 32 - excess vinyl trimmed on the rear of the panel, staples placed in critical areas.jpg (153.20 KB) 32 - excess vinyl trimmed on the rear of the panel, staples placed in critical areas.jpg (153.20 KB)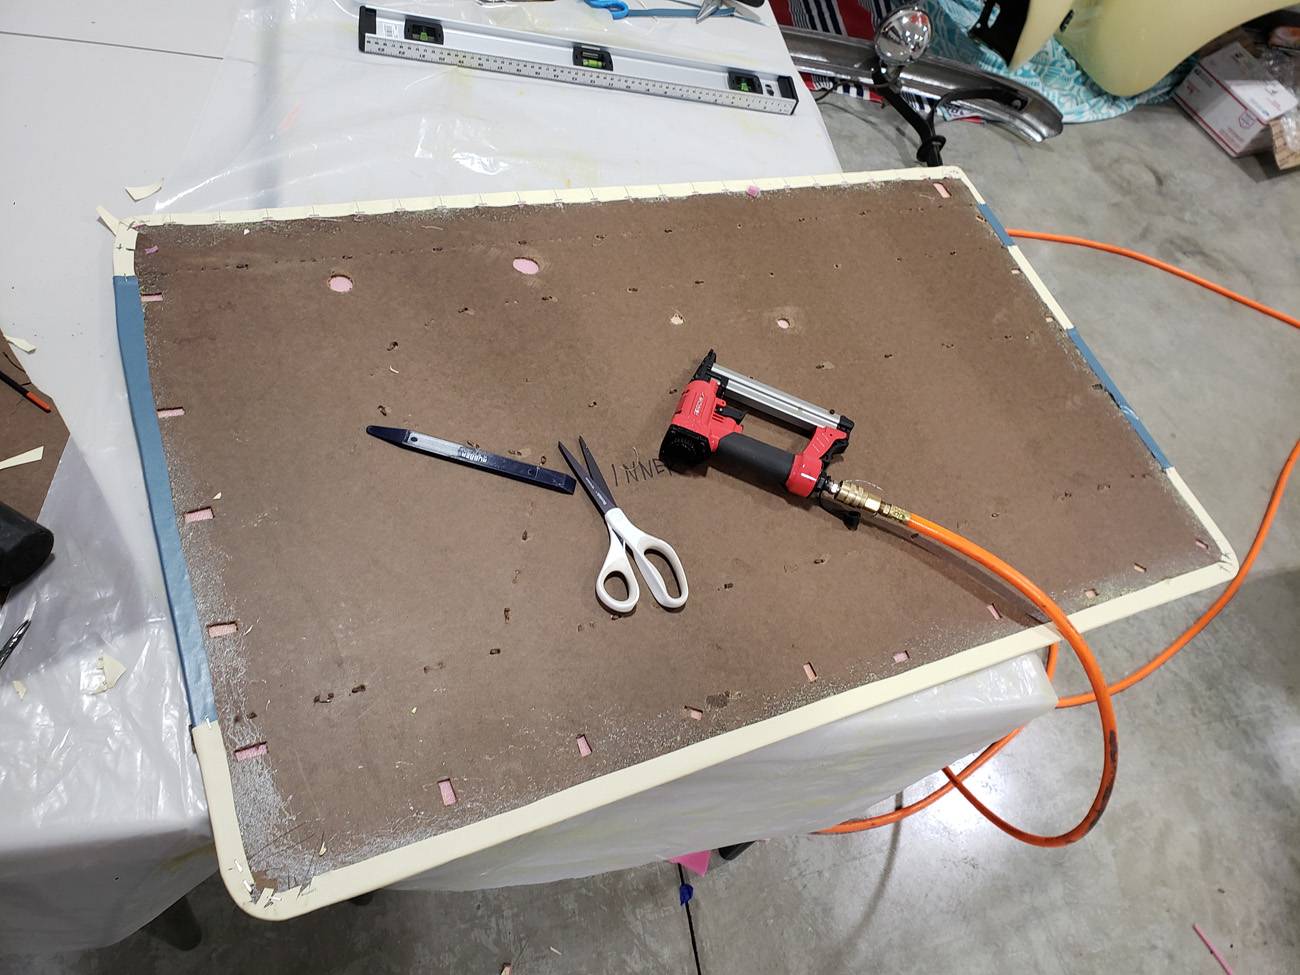 33 - Completed, comparison to the old faded panel.jpg (124.11 KB) 33 - Completed, comparison to the old faded panel.jpg (124.11 KB)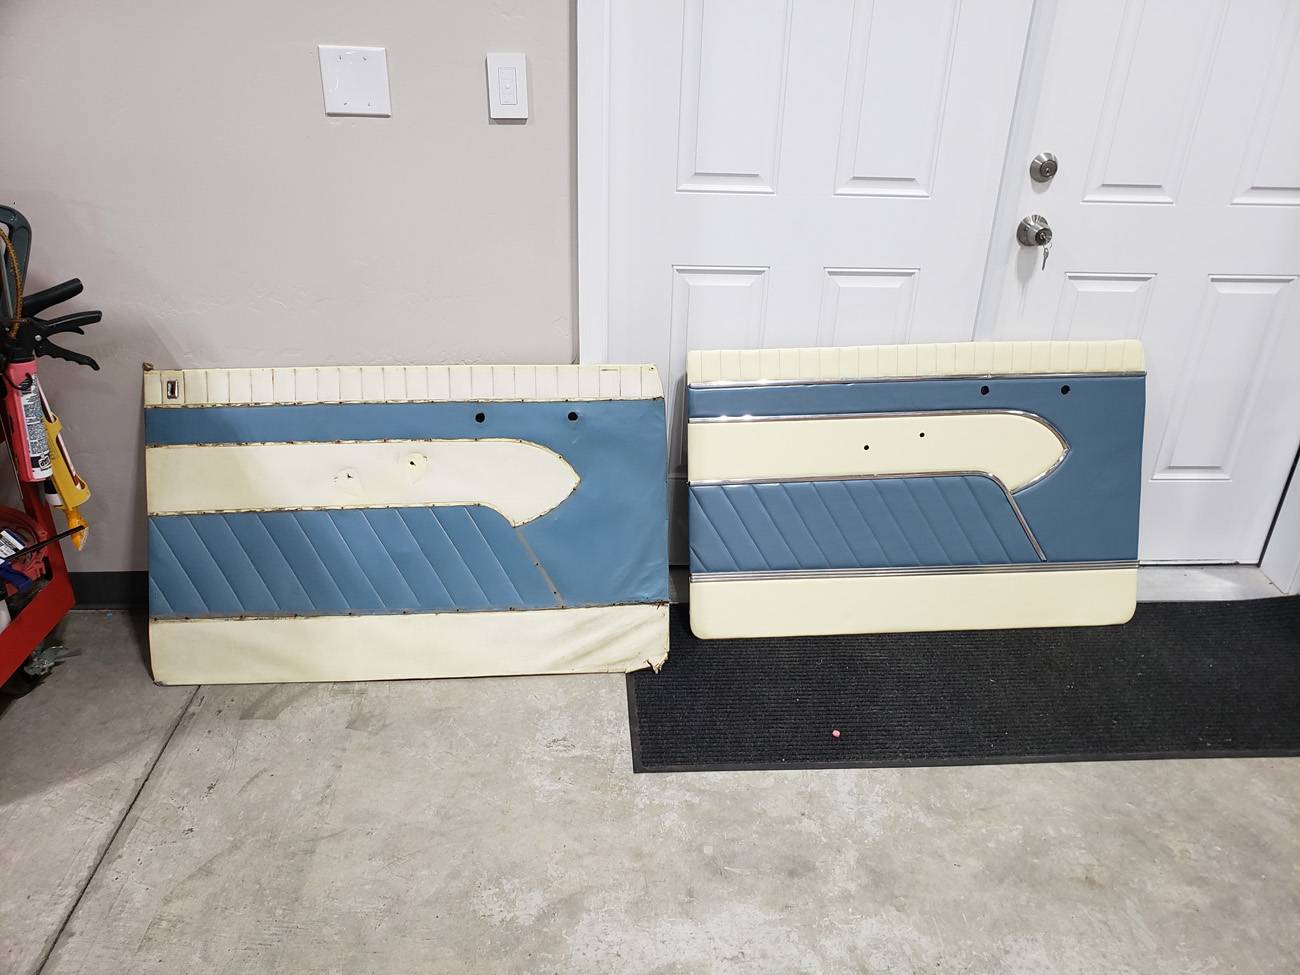
Posted on: 2023/4/9 15:02
|
|||
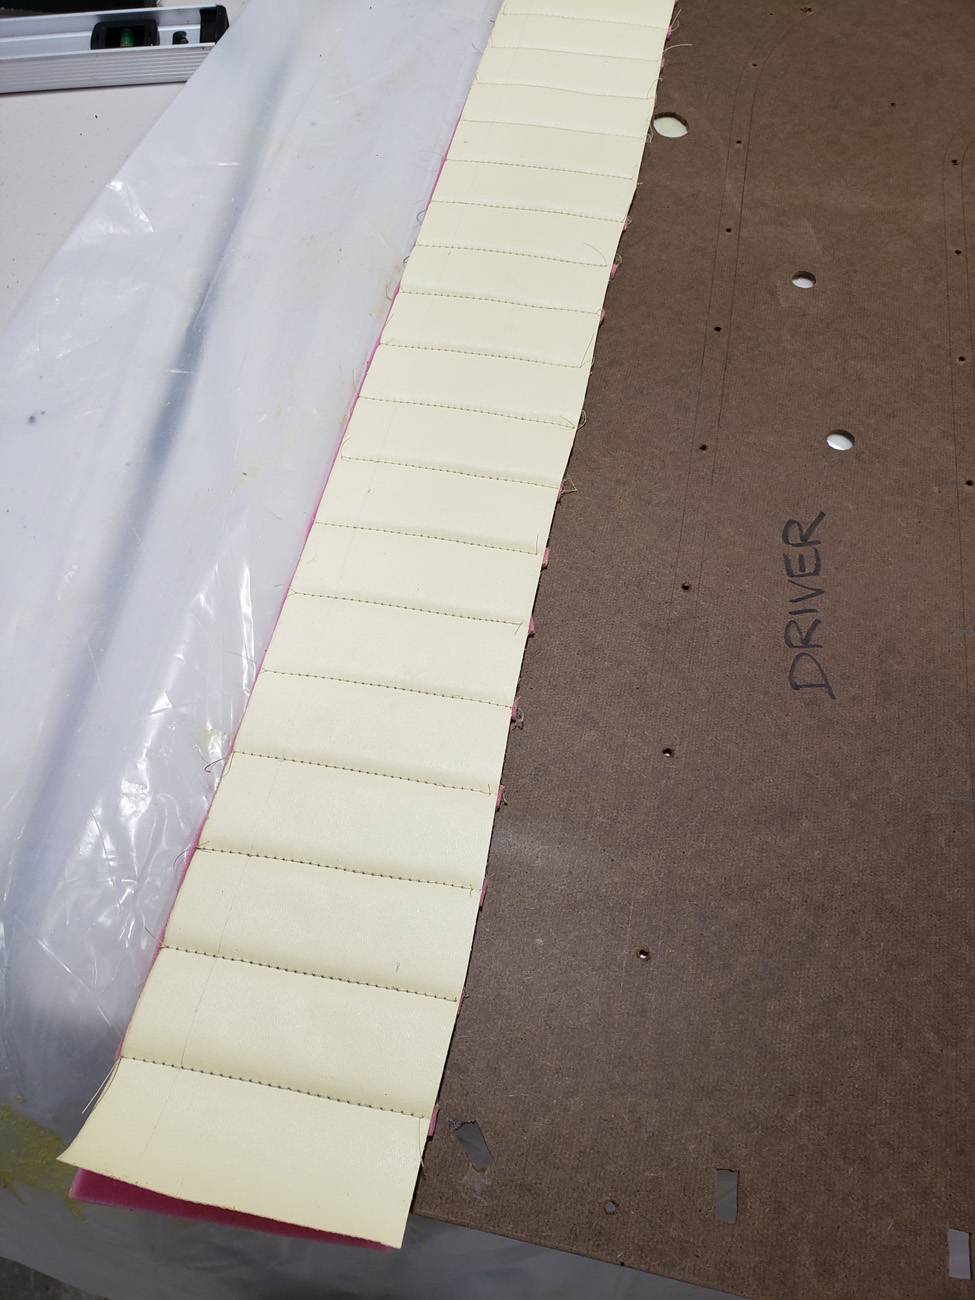
|
||||
|
Re: KPack
|
||||
|---|---|---|---|---|
|
Webmaster

|
They look fantastic!
Posted on: 2023/4/9 15:56
|
|||
|
-BigKev
1954 Packard Clipper Deluxe Touring Sedan -> Registry | Project Blog 1937 Packard 115-C Convertible Coupe -> Registry | Project Blog |
||||
|
||||
|
Re: KPack
|
||||
|---|---|---|---|---|
|
Home away from home

|
Yes indeed, they look great!
Posted on: 2023/4/9 20:48
|
|||
|
All generalities are false.
Once I thought I was wrong but I was mistaken. Don Pierson Packard / IMPERIAL page CA DMV Licensed Vehicle VIN Verification 1951 Henney-Packard 3-Door Long Wheelbase Air Force Ambulance The 1951 Henney-Packard is For Sale! 1954 Packard Patrician 1954 Packard Patrician Parts Car 1956 Clipper Custom Sedan |
||||
|
||||
|
Re: KPack
|
||||
|---|---|---|---|---|
|
Home away from home
|
Thanks guys! It's been fun so far.
Test mounted the last two door panels today and everything lines up great. I checked the springs and I think the small spring goes to the window regulator and the larger one goes to the door handle. I test fit the regulator handle and the door handle with a retaining pin. The door handle for sure will not need a spring to give it tension. It was very difficult to get a pin in there. The regulator handle will need a spring. I'll go ahead and get the springs for all of them and then see if I need them all. Lastly I picked up some frames and printed off some of my favorite Packard pictures to mount on my wall. I've got a few more to add, but currently there are a few of my favorite shots of the Panama, and one picture of my dad and grandfather in front of my dad's '38. -Kevin Attach file: Door panel springs.jpg (131.67 KB)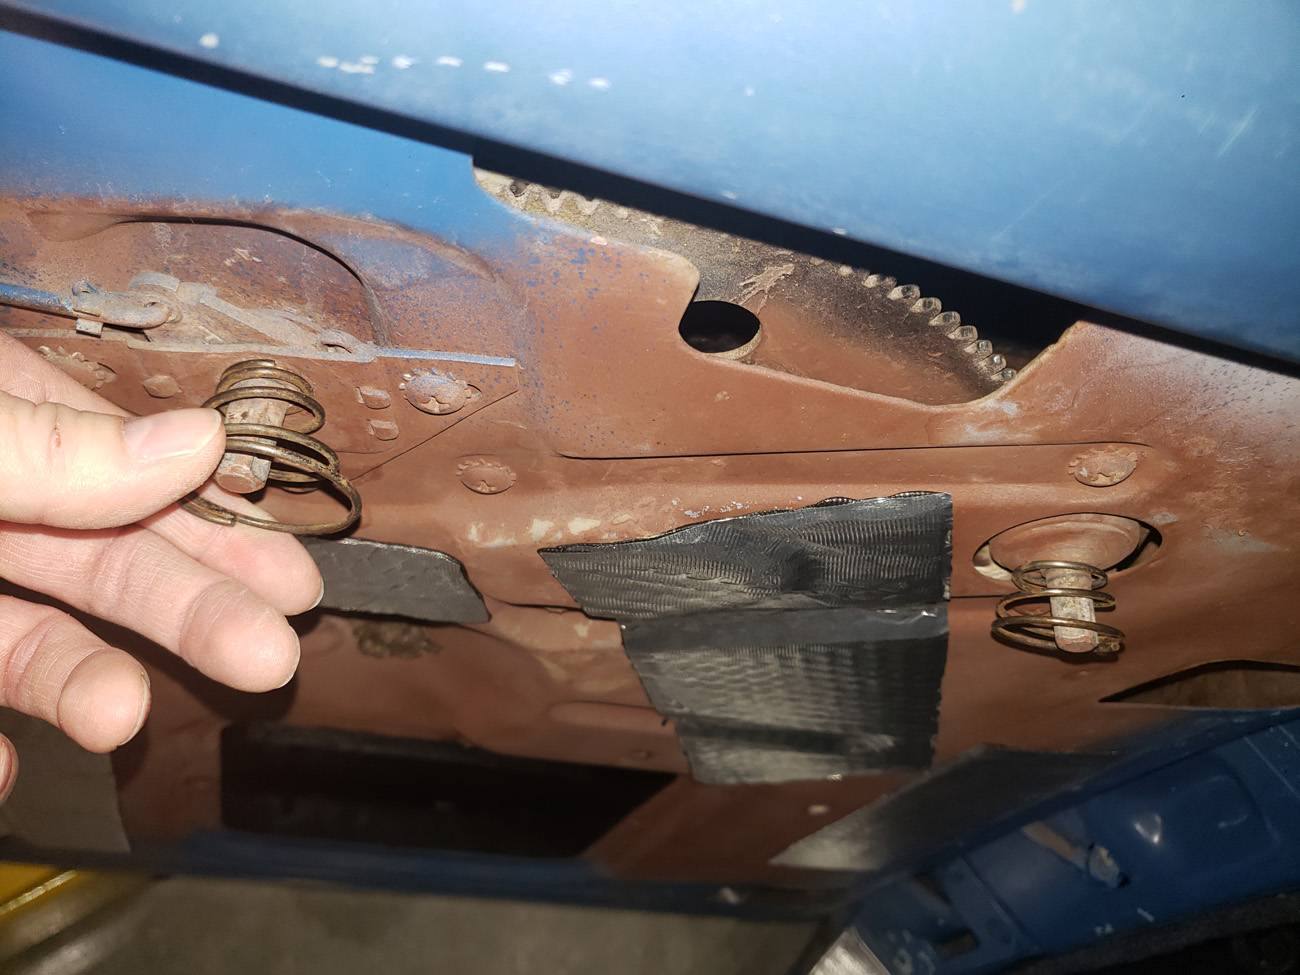 Door handle installed.jpg (105.46 KB) Door handle installed.jpg (105.46 KB)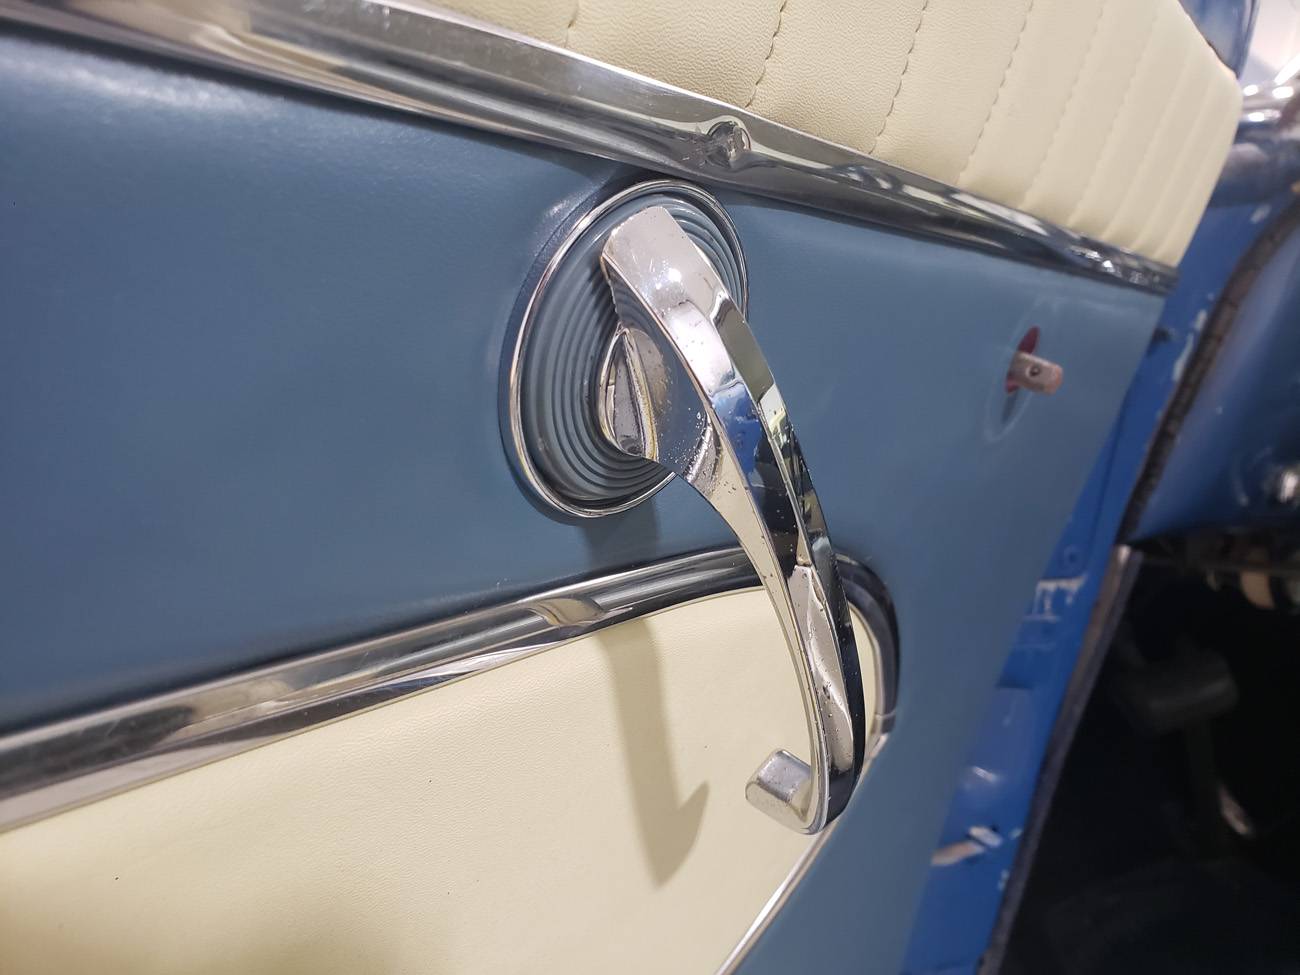 The Packard Wall.jpg (115.28 KB) The Packard Wall.jpg (115.28 KB)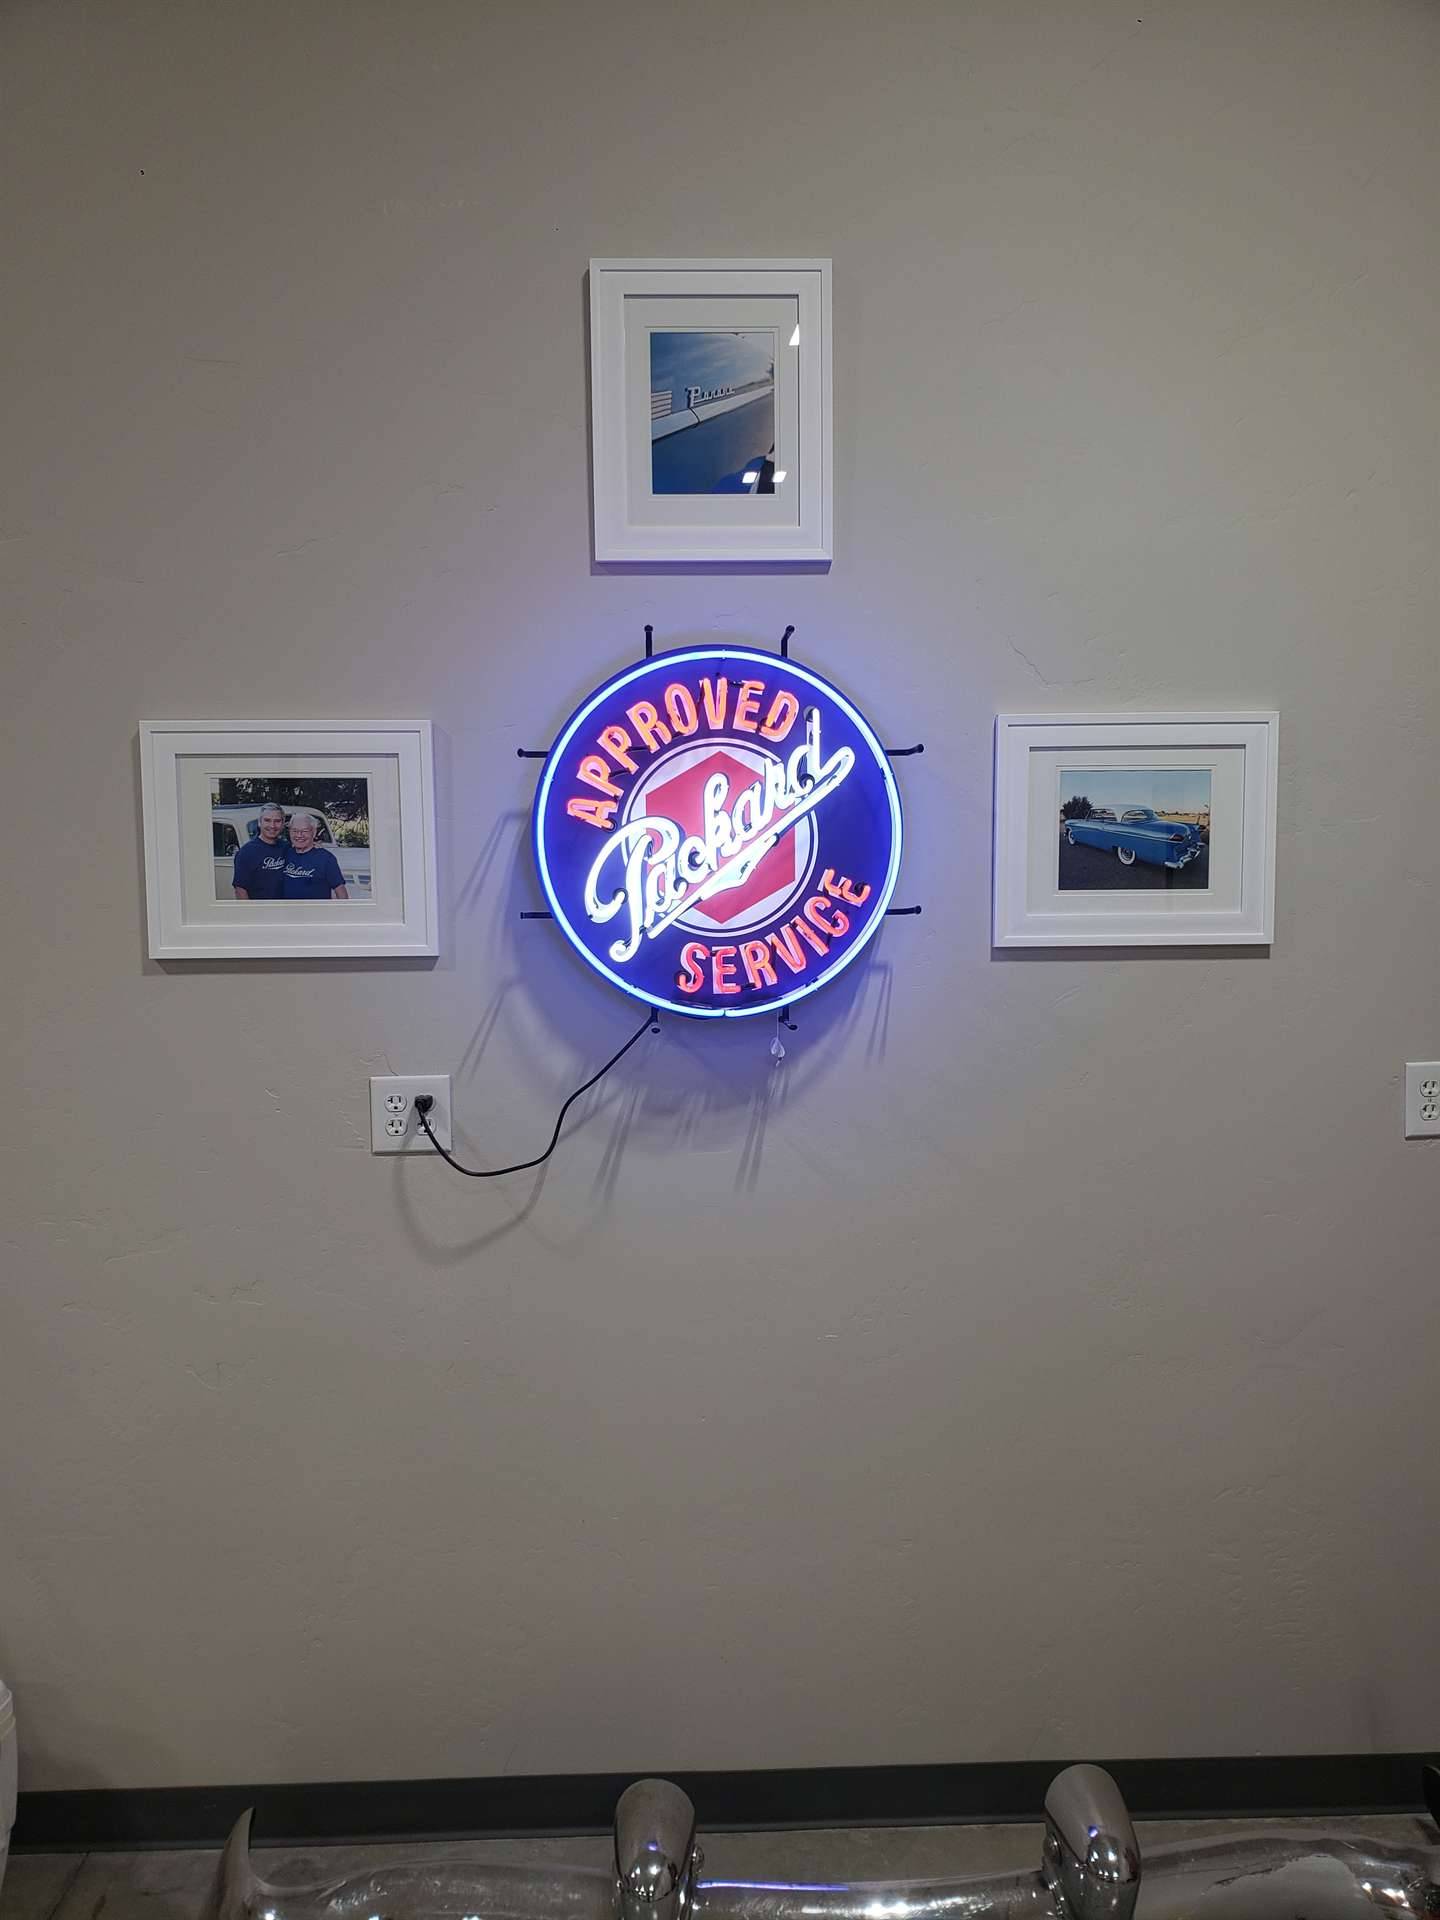
Posted on: 2023/4/10 22:56
|
|||
|
||||
|
Re: KPack
|
||||
|---|---|---|---|---|
|
Home away from home
|
The springs should all be the same, or at least they are on my 1956 and on all my earlier cars.
Posted on: 2023/4/11 1:38
|
|||
|
All generalities are false.
Once I thought I was wrong but I was mistaken. Don Pierson Packard / IMPERIAL page CA DMV Licensed Vehicle VIN Verification 1951 Henney-Packard 3-Door Long Wheelbase Air Force Ambulance The 1951 Henney-Packard is For Sale! 1954 Packard Patrician 1954 Packard Patrician Parts Car 1956 Clipper Custom Sedan |
||||
|
||||
|
Re: KPack
|
||||
|---|---|---|---|---|
|
Home away from home

|
I'm not familiar with these springs as I don't see them on either of my 55's.
Posted on: 2023/4/11 4:05
|
|||
|
1955 400 | Registry | Project Blog
1955 Clipper Deluxe | Registry | Project Blog 1955 Clipper Super Panama | Registry Email (Parts/service inquiries only, please. Post all questions on the forum.) service@ultramatic.info |
||||
|
||||
|
Re: KPack
|
||||
|---|---|---|---|---|
|
Home away from home
|
You might be right, I was possibly thinking of my 1954 which I am also working on.
Posted on: 2023/4/11 18:00
|
|||
|
All generalities are false.
Once I thought I was wrong but I was mistaken. Don Pierson Packard / IMPERIAL page CA DMV Licensed Vehicle VIN Verification 1951 Henney-Packard 3-Door Long Wheelbase Air Force Ambulance The 1951 Henney-Packard is For Sale! 1954 Packard Patrician 1954 Packard Patrician Parts Car 1956 Clipper Custom Sedan |
||||
|
||||
|
Re: KPack's 1954 Panama
|
||||
|---|---|---|---|---|
|
Home away from home
|
So it's a 1954 and earlier thing? I'll probably just get a few of the normal size and call it good.
-Kevin
Posted on: 2023/4/11 18:25
|
|||
|
||||


