|
Re: Wade's Workshop
|
||||
|---|---|---|---|---|
|
Forum Ambassador

|
Thursday 1st October 2015
Some progress at last! Cleaned up the timing case cover, but it still needs paint. Removed sump(pan) from Coupe. Fair amount of metal particles in the front part of the sump with some in the lower section as well. I'm hoping the particles in the lower section were washed down there by my kerosene flushes after the timing case came off and the oil was drained. This old body had a hard time under the Coupe just getting to the bolts that needed undoing, including the bellhousing bottom. Not looking forward to putting that big and heavy cast piece back on! Have cleaned up the sealing surface of the sump but will have to straighten parts of it which bent in removal, it was stuck on pretty tight. Have also removed the oil pickup, have left it to drain overnight, and will clean that up as well. With school holidays we get the grandkids tomorrow so I won't get back to the Coupe until Saturday. Then, I'll spray brake cleaner like crazy inside the block to remove any stray particles. I'll also, much more carefully, clean the timing chain, gears and vicinity where the trouble came from. Attach file:  (38.45 KB) (38.45 KB)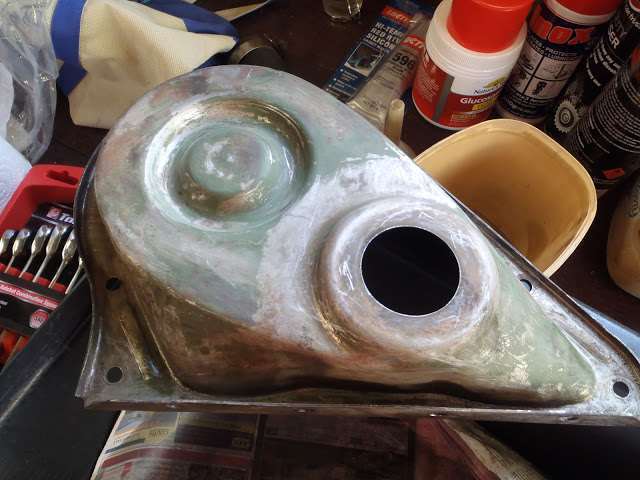 (47.94 KB) (47.94 KB)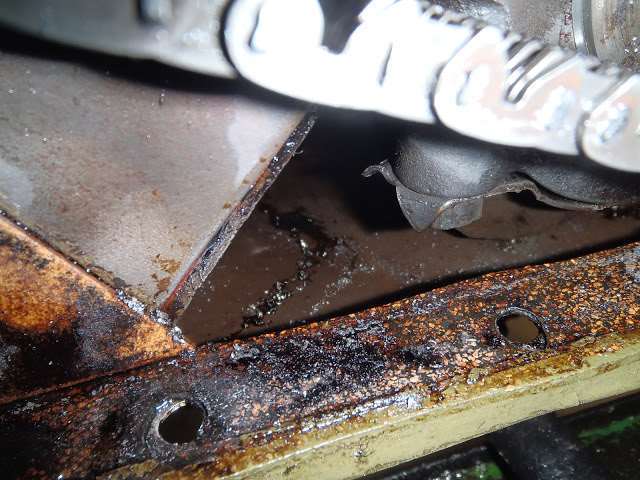 (40.57 KB) (40.57 KB)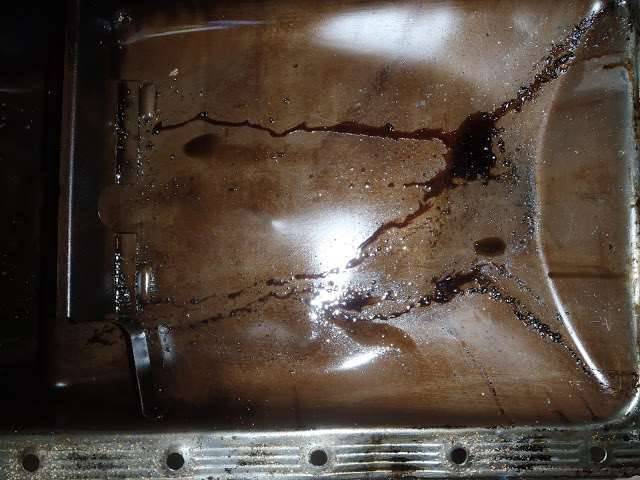 (35.90 KB) (35.90 KB)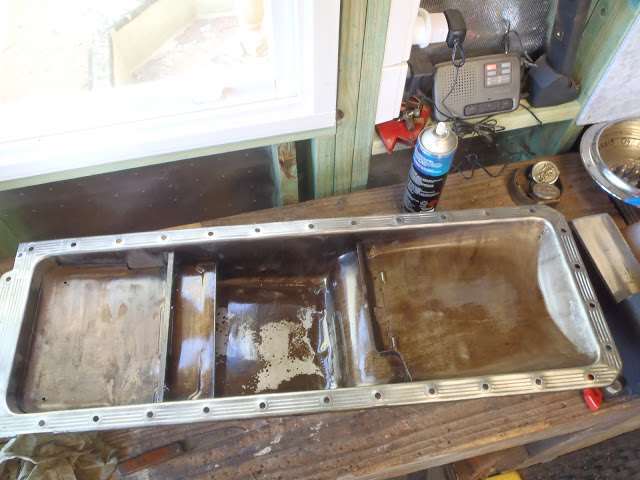 (24.98 KB) (24.98 KB)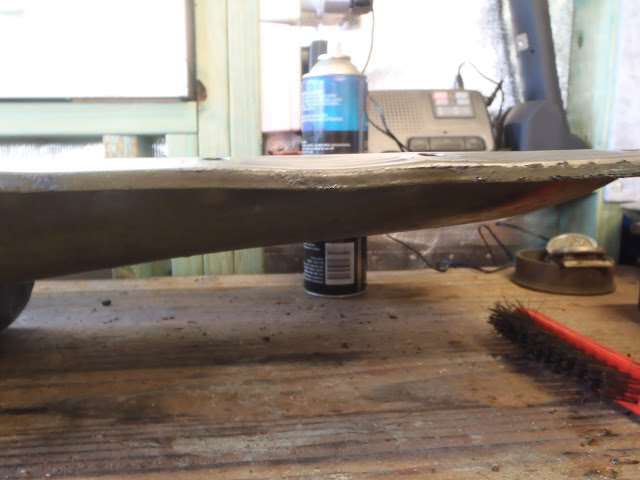
Posted on: 2015/10/1 4:48
|
|||
|
Mal
/o[]o\ ====  Bowral, Southern Highlands of NSW, Australia "Out of chaos comes order" - Nietzsche. 1938 Eight Touring Sedan - SOLD 1941 One-Twenty Club Coupe - SOLD 1948 Super Eight Limo, chassis RHD - SOLD 1950 Eight Touring Sedan - SOLD What's this?  Put your Packard in the Packard Vehicle Registry! Here's how! Any questions - PM or email me at ozstatman@gmail.com |
||||
|
||||
|
Re: Wade's Workshop
|
||||
|---|---|---|---|---|
|
Forum Ambassador
|
Saturday 3rd October 2015
Started off by painting the timing case with POR 15. Then it was under the engine to clean the lower face of the block for when the sump(pan) goes back on. Used a nylon scouring pad to remove the last of the gasket and gasket cement along with a scraper for any intransigent spots then finished off with spray-on brake cleaner and a clean rag. Turned then to timing chain area to clean up the metal particle mess in that area. Initially this entailed a really plentiful spraying of brake cleaner over the exposed timing gears and chain. Then it was on to a repetitive serious of sprayings of the links between the crank sprocket and the cam sprocket. After each length of links was very liberally sprayed/doused in brake cleaner the crank was turned over by putting the harmonic balancer on and tightening the nut until the crank was able to be turned. Each time this was done about 6 to 8 links were moved the balancer taken off and copious spraying undertaken. No idea how many times the balancer went on and off or how many crankshaft rotations were made but, suffice to say, I'm now very well practiced in harmonic balancer removal and installation. I do know one measurement which may or may not be relevant to others who may find themselves in a similar situation - it took over 2 full cans of aerosol brake cleaner to do the job. Also sprayed the forward section of the crankcase even though from observation there didn't appear to be any metal particles in residence. Will get back to the job on Monday because this afternoon the AFL Grand Final is being played. Kinda like the NFL Super Bowl but playing "Aussie Rules" football. While tomorrow the NRL Grand Final is played, another Super Bowl type event but this time for Rugby League football. For those who have heard of Jarryd Hayne this is the type of football he played before going to the NFL this year Attach file: (40.22 KB)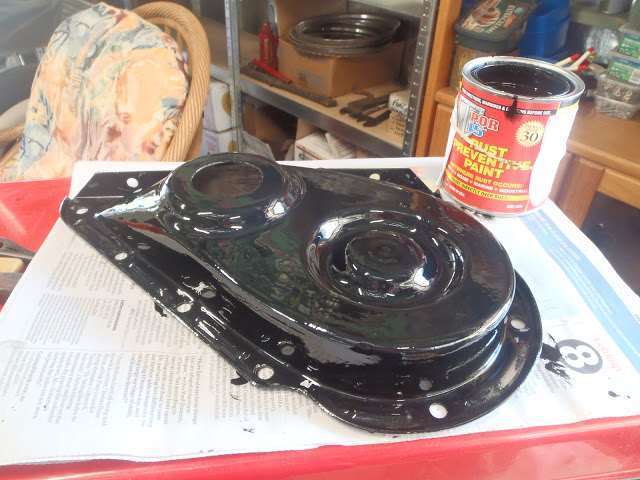 (41.41 KB) (41.41 KB)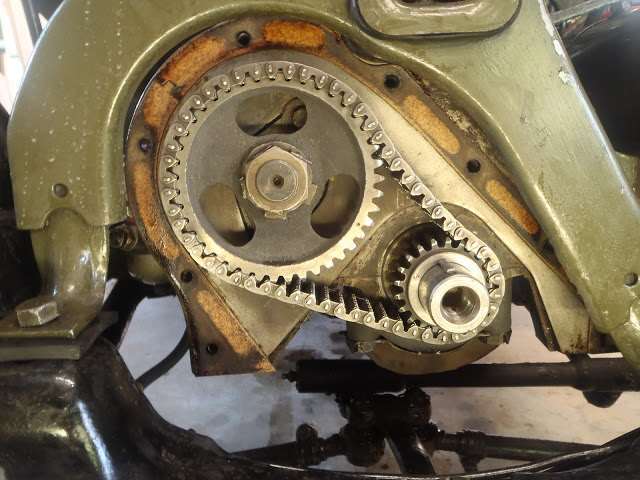
Posted on: 2015/10/2 23:47
|
|||
|
Mal
/o[]o\ ==== Bowral, Southern Highlands of NSW, Australia "Out of chaos comes order" - Nietzsche. 1938 Eight Touring Sedan - SOLD 1941 One-Twenty Club Coupe - SOLD 1948 Super Eight Limo, chassis RHD - SOLD 1950 Eight Touring Sedan - SOLD What's this? Put your Packard in the Packard Vehicle Registry! Here's how! Any questions - PM or email me at ozstatman@gmail.com |
||||
|
||||
|
Re: Wade's Workshop
|
||||
|---|---|---|---|---|
|
Forum Ambassador
|
Tuesday 6th October 2015
Attended to the freshly POR painted timing case cover which required some cleaning of the gasket surfaces where paint had seeped through the bolt holes. Then finished cleaning the sump(pan) inside and out and flattened the sump edges requiring that treatment. But....it was one step forward and two back! Took out the sump gasket Wade had sent down, a two piece FEL-PRO. But....a 1" piece broke off the rear of one side. Not to worry, that didn't seem too bad, sure it could be made to work with careful fitment. But....that wasn't all, in laying the pieces out on the sump, another piece broke off this time from the front of the other side! That piece is also warped, with a big bow in it along it's length. I could also see another part tear in the first piece. And, you all know as we grow older we shrink? Well so had the gaskets, they were both about 1&1/2" shorter than required? What to do? Why, it was off to the parts store for a sheet of gasket cork. Good idea but with their sheets of cork only in 400mm lengths and the sides of the FEL-PRO 2 piece gasket(if it was de-shrunk, is that a word?) were each about 915mm long so that wasn't going to work. Didn't have any thick paper gasket material either. Next thought was RTV, which they did have, but before resorting to that rang my Packard mentor Wade. Explained my predicament and was advised he "may" have another sump gasket but would have to look for it. When Wade called back shortly thereafter it was to advise that he had the "remains" of 2 sump gaskets from 4 piece gasket sets BUT he only had 3 of the pieces. Missing was the front piece which I could probably cobble up from the remains of the shrunken gaskets I had. Wade did mention that shrunken gaskets can often be brought back to size by immersion in hot water. With the FEL-PRO gaskets breaking apart, although it appears their use by date is well past, for the pieces I'll be using a nice hot bath and careful massaging may be enough to rejuvenate them. And, most fortuitously, Wade is coming down to Sydney tomorrow for an appointment. I too will be in Sydney for a blood plasma donation and, although I doubt our paths will physically cross, the workshop will be a common point for both of us to deposit and pick up gasket pieces! Attach file: (34.26 KB)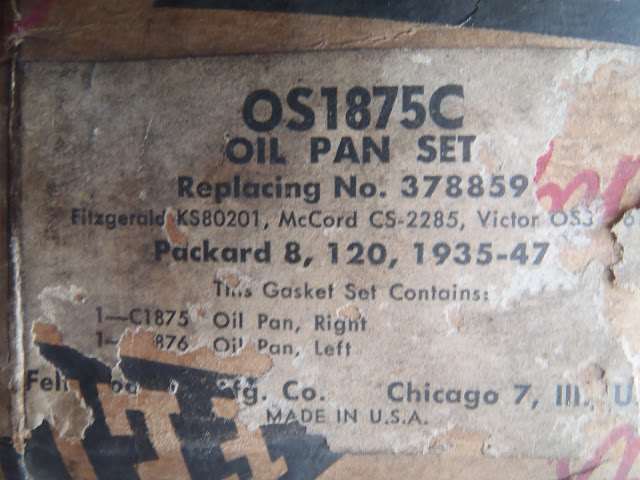 (52.55 KB) (52.55 KB)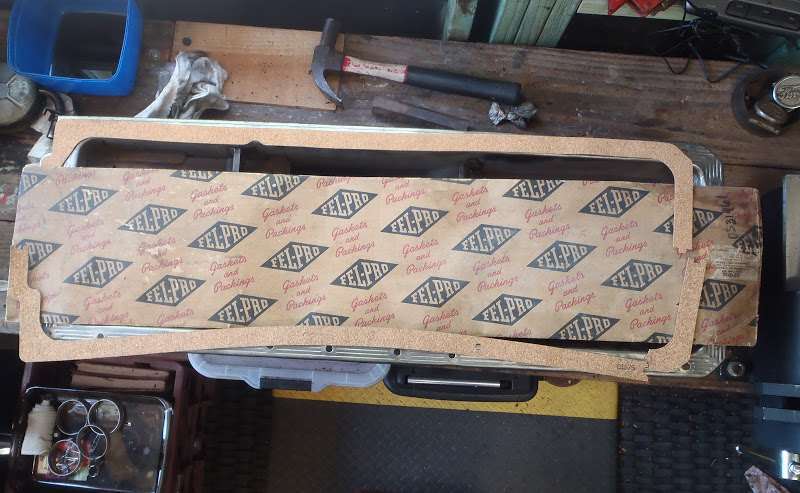 (29.96 KB) (29.96 KB)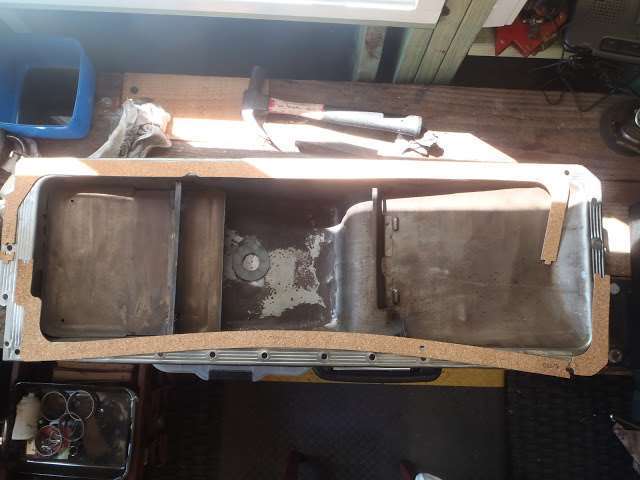 (26.18 KB) (26.18 KB) (38.92 KB) (38.92 KB)
Posted on: 2015/10/5 20:34
|
|||
|
Mal
/o[]o\ ==== Bowral, Southern Highlands of NSW, Australia "Out of chaos comes order" - Nietzsche. 1938 Eight Touring Sedan - SOLD 1941 One-Twenty Club Coupe - SOLD 1948 Super Eight Limo, chassis RHD - SOLD 1950 Eight Touring Sedan - SOLD What's this? Put your Packard in the Packard Vehicle Registry! Here's how! Any questions - PM or email me at ozstatman@gmail.com |
||||
|
||||
|
Re: Wade's Workshop
|
||||
|---|---|---|---|---|
|
Forum Ambassador
|
Thursday, 8th October 2015
"Wade is coming down to Sydney tomorrow for an appointment. I too will be in Sydney.....although I doubt our paths will physically cross" Contrary to the preceding statement our paths did cross briefly yesterday at the Workshop resulting in an exchange of gifts. 3 pieces of a 4 piece sump gasket set for me and about 10 empty small jars for Gina for her marmalade making! Today made the missing piece of gasket for the front end of the sump although it turned out to be 3 pieces ending up making a sump gasket set of 6 pieces! Reason being one of the other broken 2 piece gasket set being used was broken itself near where it was to be joined with one of the "Wade" side pieces. Laid out the "new" gaskets on the sump, almost perfect but the 2 side pieces had shrunk, then got busy measuring and cutting the other gaskets to suit. Also, as recommended, gave both the old and new gaskets a hot water soaking treatment. This resulted in the old gaskets expending to fit while one of the new side gaskets expanded too far! To fix this, some remedial treatment with the wife's hair dryer set on the lowest heat setting was required. Once all gaskets fitted together applied Loctite No 3 Non hardening gasket cement. Then came the fun part getting the sump back up where it belonged. Dispensed with the creeper because I've found it easier to slide around on the cement floor myself. The creeper seems to have a mind of it's own at times, like a shopping trolley! Reinstalled the cleansed oil pump pickup then rotated the crankshaft so the forward crankshaft counterweights and rod ends were safely up and out of the way. Lying on my back and balancing the sump in my right hand, swung the oil pump pickup out of the way and guided the sump forward. Once the pickup had cleared the forward baffle the rear of the sump could be raised when it was far enough forward. Then was able to locate the rear of the sump into the only stud(the reminder of the fastenings are bolts) and secure that loosely with a nut and washer. From there it was a matter of inserting each bolt and washer and finger tightening. Once these nuts were in place then positioned and refitted the cast iron bellhousing bottom. Hadn't been looking forward to that, it's quite heavy. Well at least it's heavy when lying under a Packard! But, surprisingly, it was relatively easy and for that I'm thankful. Next, removed the nut and bolts from the rear of the sump and installed the steel plate that clamps there. Then installed the vertical cover to close off the bellhousing. Attach file: (40.71 KB)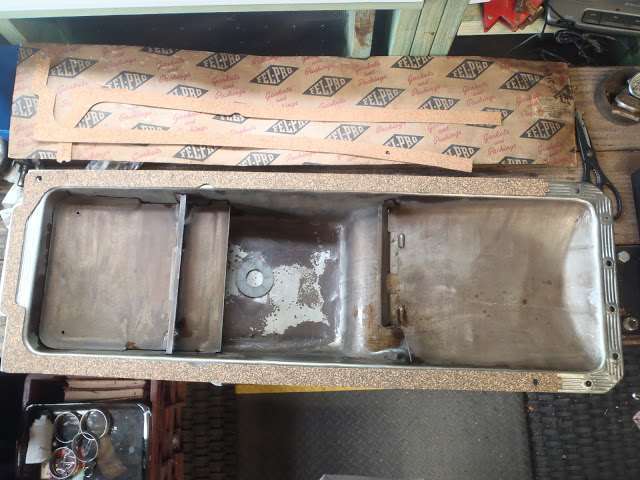 (25.00 KB) (25.00 KB)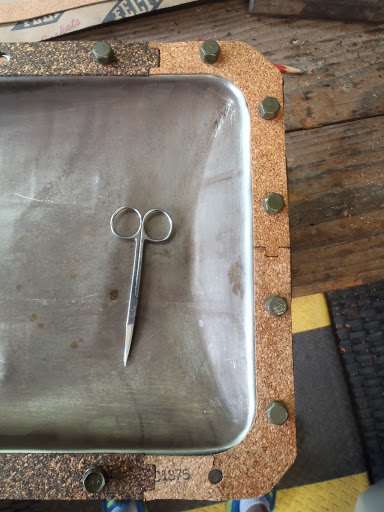 (38.12 KB) (38.12 KB)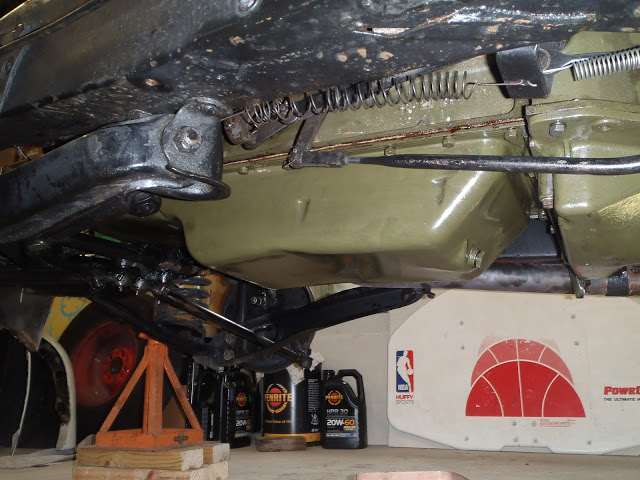
Posted on: 2015/10/8 3:27
|
|||
|
Mal
/o[]o\ ==== Bowral, Southern Highlands of NSW, Australia "Out of chaos comes order" - Nietzsche. 1938 Eight Touring Sedan - SOLD 1941 One-Twenty Club Coupe - SOLD 1948 Super Eight Limo, chassis RHD - SOLD 1950 Eight Touring Sedan - SOLD What's this? Put your Packard in the Packard Vehicle Registry! Here's how! Any questions - PM or email me at ozstatman@gmail.com |
||||
|
||||
|
Re: Wade's Workshop
|
||||
|---|---|---|---|---|
|
Forum Ambassador
|
Friday, 9th October 2015
A little more progress, reinstalled the timing case after oil soaking a new seal(thankyou Wade). Also oiled the timing chain and gears because they'd been washed clean of any lubricant in the cleaning process. The top plate, into which the sump bolts screws and holds together the timing case and the front flange of the sump, was much easier this time round. The holes must be positioned slightly differently in the '35 120 timing case because installing that timing case was very difficult. Of course it wouldn't have had anything to do with the case itself resting on the timing chain would it?  Attach file: (38.32 KB)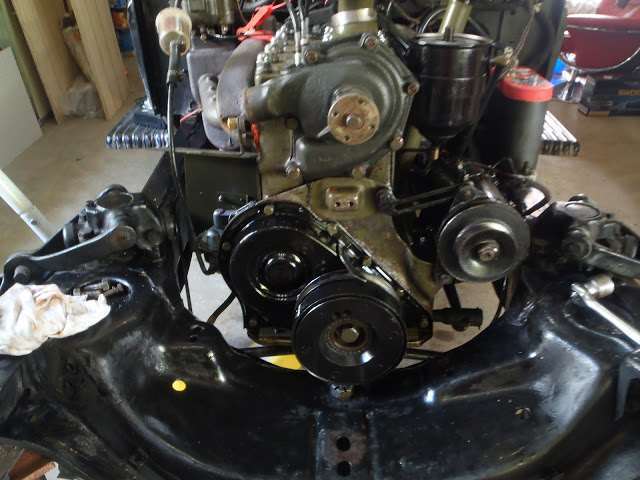
Posted on: 2015/10/9 2:51
|
|||
|
Mal
/o[]o\ ==== Bowral, Southern Highlands of NSW, Australia "Out of chaos comes order" - Nietzsche. 1938 Eight Touring Sedan - SOLD 1941 One-Twenty Club Coupe - SOLD 1948 Super Eight Limo, chassis RHD - SOLD 1950 Eight Touring Sedan - SOLD What's this? Put your Packard in the Packard Vehicle Registry! Here's how! Any questions - PM or email me at ozstatman@gmail.com |
||||
|
||||
|
Re: Wade's Workshop
|
||||
|---|---|---|---|---|
|
Forum Ambassador
|
Saturday 9th October 2015
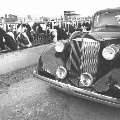
A little more progress with the front engine mount reinstalled, sump bolt tightened and oil added. Then removed the spark plugs and turned engine over to force oil through everything. This was successful with the oil pressure gauge climbing off the bottom stop and showing about 5 lbs pressure in this mode. Replaced sparkplugs and started up and ran the engine for about 30 seconds only, no cooling system in place at the present. With the oil pressure gauge coming up to about 40 lbs at the end of that. Speaking of cooling systems see the photos of a 1st Series Six an Aussie resurrected about 2 years ago. Guy by the name of Andy Smith, needing to get his "survivor" running, rigged up an "alternative cooling system". And I went for a ride in the back of Andy's 1st Series "ute" about 9 months later at a Packard club rally at Mildura. Attribution - 1st 4 photos of Andy's 1st Series are by the owner. Attach file: (45.64 KB)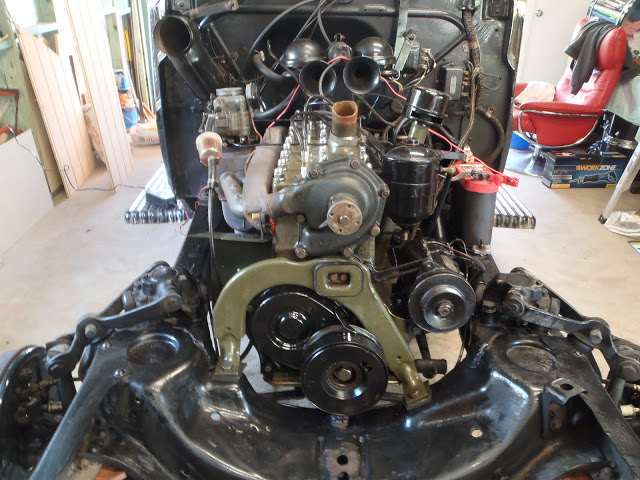 (61.20 KB) (61.20 KB)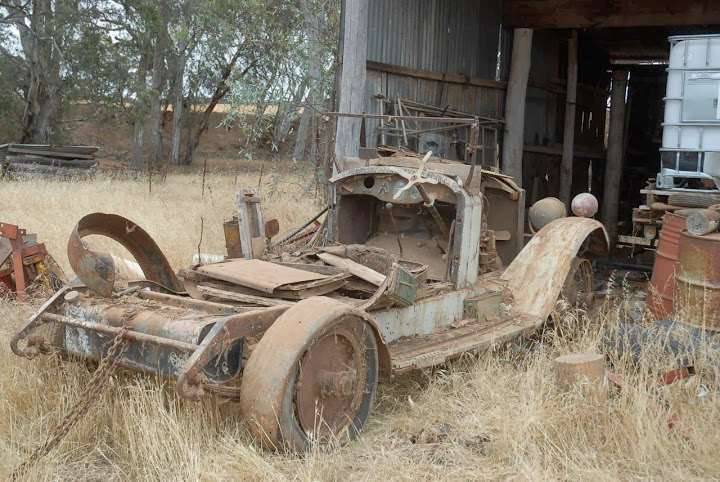 (49.72 KB) (49.72 KB)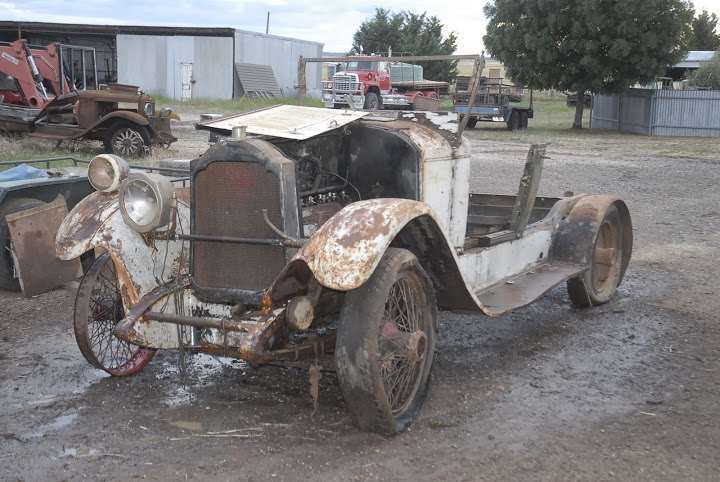 (68.39 KB) (68.39 KB)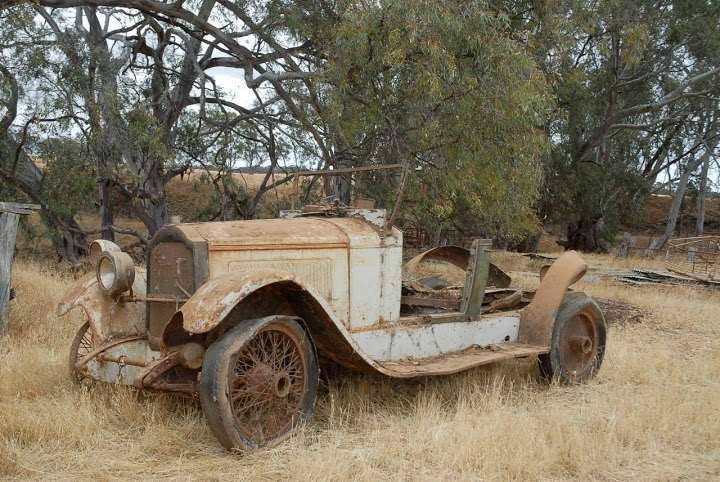 (46.00 KB) (46.00 KB)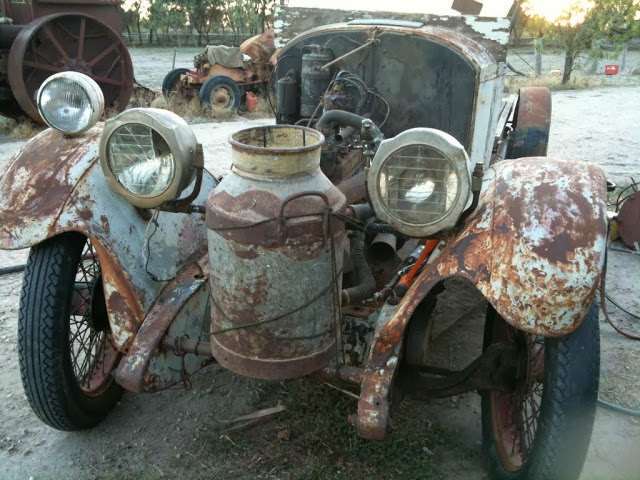 (44.70 KB) (44.70 KB)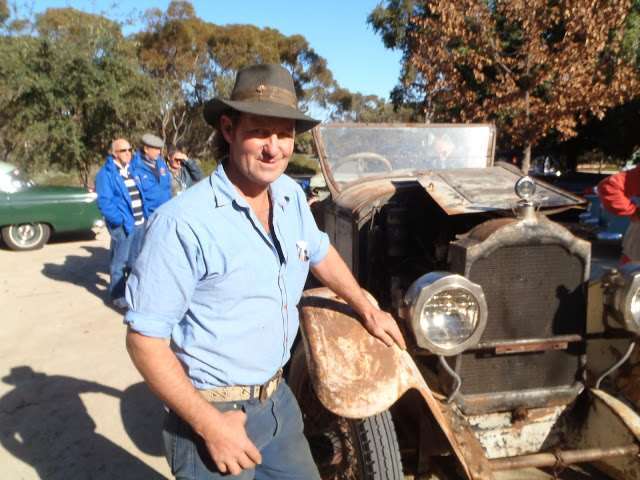 (38.69 KB) (38.69 KB)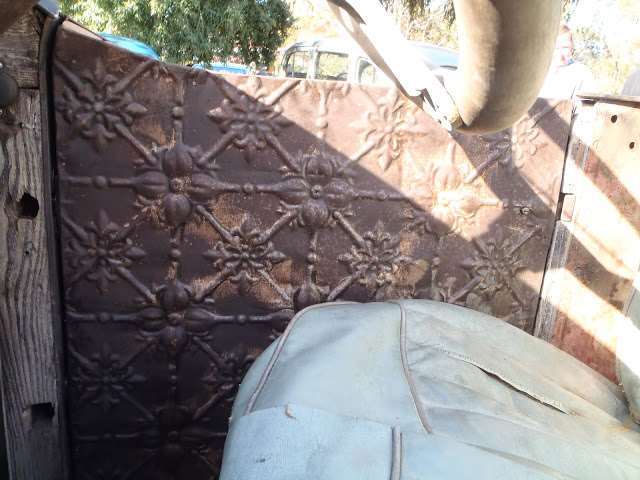 (35.23 KB) (35.23 KB)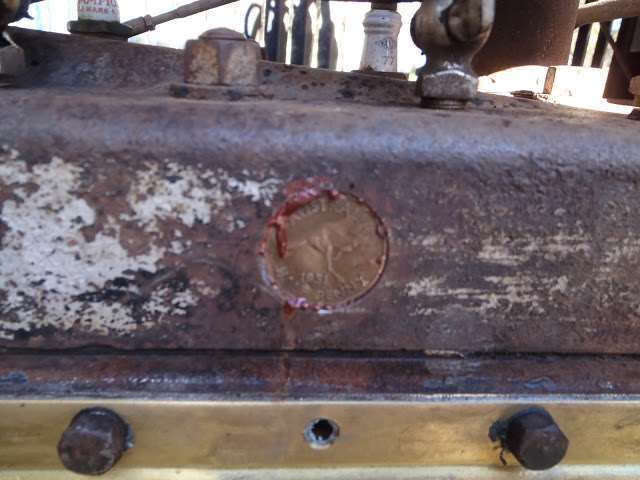 (39.86 KB) (39.86 KB)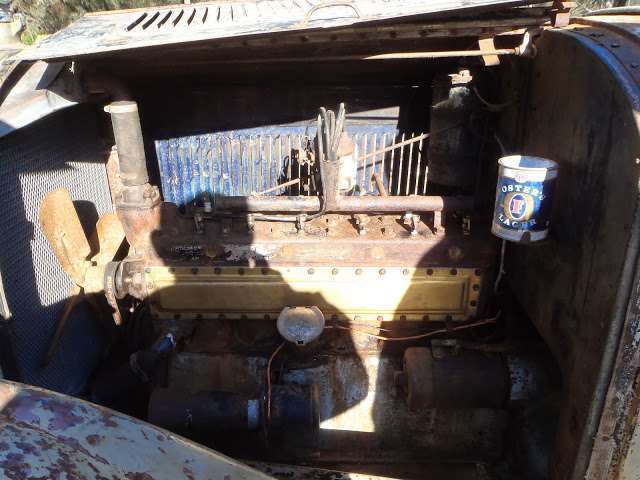 (41.97 KB) (41.97 KB) (45.42 KB) (45.42 KB)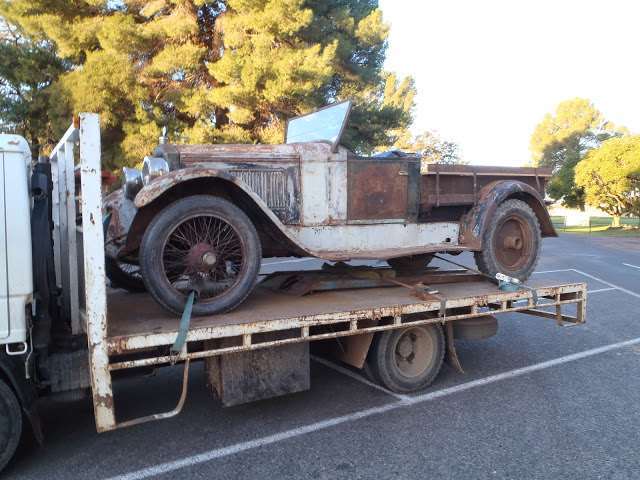 (57.10 KB) (57.10 KB)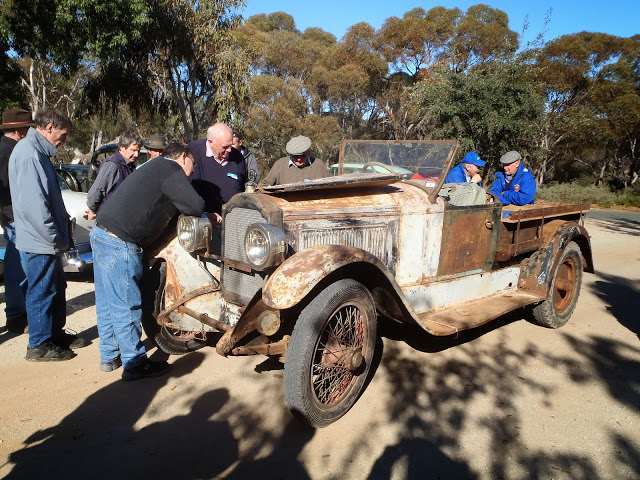 (56.88 KB) (56.88 KB)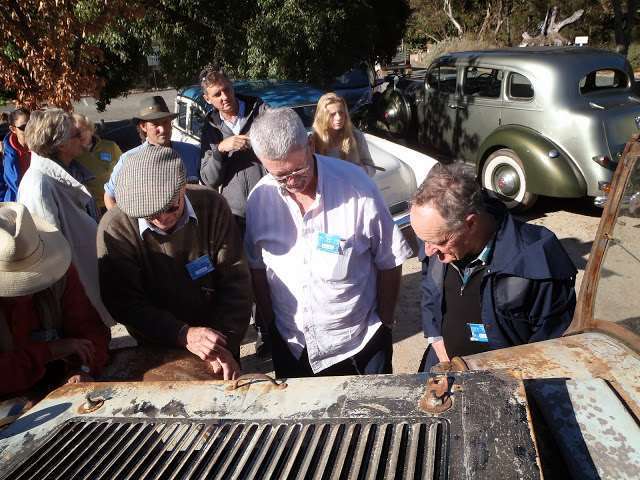
Posted on: 2015/10/9 21:17
|
|||
|
Mal
/o[]o\ ==== Bowral, Southern Highlands of NSW, Australia "Out of chaos comes order" - Nietzsche. 1938 Eight Touring Sedan - SOLD 1941 One-Twenty Club Coupe - SOLD 1948 Super Eight Limo, chassis RHD - SOLD 1950 Eight Touring Sedan - SOLD What's this? Put your Packard in the Packard Vehicle Registry! Here's how! Any questions - PM or email me at ozstatman@gmail.com |
||||
|
||||
|
Re: Wade's Workshop
|
||||
|---|---|---|---|---|
|
Home away from home
|
I love the milk can radiator!

Posted on: 2015/10/9 21:52
|
|||
|
I can explain it to you but I can't understand it for you
 Bad company corrupts good character! Farming: the art of losing money while working 100 hours a week to feed people who think you are trying to kill them |
||||
|
||||
|
Re: Wade's Workshop
|
||||
|---|---|---|---|---|
|
Forum Ambassador
|
Wednesday, 14th October 2015
Progress! The front clip is back on!!! Well it's sitting there with some bolts and fasteners in place, but at least it's not sitting on the floor anymore. With that space cleared it seems much more spacious in the garage, as it should be! And, it proves it can be done on your ownsome. I for one was almost in concert with those nay/doomsayers who advised against it but got there in the end. Still a lot to do in getting everything buttoned up and aligned but the major challenge has been met and achieved. Must say this old arthritic body is finding it difficult getting under the Coupe. Especially as, at times, it's a lot of under and out and under and out, etc. First thing done today was putting the final two sump bolts in place because in buttoning up the sump last week came up one bolt short. So left one out of each side and while at Wade's Shed on the Central Coast on Sunday raided his "junk box" for a couple the same as the sample I took with me. And of course I found the missing sump bolt today when chasing a nut I dropped into the confines of the front crossmember understructure. The nut I dropped in there was the big nut that secures the bottom of the radiator collar structure to the frame. In trying to fish that out, disturbed the missing sump bolt which promptly made it's way to the floor. Before getting to that stage I'd done a final clean up of the engine and surrounds. Then put the front wheels back on and dropped the coupe to the floor from the jackstands. Rolled the Coupe forward until it was just behind the clip. Raised the clip until the bottom of the mudguards(fenders) would clear the tops of the tyres(tires). Also had to tie the right side of the clip to a shelving unit, the clip had an annoying habit of rotating 90 degrees! Then pushed the Coupe forward in increments. After each push forward would check each side for alignment and clearance, then repeat and repeat. Also, as protection, draped old towels over the rear of the mudguards(fenders). Once close to position started lowering the clip and pushing and checking in smaller increments. Once one of the right side bonnet(hood) side panel locating holes was reasonably aligned with the corresponding captive nut, a nut was loosely threaded in. That's when I turned to the aforementioned big nut to secure the radiator collar and structure to the front crossmember, a major fastening point. Initially I couldn't locate the nut to be used which I'd scrounged from my own "junk box", there wasn't a nut there when I pulled the clip off! Finally found it just where I'd left it, but over time something had gone on top off it! There was more very minor shuffling of Coupe and clip in order to get the captive bolt to drop though the locating hole in the crossmember. It wasn't till I realised I actually needed to stop moving the Coupe and concentrate on only moving the clip that success came. Then loosely bolted the left mudguard(fender) to the body. Next reinstalled the rods/stays from the front crossmember to the sides of the radiator collar. I'd taken each side off differently, the left without it's base bracket, the right including it's base bracket, and because of that had to first put the base bracket back on the right side stay/rod. That's about as far as I progressed, but for me it's quite an accomplisment! Attach file: (16.81 KB)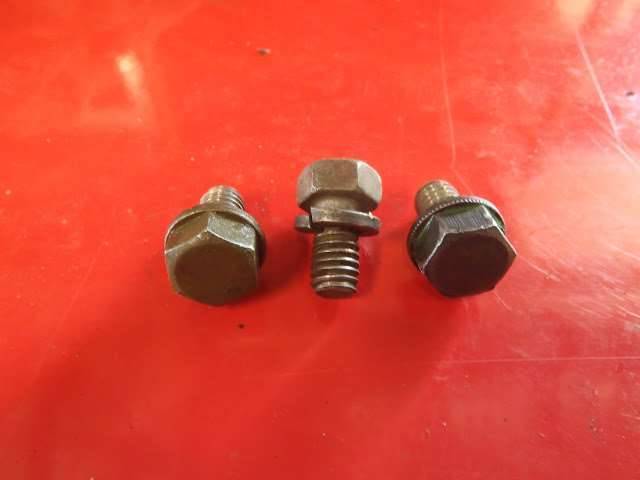 (12.46 KB) (12.46 KB)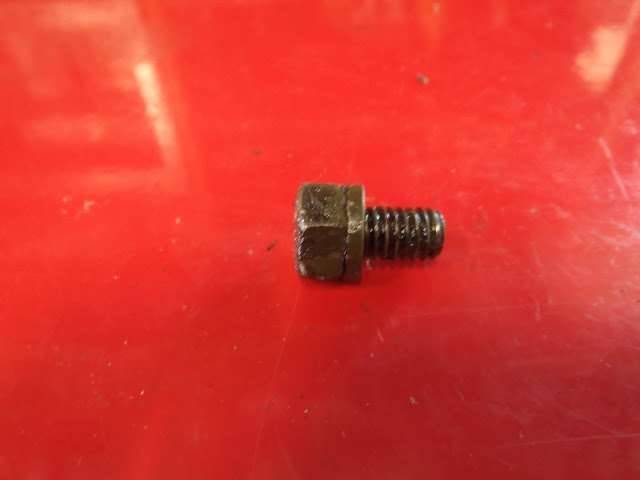 (48.46 KB) (48.46 KB)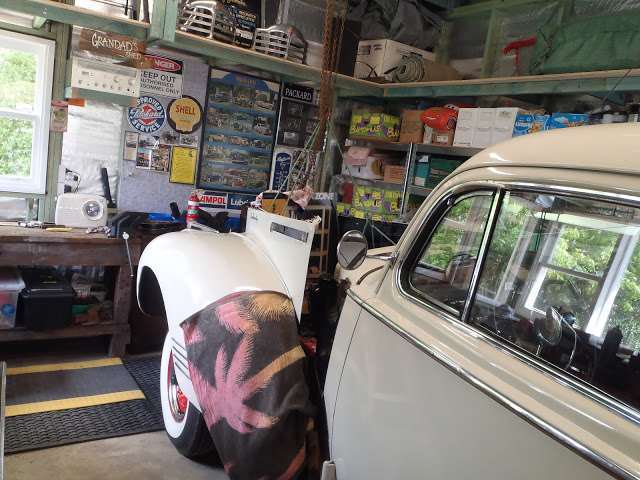 (38.12 KB) (38.12 KB)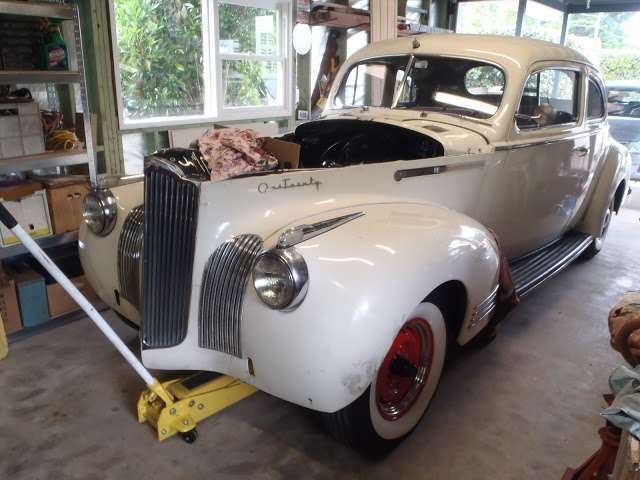 (40.73 KB) (40.73 KB)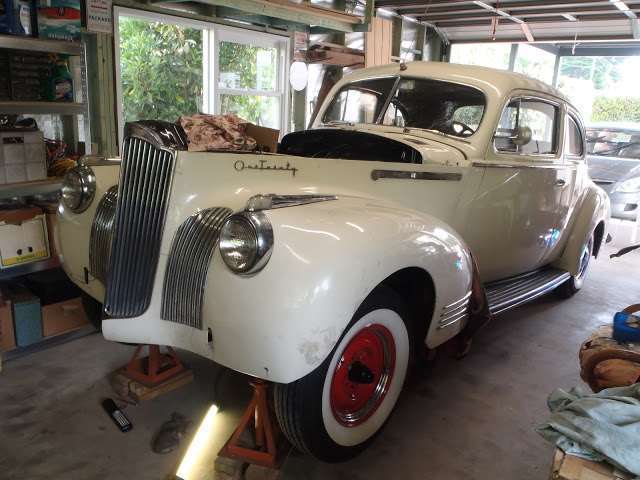
Posted on: 2015/10/14 3:27
|
|||
|
Mal
/o[]o\ ==== Bowral, Southern Highlands of NSW, Australia "Out of chaos comes order" - Nietzsche. 1938 Eight Touring Sedan - SOLD 1941 One-Twenty Club Coupe - SOLD 1948 Super Eight Limo, chassis RHD - SOLD 1950 Eight Touring Sedan - SOLD What's this? Put your Packard in the Packard Vehicle Registry! Here's how! Any questions - PM or email me at ozstatman@gmail.com |
||||
|
||||
|
Re: Wade's Workshop
|
||||
|---|---|---|---|---|
|
Forum Ambassador
|
Thursday, 15th October 2015
The front clip is now secured, at least I don't have any fasteners left over, as far as I can tell. Hopefully tomorrow will start putting things back on the engine and reconnecting wires which were disconnected for the clip removal, etc. Attach file: (40.22 KB)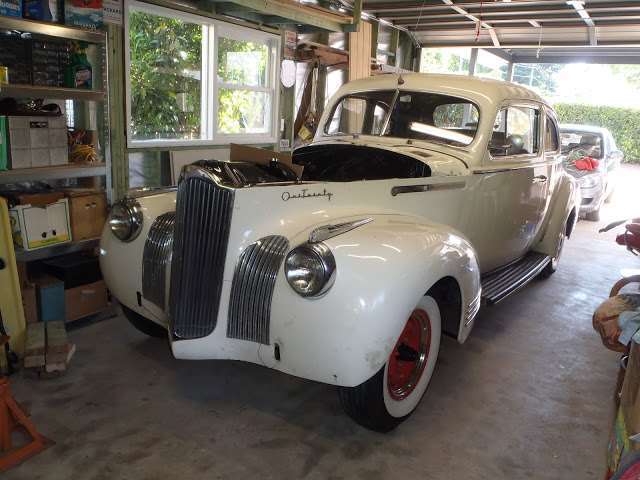
Posted on: 2015/10/15 3:01
|
|||
|
Mal
/o[]o\ ==== Bowral, Southern Highlands of NSW, Australia "Out of chaos comes order" - Nietzsche. 1938 Eight Touring Sedan - SOLD 1941 One-Twenty Club Coupe - SOLD 1948 Super Eight Limo, chassis RHD - SOLD 1950 Eight Touring Sedan - SOLD What's this? Put your Packard in the Packard Vehicle Registry! Here's how! Any questions - PM or email me at ozstatman@gmail.com |
||||
|
||||
Register To PostTopic is Locked


