|
Re: 51Packard's....51 Packard
|
||||
|---|---|---|---|---|
|
Webmaster

|
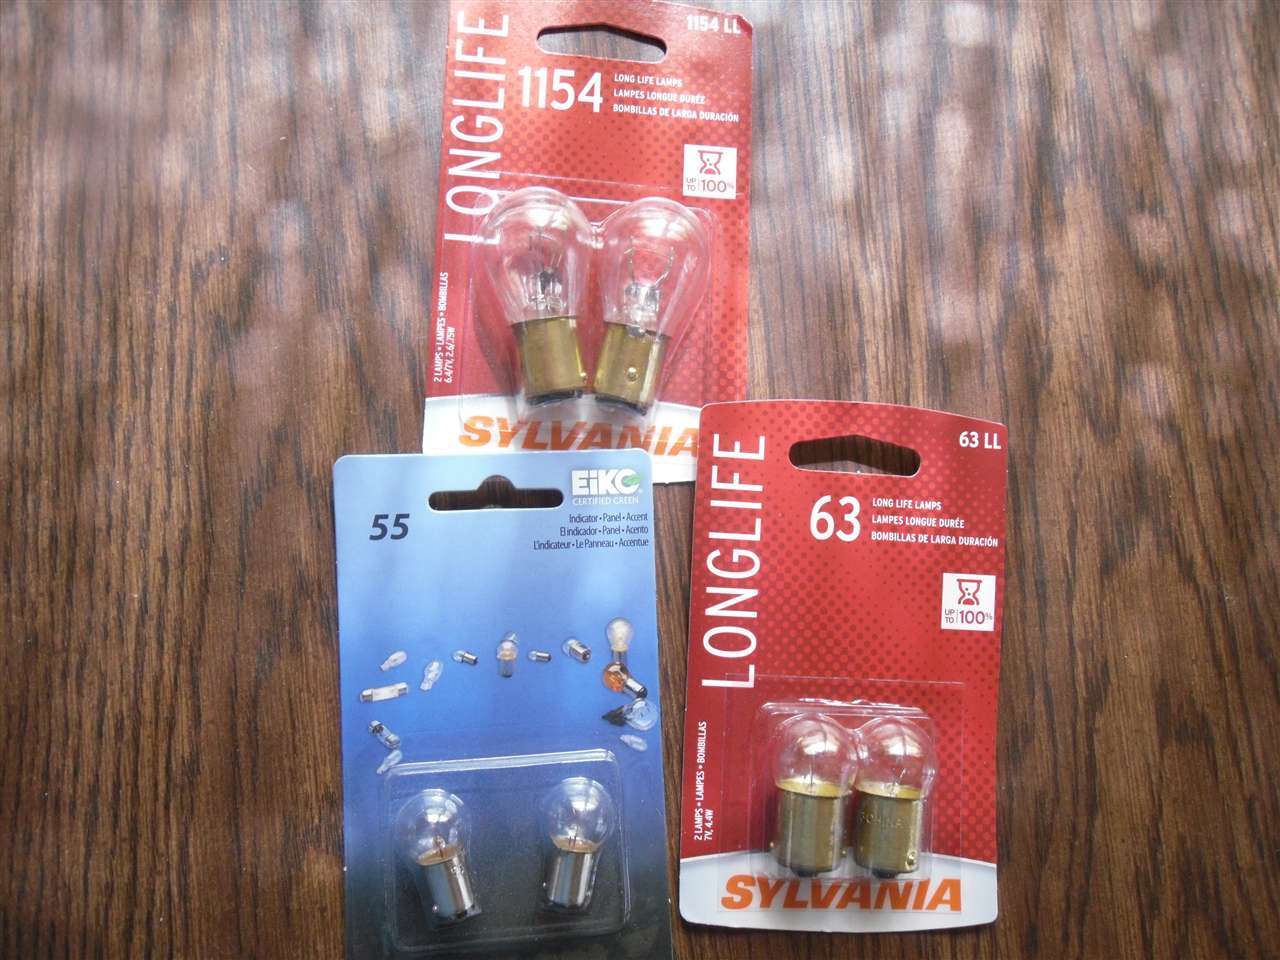
Check the number on your old bulbs. Also awhile back I posted a link to a bulb cross reference to modern numbers. Have to see where I put that.
Posted on: 2011/3/25 22:15
|
|||
|
-BigKev
1954 Packard Clipper Deluxe Touring Sedan -> Registry | Project Blog 1937 Packard 115-C Convertible Coupe -> Registry | Project Blog |
||||
|
||||
|
Re: 51Packard's....51 Packard
|
||||
|---|---|---|---|---|
|
Webmaster
|
Posted on: 2011/3/25 22:23
|
|||
|
-BigKev
1954 Packard Clipper Deluxe Touring Sedan -> Registry | Project Blog 1937 Packard 115-C Convertible Coupe -> Registry | Project Blog |
||||
|
||||
|
Re: 51Packard's....51 Packard
|
||||
|---|---|---|---|---|
|
Forum Ambassador

|
Don't think you'll have any luck repairing--at least for long. The wire is nichrome resistance wire and doesn't take ordinary solder. Not even sure it would take silver solder but that would be the better one to try. The ordinary solder would separate when the wire gets hot--if it would even stick in the first place. Usually the ends are just riveted on the terminals and a special high temp ceramic cement is used to hold the coil in the slot. Depending on which end broke, the lights could work until the break and then stop. Bigger issue is the sections may separate when the wiper moves over the joint, get caught and could pull out of the ceramic slot and short.
Am working on that other little project today. Have fixed a couple of things and started on another. One item is not looking good right now but we'll see. There are options.
Posted on: 2011/3/26 14:25
|
|||
|
Howard
|
||||
|
||||
|
Re: 51Packard's....51 Packard
|
||||
|---|---|---|---|---|
|
Forum Ambassador

|
A #82 bulb is 6-8 volt, 6 candlepower, current draw given as 0.89 amps at 6 volts. Data from GE Lamp Division, 1934. Almost all 6-volt bulbs are still commonly available at auto parts stores. The exceptions are mostly headlamp bulbs.
Posted on: 2011/3/26 14:56
|
|||
|
||||
|
Re: 51Packard's....51 Packard
|
||||
|---|---|---|---|---|
|
Home away from home

|
Thanks guys. Seems like I'm over-restoring. I should have just left the switch alone. Here are two pics I was trying to load earlier, but it wouldn't work.
Attach file:  (74.16 KB) (74.16 KB)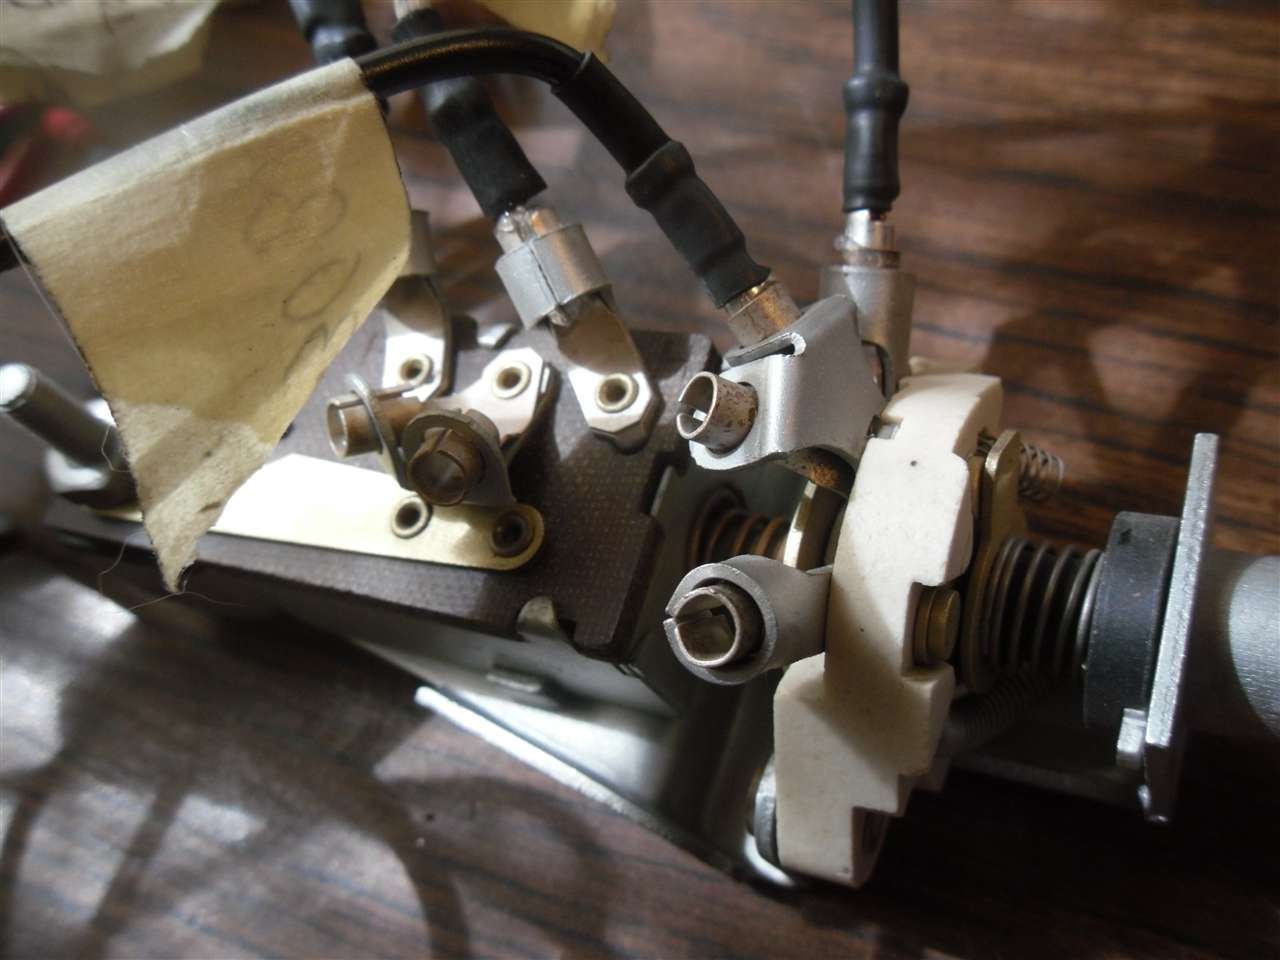 (57.67 KB) (57.67 KB)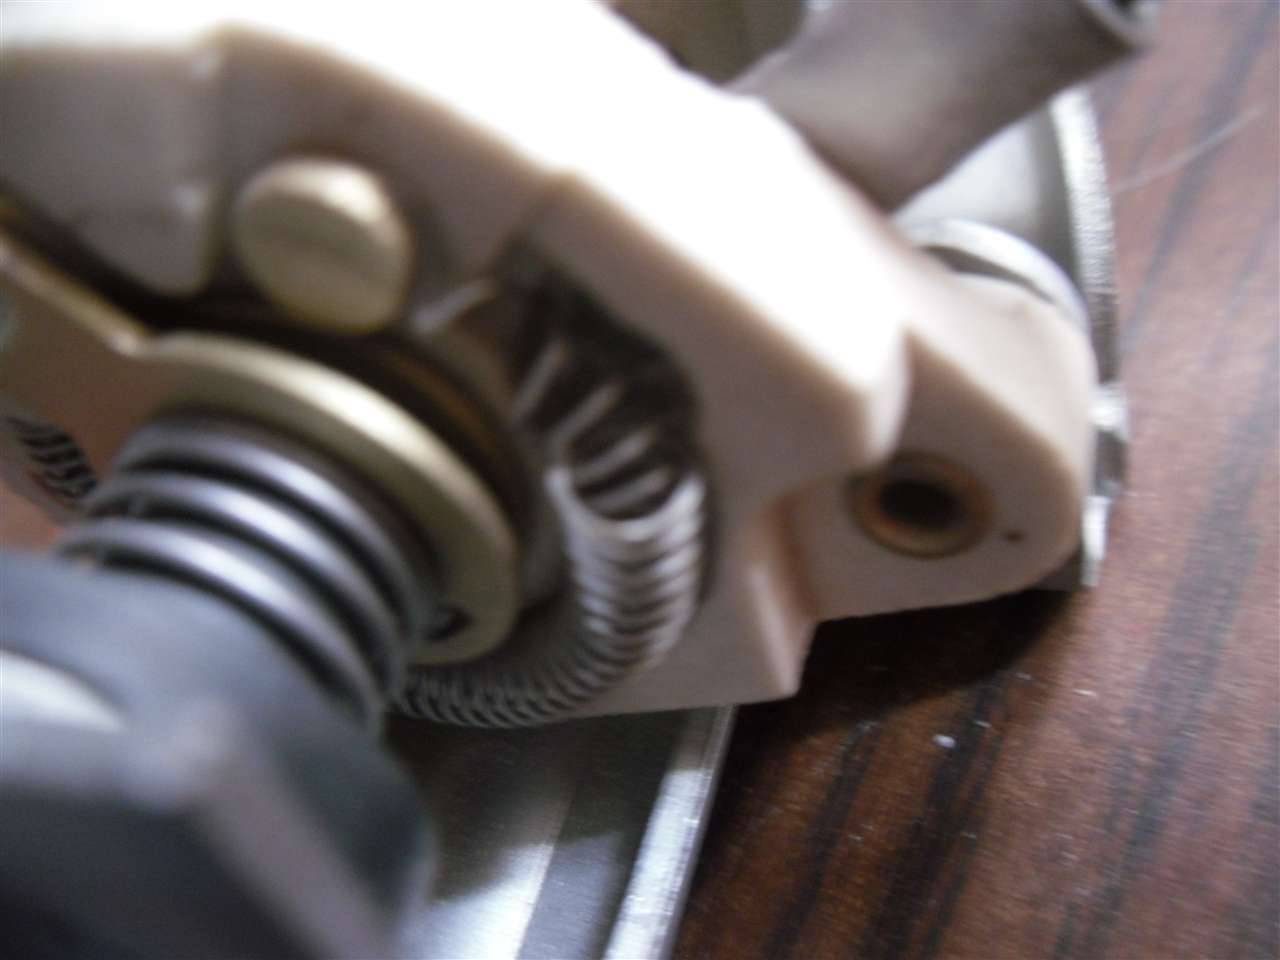
Posted on: 2011/3/26 17:50
|
|||
|
[url=h
|
||||
|
||||
|
Re: 51Packard's....51 Packard
|
||||
|---|---|---|---|---|
|
Home away from home
|
Over the last couple of days I have only worked a few minutes on the car. I managed to get the new wire harness in, but not totally hooked up. The fit looks pretty good in the engine compartment and the extra length I added by the instruments made installation pretty easy. Real pain getting the wires through the firewall though. Having the wires already installed on the instrument panel was cumbersome at first, but made it easier because it kept all the wires in the correct orientation. I won't attach it permanently yet because the drivers side fender will have to come off again.
I also picked up this headlight switch from a '54 Patrician on ebay. Only $10 so I thought it was pretty reasonable. It arrived today. I haven't tested it or anything, but I noticed that pulling the switch out is a lot harder than on mine. I don't know if that is a good thing or not. What is the best way to clean this? I don't trust myself with the media blaster on it again since my coiled wire broke on my original. This one looks pretty corroded. Attach file: (125.95 KB)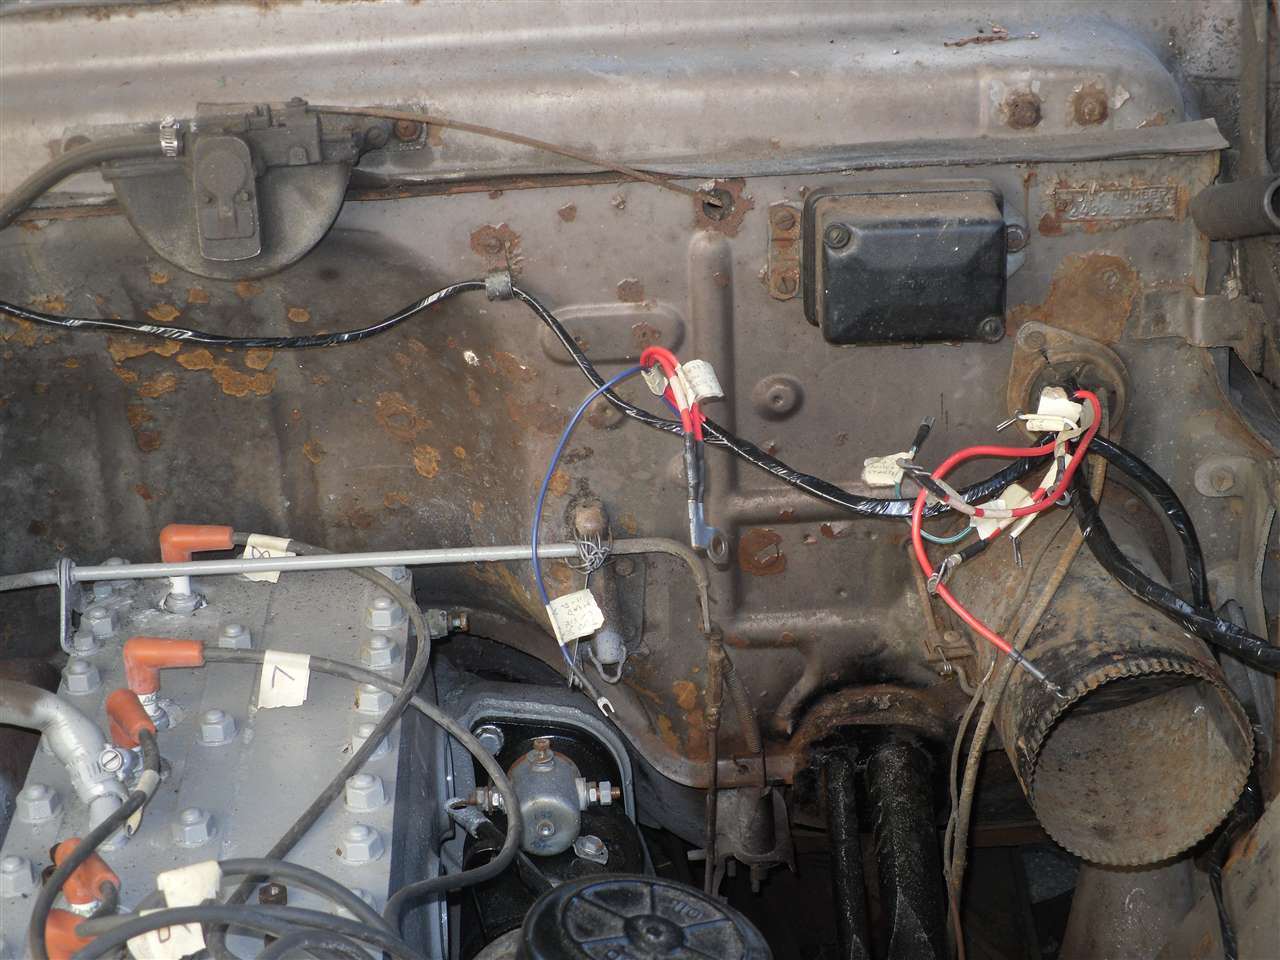 (137.48 KB) (137.48 KB)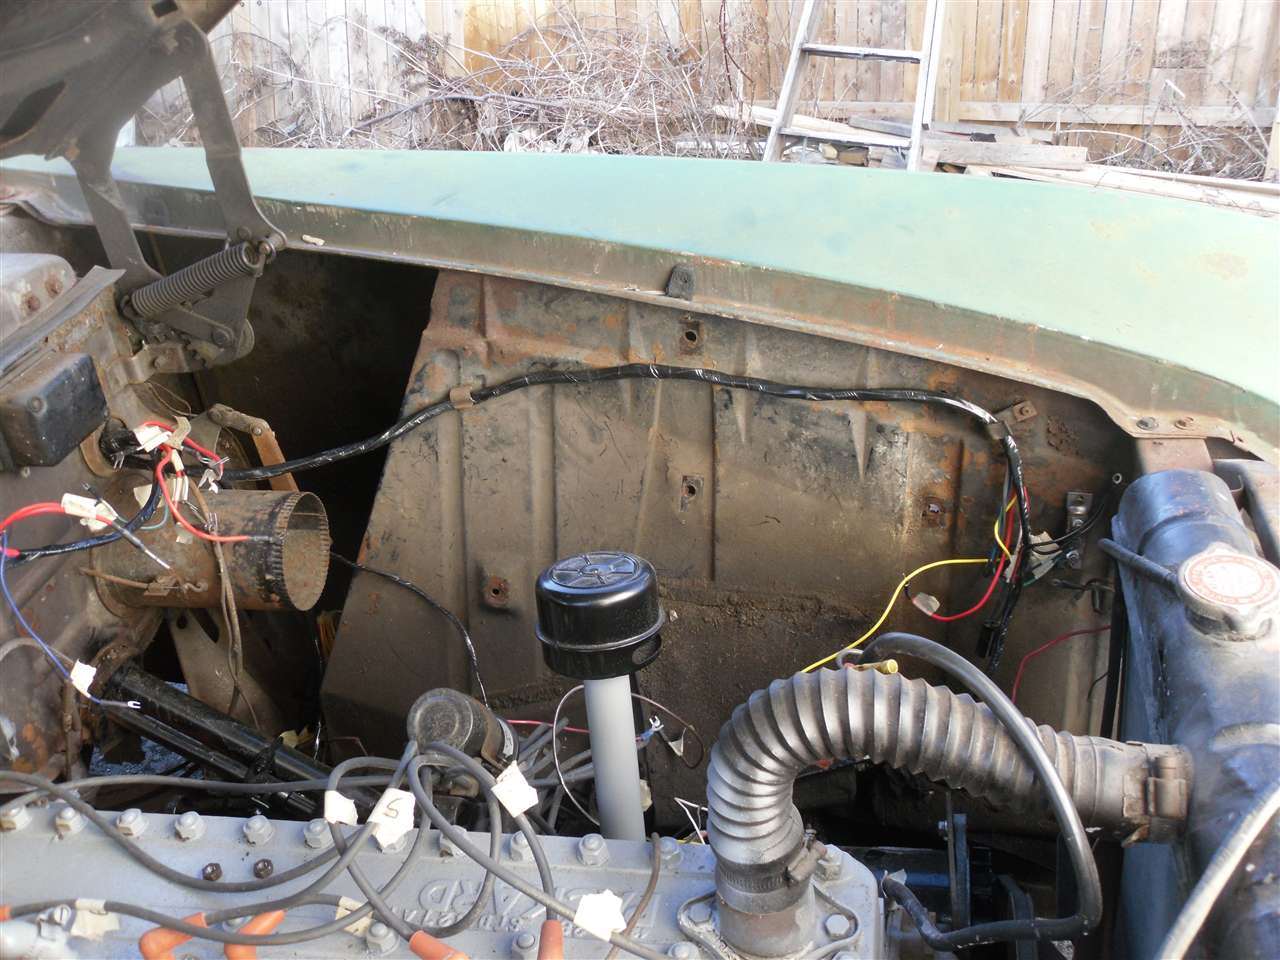 (64.90 KB) (64.90 KB)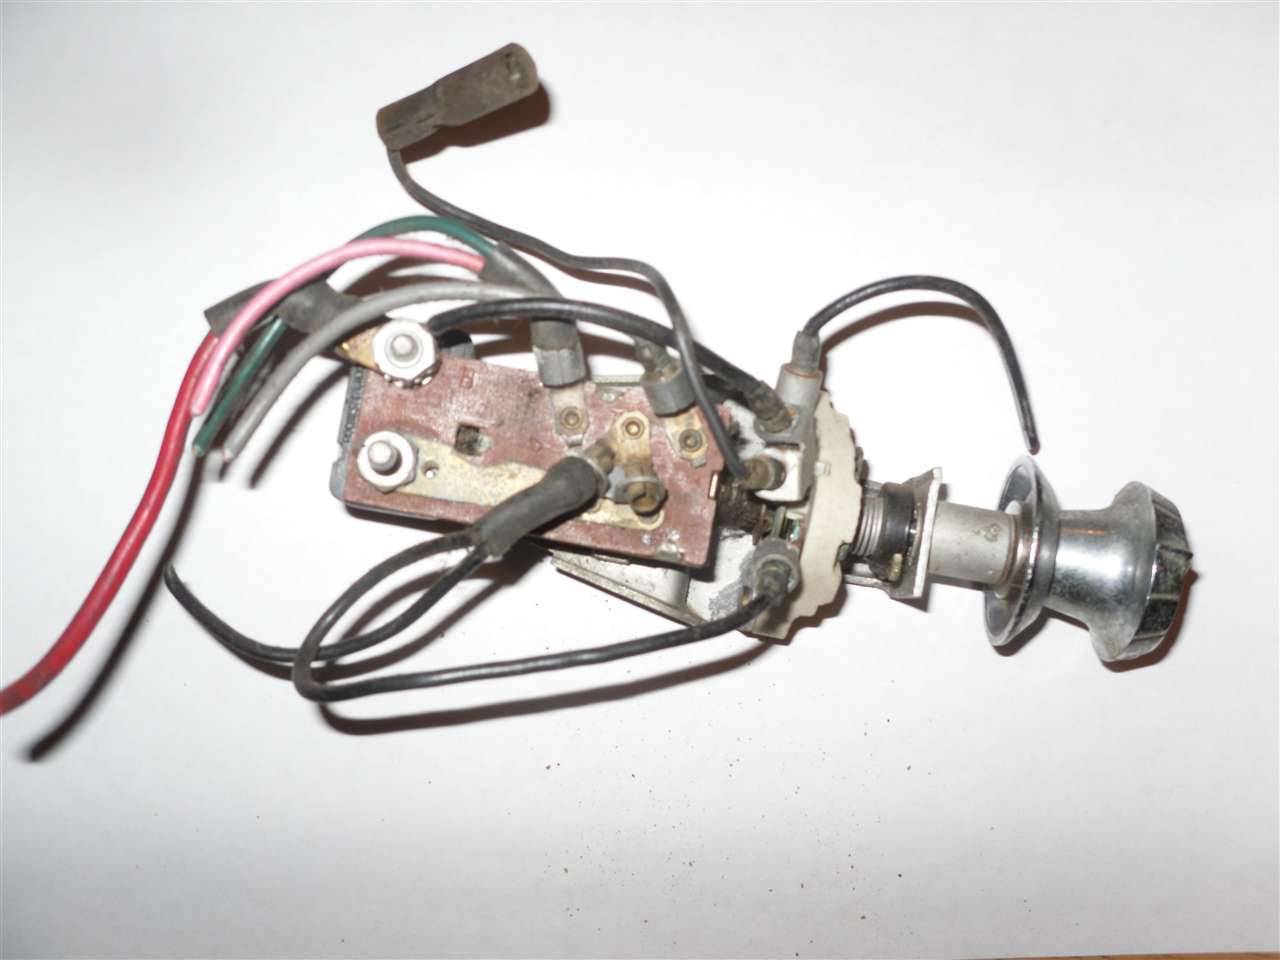 (43.89 KB) (43.89 KB)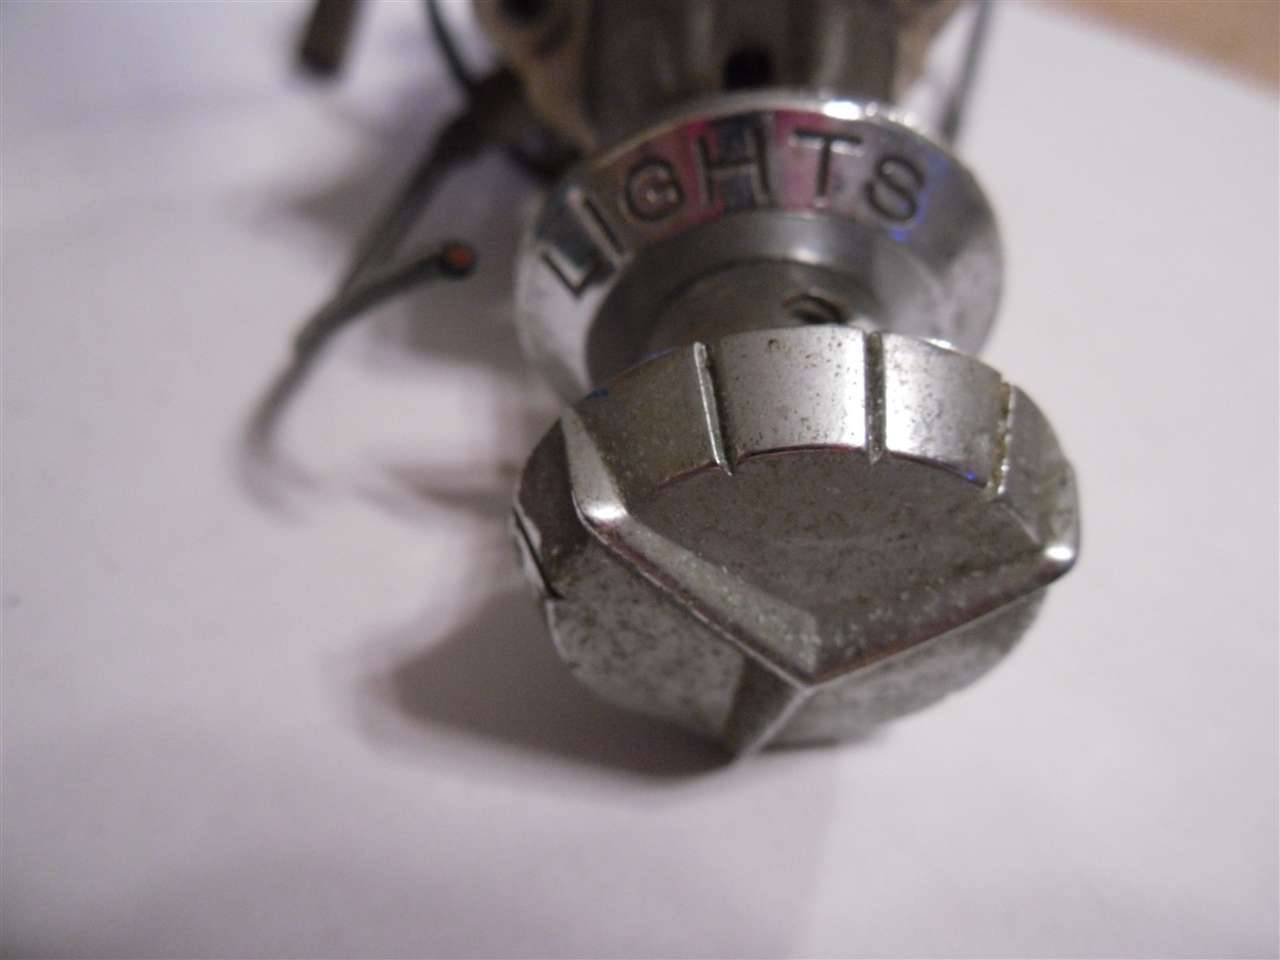
Posted on: 2011/4/5 20:08
|
|||
|
[url=h
|
||||
|
||||
|
Re: 51Packard's....51 Packard
|
||||
|---|---|---|---|---|
|
Forum Ambassador
|
It probably has old hardened & dry grease inside. If you are careful, the tabs holding the back terminal section on can be un-bent and the switch open and cleaned. There are several parts and under some spring tension so make sure they are accounted for. The rheostat and the wipers are likely very corroded. Use some contact cleaner on that section and lubriplate on the terminal slide part. Here is an exploded view of the switch.packardinfo.com/xoops/html/modules/newbb ... ic.php?post_id=46057#forumpost46057
I found an adhesive that at first glance, looks good for the loose rheostat wire. Of course that won't fix the break. I haven't ordered any yet to try so could be wrong but if someone wants the honor, here it is.flexbar.com/shop/pc/ROCKSETT-2-OZ-82p4019.htm
Posted on: 2011/4/5 20:18
|
|||
|
Howard
|
||||
|
||||
|
Re: 51Packard's....51 Packard
|
||||
|---|---|---|---|---|
|
Home away from home
|
4-5-11
Maybe Spring will come soon? Got a taste of it today with some mild weather. I did something I have never done before. I removed a gas tank from a car! This is a necessity to fix the truck and rear quarter panel rust holes. First I checked BigKev's blog so I would know what to expect. I checked the tank by tapping on it to see if it was empty. The car was running before winter so I knew it would have a little gas in it. Sounded very empty. That would be a good thing because the gas going to the carb has been nice and clear and if it is pulling it from a practically empty tank, the internals should be in good shape. I'll know more when I take the sending unit out. First problem was the fuel line going to the tank. The line loosened from the tank fairly easily, but also broke. Looks like I will be running new line. Probably would have had to do that anyway. Next problem. The vent tube had the original clamp on the side toward the tank, but it was not hooked up. The other side had a screw type clamp that was too rusted to come off. Hose was too stiff to bend so I had to cut it. No big deal there. After that came the nuts on the T shaped threaded rods holding the tank straps. The bolts wouldn't budge, but using an impact forced the T on the top to turn and come out of the slot so I was able to get both off that way. Looks like I will have to buy a nut splitter to get the nuts off. The drivers side threaded rod was bent pretty bad. Not sure how or when that happened. I noticed that the bottom trunk area has black rust proofing coating sprayed on it (I think that is what it is). I do not know if it is original. It was all over the exposed trunk area and the bottom of the tank. The top of the tank and the trunk area where the tank was did not have any. Because of this coating, I'm not sure if the tank has any leaks. I've only put 2-4 gallons of gas in it when I run it, but it always seems low. Either there is a leak or it's just because these cars suck so much gas. Removing the tank exposed more of a mysterious green paint. I noticed this many years ago and that made me think my car was originally green (combined with the green interior it has). This is why I started to paint it green, to see what it would look like. Once I discovered this site, I was able to decipher the color code as actually being Argentine Gray Metallic. So I still don't know why this paint is here. What is the best way to clean up the outside of the tank? Should I fill it with water before using a stripper disk on it to get the rust off or will that hurt the inside of it? Do you guys clean up and reuse the retaining straps or do you get new ones and from where? Can you buy the T shaped threaded rods anywhere? I think it would be nice to replace them to make future removal easier. Attach file: (107.30 KB)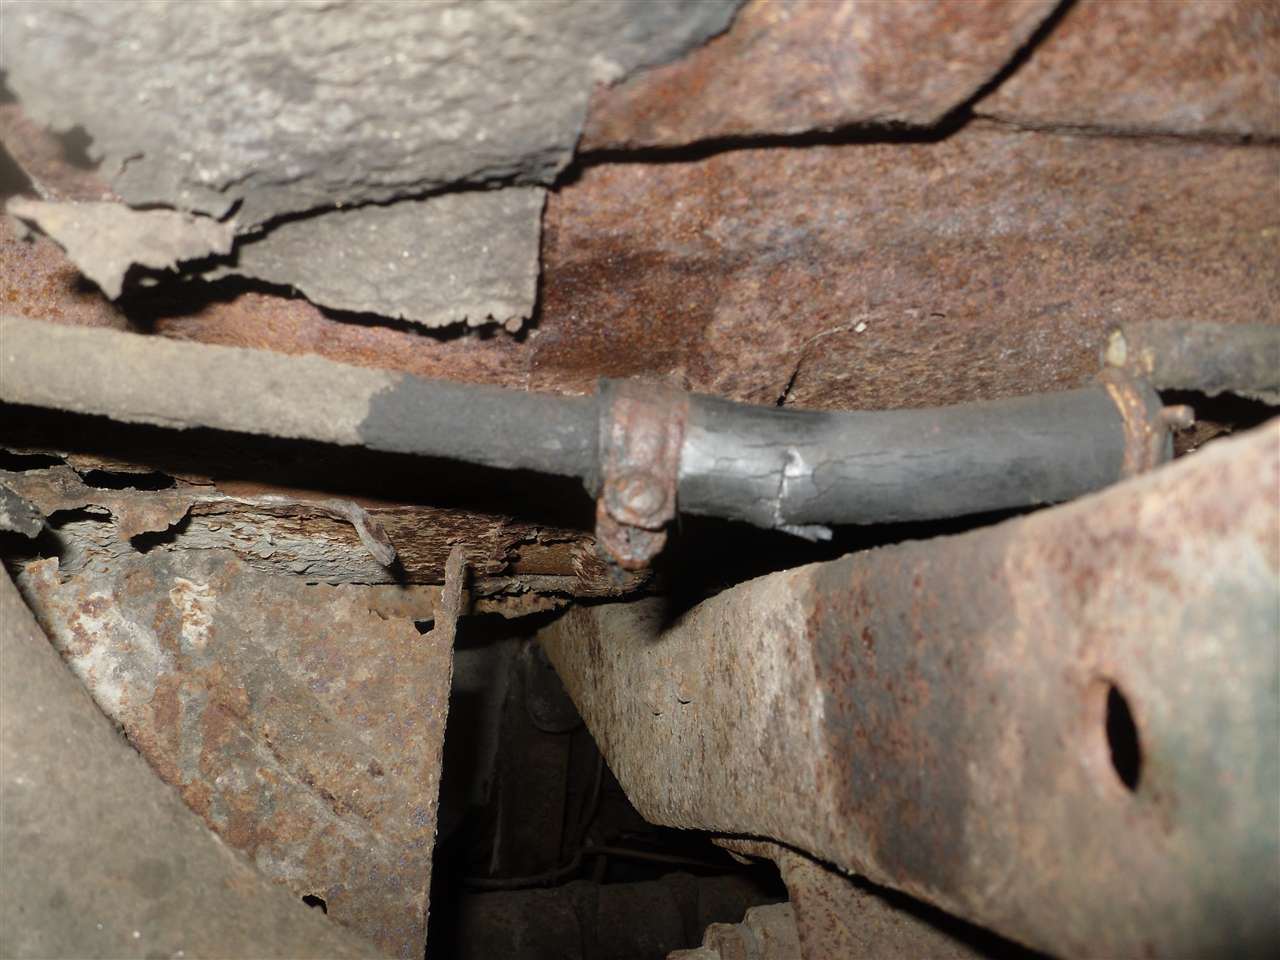 (127.14 KB) (127.14 KB)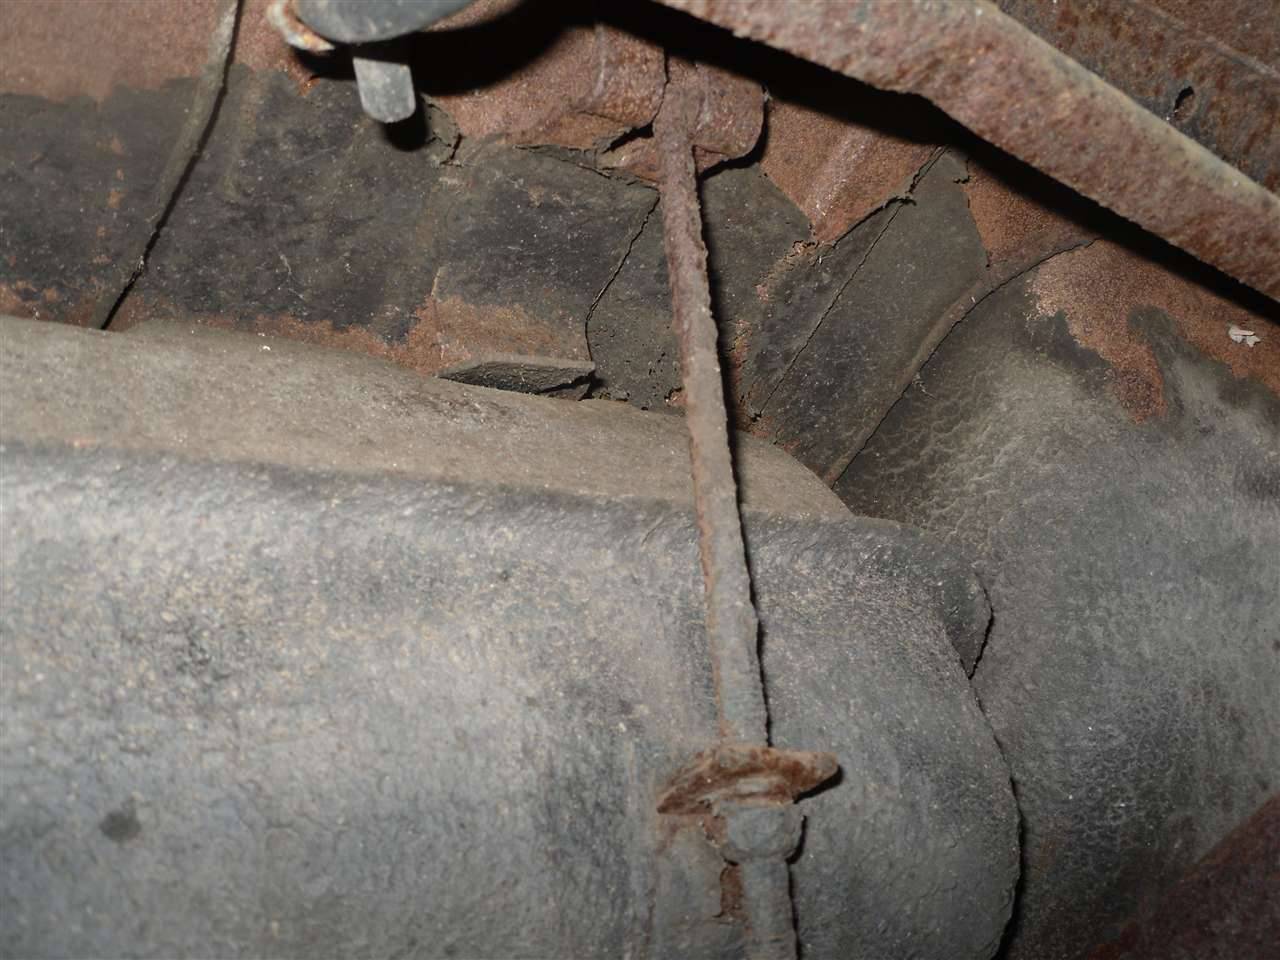 (200.46 KB) (200.46 KB)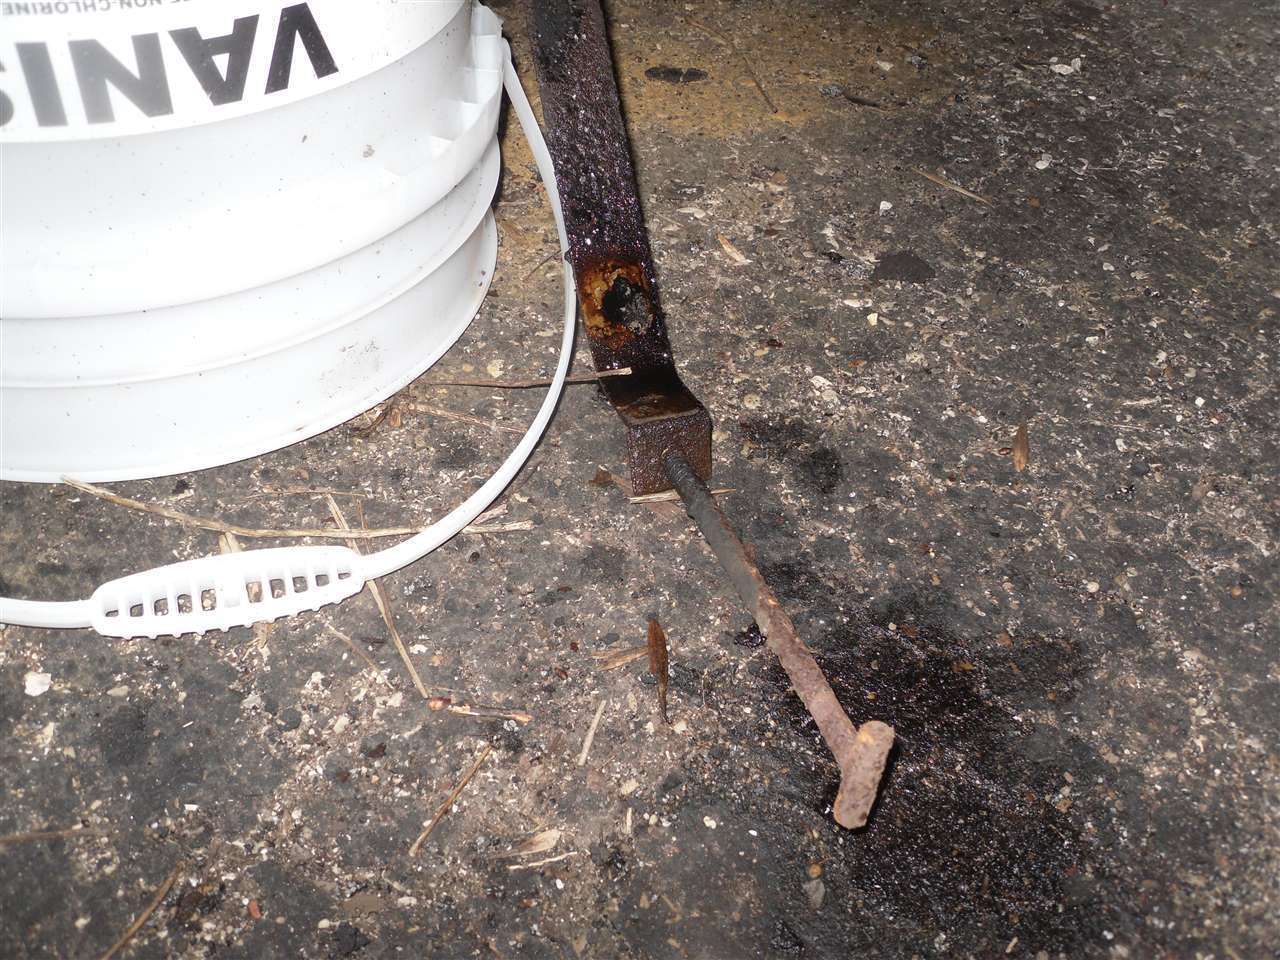 (116.77 KB) (116.77 KB)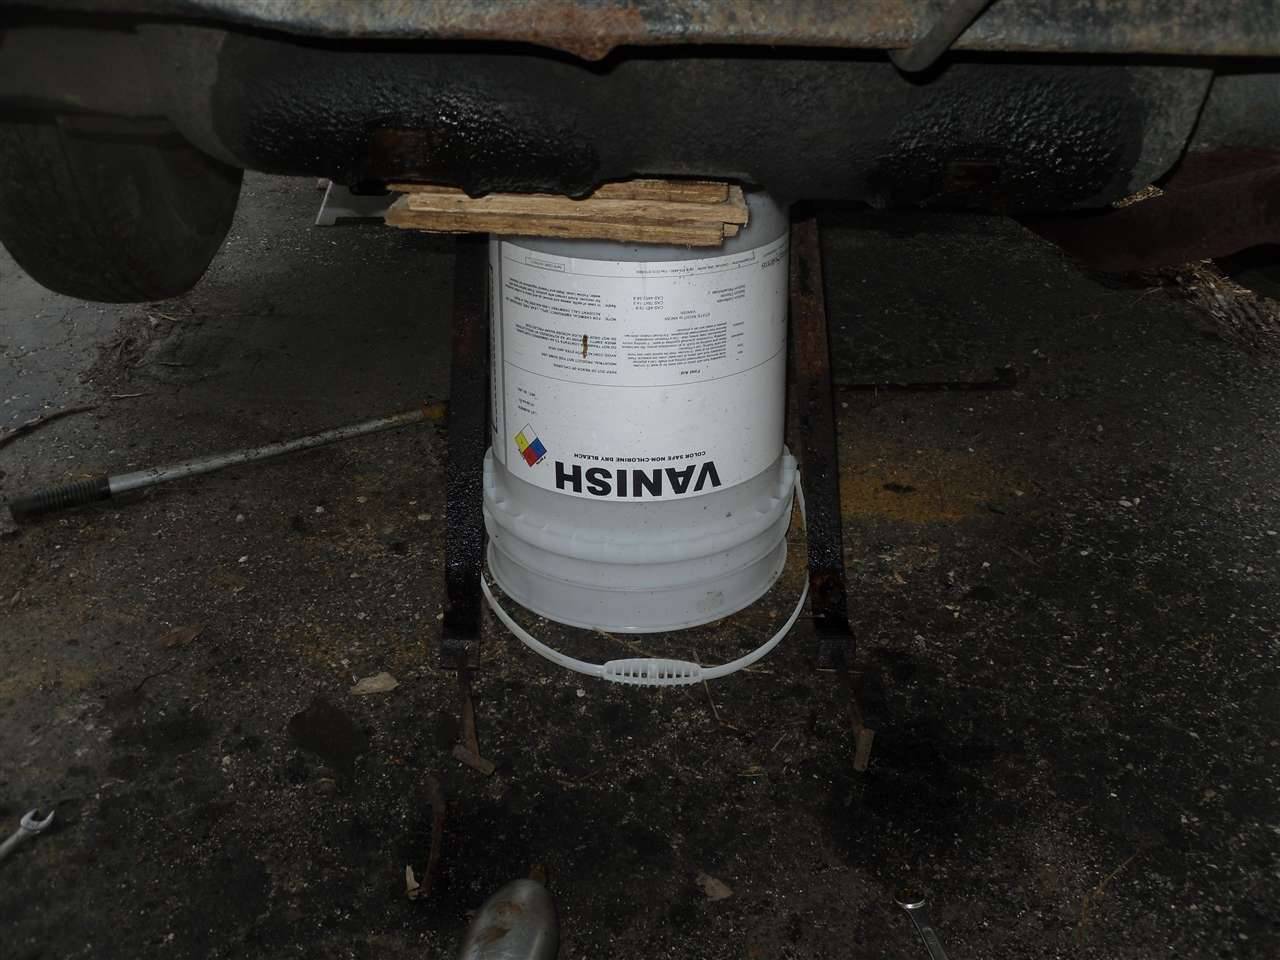 (124.16 KB) (124.16 KB)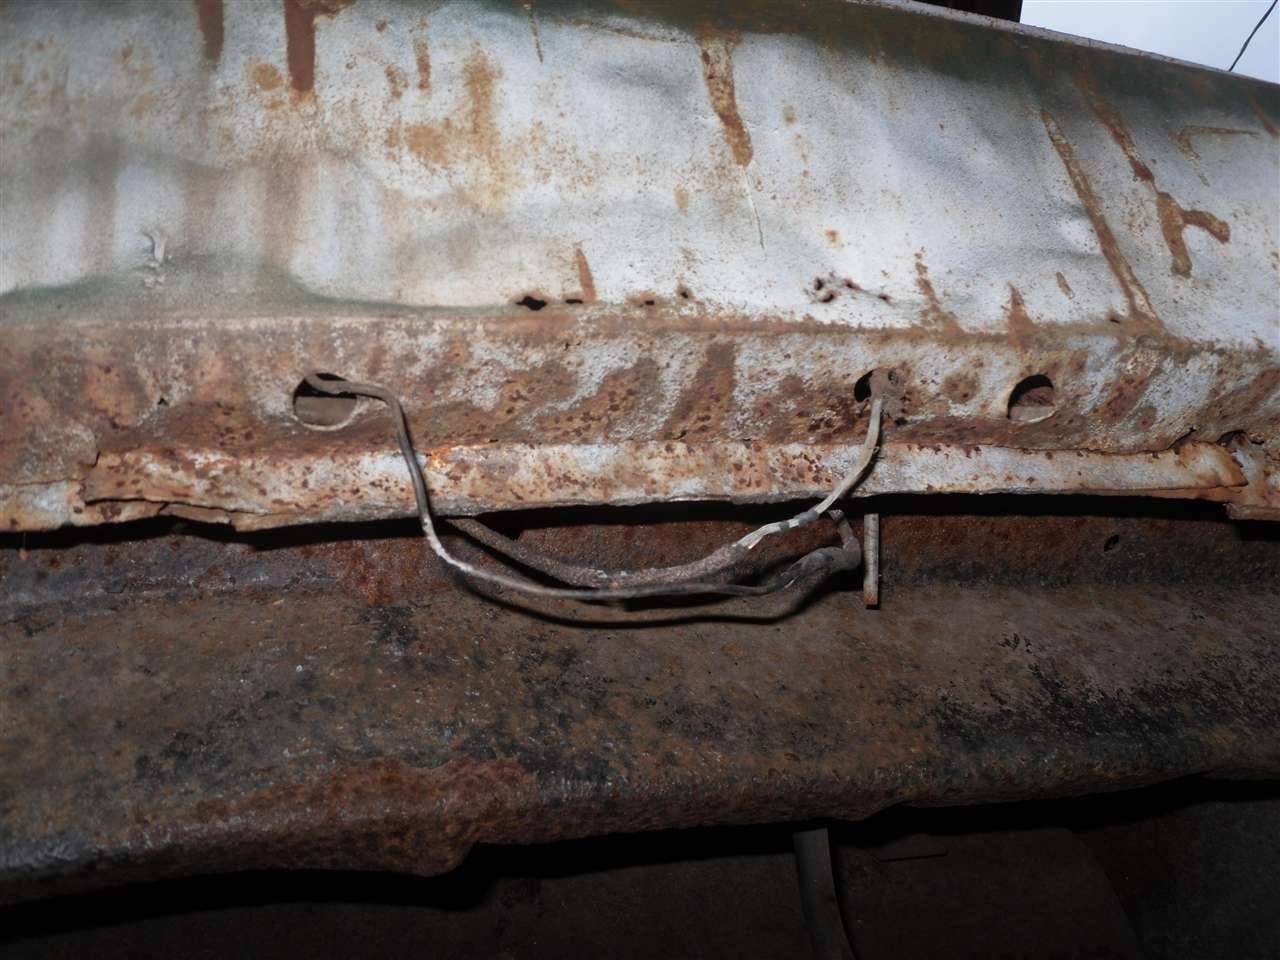 (157.11 KB) (157.11 KB)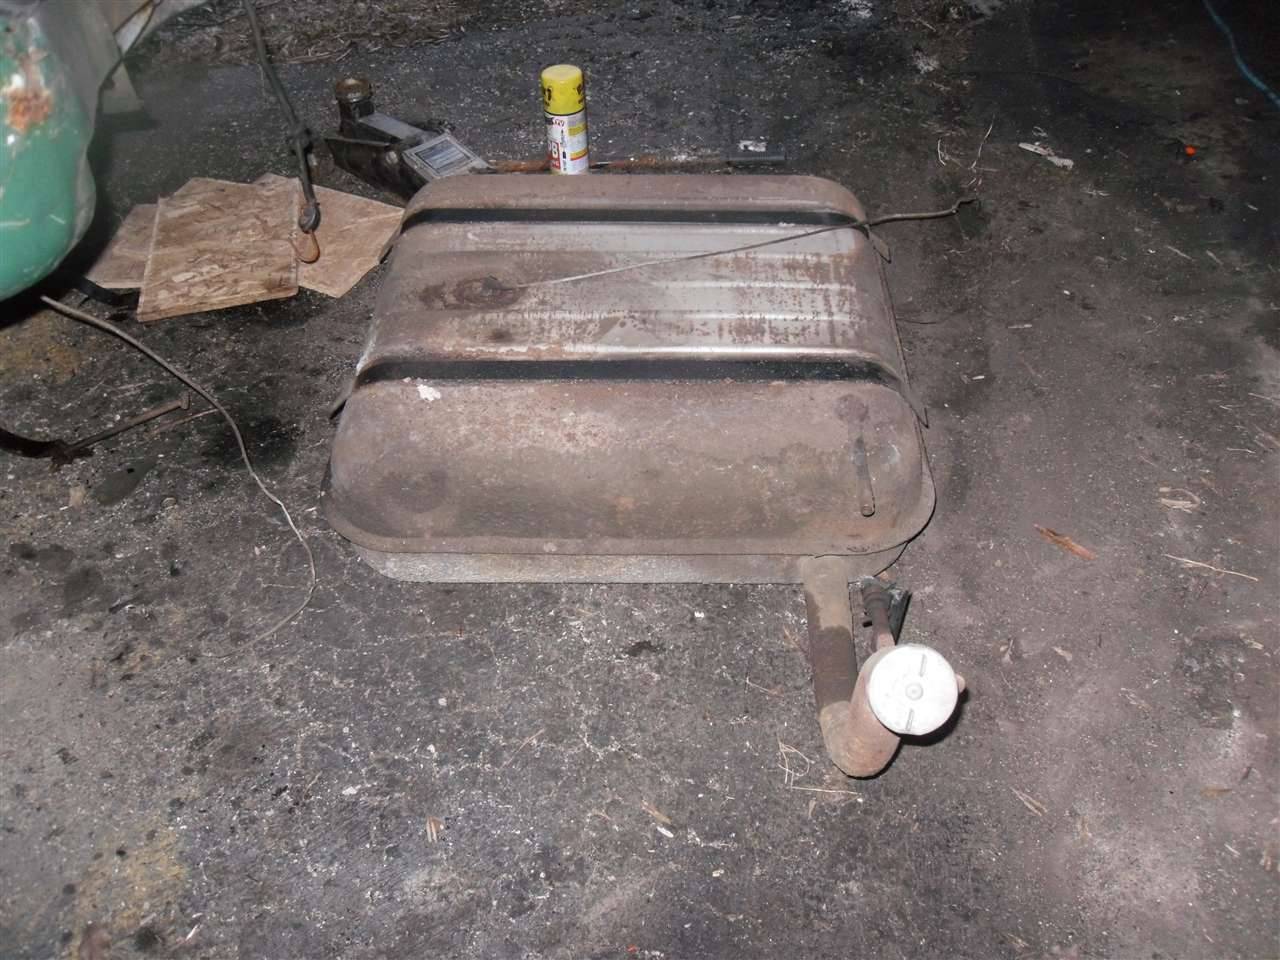 (146.53 KB) (146.53 KB)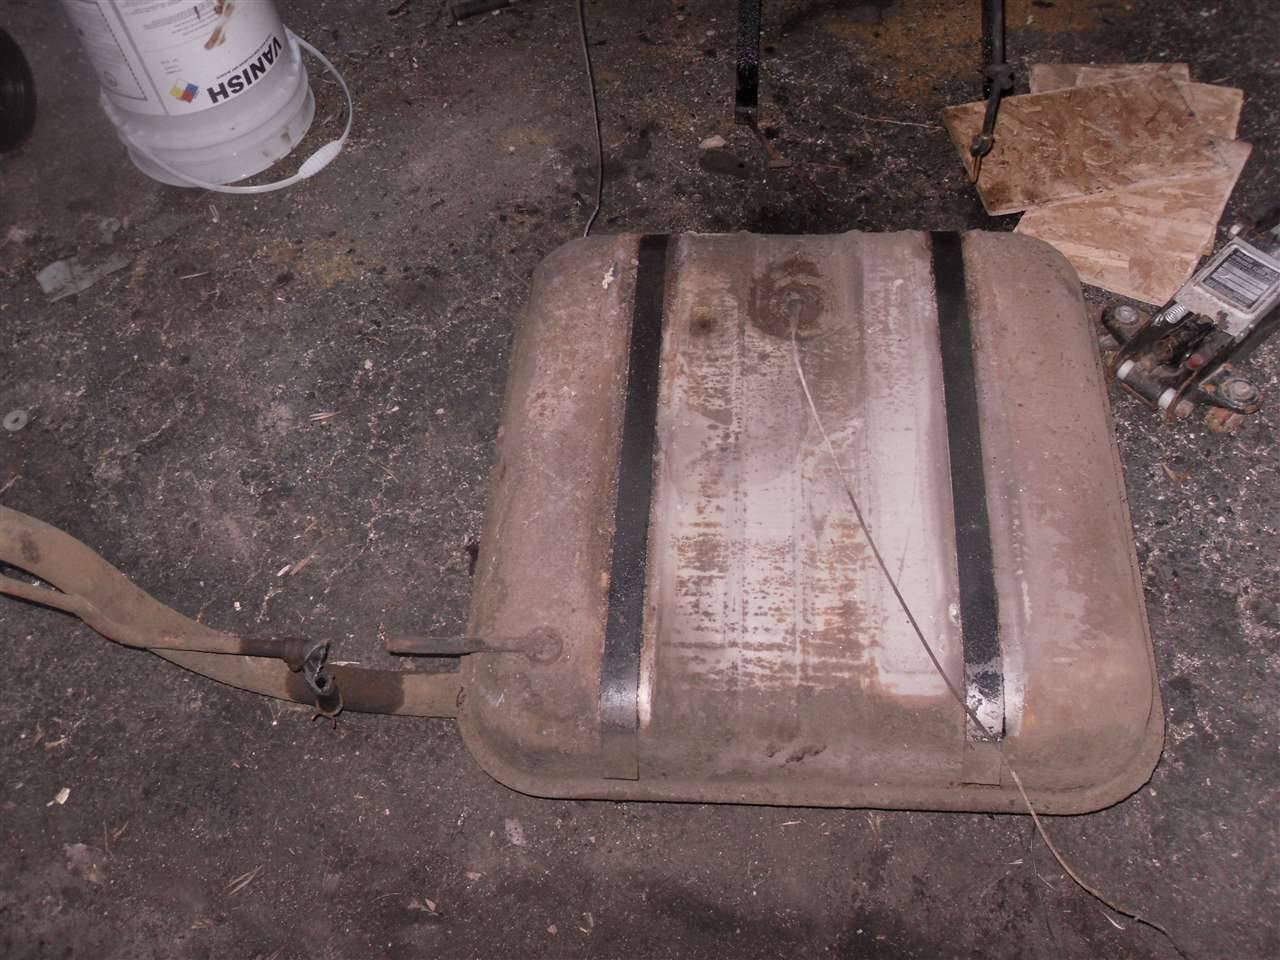 (150.91 KB) (150.91 KB) (100.33 KB) (100.33 KB)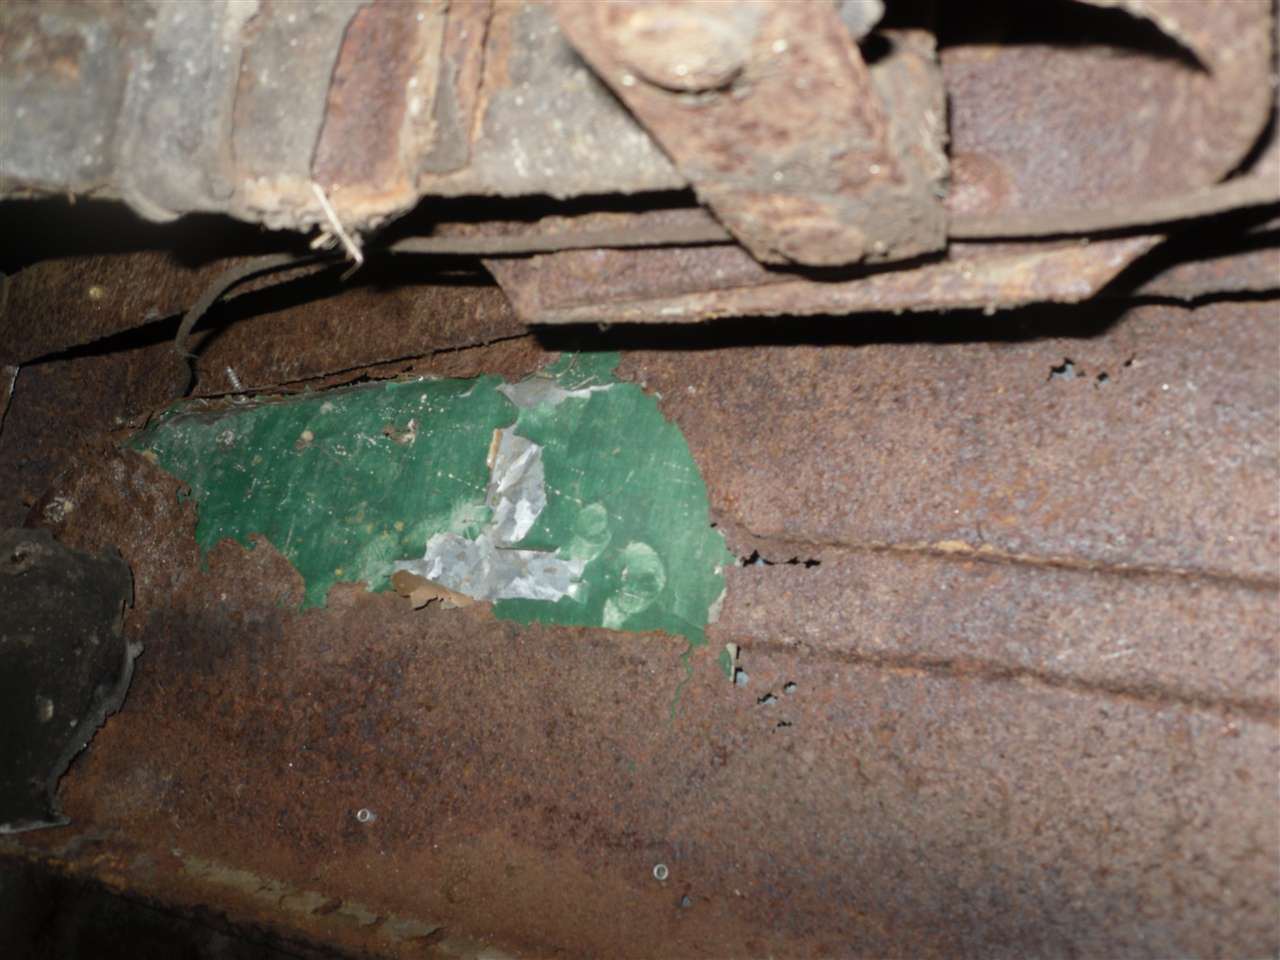
Posted on: 2011/4/5 20:42
|
|||
|
[url=h
|
||||
|
||||
|
Re: 51Packard's....51 Packard
|
||||
|---|---|---|---|---|
|
Forum Ambassador
|
One caution on the tank. Unless you had it out or are very lucky, the drain plug is probably rusted. If it is and you try to remove it without holding the tank bung with something, that little piece is pressed in and will twist and leak. No way to easily repair once that happens.
If the vendors don't have the bolts, here is one possibility-- if the proper combinations can be picked so they are long enough.mcmaster.com/#t-bolts/=br1hox Attach file: (36.50 KB)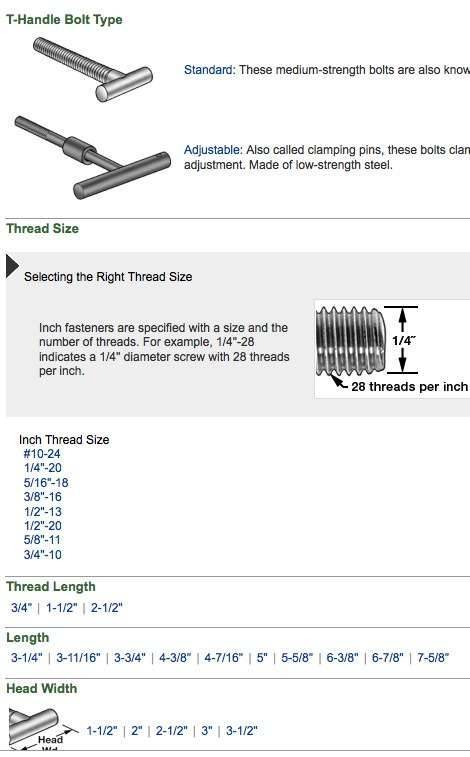
Posted on: 2011/4/5 20:50
|
|||
|
Howard
|
||||
|
||||


