|
Re: Mike P 1955 400 Slow Resto Thread!
|
||||
|---|---|---|---|---|
|
Just popping in

|
hi Mike,
I got new tank from Auto City and it was perfect. No issues with the filler neck fit (or anything else for that matter.) For my 55 400 perfectly. Threw a satin clear coat over it for good measure and sent a bore scope into the tank too. Clean as a whistle. And I paid around 350$ not including shipping. -Dan
Posted on: 2022/6/23 19:59
|
|||
|
||||
|
Re: Mike P 1955 400 Slow Resto Thread!
|
||||
|---|---|---|---|---|
|
Just can't stay away
|
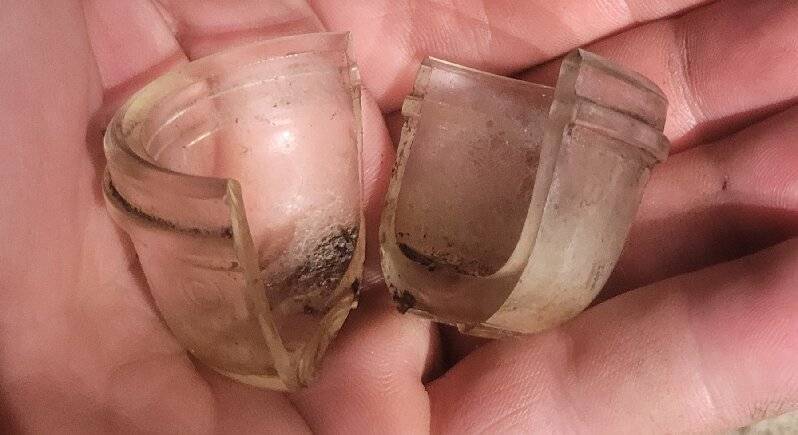
Hey guys when I took the carb off and dissasembled the glass bowl . The bowl just split into 2 pieces. Any recomendations of where I can get a new one?
Posted on: 2022/6/30 0:51
|
|||
|
-Mike
1955 Packard 400 |
||||
|
||||
|
Re: Mike P 1955 400 Slow Resto Thread!
|
||||
|---|---|---|---|---|
|
Home away from home
|
If you can't find one sooner, I have NORS AC filter assemblies at my Oregon shop and can check if any are actually spares. They are identical to the originals but have a more easily replaceable filter element.
Posted on: 2022/6/30 2:19
|
|||
|
||||
|
Re: Mike P 1955 400 Slow Resto Thread!
|
||||
|---|---|---|---|---|
|
Just can't stay away
|
Are these gaps acceptable. This is in the fully closed position.
Attach file:  20220630_070249.jpg (260.09 KB) 20220630_070249.jpg (260.09 KB)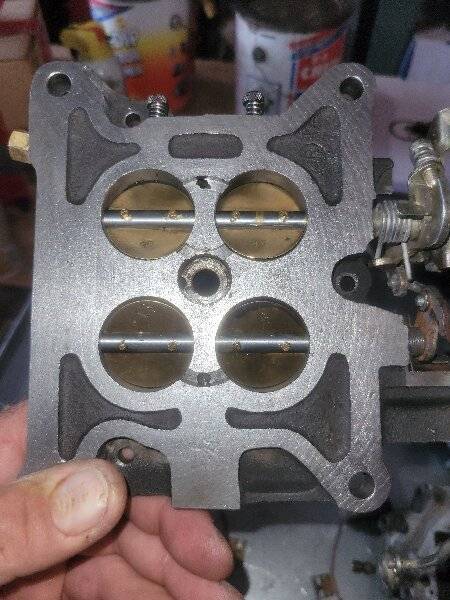  20220630_070244.jpg (193.46 KB) 20220630_070244.jpg (193.46 KB)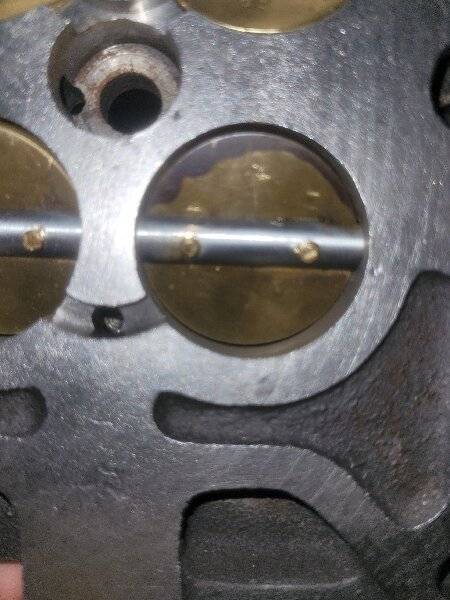  20220630_070241.jpg (289.98 KB) 20220630_070241.jpg (289.98 KB)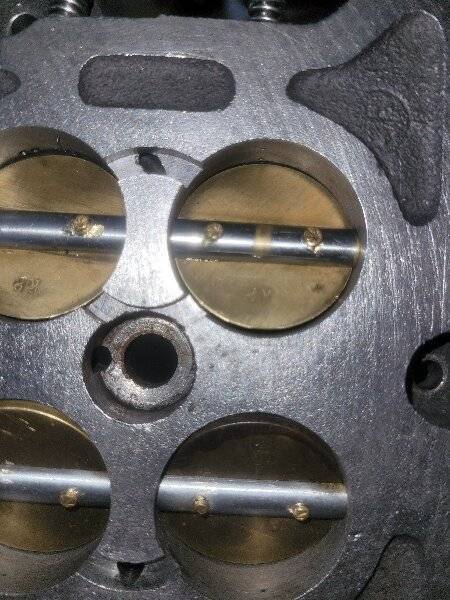  20220630_070230.jpg (243.20 KB) 20220630_070230.jpg (243.20 KB)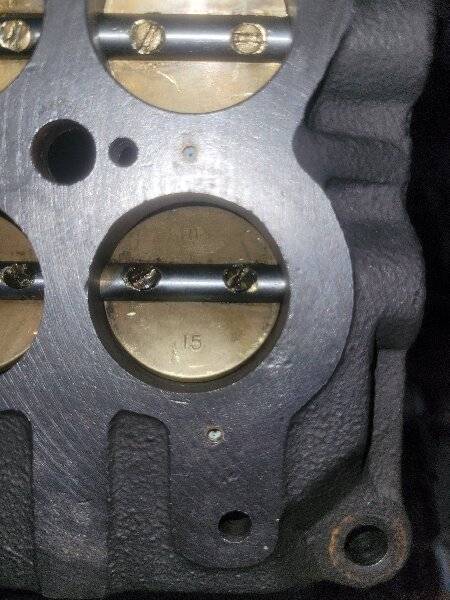  20220630_070216.jpg (196.22 KB) 20220630_070216.jpg (196.22 KB)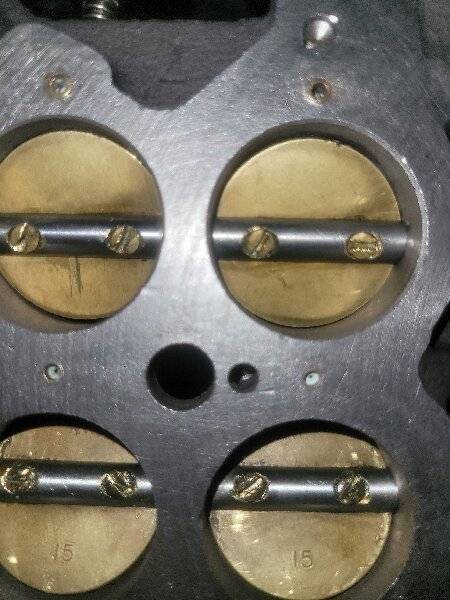  20220630_070209.jpg (293.88 KB) 20220630_070209.jpg (293.88 KB)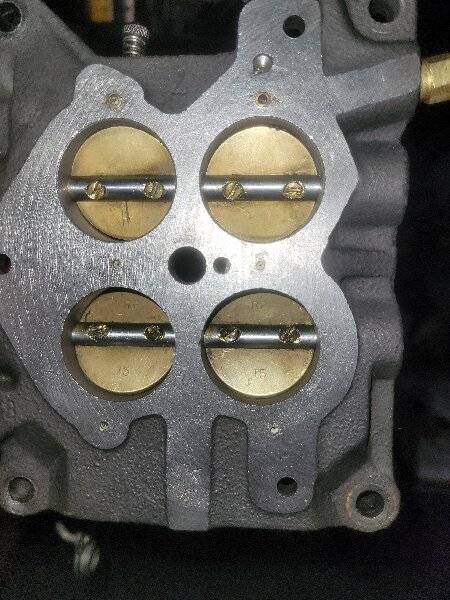
Posted on: 2022/6/30 9:06
|
|||
|
-Mike
1955 Packard 400 |
||||
|
||||
|
Re: Mike P 1955 400 Slow Resto Thread!
|
||||
|---|---|---|---|---|
|
Forum Ambassador
|
It varies but there should be a small gap. The rebuild instructions for the 4GC start on page 15 in the service article here See if the gap is as specified in the fast idle adjustment step 5 on page 17. As real world conditions warrant, the adjustment could vary the gap slightly.
There is also a training manual for the 4GC that goes into a bit of detail on how that section functions and how adjustments determine where the final gap will fall.packardinfo.com/xoops/html/downloads/1955_4GCTrainingBook.pdf
Posted on: 2022/6/30 9:37
|
|||
|
Howard
|
||||
|
||||
|
Re: Mike P 1955 400 Slow Resto Thread!
|
||||
|---|---|---|---|---|
|
Home away from home
|
Pretty sure the secondaries should be tight shut until called for. The edges of the butterflies are tapered and it might be that your secondaries are in upside down--can't quite make out in the photo. Will look at a carb sometime this afternoon.
Posted on: 2022/6/30 11:59
|
|||
|
||||
|
Re: Mike P 1955 400 Slow Resto Thread!
|
||||
|---|---|---|---|---|
|
Home away from home

|
Quote:
Take a photo of the metal part (top) of the filter housing. Let's see what that is. The housing will say so. This glass bowl looks like the Carter type filter which had a small glass bowl and a wonderful permanent ceramic filter element (something that people today oddly want to throw away!). When Carter filter housing gaskets began to leak with age, the tendency of most people was to ham-hand tighten up on the bowl tensioner. Never realizing that the glass can only take so much pressure stress (along with all of the massive temp changes and vibration). After a King-Kong tightening, the bowl often eventually does what glass clamped in metal does. It breaks. AC fuel line filters had a deeper bowl, different element and different (bail wire) clamping system. The whole thing was bigger. Check and see what your car has. Although senior Packards of this period normally used Rochester carburetors (and Clippers used Carter) the filters were not the same as the carbs. Get another filter assembly from Mike Dulinski or Kanter Brothers and be sure to replace the old gasket with a new one prior to fastening and tightening the glass bowl.
Posted on: 2022/6/30 12:20
|
|||
|
||||
|
Re: Mike P 1955 400 Slow Resto Thread!
|
||||
|---|---|---|---|---|
|
Home away from home
|
Wandered to the basement and checked. Secondaries should be closed as tight as a tick and the butterflies do have tapered edges so must be installed so the tapered edge seals to the bore of the carb. I've had grief in the past on 4 bbl carbs where the secondaries did not quite close--you can't get a good idle or throttle response.
Posted on: 2022/6/30 16:01
|
|||
|
||||
|
Re: Mike P 1955 400 Slow Resto Thread!
|
||||
|---|---|---|---|---|
|
Just can't stay away
|
Hey guys thanks for all the feedback!
I have ordered a new sediment bowl set up from Kanter. The new one doesn't come with a ceramic bowl the guy said it has a paper filter. I still want a new bowl for my original. The guy from Kanter told me they sold just the bowl and seal in the past but didn't see it as a option anymore. Heres the story with the carb throttle body. The last owner bought a rebuilt carb and bolted it on, the problem is the carb had been sitting for a long time so the accelerator pump was shot. The original carb was in pieces in the trunk. I took both carbs apart 100% everything came apart easily with the carb that was installed. So when I got to dissasembling the original carb that was in the trunk I didn't know they peen the throttle valve primary and secondary screws since the other carb was so easy to take them out, I broke 1 of the secondary valve screws off in the shaft. Since I want to use the original carb I took the secondary shaft and valves from the unoriginal carb and installed it on the original carb. Well it didn't work out as you can see with the gaps in the pics. I put the original secondary shaft and plates back in the original carb and wala no gaps. Now I need to drill out and tap the one screw I broke to 8-32×5/16 right? I am going to rebuild both carbs since all parts are there. Does anyone have any experience with the new style float needles? I still have the original rubber tipped ones but didnt know how troublesome old needles are. What size are the original throttle valve/shaft screws? 6-32×5/16? As far as the gas tank goes I was going to take it to a Reun place but it would have cost $950!!!!! So then I was going to take it to a radiator shop and have them clean it out but that alone was going to cost $150. So then I got the great idea to try and remove the rust on the outside using electrolysis. See the attached pics. I let it sit 3 days 12-15 amps continous, looks good just can't get the black stuff off 100%,cant see it since it flash rusted so quick. Why do some parts of the tank rust quick and some parts not at all? Is the tank galvanized?I didnt have a node in the tank to draw the rust so there is still rusty stuff from about mid tank. I will just throw some chain/ rocks etc in there with water and shake it every day until the kit gets here. Thought I might as well try and make this tank work before shelling out $500+ dollars for a new tank. Packarddon: Thank you for the offer. HH55: Thank you for the info. I already have the whole manual printed out but I didn't have the extra 9 page training manual. Ross: Thank you for checking I have dissasembled and need to try again. Leedy: There is a pic attached of the metal part. Thanks for all the in info. Attach file:  20220630_061643.jpg (168.87 KB) 20220630_061643.jpg (168.87 KB)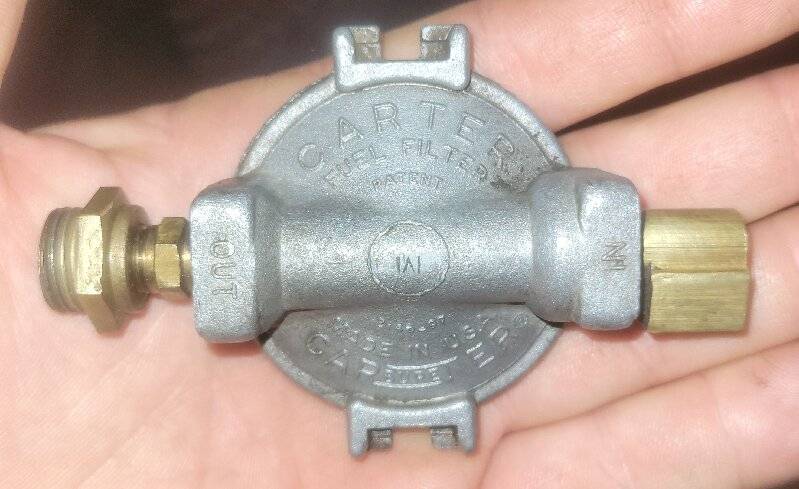  20220622_200054.jpg (271.38 KB) 20220622_200054.jpg (271.38 KB)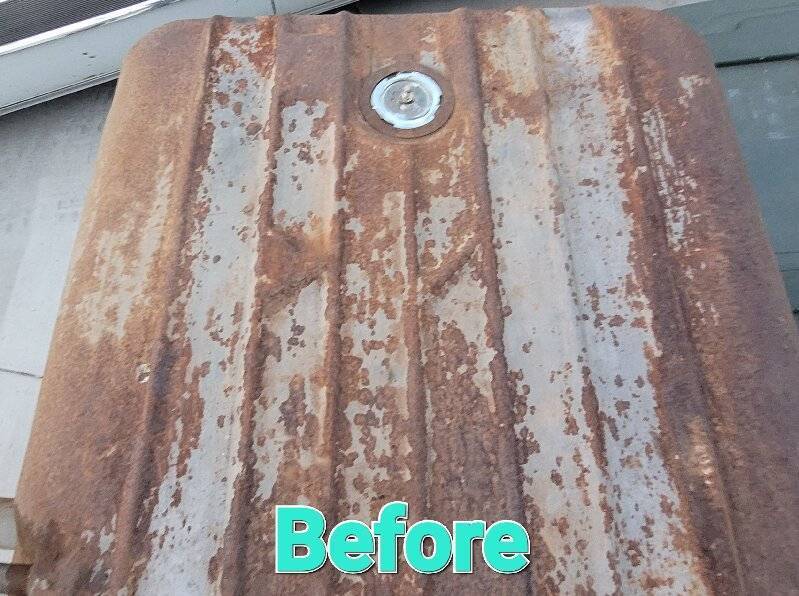  20220622_200050.jpg (133.78 KB) 20220622_200050.jpg (133.78 KB)  20220622_200100.jpg (198.98 KB) 20220622_200100.jpg (198.98 KB)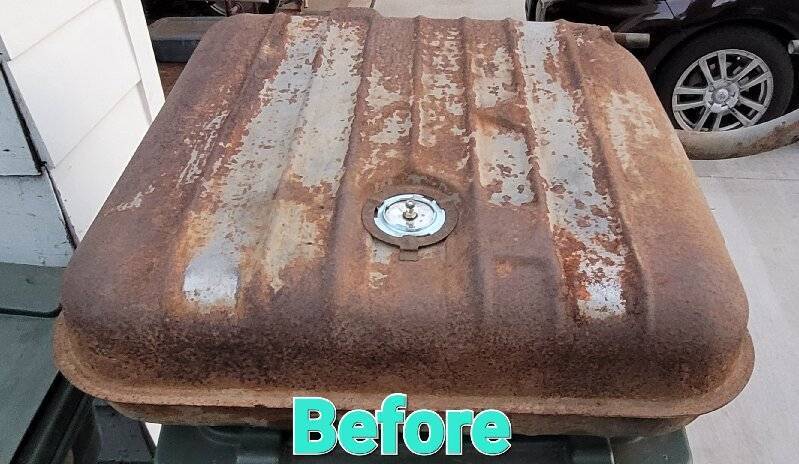  20220622_200112.jpg (160.47 KB) 20220622_200112.jpg (160.47 KB)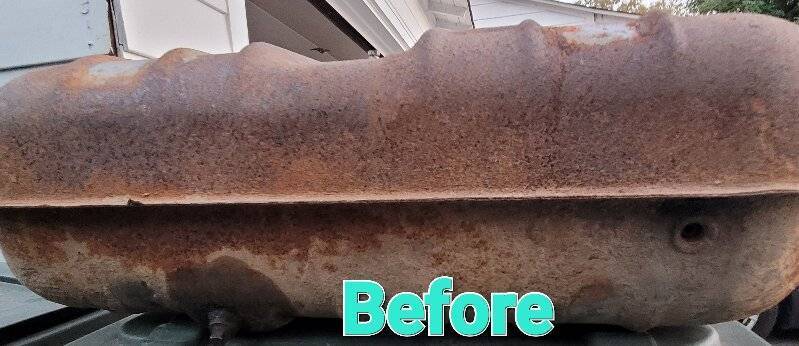  20220622_201007.jpg (318.13 KB) 20220622_201007.jpg (318.13 KB)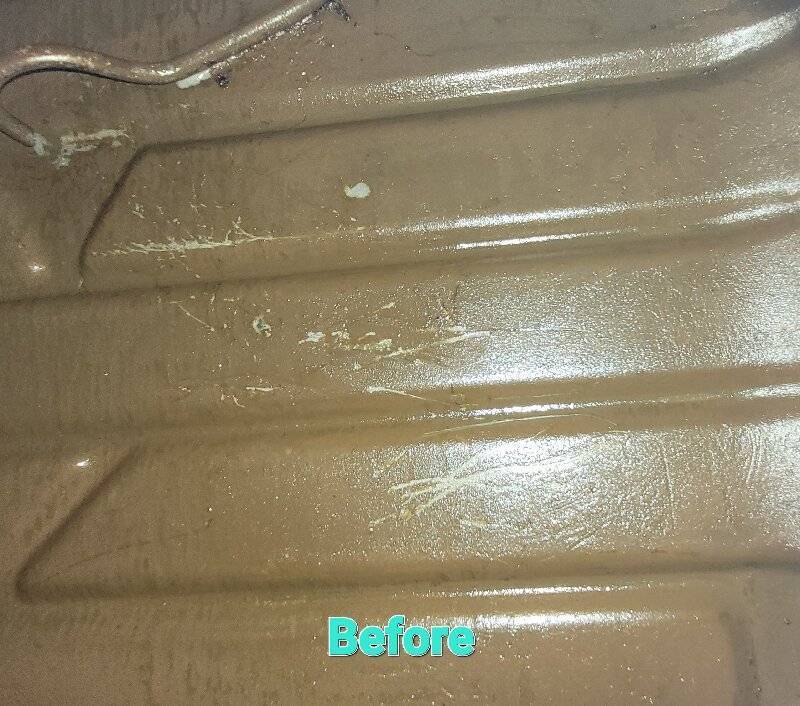  20220622_201319.jpg (313.88 KB) 20220622_201319.jpg (313.88 KB)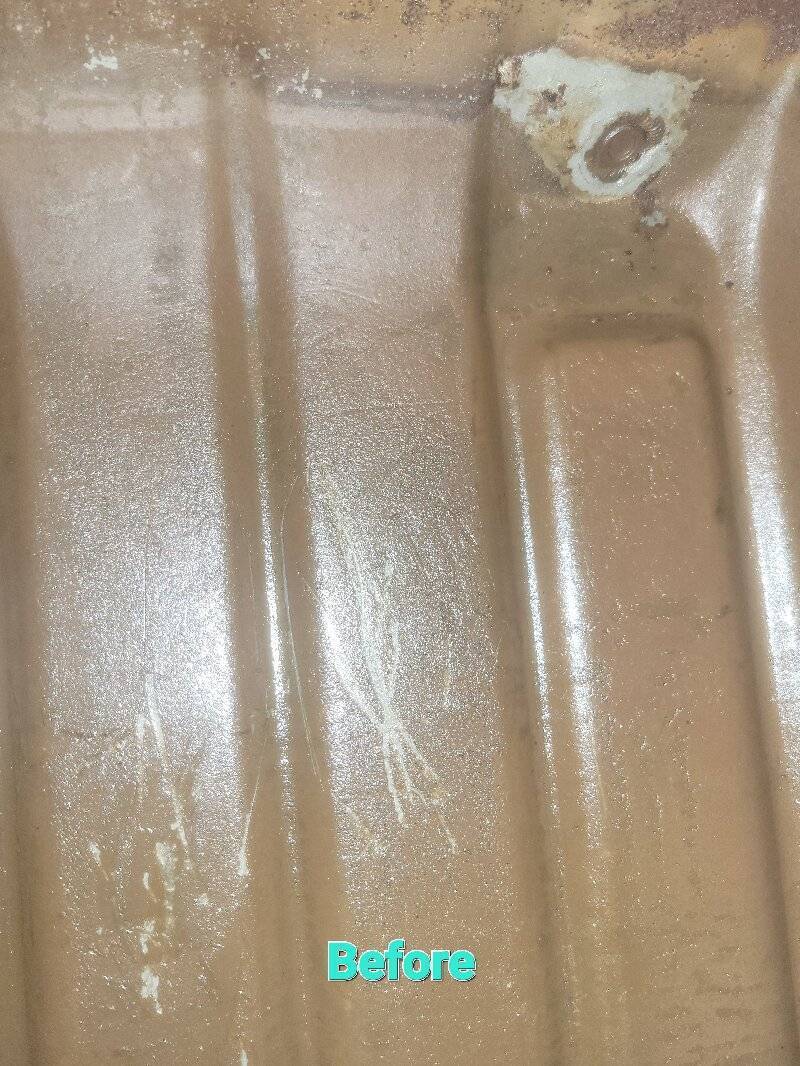  20220626_152950.jpg (120.16 KB) 20220626_152950.jpg (120.16 KB)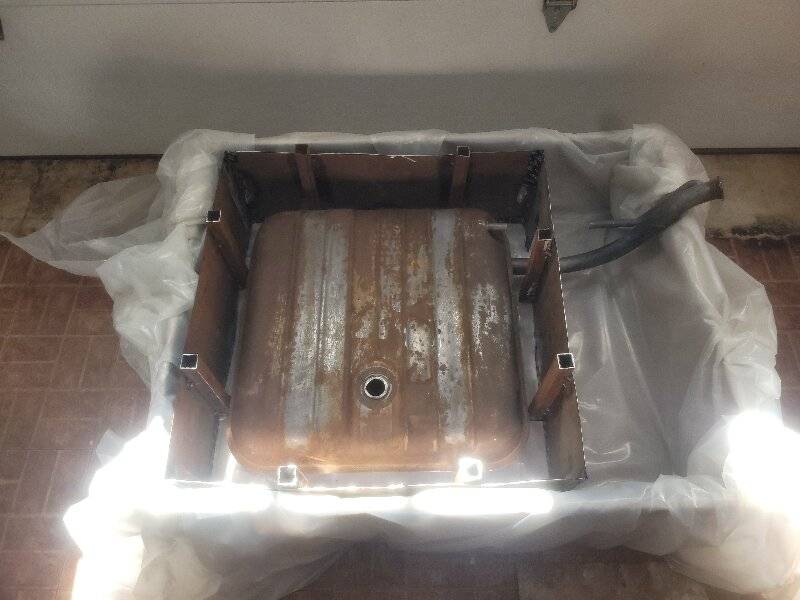  20220626_160039.jpg (175.78 KB) 20220626_160039.jpg (175.78 KB)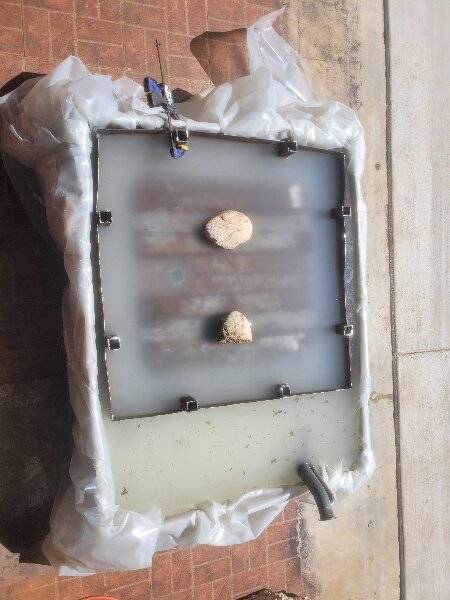  20220627_180840.jpg (226.32 KB) 20220627_180840.jpg (226.32 KB)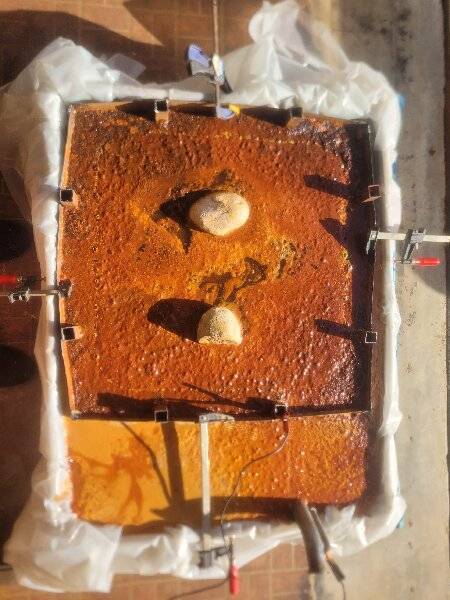  20220630_220155.jpg (225.54 KB) 20220630_220155.jpg (225.54 KB)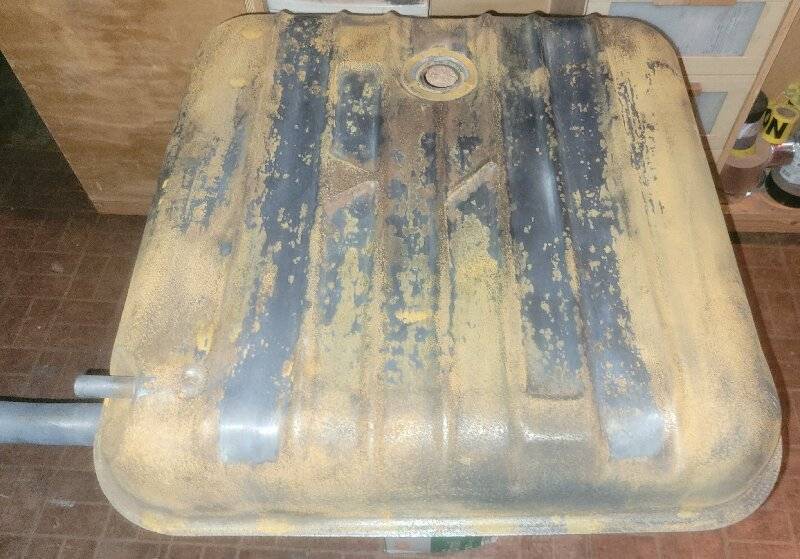  20220630_220230.jpg (182.23 KB) 20220630_220230.jpg (182.23 KB)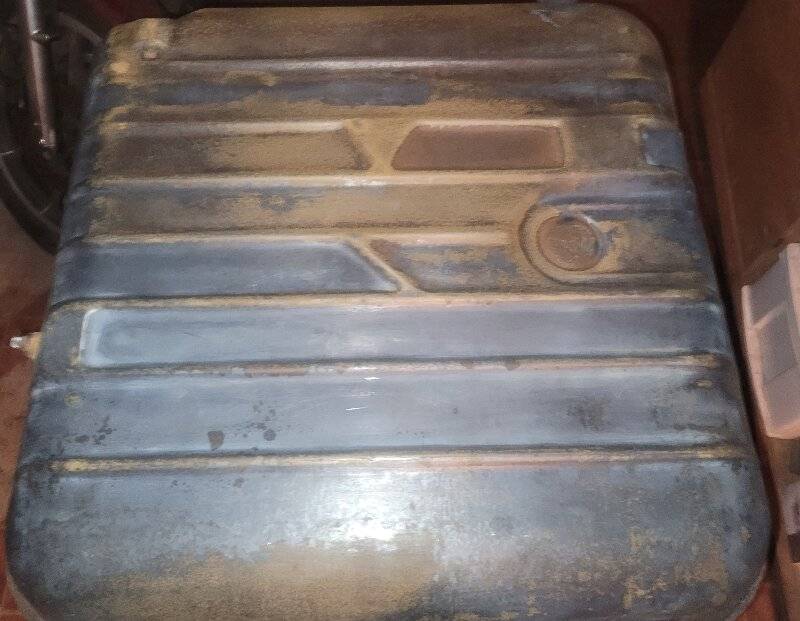  20220630_220241.jpg (198.56 KB) 20220630_220241.jpg (198.56 KB)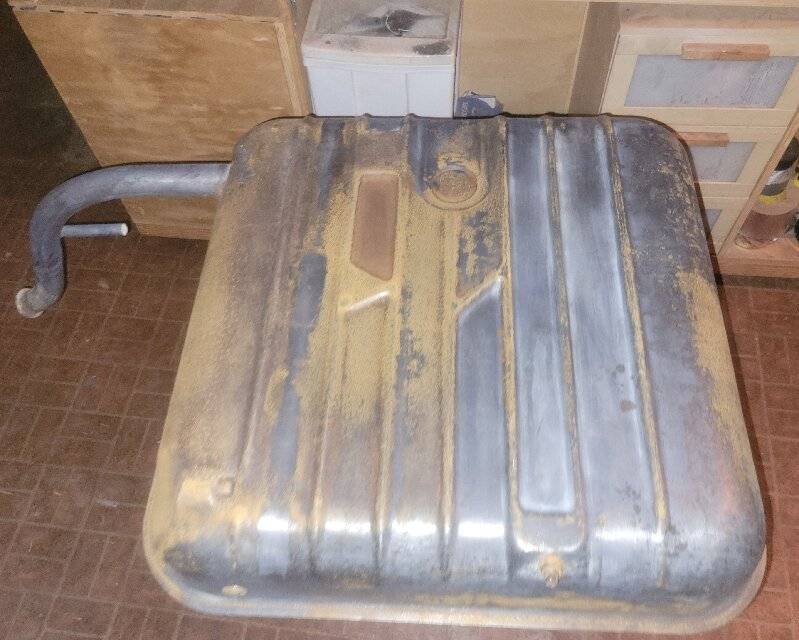  20220630_220533.jpg (270.95 KB) 20220630_220533.jpg (270.95 KB)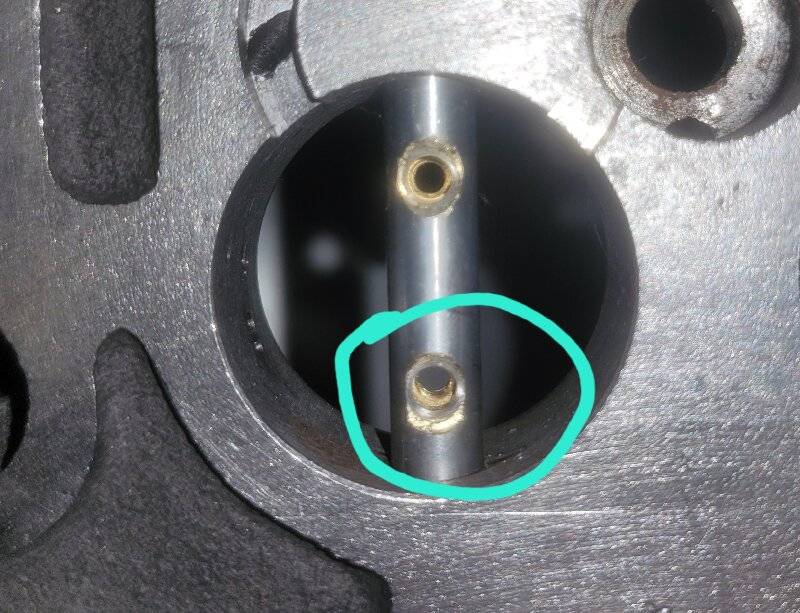  20220630_220821.jpg (142.46 KB) 20220630_220821.jpg (142.46 KB)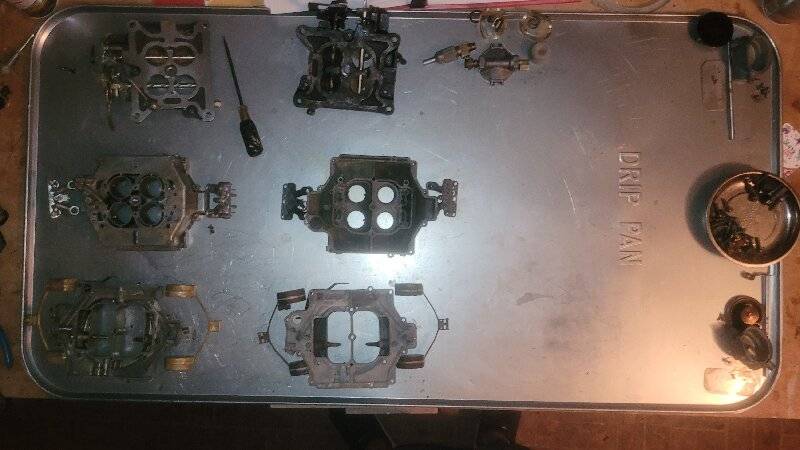  20220630_171807.jpg (163.71 KB) 20220630_171807.jpg (163.71 KB)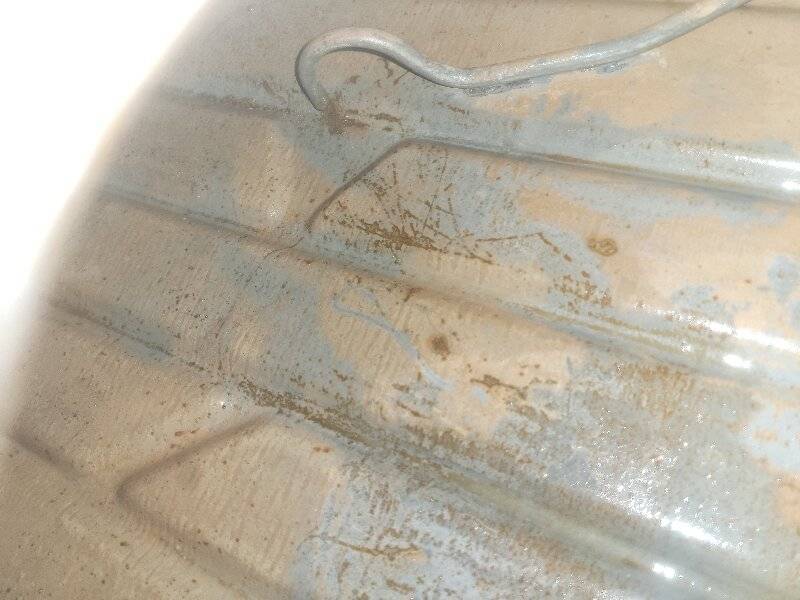  20220630_171625.jpg (232.36 KB) 20220630_171625.jpg (232.36 KB)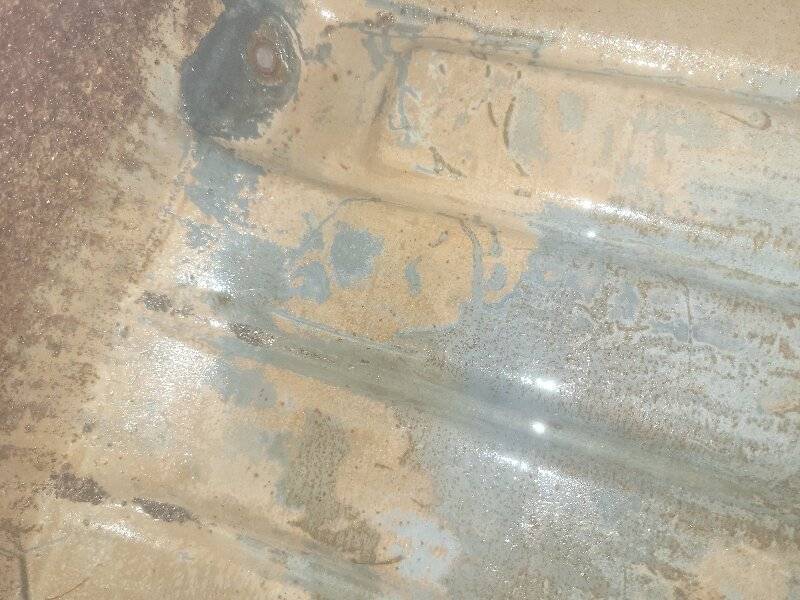
Posted on: 2022/7/1 0:13
|
|||
|
-Mike
1955 Packard 400 |
||||
|
||||

