|
Re: Wade's Workshop
|
||||
|---|---|---|---|---|
|
Forum Ambassador

|
Monday 19th April 2010
First up this morning was car shuffling with some of Rick's and John's customer vehicles moved outside. Then the front bumper and clip for the '41 were moved out of the way, the '41 pushed into the slot in front of John's hoist and Big Red started up and driven to the front door of the shop. Next 3 floor jacks were positioned under the timber supporting the '34 body, with one under the front support and one at each side of the rear support. In unison the body was moved at a 45 degree angle across to where Big Red had been sitting next to the shelving on the side wall. The front wheels of the '34 chassis had been lowered to the floor previously and now a floor jack was placed under the centre of the diff and the rear jack stands removed. The chassis was rolled back on the jack and close to a 180 degree turn executed so the Chassis could sit parallel and alongside it's body. Then the '41 was pushed back into almost the same position it had formerly occupied. At this point re-shuffling was suspended as Wade and I embarked aboard Big Red for it's shakedown run after the rebuild. There was also another reason for the run, but I'll get to that in due course. So out the shop door, along the driveway and into the street. It has been 1 year 2 weeks and 3 days since Big Red was last on a public road. The car ran strongly, smoothly and without incident, probably about 4 miles in total. Good oil pressure, water temp went up to about 180 degrees then dropped back to about 160 after the radiator shutters opened fully. And instead of going back to the workshop we went to Tyre and Wheel, just around the corner, to see if they could do a wheel alignment of Big Red. Formerly Wade used to use BrianH, a guy in the old car movement with a wheel aligning machine, but just recently Brian has sold the business and retired so another alignment facility was required and that's where Tyre and Wheel came in. They fitted the new radials for Big Red some months ago as well as the radials I put on the '41 last year. Initially there were some fears Big Red might be too big for their hoist but some quick pacing and measuring by Wade soon put that concern to rest. Once on the hoist Big Red was then rigged up with measuring equipment on each wheel, all of which was connected to a PC and displayed the various readings in millimetres, degrees and angles. For a front end that was set up by eye, Wade's that is, it was pretty close and a minimum of adjustment was required. Returning to the workshop Big Red was temporarily parked next to Old Blue outside then Wade and I jumped into his ute to go and pick up the block, crank, rods, pistons, etc, etc for the '41 from Graham Wilkins. After I got over the "$ticker $hock" for the cost involved, didn't know machining and set up services were that expensive, everything was loaded into the ute and we returned from whence we came. On the drive back my costs concerns were put somewhat to rest when Wade gave me a ballpark figure for his Super 8 rebuild. I'm now more than glad I "only" have a 120. From what he told me I could only afford the Super 8 engine, the rest of the car wouldn't even be in the picture! Unloaded everything, once back at the workshop, setting up the bare block on the "engine table". The next step was going to be putting the block in the parts washer to remove any debris left from the machining processes. But before doing so Wade, on checking the oil galleries, found the oil galleries to still have a fair bit of gunk in them. This necessitated using a long rod to push through the large loose bits. Then spraying the galleries with brake cleaner and with a piece of rang on the end of the rod numerous run throughs to clear the galleries completely. Next were the oiling holes for the tappets and the external plug holes. All these had some gunk and there were a number that appeared to be completely blocked! Used more brake cleaner, a lot more, and also a lot more rodding. Had to reclean the long galleries again after this and also the holes servicing the main bearings. All done, into the parts washer, loaded up with fresh water and detergent and away it went for about 20 minutes. Out of the washer, a blow out with compressed air to clear any water remaining from the water jacket then the block was hoisted back onto the engine table. Then more blowing of every surface, hole and orifice to ensure all water was removed and everything was clean. During all this Wade had backed in Old Blue to where the '34 chassis had been. Tonight Wade is driving Big Red home and tomorrow the re-assembly of the '41's engine begins. Video - On the road again Attach file:  (36.79 KB) (36.79 KB)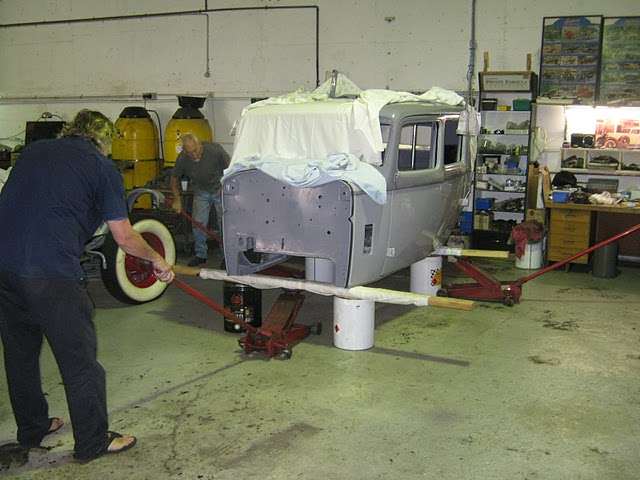 (34.69 KB) (34.69 KB) (40.12 KB) (40.12 KB)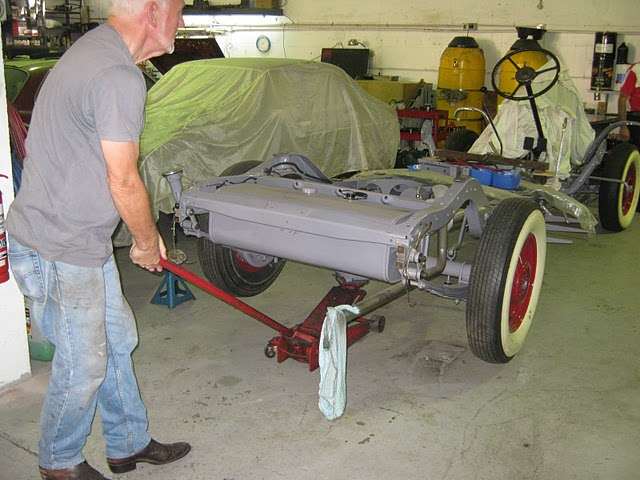 (38.09 KB) (38.09 KB)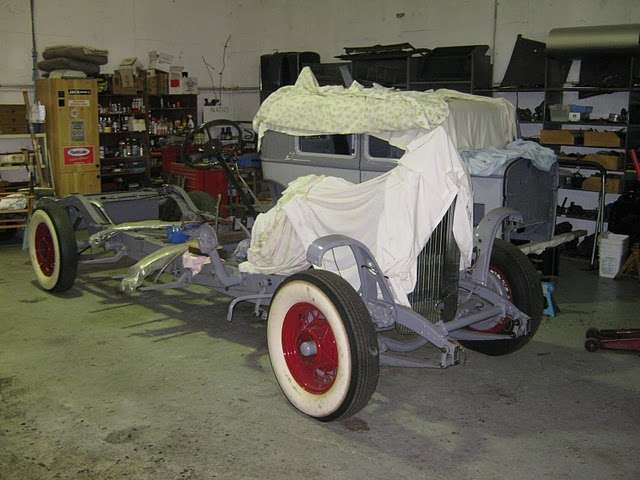 (42.29 KB) (42.29 KB) (33.81 KB) (33.81 KB) (36.42 KB) (36.42 KB)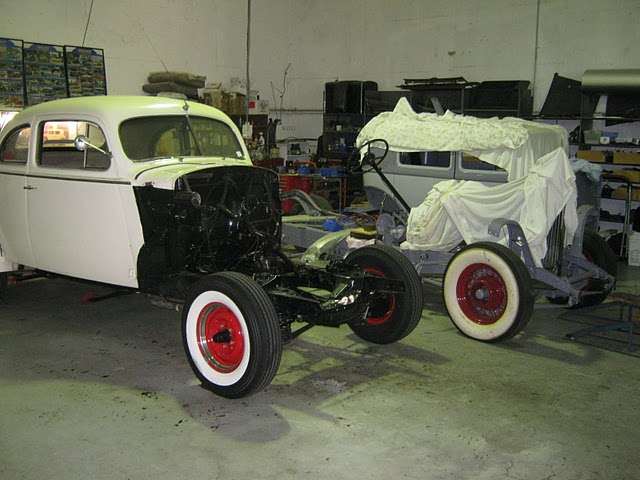 (35.97 KB) (35.97 KB) (43.04 KB) (43.04 KB)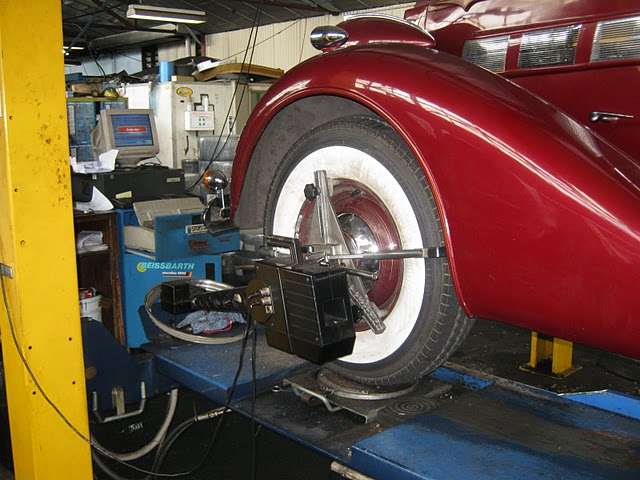 (43.48 KB) (43.48 KB)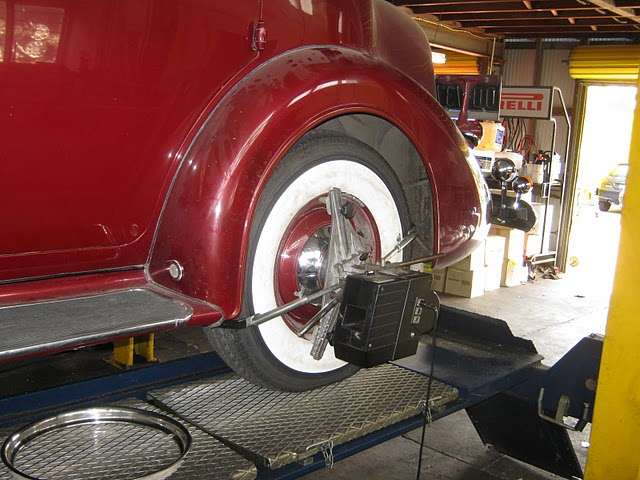 (27.82 KB) (27.82 KB)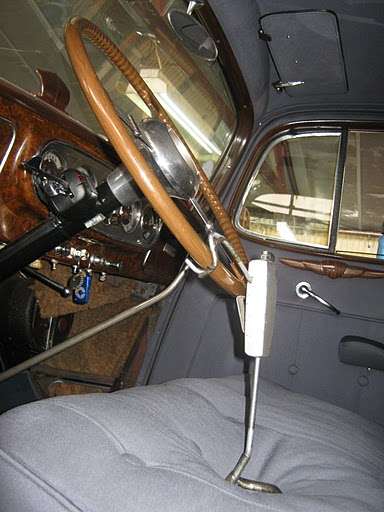 (26.46 KB) (26.46 KB)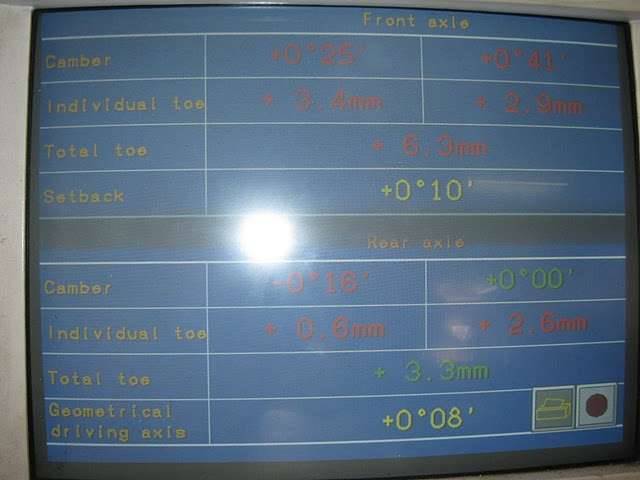 (26.21 KB) (26.21 KB) (40.07 KB) (40.07 KB)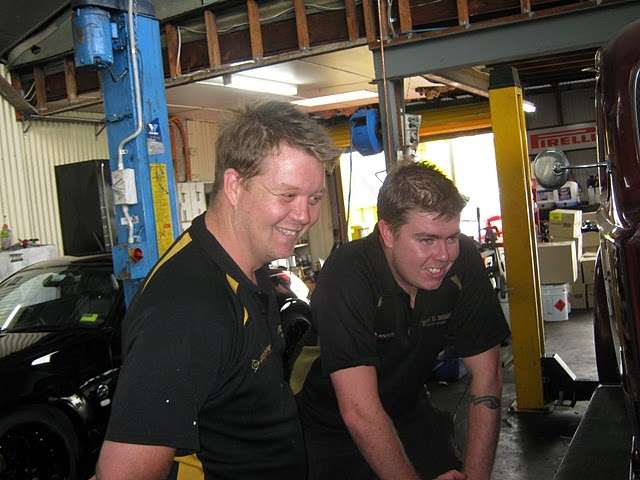 (30.69 KB) (30.69 KB) (46.84 KB) (46.84 KB)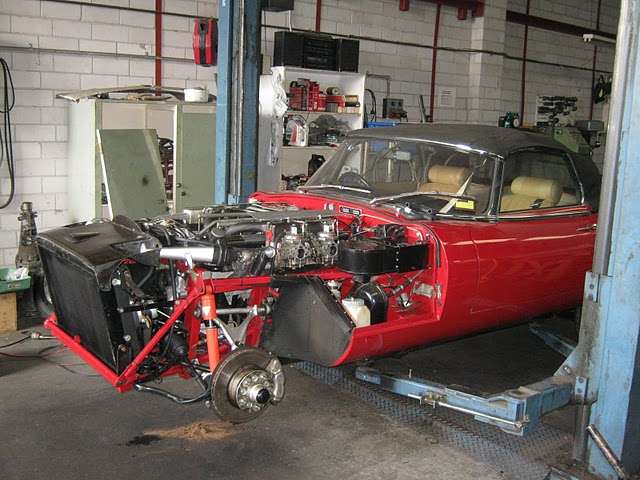 (47.99 KB) (47.99 KB) (27.28 KB) (27.28 KB) (59.33 KB) (59.33 KB)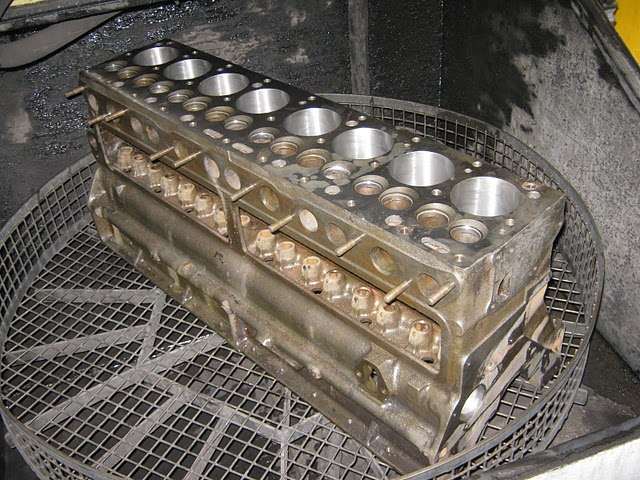 (54.97 KB) (54.97 KB)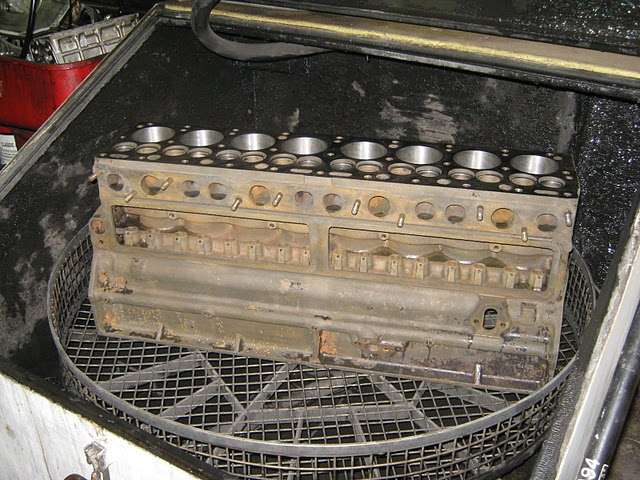 (34.77 KB) (34.77 KB) (38.56 KB) (38.56 KB)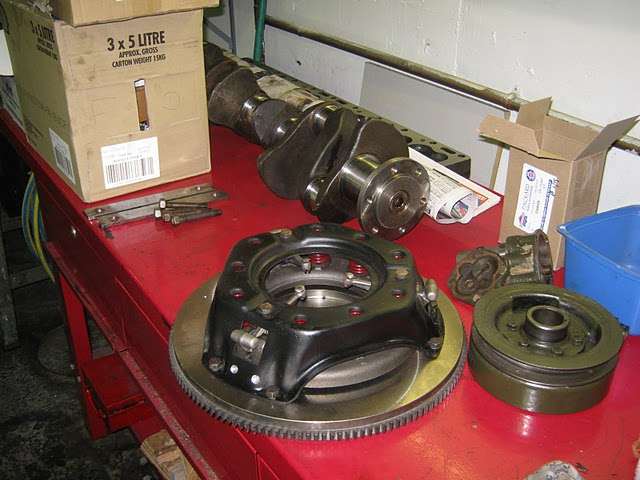 (30.69 KB) (30.69 KB)
Posted on: 2010/4/19 6:17
|
|||
|
Mal
/o[]o\ ====  Bowral, Southern Highlands of NSW, Australia "Out of chaos comes order" - Nietzsche. 1938 Eight Touring Sedan - SOLD 1941 One-Twenty Club Coupe - SOLD 1948 Super Eight Limo, chassis RHD - SOLD 1950 Eight Touring Sedan - SOLD What's this?  Put your Packard in the Packard Vehicle Registry! Here's how! Any questions - PM or email me at ozstatman@gmail.com |
||||
|
||||
|
Re: Wade's Workshop
|
||||
|---|---|---|---|---|
|
Forum Ambassador
|
Tuesday 20th April 2010
Because Wade had a few concerns after driving Big Red home last night, a slight vibration, a chirping noise and the heat riser valve not working, I was given instructions on a step by step basis on how to start the '41 120 engine re-assembly process. While I was engaged in that, Wade began tinkering with Big Red attempting to find the cause and to rectify his concerns. Wade thought his best diagnostic tool to identify the vibration would be John so he took him for a short run to listen and feel for it. John's opinion - It's not a vibration but a slight miss. Back at the workshop checks were performed for spark and fuel delivery finding nothing amiss(pun intended). Next compression testing was performed with 120lbs+ registered on every cylinder, so a sticking valve was ruled out. Because of Wade's recent experiences where holes had been blown through the bottoms of two manifold hot boxes this was the next area investigated. Necessitated removal of the carburettor and visual and mechanical inspection inside the base and sides of the intake manifold below the carb. Didn't find any holes so good news in that regard, but the problem still remained. Inspection of the sealing of the intake manifold to the block didn't find anything amiss either. Although because of similar problems some months back with obtaining a good seal on Old Blue led Wade to undertake check and re-tighten all the intake manifold nuts. And here something did turn up, one of the studs and nuts was stripped, all the others being fine. By means of a new nut with a pristine thread Wade managed to overcome this impediment and snug down the nut securely. During the course of the carb removal the chirping noise was also found. It was the small heat shield at the front and side of the carb between it and the exhaust manifold at that point. The screw securing it to the carb had fallen out and the heatshield was rubbing against the exhaust manifold, the screw lodging between the intake and exhaust manifolds! Easily fixed with a new screw when the carb went back on. Next was the heat riser valve. Wade has installed a new one but because there wasn't one there previously, the old valve had been wired shut, wasn't too sure about how the spring to operate it should be installed. Didn't appear to be working the way it was and it appears it can only go in two ways so Wade was flipping it over to try the other way but with reservations about doing this. At this point I had to leave because of grandfatherly baby sitting committments so will find out tomorrow how it all turned out. Video - Compression test Appears all the work was being done on Big Red, but not so, there was work done on the '41's engine I just choose to focus on Big Red initially. First up I was tasked with ensuring the cam followers were all clean and the holes they ride in were likewise. I was returning each cam follower to the hole it had come from, but during the cleaning found a number of followers had worn or suspect surfaces. Fortunately Harvey had been kind enough to bring along some NOS cam followers to the recent PACA run. Before this they weren't going to be used but now they came in very handy indeed. Cam followers installed, next were the fore and aft oil gallery plugs. Cleaned these up and installed using Loctite to ensure they weren't going anywhere. Next lubed up the cam with what can only be described as the stickiest substance I've ever encountered, an engine assembly lube that sticks and stays ensuring on initial start up that lubrication is present until oil begins circulating. Next the cam retaining plate was installed, similarly lubed up. I didn't do all this by myself as there was a lot of backwards and forwards between Wade and myself and Big Red and the '41 engine. It was just easier to write it this way otherwise there would have been a lot of chopping, changing and fragmenting of the story. Attach file: (24.67 KB)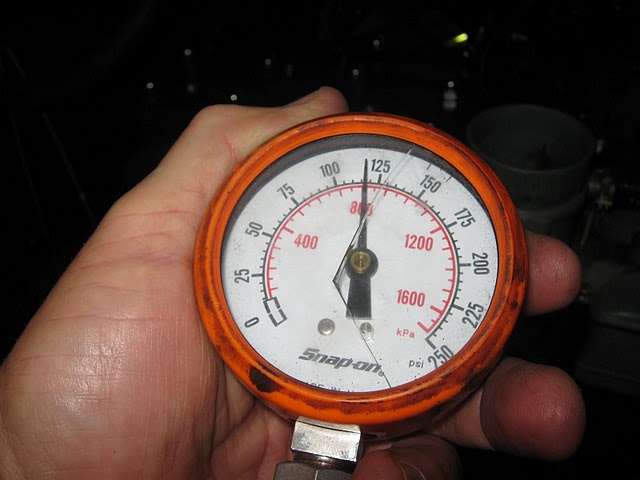 (47.11 KB) (47.11 KB) (46.89 KB) (46.89 KB) (40.40 KB) (40.40 KB) (17.57 KB) (17.57 KB)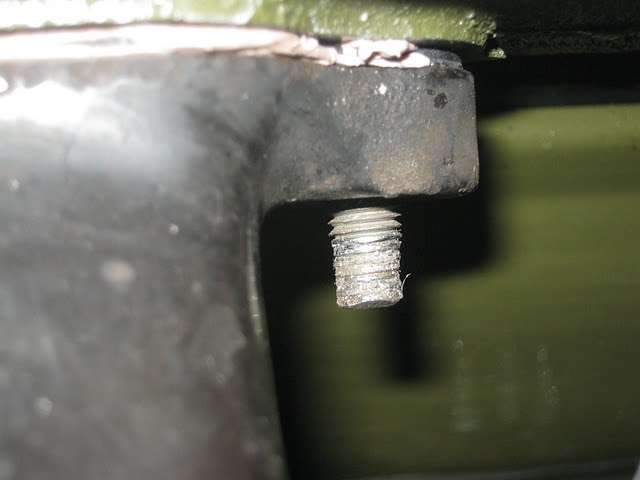 (35.15 KB) (35.15 KB)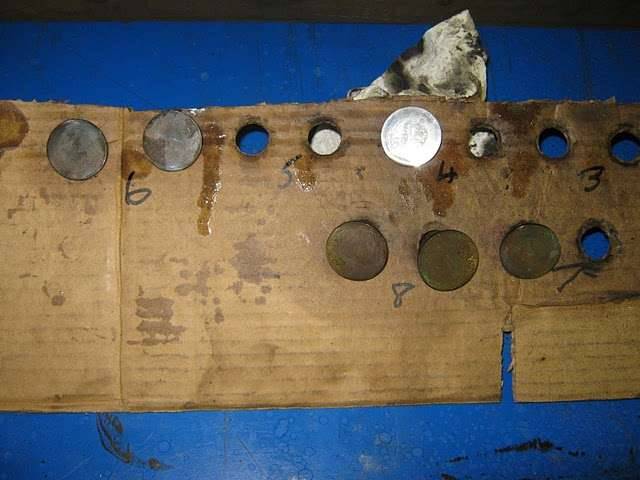 (31.86 KB) (31.86 KB)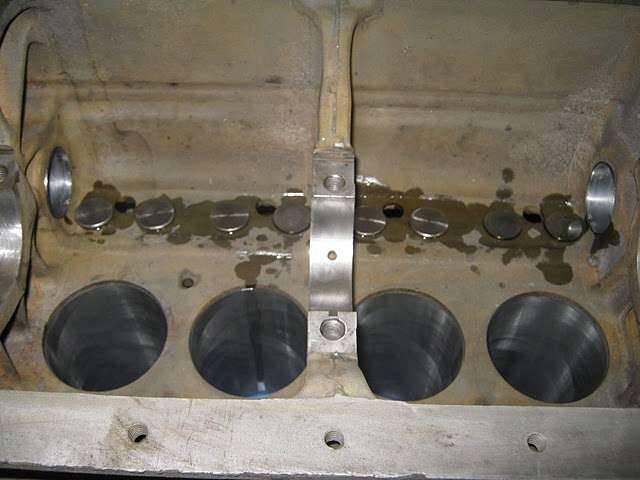 (42.84 KB) (42.84 KB) (27.65 KB) (27.65 KB)
Posted on: 2010/4/20 6:26
|
|||
|
Mal
/o[]o\ ==== Bowral, Southern Highlands of NSW, Australia "Out of chaos comes order" - Nietzsche. 1938 Eight Touring Sedan - SOLD 1941 One-Twenty Club Coupe - SOLD 1948 Super Eight Limo, chassis RHD - SOLD 1950 Eight Touring Sedan - SOLD What's this? Put your Packard in the Packard Vehicle Registry! Here's how! Any questions - PM or email me at ozstatman@gmail.com |
||||
|
||||
|
Re: Wade's Workshop
|
||||
|---|---|---|---|---|
|
Forum Ambassador
|
Wednesday 21st April 2010
Before heading to the workshop, went to the Roads and Traffic Authority office at Ryde because yesterday I'd received a road registration renewal form for the '38 which was sold last July! At the RTA I was advised even though I'd sold the car and completed a transfer declaration it hadn't been received by them. Now I have to complete a Notice of Disposal Form to advise them I am no longer the owner. At the workshop re-assembly of the '41's engine was the main, and only, order of the day. First up was cleaning the crankshaft externally and internally, then the main bearing seats(if that's the term to use) in the block using cleaning fluid then blowing through with compressed air. Next was inserting the new bearing shells in the bearing seats, again using the engine assembly lube, and lifting and lowering the crankshaft into place. Then, more cleaning, this time the main bearing caps, insertion of the new bearing shells, assembly lubed and the bearing caps installed one at a time and the bolts just gently tightened, turning the crankshaft by hand between each bearing installation. Once all caps were installed out with the tension wrench and torqued down in increments to that specified. Last detail was turning over the tags on the "keepers?", what a frustrating process, but it needs to be done so nothing comes undone resulting in catastrophe. Next were the pistons, pins, rods, rings and big end bearings. This was done on a cylinder by cylinder basis picking up a rod, identifying which cylinder it was marked for, unbolting the bearing cap and blowing compressed air through the rod oil holes to ensure they were clean. Fortunately the rods, pistons, etc didn't require any further cleaning. Next a piston was selected, the small end bush lubricated and the piston and rod united via the piston pin. Next was installing the circlips each side of the pin, involving me using circlip pliers to grasp and compress the diameter of the circlip and inserting it in the piston which Wade was holding. Never got one one first go, there was always some fiddling to get the circlips to seat in their grooves. My next task was installing the piston rings which was done by holding the con rod in cushioned jaws of the vice and having the piston sit on top of the jaws providing a stable platform for this frustrating exercise. All I can say is I'm thankful that I didn't break any rings in installing them. I though with practice that I'd improve as I went but that wasn't the case. In fact if anything I seemed to get worse as I went along and Wade had to rescue me a couple of times when errant rings went in grooves they weren't supposed to lodge in. But we got there. As each piston and rod assembly was completed the rings were liberally soaked in oil along with the piston skirts and clamped into a ring compressor. A bearing shell was then inserted in the big end of the rod along with plenty of oil again and inserted into the corresponding cylinder which Wade had oiled up while I was battling with piston rings. With Wade at the crankshaft end directing traffic, "turn it a little that way, no too much back a bit", to align the con rod with the journal. Once aligned I knocked the piston into the cylinder, there may or may not be more instructions, until seated on the big end crankshaft journal. More oiling and insertion of bearing shells into the big end bearing caps and they were inserted onto the end of the rod and the nuts installed and lightly tightened. Not done in any order, just how the numbered rods were picked up, but we must have been doing something right because the last empty cylinder was #2 and thankfully so was the last con rod! The rod caps were then torqued down in increments to that specified. What needs to be done now is the Pal Lock Nuts at the moment they are only on there finger tight - Wade thinks he's read somewhere how these should be tightened but can't remember where and the procedure. So if you know, please let us know. Last procedure for the day was installing the new timing gears and chain. But before actually doing that the front engine plate needs to be mounted. A coat of gasket cement on four surfaces later, the block, two sides of the gasket and the back of the engine plate we were ready to install the engine plate. Only problem was the gasket wasn't quite right ALL the holes were off, enough so that it made the exercise of trying to fit the engine plate a nightmare. But Wade came to the rescue again producing a spare gasket of his own and a much better quality one too. From there it was easy, hardest part being applying the gasket cement to both faces of the gasket. That done Wade, after lining up the marks on the timing gears and the crankshaft and camshaft, slid the new gears and chain onto the crank and camshafts. Next was checking that the gears and shafts were all in alignment across the shafts centres and the marks on the gears, with alignment checking out OK. The retaining nut for the camshaft gear uses a washer with a little tag on the inside which slots into a groove on the shaft and the washer off the '41 was somewhat the worse for wear because it's tag was almost non-existant. Out of his box of tricks, without even an "Abracadra!", Wade produced another washer with a perfect inside tag. Problem solved! Nut tightened and outside tags turned up against flats. That's where we left things for the day, doesn't seem like a lot was done but with yours truly being the main protagonist, albeit with Wade directing proceedings, speed was not a quality in evidence. That coupled with cleaning, oiling, more cleaning, more oiling, especially more and more oil, things tended to get slippery as well which doesn't help one who is clumsy at the best of times. Attach file: (28.45 KB)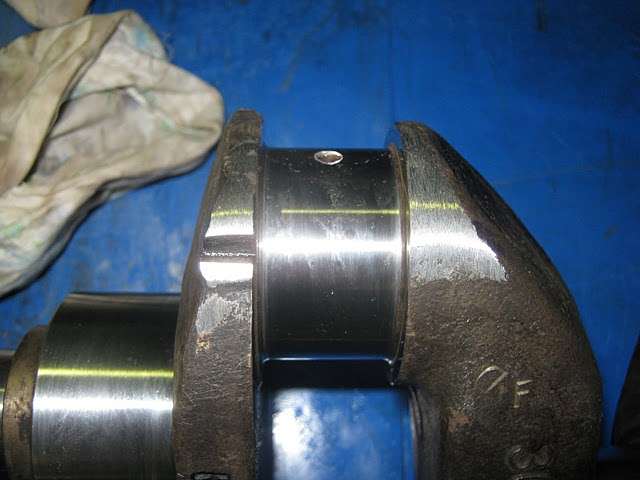 (29.04 KB) (29.04 KB)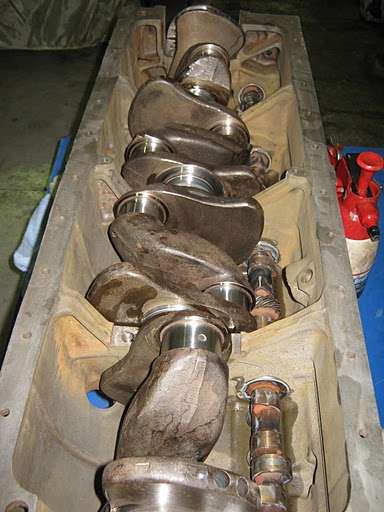 (48.50 KB) (48.50 KB)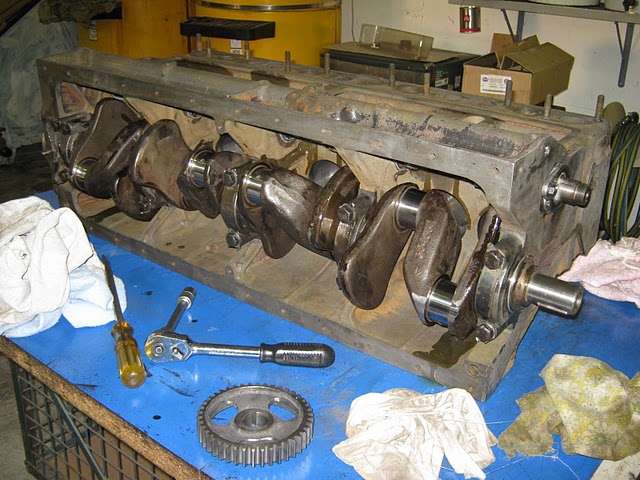 (22.72 KB) (22.72 KB)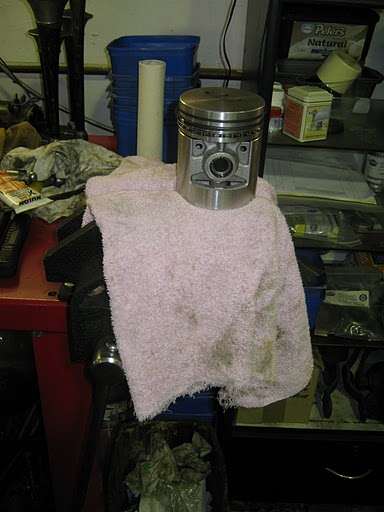 (48.93 KB) (48.93 KB) (38.75 KB) (38.75 KB) (42.06 KB) (42.06 KB)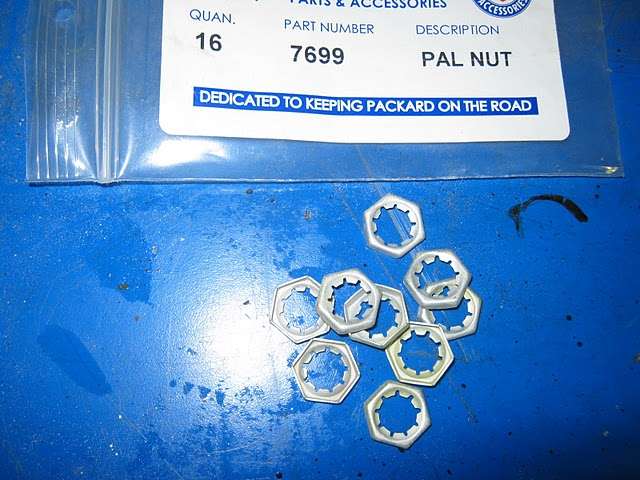 (30.22 KB) (30.22 KB)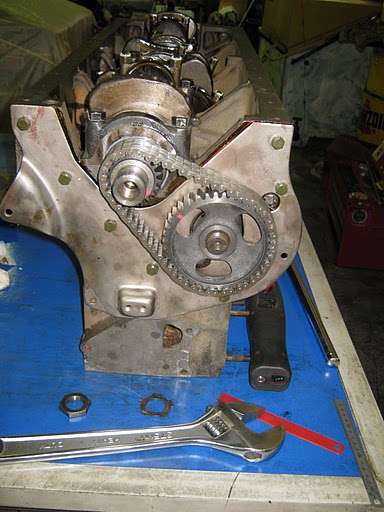 (32.18 KB) (32.18 KB)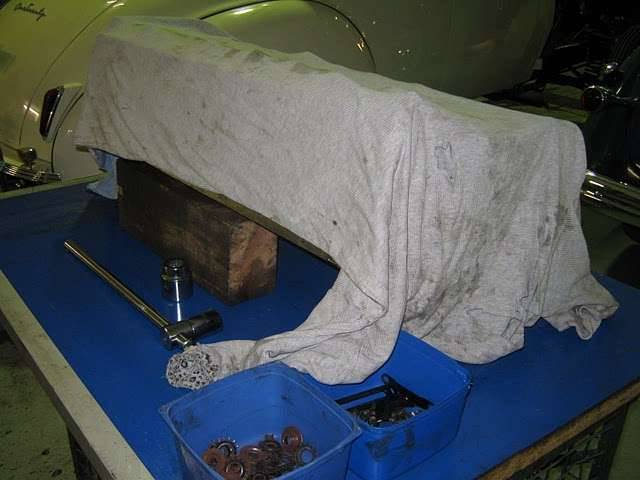
Posted on: 2010/4/21 6:19
|
|||
|
Mal
/o[]o\ ==== Bowral, Southern Highlands of NSW, Australia "Out of chaos comes order" - Nietzsche. 1938 Eight Touring Sedan - SOLD 1941 One-Twenty Club Coupe - SOLD 1948 Super Eight Limo, chassis RHD - SOLD 1950 Eight Touring Sedan - SOLD What's this? Put your Packard in the Packard Vehicle Registry! Here's how! Any questions - PM or email me at ozstatman@gmail.com |
||||
|
||||

|
Re: Wade's Workshop
|
||||
|---|---|---|---|---|
|
Forum Ambassador
|
Thursday 22nd April 2010
No workshop activity to report, instead I went over to Noel's warehouse to pic up some parts from the PACA club stock before they relocate this weekend to their new home in Canberra some 170 miles southwest of Sydney. Picked up some headlight gaskets for Jeff, transmission mounts for Wade and a distributor and front engine mount for myself. Wade was also looking for a starter end plate(nose?) because the spare one he has has a big weld across it and doesn't work. The one he obtained from club stock last year turned out to be too long and the other two presently in stock are close but not right, so the search goes on. On the way back I called into ABC Bearings and bought a new pilot bearing for the '41. Not exactly the same, it's 2mm thicker, it is a sealed bearing and I will put it in the parts cross reference. Arrived at the workshop with the boxful of parts to find Harvey there with Wade. Harvey had called in to pick up the set of chromed acorn head nuts to use on the rebuild of his boss's '39 120. Harvey also dropped off a pic, from a 1980 calender, which features Wade's '34. It's the same pic as the one Wade has up on the wall. Now it's off to see the granddaughters, a complete change of pace. Attach file: (42.55 KB) (45.58 KB) (45.58 KB)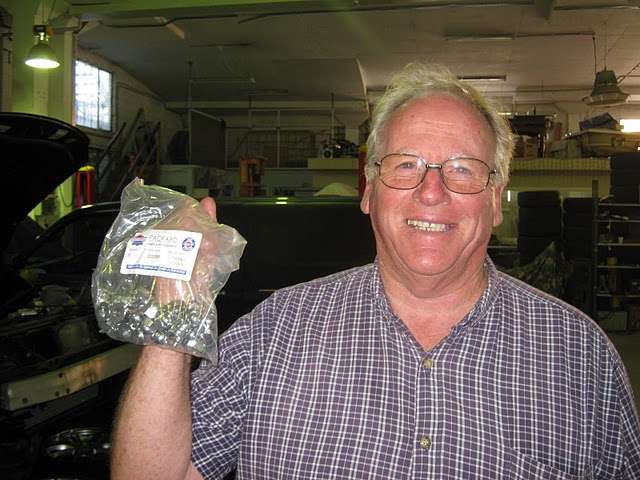 (49.06 KB) (49.06 KB)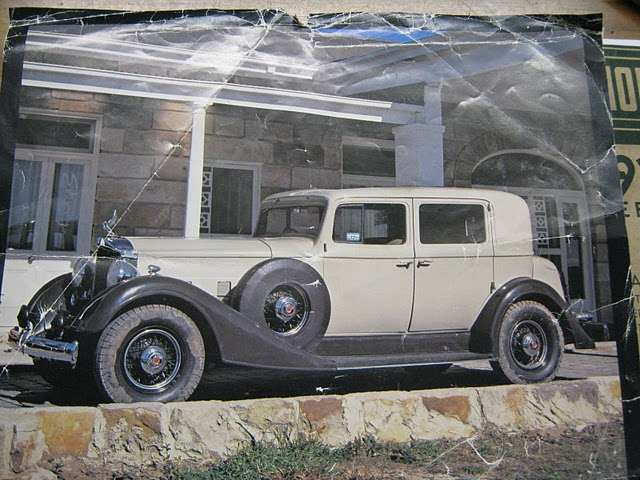 (38.30 KB) (38.30 KB)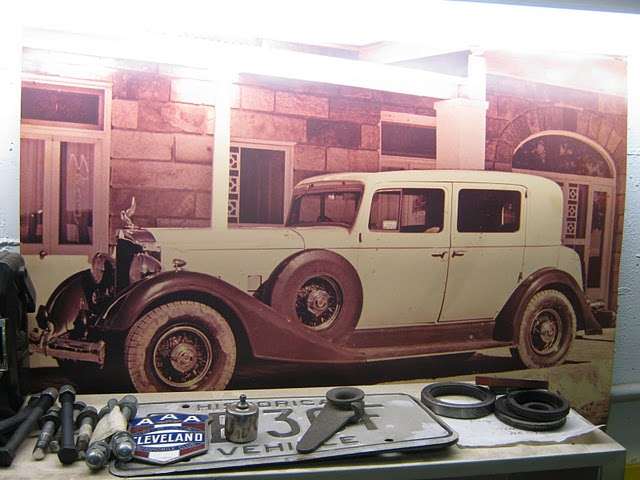 (42.53 KB) (42.53 KB)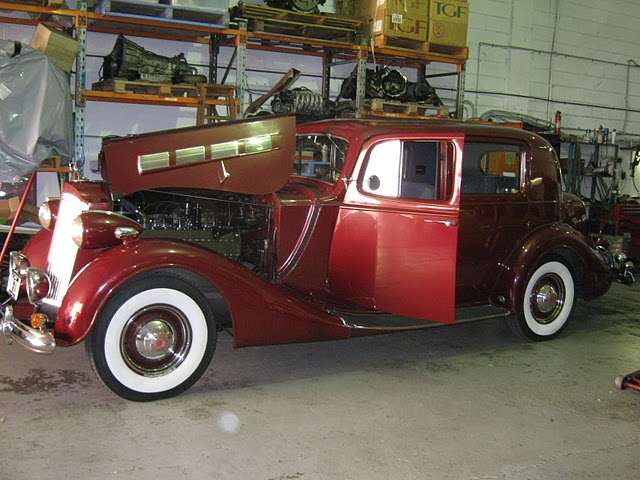
Posted on: 2010/4/21 23:02
|
|||
|
Mal
/o[]o\ ==== Bowral, Southern Highlands of NSW, Australia "Out of chaos comes order" - Nietzsche. 1938 Eight Touring Sedan - SOLD 1941 One-Twenty Club Coupe - SOLD 1948 Super Eight Limo, chassis RHD - SOLD 1950 Eight Touring Sedan - SOLD What's this? Put your Packard in the Packard Vehicle Registry! Here's how! Any questions - PM or email me at ozstatman@gmail.com |
||||
|
||||
|
Re: Wade's Workshop
|
||||
|---|---|---|---|---|
|
Home away from home
|
Hi Mal, Palnut installation: Torque conrod bolts to 60 ft/lbs, This is a "dry" torque and I would set to 45 ft/lbs if oiled. Turn Palnut on bolt with smooth face torward regular nut until it contacts nut, then tighten Palnut one quarter to one third additional turn to lock it in place. The Flackmaster forwarded some very interesting data on Torque spec info to me and it states that base line torque figures are for un lubricated, unplated bolts and explains, to me, why so many people strip locking bolts/ nuts etc on Packards. I have not been able to upload his info so far but i hope to do so.Best Regards Peter
Posted on: 2010/4/22 0:47
|
|||
|
I like people, Packards and old motorbikes
|
||||
|
||||
|
Re: Wade's Workshop
|
||||
|---|---|---|---|---|
|
Forum Ambassador
|
Friday 23rd April 2010
Arriving at the workshop found Big Red up on Rick's hoist with Wade "topping up" all the grease points. Although all the suspension had been rebuilt and greased prior to Big Red going back on the road, Wade ensures that after some initial running in that all greaseable components are "topped up", just in case. He then set about checking out his fuel tank sender unit, because the gauge had a flicker, to see whether it was grounded properly and the sender was functioning properly. This necessitated me climbing a ladder to get onto the hoist then into the front seat to turn the ignition switch on or off and then monitoring the fuel gauge while Wade was under Big Red plugging his multi-meter in at various points and bypassing wiring as required. Turns out there was a faulty connector and its replacement has solved the problem. While Wade was working on Big Red I was installing valves, valve springs, etc then setting the tappets, specified as 0.007" inlet hot and 0.010" exhaust hot. First I had to clean up the valve spring retainers although they'd been cleaned previously. Four months cleaned back to bare metal left some surface rust which the media blasting cabinet fixed. Inserted each valve into place from the numbers Graham had marked on the head of each one. Then valve by valve the anti-rotator, valve spring and retainer and then applying the valve spring compressor, doing the corners first because these are the least accessible, to enable the collets(with a light smear of grease so they stuck) to be slipped into place and the spring compressor released. Only had one mishap at the end of each valve attempt where one of the collets slipped out and had to be done again. Of course there were lots of slips along the way with collets regularly slipping out of oily fingers. Fortunately Wade had provided a telescopic magnet, he's done this before, so I could easily retrieve any errant parts. With all valves, springs, etc in place it was onto setting the tappets and because the settings given in the book are "hot", and I was doing it "cold", the inlets were set @ 0.008" and exhausts @ 0.012". Will go over the settings again on Tuesday to ensure they are all OK. Quote: Peter Packard wrote: Hi Mal, Palnut installation:......Turn Palnut on bolt with smooth face torward regular nut until it contacts nut, then tighten Palnut one quarter to one third additional turn to lock it in place. ........  for the info, my mechanic will be pleased! for the info, my mechanic will be pleased!Attach file: (38.30 KB)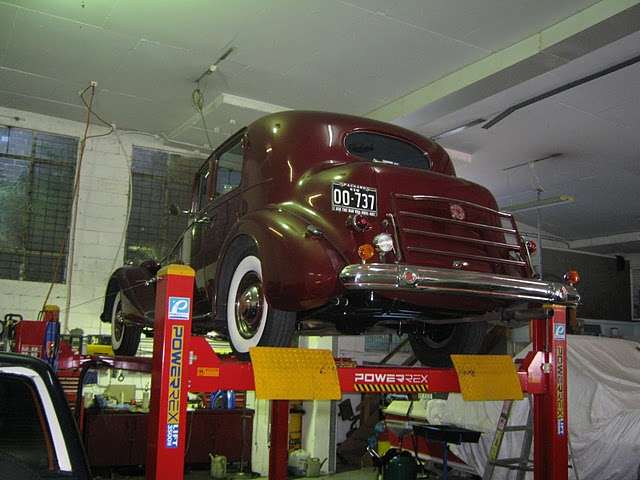 (33.41 KB) (33.41 KB)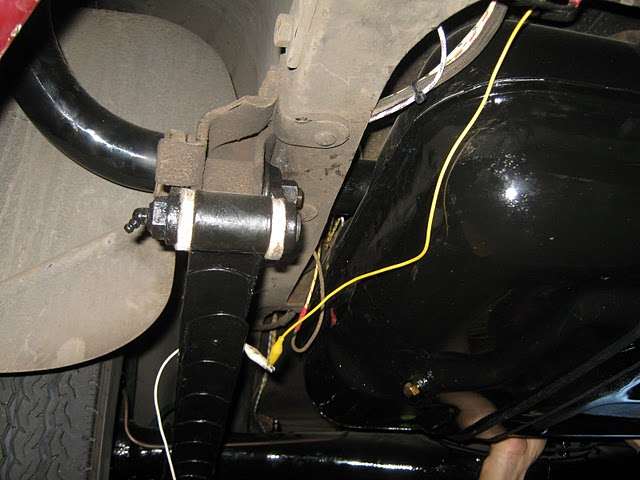 (40.29 KB) (40.29 KB)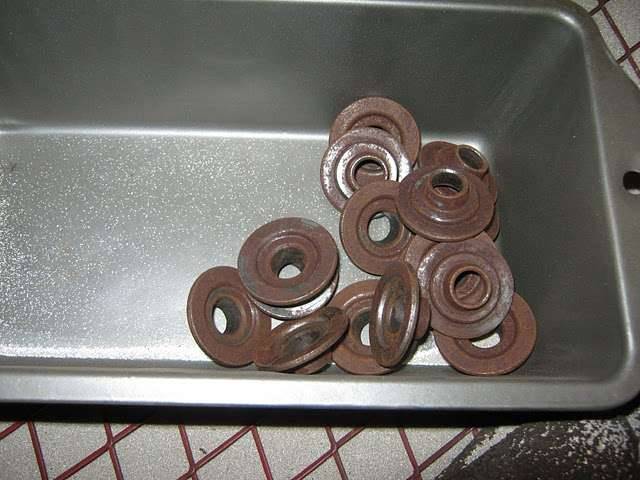 (48.21 KB) (48.21 KB)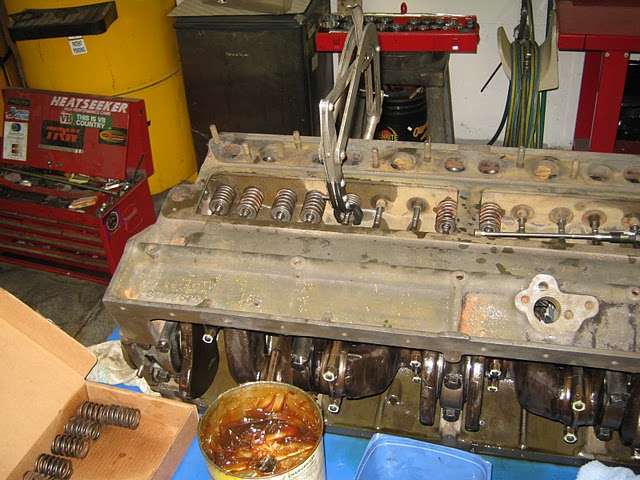 (39.15 KB) (39.15 KB)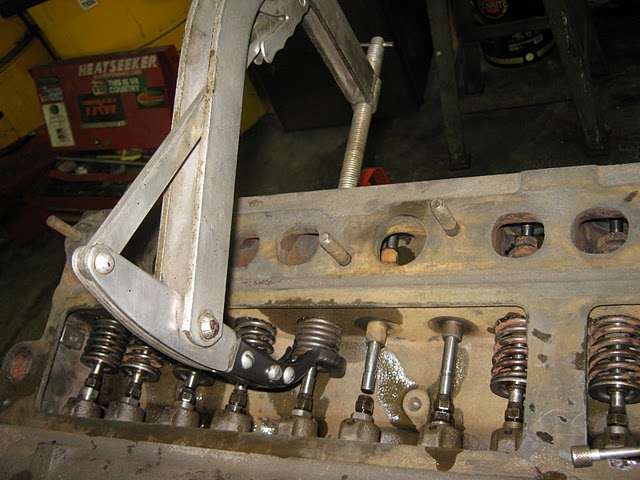 (43.86 KB) (43.86 KB)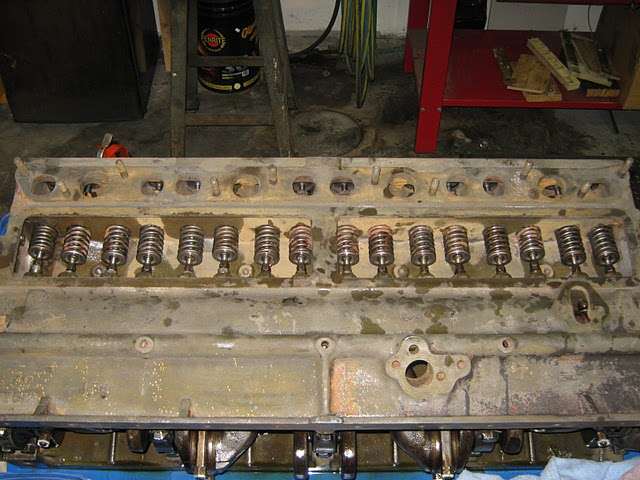 (43.54 KB) (43.54 KB)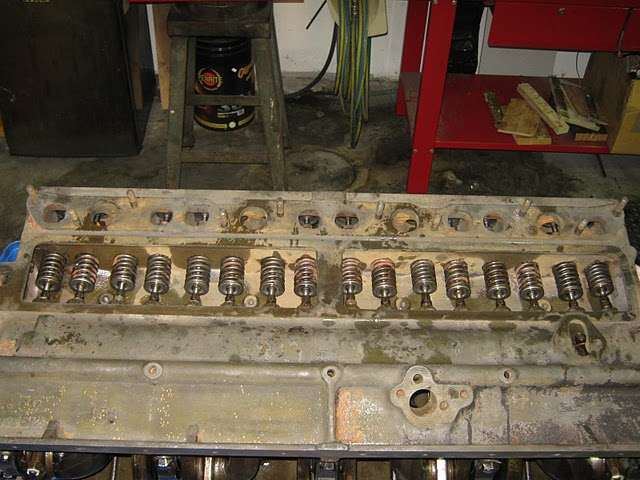 (23.43 KB) (23.43 KB) (40.59 KB) (40.59 KB)
Posted on: 2010/4/22 22:57
|
|||
|
Mal
/o[]o\ ==== Bowral, Southern Highlands of NSW, Australia "Out of chaos comes order" - Nietzsche. 1938 Eight Touring Sedan - SOLD 1941 One-Twenty Club Coupe - SOLD 1948 Super Eight Limo, chassis RHD - SOLD 1950 Eight Touring Sedan - SOLD What's this? Put your Packard in the Packard Vehicle Registry! Here's how! Any questions - PM or email me at ozstatman@gmail.com |
||||
|
||||
|
Re: Wade's Workshop
|
||||
|---|---|---|---|---|
|
Forum Ambassador
|
Tuesday 27th April 2010
Short half day at the workshop. Started by re-checking the tappet clearances. Then onto cleaning up the front of the engine plate and the gasket surface of the timing case cover prior to re-fitting them. Oiled up the new crankshft seal. Also cleaned up the snout of the crankshaft and the hub of the balancer/lower pulley, and that's where a problem reared its ugly head. While cleaning up the snout of the pulley hub noticed what I thought was a crack. The more I looked at it the more it looked like a crack. And why would this be so? Because it is a crack! Up to this point the engine assembly had been going well, slowly but well. But not to fear, surely Wade would have one tucked away? Almost, he had half of one, but unfortunately it was the wrong half. The half I needed was the hub half, not the outside balancer half which Wade had. But what about the worn-out engine out of John's '39 which was slowly leaking oil in the corner? Looked the same, even though it is a 110 and not a 120 engine. Only way to find out was to take it off, clean it up, compare and try it. Came off easily, cleaned up well, compared very favourably but was too tight a fit. Some massaging with 400 paper on the interior of the hub and a likewise cleanup on the crankshaft snout and there we had it. A nice snug fitting pulley/balancer. Next Wade put in a call to Graham Wilkins about my concerns about whether the new pulley/balancer itself needed balancing. The answer was yes, and because I was leaving soon for granddaughter sitting duties I took the opportunity to leave at that point to drop the balancer off with Graham. If I'd had the time I could have stayed and taken it with me, but because I was on a tight timeline said I'd come back tomorrow. And here I got a surprise, Graham said he'd drop it in at the workshop tomorrow morning because he has a delivery to make in the neighbourhood! And what was Wade doing while I was discovering a crack in the fabric holding the universe together? Besides confirming said crack, finding the wrong half of a replacement balancer and removing the old balancer from John's '39 110 engine, he was re-installing the radio back into Big Red. He was doing this outside in the sunshine, a lovely autumn(fall) day here in Sydney and while doing that had a call from Noel. Outcome of which is that Noel's '39 120, presently in my garage, is likely to go down to the workshop tomorrow. It'll change places with Old Blue, Wade's '37 120 and Wade will start work on replacing the wiring harness. Only trouble is, I fired up Noel's '39 yesterday with the intention of giving it a short run to keep things circulating but never left the garage. Couldn't find Reverse or First gear and it appears the shift is hanging up for want of a better term. The plan is that Wade will drive Old Blue up late tomorrow morning, work on getting the shift fixed in the '39, then driving the '39 back to the workshop. Other recent items of interest, were working on the running boards again yesterday with still work to be done on both boards, and receiving delivery of the chromed & domed head nuts and washers I'd ordered last week from Max. Seeing Harvey's nuts the other day, I just couldn't resist the allure of the "bling". Attach file: (45.56 KB) (44.40 KB) (44.40 KB) (39.40 KB) (39.40 KB)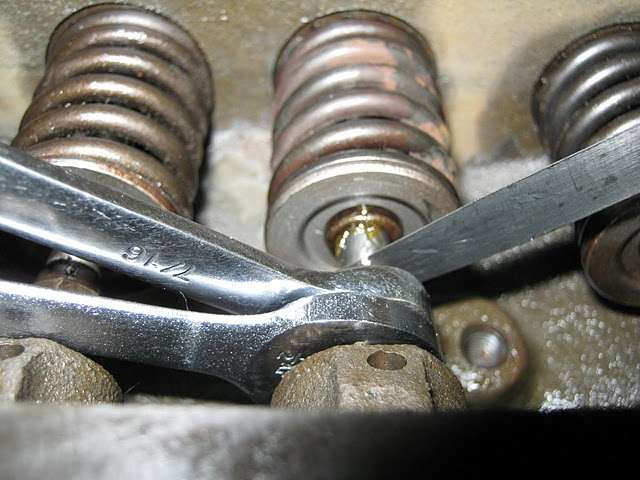 (33.55 KB) (33.55 KB)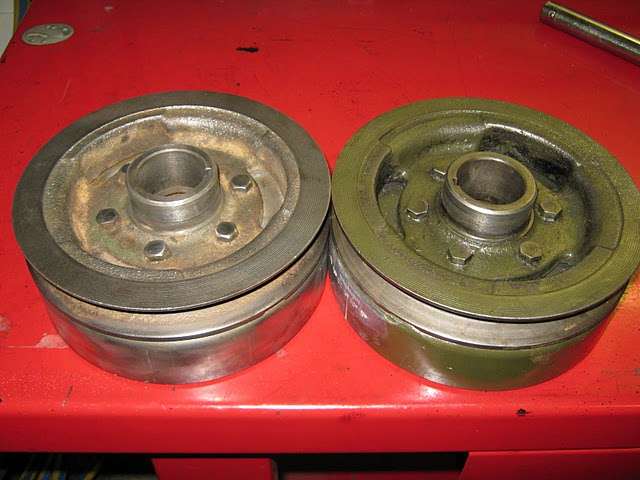 (31.84 KB) (31.84 KB)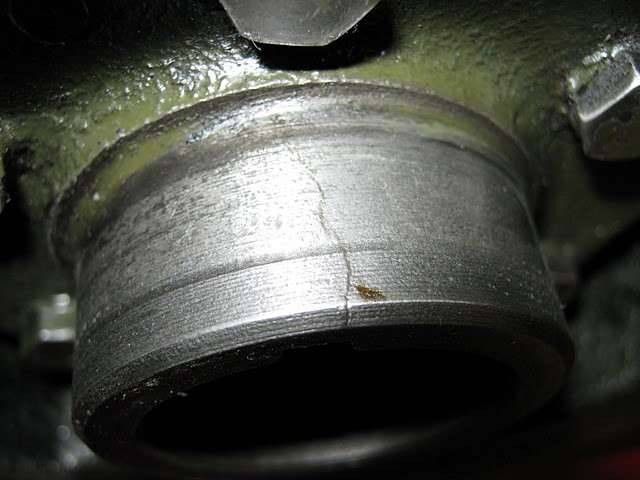 (46.77 KB) (46.77 KB)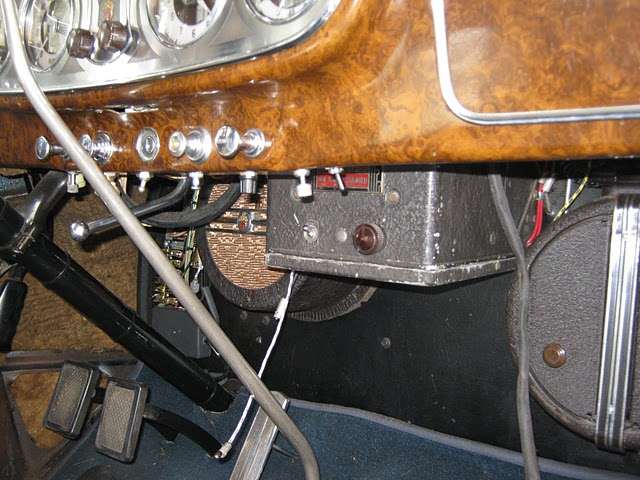 (35.52 KB) (35.52 KB)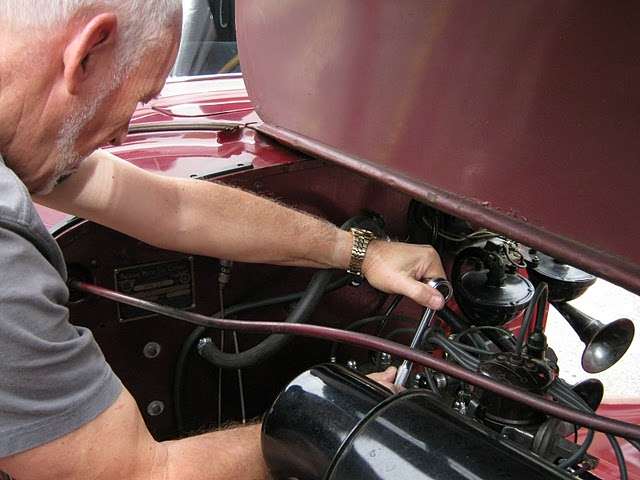 (45.49 KB) (45.49 KB)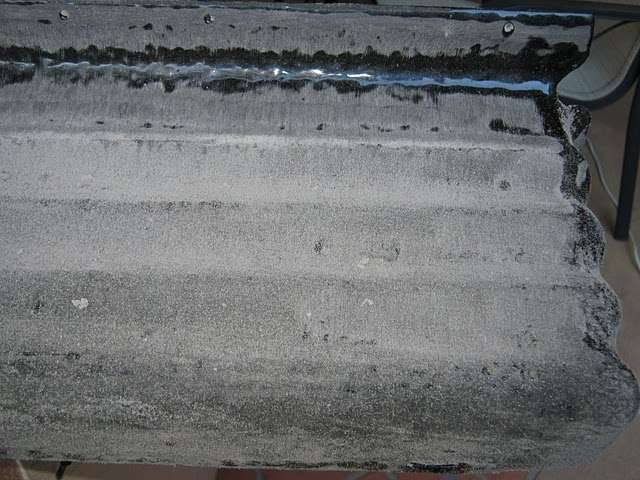 (45.83 KB) (45.83 KB)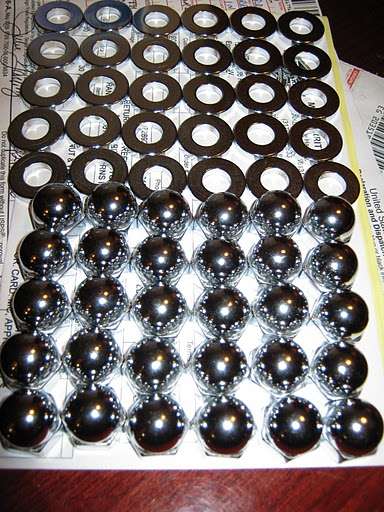 (41.53 KB) (41.53 KB)
Posted on: 2010/4/27 5:33
|
|||
|
Mal
/o[]o\ ==== Bowral, Southern Highlands of NSW, Australia "Out of chaos comes order" - Nietzsche. 1938 Eight Touring Sedan - SOLD 1941 One-Twenty Club Coupe - SOLD 1948 Super Eight Limo, chassis RHD - SOLD 1950 Eight Touring Sedan - SOLD What's this? Put your Packard in the Packard Vehicle Registry! Here's how! Any questions - PM or email me at ozstatman@gmail.com |
||||
|
||||
|
Re: Wade's Workshop
|
||||
|---|---|---|---|---|
|
Home away from home

|
Mal, it seems that rebuilding Packard engines at the Workshop is easy as 1-2-3. I like how the rebuilds of the inline 8 engines have been documented!
tracking the ''bling''....well you are right about this one Mal. I think its a way to see, how long one postage can travel from point A to B!
Posted on: 2010/4/27 15:44
|
|||
|
Dreaming about a 1954 Packard Clipper
|
||||
|
||||
|
Re: Wade's Workshop
|
||||
|---|---|---|---|---|
|
Forum Ambassador
|
Wednesday 28th April 2010
After donating blood plasma and platelets earlier in the morning started Noel's '39 up and still couldn't find anthing other than 2nd and top gear. Noel had given some instructions "I think I probably left it in overdrive. You have to pull the lever out (under the dash near the vent handle) in order to reverse it." and "by the way it needs to be in neutral before you pull the lever right out. If it sticks half way, which sometimes happens, you can pull it out all the way while the engine is running. The idiosyncrasies of vintage motoring!!" Well in, out, idiosyncrasies or whatever it still wouldn't go into reverse! Called Wade, I'd alerted him yesterday about this, and a little later he arrived. Brought his shop light with him, I'd alerted him about that too, because there's not much light in my garage. Found the gear linkage out of whack which some gentle persuasion easily fixed. Back in place some dry runs shifting gears and it all looked and felt to be working. However after starting the engine, although there was an improvement, now had first but still no reverse. Turned to muscle power, mainly Wade's while this fat guy sat behind the wheel, to push the car out into the driveway and roll it down onto the road. Thankfully my driveway slopes downhill from the garage. Wade then slotted Old Blue into the garage, took over driving of the '39 and he followed me back to the workshop. Once there another manual effort was required to back it in but this time Wade steered while John, Graham and I pushed her into the recently vacated bay. Wade then set about familiarising himself with both the new harness and the wiring as it presently is on the '39. Wade also removed Noel's radio, although he'd fixed the speaker previously(It didn't actually have a speaker in the speaker box and Noel had wondered why it didn't work, not even static!), it still doesn't give a good sound. So Wade's nights as well as days will be taken up on working on Noel's '39. While Wade was doing that, my efforts were directed to the '41's engine. Turns out Graham Wilkins wasn't able to bring the balancer over this morning so he had it couriered over in the afternoon. First up was re-installing the oil gallery plugs on the outside of the block. Next the new large cam gallery welch plug at the rear of the block. Then the new head studs, all 27 of them. The bellhousing was then bolted back on to the block. At this point the flywheel was going to be re-installed too, but......no bolts! Seems they are still with Graham Wilkins so I'll contact Graham tomorrow morning and pick them up before going to the workshop. Finally the timing cover was installed, but not before it was exchanged for one from the seemingly never-ending supply of parts on Wade's shelves. My cover had a dent in it where the cork seal is meant to seal. A quick clean up of the "new" timing cover, liberal application of gasket cement, pre-oiling of the new timing chain and gears and on it went. Attach file: (34.77 KB)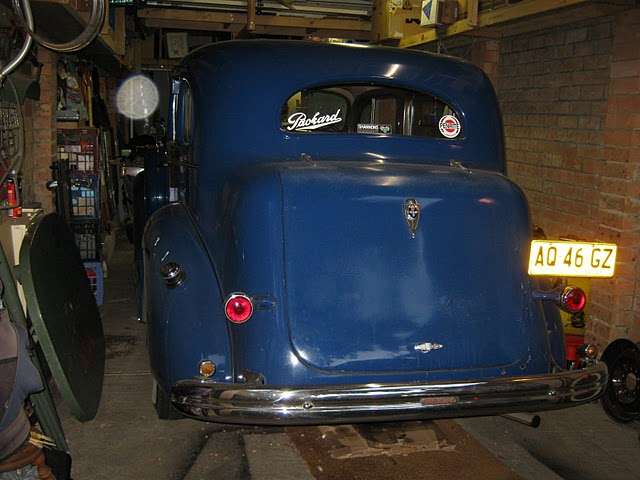 (30.72 KB) (30.72 KB) (41.40 KB) (41.40 KB)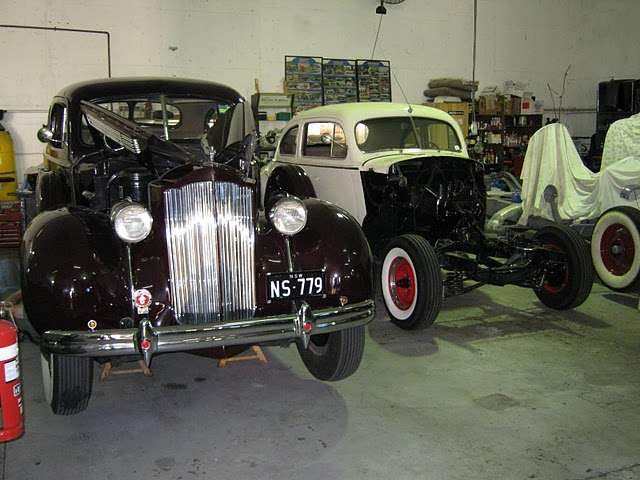 (35.91 KB) (35.91 KB)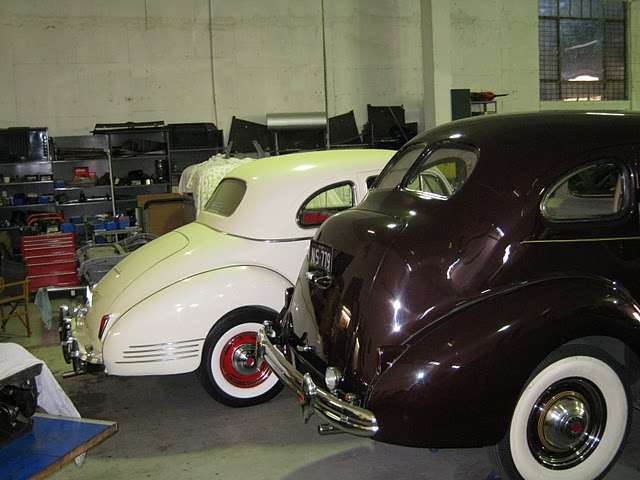 (40.33 KB) (40.33 KB) (40.84 KB) (40.84 KB)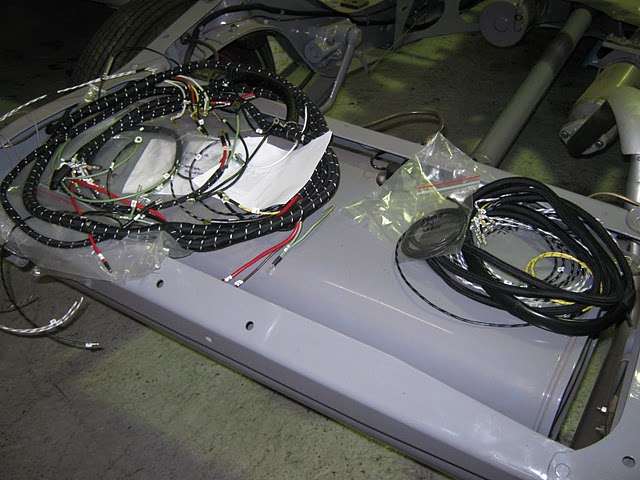 (48.65 KB) (48.65 KB)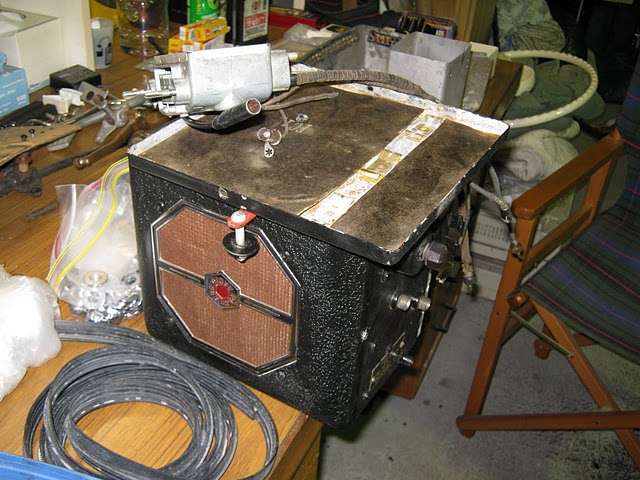 (61.95 KB) (61.95 KB)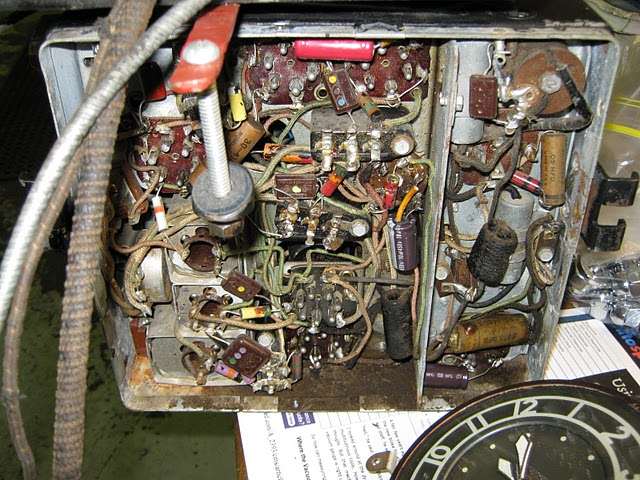 (43.27 KB) (43.27 KB) (46.44 KB) (46.44 KB)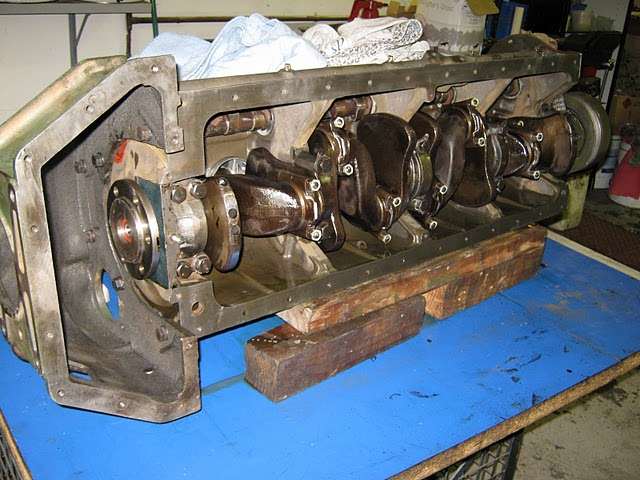 (31.41 KB) (31.41 KB)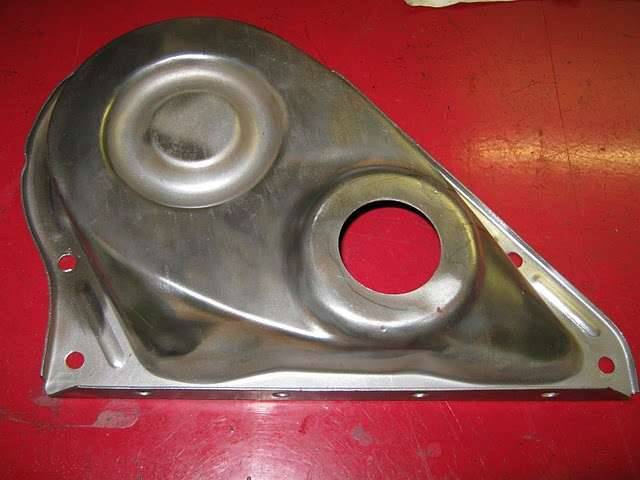 (36.62 KB) (36.62 KB) (45.53 KB) (45.53 KB)
Posted on: 2010/4/28 4:05
|
|||
|
Mal
/o[]o\ ==== Bowral, Southern Highlands of NSW, Australia "Out of chaos comes order" - Nietzsche. 1938 Eight Touring Sedan - SOLD 1941 One-Twenty Club Coupe - SOLD 1948 Super Eight Limo, chassis RHD - SOLD 1950 Eight Touring Sedan - SOLD What's this? Put your Packard in the Packard Vehicle Registry! Here's how! Any questions - PM or email me at ozstatman@gmail.com |
||||
|
||||
Register To PostTopic is Locked


