|
Re: Vacation Car - 56 Patrician
|
||||
|---|---|---|---|---|
|
Home away from home

|
On the factory A/C vents,
Would the blueprints be helpful with a 3D printer, or do you need the part to use with a 3D printer?
Posted on: 2020/7/7 13:23
|
|||
|
||||
|
Re: Vacation Car - 56 Patrician
|
||||
|---|---|---|---|---|
|
Home away from home

|
Quote:
Let the Ride Decide: Depending on the detail of the prints the blue prints would actually be better. The blue prints should have the tolerances that the factory says it should have while any physical part that could be used for 3D printing could not only be out of factory specification, but could be damaged, modified or simply just warped/shrunk due to age and sunlight. From the blue prints a 3D model could be created in the computer and then 3D printed.
Posted on: 2020/7/13 9:48
|
|||
|
||||
|
Re: Vacation Car - 56 Patrician
|
||||
|---|---|---|---|---|
|
Home away from home

|
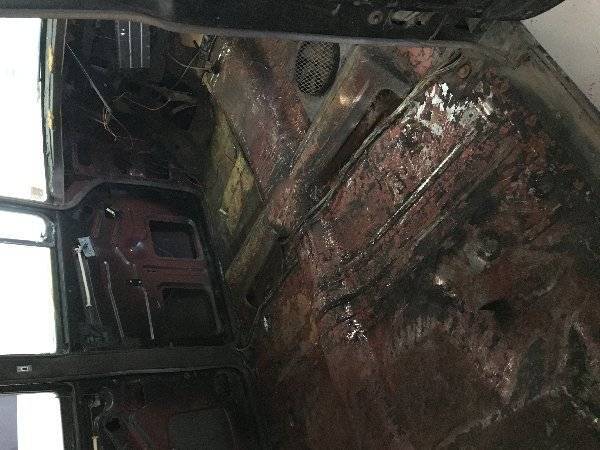
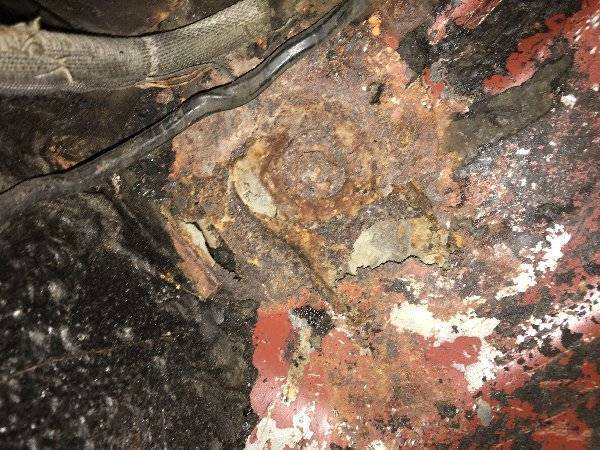
This past week I was able to go back to where the car is located at to get some work done. I took an air needle to the underside of the car to help prepare the frame for paint and knock off any lose undercoating. I tried using it for the interior and it did okay removing some undercoating but not much. I guess I didnt need to go as far as I did but I figured I got a 1/3 off so might as well get the rest off. So I got air chisel out and went to town getting about 80% of the undercoating out of the interior. Its a good thing I did, I found more rust near the body mount in front of the rear drivers side tire.
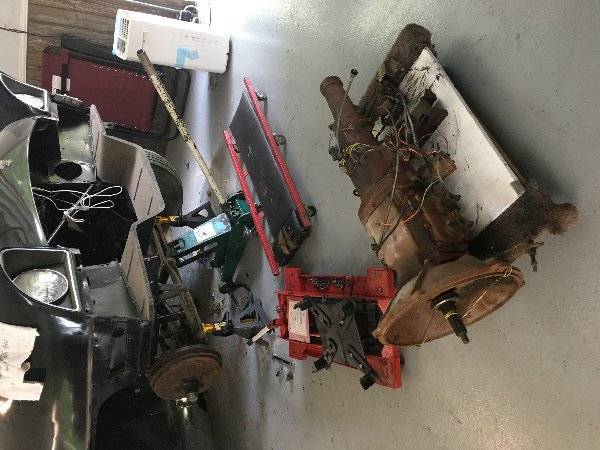
In the process of attacking the underside I also removed the driveshaft and transmission. One thing I noticed was that one shift fork was able to shift from I believe it was 3rd gear, neutral and reverse. However the other shift fork controlling 1st and 2nd gear was frozen solid. I was going to tear into the trans anyway but hopefully that frozen fork isnt anything serious. I was told this was driven after the conversion so I guess something happened in storage since the 90's. Next projects on the car is to hopefully get the glass out of the doors, what trim I could get off the doors and the rest of the car, finish removing the undercoating from the interior and start removing the rust prone areas of the car. I think I am going to get the quarter panel from that eBay listing and at least have something to start with for repairing that section of the car.
Posted on: 2020/7/13 10:04
|
|||
|
||||
|
Re: Vacation Car - 56 Patrician
|
||||
|---|---|---|---|---|
|
Home away from home
|
The front shift lever works the 3rd (High) and 2nd gears; the rear lever works the 1st (Low) and Reverse gears.
Posted on: 2020/7/14 17:26
|
|||
|
We move toward
And make happen What occupies our mind... (W. Scherer) |
||||
|
||||
|
Re: Vacation Car - 56 Patrician
|
||||
|---|---|---|---|---|
|
Home away from home

|
This past week I was able to get some time at the folks place to get more work done on the patrician. I finished removing the undercoating on the floors and found a couple more rust holes, mostly where the seat tracks meet the floor. Given what I found on the floor, I should probably remove the undercoating in the trunk to insure there is nothing hiding under that as well.
I was able to remove the door glass and regulators out of all the doors. For the front the regulators were removed first, loosen the vent window, removed glass and then vent window. The rear the regulator was removed, loosen vent window and shifted the tracks to remove the glass followed by removing the vent window. I did notice on top of needing new glass for the front doors I am also going to need a regulator and motor for the driver door. for what ever reason the regulator and motor were separated from the car. Hopefully Ill be able to find one. All door trim was removed including the door handles... that was a major struggle. all but one spring clip was damaged during removal. So I am going to need to add that to the list of parts I need to find. other work included removing the hood, fenders, radiator support, and trunk lid. It is bitter sweet seeing the progress on the vehicle, while the vehicle is looking less and less like a vehicle. So I believe the next time I am should be spent removing the wiper system, remove what is left of the evaporator box, remove the under coating in the trunk, start stripping the paint in the engine bay and start cutting out the bad metal to weld in new stuff!!
Posted on: 2020/8/18 13:24
|
|||
|
||||
|
Re: Vacation Car - 56 Patrician
|
||||
|---|---|---|---|---|
|
Home away from home

|
I had the same rust in the seat track areas. After cutting away the bad metal, I found there is a channel running below the rusted area. It is a concave channel and seems to collect mud and moisture. It apparently just sits there until it rusts through the floor.
Nice progress! Lots of work trying to fix the rust. I'm right in the middle of trying to figure that out myself, and it's not fun. -Kevin
Posted on: 2020/8/18 18:01
|
|||
|
||||
|
Re: Vacation Car - 56 Patrician
|
||||
|---|---|---|---|---|
|
Home away from home

|
Quote:
Thanks!! Yea I am not a fan of this rust repair stuff, but its just the nature of the beast
Posted on: 2020/8/19 13:27
|
|||
|
||||
|
Re: Vacation Car - 56 Patrician
|
||||
|---|---|---|---|---|
|
Home away from home

|
So now that I was able to finish up some home projects I now have time to get to the parts out here in Pittsburgh!!
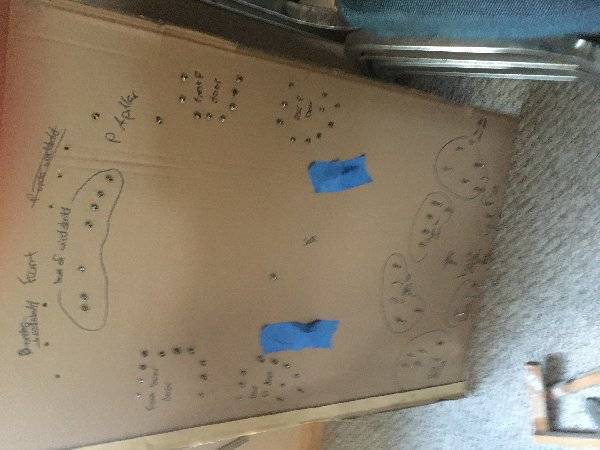
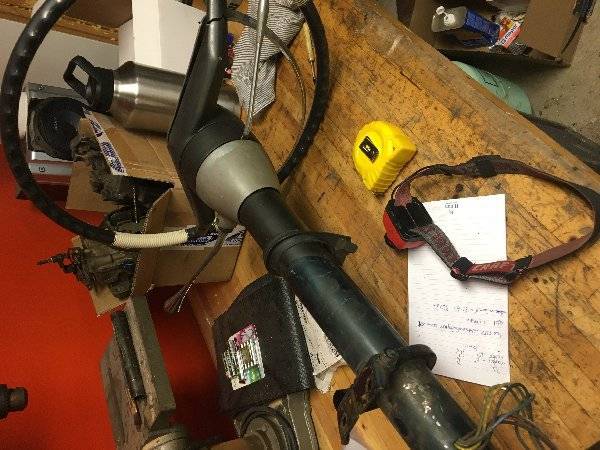
When we removed the interior trim from the car we taped all of the screws in the holes they came out of. Well I removed them from the parts and punched them into some cardboard so I know where they all come from. Learned that trick from Hemmings. I disassembled the steering column to get that ready for paint. Pretty excited to get that back together with new paint and grease so shifting that transmission is smooth as silk. with all of that done I started to get the sanding done. I should be able to finish that by the end of the week and hopefully get them painted in the next couple months. Then in the mean time clean and make sure the gauge cluster is in working and presentable order.
Posted on: 2020/8/26 17:57
|
|||
|
||||
|
Re: Vacation Car - 56 Patrician
|
||||
|---|---|---|---|---|
|
Forum Ambassador
|
Before hooking up the Ultra gearshift linkage again it would be a good idea to manually check the lever on the drivers side of the trans with nothing connected. Grab hold and move it thru the range from Neutral to Reverse and back again. Make sure you feel each detent and that there is no excess slop or much movement more than a 1/8" or so at the end of the lever when you are in a detent.
There is a lever attached to the shaft inside the trans that moves the manual valve and detent. The setscrew threads on that inner lever have a nasty habit of stripping and letting the setscrew and lever loosen. If it gets bad the lever can no longer move the valve thru the complete range or if the screw falls out you might be unable to get into any gear. Things like that always seem to happen in the middle of nowhere or at a really inconvenient time.
Posted on: 2020/8/26 18:24
|
|||
|
Howard
|
||||
|
||||

 (266.79 KB)