|
Re: Wade's Workshop
|
||||
|---|---|---|---|---|
|
Forum Ambassador

|
Wednesday 16th February 2011
Mat, it works!  This afternoon, after a lot of "fine tuning", the '34 roared into life with alternator mounted and running. There were wide grins all round for a couple of very happy people over in the Packard corner of the workshop. But before getting there, there were a number of things happen, aka "fine tuning". Just after arriving at the workshop John went round to Repco and picked up the two fan belts ordered on Monday(Both A11 in Section, one 1030mm, the other 1300mm). Because we're using both pulleys on the crank with the front one only driving the water pump and the rear one the water pump and alternator two different length belts are required. But the trouble was they were both too long even though they didn't have a 1300mm belt and supplied a 1295mm instead. What fooled us was we did have an A13 1030mm belt and it fitted well so assumed(yeah we know, makes an 'ass' of 'u' and 'me') all that needed to be done was get the same length but in the A11 section. Wrong, the length needs to be shorter because the belt sits lower in the vee, lower yes but not bottoming. Because we hadn't measured the required length for the front belt, thought it would be a good idea to do so now. And the measurement - 990mm, quite a difference! Yesterday we'd measured 1270mm for the rear belt and scaled up to 1300mm because although John had an A11 1270mm belt, it didn't fit! Or so we thought. Turns out by rotating the alternator right down on it's bracket it does fit and fits well! So we had one belt, the rear, and needed a new front one. Fortunately as John had to do a test drive he took the opportunity to return the two "too long" belts to Repco and pick up a 990mm one instead. This afternoon, after a lot of "fine tuning", the '34 roared into life with alternator mounted and running. There were wide grins all round for a couple of very happy people over in the Packard corner of the workshop. But before getting there, there were a number of things happen, aka "fine tuning". Just after arriving at the workshop John went round to Repco and picked up the two fan belts ordered on Monday(Both A11 in Section, one 1030mm, the other 1300mm). Because we're using both pulleys on the crank with the front one only driving the water pump and the rear one the water pump and alternator two different length belts are required. But the trouble was they were both too long even though they didn't have a 1300mm belt and supplied a 1295mm instead. What fooled us was we did have an A13 1030mm belt and it fitted well so assumed(yeah we know, makes an 'ass' of 'u' and 'me') all that needed to be done was get the same length but in the A11 section. Wrong, the length needs to be shorter because the belt sits lower in the vee, lower yes but not bottoming. Because we hadn't measured the required length for the front belt, thought it would be a good idea to do so now. And the measurement - 990mm, quite a difference! Yesterday we'd measured 1270mm for the rear belt and scaled up to 1300mm because although John had an A11 1270mm belt, it didn't fit! Or so we thought. Turns out by rotating the alternator right down on it's bracket it does fit and fits well! So we had one belt, the rear, and needed a new front one. Fortunately as John had to do a test drive he took the opportunity to return the two "too long" belts to Repco and pick up a 990mm one instead.While John was out turned to Noel's '39, for which Wade had had a long discussion yesterday with Peter Packard. They have come to the conclusion that because of wear in some of the components in the OD a spacer or shim is required for re-alignment of the components. That means the OD is coming out but not the trans this time. In order to facilitate this the rear end of the '39 was jacked up and jackstands put in place so there's working room under there. By this time John had returned with the 990mm belt and it fitted. However, in my own inimitable style, I hadn't tightened, let along used spring washers on, the bolts holding the alternator bracket to the mounting plate and consequently it was flapping in the breeze when the belts were put on. Fixed, aka fine tuned, with the appropriate washers and properly tightened. Then some fine tuning to the alternator tensioning arm, it was slightly bent, but a little persuasion with the heavy hammer soon straightened it out. Although now all looked good, it was once again time to pull the whole thing apart so it could all go back together for the final time. Needed to apply gasket sealant to the oil cooler/filter housing being blocked off by the mounting plate. Also needed to apply another sealant to the bolt holes drilled and tapped into the block to hold the mounting plate. Additionally the three lower bolts for the mounting plate each have a spacer and load spreading washer between the mounting plate and the water jacket side plate. But....because of the difficulty of inserting the bolts into the mounting plate then the spacers and washers between the two plates the lower bolts, spacers and washers were installed with the mounting plate. held in place by some more sealant. Bloody awful stuff to work with using your hands but it serves a purpose. All went well with Wade holding the mounting plate and bolts/spacers/washers 'glued' in place and me screwing on a couple of nuts on the former oil cooler/filter housing studs. Then the bolts for the top mountings were inserted together with spacers and washers. And that's where I came undone! Washers! When doing all the measuring, trial fitting, etc I overlooked the fact I didn't have washers under the heads of the bolts. As a consequence, with washers now under the bolt heads, there wasn't enough thread left on the bolts I'd ground down to provide sufficient thread depth. Not to worry, a quick trip to Lee Bros for some new bolts solved that. It also taught me a vital lesson in not taking short cuts or taking things for granted. While I was out Wade was back under the '39 taking off the drive shaft, rear OD mount, disconnecting the Solenoid, disconnecting the OD cable and removing the Flackmaster snubber. With all that done, and returning from the right length bolt quest, work resumed on mounting the alternator mounting plate. It's wonderful what can be done when you have the right fasteners available, it all comes together as it should! Saying that, we resorted to using shortened bolts for two of the lower mountings as the full length bolts bottomed out, so they came in handy after all. Then the tightening sequence, because in my measuring and drilling of holes initially a couple of the oil cooler/filter mounting ones were slightly off and these had to tweaked down first followed by the rest of the oil cooler/filter then by the larger perimeter right length bolts. The perimeter bolts also had plenty of sealant applied because of the possibility the holes penetrated to the water jacket. A number of sequences were performed before everything snugged down nicely. Then the cooling system was refilled and a leak check performed, unfortunately finding not one but two. One was a very slight leak from the water pump housing which disappeared when the pump housing nuts were re-tightened. The other was the bottom right bolt of the alternator mounting plate and was a more serious proposition. Water was making its way along the threads of bolt, through the spacer and dribbling down from the end of the spacer and the alternator mounting plate. It meant 1) that bolt penetrated the water jacket and 2) the spacer wasn't square. Made another spacer, this time with the ends square to the body. But it took a number of attempts before it was the right length because I made it a fraction too long. Necessitated repeated trips between the grinding wheel and the '34 before it had shrunk to the correct length. Wade also had a look at the bolt being used, it was one of the ground down ones and determined it could be a little longer to better fill the hole. So a slightly longer ground down bolt was selected, a chamfer ground on its end, liberal amounts of sealant applied in and around the bolt hole and fittings and back it went together. Filled with water and......no leaks! Then startup.....and as I said earlier.....it works! Of course it wasn't yet connected up to charge, but Wade had that in hand having recycled a length of cable and fittings from Noel's old '39 harness. So with a new connector on the alternator end of the cable it was run between the alternator and a terminal on the starter motor. Multimeter testing without the wire mounted confirmed the alternator was pumping out over 6V so all looked good. But it wasn't! Although the multimeter was registering over 6V and going up over 7V when revved the ammeter inside the '34 was just showing a discharge and no variation when revved. Fortunately Wade figured out that the alternator needed to be routed through the cabling still extant on the '34's generator because it was from there the ammeter was being fed and consequently the battery. At least that's what I think he said, when it comes to things electrical I'm in the dark.  However once connected up in this sequence it all worked so Mat, now you won't be in the dark. However once connected up in this sequence it all worked so Mat, now you won't be in the dark.That wasn't end for the '34, because the current starting procedure is a two man operation necessitating one operating the choke manually while the other starts the car. The rod between the choke mechanism and the carb is missing for a start but Wade believes he has a spare, just has to find it. Took off the choke mechanism, it's a minor engineering marvel in itself how it works and, apart from needing a good cleanup and the fact the spring wasn't hooked up properly, looks to be OK. Also boxed up my old '41 120 harmonic balancer to be shipped to Dave for Old Blue as a temporary fix until he can get his repaired or locate a good one. The other thing I did was take some pic's of The Fossils firewall for a guy on the PAC Site who'd PM'd me. Just as well I asked Wade about his queries because I would have given him the wrong info otherwise. Attach file:  (35.06 KB) (35.06 KB)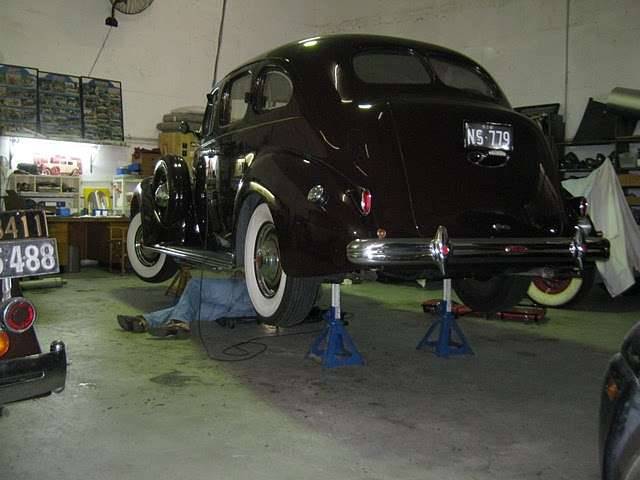 (23.26 KB) (23.26 KB)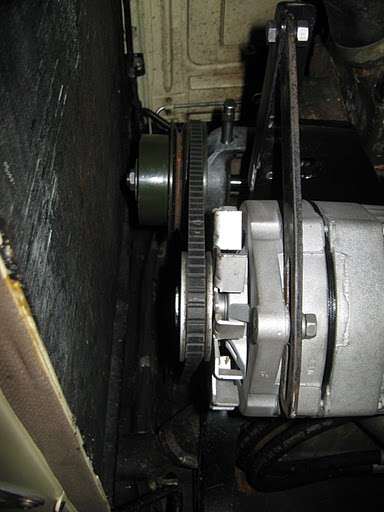 (24.97 KB) (24.97 KB)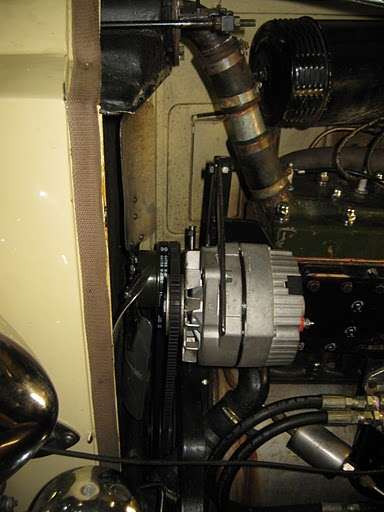 (33.73 KB) (33.73 KB)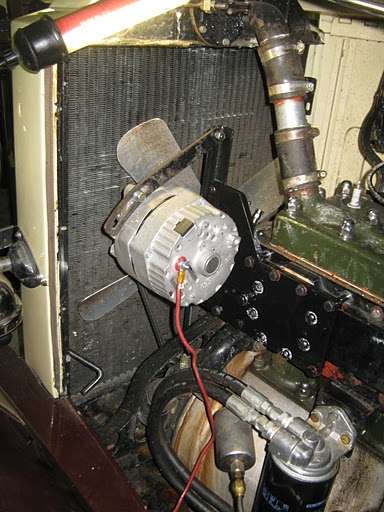 (29.82 KB) (29.82 KB)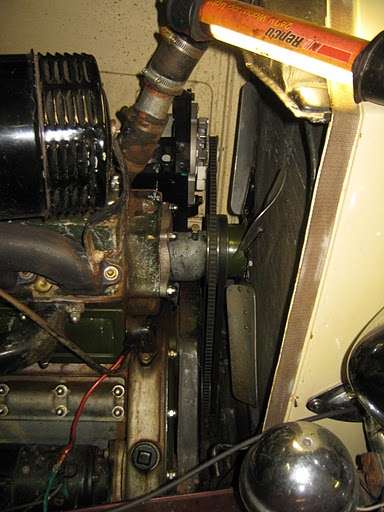 (48.82 KB) (48.82 KB)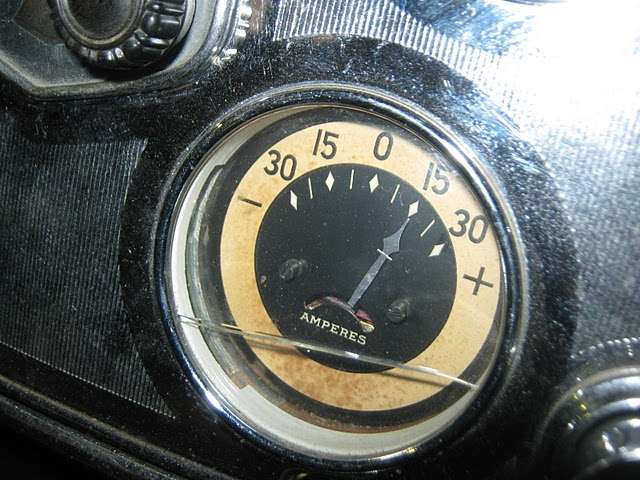 (34.23 KB) (34.23 KB)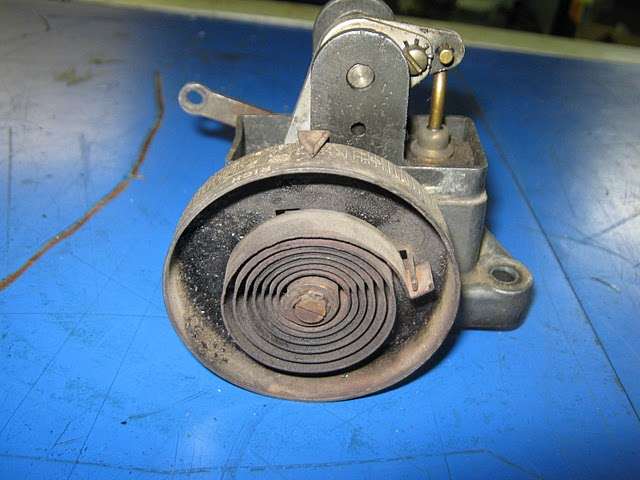 (31.44 KB) (31.44 KB)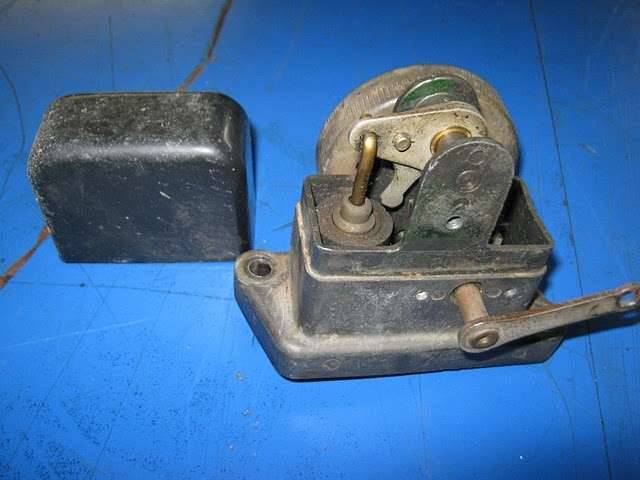 (20.94 KB) (20.94 KB)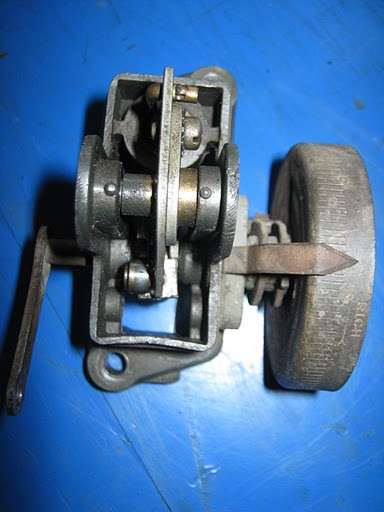 (26.56 KB) (26.56 KB)
Posted on: 2011/2/16 3:56
|
|||
|
Mal
/o[]o\ ====  Bowral, Southern Highlands of NSW, Australia "Out of chaos comes order" - Nietzsche. 1938 Eight Touring Sedan - SOLD 1941 One-Twenty Club Coupe - SOLD 1948 Super Eight Limo, chassis RHD - SOLD 1950 Eight Touring Sedan - SOLD What's this?  Put your Packard in the Packard Vehicle Registry! Here's how! Any questions - PM or email me at ozstatman@gmail.com |
||||
|
||||

|
Re: Wade's Workshop
|
||||
|---|---|---|---|---|
|
Forum Ambassador
|
Mat,
Here's a video of the alternator mounted and running. I also failed to mention yesterday that the exhaust system is the next major component to be addressed.
Posted on: 2011/2/16 15:11
|
|||
|
Mal
/o[]o\ ==== Bowral, Southern Highlands of NSW, Australia "Out of chaos comes order" - Nietzsche. 1938 Eight Touring Sedan - SOLD 1941 One-Twenty Club Coupe - SOLD 1948 Super Eight Limo, chassis RHD - SOLD 1950 Eight Touring Sedan - SOLD What's this? Put your Packard in the Packard Vehicle Registry! Here's how! Any questions - PM or email me at ozstatman@gmail.com |
||||
|
||||
|
Re: Wade's Workshop
|
||||
|---|---|---|---|---|
|
Forum Ambassador
|
Friday 18th February 2011
Arrived at the workshop before Wade, ask him about the new Iron Cove bridge and the changed supposedly improved traffic flows and you'll understand why I now often get in before him! Found that Noel's '39 wasn't there, instead Packard space was being occupied by Rick's Lexus Soarer! When Wade arrived in the '39 he said it's all good now. Was able to get the OD housing off, fixed the problem, then with Grahams help put it back in yesterday. Looking good Noel. The '39 arrived in the workshop nose first but was backed out, a Holden HZ Station Wagon and the Soarer moved out of the way, and the '39 then backed into Packard corner awaiting Noel's return. Only minor matter was the OD kickdown which wasn't working but in a quick check the Solenoid could be heard working. Wade then turned to giving Big Red some attention. When out in it during the week a leaking roof became evident. It was OK when moving but when parked for a while, because of the curvature of the rubberoid insert, water tends to pool in the rear corners and leak through into the headliner of the rear passenger compartment. And we can't have drips raining down on Gina, in her accustomed rear seat position, can we? Fix, and it's only a "quick fix" was to apply silicone sealant to the inside and outside raised edging of the roof insert. The roof insert will be replaced properly at a future date Wade tells me. That done, we then turned to Mat's '34. Wade had had a call from Mat yesterday and Wade was able to tell him he'd fixed the automatic choke having found the linkage rod and serviced the choke mechanism. Wade's also arranged that Mat will take the '34 to Pro-Axle Australia, when it's up and running, to determine whether they'll require the complete car or just the axle in order to straighten it. And, in order to get it running properly, Wade had called into Quickfit mufflers at Gladesville, on the way in this morning, and teed up with them to replace the exhaust and tail pipes and fit the new muffler Wednesday of next week. The other thing needed was to get rid of the miss/es when the '34's running. Yesterday Wade found the mixture screws were right out in trying to set the idle after the choke overhaul. So today pulled the sparkplugs, very black, and which I then cleaned and re-gapped(all were too far open), seems I'm getting better and faster at it, Wade even commented on it! While I was doing that, Wade pulled the distributor cap which didn't look good, see pic's of the "gunk" on the ends of some of the leads inside the top of the cap, as well as the contacts inside the cap body being worn. Fortunately, and I use that word advisedly, Wade had a spare on the shelf. A used one it was, to be sure, but there it was and available. I understand these things are worth considerable $$$$ even in used mode. I cleaned up the new(used) cap housing, cap cover and rotor while Wade checked the points, which were good. Attention was then turned to the sparkplug and coil leads because Wade wanted to ensure the spark didn't encounter any problems in it's travels from coil to combustion chamber. All the leads are metal cored but most were toooo loooong requiring 6 of the 8 plug leads to be shortened, the connectors being de-soldered then re-soldered. Also found that two of the leads, 1 and 2, had sustained some burn damage, probably from laying on the exhaust manifold. One of these was shortened, enabling the burned part to be excised, while the other was replaced with a length of plug cable from Wade's magical shelves. All done, and back together, started up on the first cylinder receiving spark so it seemed and ran a lot better than before. Still a very slight miss but not the farting and carrying on there was previously. The new exhaust system may even help that too. Only other thing was to find a nut/washer/spring washer to anchor the air filter/silencer by the stud at it's front end to the bracket which mounts from the front of the exhaust manifold. Attach file: (34.89 KB)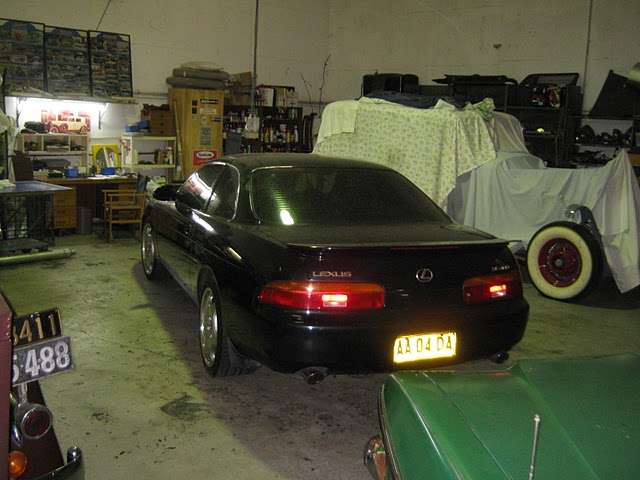 (39.10 KB) (39.10 KB) (33.04 KB) (33.04 KB)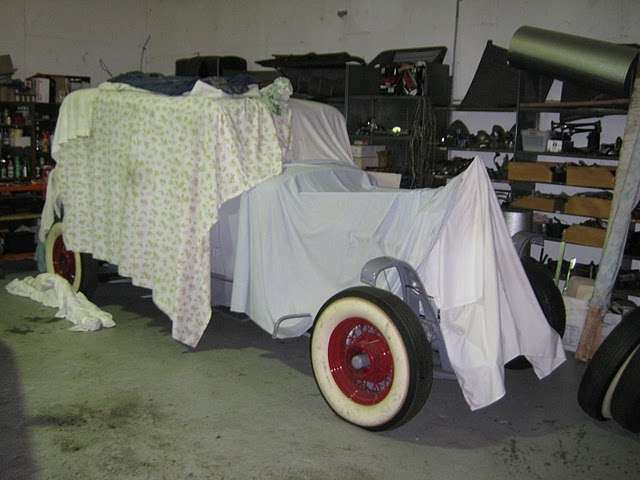 (38.70 KB) (38.70 KB) (43.51 KB) (43.51 KB) (43.07 KB) (43.07 KB) (34.74 KB) (34.74 KB) (36.93 KB) (36.93 KB)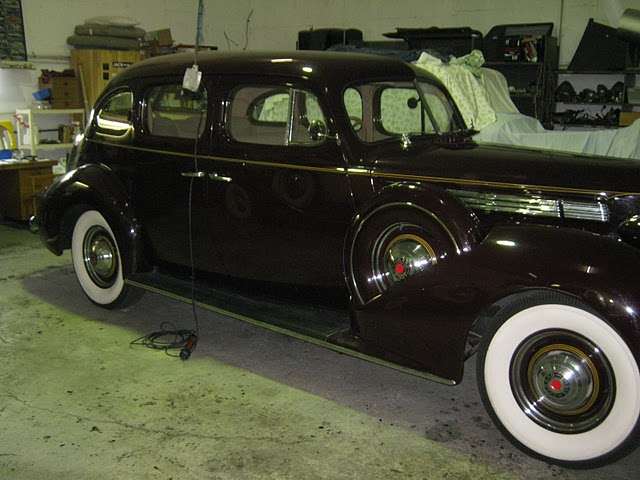 (27.24 KB) (27.24 KB)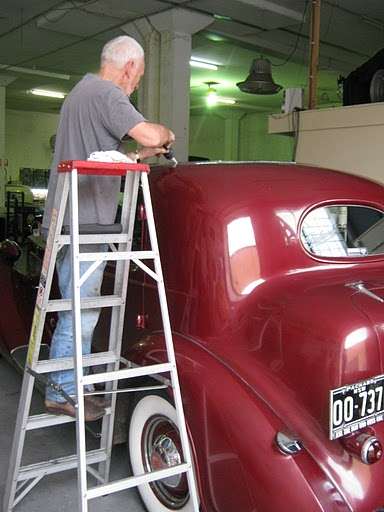 (17.45 KB) (17.45 KB)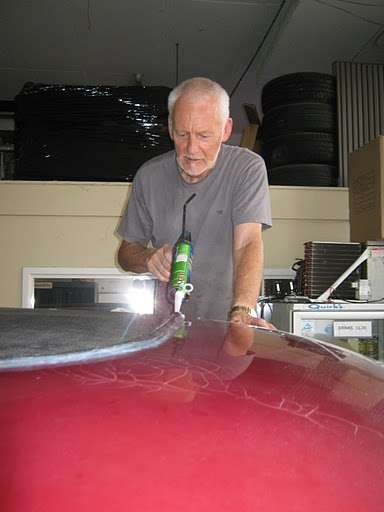 (23.43 KB) (23.43 KB)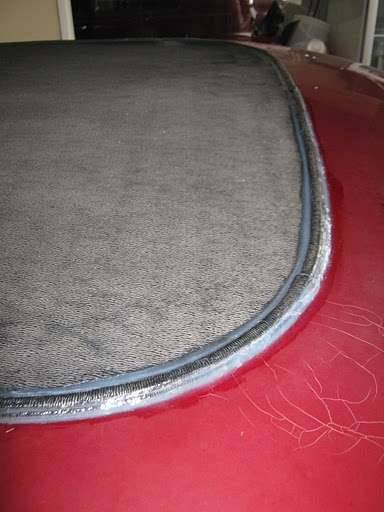 (32.21 KB) (32.21 KB)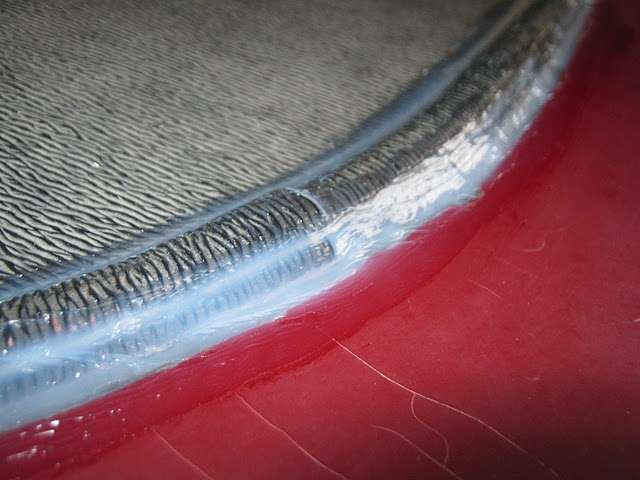 (42.77 KB) (42.77 KB)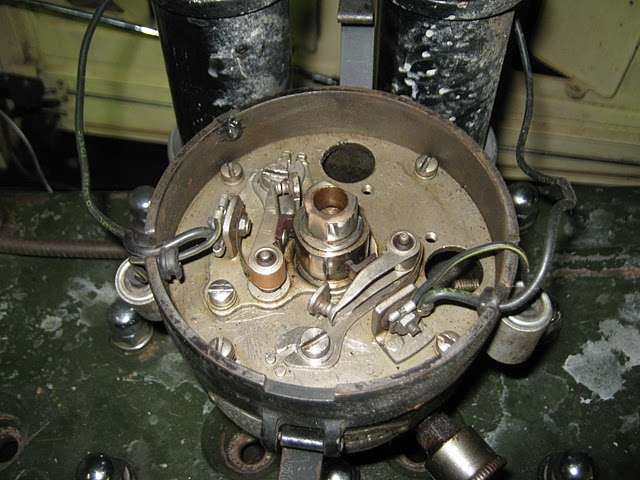 (47.73 KB) (47.73 KB)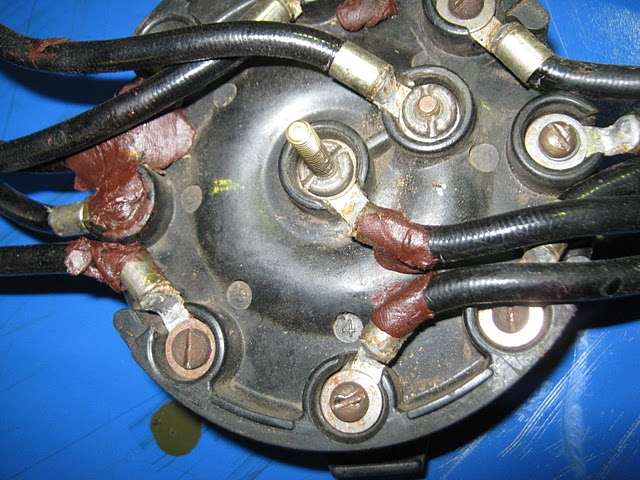 (41.55 KB) (41.55 KB)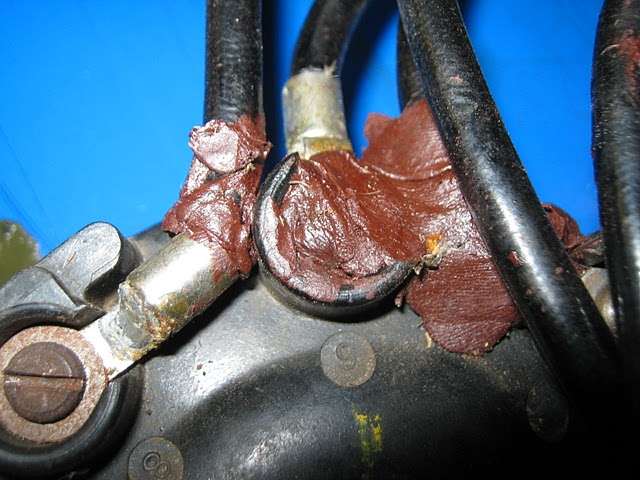 (39.86 KB) (39.86 KB)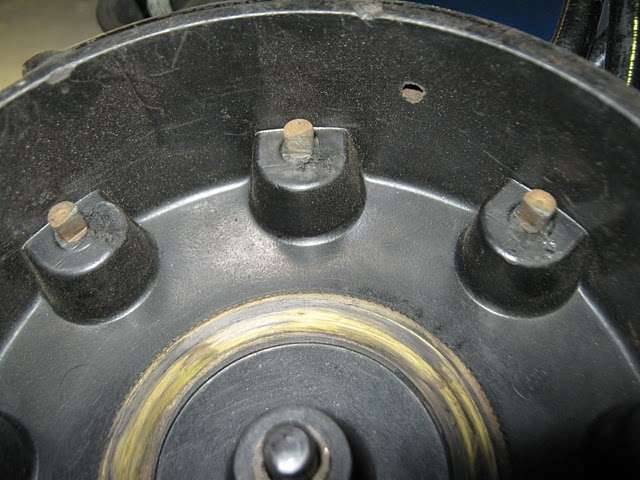 (21.94 KB) (21.94 KB)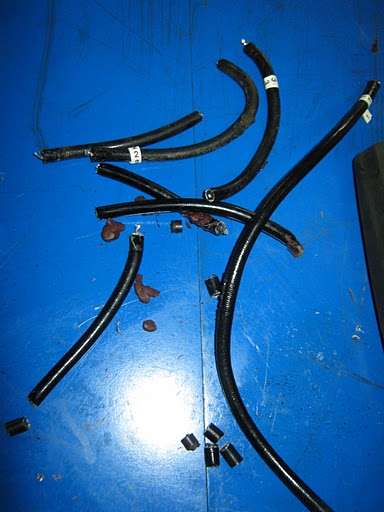 (46.04 KB) (46.04 KB)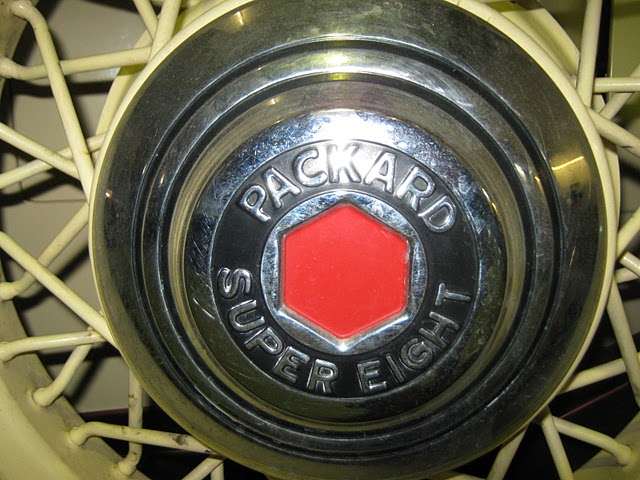
Posted on: 2011/2/18 1:35
|
|||
|
Mal
/o[]o\ ==== Bowral, Southern Highlands of NSW, Australia "Out of chaos comes order" - Nietzsche. 1938 Eight Touring Sedan - SOLD 1941 One-Twenty Club Coupe - SOLD 1948 Super Eight Limo, chassis RHD - SOLD 1950 Eight Touring Sedan - SOLD What's this? Put your Packard in the Packard Vehicle Registry! Here's how! Any questions - PM or email me at ozstatman@gmail.com |
||||
|
||||
|
Re: Wade's Workshop
|
||||
|---|---|---|---|---|
|
Home away from home
|
She's looking good
 The "gunk" was used to try and stop the sparks from jumping. For some reason those spark plugs never did quite work perfectly from day 1. The SUPER EIGHT hubcaps were on the car when I purchased it. I have a set of Packard 8 hubcaps at home which just require painting and then will be ready to go on. It sounds like the more you look at the more the more things you are finding wrong with it  I guess its better to find them now than later. I guess its better to find them now than later. I'm not going top recognise the car, she'll be sitting better, sounding better & running better just like a 34 Packard should
Posted on: 2011/2/18 8:27
|
|||
|
||||
|
Re: Wade's Workshop
|
||||
|---|---|---|---|---|
|
Forum Ambassador
|
Tuesday 22nd February 2011
First up this morning the '34's steering box was re-adjusted. This had been done earlier in the piece but Wade felt it was a little overdone so backed it off a little. Then the '34 went up on Rick's hoist where the rear spring hangers were tightened up with reasonable undercar access now available. Lying on a creeper under a car is not the way to tighten these. The opportunity was also taken to adjust the rear brakes and check things out generally under the car. This inspection found a 5/8" ring/open end Fuller brand spanner(wrench) stuck on a bolt between the frame and x-member on the right side. The spanner(wrench) looks like it survived a round trip to Kangaroo Island at least but has now been removed and is inside the car. Another thing I noticed under the '34 is that neither of the running boards are bolted to their brackets! They are only held on by the bolts/nuts securing them to the mudguards(fenders) and valance panels. Another thing I noticed under there, well for the parts I could see, is that the woodwork has been replaced. After the undercar stuff was done, but still on the hoist, Wade checked indicator operation with only three out of the four working. The odd one not working was the left front indicator so, as a first step, the lens came off, bulb visually checked and also electrically checked and it was fine. Then traced the brown wire for the left front indicator to the left rear indicator where it is joined in, there Wade firmed up the connection. Mentioning brown wire, there's lots of brown wire on the '34, not exactly colour coded or helpful. Put the bulb and lens back on and......nothing! Now none of the blinkers worked! Wade then pulled and checked the fuse and re-installed it, now......they all work! Off the hoist and off for a test run, brakes work badly as Brian complained to Wade all the way back from Kangaroo Island, there's a major hesitation when accelerating, could be the carb accelerator pump, and there's a very slight weep from the stud hole that gave us trouble on the alternator mounting plate. Any way you turn there seems to be something demanding attention. But putting Mat's '34 aside until tomorrow, when it goes to Quickfit Mufflers at Gladesville for it's exhaust refresh, turned to the other '34 in the workshop, The Fossil. Well that was the plan, but things didn't progress too far. Plan was to re-unite the rechromed front and rear bumpers with their mounting brackets. Wade had fought to get the brackets off the bumpers some years ago and managed to do so because he didn't have to worry about keeping new paint and chrome from getting scratched or damaged. Getting these things back together is another matter altogether because the spring steel bumper brackets are wider than the bumpers. The bumper brackets are made of one piece of steel which must be somehow made to fit into the ends of the bumper itself. To do that the bracket was compressed, levered, stretched, bent, bowed, used a come along, used the engine hoist, used body weight, in fact used anything or anyway which "might" help to achieve the desired result, but all to no avail. I might have overdone the expressions used a little in an attempt to convey the struggles involved, just trying to set the scene and frustration encountered. In the end Wade said to leave it and he'll talk with Barry Smith tonight who has done this before and describes it as "a real bastard of a job". There had been a lot of standing around, scratching of heads, thoughts about how to do the job but no meaningful result. Attach file: (30.15 KB)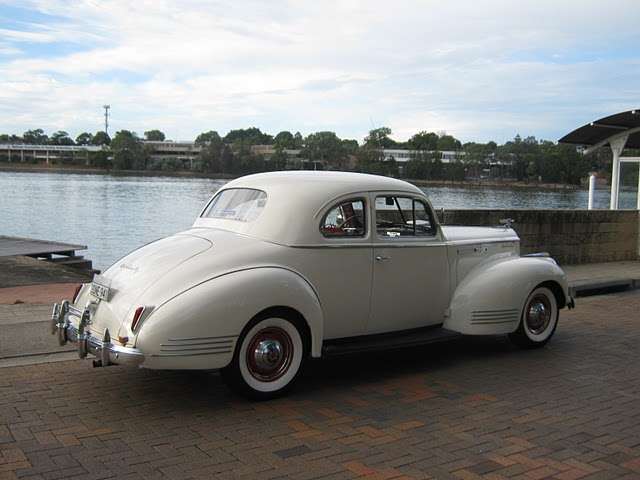 (31.84 KB) (31.84 KB)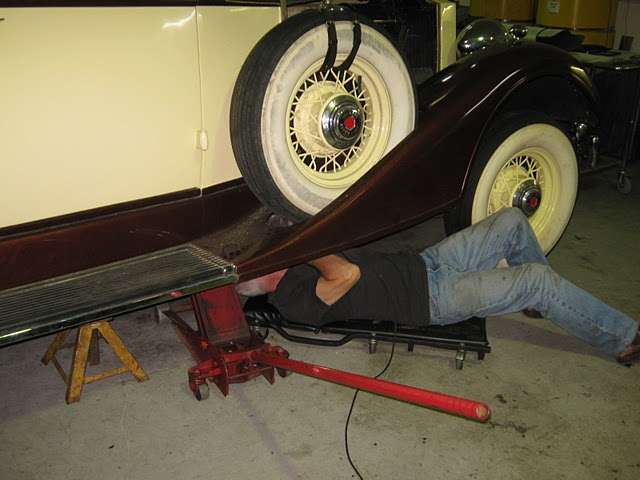 (27.62 KB) (27.62 KB) (28.65 KB) (28.65 KB) (38.35 KB) (38.35 KB) (28.68 KB) (28.68 KB)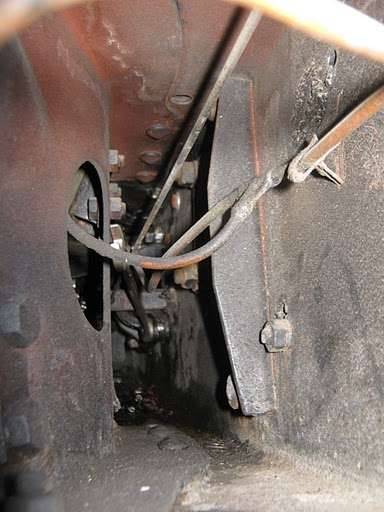 (29.17 KB) (29.17 KB) (25.16 KB) (25.16 KB)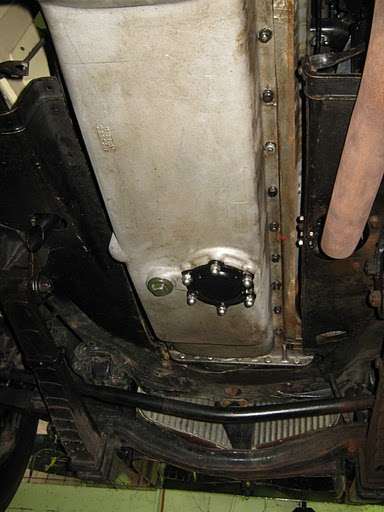 (45.65 KB) (45.65 KB)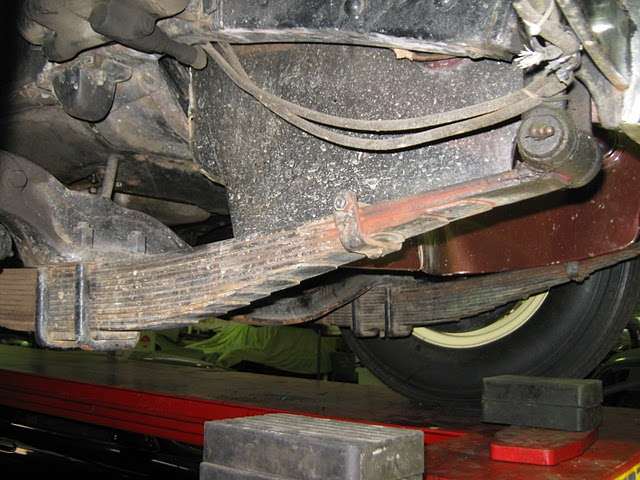 (36.82 KB) (36.82 KB) (22.45 KB) (22.45 KB)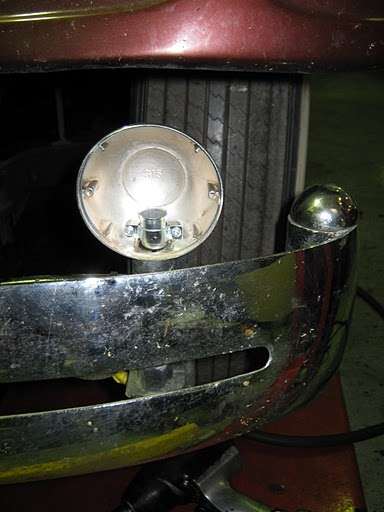 (39.25 KB) (39.25 KB) (41.48 KB) (41.48 KB)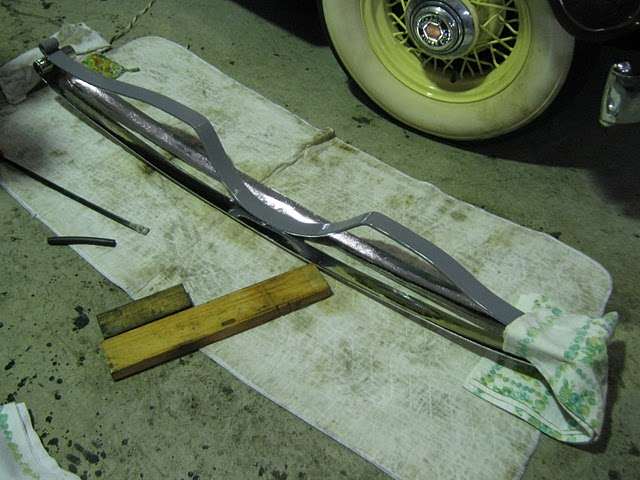 (38.39 KB) (38.39 KB)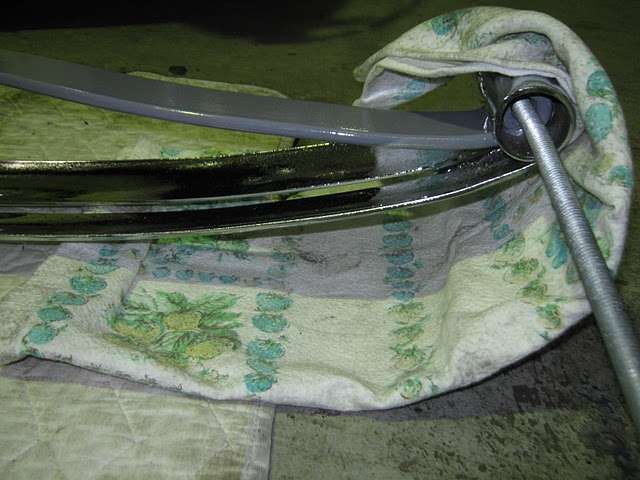 (30.89 KB) (30.89 KB)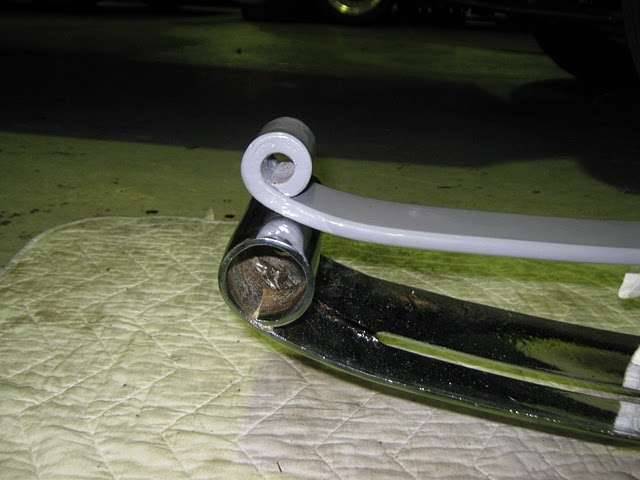 (33.95 KB) (33.95 KB) (29.37 KB) (29.37 KB)
Posted on: 2011/2/22 2:26
|
|||
|
Mal
/o[]o\ ==== Bowral, Southern Highlands of NSW, Australia "Out of chaos comes order" - Nietzsche. 1938 Eight Touring Sedan - SOLD 1941 One-Twenty Club Coupe - SOLD 1948 Super Eight Limo, chassis RHD - SOLD 1950 Eight Touring Sedan - SOLD What's this? Put your Packard in the Packard Vehicle Registry! Here's how! Any questions - PM or email me at ozstatman@gmail.com |
||||
|
||||
|
Re: Wade's Workshop
|
||||
|---|---|---|---|---|
|
Home away from home
|
G,day Mal and Wade,
The 34 sounded great on the video. Did I detect some speedo bounce and a hell of a charge on the last picture of the dash. Hoo roo Terry
Posted on: 2011/2/22 5:14
|
|||
|
||||
|
Re: Wade's Workshop
|
||||
|---|---|---|---|---|
|
Forum Ambassador
|
Terry,
Like other things on Mat's '34 the dash instruments "need work". Temp gauge seems to be stuck on about 140, speedo does bounce, ammeter sticks and not sure if the fuel gauge works.
Posted on: 2011/2/22 14:14
|
|||
|
Mal
/o[]o\ ==== Bowral, Southern Highlands of NSW, Australia "Out of chaos comes order" - Nietzsche. 1938 Eight Touring Sedan - SOLD 1941 One-Twenty Club Coupe - SOLD 1948 Super Eight Limo, chassis RHD - SOLD 1950 Eight Touring Sedan - SOLD What's this? Put your Packard in the Packard Vehicle Registry! Here's how! Any questions - PM or email me at ozstatman@gmail.com |
||||
|
||||
|
Re: Wade's Workshop
|
||||
|---|---|---|---|---|
|
Forum Ambassador
|
Wednesday 23rd February 2011
Instead of going directly to the workshop this morning waited until Wade called me and met him at Quick-Fit Mufflers at Gladesville where he'd taken Mat's '34 for it's muffler and exhaust/tail pipe refit. Once at the workshop The Fossils bumper bar and bumper bracket situation was then addressed. I'd thought I had a brilliant idea  last night and rang Wade at the time to convey it. But in the harsh reality of day, once confronted by the recalcitrant parts, realised it wouldn't work. Fortunately a greater mind than mine, Wade's, had also been mulling the situation over and used a small part of my idea in the final solution to this conundrum. Solution was to chain one end of the bumper bar together with the bumper bracket with a long length of threaded rod through the joined eyes to the base of a concrete pillar. The pillar was first dressed with padding, to protect the rechromed bumper surface, by sticking it to the structure with packaging tape. Once chained in place the other end of the bumper bar and bracket were then pushed back against the pillar but the first attempt fell short. Not to worry, with advice from John and Rick the top of the bumper bar was then pulled flat against the pillar using a "come-along" and another long length of threaded rod. This attempt also fell short but wasn't far from succeeding. Final piece of the puzzle was to use a block of wood between the bumper and the bracket to provide a pivot point and a resulting shorter arc.....and success! Well, two guys, Rick and Mal, were holding the bracket in place and not permitting it to spring back. Wade was also there wielding a long tyre lever, which had it's head ground down, and was used to help lever the eye of the bracket into the eye of the bumper. A shout out to John, on the other side of the workshop, to bring a large hammer resulted in John joining in and hammering the block of wood out. This was accomplished, with some trepidation by everyone involved I'm sure, and we could tell it worked when there was a terrific BANG as it slotted into place. The BANG was accompanied by a loud cry of $hit, normally I don't swear much but this scared the crap out of me! And the funny thing is, once the bracket was in place in the bumper bar it was loose and rattling in there! One down and one to go so onto the rear bumper, which looked to be a greater challenge than the front presented. It's a longer bumper with a longer bracket so should be OK, but the bracket is not just longer but comparatively longer to boot than the front one. Same procedure again but to achieve the required amount of bend in the bracket a higher fulcrum point in the form of a bigger block of wood was required. Success again achieved and this time, knowing what was coming, didn't find it necessary to swear. last night and rang Wade at the time to convey it. But in the harsh reality of day, once confronted by the recalcitrant parts, realised it wouldn't work. Fortunately a greater mind than mine, Wade's, had also been mulling the situation over and used a small part of my idea in the final solution to this conundrum. Solution was to chain one end of the bumper bar together with the bumper bracket with a long length of threaded rod through the joined eyes to the base of a concrete pillar. The pillar was first dressed with padding, to protect the rechromed bumper surface, by sticking it to the structure with packaging tape. Once chained in place the other end of the bumper bar and bracket were then pushed back against the pillar but the first attempt fell short. Not to worry, with advice from John and Rick the top of the bumper bar was then pulled flat against the pillar using a "come-along" and another long length of threaded rod. This attempt also fell short but wasn't far from succeeding. Final piece of the puzzle was to use a block of wood between the bumper and the bracket to provide a pivot point and a resulting shorter arc.....and success! Well, two guys, Rick and Mal, were holding the bracket in place and not permitting it to spring back. Wade was also there wielding a long tyre lever, which had it's head ground down, and was used to help lever the eye of the bracket into the eye of the bumper. A shout out to John, on the other side of the workshop, to bring a large hammer resulted in John joining in and hammering the block of wood out. This was accomplished, with some trepidation by everyone involved I'm sure, and we could tell it worked when there was a terrific BANG as it slotted into place. The BANG was accompanied by a loud cry of $hit, normally I don't swear much but this scared the crap out of me! And the funny thing is, once the bracket was in place in the bumper bar it was loose and rattling in there! One down and one to go so onto the rear bumper, which looked to be a greater challenge than the front presented. It's a longer bumper with a longer bracket so should be OK, but the bracket is not just longer but comparatively longer to boot than the front one. Same procedure again but to achieve the required amount of bend in the bracket a higher fulcrum point in the form of a bigger block of wood was required. Success again achieved and this time, knowing what was coming, didn't find it necessary to swear.Back on what was now a padded bench, courtesy of some old sofa cushions to protect the chrome, the threaded roda were driven out and fitting of the bumper centre decorative piece and end bolts commenced. All the fittings are rechromed and because of this the end bolts presented some fitting refinement in the form of removing some of the chrome build up on the end bolt bolt and nut. Wade had also picked up some rubber bushes some years ago but unfortunately had only 4 bushes whereas 8 are required. There are 2 at each end bumper bolt, one top and one bottom. So off on a road trip to Grippy Rubber where 8 rubber door stops in lieu of the correct sized bushes were purchased. Door stops, you say? Yes, they didn't have the rubber bushes in the right size but by cutting down 8 rubber door stops the equivalent of the 4 rubber bushes required could be manufactured. Also dropped in to Lee Bros and picked up stainless steel flat and spring washers for the bumper centre pieces. Also, while on the road, received a call from Tony at Quick-Fit to advise Mat's '34 was ready. So then proceeded to Gladesville and picked up the '34 which I followed back to the workshop. On the way back saw the blinkers on the '34 are working as they should but the left brake light was so faint as to be almost non existent. Checked the tail light operation once back and the left side was also much fainter than the right. Off with the left bezel and lens and noted that both the tail light bulb and the brake light bulb are No. 63's. Also checked the right tail light bulbs to see if there was a reason they are so bright in comparison. There is, they have completely different bulbs, what they are I don't know but whatever they are they are very effective. Wade scratched around in the '34's glovebox and came up with a tin with some spare bulbs one of which was swapped for the left tail light bulb with improved results. Still not as bright as the right but certainly an improvement on the lack of light before. But, back to the Attach file: (21.91 KB)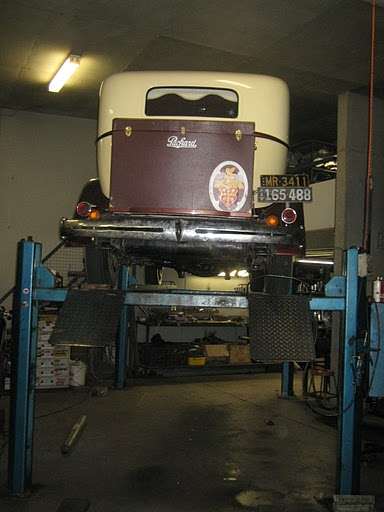 (49.30 KB) (49.30 KB)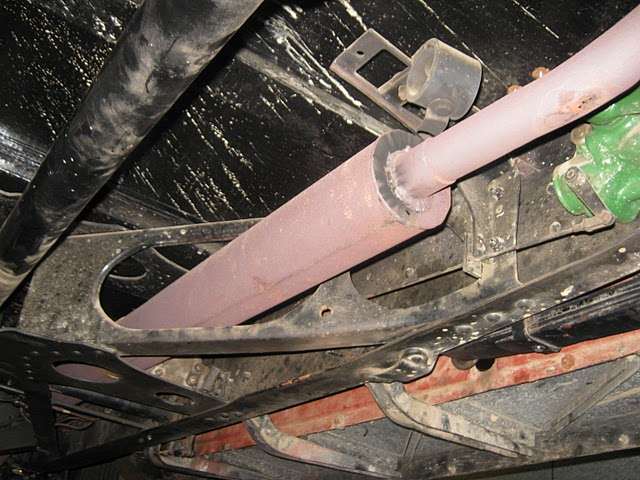 (33.95 KB) (33.95 KB) (40.62 KB) (40.62 KB) (49.72 KB) (49.72 KB)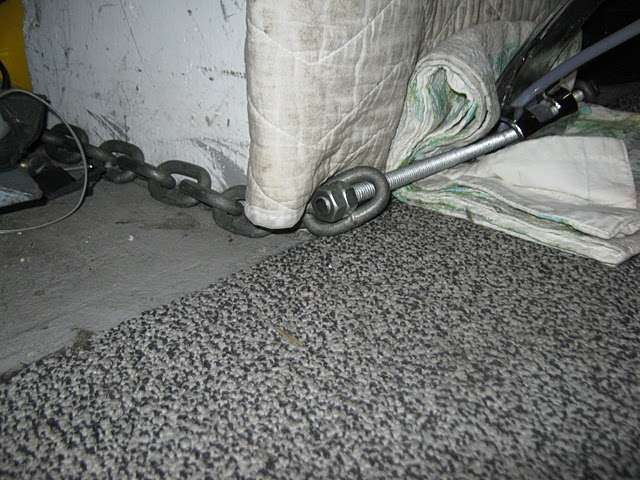 (24.52 KB) (24.52 KB)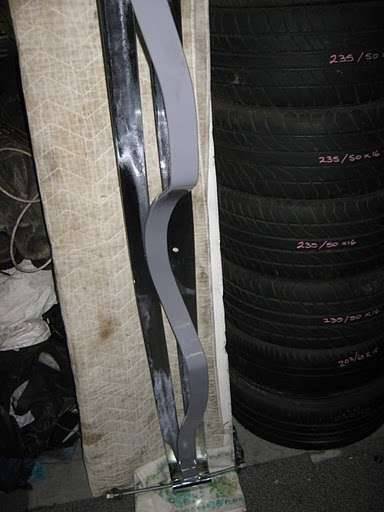 (20.87 KB) (20.87 KB)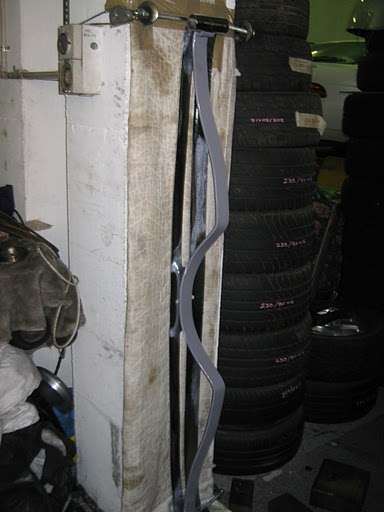 (31.42 KB) (31.42 KB)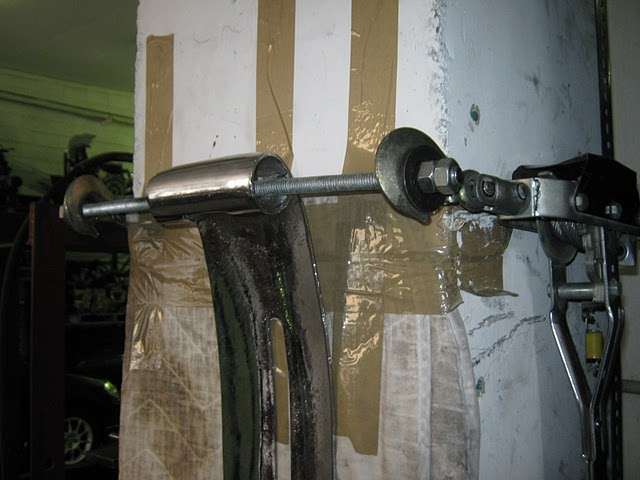 (19.97 KB) (19.97 KB) (28.23 KB) (28.23 KB)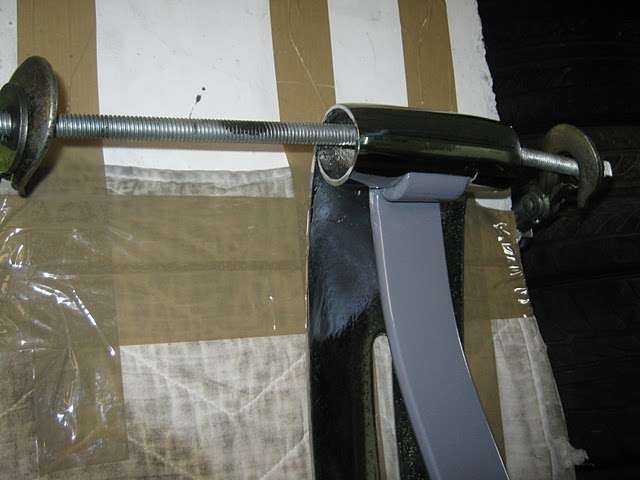 (27.86 KB) (27.86 KB)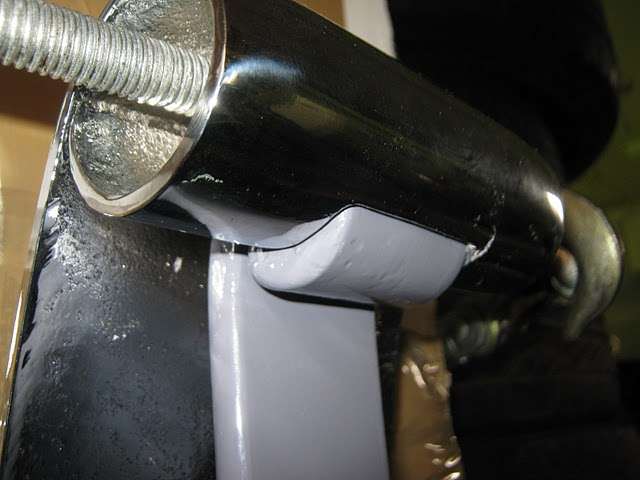 (31.53 KB) (31.53 KB)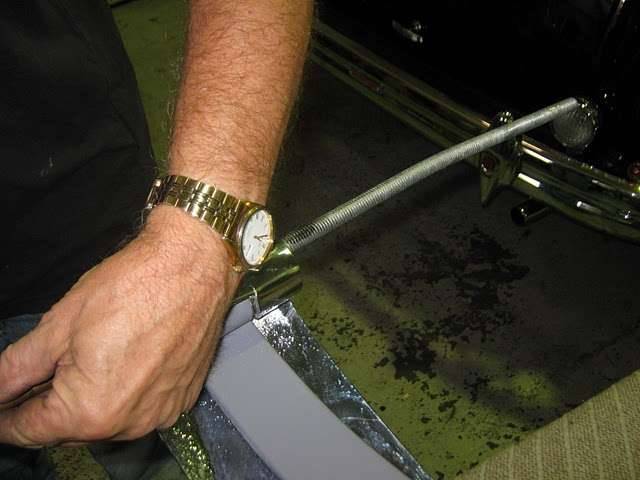 (30.51 KB) (30.51 KB) (31.60 KB) (31.60 KB)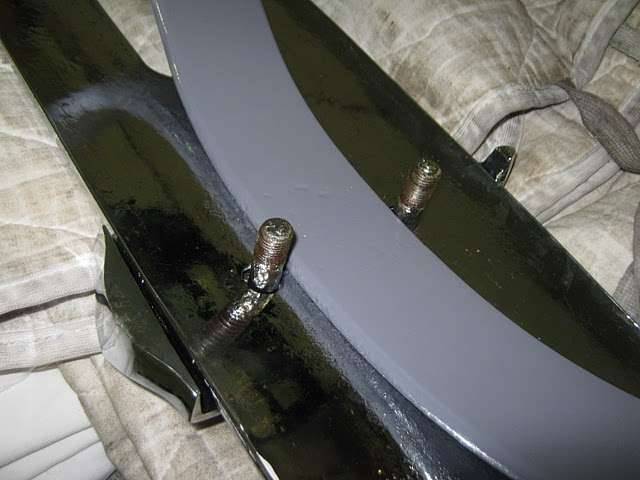 (29.21 KB) (29.21 KB)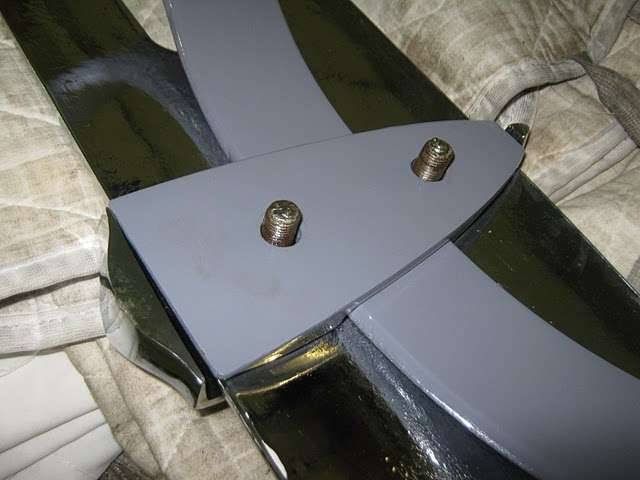 (29.79 KB) (29.79 KB)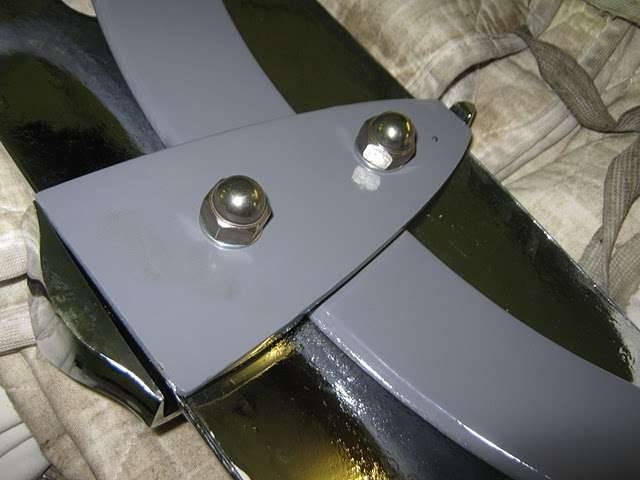 (26.23 KB) (26.23 KB)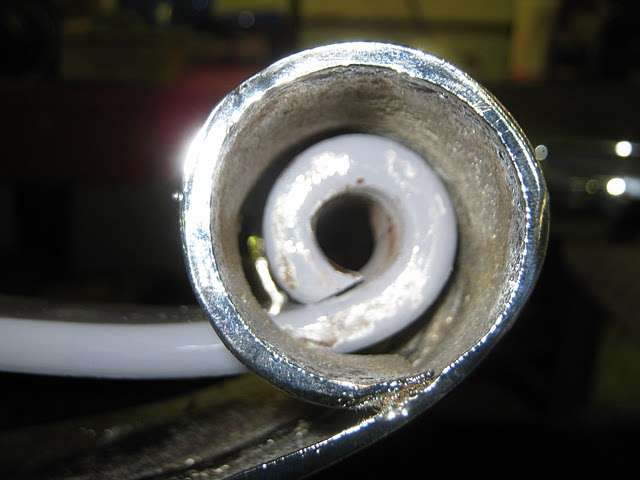 (23.26 KB) (23.26 KB)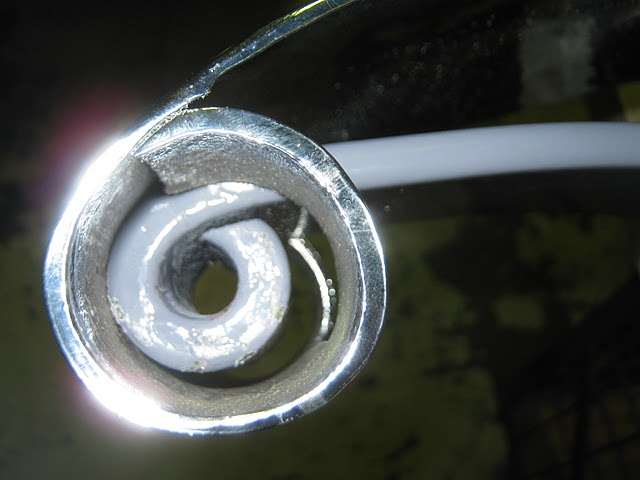 (23.08 KB) (23.08 KB)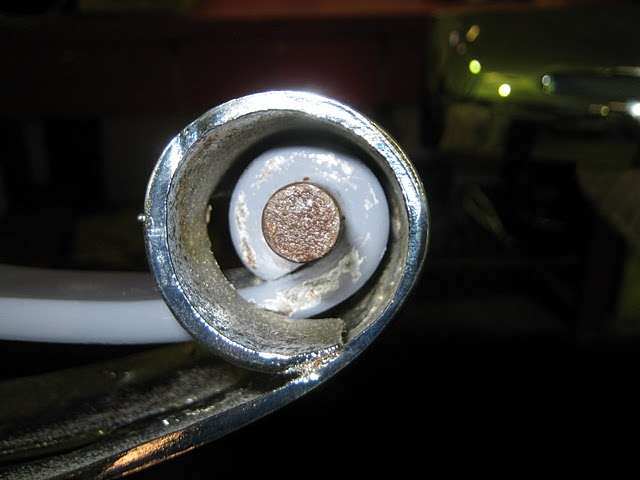 (32.51 KB) (32.51 KB)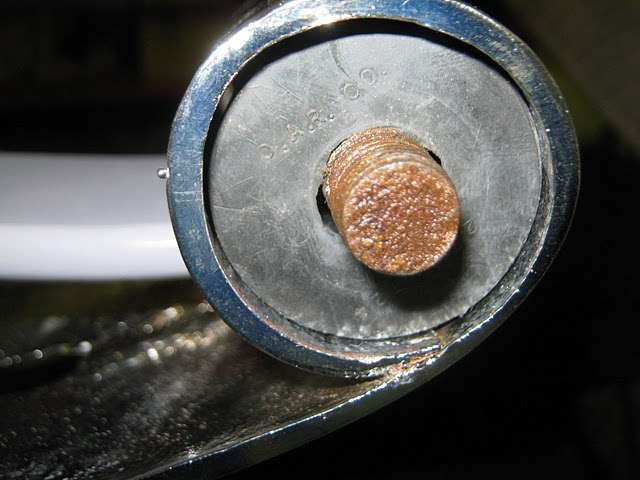 (39.48 KB) (39.48 KB) (43.29 KB) (43.29 KB) (28.33 KB) (28.33 KB)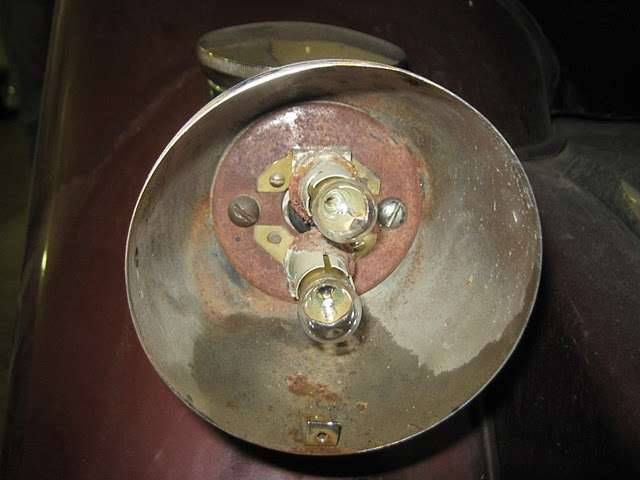 (27.05 KB) (27.05 KB)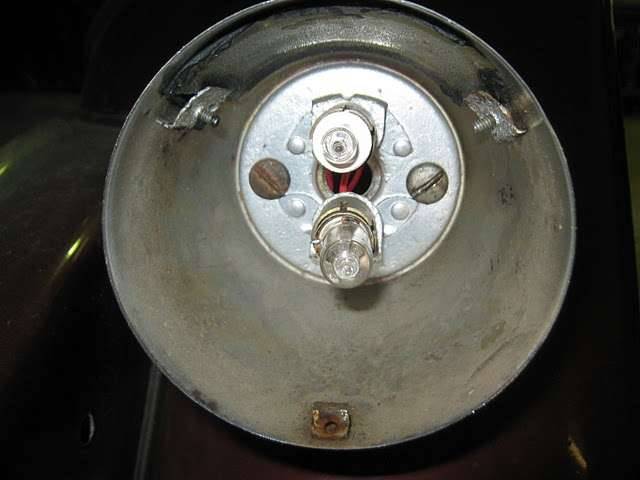 (33.94 KB) (33.94 KB) (23.03 KB) (23.03 KB)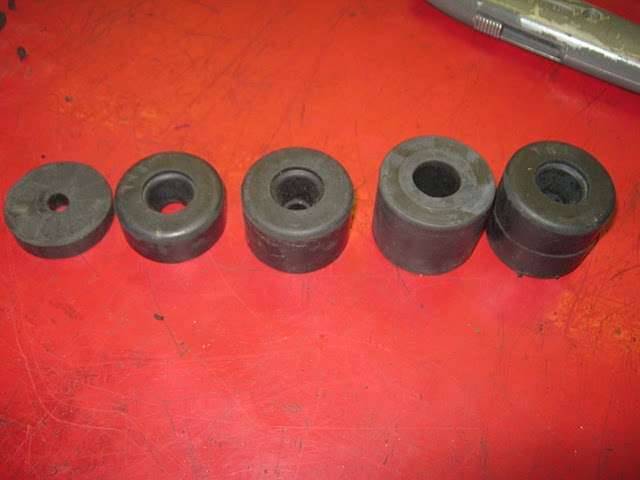 (40.75 KB) (40.75 KB)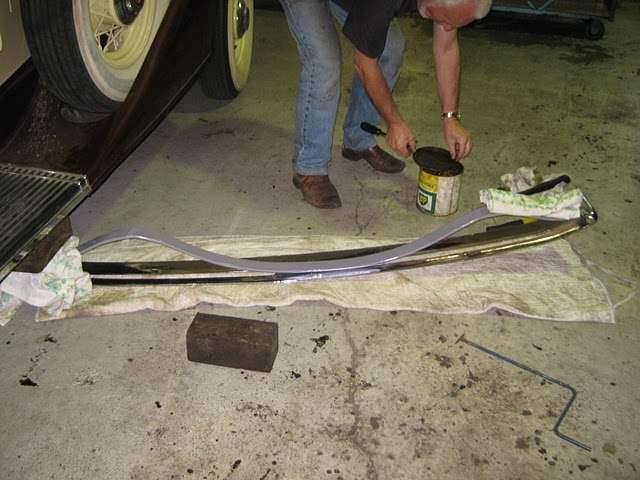
Posted on: 2011/2/23 5:29
|
|||
|
Mal
/o[]o\ ==== Bowral, Southern Highlands of NSW, Australia "Out of chaos comes order" - Nietzsche. 1938 Eight Touring Sedan - SOLD 1941 One-Twenty Club Coupe - SOLD 1948 Super Eight Limo, chassis RHD - SOLD 1950 Eight Touring Sedan - SOLD What's this? Put your Packard in the Packard Vehicle Registry! Here's how! Any questions - PM or email me at ozstatman@gmail.com |
||||
|
||||
|
Re: Wade's Workshop
|
||||
|---|---|---|---|---|
|
Forum Ambassador

|
Mal, I always enjoy reading your posts, in part because they are interesting and well-written, and also because I own a 34 Eight. I found the bumper fitting to the irons interesting because you have a 1-piece bumper whereas both front and rear on my 34 are two-piece, split at the center with a lap joint which in turn is covered by the center plate. MUCH easier to mount. Perhaps a running change, though I've not seen it mentioned in the Service Letters and the parts book doesn't seem to identify 2-piece bumpers. But my plater was sure happy to have pieces only half-length to deal with.
Posted on: 2011/2/23 9:10
|
|||
|
||||
Register To PostTopic is Locked


