|
Re: Wade's Workshop
|
||||
|---|---|---|---|---|
|
Forum Ambassador

|
Monday 28th March 2011
After a break brought about by Wade's absence followed by my own it was back to the workshop today. On arrival, found Big Red in the carpark sporting it's new windscreen. Wade had also picked up the left front quarter window for The Fossil and thats now ready to be installed. Also saw a couple of new jobs that had come in for Wade's attention, a water pump and a distributor, both from BruceD from Wagga Wagga about 460kms south west from Sydney. I added to the bench clutter by bringing back the vibration damper from DaveE, Old Blue's new owner. Wade had also started to re-install the trim piece from the top of the back of Big Red's front seat. He only got as far as removing all the old staples, which took hours because there are lots of them, before he discovered he didn't have the right length staples for the re-installation. Last week Wade had ordered some shorter staples from Salmon Bros, just around the corner, so first job was to jump in Big Red to go and pick them up. But....they hadn't come in, so back to the workshop where later Wade received a phonecall saying Salmon Bros didn't carry these staples now but they did offer the possibility of an alternate source. Returning to the workshop turned to the '41 and removing the wiper motor, gearbox and linkages. After our failed attempts from a week and a half ago, and after reading the instructions, should be easy now. Just remove the wiper arms, take off the retaining nuts for the wiper towers, take off the large under dash nut and hey presto, out it comes! Except it didn't! There isn't much space up under the dash and anything that could impede the wipers removal did so. Ended up having to take out the inner windscreen moulding because 1) a couple of it's retaining screws provided points of impedence and 2) a couple of the dashboards screws because they too also impeded removal. But finally it all came out. Then, with reference to the STEWART-WARNER ELECTRIC WINDSHIELD WIPER SERVICE INSTRUCTIONS found on PackardInfo in the Manuals and Literature Section, a number of electrical tests were performed to identify the wiring and its functionality, together with a couple of hand drawn diagrams to help with reassembly later. That done the wiper unit was disassembled with the arm actuating mechanism separated from the motor/gear unit. Then the electric motor was removed from the drive unit. That left the drive unit, although the coil unit was now accessible in the body of the drive unit, the gear drive for the arm actuating mechanism was then disassmbled. The two things that stood out in doing this were 1) the wiring for the wiper, it hadn't been replaced a couple of years ago when the rest of the '41 was re-wired(with hindsight should have been) and 2) the build up of dirt and grease in and around the mechanical side of the mechanism. So while Wade set about re-wiring I undertook cleaning of the mechanical components, these scrubbing up well. One other thing noticed in dis-assembly was a small insulating tab that had broken, so my next task was to make a replica. Wade didn't have anything suitable to use so I called upon Rick, who with his mate Thomas, was able to provide a plastic component from a PC from which I was able to cut out a piece to suit. Seemed simple enough, and encouraged by the past success of MBM gaskets, made an insulating tab, and another, and another, and another and finally one that would work! Looks like MBM doesn't extend to insulating tabs. With an acceptable tab now to hand re-assembly commenced. Following the Stewart Warner instructions, the gearbox body was mounted in the vice and components carefully added including ensuring all alignment requirements were followed. Just as well we had four hands, would have proved a lot more difficult otherwise. We now had the gear and crank mounted back on the gearbox as well as the electric motor. Next Wade connected up the new wiring he'd made earler. All went together well then a test to see how it functioned with power. Some success, being able to be turned on and off but only operated at low speed. Further examination revealed that the two wires soldered in underneath the rectifier needed replacement as well. So out again with the soldering iron and following de-soldering of the rectifier the two wires concerned were replaced. Another test, but still the same result, turned on and off but only low speed operation. Wade turned to the wiring diagrams and there it was two wires had been hooked up incorrectly. Turn them about and VOILA! We now had wipers that turned on and off and also provided low and high speed operation! Although I should mention that high speed wiper operation for a '41 Packard shouldn't be confused with high speed operation for a modern car! Attach file:  (65.42 KB) (65.42 KB)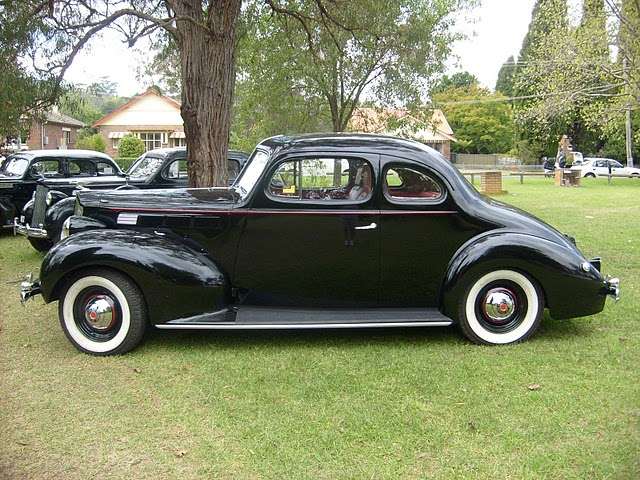 (34.85 KB) (34.85 KB) (31.77 KB) (31.77 KB)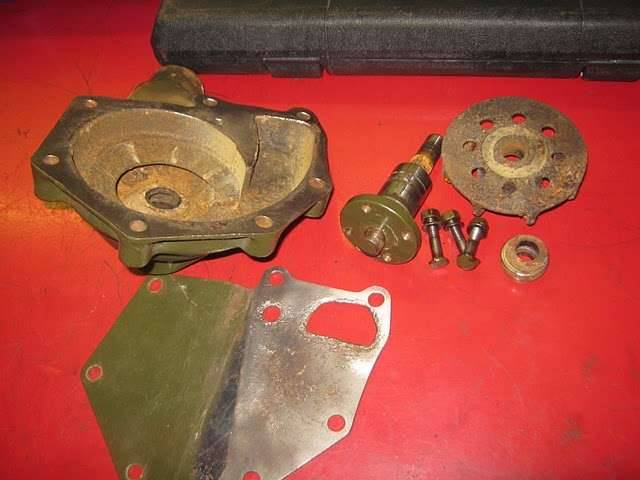 (43.70 KB) (43.70 KB)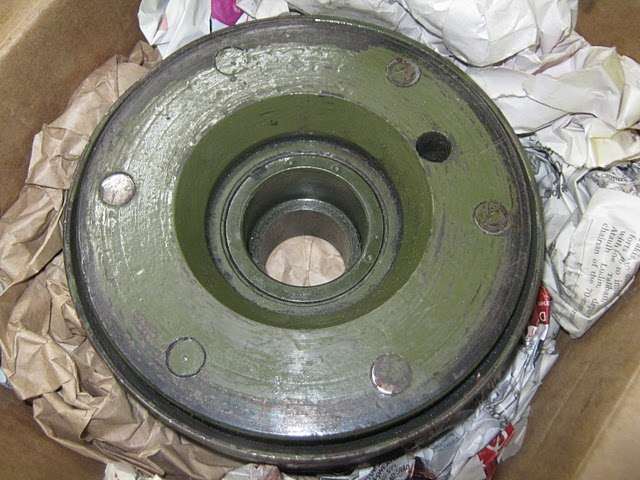 (23.22 KB) (23.22 KB)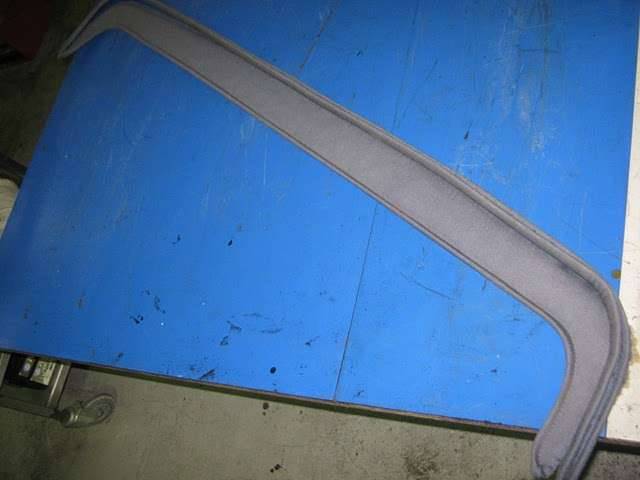 (35.38 KB) (35.38 KB)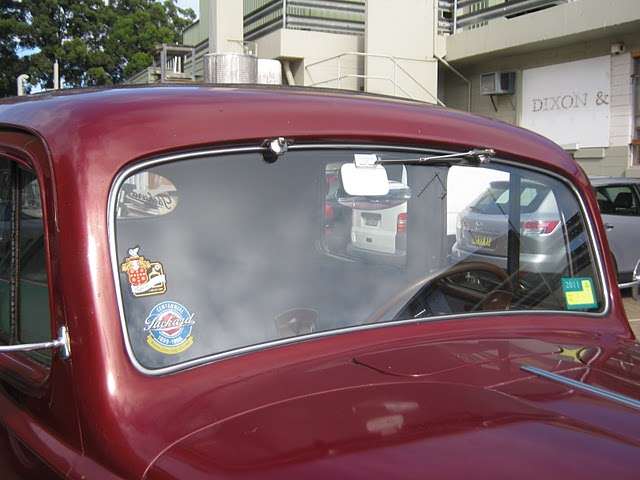 (19.30 KB) (19.30 KB)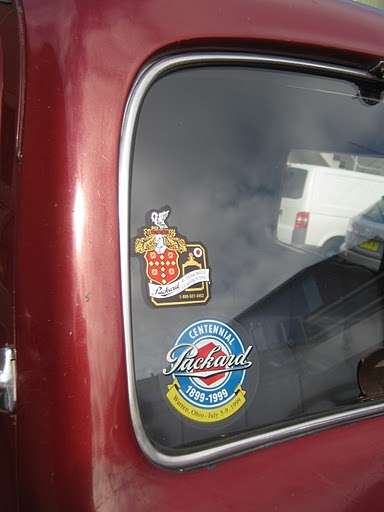 (30.35 KB) (30.35 KB)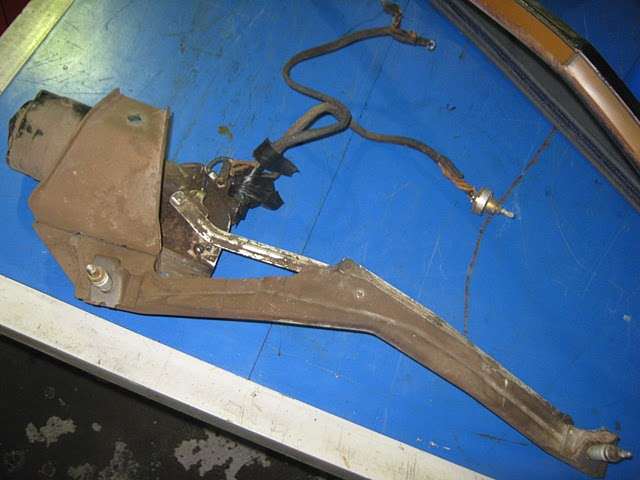 (36.47 KB) (36.47 KB) (37.06 KB) (37.06 KB) (25.58 KB) (25.58 KB)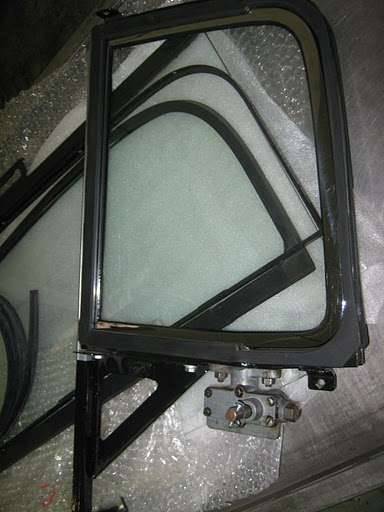 (28.57 KB) (28.57 KB)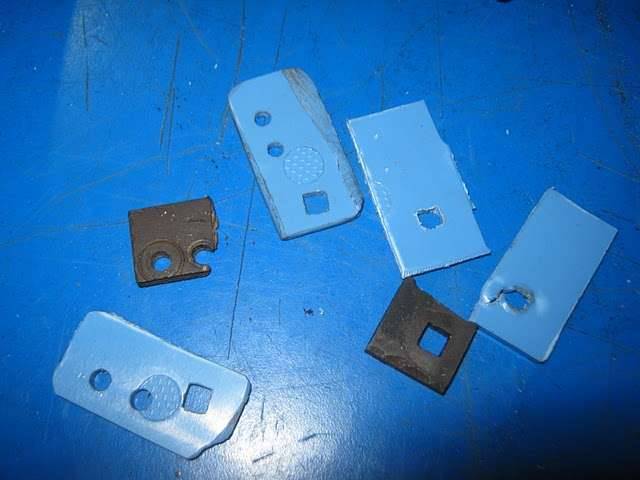 (29.39 KB) (29.39 KB)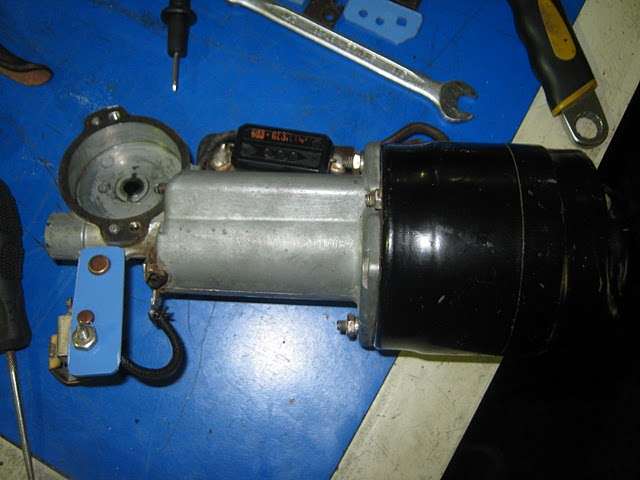 (24.13 KB) (24.13 KB)
Posted on: 2011/3/28 3:02
|
|||
|
Mal
/o[]o\ ====  Bowral, Southern Highlands of NSW, Australia "Out of chaos comes order" - Nietzsche. 1938 Eight Touring Sedan - SOLD 1941 One-Twenty Club Coupe - SOLD 1948 Super Eight Limo, chassis RHD - SOLD 1950 Eight Touring Sedan - SOLD What's this?  Put your Packard in the Packard Vehicle Registry! Here's how! Any questions - PM or email me at ozstatman@gmail.com |
||||
|
||||
|
Re: Wade's Workshop
|
||||
|---|---|---|---|---|
|
Forum Ambassador
|
One thing I forgot to mention is that there was on eBay a complete wiper motor assembly for a 41/42.
cgi.ebay.com.au/ws/eBayISAPI.dll?ViewIte ... 86355&ssPageName=ADME:B:WNA:AU:1123 Auction has now ended, but it looked like it might be a fall back position if our actions didn't work. What I really want to say, and I've said it before, it's amazing how often the part/s you're after appear on eBay when you need 'em. Seems like the sellers are reading our posts and then put the part/s up for auction!
Posted on: 2011/3/28 7:11
|
|||
|
Mal
/o[]o\ ==== Bowral, Southern Highlands of NSW, Australia "Out of chaos comes order" - Nietzsche. 1938 Eight Touring Sedan - SOLD 1941 One-Twenty Club Coupe - SOLD 1948 Super Eight Limo, chassis RHD - SOLD 1950 Eight Touring Sedan - SOLD What's this? Put your Packard in the Packard Vehicle Registry! Here's how! Any questions - PM or email me at ozstatman@gmail.com |
||||
|
||||
|
Re: Wade's Workshop
|
||||
|---|---|---|---|---|
|
Forum Ambassador
|
Tuesday 29th March 2011
Even after catching a train three stops and then walking to the workshop I beat Wade in this morning. Why? So I could drive the '41 home today without having to worry about having 2 cars at the workshop at once. I can only drive one at a time can't I? So, in his absence, started removing the perished rubber gaskets for the windscreen wiper towers from the cowl. During this operation Wade arrived and, while I carried on with the gasket removal, he scrounged up a pair of washers to replace the fibre washers which were also past their use by date. Continuing with the gasket removal and, because the old gaskets had re-paint over their edges, I managed to chip the paint around the edges of the gasket area. Not much but enough. However to compensate, the MBM wiper tower gaskets are about 1/8" wider all round than they should be. Shhhhhh, I won't tell anyone(judges?) if you don't! And had greater success today in making the gaskets than yesterday's efforts with insulating tabs. With all in readiness for re-installation of the wiper motor and mechanism setup Wade assumed his upside down under a Packard dash position. Passed him the wiper motor and mechanism setup and the fun began. There really wasn't anything I could do but wait for the wiper arm shafts to appear through the holes on the cowl. Lot of struggling, twisting of body, arms, attitude and wiper motor and mechanism setup before the right side wiper arm shaft finally appeared. Even then it wasn't right and had to be drawn back into the car and tried again. Second time round was more successful with both wiper arm shafts popping through almost simultaneously. Then some scurrying by me side-to-side as I installed the MBM gaskets, wiper towers, washers and nuts, with the nuts just finger tight. Wade then bolted the mechanism setup to the body, also finger tight giving him the chance to come up for a breath of air as well as give his contorted and abused body a chance to recover. Then tightened the nuts on the wiper shafts and once again it was "assume the position" for Wade. Tightened up the mounting nut for the mechanism setup, the wires connected to the wiper motor and the wiper switch installed. Before going any further with re-installation Wade re-emerged so it could be put to the test. Didn't work, until it was realised the ignition wasn't on, then it did! Back to re-installation, with the radio going back in and aerial and power cables plugged in, and heater controls re-mounted under the dash edge. Conducted another test to ensure the radio was still working, and it was, I remembered to turn on the ignition this time. Underdash work complete, the windshield moulding was the next item to be re-installed which was left to me while Wade went about re-mounting the wiper arms and blades. The left wiper arm and blade also weren't fitting together properly, which Wade overcame, only to find the tensioning spring in the base of that arm had lost it's tension and wasn't providing any positive pressure to the blade against the windscreen. Diving into his box of '41 out of the way went with Wade in Big Red up to the hardware store at West Ryde chasing some Arrow T25 staples so the cover piece on the fixed front seat back could be re-affixed. Wade has lots of 3/8" 10mm staples. but was after some a bit smaller, because these tended to stand proud through a couple of layers of upholstery material and into the wood underneath. But, he struck out, they don't carry them either. Back to the workshop and using the 3/8" 10mm staples and very firm pressure most penetrated sufficiently with some requiring a light hammer tap or two to complete the job. That was the cover piece, the edging strip then had to be stapled over the top of that. Too many layers for the stapler to be effective resulting in that job being postponed until Wade comes up with appropriate tacks/nails to finish the job. Next turned to The Fossil, almost the forgotten occupant of the workshop. After cleaning up the left front window, which accumulated much dust, it and the left front quarter window were installed, fitting in nicely. Then the wooden panel that holds the window winding mechanism and door lock was installed. Biggest problem here was finding the right slotted head wood screws. Most of the originals had been saved and were re-used but there were some missing. Fortunately Wade has a box of miscellaneous wood screws and substitutes were found. However the supply of suitable screws is slowly abating, must remember to bring some in. Attach file: (17.06 KB) (19.23 KB) (19.23 KB)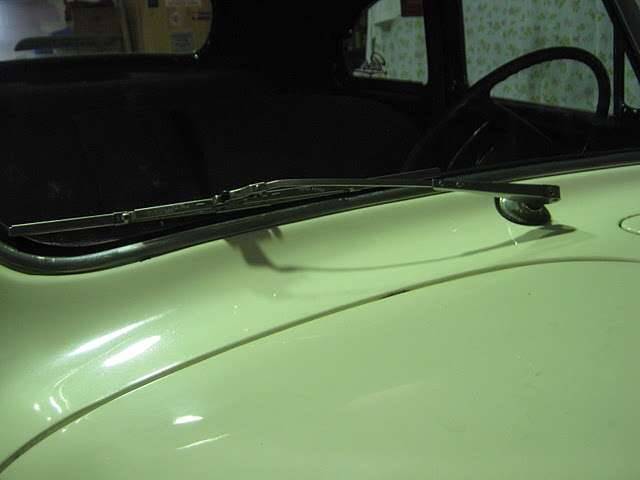 (39.22 KB) (39.22 KB)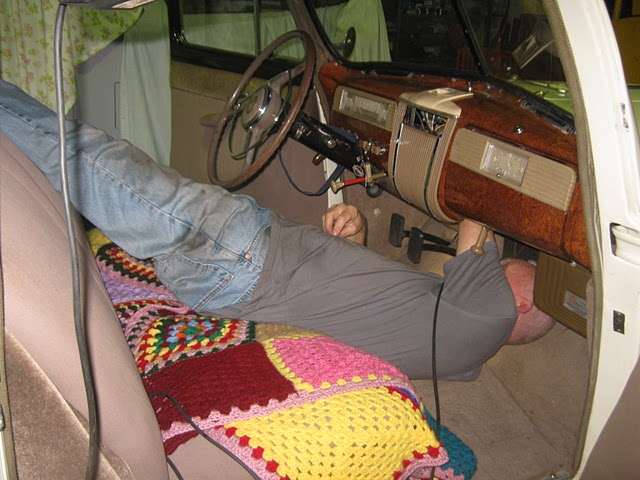 (2.82 KB) (2.82 KB) (43.94 KB) (43.94 KB) (20.89 KB) (20.89 KB)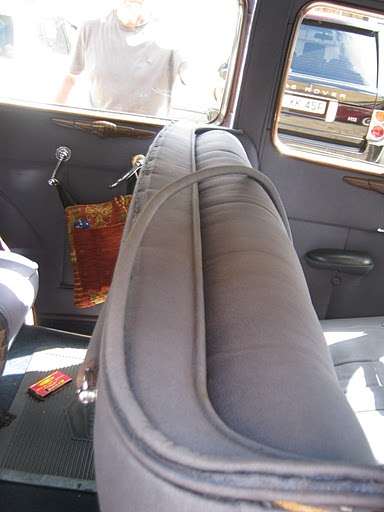 (20.80 KB) (20.80 KB)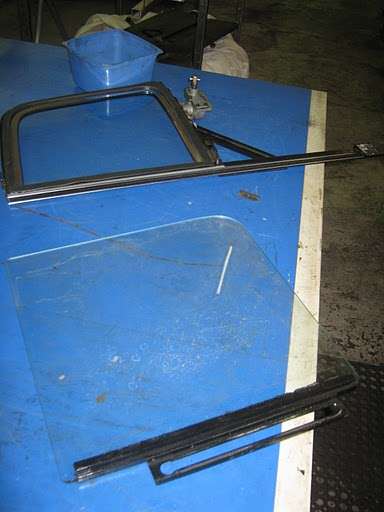 (23.50 KB) (23.50 KB)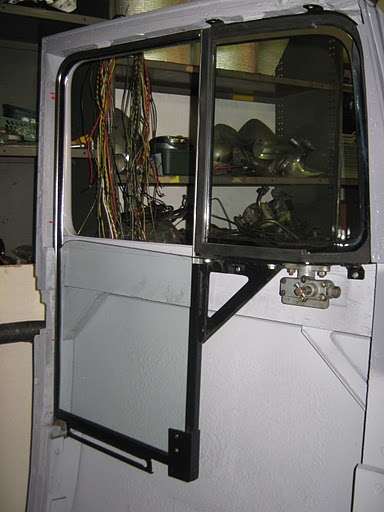 (24.30 KB) (24.30 KB)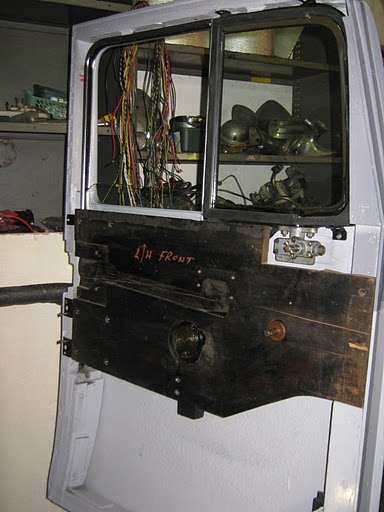 (26.46 KB) (26.46 KB)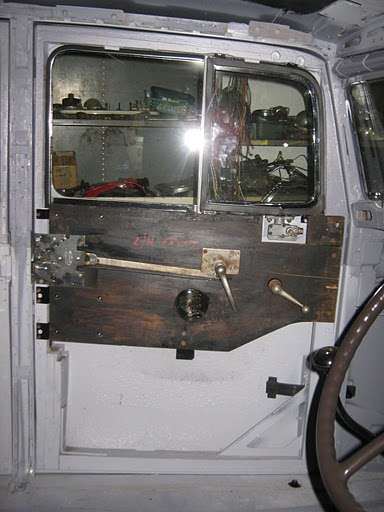 (14.02 KB) (14.02 KB)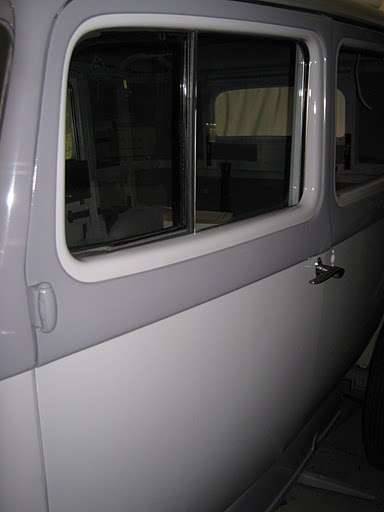 (33.12 KB) (33.12 KB)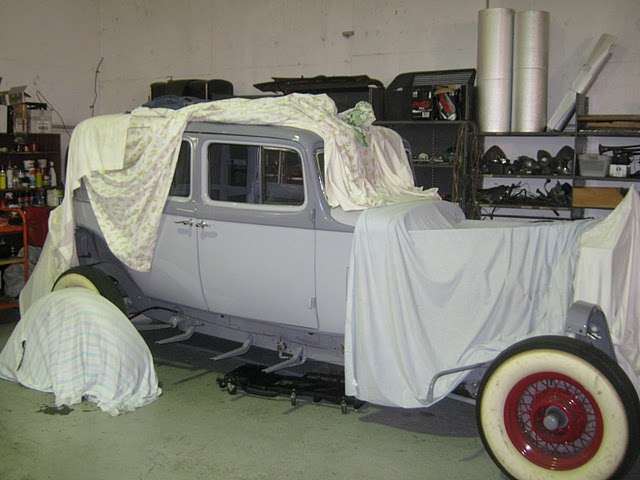 (37.86 KB) (37.86 KB) (38.61 KB) (38.61 KB)
Posted on: 2011/3/29 3:26
|
|||
|
Mal
/o[]o\ ==== Bowral, Southern Highlands of NSW, Australia "Out of chaos comes order" - Nietzsche. 1938 Eight Touring Sedan - SOLD 1941 One-Twenty Club Coupe - SOLD 1948 Super Eight Limo, chassis RHD - SOLD 1950 Eight Touring Sedan - SOLD What's this? Put your Packard in the Packard Vehicle Registry! Here's how! Any questions - PM or email me at ozstatman@gmail.com |
||||
|
||||

|
Re: Wade's Workshop
|
||||
|---|---|---|---|---|
|
Forum Ambassador
|
Wednesday 30th March 2011
Yesterday I said ".....Wade has a box of miscellaneous wood screws.....However the supply of suitable screws is slowly abating, must remember to bring some in." I remembered to bring my loose screws in, although some would suggest I'm the one with a screw loose.  Today the issue of Big Red leaking coolant from the water jacket cover plate and cover plate bolts was addressed. But before starting Wade rang Barry Smith for advice on what he uses to coat threads to provide a seal against coolant leaks and the answer came back Loctite 569 Thread Sealer. So, a leisurely walk around to Repco who didn't have it in stock but advised it could be ordered in from Queensland 500 miles away. Instead Wade, on returning to the workshop, called ABC Bearings who don't stock Loctite products but carry Hernon instead and advised that Hernon 947 Thread Sealant is the same as the Loctite 569. Since then I've found a Loctite to Hernon Conversion Table on line, doesn't exactly equate, but I'd imagine any difference would be minor. Then over to ABC, picked up a bottle of sealer about AU$23, less than 1/2 the cost of the loctite and almost a 1/3rd cheaper when you factor in the freight charge on top of the product cost. Pays to shop around! Back at the workshop shuffled cars out and backed Big Red in next to The Fossil, drained the cooling system and removed the oil filter. Oil filter removal is necessary because the lower cover plate front bolts where the leaks are present are obscured by the filter. Did the job in increments removing a number of bolts, cleaning bolts, cleaning bolt holes and then applying the Hernon 947 and re-installing the cleaned bolts. A very manual process with Wade removing bolts, me cleaning bolts, Wade cleaning threads and then re-installing the suitably Hernon 947 coated bolts. Then onto the next section and so on. Difficulties were encountered removing and re-installing some of the bolts because of the piping system for the oil filter interfering with access, as well as the oil filler tube. A couple of threads also needed to be heli-coiled, one was OK being easily accessible while the other was behind the fitting and oil pipe at the rear of the oil filter. This necessitated judicious pressure being applied to the pipe to bend it out of the way while tapping and insertion operations were carried out. 22 bolts received the Hernon 947 treatment, 16 along the bottom of the cover plate and 2 at each end. The 16 bolts along the upper edge of the cover plate weren't disturbed because no leaks were apparent there. That done turned to the oil filter. Wade has one of the replica machined two piece aluminium housing types which encloses a modern spin-on filter cartridge. Because the filter had to come off Wade was taking this as an opportunity to change the filter as well as the oil. My contribution to this was a pair of MBM gaskets for the filter to oil pipe fittings when it goes back together tomorrow. Unfortunately I have to miss that, as well as Noel bringing his '39 in after the body work and re-paint on his mudguard(fender) dings to have the right side mount re-fitted. What's more important than Packards? Answer - Grandchildren. I will catch up with Noel on Sunday however because he's the organiser of April's monthly PACA run. On this run we're going to another PACA members house to see his recently imported '34 Twelve as well as his other cars. That will be followed by a trip to the New South Wales Rail Transport Museum, should be a good day! Attach file: (43.39 KB)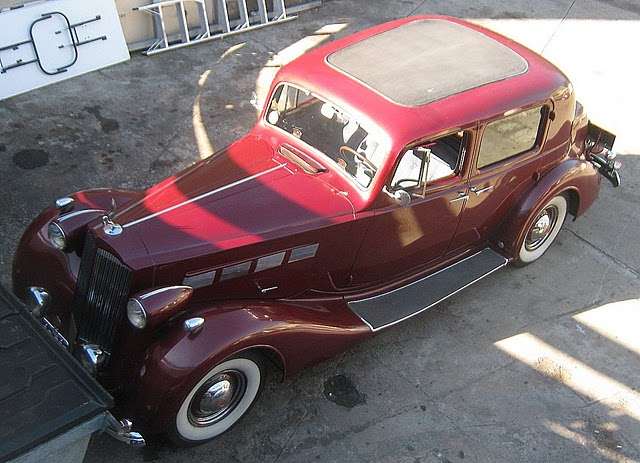 (22.60 KB) (22.60 KB)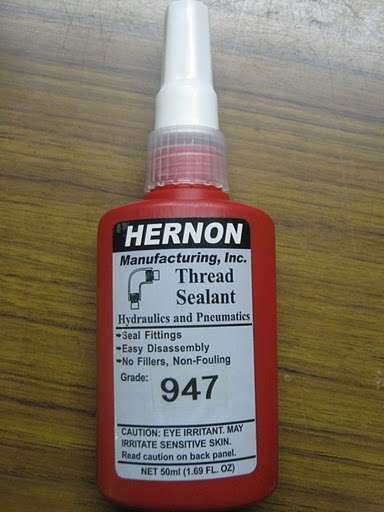 (31.51 KB) (31.51 KB) (32.87 KB) (32.87 KB) (34.22 KB) (34.22 KB)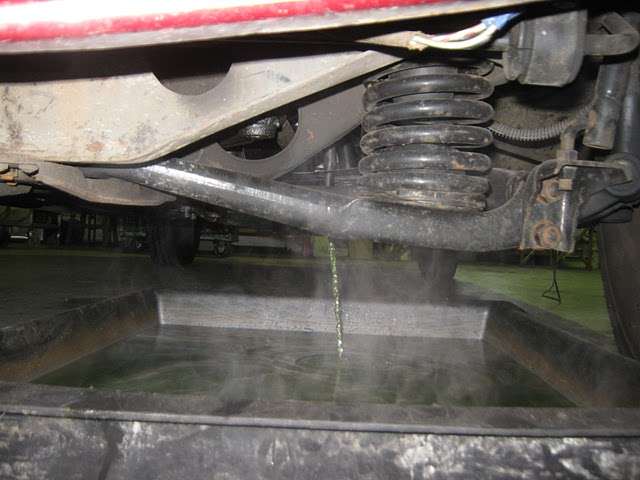 (40.94 KB) (40.94 KB)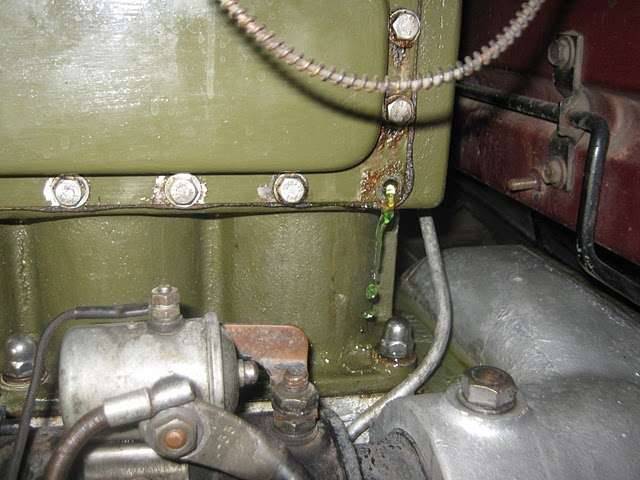 (26.63 KB) (26.63 KB) (25.45 KB) (25.45 KB) (23.40 KB) (23.40 KB)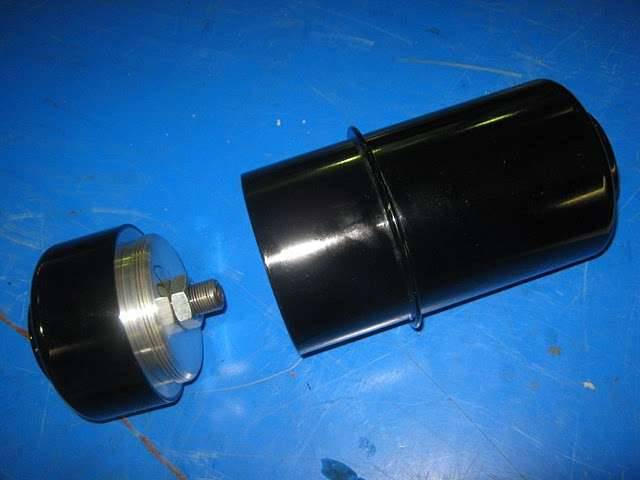 (34.05 KB) (34.05 KB)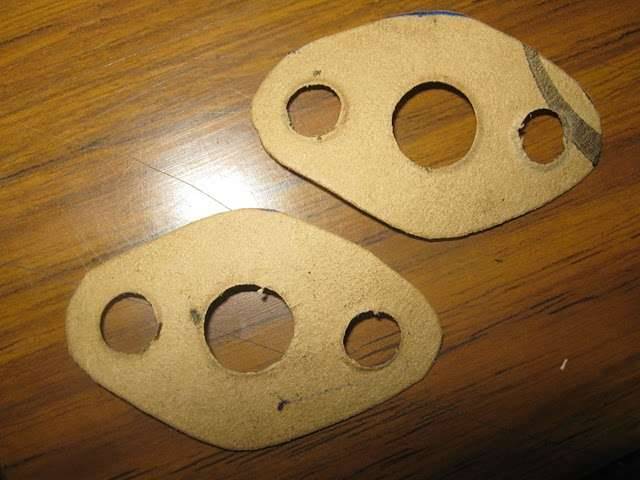
Posted on: 2011/3/30 2:51
|
|||
|
Mal
/o[]o\ ==== Bowral, Southern Highlands of NSW, Australia "Out of chaos comes order" - Nietzsche. 1938 Eight Touring Sedan - SOLD 1941 One-Twenty Club Coupe - SOLD 1948 Super Eight Limo, chassis RHD - SOLD 1950 Eight Touring Sedan - SOLD What's this? Put your Packard in the Packard Vehicle Registry! Here's how! Any questions - PM or email me at ozstatman@gmail.com |
||||
|
||||
|
Re: Wade's Workshop
|
||||
|---|---|---|---|---|
|
Forum Ambassador
|
Monday 4th April 2011
No Packard action at the workshop today but took the opportunity to catch up with Tony at Quickfit Mufflers @ Gladesville in relation to this earlier post. Quote: Ozstatman wrote: Wednesday 9th March 2011......Previously the '41 was up on Rick's hoist where Wade watched and listened below while I started and ran the engine. Nothing apparent but Wade suggested tightening the exhaust manifold to engine pipe connection, seemed to help a bit so it suggests the doughnut type gasket there might be failing. I'll take the '41 to Tony at Quickfit Mufflers next week so he can cast his expert eyes and ears over it. While the '41 was up on the hoist took the opportunity to tighten the inlet/exhaust manifold to block nuts...... It wasn't quite next week, but actually next month! Up on the hoist Tony quickly checked the manifold to engine pipe connection, it was good. Then, after some visual inspection, used a length of rubber hose to listen to the manifold to block connections and the hot box. And that's where the problem lies, in or around the hot box! I've heard and seen the stethoscope method used to track down engine noises but hadn't considered this technique when it came to exhaust manifold and pipe issues. Following Tony's pinpointing of the problem area called and discussed the matter with Wade. And I'm now in the process of ordering manifold and hot box gaskets from the US. With the repair to be carried out when the gaskets arrive. Attach file: (24.14 KB)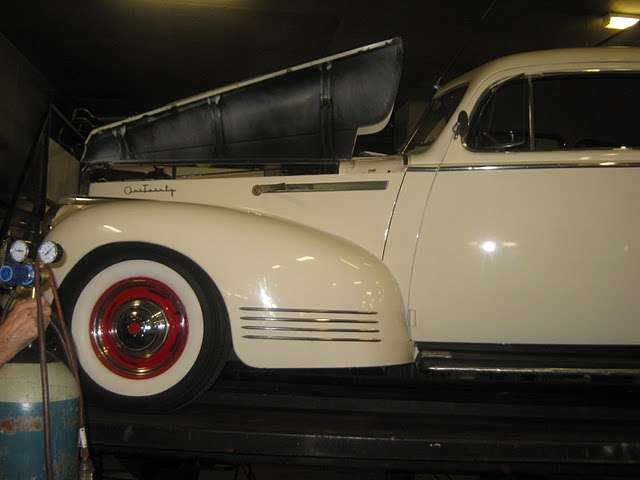 (25.11 KB) (25.11 KB)
Posted on: 2011/4/3 23:40
|
|||
|
Mal
/o[]o\ ==== Bowral, Southern Highlands of NSW, Australia "Out of chaos comes order" - Nietzsche. 1938 Eight Touring Sedan - SOLD 1941 One-Twenty Club Coupe - SOLD 1948 Super Eight Limo, chassis RHD - SOLD 1950 Eight Touring Sedan - SOLD What's this? Put your Packard in the Packard Vehicle Registry! Here's how! Any questions - PM or email me at ozstatman@gmail.com |
||||
|
||||
|
Re: Wade's Workshop
|
||||
|---|---|---|---|---|
|
Forum Ambassador
|
Wednesday 6th April 2011
In my absence last week Wade had finished Big Red and had done some work on The Fossil. He'd installed some of the new wooden window bottom stops, made by Starliner, thanks Chris, together with rubber cushion blocks glued on top. And today we installed on the left rear window. Some while ago the upper U shaped piece of bailey channel had been installed but the bottom pieces, one either side, hadn't been. Reason was we ran out of bailey channel! Also, to install the window, the glass together with its bottom rail are held in place in the upper inverted U of bailey channel and the two lower side pieces of bailey channel are measured, cut and secured in place. Means, once installed, the window can't be removed until the lower pieces of bailey channel are removed! Then the board holding the winding mechanism was installed. Needed a couple of attempts before everything was right. There were two main problems, 1) the bottom rail of the window was catching on the front bailey channel, and 2) the lock mechanism wouldn't sit properly in the board. 1) was probably because when Ralph Moore Autoglass cut the new window glass and installed and sealed it to it's lower rail it was slightly off from the original. A little judicious use of a grinder and file fixed that. 2) was because Wade had disassembled the lock bodies and mechanisms for re-chroming, replacing broken springs and general cleaning and maintenance. In doing so a rivet was drilled out and replaced by a screw which now bottomed on the mechanism board. Fix was to drill an indent into the board, and Voila! Problem solved. Of course all this meant a number of assembly, dis-assembly, assembly and dis-assembly cycles before everything was settled into place, taking a good couple of hours, time flies when you're having fun! Next was final body alignment and bolt down. If we thought the number of assembly, dis-assembly, assembly and dis-assembly cycles for the windows was excessive we didn't know how good we'd been until this next step. There was quite a gap at the top of the doors on both sides as well as differences in the gaps between front and rear doors. There had been an initial attempt doing this a month or so back and Barry Smith had lent "technical advice" as well as being hands on the matter when he was last at the workshop, but all to no avail. Barry's advice was along the lines of throw away what you think is logical and do the opposite. In the end that turned out to be good advice, especially after trying, and trying, the logical process over, and over, without success! Started on the closest side which happened to be the right side and went from there. An initial inspection of the body pads revealed a number of different sized pads in place from our previous attempt at body alignment. Then all the body bolts were tightened down revealing a closing of the gaps but still a discrepancy between the front and rear top alignments. Loosening off bolts, jacking up the body at a number of points, installing thinner or thicker body pads on a logical and then on an illogical basis produced some small measures of success but mainly frustration. Finally though we figured out that using a thicker pad on the front body bolt, of course the most awkward one to access, actually lifted the rear of the front door up when that bolt was re-tightened. So things were looking good for the right side, but......the valance panel needed to be installed. Simple? In theory, yes. In practice, no. Getting the valance installed required the rear of the body to be jacked up so the panel could be slid in, over the top of the body pads mind you, while the front of the body was levered up carefully. And of course the valance needed to be in its proper place because it's bolted to the chassis too. Took a number of attempts shuffling it in and out, backwards and forwards before placement was acceptable. Then all the body bolts were re-tightened resulting in what had previously been a good alignment now being a poor one. Scratching of heads didn't help so back into it loosening bolts and placing thinner or thicker pads at strategic points. By strategic points, I mean any one of the five body bolt locations on that side, shouldn't have been too difficult with that few to play with should it? So more illogical thinking, mixed in with some trial and error and we finally came back to an alignment which was "acceptable". Right side all tightened down turned to the left side. A glaring observation of that side was the fact that when the doors were closed there was a gap at the top of doors you could see through. Fortunately one of the lessons learned from the right side was to use a thinner body pad and then tighten the middle body bolt down. Worked, but again when all bolts were tightened there was a mis-alignment between the front and rear door tops. More different sized pads. more tightening of bolts, more loosening of bolts on it went until finally a reasonable alignment was obtained. Then came the valance panel installation for the that side. Provided a new problem in not aligning like the other side but after a lot of incremental adjustments it was in. Again, after the body bolts were tightened the alignment of the front and rear door tops was out. By now however, although not fully understanding the why, we knew the how of going about correcting this. Loosened off the front three bolts, another pad for the front bolt, re-tightened the bolts and Houston we have alignment! With that returned to the right side performed the same procedure there and what was previously "acceptable" now became much more so. Attach file: (20.30 KB)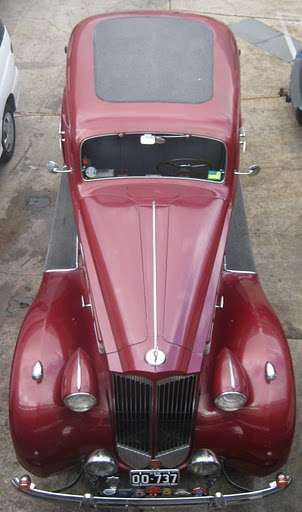 (26.56 KB) (26.56 KB)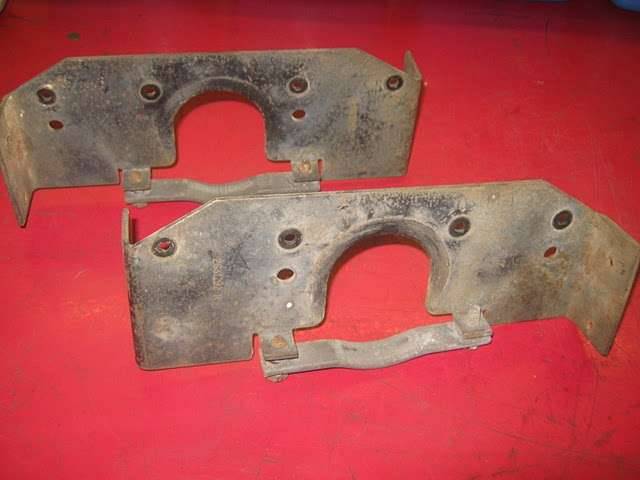 (23.69 KB) (23.69 KB) (23.19 KB) (23.19 KB) (41.63 KB) (41.63 KB)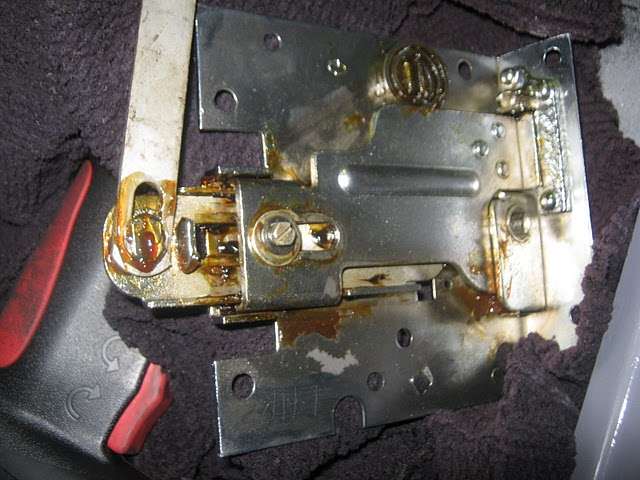 (27.31 KB) (27.31 KB)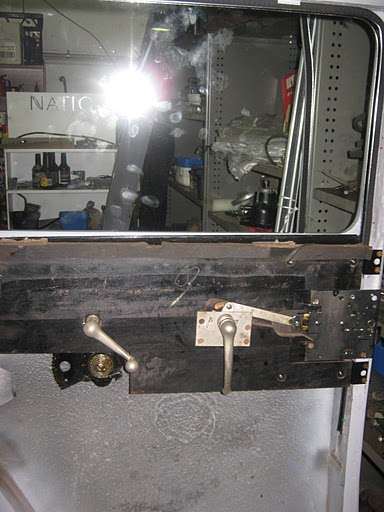 (22.08 KB) (22.08 KB)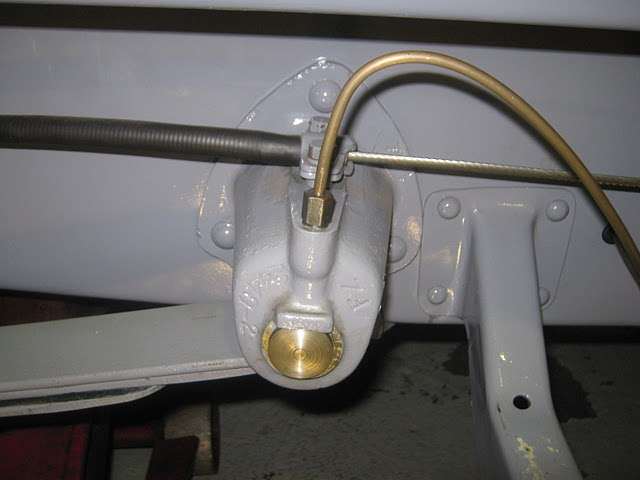 (21.42 KB) (21.42 KB)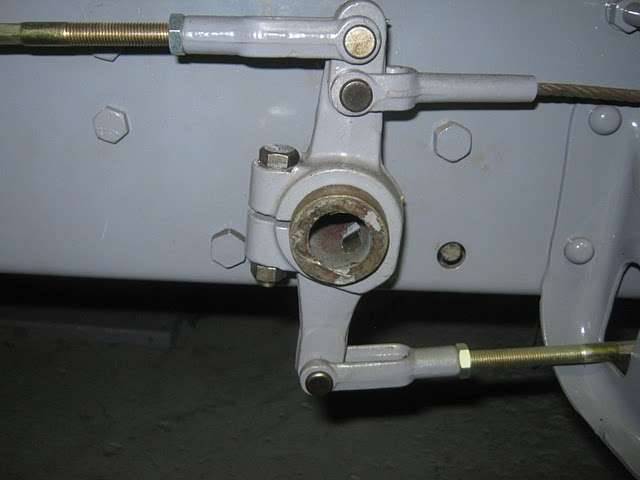 (17.08 KB) (17.08 KB)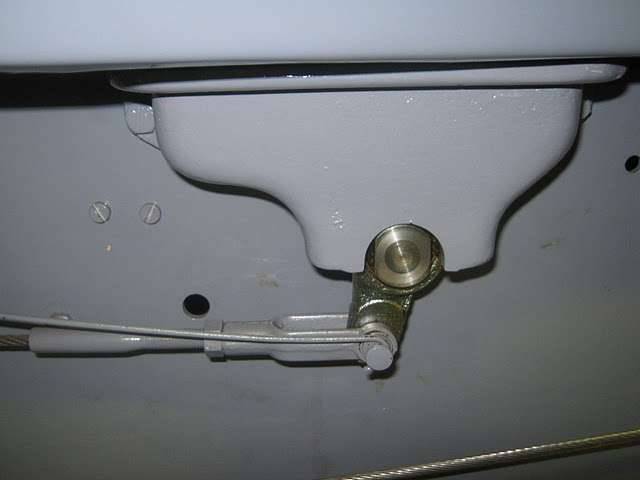 (34.27 KB) (34.27 KB) (30.37 KB) (30.37 KB)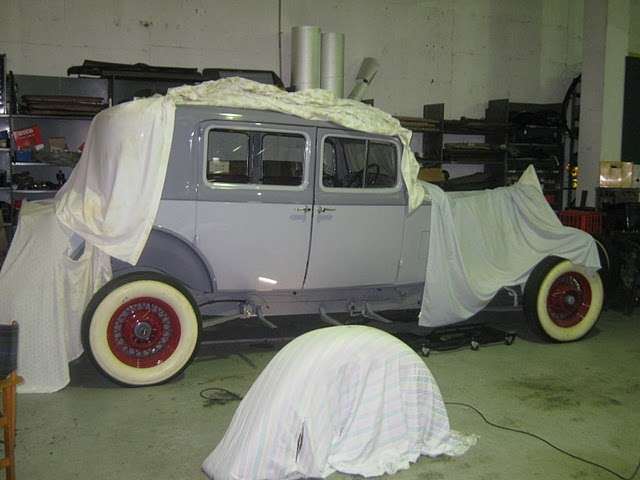 (30.27 KB) (30.27 KB)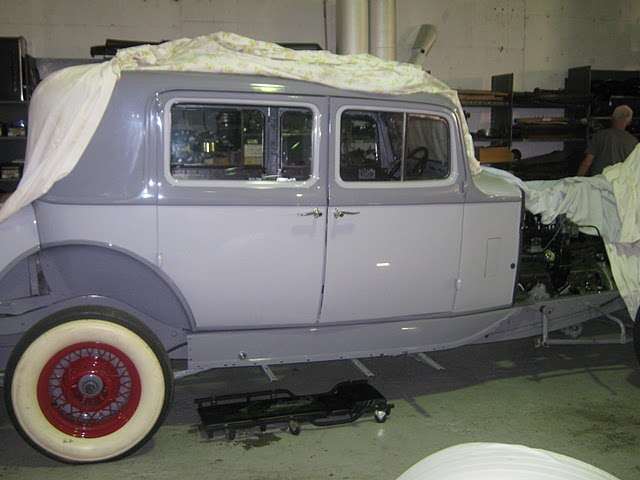 (18.01 KB) (18.01 KB)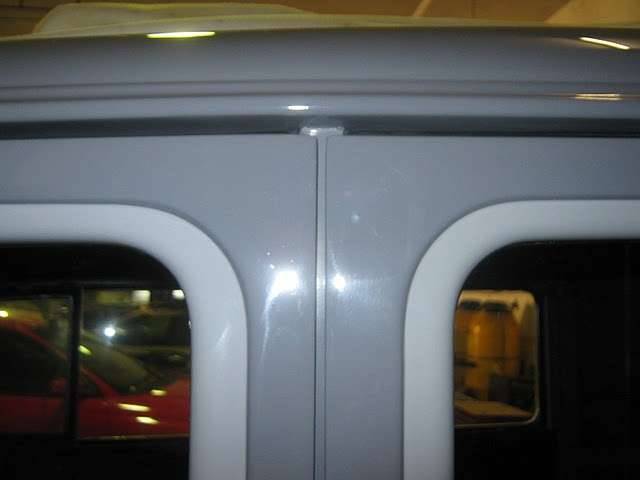
Posted on: 2011/4/6 3:48
|
|||
|
Mal
/o[]o\ ==== Bowral, Southern Highlands of NSW, Australia "Out of chaos comes order" - Nietzsche. 1938 Eight Touring Sedan - SOLD 1941 One-Twenty Club Coupe - SOLD 1948 Super Eight Limo, chassis RHD - SOLD 1950 Eight Touring Sedan - SOLD What's this? Put your Packard in the Packard Vehicle Registry! Here's how! Any questions - PM or email me at ozstatman@gmail.com |
||||
|
||||
|
Re: Wade's Workshop
|
||||
|---|---|---|---|---|
|
Forum Ambassador

|
As to the mystery parts, I know what they are but will not reveal the answer until I know what the prize is.
Posted on: 2011/4/6 8:43
|
|||
|
||||
|
Re: Wade's Workshop
|
||||
|---|---|---|---|---|
|
Forum Ambassador
|
Quote:
flackmaster wrote: As to the mystery parts, I know what they are but will not reveal the answer until I know what the prize is. No prize, unless a broken engine snubber is attractive to you, just the satisfaction of knowing you solved the mystery. Of course you can also reach round and pat yourself on the back, the Pacific Ocean makes it difficult for me to do so. Plus I'm sure you'll want to put Noel out of the misery of his not knowing. PS - I took and posted the pic with the expectation you would be one to respond!
Posted on: 2011/4/6 14:53
|
|||
|
Mal
/o[]o\ ==== Bowral, Southern Highlands of NSW, Australia "Out of chaos comes order" - Nietzsche. 1938 Eight Touring Sedan - SOLD 1941 One-Twenty Club Coupe - SOLD 1948 Super Eight Limo, chassis RHD - SOLD 1950 Eight Touring Sedan - SOLD What's this? Put your Packard in the Packard Vehicle Registry! Here's how! Any questions - PM or email me at ozstatman@gmail.com |
||||
|
||||
|
Re: Wade's Workshop
|
||||
|---|---|---|---|---|
|
Forum Ambassador
|
Friday 8th April 2011
Wade tells me he kept himself busy most of yesterday remounting the sidemount brackets on The Fossil. Apparently another pair of hands wouldn't have helped much so I don't feel too guilty about not being at the workshop. The difficulty was access in inserting the retaining bolts/nuts/washers on the inside of the chassis. Besides being in completely blind areas, necessitating all operations by feel, most needed to be held by a pair of pliers to reach the desired point of insertion or attachment No wonder it took the best part of 6 hours to do it. Although Wade did get the use of an additional pair of hands with Darren lending assistance on one particularly troubling bolt/nut, but that was all. After that, Wade had started on the right side bonnet(hood) side panel adding hardware in the form of the side door springs being attached and had run a die over the exposed and painted stud threads. Besides that, Noel had dropped his '39 120 Touring Sedan in. It, Big Red and my '41 Coupe are the bridal cars for a young mate of John's wedding tomorrow, Saturday. On to today. Because of the wedding Wade needed to attend to a couple of minor matters on Big Red. One of which was one of the front seat upholstery buttons, there are six and the middle one on the left(drivers) side seat squab, had parted ways with it's retaining cord. Didn't think Wade was that heavy, but that is the side that is occupied all the time so it receives the most stress. The other was the upholstery piece on the front seat back that covers the gap between the seat itself and the rigid body seat back structure. The staples used a couple of weeks ago were too short so tacks were on the shopping list as a solution. And for Noel's '39 some double sided tape, What for? The hubcaps of course, because Noel has lost a few along the way. Purchases made and back at the workshop I removed, taped and re-installed the two rear hubcaps while Wade busied himself with Big Red's front seat squab. Once Wade was ready that then became a two man job so I put aside Noel's hubcaps and assisted. Because of the lack of time and a limited range at the local hardware store bricklayers nylon string was purchased for the upholstery button job, in a lovely shade of fluorescent green too. Using a long mattress needle and with a length of brickies string looped through the eye of the needle Wade pierced the squab at the button point and pushed it through to the back within the confines of the upholstery spring it's located within. Difficult to do because the length of the needle, just long enough to pierce the squab, doesn't lend itself to precision positioning. Besides fixing the broken button string, the other two buttons under the drivers posterior had their strings replaced as a preventative maintenance measure. With the seat squab back in Big Red, then taped the two front hubcaps on Noel's '39. Also painted Noel's mobile phone number inside these two, the rear two hubcaps already having had that detail attended to. Turned to Big Red's upholstery again with Wade tacking the front seat top cover to the rigidly mounted seatback frame. Took a lot of tacks, but worked out well in the end. The tacking work was carried out in the carpark and once back inside Wade turned againto the bonnet(hood) side panels for The Fossil. Wade mounted the new Steele's rubber rubbing block to the right side panel as well as the small rubber dimple which is situated under the Packard spear. Turned to the left side panel, new ventilation door springs installed, painted studs cleared of paint using a die and rubber rubbing block and rubber dimple installed. Next items to be attended to were the bonnet locking rods. These haven't yet been cleaned and painted but should be done so early next week. Although they look the same, there are differences between the right and left sides so Wade made a drawing detailing each rod for reference at re-assembly time, probably later next week. Some old fashioned black-smithing was also in order to straighten the kinks in the shorter rods which run between the bonnet(hood) handles and the long locking rods. Quote: flackmaster wrote: As to the mystery parts, I know what they are..... So do I, now. Apparently they are ".....a piece which holds the headlights in a Dodge Charger! When Mathew and I were in Arkinsas with Flackmaster we found these among a pile of Chrysler parts, and Mathew wanted them for his Charger...."  Noel. Pity Mat didn't get more parts, he needs them as I believe he's written the Charger off! Might be for the best, now he can concentrate on his Packards! Sorry Mat, can't help myself. Noel. Pity Mat didn't get more parts, he needs them as I believe he's written the Charger off! Might be for the best, now he can concentrate on his Packards! Sorry Mat, can't help myself.Also had a request from Hobbs "......The little brackets that mount on the front chassis bar (both sides) of Wade's 34. I don't have these and am seeking a detailed photo of them. Any help would be great! BTW, does flackmaster have much as far as parts for 1933-1934. Not sure I have his info, but he does sure seem knowledgeable!....." Hobbs, as you know, any communication sent to me is usually regarded as fair game as far putting it onto this Project Blog is concerned. I'll try and remember to get some bracket pic's tomorrow when I'm down at the workshop getting the '41, Big Red and Noel's '39 dressed in their wedding finery. As to the Flackmaster, believe it's mostly Junior Pre-War parts but I notice there has been a shift in recent times to other Packard parts as well. Might be better to refer directly to him, probably by PM. Or, David may respond here or by PM to you. Attach file: (22.42 KB) (19.86 KB) (19.86 KB)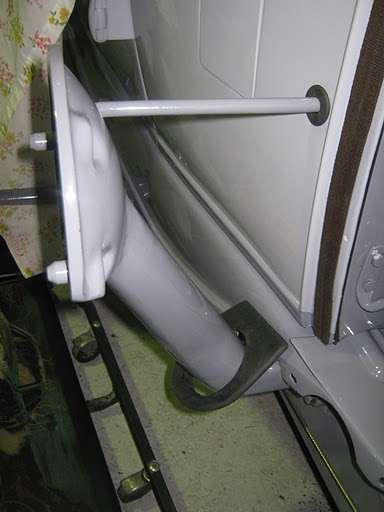 (18.94 KB) (18.94 KB)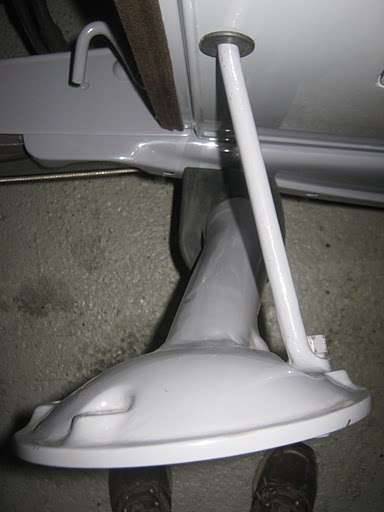 (28.00 KB) (28.00 KB)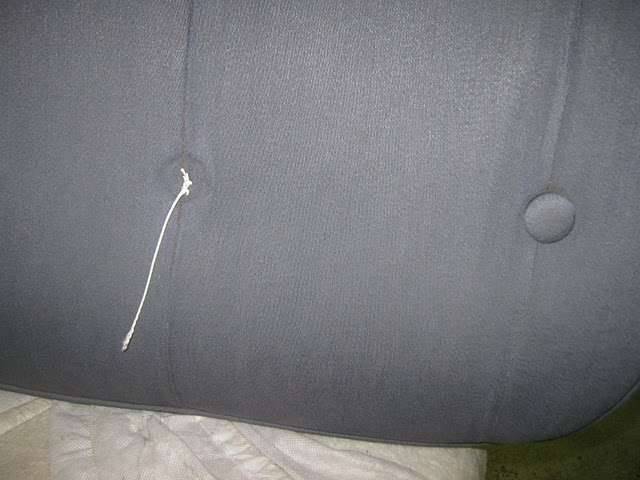 (25.48 KB) (25.48 KB)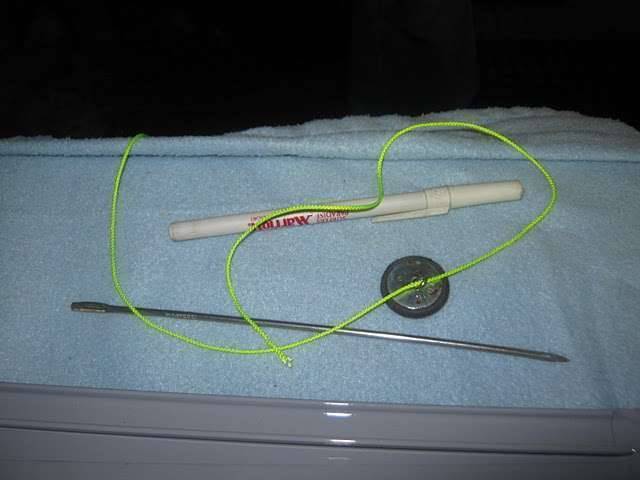 (46.48 KB) (46.48 KB)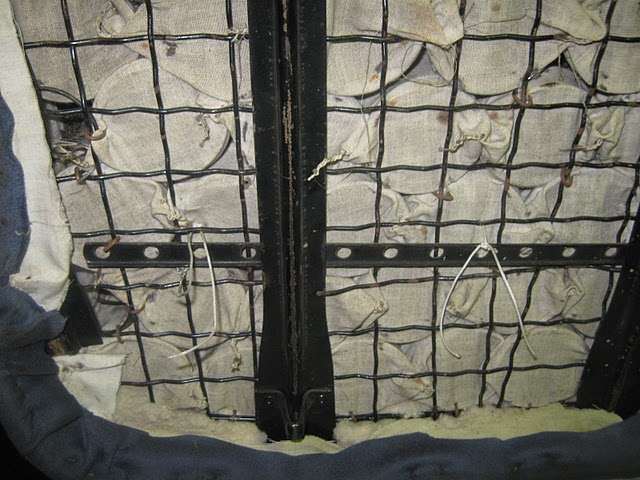 (44.60 KB) (44.60 KB) (50.70 KB) (50.70 KB)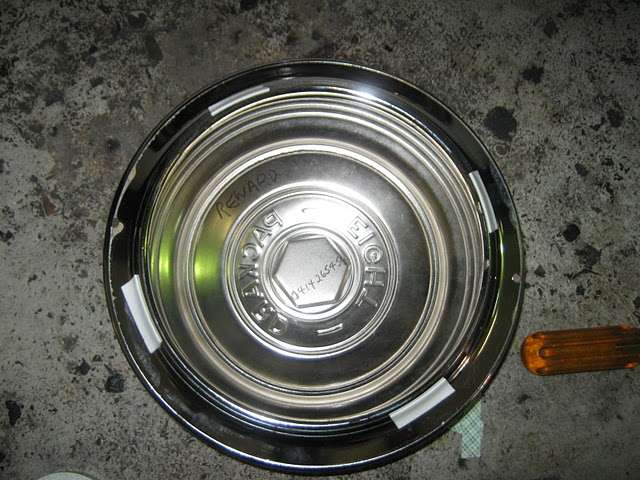 (32.07 KB) (32.07 KB)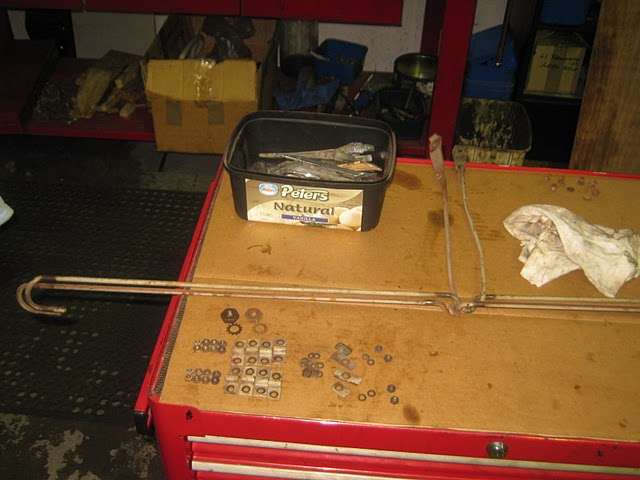 (14.56 KB) (14.56 KB)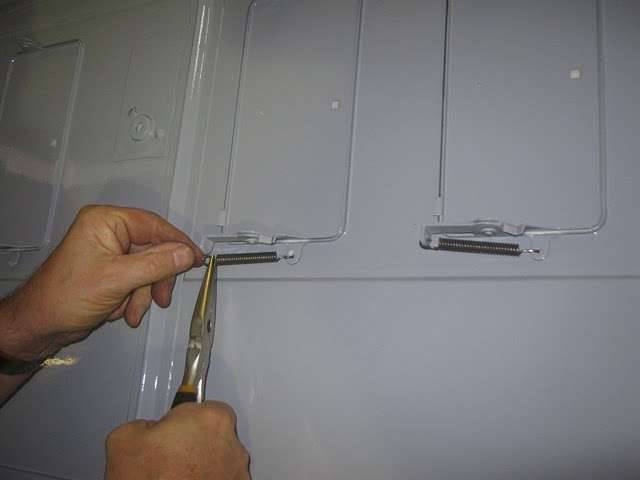 (17.00 KB) (17.00 KB)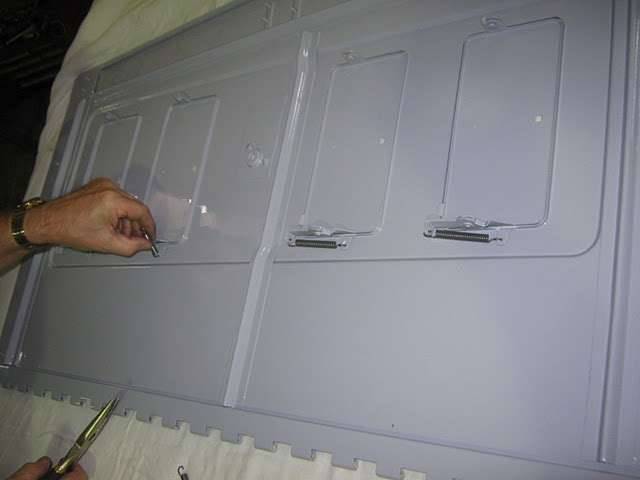 (10.59 KB) (10.59 KB)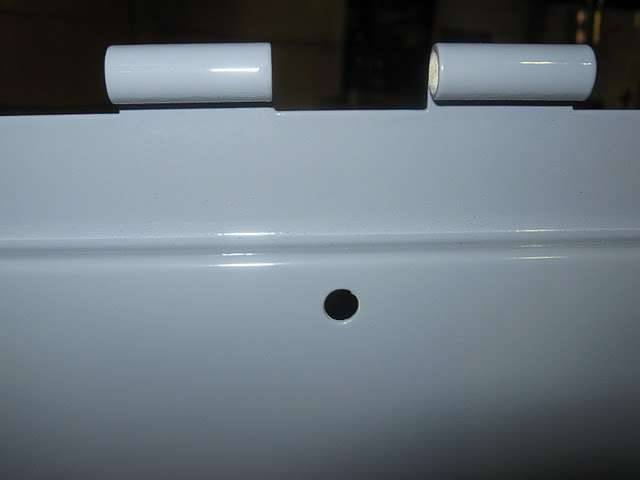 (11.84 KB) (11.84 KB)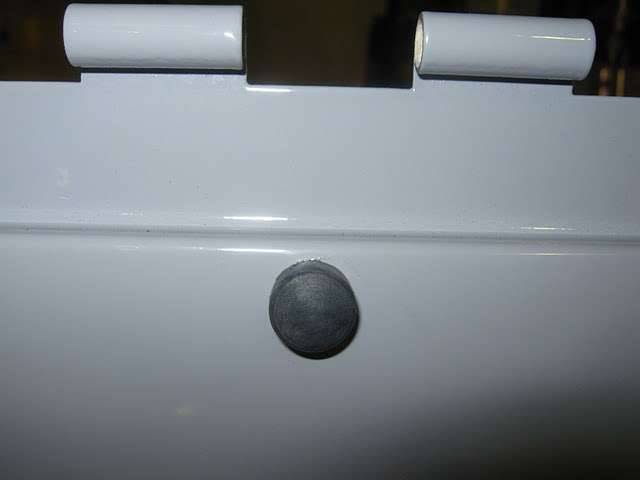 (10.50 KB) (10.50 KB)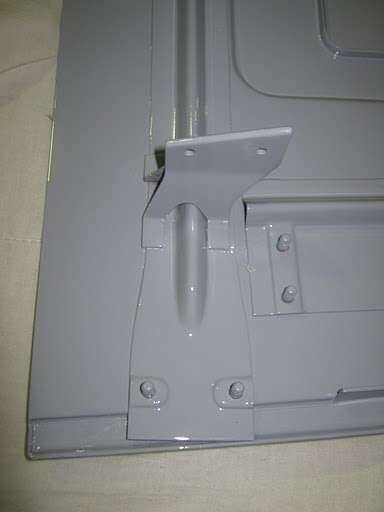 (11.17 KB) (11.17 KB)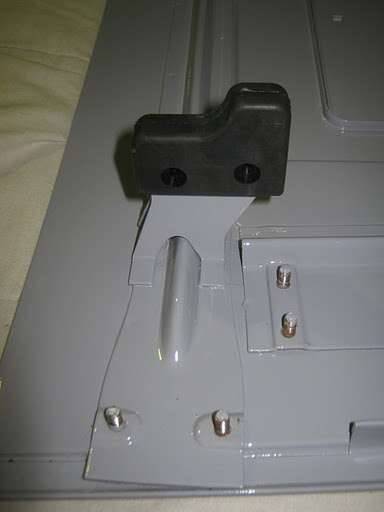 (12.94 KB) (12.94 KB)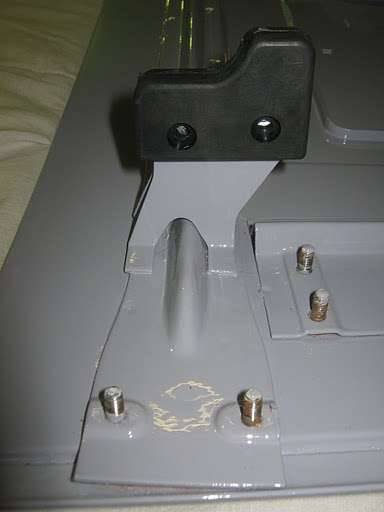
Posted on: 2011/4/8 1:04
|
|||
|
Mal
/o[]o\ ==== Bowral, Southern Highlands of NSW, Australia "Out of chaos comes order" - Nietzsche. 1938 Eight Touring Sedan - SOLD 1941 One-Twenty Club Coupe - SOLD 1948 Super Eight Limo, chassis RHD - SOLD 1950 Eight Touring Sedan - SOLD What's this? Put your Packard in the Packard Vehicle Registry! Here's how! Any questions - PM or email me at ozstatman@gmail.com |
||||
|
||||
Register To PostTopic is Locked


