|
Re: Wade's Workshop
|
||||
|---|---|---|---|---|
|
Forum Ambassador

|
Bill,
Thermostat is from Max Merritt, Part #223131. And as an old Aussie TV ad used to say, "Bring your money with you".
Posted on: 2011/10/3 14:38
|
|||
|
Mal
/o[]o\ ====  Bowral, Southern Highlands of NSW, Australia "Out of chaos comes order" - Nietzsche. 1938 Eight Touring Sedan - SOLD 1941 One-Twenty Club Coupe - SOLD 1948 Super Eight Limo, chassis RHD - SOLD 1950 Eight Touring Sedan - SOLD What's this?  Put your Packard in the Packard Vehicle Registry! Here's how! Any questions - PM or email me at ozstatman@gmail.com |
||||
|
||||
|
Re: Wade's Workshop
|
||||
|---|---|---|---|---|
|
Forum Ambassador
|
Quote:
Ozstatman wrote:.....tomorrow...we join the OASIS Club for their monthly run....to the Australian Aviation Museum at Bankstown Airport..... Good run today with Wade and I having the only Packards amongst the Morris & Mini Minors, an MGB, an Austin Freeway, Austin A40 Devon and others. See my pic's in this Picasa Album. Attach file:  (19.51 KB) (19.51 KB)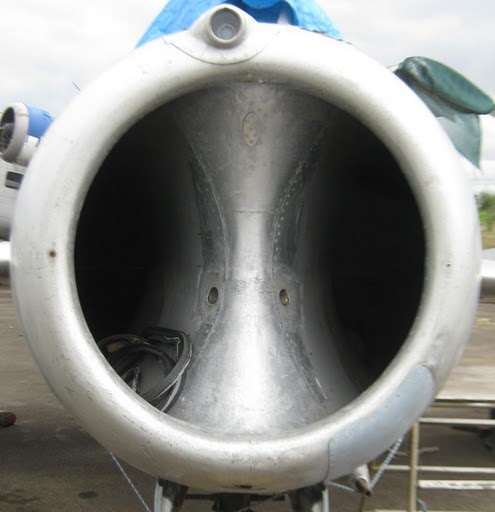 (44.04 KB) (44.04 KB)
Posted on: 2011/10/4 5:17
|
|||
|
Mal
/o[]o\ ==== Bowral, Southern Highlands of NSW, Australia "Out of chaos comes order" - Nietzsche. 1938 Eight Touring Sedan - SOLD 1941 One-Twenty Club Coupe - SOLD 1948 Super Eight Limo, chassis RHD - SOLD 1950 Eight Touring Sedan - SOLD What's this? Put your Packard in the Packard Vehicle Registry! Here's how! Any questions - PM or email me at ozstatman@gmail.com |
||||
|
||||
|
Re: Wade's Workshop
|
||||
|---|---|---|---|---|
|
Forum Ambassador
|
Wednesday 5th October 2011
Quote: Ozstatman wrote:.....First up re-installed the left front mudguard(fender) stay on Fleurette. Oh-oh! The stay is upside down in the pic I took! After that moved on to The Fossil and installed the front frame rail covers. Able to do that with confidence now that PackardBarry confirmed positioning of the nut on the underside of the top frame rail. But there's still something of a nagging question to answer, why is that nut shaped like it is? Anyone? Now when I say installed I really meant the right side was installed twice while the left side was installed only once. Something about learning from your mistakes? The first install on the right side went well until I reminded Wade at the end of doing so that he had wanted to install tape over the heads of two groups of rivets on the top of the frame rail. I'd forgotten until that point of time that Wade had wanted to do that. The tape was being installed to prevent squeaks once the covers are installed. So off the cover came, on went the tape and back on went the cover. And although PackardBarry had said ".....Its hard to get to; socket - elbow - extension - ratchet...." Wade found that it was relatively easily accessible from under the frame rail, so wasn't a problem. Then started on installing the new the radiator shell webbing. But struck a minor hiccup, the fasteners to hold the webbing to the radiator shell needed to be cleaned and painted. They are now painted but will have to wait for tomorrow at least until dry to be installed. During the course of Fleurette's pinion seal replacement Wade received a phone call from Noel. Apparently the R6 OD that went back with Noel to Peter Packard created a little confusion. What had happened was that Wade had received two lots of parts for the OD rebuild. A complete unit from PeterL and a set of internal parts from Peter Packard. Wade used the internals from PeterL's R6 and didn't use any of Peter Packard's parts. And at the end of the job had assembled a complete R6 using PeterL's housing and Peter Packard's internals. All clear now, or as clear as mud? Attach file: (38.53 KB) (32.52 KB) (32.52 KB) (38.87 KB) (38.87 KB)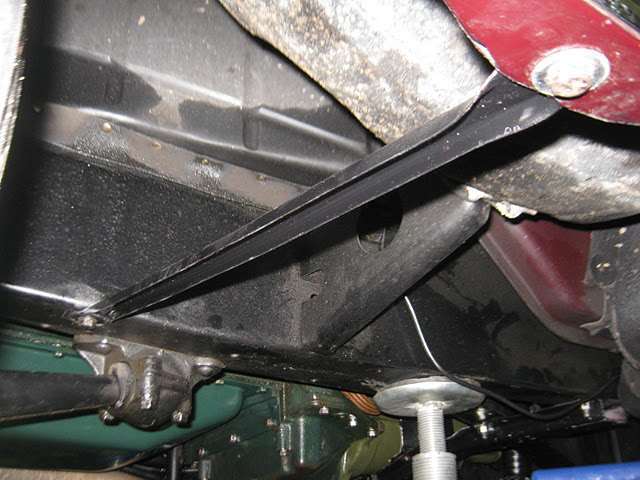 (40.20 KB) (40.20 KB)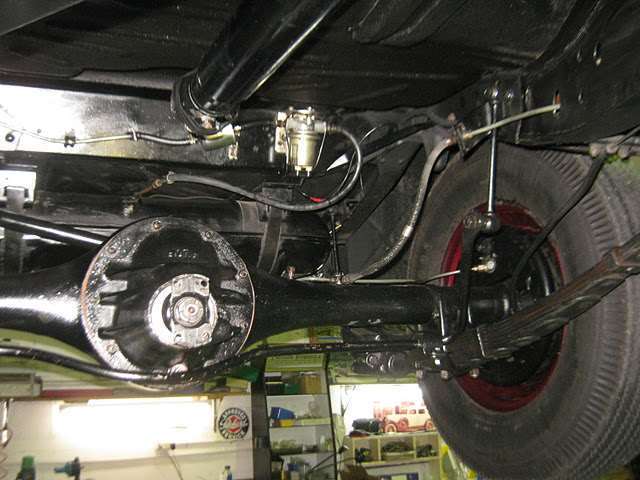 (28.39 KB) (28.39 KB)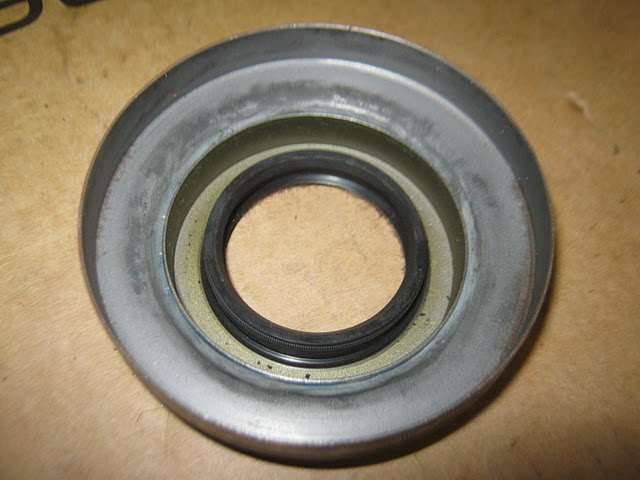 (27.47 KB) (27.47 KB)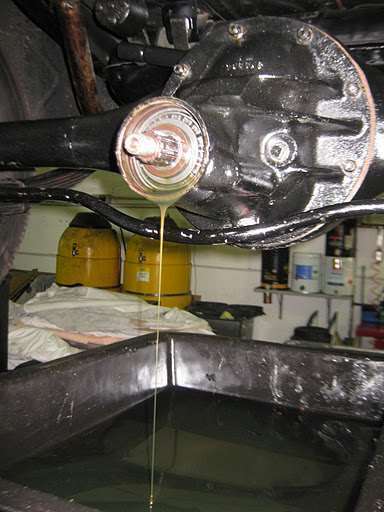 (26.46 KB) (26.46 KB)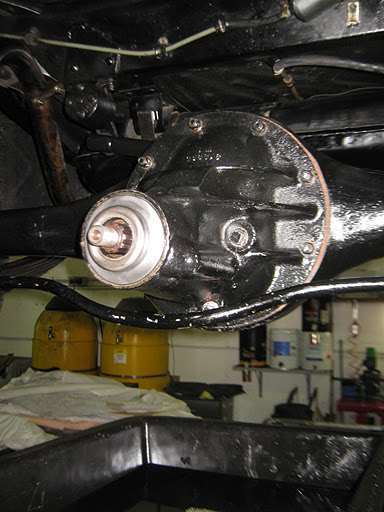 (43.45 KB) (43.45 KB)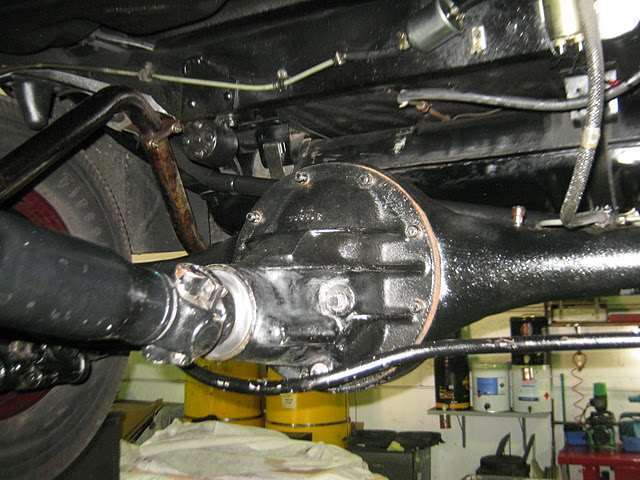 (20.44 KB) (20.44 KB)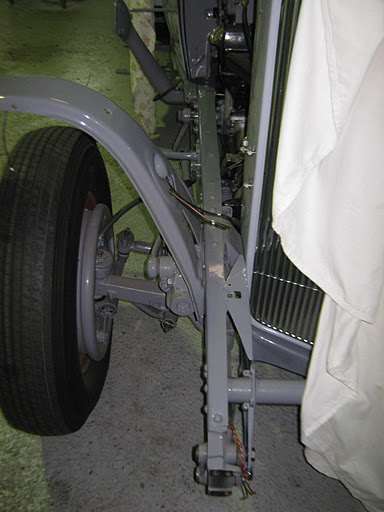 (8.12 KB) (8.12 KB)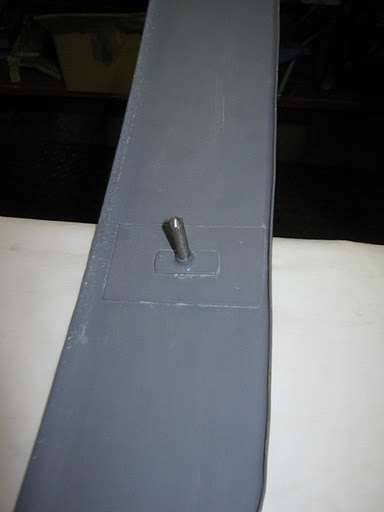 (25.40 KB) (25.40 KB)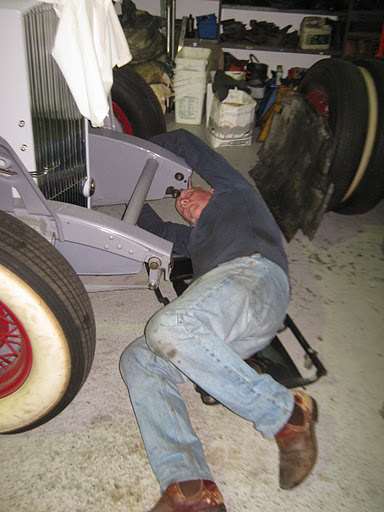 (35.11 KB) (35.11 KB)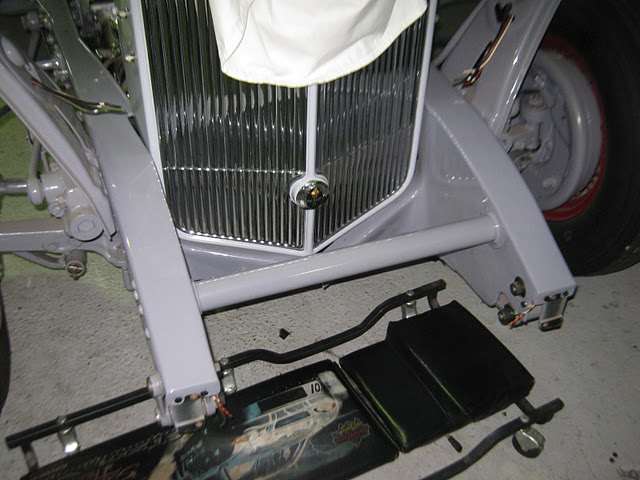 (22.03 KB) (22.03 KB)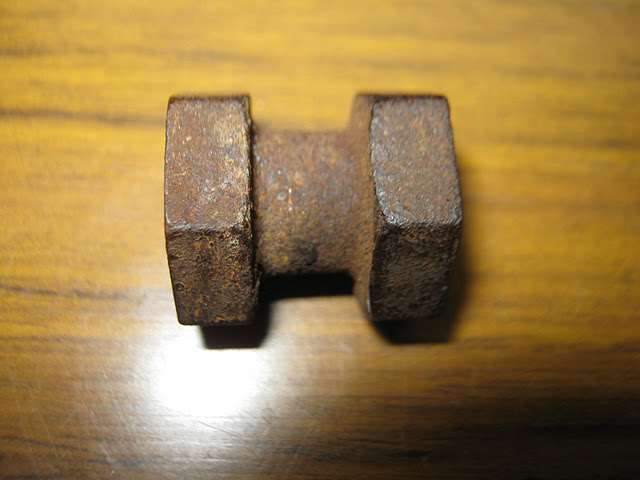 (20.00 KB) (20.00 KB)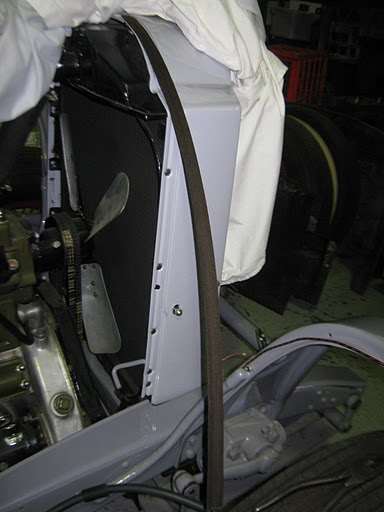 (15.60 KB) (15.60 KB)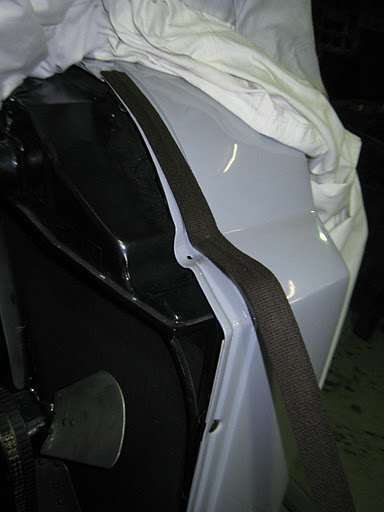 (33.18 KB) (33.18 KB) (19.60 KB) (19.60 KB)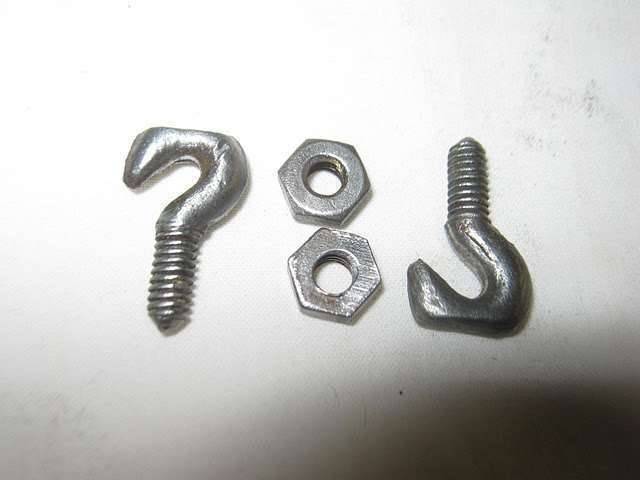 (35.67 KB) (35.67 KB)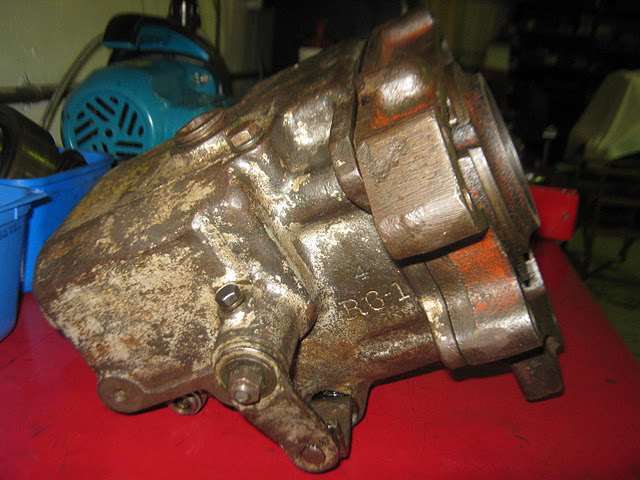
Posted on: 2011/10/5 3:01
|
|||
|
Mal
/o[]o\ ==== Bowral, Southern Highlands of NSW, Australia "Out of chaos comes order" - Nietzsche. 1938 Eight Touring Sedan - SOLD 1941 One-Twenty Club Coupe - SOLD 1948 Super Eight Limo, chassis RHD - SOLD 1950 Eight Touring Sedan - SOLD What's this? Put your Packard in the Packard Vehicle Registry! Here's how! Any questions - PM or email me at ozstatman@gmail.com |
||||
|
||||
 .....
.....|
Re: Wade's Workshop
|
||||
|---|---|---|---|---|
|
Forum Ambassador
|
Monday 10th October 2011
Backtracking to yesterday, PACA had a run to the Kurrajong Radio Museum. Kurrajong being in the foothills of the Blue Mountains west of Sydney we met at Macca's at McGraths Hill, and 7 Packards convoyed to the Museum from there. At the museum Wade donated a pair of WW2 Army radios about which Ian, the Museums founder, was able to relate the model's history right off the top of his head, most impressive. Following the museum visit we continued on to the Kurrajong Heights pub for lunch. Link to my pic's from the day. But, before returning to today, learnt that late last week Wade had had dramas with Fleurette because the new pinion seal wasn't sealing. Turned out the dust shield on the pinion yoke was contacting the seal body causing the seal body to rotate in the snout of the pumpkin. Wade cured that by removing the dust shield from the pinion yoke, together with a good application of Loctite on the mounting surfaces of the seal body and pinion snout. One sealing problem fixed but another raised it's ugly head being an oil leak from the trans. So that was todays fix on Fleurette. Put Fleurette up on the hoist and it was evident there was oil coming from somewhere but not from anywhere visible from under the car. So down came Fleurette, not completely because she was going back up later, and the left side aluminium(aluminum) carpet edge/trim was unscrewed, the front seat squab removed and the front carpet slid from under the seat and rolled up under the dash. Then the trans inspection plate was removed and the trans top inspected. Wade had suspected the leak was emanating from the trans top bolt which has a hole through it to provide ventilation for the trans. There certainly was oil there so that bolt, it was the left middle one , was swapped with the right rear bolt, together with a couple of copper washers. The leaked oil was then cleaned up from the trans top, Fleurette raised up on the hoist again and the leaked oil on the side, and bottom of the trans also cleaned up. Fleurette was lowered again, not to floor level, but before re-installing the front interior fittings the engine was started and run up to about 40mph in gear observing the trans top for any signs of leaks. There were none, so Fleurette again went up on the hoist and another undercar inspection for leaks took place. Again, none found. Refitted the carpet, edge trim and seat squab then took Fleurette for a run on the test route then back into the workshop, back on the hoist and no evidence of a trans oil leak. Wades thoughts are that the left side of the trans housing has a oiling channel running below the bolts on that side and in some way the oil is expelled/pumped/forced/syphoned(insert your word of choice) through the hole in the bolt leading to the oil loss. Wade will probably road test Fleurette over the next few days seeing Noel is at Mudgee with TonyW who is working on Noel's body. What? No, not Noel's body, the body of Noel's '41 160 Coupe! With Fleurette done, time to turn to The Fossil. Last week Wade had threaded the wiring harness through the enlarged hole in the body bracing so that's another small step accomplished. Also, when we left Wade last time, installing the radiator shell webbing had started, with the webbing's wire centre affixed at the top of the shell, and it had then stopped but today saw it's continuance. The little hooked bolts, that grab the wire centre of the webbing were ready for fitting which entailed piercing a hole through the webbing adjacent to the centre wire and the hook bolts inserted. Near the top of the radiator shell there is a U shaped indentation which accommodates the hook bolt. Takes a bit of muscle to get the webbing sufficiently into the U so that a washer and nut can be affixed in the confines between the radiator top tank and the radiator shell. But first have to shape the centre wire to the U shape required Got there! Next was affixing the bottom end of the wire to the bottom edge of the radiator shell. Had to trim about 1/4" off the bottom of the webbing then the wire was bent under the lower edge of the radiator shell, then trimmed about 1" off the wire and it was bent to firmly hook the webbing to the radiator shell. Next was another hook bolt about two thirds of the way down the side of the radiator shell. Retention of this hook bolt is different from the upper bolt in that the upper bolt just has a nut and washer while this has a formed rubber washer and a flat washer which fit the inside contours of the radiator shell. Except it didn't seat in the contours properly, maybe the pieces from the original Fossil are slightly different from the replacement Fossil? Required a little judicious trimming to get the fit required along with some muscle again to get the wire to deform sufficiently. With the left side done turned to the right side. Did the trimming of the formed rubber washer prior to starting which combined with not having to trim the webbing length made for an easier job. Still required some muscle to form the webbing centre wire and to fit the hook bolts. Radiator webbing done, what next? Wade was concerned the radiator and radiator shell weren't vertical. That was certainly the case with a much smaller gap between the fan blades at the bottom of the radiator than those at the top. Should be easy to fix, right? Just shorten the firewall to radiator stays so that the top of the radiator structure is pulled back towards the firewall, right? The radiator top certainly went back, a little at a time, when the outside nuts on the stays were loosened and some Mal muscle applied. To complement the outside nuts being loosened the inside nuts, those under the cowl at the back of the firewall, were likewise tightened. But were we doing it right? A series of measurements confirmed that side to side and top and bottom the distances between firewall and radiator shell were equal. But were they right? Used the left upper bonnet(hood) panel as a check. This showed that the gaps between the panel and the body and the panel and the radiator shell weren't right. Instead of a consistent gap along either edge, each edge had a tapered gap. Easiest way I can describe it is like a "slight" parrallelogram inside a rectangle. Given that, how to fix it? First blush seems to indicate that the radiator shell besides not being perpendicular is also slightly twisted, not being square to the centreline of the car. Solution? Unbolt radiator mounting bolts and pivot radiator and radiator shell structure slightly at the same time removing a mounting shim from each side as the radiator shell structure seems to be sitting slightly too high to. Put The Fossil up on stands to give some room to get underneath her but then struck a snag. Because the cooling system is full tried to drain the radiator using the little cock in the lower outlet except it wouldn't undo. It has a brass handle to release the cock and let the water flow but it wouldn't release. Wade assured me he'd tested the cock thoroughly before he mounted it and it worked easily and perfectly. Looks like time, water and who knows what is conspiring against him. With the day slipping away, left it at that and will return tomorrow fresh and ready to do battle anew. Attach file: (39.03 KB)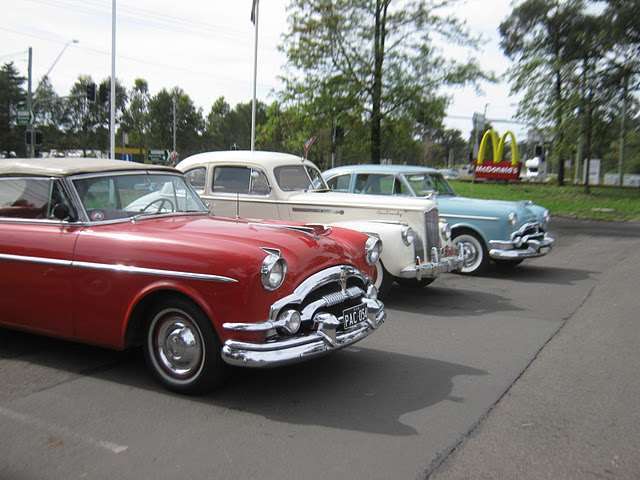 (20.71 KB) (20.71 KB) (22.96 KB) (22.96 KB)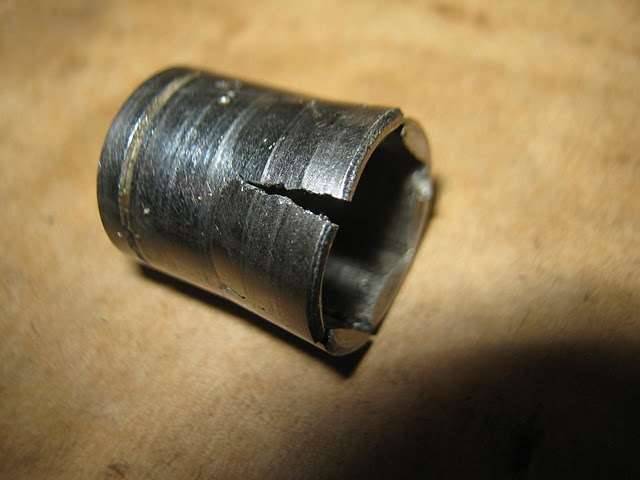 (37.58 KB) (37.58 KB)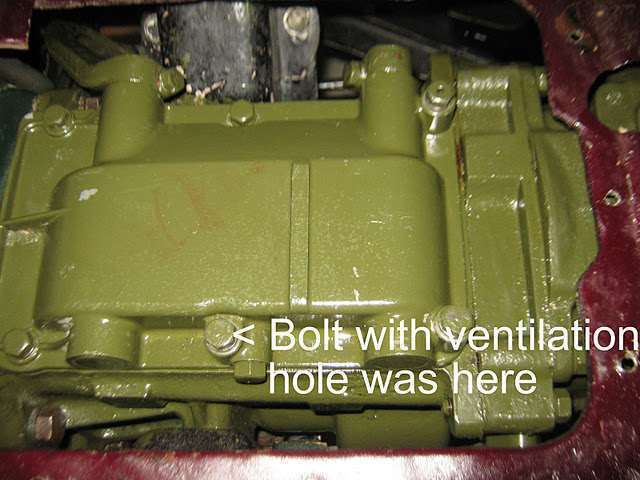 (31.76 KB) (31.76 KB)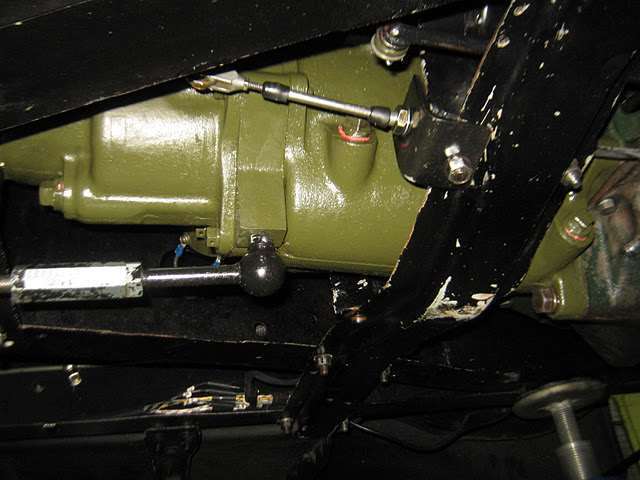 (29.16 KB) (29.16 KB) (23.86 KB) (23.86 KB)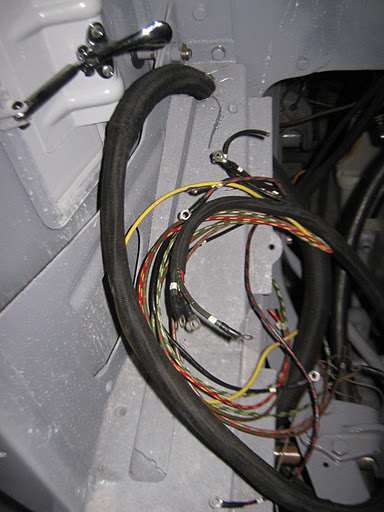 (33.33 KB) (33.33 KB)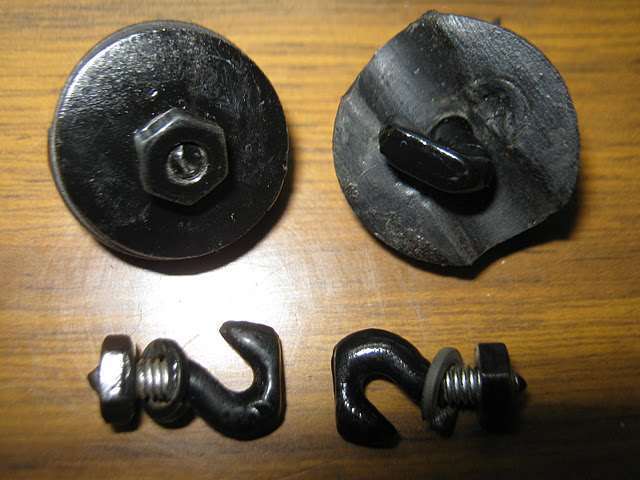 (27.37 KB) (27.37 KB)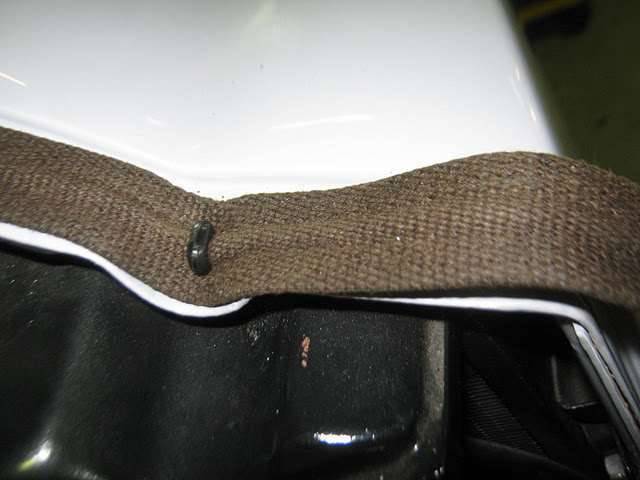 (25.15 KB) (25.15 KB) (12.93 KB) (12.93 KB)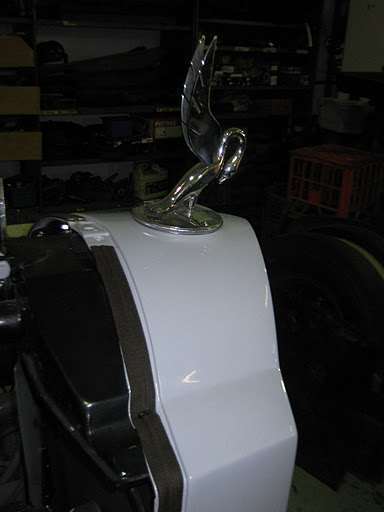 (28.95 KB) (28.95 KB) (27.89 KB) (27.89 KB) (37.00 KB) (37.00 KB)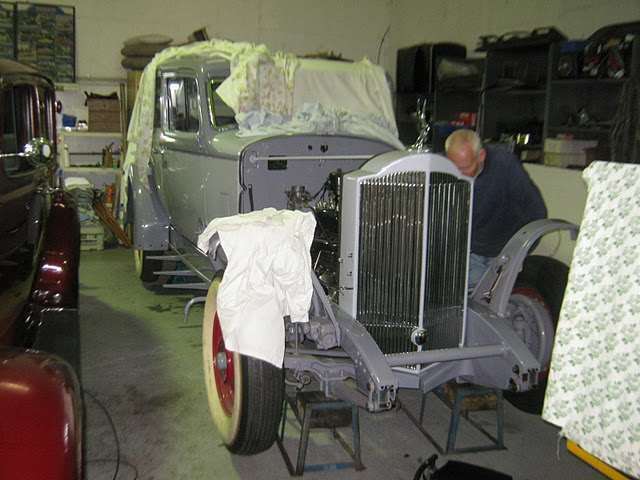
Posted on: 2011/10/10 4:14
|
|||
|
Mal
/o[]o\ ==== Bowral, Southern Highlands of NSW, Australia "Out of chaos comes order" - Nietzsche. 1938 Eight Touring Sedan - SOLD 1941 One-Twenty Club Coupe - SOLD 1948 Super Eight Limo, chassis RHD - SOLD 1950 Eight Touring Sedan - SOLD What's this? Put your Packard in the Packard Vehicle Registry! Here's how! Any questions - PM or email me at ozstatman@gmail.com |
||||
|
||||
|
Re: Wade's Workshop
|
||||
|---|---|---|---|---|
|
Forum Ambassador
|
Tuesday 11th October 2011
Wade had taken Fleurette home overnight and there she was sitting in the carpark when I arrived. All looked promising as far as oil leaks were concerned with no obvious puddles after being parked at Wade's overnight. But to better check things out, once again Fleurette went up on the hoist. And check out she did. Trans good. Engine OK after sump bolts were tightened, the front and rear oil seal leaks although minor are major to fix properly so will be monitored and tolerated for now. The pinion seal was pristine clean but....seeing there was no excess oil under the car it was apparent there was oil seeping from the pumpkin to diff housing joint. All the pumpkin bolts were tightened, the area cleaned, and no doubt Fleurette will be up in the air again tomorrow showing off her bottom! Once Fleurette was back on the shop floor Wade had a job for me to do on her, re-install the front seat squab because it had been skating around on the trip home and back. The squab fitment has been a problem for Noel previously and it also proved so today. And in trying to get it in today we actually ended up taking it out! On the bench, upside down, it was apparent that the right side "clip" had been moved from it's stock position. But left that as is(sorry, forgot to take a pic) and with some brute force the squab returned to where it should be. Another pet peeve of Wade's, besides leaks, is rattles and Fleurette has many to contend with. However there were two in the same area which Wade was determined to address, those emanating from the horn button and horn ring. They annoyed Wade so much that at stages on the trips home and back Wade was gently holding the horn button to prevent it rattling. After getting the horn button and ring off the steering wheel hub the cause of one of the rattles was readily apparent, a very ineffective spring under the horn button. The spring looks like it was hand wound from very thin wire and has lost whatever tension it did have earlier in it's life. Wade again turned to his magic shelf but no horn spring, instead the next best thing a '34 door handle spring, looks very similar to the real thing! And it worked. The other rattle, after careful observation of the horn button, horn ring and steering wheel hub, was the spokes of the horn ring contacting the hub. A judiciously placed piece of tape on the hub, for each of the three spokes, and another rattle silenced. Noel, although it won't be as quiet as your old Roller, I'm sure you'll notice the difference. Then it was time for The Fossil to receive some attention, back on 30th September I wrote, Quote: ......During the time John was away another minor fix was started. This involved the upper edge of the front window frames and its visibility. When I say the window frame, it is the upper edge of the channel/frame the window sits in, and with the front windows wound up this edge is noticeably visible. The rear windows, when wound up, don't suffer from this. To correct this it was decided to pack the window channel a little at the top and sides so that when fully up the window sits a little lower. We were partway through doing this on the left window when PeterL arrived...... Started on the left window by cutting about 1/4" off the front end of the top bailey channel the window glass winds into. The packing and rebending processes meant the channel was now too long. Wade used a fine cutting disc on his angle grinder and, after draping The Fossil in more old sheets to protect the paint from little hot metal mini meteorites, the cut was made. So quickly so, because I had my eyes shut(my form of eye protection in this instance), that I could hardly believe it was already done. Then the trimming and insertion of packing, redrilling of screw holes and refitting the bailey channel. Done, but Wade wasn't happy. Could still see the edge at the bottom of the glass, just, but it was the ragged edge from the sealant used that was bugging him. Because Wade would never be able to sleep peacefully again if he didn't "do something", Wade did something. He pulled the window out to trim up the offending ragged edges. Only this meant the outside door handle came off, the door lock mechanism came off, the wooden frame that encompasses the mounting of the door lock mechanism, the window handle and the quarter window mechanism came off. Then finally the quarter window frame was undone, the door window manipulated out and the quarter window frame temporarily re-installed. Door window on the bench the offending ragged edges are now ragged no more. Then back it all went into The Fossil. Left side done, now for the right side. This time disassembled everything first and gave the offending ragged edges the haircut needed, then reassembled everything into the door. Followed that with the packing and refixing of the bailey channel. And Wade is phoning John, Appin, tonight to arrange for John's '40 110 4 Door Touring Sedan to come in for it's broken universal, trans, OD or diff, one of these, all of these or some combination thereof to receive attention. Attach file: (34.92 KB) (31.50 KB) (31.50 KB) (23.55 KB) (23.55 KB)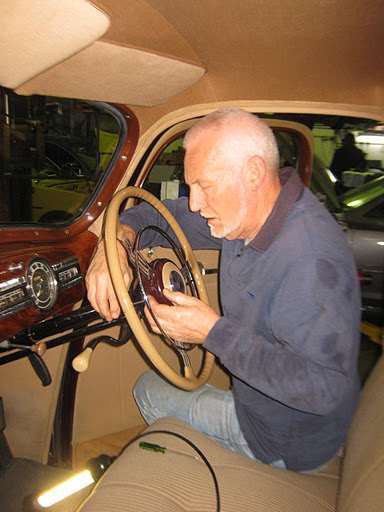 (32.11 KB) (32.11 KB)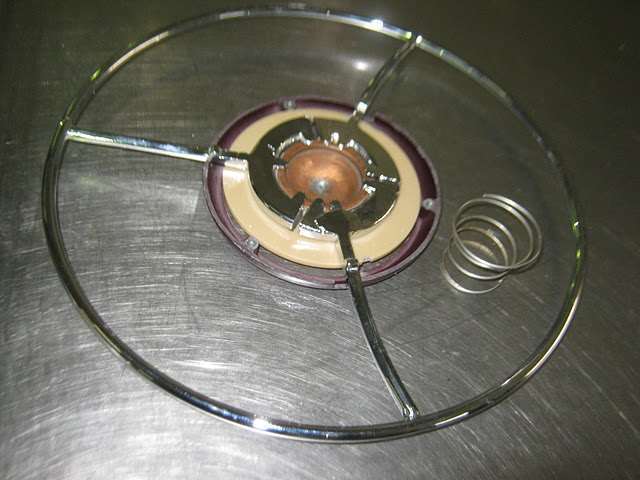 (31.69 KB) (31.69 KB)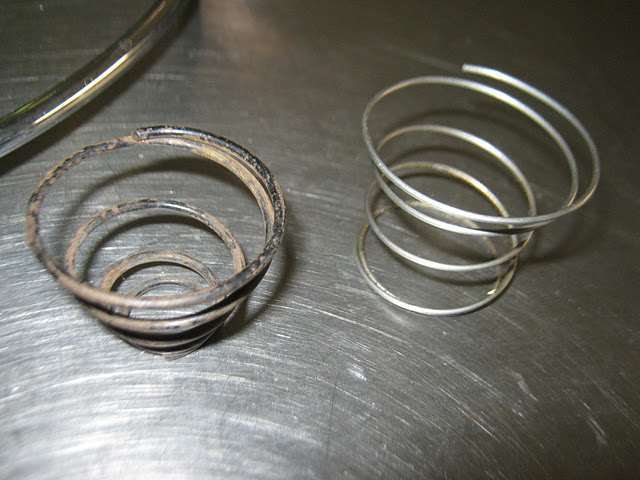 (30.03 KB) (30.03 KB)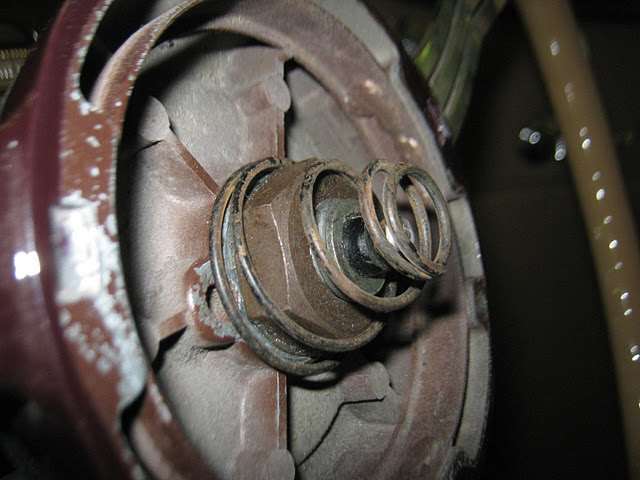 (35.90 KB) (35.90 KB)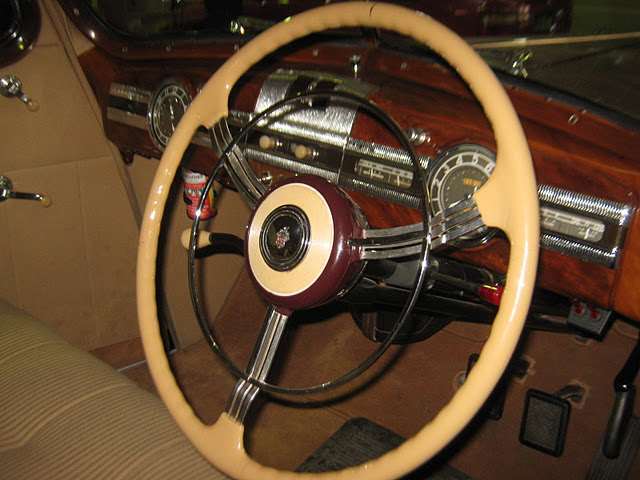 (17.90 KB) (17.90 KB)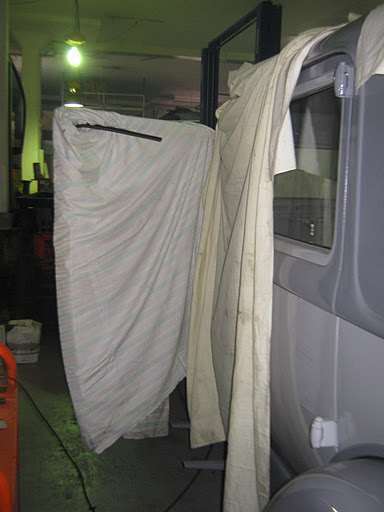 (28.17 KB) (28.17 KB)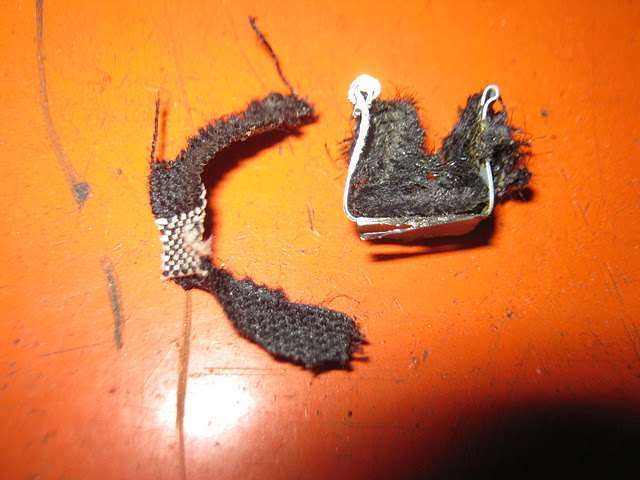 (24.54 KB) (24.54 KB)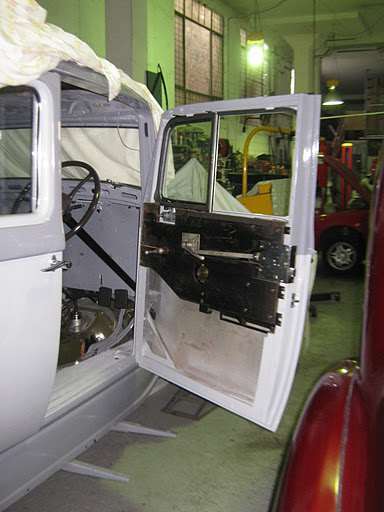 (25.31 KB) (25.31 KB)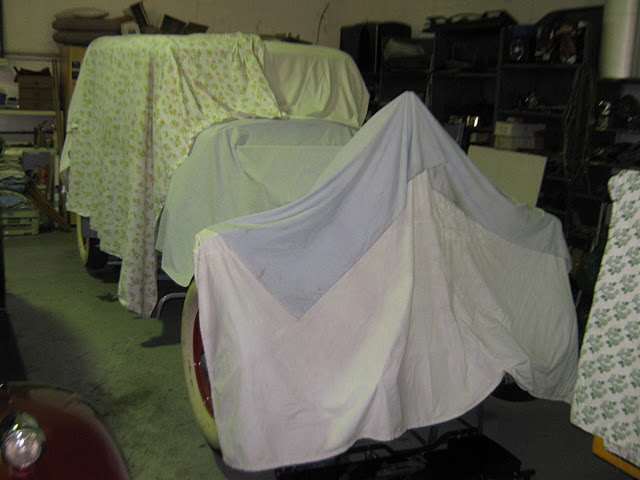 (39.94 KB) (39.94 KB)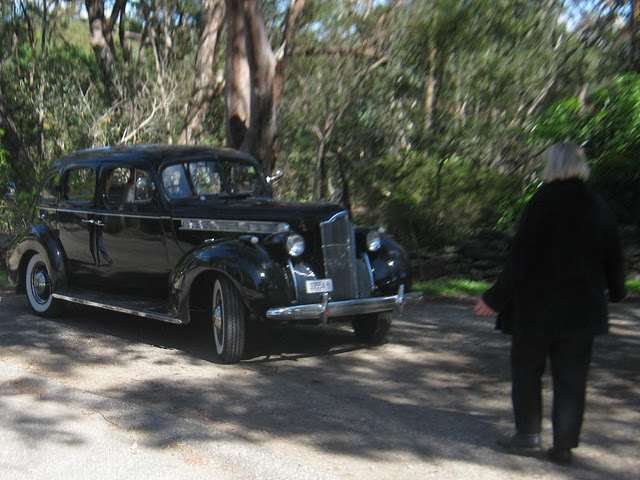
Posted on: 2011/10/11 3:02
|
|||
|
Mal
/o[]o\ ==== Bowral, Southern Highlands of NSW, Australia "Out of chaos comes order" - Nietzsche. 1938 Eight Touring Sedan - SOLD 1941 One-Twenty Club Coupe - SOLD 1948 Super Eight Limo, chassis RHD - SOLD 1950 Eight Touring Sedan - SOLD What's this? Put your Packard in the Packard Vehicle Registry! Here's how! Any questions - PM or email me at ozstatman@gmail.com |
||||
|
||||
|
Re: Wade's Workshop
|
||||
|---|---|---|---|---|
|
Home away from home

|
Sam Irwin - Tall Tales but True! (chapter II)
Quote: ...I am returning to see Sam again ...you give me your wife June's email address... 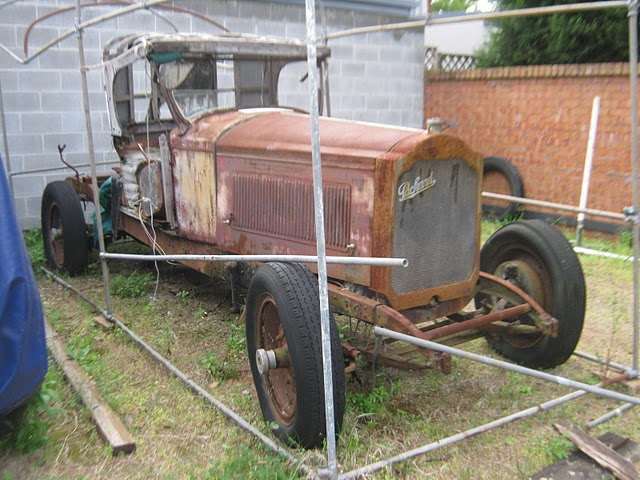 Mal, try to connect Sam and Matt who is looking for a RHD steering box. To quote him: Quote: "...I am currently on the look out for a suitable steering box. The original set up is not my preference and the car will be right hand drive, so a donor box from another vehicle will be sought..." BTW Due to excessive demand the Picasa link in post #872 has conked out. Attach file: (44.48 KB)
Posted on: 2011/10/12 4:36
|
|||
|
The story of ZIS-110, ZIS-115, ZIL-111 & Chaika GAZ-13 on www.guscha.de
|
||||
|
||||
|
Re: Wade's Workshop
|
||||
|---|---|---|---|---|
|
Forum Ambassador
|
Quote:
Guscha wrote:.....Mal, try to connect Sam and Matt who is looking for a RHD steering box......BTW Due to excessive demand the Picasa link in post #872 has conked out. Matt is probably looking for a RHD steering box with a faster ratio than one off a Packard can offer, to help the Biposto in it's time on the track. Besides, although I had already planted a seed with Sam for another Packard part that Matt desires the response was underwhelming. I think Sam wants to hold onto all parts of his "parts car". Concerning the link in post #872, the response from Sam when he saw the album was that it was nice but he didn't want to share his backyard with the world. Therefore I have limited the visibility of the album in accordance with Sam's wishes.
Posted on: 2011/10/12 15:17
|
|||
|
Mal
/o[]o\ ==== Bowral, Southern Highlands of NSW, Australia "Out of chaos comes order" - Nietzsche. 1938 Eight Touring Sedan - SOLD 1941 One-Twenty Club Coupe - SOLD 1948 Super Eight Limo, chassis RHD - SOLD 1950 Eight Touring Sedan - SOLD What's this? Put your Packard in the Packard Vehicle Registry! Here's how! Any questions - PM or email me at ozstatman@gmail.com |
||||
|
||||
|
Re: Wade's Workshop
|
||||
|---|---|---|---|---|
|
Forum Ambassador
|
Thursday 13th October 2011
Yesterday, in my absence, Wade had spent a lot of time on the rear door windows of The Fossil. Had disassembled all rear doors hardware, removed the window glass and tidied up the channel the glass sits in. Had also shimmed the right rear door bailey channels to obtain a snugger fit for the glass. The glass had been running smoothly but wasn't running vertically because there was too much movement between the glass and the bailey channel. Now the glass runs both smoothly and vertically. We started on packing the left side bailey channel this morning and were almost through doing that when there was a whisper in my ear, wasn't expecting that! It was Annet, (Appin)John's wife. They'd followed their '40 110 Touring Sedan over, on the back of a tilt tray tow truck, for repair of a broken universal joint and possibly more. Out in the yard there was the '40, have to find out if she(he?)[John, you'll let us know won't you? ] has a name, on the back of the tttt in a most undignified stance. The snout of the diff was pointing directly down. The tttt was backed into the entrance of the workshop and the '40 unloaded and then pushed over to the hoist. Up on the hoist inspection revealed the broken pinion flange universal joint, the hand brake cables had snapped or been torn from the backing plates AND the "mounting pads" on the diff housing had broken off, hence the diff's rotation. Visual inspection at the trans/OD end of things didn't show any apparent damage but that would be looked more closely later. Another thing which wasn't broken was the rear flexible brake hose, in fact that was probably the thing that prevented the diff housing from rotating further. Just as well it didn't break too otherwise the car wouldn't have been able to stop at the time of the incident! Because Annet was taking John to work, after the '40 was delivered, they didn't stay for the tear-down although they did enjoy a coffee, made by that Master Barista John, before they departed. We were also joined by Harvey, who had called in to see Wade, with Harvey very quick to offer assistance in the form of a brake drum puller which Wade declined, more of that later. Proceeding to the tear-down, first the front universal joint was disconnected from the OD flange. The rational here was to determine whether there was apparent damage to the trans or OD. This was to be checked by dropping the '40 down and starting her up, except it didn't. The battery was low having sat for about a month since the incident happened. However, after a 12V boost, the '40 rattled into life and after warming up a number of tests in gear, in OD, locked out of OD, etc showed that end of the drivetrain is working fine. Back up in the air serious tear-down began with the remnants of handbrake cable disconnected. The tailshaft, which Annet found in the grass verge by the side of the road after the incident after John couldn't locate it, had it's rear universal joint removed and the replacement John had bought off eBay some time ago "just in case" fitted. At this stage it was looking like the major part of this repair was to be the re-welding of the mounting pads to the diff housing. At this point lunch intruded. It's a tradition for a formal lunch at the workshop every Thursday. although even that has become subject to change. Lunch today was homemade pizzas made from a variety of ingredients including ham, cheese, tomato paste, cherry tomatoes, prawns(shrimp), figs, salami, etc, etc washed down by your beveragec of choice. All I can say is, it was delicious and for the record mine was Coca-Cola. But like many Thursday lunches it was spoiled by a constant stream of deliveries and other distractions, So much so that formal lunch day has now been moved to Tuesday, starting next week! Even Harvey returned during lunch bearing a brake drum puller which he was determined Wade should have in case it was needed, and it was! Lunch and other distractions aside it was back to the '40. Rear wheels off, axle nuts off, brake puller applied and each brake drum eventually came off with a loud pop. Thanks for the puller Harvey. The brake drums were being pulled to check for damage to the hand brake cable fittings, there was none, but a leaking right axle seal was discovered instead. Also disconnected the brake lines and removed the backing plate assemblies. So far, so good. But.....then Wade noticed the pinion flange for the rear universal joint was bent! Hadn't wanted to take out the pumpkin but this development changed all that. Propped up the snout of the pumpkin, drained most of the oil, undid the pumpkin to diff housing nuts, "broke the seal" holding the pumpkin to the diff housing then removed the prop and rotated the pumpkin while I held it. Gravity then took effect and I staggered to the bench with the pumpkin, not helped at all by tripping over the rattle gun on the way, but I made it. The pinion flange was removed and from Wade's magic shelf a replacement flange was produced. The replacement flange was cleaned up along with the full floating mounting pads. It is apparent the right side mounting pad is not looking as healthy as the left side pad. The left side pad has a flat "bottom" sitting on the bench while the right side pad has a bend in it. Additionally the left side pad "fits" snuggly from whence it was wrenched while the right side flops around, to coin a phrase. Parts required at this stage are new hand brake cables, new pinion seal, new rear axle seal kit and new rear flexible brake hose. But that could be subject to change as work progresses. Additionally I'll pull the sparkplugs and clean and re-gap them and Wade will conduct compression tests while the plugs are out. Attach file: (21.10 KB) (25.86 KB) (25.86 KB)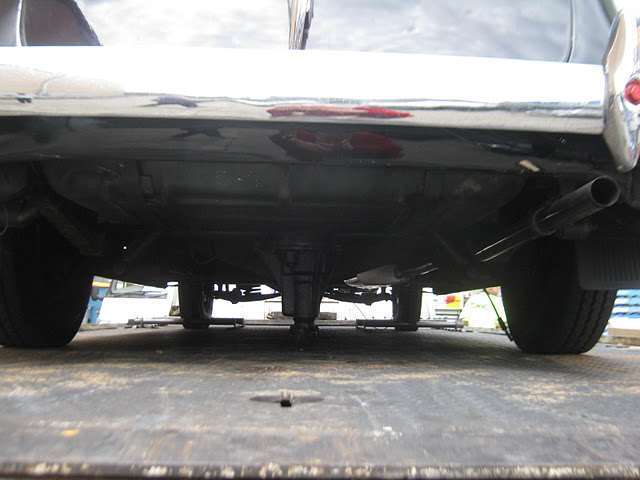 (21.81 KB) (21.81 KB) (29.60 KB) (29.60 KB)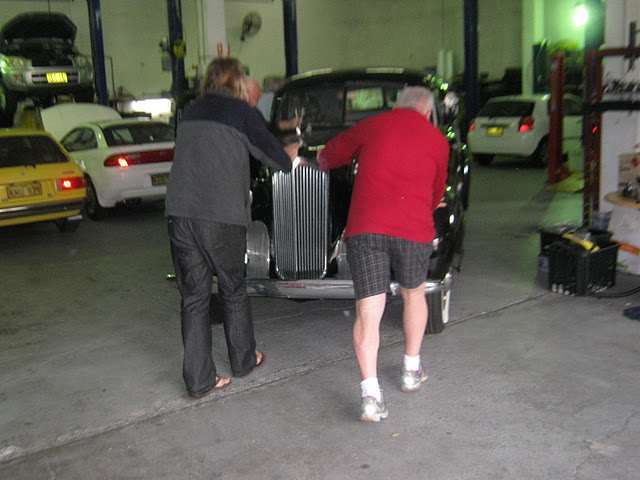 (26.45 KB) (26.45 KB) (40.53 KB) (40.53 KB)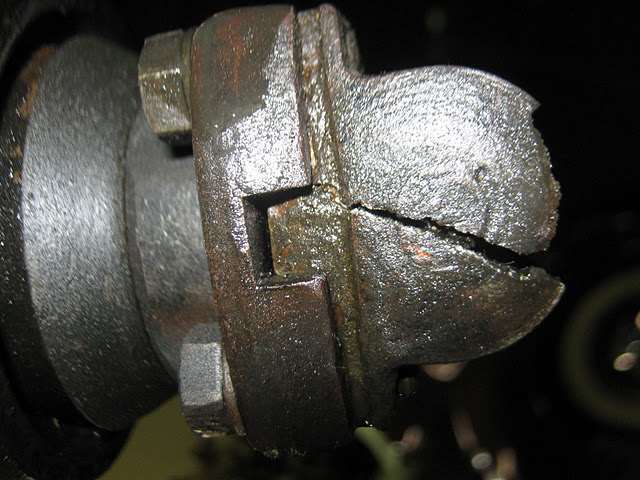 (35.67 KB) (35.67 KB)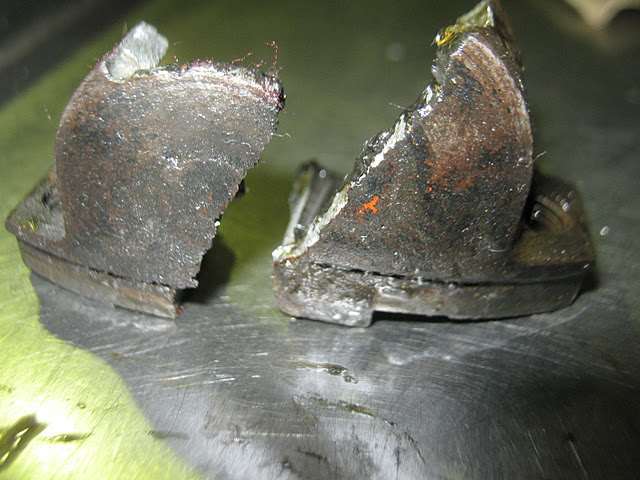 (22.30 KB) (22.30 KB)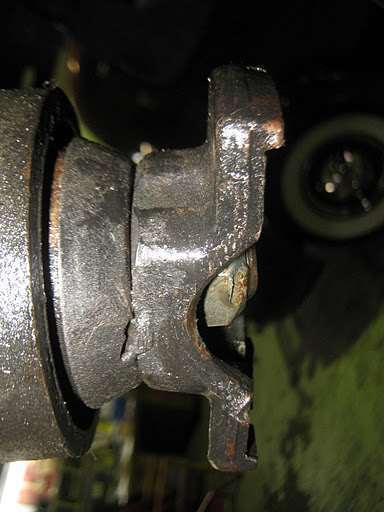 (39.51 KB) (39.51 KB)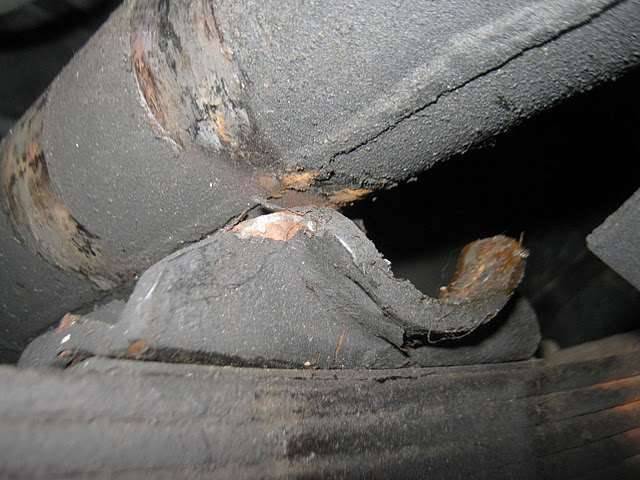 (33.58 KB) (33.58 KB)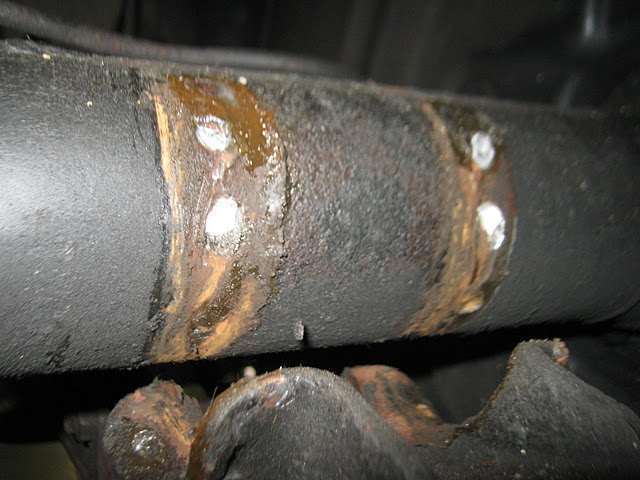 (29.13 KB) (29.13 KB)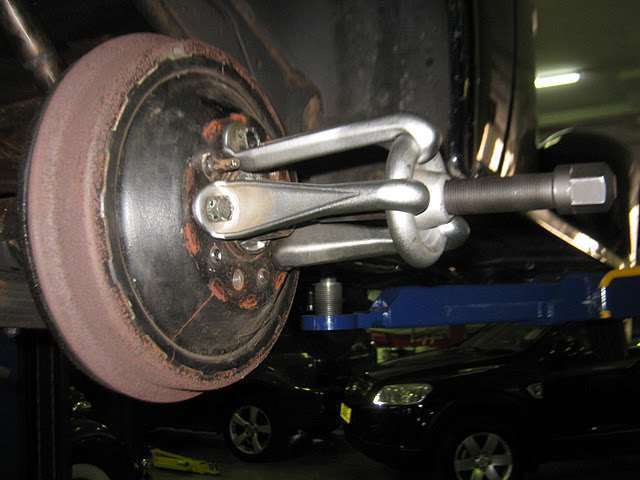 (21.70 KB) (21.70 KB)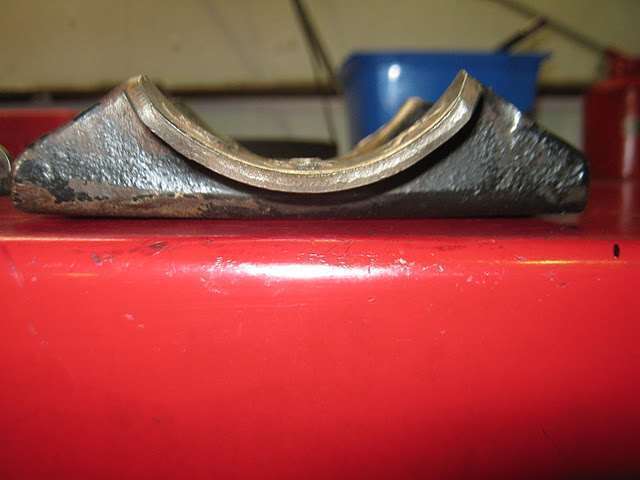 (20.95 KB) (20.95 KB)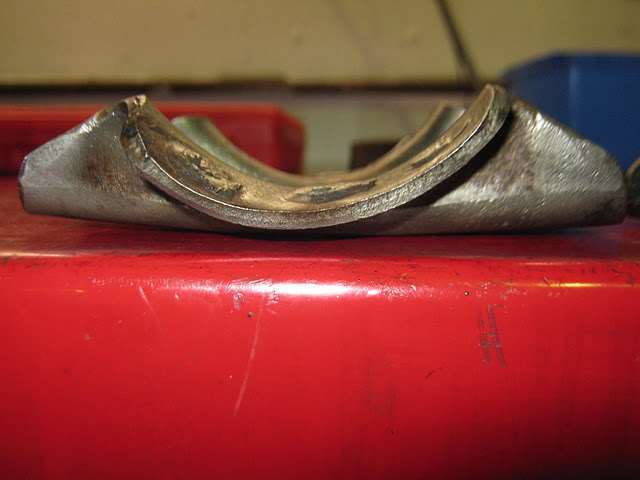 (23.70 KB) (23.70 KB)
Posted on: 2011/10/13 6:32
|
|||
|
Mal
/o[]o\ ==== Bowral, Southern Highlands of NSW, Australia "Out of chaos comes order" - Nietzsche. 1938 Eight Touring Sedan - SOLD 1941 One-Twenty Club Coupe - SOLD 1948 Super Eight Limo, chassis RHD - SOLD 1950 Eight Touring Sedan - SOLD What's this? Put your Packard in the Packard Vehicle Registry! Here's how! Any questions - PM or email me at ozstatman@gmail.com |
||||
|
||||
|
Re: Wade's Workshop
|
||||
|---|---|---|---|---|
|
Forum Ambassador
|
Friday 14th October 2011
Arriving at the workshop I was put to work cleaning the diff housing of the dirt, oil, grime and grease adorning it. But just prior to that the diff housing "on the shelf" was inspected in case it fitted. It didn't! While I was doing that Wade did some housekeeping, including refilling the grease gun, then started on the mounting pads preparing them for re-attachment to the diff housing. I joined Wade at the point where brute strength was no longer making an impression. Instead Wade turned to the hot spanner, mounting the right side pad in the vice and using the oxy torch to heat it then re-shaping it, taking a couple of attempts before it attained the required shape. Part of this process were a number of trial fits on the cleaned up diff housing on the bench. Finally the mounting pads were placed on the rear springs, still in the car, and the diff housing slid back into place. Result? Looks pretty good! Then while Wade ground the stumps of the welds off the insides of the mounting pads I cleaned up the gasket face for the pumpkin as well as the oil slick it had deposited on the bench top since sitting there from yesterday. Wade then ground off the weld stumps on the diff housing using an angle grinder. Mounting pads back onto the springs and diff housing onto the pads and it felt as well as looked good. While Wade was busy organising the arc welder, for John to tack weld the pads to the housing, I was doing more cleaning, this time the U bolts, nuts and washers. Wade and Graham then departed, to walk round the corner, to have the mounts securely welded to the housing. Only trouble was the guy wasn't there. While they were away I took the opportunity to clean still more parts in readiness for re-assembly. And just prior to leaving for Friday lunch, Wade picked up Noel from the railway station.. Back at the workshop Noel took the opportunity to see John and Annet's '40 110 and hear of it's tale of woe. Noel was then able to depart in Fleurette. I trust he had an uneventful trip home, he deserves it. Quote: Snapey wrote:.....Is there no retaining strap or cross member on the car to prevent a broken prop shaft from 'pole vaulting' the car as it looks like has happened here?...... Fortunately this era Packard has a X member which surrounds the front of the tailshaft and the front uni. Would make a hell of a noise if the front uni broke but shouldn't pole vault. What appears to have happened in this instance is that the diff housing U bolts weren't tight. Seems John had been hearing a "clunk" for a while, thought it could be the uni joints and checked those and found them to be OK. Because of the loose fasteners it looks like the movement of the diff housing trying to rotate finally reached a point where, when the car was put out of OD coming off the motorway, it finally snapped the welds, snapped or pulled out the hand brake cables, bent the pinion flange and broke the rear uni joint. Luckily the rear flexible brake line between chassis and diff housing remained intact so Annet, who was driving at the time, could bring the car to a stop. All that was accompanied by a lot of noise and because the front universal joint mounts to a splined "slip" joint which permits fore-and-aft movement of the tailshaft it only has one way to go, backwards, and it slid out on the road without any complications. Attach file: (22.99 KB)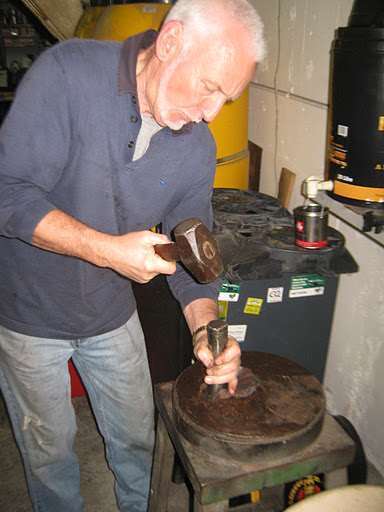 (33.46 KB) (33.46 KB)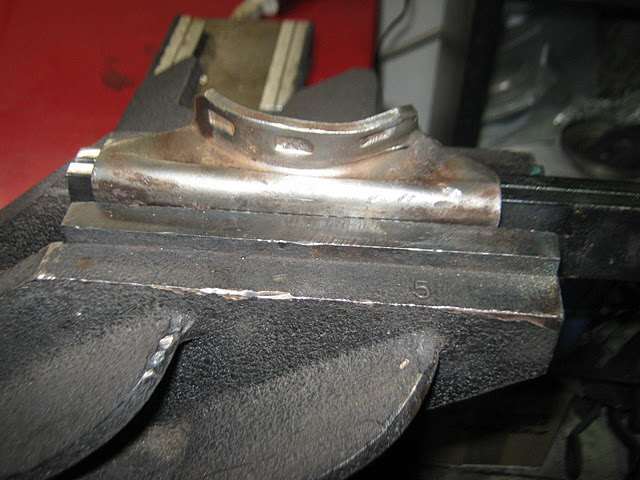 (29.72 KB) (29.72 KB)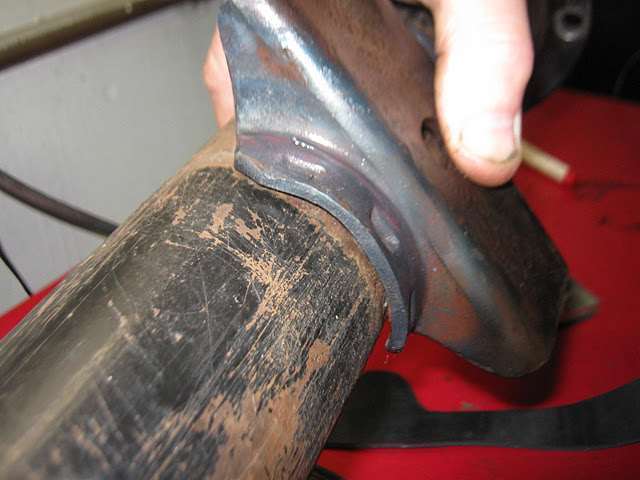 (37.78 KB) (37.78 KB)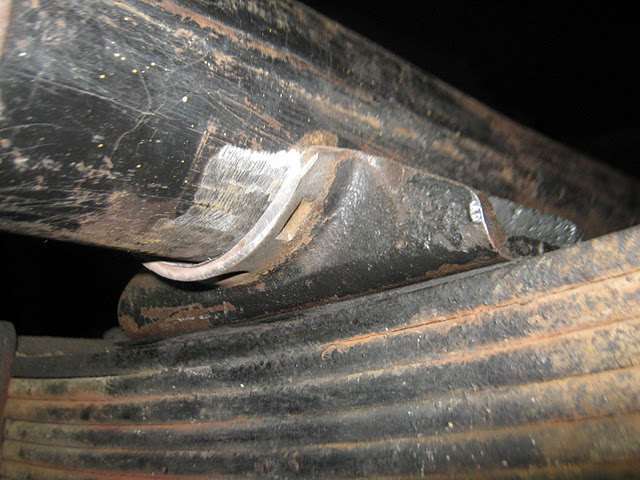 (36.75 KB) (36.75 KB)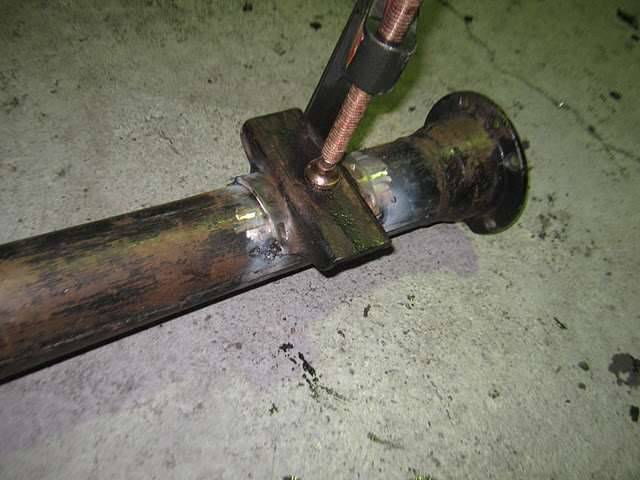 (33.75 KB) (33.75 KB)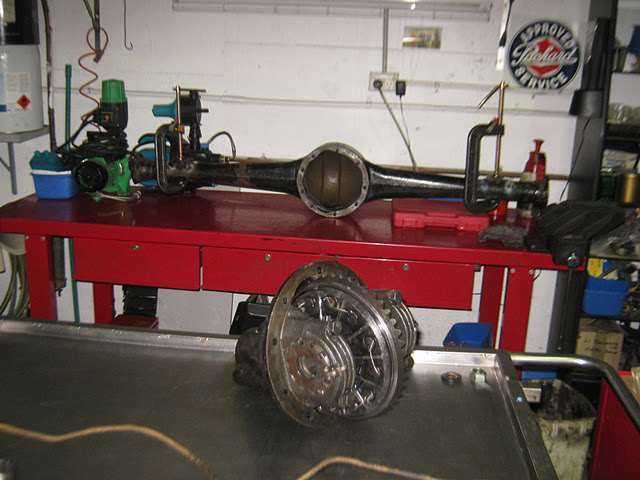 (33.19 KB) (33.19 KB) (42.25 KB) (42.25 KB)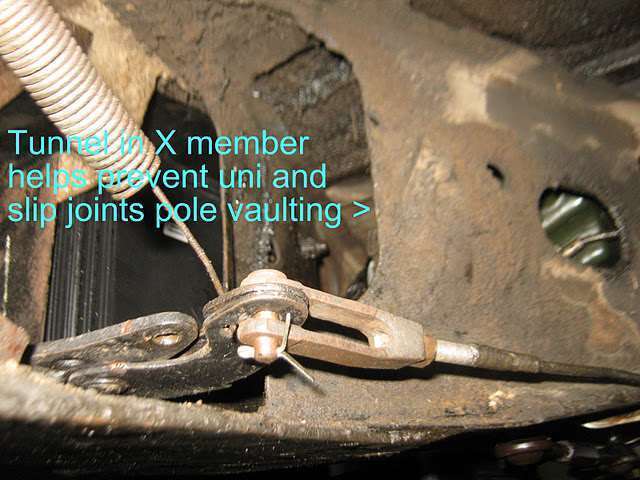 (31.04 KB) (31.04 KB)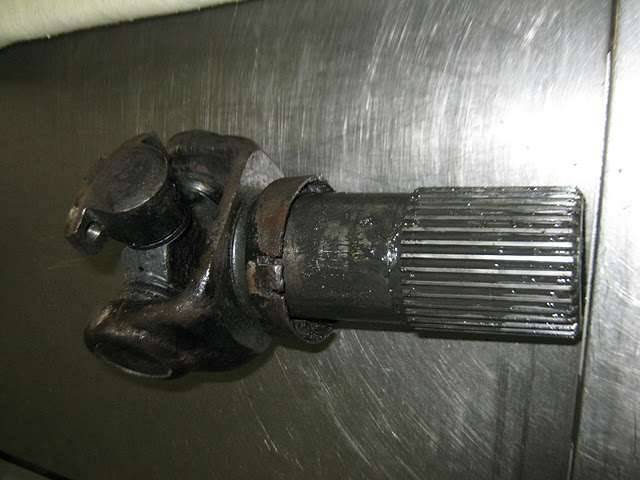
Posted on: 2011/10/14 0:57
|
|||
|
Mal
/o[]o\ ==== Bowral, Southern Highlands of NSW, Australia "Out of chaos comes order" - Nietzsche. 1938 Eight Touring Sedan - SOLD 1941 One-Twenty Club Coupe - SOLD 1948 Super Eight Limo, chassis RHD - SOLD 1950 Eight Touring Sedan - SOLD What's this? Put your Packard in the Packard Vehicle Registry! Here's how! Any questions - PM or email me at ozstatman@gmail.com |
||||
|
||||
Register To PostTopic is Locked


