|
Re: Sealing Temperature Gauge Lead
|
||||
|---|---|---|---|---|
|
Forum Ambassador
|
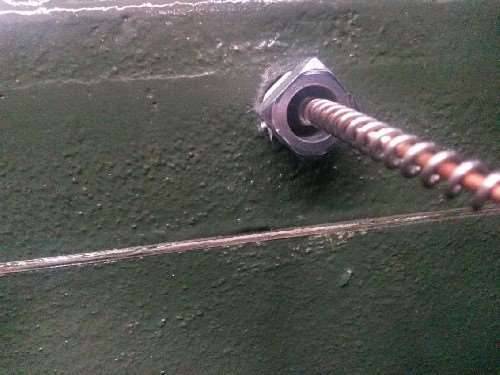
If you are using the stock gauge and sender possibly there is rust or corrosion preventing the nut from threading all the way. If that is not it or can't be corrected, I was able to seal an aftermarket sender nut that was too short and had the same slide problem by using a heavy O ring. Found one that fit around the bulb snugly in the faucet washer section at the hardware store. It was about 1/8" thick and supposed to be able to withstand high temp. The ring sealed the front of bulb to the head and also pushed the bulb out far enough the nut was able to seal the rear side. So far, so good.
Posted on: 2014/9/24 9:42
|
|||
|
Howard
|
||||
|
||||
|
Re: Sealing Temperature Gauge Lead
|
||||
|---|---|---|---|---|
|
Home away from home

|
Thank you very much for your reply. I'm not sure of the thread size or I would run a tap through to make certain the threads are completely clean.I'll try your method.
Posted on: 2014/9/24 9:45
|
|||
|
||||
|
Re: Sealing Temperature Gauge Lead
|
||||
|---|---|---|---|---|
|
Forum Ambassador

|
I'm not sure of the thread size or I would run a tap through...
Threads are almost certainly NPT so unless you have a pipe thread tap, don't touch them with a regular tap; better to use a small rotating wire brush or similar on the end of a Dremel, or even a small stiff wire brush.
Posted on: 2014/9/24 10:00
|
|||
|
||||
|
Re: Sealing Temperature Gauge Lead
|
||||
|---|---|---|---|---|
|
Home away from home

|
O.K. good advice, I'll use my dremel tool. Thank you
Posted on: 2014/9/24 10:19
|
|||
|
||||
|
Re: Sealing Temperature Gauge Lead
|
||||
|---|---|---|---|---|
|
Home away from home

|
I just put an aftermarket temp gauge in my 38 and the instructions said to be sure to use the adapter that came with the unit. I didn't the first time and I had the same in and out movement you seem to have. The adapter screws into the block then the probe goes into the adapter.
Posted on: 2014/9/24 10:37
|
|||
|
1938 1601 Club Coupe
|
||||
|
||||
|
Re: Sealing Temperature Gauge Lead
|
||||
|---|---|---|---|---|
|
Forum Ambassador
|
If a good quality gauge set has adapters by all means that solves the problem. The adapters that came with the elcheapo temporary gauge set (oil/temp/amps) I installed to use while the dash is out were for smaller & for metric holes. The nut alone fit the Packard head perfectly -- just didn't push the bulb into the head far enough to seal. I'd have to doublecheck but think the 47 356 head is standard NF 5/8-18 thread. I was able to buy a bolt that fit perfectly and used that to block the opening until I decided to install the temporary gauge. No idea what size hole is in the prewar heads.
When the real gauges are reinstalled, even though the aftermarkets are not top end I plan on keeping the gauge set installed as a backup. They should at least give some kind of second opinion if something seems amiss. Am thinking an adapter block made to fit under the radiator hose/thermostat housing and tapped for one of the smaller sender adapters will be the way I do the temp gauge. Oil gauge is already permanently plumbed to the next to rear port of main gallery on passenger side. Permanently wiring a second Amp gauge remotely poses a bigger question because of the length in extra wire needed. I may just run wires to have them available but not connected unless there is a reason.
Posted on: 2014/9/24 11:32
|
|||
|
Howard
|
||||
|
||||
|
Re: Sealing Temperature Gauge Lead
|
||||
|---|---|---|---|---|
|
Home away from home

|
My original unit was reworked by Wolf Instruments, looks like they did a really nice job but no adapters. The square nut is completely seated but I do not want to tighten any further as I feel decent resistance so I stopped while I was ahead.
Posted on: 2014/9/24 14:13
|
|||
|
||||
|
Re: Sealing Temperature Gauge Lead
|
||||
|---|---|---|---|---|
|
Forum Ambassador
|
IIRC, your bulb twisted off. Did they replace the sensor bulb and tubing or just repair the break? If replaced, I wonder if they used a bulb that is shorter than the original. That is another thing I noticed on the aftermarket bulb. The bulb shoulder that meets the seat pocket in the head was not as long a distance from the outside end as Packards. That might be the entire issue.
Posted on: 2014/9/24 14:23
|
|||
|
Howard
|
||||
|
||||

 (91.26 KB)


