|
Re: 1954 Clipper Deluxe Sportster
|
||||
|---|---|---|---|---|
|
Home away from home

|
Hi
To mark those wires so you can get them back to the right connection, visit your local electrical supply house and get a book of wire marker labels: grainger.com/category/wire-marking-label ... -supplies/electrical/ecatalog/N-qfl Steve
Posted on: 2015/9/26 11:44
|
|||
|
.....epigram time.....
Proud 1953 Clipper Deluxe owner. Thinking about my next Packard, want a Clipper Deluxe Eight, manual shift with overdrive. |
||||
|
||||
|
Re: 1954 Clipper Deluxe Sportster
|
||||
|---|---|---|---|---|
|
Just can't stay away
|
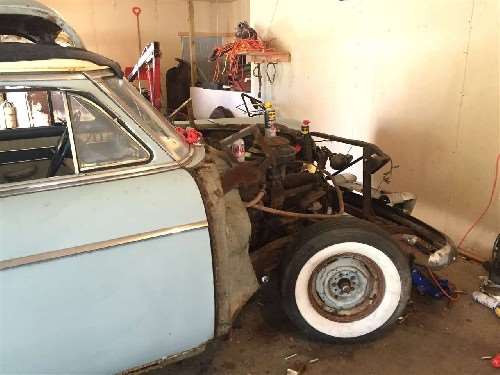
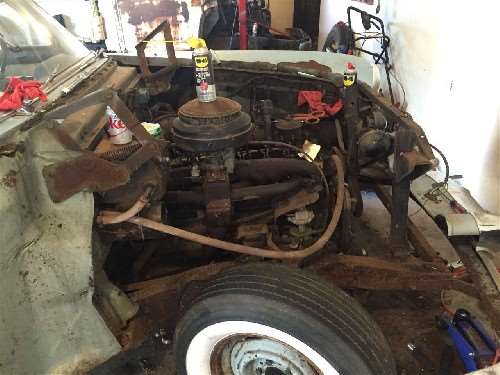
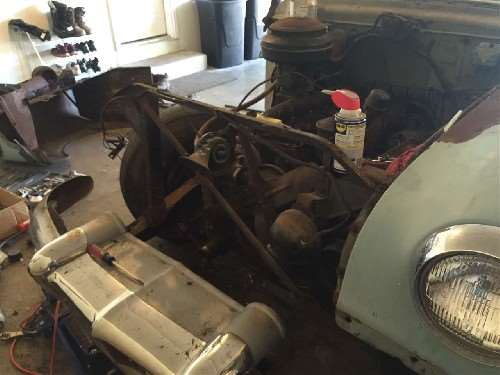
How do you guys recommend attaching the engine hoist to the engine?
Posted on: 2015/9/29 19:40
|
|||
|
||||
|
Re: 1954 Clipper Deluxe Sportster
|
||||
|---|---|---|---|---|
|
Forum Ambassador
|
I think you will get different opinions. Depending on if you are going to remove the trans at the same time weight will be around 950 with standard and close to 1100 lbs with Ultra -- not counting any other stuff still bolted on. Bulky and hard to maneuver since it has to come out at a steep angle to clear the front crossmember and then lift high to clear the oil pan and then the trans as you level it out.
I used a load leveler and a pair of lifting straps front and back under the engine on mine. You do need to secure them to keep any sliding under control. Others choose the head bolts and chain with brackets, I do recommend the load leveler with either method because it makes life so much easier when you need to tilt the engine. If you choose the lifting brackets on the head bolts I would use 4 of them rather than two because of the weight. IIRC, center of gravity with trans attached will be around #7 cylinder -- farther back if automatic -- so you want the brackets positioned more toward the rear of engine.
Posted on: 2015/9/30 12:06
|
|||
|
Howard
|
||||
|
||||
|
Re: 1954 Clipper Deluxe Sportster
|
||||
|---|---|---|---|---|
|
Forum Ambassador

|
Weights per factory specifications:
1. Engine with clutch and transmission - 875# 2. Engine with clutch, trans and OD - 910# 3. Engine with Ultramatic -1010# Removing starter, generator and manifolds will give a significant reduction, close to 75# I'd guess.
Posted on: 2015/9/30 12:29
|
|||
|
||||
|
Re: 1954 Clipper Deluxe Sportster
|
||||
|---|---|---|---|---|
|
Just can't stay away

|
Ok, so I got the largest engine stand I could afford, which is a 2,000 lbs one. My question is, can I bolt it to the back of the bell housing or should I remove all of that and bolt it right to the engine?
Posted on: 2015/10/12 15:57
|
|||
|
||||
|
Re: 1954 Clipper Deluxe Sportster
|
||||
|---|---|---|---|---|
|
Forum Ambassador
|
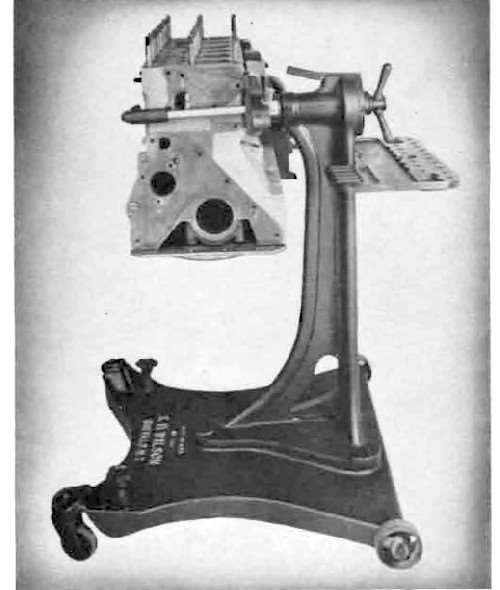
That is a considerable amount of weight and leverage to be supported from a few bolts on just one end. At the least if you are gong to mount it lengthwise I would try and figure a way to also support the front with some kind of removable piece. Some with longer engines and short stands have made a piece to fit between the floor to under the front of engine. Others have used some sort of wooden box or crate and shims and others kept the cherry picker attached to the front. Downside to those methods is the support has to be removed or loosened to rotate the engine so still not very safe during the period support is not in use. Preferred would be to support the engine from the side as Packard did on their shop stands. Here is a photo of the Packard stand. I'd bet Ross has a good safe setup so it would be good to see a photo of what he has.
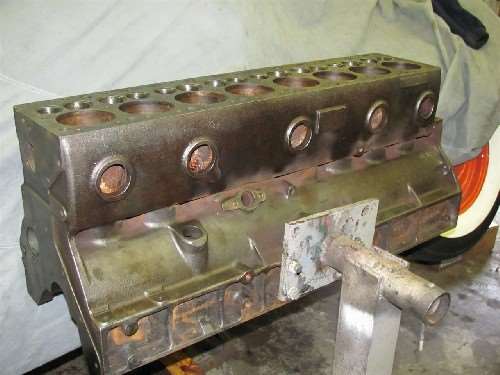
To mount the long engines to my el cheapo HF stand in a method similar to the Packard way I went to a metal salvage and found a length of scrap 1/2" thick plate steel about 4" wide. Length was about 4' which was cut to fit the length of engine plus a couple of inches left over on each end. Bought some concrete foundation anchor J bolts at the hardware store and drilled the plate so those could snugly fit on each end of engine. You can get those bolts long enough to reach the valve side and lock in the cavity although the J portion did have to be trimmed a bit for a snug fit. A friend welded a piece of pipe to fit the HF bore on the plate so the engine could be rotated in the stand. He also welded a bit of metal to the bottom of the plate to reach a couple of the bolt holes on the low side of block. It worked rather well for the engines I did. I'd post a photo but it was given to a friend for his engine and now resides in another state.
Posted on: 2015/10/12 17:05
|
|||
|
Howard
|
||||
|
||||
|
Re: 1954 Clipper Deluxe Sportster
|
||||
|---|---|---|---|---|
|
Home away from home
|
I remember my father had one of those large cast iron engine stands. I wonder what happened to it?
(o{}o)
Posted on: 2015/10/12 17:11
|
|||
|
We move toward
And make happen What occupies our mind... (W. Scherer) |
||||
|
||||
|
Re: 1954 Clipper Deluxe Sportster
|
||||
|---|---|---|---|---|
|
Home away from home
|
I always mount the engines from the side. Use the rear two bolts holes of the left motor mount and the two holes on the skirt of the engine which are oh, 5 or 6 inches to the rear of the motor mount bolt holes. Drill the plate on your new motor stand to match these holes and use grade 8 bolts; the size is 3/8-16. Do not use the arms supplied with the stand. Locate the holes as close to the bottom of your plate as possible to keep the center of gravity of the engine as low as possible. This will make it easier to flip the engine end for end while assembling.
Posted on: 2015/10/12 19:00
|
|||
|
||||
|
Re: 1954 Clipper Deluxe Sportster
|
||||
|---|---|---|---|---|
|
Just can't stay away

|
I'm amazed at how helpful everyone is. Thank you all for the great advice!
Posted on: 2015/10/12 20:44
|
|||
|
||||

 )
) (95.45 KB)