|
Re: Disassembly of convertible top
|
||||
|---|---|---|---|---|
|
Home away from home

|
Quote:
The framework on your top broke at the point where it broke due to uneven pressure against it-not because of a design flaw. It also appears that all hinge pins have been painted over. If a topstack frame has been painted as an assembly and then allowed to dry, then yes, it could also compound any potential issues with binding up. Frames were not originally painted after assembly. Otherwise, okay, but it would seem you have done your diagnosis here and it would appear to be in your electro-hydraulics and not in the topstack frame. Why? If you disconnected the top from the rams and it goes up and down without binding, then obviously the binding does not appear to be in the framework or top fabric, but rather in the electro-hydraulics. (HINT: raising and lowering one of these tops by one person-by hand can cause additional damage. These tops were engineered to be raised or lowered under even pressure from both sides. So get a friend to balance pressure on both sides before raising/lowering). New or not, rams can still operate unevenly. They can be damaged, have internal or external leaks, bent rods, dented housings, etc. Or the rams can simply be mis-matched (hint, both shiny rods have to extend exactly the same length). Pump motors likewise can have issues, new or not. If you are using ATF fluid, then your deeper diagnosis should begin with examining the electro-hydraulic system.
Posted on: 2016/5/1 7:23
|
|||
|
||||
|
Re: Disassembly of convertible top
|
||||
|---|---|---|---|---|
|
Home away from home
|
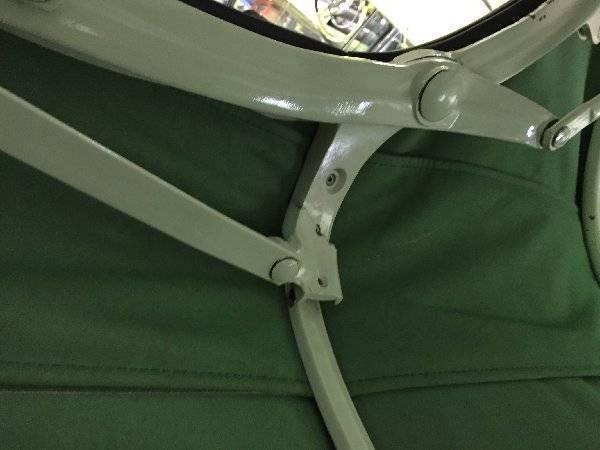
Now that I have settled down I would like to get to work on the Caribbean top. I have been unable to find any details on how the broken piece can be removed except for indication that roll pins are involved. I would also like to determine whether the three screws that apparently attach the top bow thread into the top bow or have nuts to hold them in place.
Since 55 Clipper has experienced the same problem and has reinforced the broken piece with a metal strap, maybe he can advise on how the strap is attached. Any photos, diagrams or blow up pictures of the assembly would be appreciated. I would like to see what I am getting into before starting. Thanks in advance for any information. RJR
Posted on: 2016/5/20 22:36
|
|||
|
||||
|
Re: Disassembly of convertible top
|
||||
|---|---|---|---|---|
|
Home away from home

|
Those three holes are riveted. I suppose you could use small screws.
Posted on: 2016/5/21 14:20
|
|||
|
||||
|
Re: Disassembly of convertible top
|
||||
|---|---|---|---|---|
|
Home away from home
|
Bringing back this thread from the dead...
I have a spare top frame because I needed one of these rear side rails for my 1955 Caribbean, and I have a buddy who needs the opposite side for his own '55 Caribbean. RJR, how did you manage to disassemble your top frame to swap out the broken piece? Anybody else have any experience with these? These are as rare as hens' teeth, so there's not a lot of margin for error...
Posted on: 2020/1/10 23:05
|
|||
|
||||
|
Re: Disassembly of convertible top
|
||||
|---|---|---|---|---|
|
Home away from home
|
This post is so old I nearly forgot the disaster that prompted it. Leeedy was correct that the fracture of the convertible frame was from overloading and not design defect. The overloading was due to a very simple problem. There are two brass fittings on the top lifting cylinders. There is nothing in the manual that shows which way they should face when installed and there were no cylinders on the car to provide guidance. I installed the cylinders with the top fittings pointed toward the rear. Big mistake. When the top was lowered the fitting on the passenger side contacted the wheel well. This interference on one side led to the twisting that led to the break in the frame.
I located a replacement for the frame section and when I realized how difficult the replacement would be I opted to build a reinforcement brace which I secured with screws and epoxy PC7. I figured it would work or I would end up having to remove the top and replace the piece. Suffice it to say that brace worked fine. With the cylinders turned 180 degrees the interference problem was eliminated and the top goes up and down fine. The top remains down most of the time and is raised only rarely to stretch the top material and let the sun work out the wrinkles. It was a stupid mistake that caused the problem but there is so little data on so many things about these cars that sometimes we have to learn by trial and error. The car is running well now and if the weather cooperates as it did in 2019 the car will be out more frequently to allow people to see a Caribbean on the road. Too few people have any idea that such a car ever existed.
Posted on: 2020/1/20 19:56
|
|||
|
||||
|
Re: Disassembly of convertible top
|
||||
|---|---|---|---|---|
|
Not too shy to talk

|
[b]I have a 1940 Packard Convertible, need to rebuild the Cans that open and close the top, Vacuum looking for a rebuild kit, looks like leather wiper seals , big cans about 6" Dia. [/b]
Posted on: 2020/4/27 14:30
|
|||
|
Paul Shrop
|
||||
|
||||
|
Re: Disassembly of convertible top
|
||||
|---|---|---|---|---|
|
Forum Ambassador
|
As I recall there was a poster on the PAC forum a year or so back who was in a similar situation. I believe at the time none of our Packard vendors were offering any rebuild kits but not sure about any other brand vendors or if other brands used the same size cylinders. Unless the situation has improved since the other fellow worked on his top the large diameter leather cup seal needed may not be commercially available.
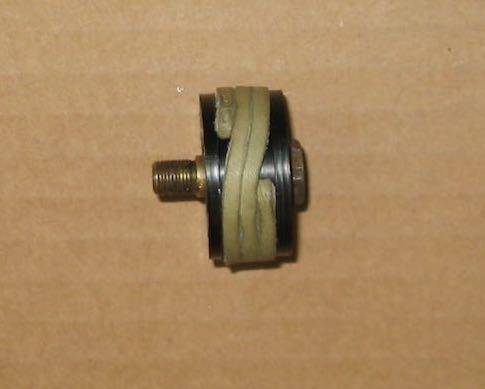
New leather cup seals are available for water pumps up to 4" or so but I don't believe he ever found any pump cups large enough for the piston in the vacuum top cylinder. A modern neoprene seal to replace the small one around the rod could probably be found at McMaster-Carr or MSC but you may need to make your own cup seal. Here is a video of a fellow making a water pump cup and I believe the same procedure could be used for the vacuum cylinder cup.youtube.com/watch?v=6xFhThdnYqE If that is not feasible because of the size then if the inside of the cylinder is smooth and in good condition possibly make a new end to attach to the piston rod that would be grooved to accept two or three modern O rings or a wrapping of square leather lacing in place of the leather cups. Before I found the video on making cups, I did the leather wrap replacement for a vacuum antenna that has an odd diameter bore and nothing commercial was available to fit. Sheet leather in an appropriate thickness should be easily found and if a lathe to cut the mold ring is not available possibly electrical conduit or PVC pipe or a PVC fitting could be used for the ring. Even a hole saw could be used to cut a hole in wood or plastic as long as the inner diameter was finished smooth enough to allow the leather to compress and slide down without tearing. Attach file:  (16.30 KB) (16.30 KB)
Posted on: 2020/4/27 16:48
|
|||
|
Howard
|
||||
|
||||

 (141.88 KB)


