|
Re: Ken's 1937 120 Touring Sedan
|
||||
|---|---|---|---|---|
|
Home away from home
|
Red for taillights is the rule of thumb as white will visually bleach-out the red of the lens due to the brightness.
Posted on: 2020/4/6 10:57
|
|||
|
||||
|
Re: Ken's 1937 120 Touring Sedan
|
||||
|---|---|---|---|---|
|
Home away from home
|
A few more things accomplished, and checked off the list.
1. Re-installed the speedometer, etc. After clear coating the wood grained panel, wet sanding, and polishing, it does like better than the rest of the dash, but I wasn't too happy with the end product. I was spraying clear coat out of a rattle can. It did not spray well. I should've just taken the time to set up my gun. Also, since this car is a preservation car, my ultimate goal is almost Hippocratic - "First, do no harm." I violated that - the paint was thin on a corner and I got a very small piece of the corner down to bare metal. I don't think anyone else will notice it, but it bothers me. New LED dash light is quite a bit brighter. I also ordered a hollow punch kit and some neoprene to make the spacer that goes between the dash and the studs on the top of the speedometer panel - I only found of of the two installed. 2. Cleaned up the tail light housings. I did something I'm normally not very good at, which is restraint. Rather than pull the housings off, so I could fully paint the interior, I simply masked off what I didn't want painted, cleaned off the loose surface rust, and misted in some rust-converter primer. Painting the interiors white would be better, but I didn't want to disturb the existing mounting pads, wiring, etc etc. 3. Re-installed the LED lights. Tail and brake lights look good; I'll check again when it's dark. They seemed red enough to me, but I may order a set of red brake light bulbs just to see the difference. I can't run red tail lights, because the tail light also illuminates the license plate on the driver's side. 4. Now, the big project. I pulled the manifolds off. After I got the exhaust manifold Jet-Hot coated a few years ago, I noted that one of the bolt holes for the bolts that hold the exhaust and intake manifolds together was broken. I found a different, better, manifold, sent it out to be porcelain coated, and am finally getting around to installing it. Here are some notes and questions: - I have been fighting a rich running problem. Just prior to pulling the manifolds, I started the car after sitting for about a month, and let it run for about a minute. Imagine my surprise, when loosening the manifolds, raw gas leaked out when I loosened the two bolts on the rear most intake manifold port. I estimate there was about an oz of gas in the intake manifold. This seems HIGHLY abnormal. Am I correct in thinking that? - As I disassembled, I found evidence of several other exhaust leaks. I didn't have the two manifolds machined to flat when re-assembling last time. I've found a local machine shop, and assuming they'll do the work, I will have the manifold sealing surfaces milled flat and true. That should solve one problem. - The manifold/pipe gasket that was supplied when I got my exhaust was the flat style. I noted that the Packard kit I have was donut style. I'm assuming that is correct? - I bought what I was told was a metallic manifold gasket set (Packard NORS) at Hershey two years ago. It's the later composite. Am I right in thinking the metallic gaskets are superior, or should I just not worry about it? I don't want to take the manifolds off again. - I rebuilt the heat riser valve (flap?) a few years ago, and noted when I did that the new flap was much flatter than what I pulled out. It seems like there is too much of a gap when it is closed. I had wired it shut anyway, and I'm thinking of just making or buying a block off plate. Anyone ever done this? If it's steel, so I still run a gasket on one or both sides? I'm concerned if I make a block off, then run two gaskets, it will throw off the manifold spacing. Although I was disappointed to find evidence of so many leaks, I am looking forward to getting the car much quieter. The porcelain on the new intake manifold also looks great, which I'm excited about. I will also have to fix a broken off stud on the new intake. One bent on the return shipping, and, of course, it broke when I tried to straighten it. Should be pretty straight forward. Thanks, as always, for all the help. Attach file:  (114.34 KB) (114.34 KB)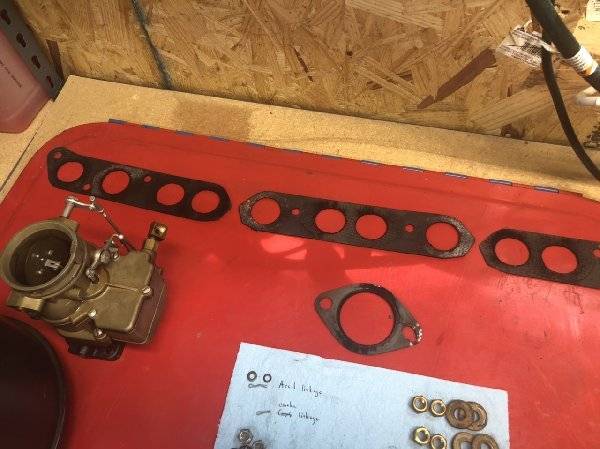  (79.32 KB) (79.32 KB)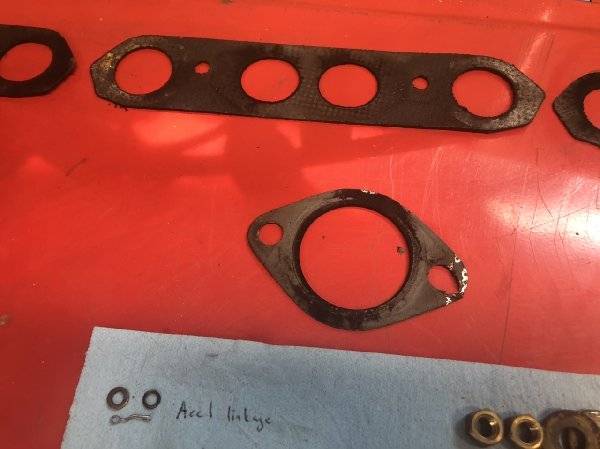  (97.59 KB) (97.59 KB)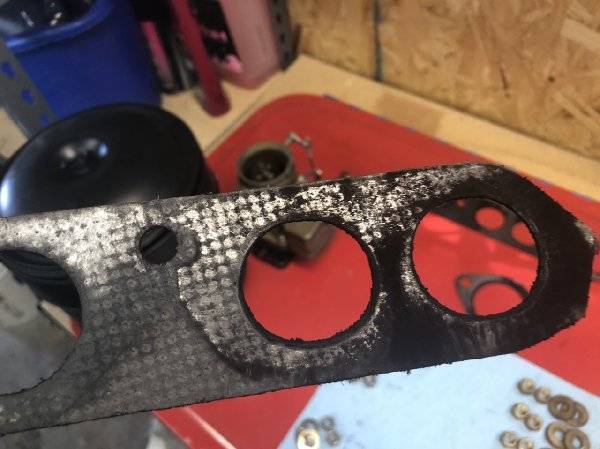  (113.89 KB) (113.89 KB)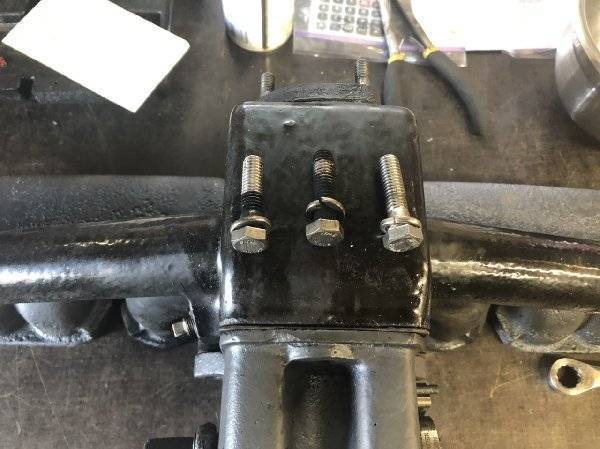  (91.50 KB) (91.50 KB)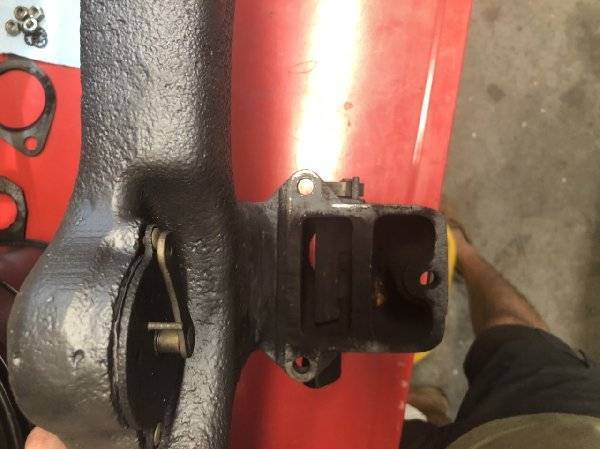  (132.46 KB) (132.46 KB)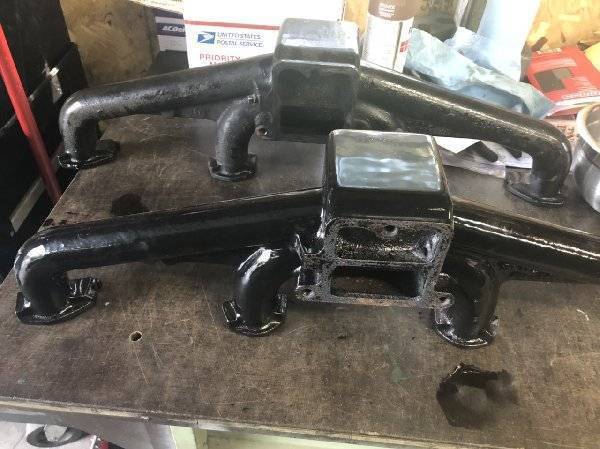  (85.11 KB) (85.11 KB)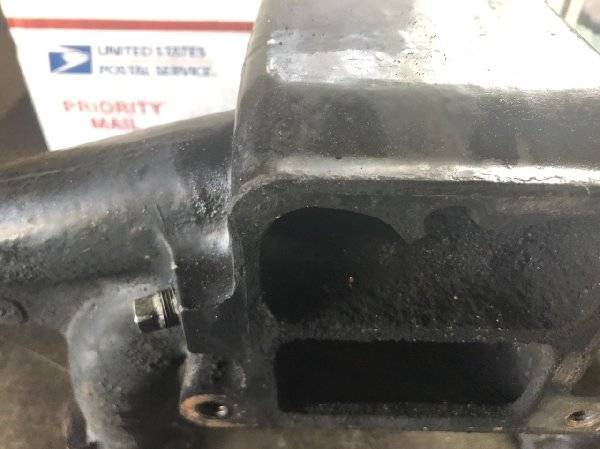  (122.30 KB) (122.30 KB)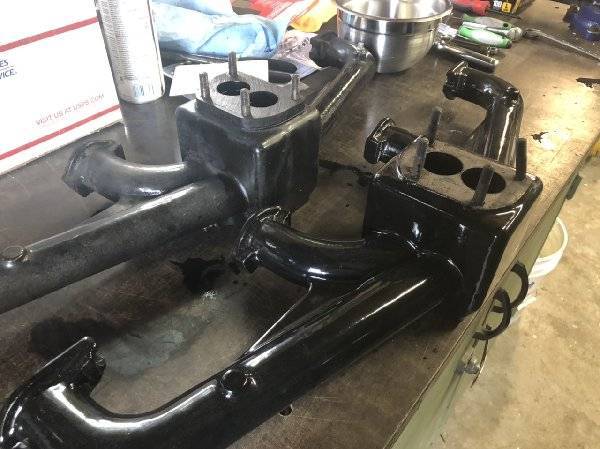
Posted on: 2020/4/9 15:04
|
|||
|
1937 120 1092 - Original survivor for driving and continued preservation. Project blog / Registry
1937 115 1082 - Total basket case, partial restoration, sold Hershey 2015 Project blog / Registry |
||||
|
||||
|
Re: Ken's 1937 120 Touring Sedan
|
||||
|---|---|---|---|---|
|
Home away from home
|
Prepped the block for the new manifold, cleaning off the mating surfaces. They all checked out as flat with a straight edge, which is good.
I also put the old, curved heat riser plate back in. It feels much better. It seems to operate more smoothly, etc. I set the spring to the loosest possible setting. If it works, great. If not, I'll wire it shut and/or fab a block off plate. It's warming up and I want to put some miles on this car. I fixed the overheating last year, finally ordered a new motor mount, so if I can fix the exhaust leaks and the rich running, I can just drive it! (Until I find something else to worry about) :) Trying to get it sorted a little better.
Posted on: 2020/4/9 21:22
|
|||
|
1937 120 1092 - Original survivor for driving and continued preservation. Project blog / Registry
1937 115 1082 - Total basket case, partial restoration, sold Hershey 2015 Project blog / Registry |
||||
|
||||
|
Re: Ken's 1937 120 Touring Sedan
|
||||
|---|---|---|---|---|
|
Home away from home
|
Today I'm going to fix the floor where some caveman used a sawzall and a pair of pliers to clearance a larger battery. I'll weld the two 2" cuts, hammer everything smoother, and then lay down some paint. (When the battery needs to be replaced, I'll drop it out from under the car and then put in the correct size)
I bought a rubber front floor mat Don Lampen a while ago, and installation of that is next. I believe originally it had jute (spelling?) under it. The front floorboard gets hot enough, especially on the passenger side where the exhaust is, that I'm thinking of dynamat instead to block heat. Should I glue it to the floor mat, to make transmission service easier, or glue to the floor and just put a separate piece over the floor board for ease of transmission access? Thanks in advance!
Posted on: 2020/4/11 11:55
|
|||
|
1937 120 1092 - Original survivor for driving and continued preservation. Project blog / Registry
1937 115 1082 - Total basket case, partial restoration, sold Hershey 2015 Project blog / Registry |
||||
|
||||
|
Re: Ken's 1937 120 Touring Sedan
|
||||
|---|---|---|---|---|
|
Home away from home
|
JW - thanks for the insight. When you did your car, did you glue the underlayment to the floor like OEM or to the carpet/mat/whatever?
I thought about moving the battery like you did, but I'd rather keep the car as original as possible, and frankly, with the right size cables I don't have too many battery problems.
Posted on: 2020/4/13 21:10
|
|||
|
1937 120 1092 - Original survivor for driving and continued preservation. Project blog / Registry
1937 115 1082 - Total basket case, partial restoration, sold Hershey 2015 Project blog / Registry |
||||
|
||||
|
Re: Ken's 1937 120 Touring Sedan
|
||||
|---|---|---|---|---|
|
Home away from home
|
Ken, my 115C had carpet (hog's hair type) and padding not glued to the floor. Enjoying your posts. Thanks for sharing.
Posted on: 2020/4/14 10:18
|
|||
|
We move toward
And make happen What occupies our mind... (W. Scherer) |
||||
|
||||
|
Re: Ken's 1937 120 Touring Sedan
|
||||
|---|---|---|---|---|
|
Home away from home
|
They generally seemed to glue the jute to the mat. That helps keep the mat from wrinkling.
Posted on: 2020/4/14 11:38
|
|||
|
||||
|
Re: Ken's 1937 120 Touring Sedan
|
||||
|---|---|---|---|---|
|
Home away from home
|
Quite a bit done since the last post.
1. Fixed the floor. I still need to paint it, but there are no longer sawzall cuts to clearance a bigger battery. It's not perfect, but it is pretty close, and will do what it needs to do. 2. Replaced the motor mount. Won't know for sure until the car is running, but just cranking it over, seems much tighter. Not too difficult of a job. Definitely due. 3. Decided to pull the floorboard over the transmission to deal with some delamination. I was originally going to source marine grade plywood and cut a new piece, but there is a peculiar ramped groove (angled dado?) cut in the underside to clearance the transmission that I don't want to try and recreate since I don't have a table saw. I plan on using some glue and clamps to fix what I have, then I'll re-install it. I did find where a previous worker had replaced several of the floorboard screws with whatever they could find. The screws are slotted flat head 1/4-28x1.5" (I think, don't have my thread gage handy). They also have a washer (pictured). They thread into speed nuts that clip into angle iron bolted to the body wood. - Does anyone have a source for the screws, washers, and speed nuts? I need 4 of each. I checked McMaster Carr (maybe on screws, but I'd have to buy 100), Restoration Specialties, and Restoration Supply Co. I also did a little bit of VIN research. I thought I recorded this the first time I did it when I bought the car, but apparently not. The VIN of 1092-10045 indicates to me that the car is the #9,044 120 produced in 1937. The engine number of X115770 indicates it is number 15,769 for the year. Per The Packard Club website, the engine serial numbers start at X100001. I am assuming they are sequential. Not sure why the engine is so far ahead of the car. Of note, the engine was cast 22 Dec 1936 and delivered to Knowles & Browne, Inc, in Cleveland, OH on 31 Dec 1936. Very quick turnaround. No data on Knowles and Browne in the dealer database on this website or that I could find via a quick google search. Any info would be appreciated. The car resided in Cleveland until I purchased it in 2015. Dave Czirr, the theft proof number is 329591. I'd be curious if it was already in your database. The car was at the centennial meet in 1999, so it was owned previously by Packard Club members as well. Attach file:  (43.21 KB) (43.21 KB)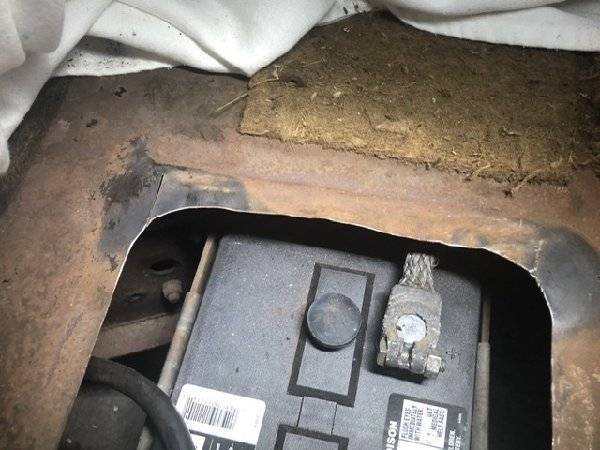  (57.40 KB) (57.40 KB)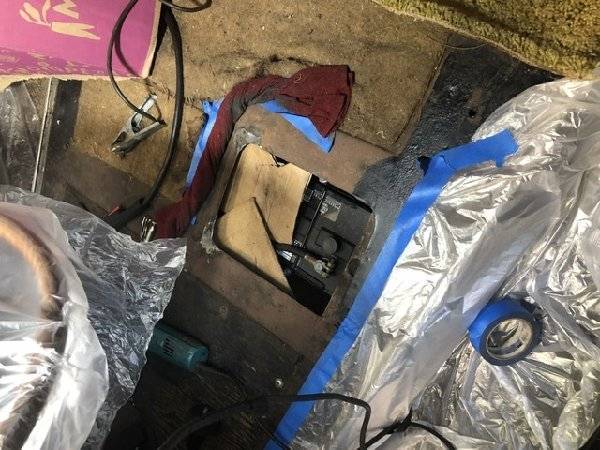  (35.01 KB) (35.01 KB)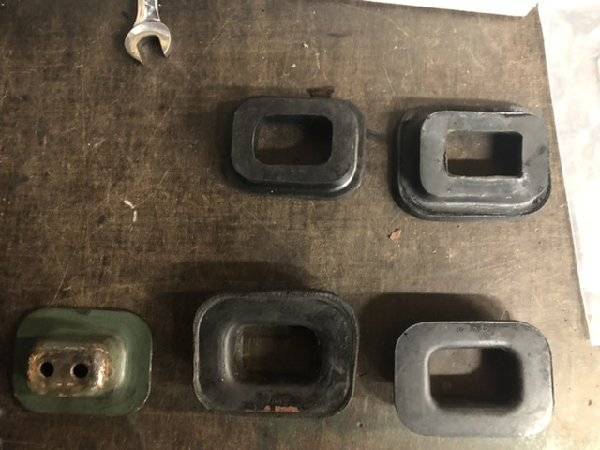  (34.46 KB) (34.46 KB)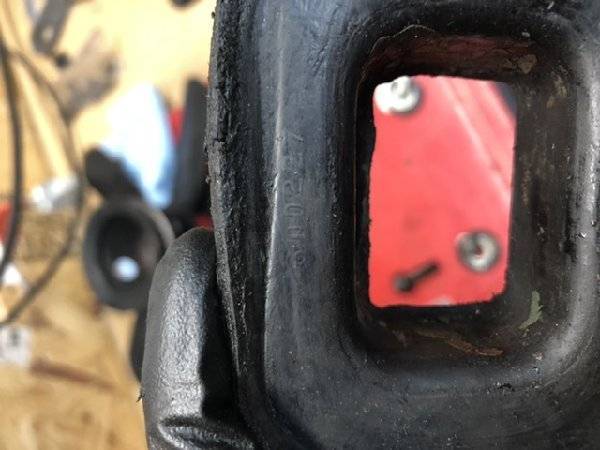  (41.86 KB) (41.86 KB)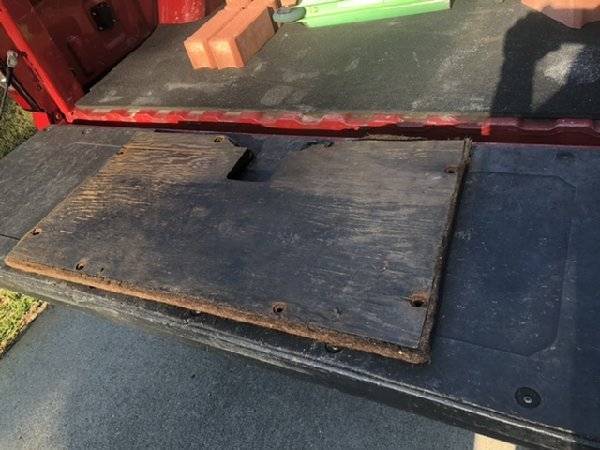  (41.42 KB) (41.42 KB)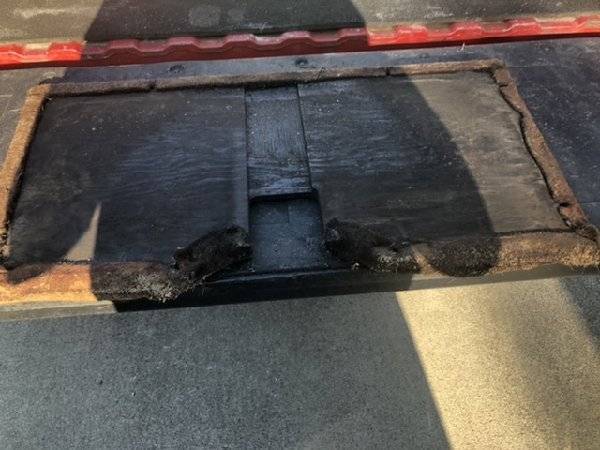  (25.45 KB) (25.45 KB)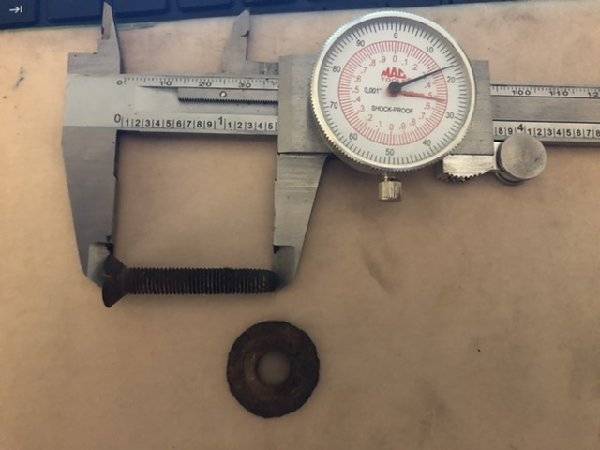  (34.30 KB) (34.30 KB)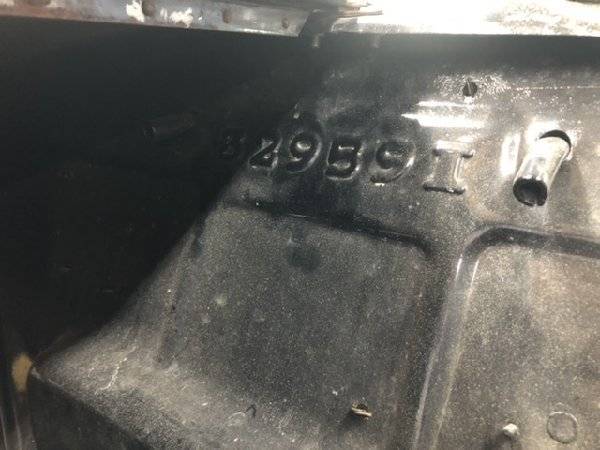  (31.75 KB) (31.75 KB)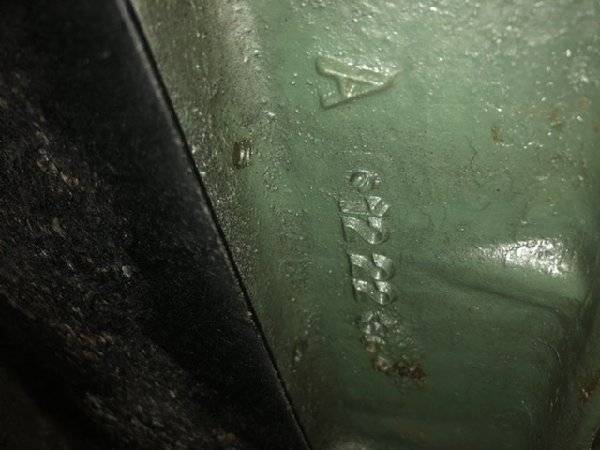
Posted on: 2020/4/16 20:40
|
|||
|
1937 120 1092 - Original survivor for driving and continued preservation. Project blog / Registry
1937 115 1082 - Total basket case, partial restoration, sold Hershey 2015 Project blog / Registry |
||||
|
||||
|
Re: Ken's 1937 120 Touring Sedan
|
||||
|---|---|---|---|---|
|
Forum Ambassador

|
Ken, re your vehicle number (VN), your car is not the 9044th 120, it's the 9044th 1092. Each body type starts a new run of sequence numbers.
Your TPN is not yet in my database. Your motor number is consistant with other 1092 cars with close TPNs
Posted on: 2020/4/16 20:48
|
|||
|
||||

