|
Re: Mike P 1955 400 Slow Resto Thread!
|
||||
|---|---|---|---|---|
|
Home away from home

|
Posted on: 2022/7/8 0:30
|
|||
|
Riki
|
||||
|
||||
|
Re: Mike P 1955 400 Slow Resto Thread!
|
||||
|---|---|---|---|---|
|
Just can't stay away
|
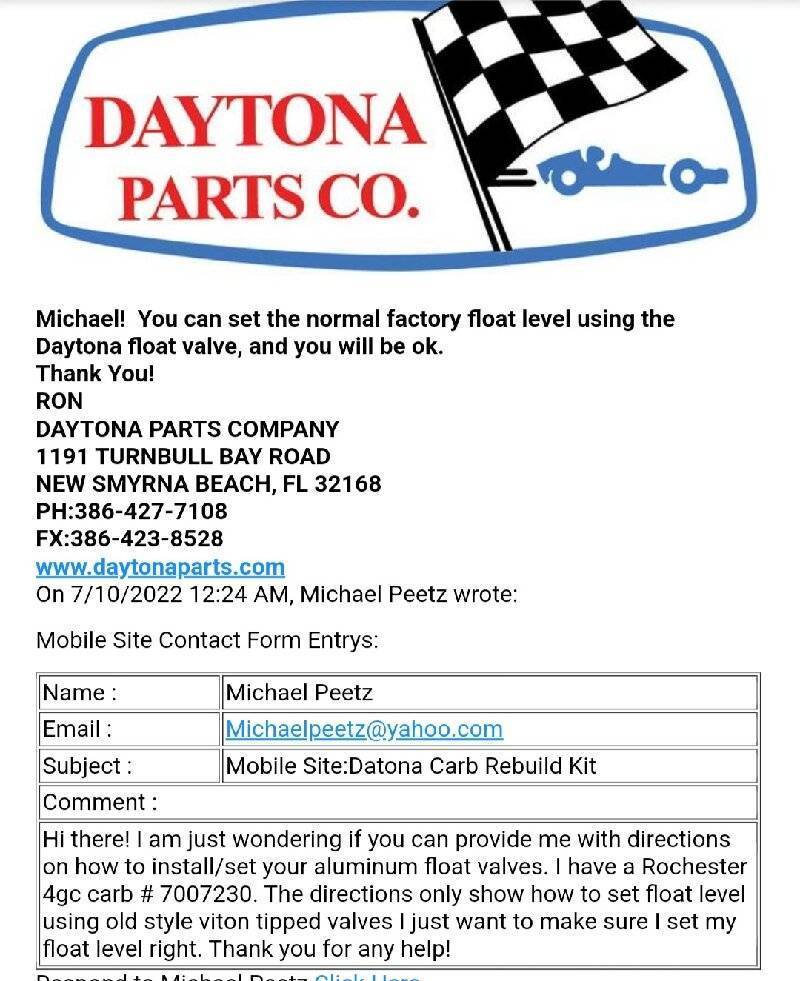
Hey guys heres what I got back when I asked Daytona how to set float level.....
Posted on: 2022/7/11 10:27
|
|||
|
-Mike
1955 Packard 400 |
||||
|
||||
|
Re: Mike P 1955 400 Slow Resto Thread!
|
||||
|---|---|---|---|---|
|
Home away from home
|
Mike and I have had several PM conversations about Daytona style fuel valves (aka needle & seat). I initially concluded Daytona was using extra gaskets to achieve the desired float level. While that may still be correct, my understanding now is Daytona makes valves of a particular height, and that height is not necessarily the height of the OEM valve, which is a critical characteristic in the float level determination/adjustment. To achieve the OEM valve height Daytona uses up to 3 fuel valve gaskets where the OEM uses 1 gasket. Dayton also acknowledges that their valve may not need additional gaskets for non-Carter applications as in Mike’s case. I surely missed the point that Mike had a Rochester unit.
The following are the instructions included in the packaging of the Daytona valves: FLOAT VALVE GASKET INSTRUCTIONS To maintain correct needle & seat height, use the following RECOMMENDED guide to install the close tolerance gaskets in this kit. CARTER APPLICATIONS, use 3 gaskets ALL OTHER BRANDS, use 1 or 2 gaskets If a valve is installed that is substantially shorter (measured from the gasket surface to the end of the needle) than the OEM valve the float tang adjustment will be beyond the intended range and will likely apply a side load to the needle. Since the Daytona specific instruction come separately, the general instruction set that comes with carburetor kits will not necessarily mention those instructions. Those of us that use a Daytona style valve(s) in our Carter carburetors should be aware of the supplementary instructions, and when in doubt as to the number of gaskets to use a measurement from the gasket sealing surface to the end of the needle will be the determining factor. My guidance of ensuring the float tang is pressing on the center of the needle when the valve is closed is likely valid. dp
Posted on: 2022/7/11 15:44
|
|||
|
||||
|
Re: Mike P 1955 400 Slow Resto Thread!
|
||||
|---|---|---|---|---|
|
Home away from home
|
The height of the float within the bowl with respect to where it closes and opens the valve is what is important rather than the height of the valve itself. In other words, the height of the valve is not critical but the height of the float with respect to it is.
Posted on: 2022/7/12 1:25
|
|||
|
||||
|
Re: Mike P 1955 400 Slow Resto Thread!
|
||||
|---|---|---|---|---|
|
Just can't stay away
|
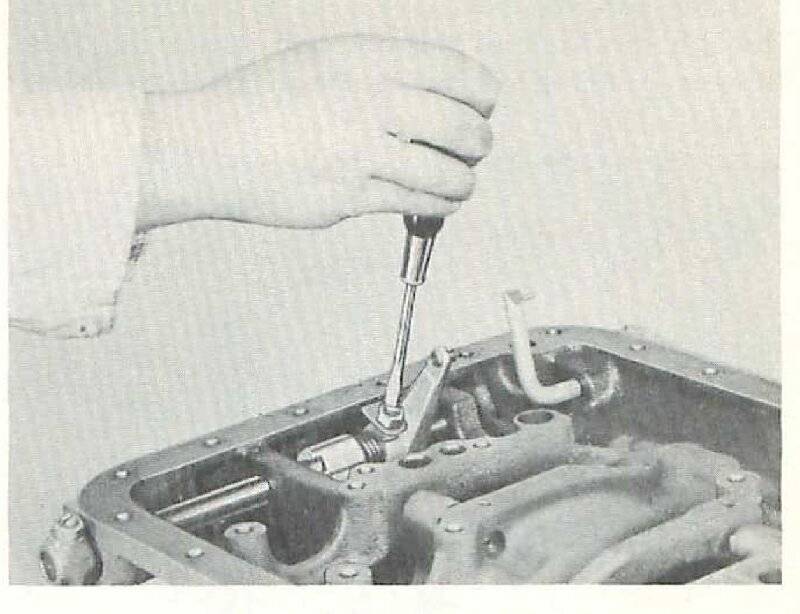
I will be dropping the Transmission pan today when I get home, is there anything I should plan on checking while it is down? All I plan on doing is cleaning the filter and rebuttoning it up with a new gasket. Any tips, tricks or anything to look out for? Thanks!
Posted on: 2022/7/12 15:39
|
|||
|
-Mike
1955 Packard 400 |
||||
|
||||
|
Re: Mike P 1955 400 Slow Resto Thread!
|
||||
|---|---|---|---|---|
|
Forum Ambassador
|
Definitely check the setscrew on the pot metal lever on the shaft and the pin at the end of the lever connecting to the curved link which works the manual valve. One of the ends of the pin connecting to the link can break letting the pin get loose and the threaded hole in the pot metal is known to strip and let the setscrew loosen or fall out.
If the setscrew loosens the detents get sloppy and if the screw falls out the lever is free and you have no gear selection. Don't try to tighten too much though because as I said, stripping the pot metal hole is a well known issue and a hard twist of the screw can do it - as can tightening the lock nut tight and have it pull the setscrew threads up shearing the pot metal threads. Some have gone with locktight but the permanent fix is to get the setscrew and stop in proper position and snug so everything is kosher then drill thru the lever and shaft so you can install a roll pin.
Posted on: 2022/7/12 16:24
|
|||
|
Howard
|
||||
|
||||
|
Re: Mike P 1955 400 Slow Resto Thread!
|
||||
|---|---|---|---|---|
|
Home away from home
|
100% concur with that advice: get your set screw snugged up so that the lever is located properly, then take a 1/8" drill bit and drill clean through the lever, shaft, and out the other side. Then drive in a roll pin. My first boss taught me to NEVER retain an oscillating load with a set screw.
Posted on: 2022/7/12 18:16
|
|||
|
||||
|
Re: Mike P 1955 400 Slow Resto Thread!
|
||||
|---|---|---|---|---|
|
Home away from home

|
If yours is worn I have a new one
Courtesy of hh56
Posted on: 2022/7/12 19:04
|
|||
|
Riki
|
||||
|
||||
|
Re: Mike P 1955 400 Slow Resto Thread!
|
||||
|---|---|---|---|---|
|
Just can't stay away
|
Ok I will check this out and add a roll pin... thanks for the offer Rick, I will let you know what I find...
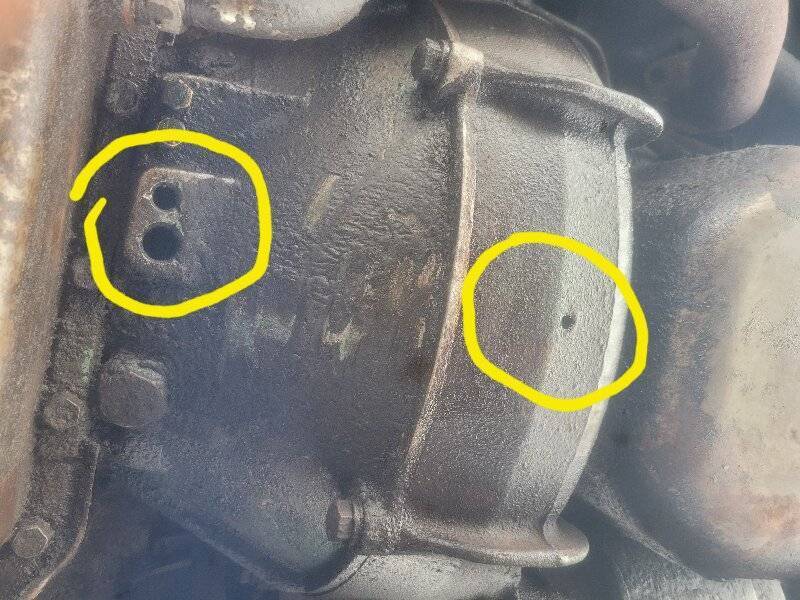
Are there supposed to be this many open holes on the bottom? Just didn't know if I am missing any plugs?
Posted on: 2022/7/12 19:46
|
|||
|
-Mike
1955 Packard 400 |
||||
|
||||

 Screenshot_20220711-082121_Yahoo Mail.jpg (155.28 KB)