|
Re: Mike's 53 Caribbean
|
||||
|---|---|---|---|---|
|
Home away from home

|
The machined area on the axle shaft is about 1 inch wide, so as long as the back of the bearing or a shoulder on the axle shaft is not pressing on the seal, I should be OK.
Thank for the pic Kevin, that looks like how far I got the passenger side in, and the one I was concerned with. The driver side went in about 3/8 inch deeper, and I was happy with that one...Guess I am over thinking/worrying here.
Posted on: 2024/7/2 4:22
|
|||
|
1953 Clipper Delux Club Sedan, 1953 Caribbean, 1969 912, 1990 Miata
|
||||
|
||||
|
Re: Mike's 53 Caribbean
|
||||
|---|---|---|---|---|
|
Home away from home

|
Measure twice cut once, or in this case....measure once and hit twice. I measured the installed depth of the seal, and the position of the sealing surface on the axle, and then decided to give drive the seal 1/2 inch deeper. Now it should all line up.
I installed the shims and paper gaskets, and made a tool like in the shop manual to measure the endplay....I'll get to that soon and remove shim(s) as needed. I'm gettin' back into the groove.
Posted on: 2024/7/2 15:25
|
|||
|
1953 Clipper Delux Club Sedan, 1953 Caribbean, 1969 912, 1990 Miata
|
||||
|
||||
|
Re: Mike's 53 Caribbean
|
||||
|---|---|---|---|---|
|
Home away from home

|
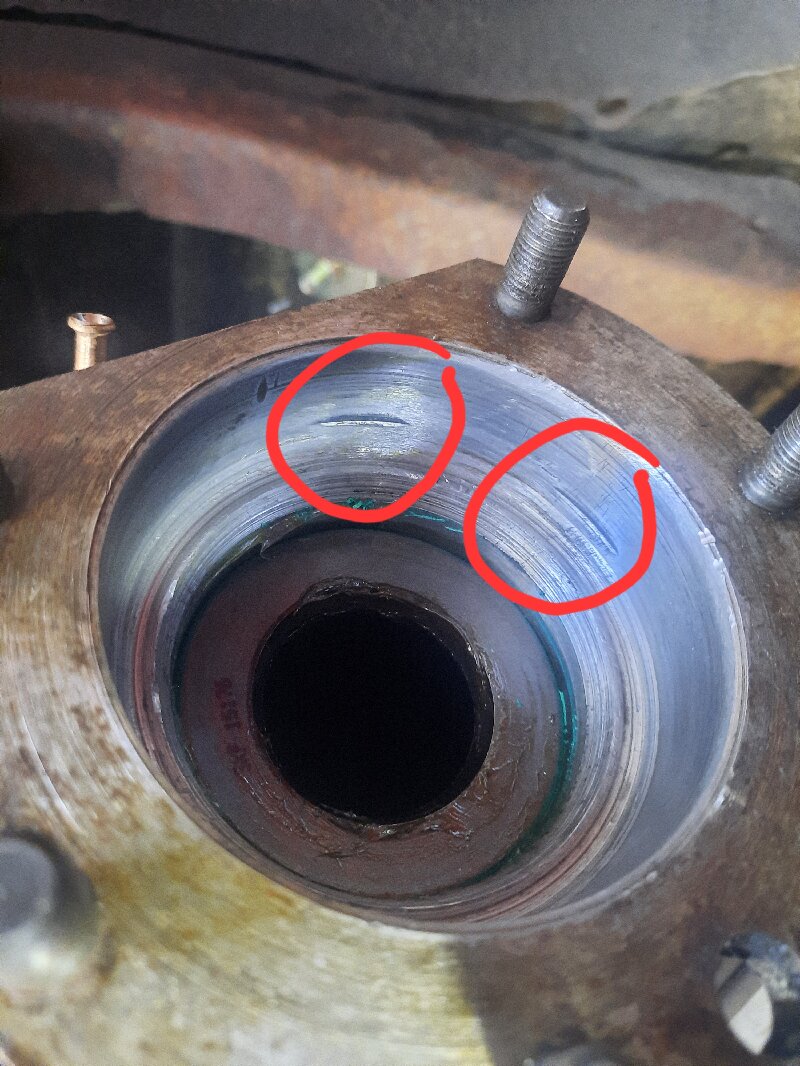
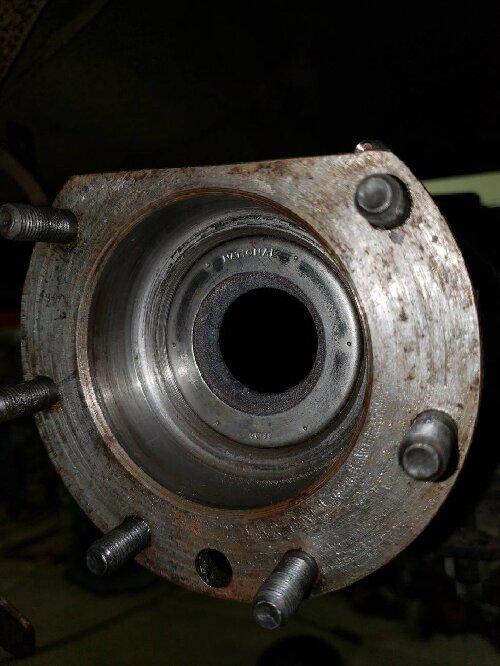
I put the axles and backing plates in, and was trying to get the bearing play set with shims, and found out I needed a lot of shims, plus the gasket to get the free-play correct. I asked Ross about getting some shims sent to Germany, but he was suspicious that something else was wrong. When I took things apart, I found that the passenger bearing race wass hanging up on the housing and not going in the last milimeter or two.
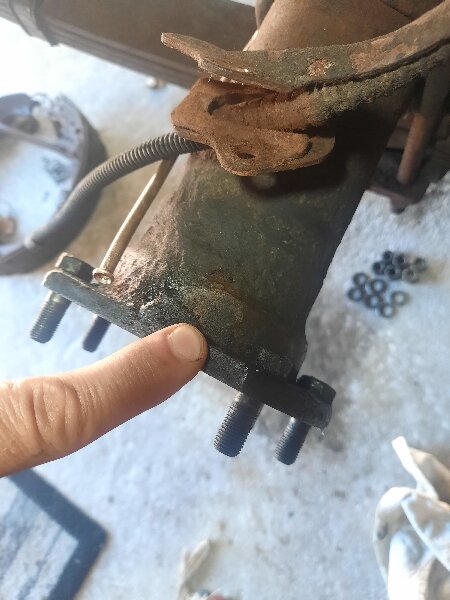
The passenger bearing race was a real bear to pull out with a slide hammer. The driver side was easy....I found two ridges on the inside of the housing where the bearing was hanging up, and can also feel two bumps on the inside of the axle housing by the ridges. On the outside of the housing I can see two marks where a chain (tow truck driver?) looks to have dented the axe housing.... I'll clean up those burrs, ridges and dents and see if the bearing then goes in easier.
Posted on: 2024/7/8 5:54
|
|||
|
1953 Clipper Delux Club Sedan, 1953 Caribbean, 1969 912, 1990 Miata
|
||||
|
||||
|
Re: Mike's 53 Caribbean
|
||||
|---|---|---|---|---|
|
Home away from home

|
Some more progress....After removing those dents/burrs, I was able to install the axle and bearing assemblys easily and also with a light hammer blow move them back and forth to check the free play. However with my new Timken bearings and "china races", the needed shim stack thickness was still about 0.095 inch which seemed like alot.
After a lot of thinking, I put back the old bearing races (Bower races) back with the new bearings, and was able to get .004 inch clearance while using one 0.020 shim on the drivers side, and on the passenger an .020 and an .005 shim. (When I took the car apart, it only hat one .005" shim more than what it is now). I am now happy that I can at least put things together with a reassonable amount of shimms and have the correct tolerance. The old bearing races still looked good, so I think I am just going to use them. I was able to measure the thickness of the new bearing races, and that looked good. However, I am not able to measure the cone section of the race, which I think might be out of tolerance. This has been an ordeal to get right. I can pull and install axles and measure endplay in my sleep by now. I also just got a new dial indicator and stand to measre this all with! Fancy new toy 
Posted on: 2024/7/9 6:02
|
|||
|
1953 Clipper Delux Club Sedan, 1953 Caribbean, 1969 912, 1990 Miata
|
||||
|
||||
|
Re: Mike's 53 Caribbean
|
||||
|---|---|---|---|---|
|
Home away from home

|
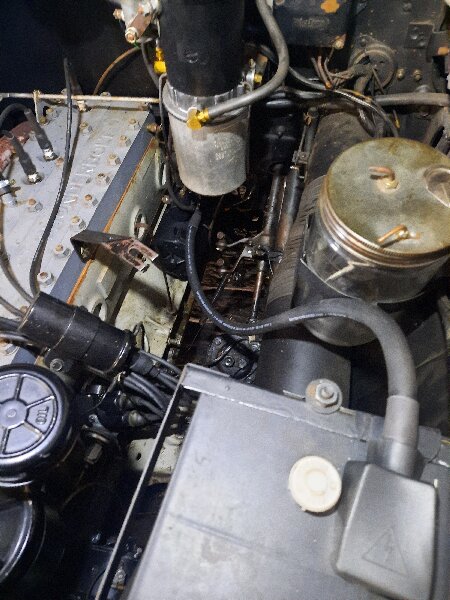
I had some time the last few days and got the rear axle back together....Getting around to some tidbits I had laying around, and I installed the 00 battery cable that I ordered from batterycablesusa.com. The length is just right, and the diameter of the wire is impressive. The picture below does not really do the cable justice. It is like a copper water pipe going from the battery to the starter! I tried one start since installing, and would say that it turns over a little quicker than before. Happy with the cable. I may try and remove the .com advertisement lettering on the cable with some brake cleaner or something since that does not look so period correct. Good to be back on the road!
Posted on: 2024/7/12 6:13
|
|||
|
1953 Clipper Delux Club Sedan, 1953 Caribbean, 1969 912, 1990 Miata
|
||||
|
||||
|
Re: Mike's 53 Caribbean
|
||||
|---|---|---|---|---|
|
Home away from home
|
I would try an alcohol solution first, e.g. 70% isopropanol.
If not, lacquer thinner will probably work to take off the lettering. Then wash it with some alcohol to remove the excess lacquer thinner.
Posted on: 2024/7/12 6:19
|
|||
|
1955 400 | Registry | Project Blog
1955 Clipper Deluxe | Registry | Project Blog 1955 Clipper Super Panama | Registry Email (Parts/service inquiries only, please. Post all questions on the forum.) service@ultramatic.info |
||||
|
||||
|
Re: Mike's 53 Caribbean
|
||||
|---|---|---|---|---|
|
Home away from home
|
I have the Delco-Packard type in my 1954 Patrician which has Packard molded into the lead clamp. No relation to Packard cars of course but having it there LOOKS like it belongs. Same with the plug wires which are Packard 440.
Posted on: 2024/7/12 10:51
|
|||
|
All generalities are false.
Once I thought I was wrong but I was mistaken. Don Pierson Packard / IMPERIAL page CA DMV Licensed Vehicle VIN Verification 1951 Henney-Packard 3-Door Long Wheelbase Air Force Ambulance The 1951 Henney-Packard is For Sale! 1954 Packard Patrician 1954 Packard Patrician Parts Car 1956 Clipper Custom Sedan |
||||
|
||||
|
Re: Mike's 53 Caribbean
|
||||
|---|---|---|---|---|
|
Home away from home
|
Packard not from the Packard Electric name?
Posted on: 2024/7/12 11:17
|
|||
|
1955 400 | Registry | Project Blog
1955 Clipper Deluxe | Registry | Project Blog 1955 Clipper Super Panama | Registry Email (Parts/service inquiries only, please. Post all questions on the forum.) service@ultramatic.info |
||||
|
||||
|
Re: Mike's 53 Caribbean
|
||||
|---|---|---|---|---|
|
Home away from home
|
Packard Electric was Delco-Packard, a GM subsidiary.
Posted on: 2024/7/12 14:08
|
|||
|
All generalities are false.
Once I thought I was wrong but I was mistaken. Don Pierson Packard / IMPERIAL page CA DMV Licensed Vehicle VIN Verification 1951 Henney-Packard 3-Door Long Wheelbase Air Force Ambulance The 1951 Henney-Packard is For Sale! 1954 Packard Patrician 1954 Packard Patrician Parts Car 1956 Clipper Custom Sedan |
||||
|
||||


 20240708_104922.jpg (987.66 KB)