|
Fuel Pump Rebuild
|
||||
|---|---|---|---|---|
|
Home away from home

|
Current project is to rebuild my fuel pump, not because I think it's bad, but because I have no idea how old the diaphragms are. I would guess it's been rebuilt at least once as there are a couple of the original lock washers missing.
Found this very helpful video.youtu.be/g4uJh_mn_6g?si=ng7DThSDpTPxtfcF Thank goodness for the internet, like packardinfo.com, it makes caring for our cars so much easier. Question: The rebuild kit came with 2 new gaskets (pictured below) which are not nearly as thick as the original gasket. The new ones are 0.024" each and old one is 0.078". The new ones will compress a bit and I suspect even if I stacked the two of them they would be about half as thick as the original. Should I stack the two new ones, or use the two new ones on either side of the old one, or other?? I'm not so concerned about the position as I am about heat transfer. I may be over-thinking this, but I'm rebuilding my fuel pump to prevent issues, not cause them!  I'm glad to see things are pretty clean inside, that is, not a bunch of junk stuck to the screen. (I didn't even know there was a screen!) I suspect I'll find the diaphragms are in good shape, but good to get ones installed that I know are compatible with modern fuels. 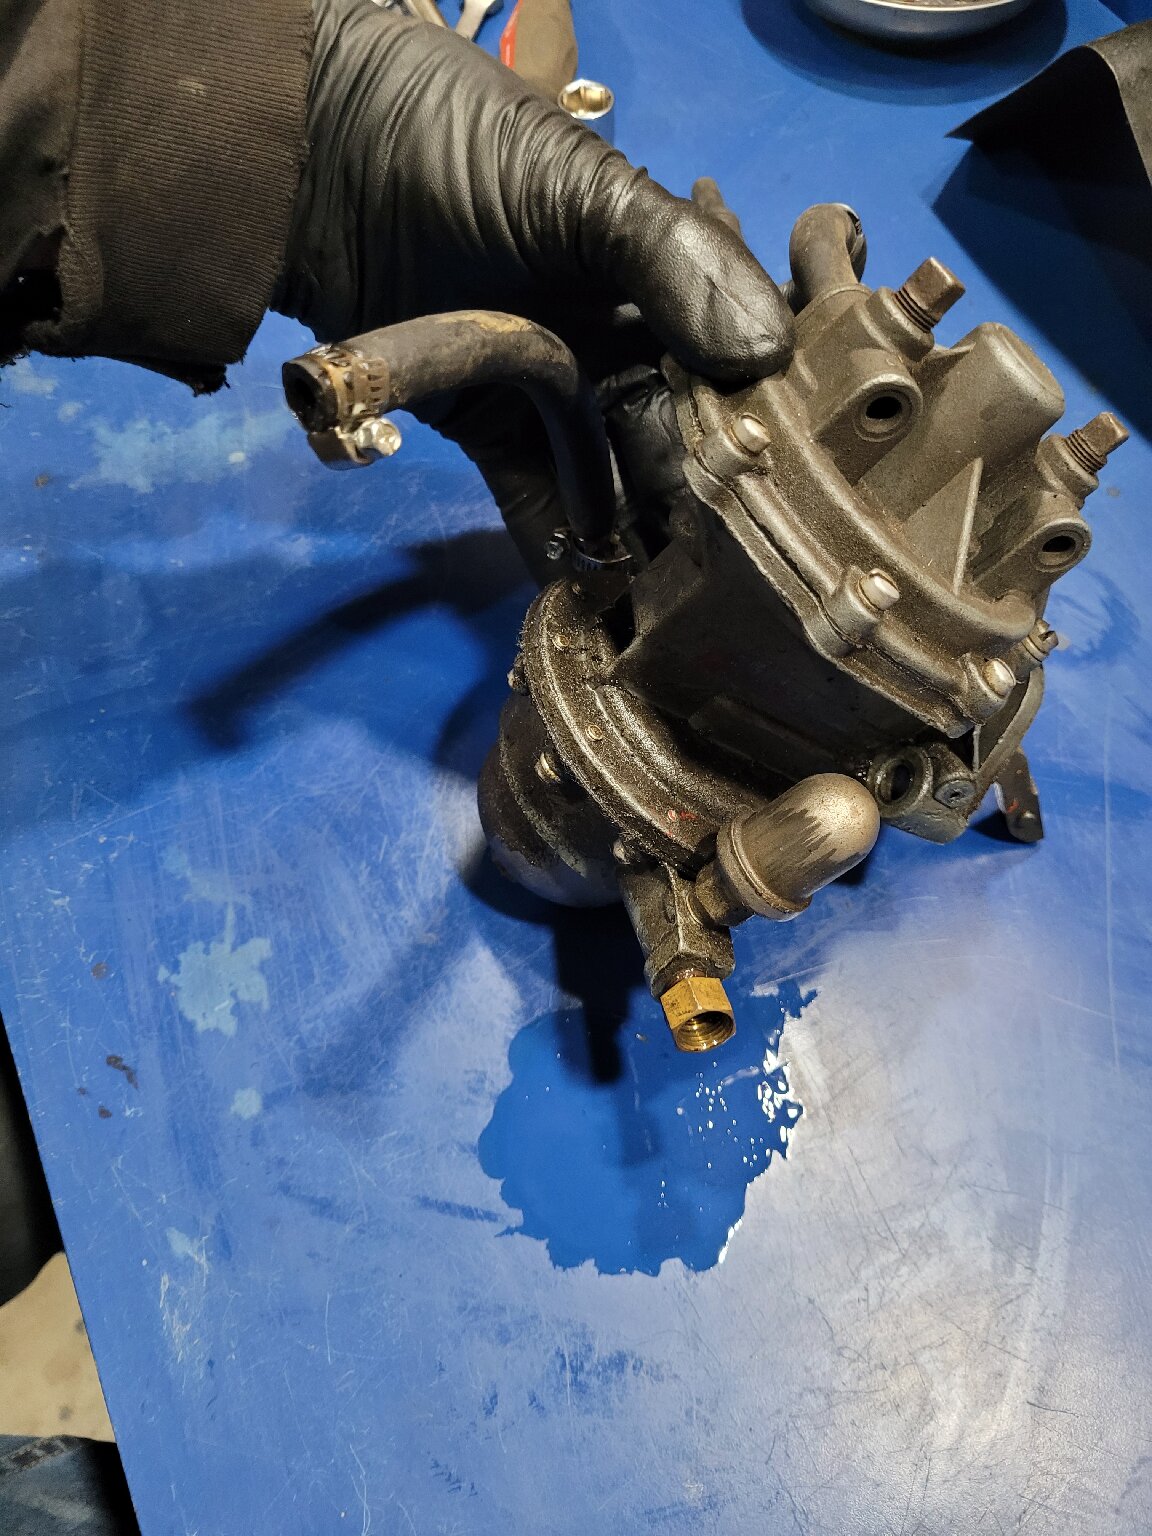 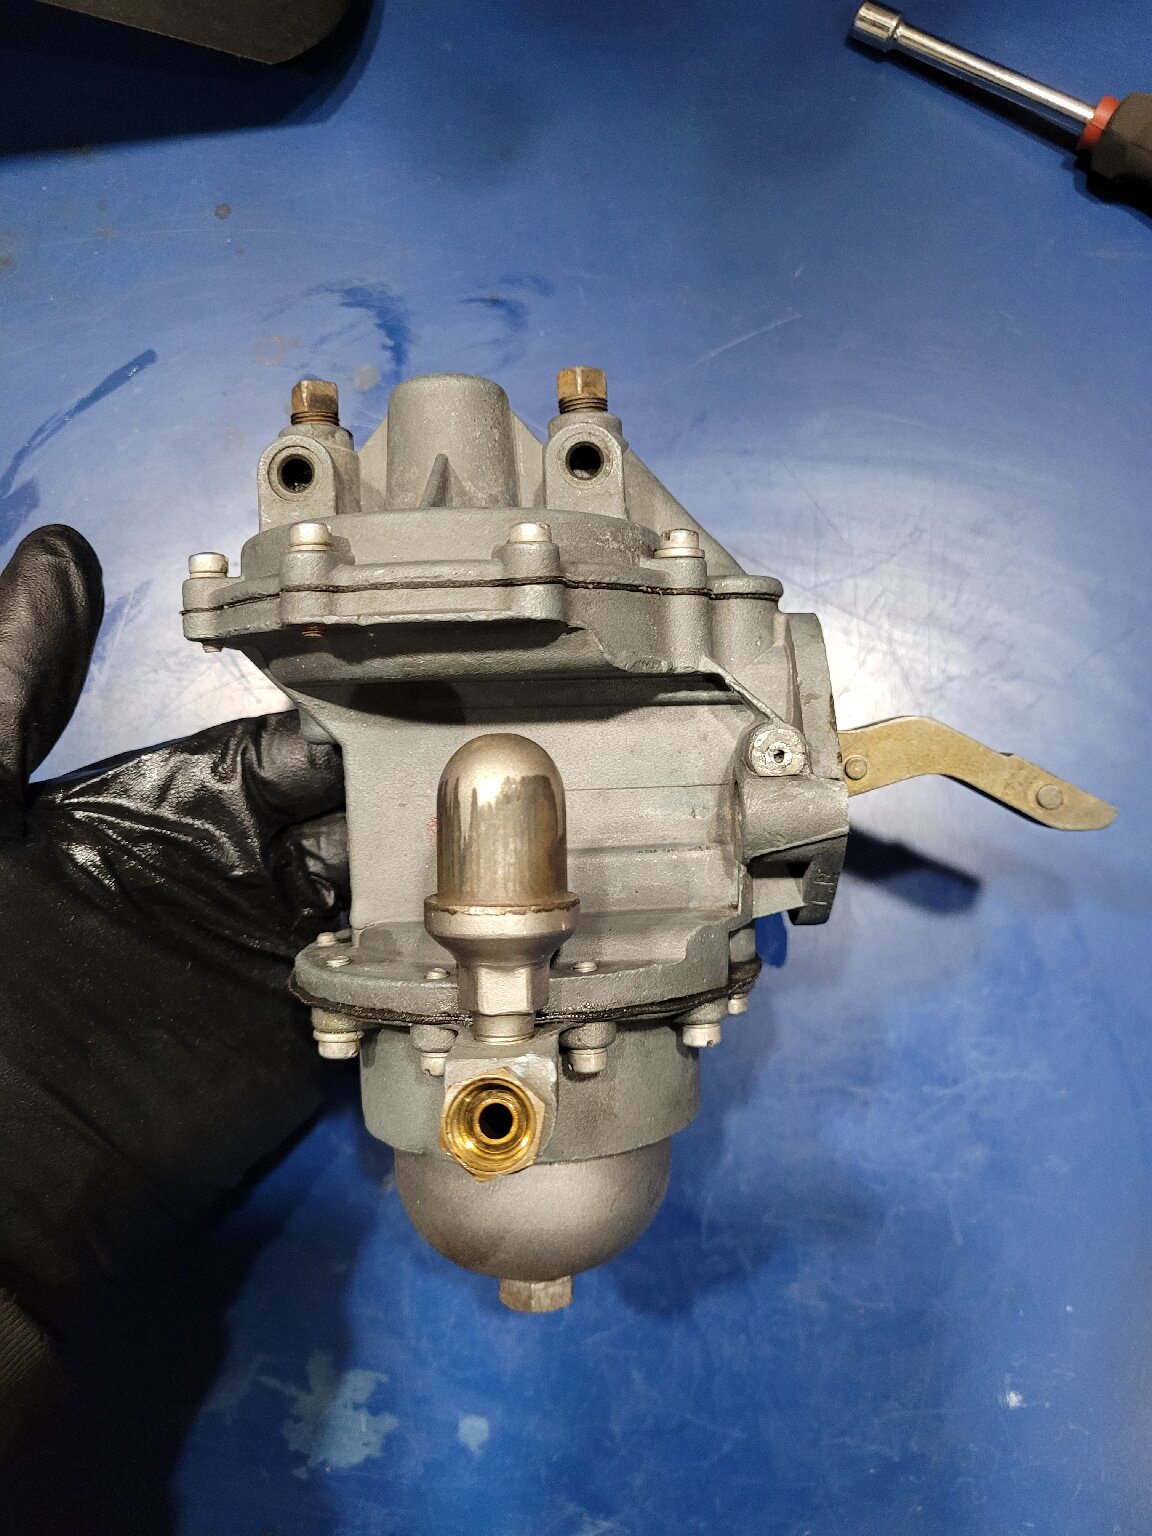 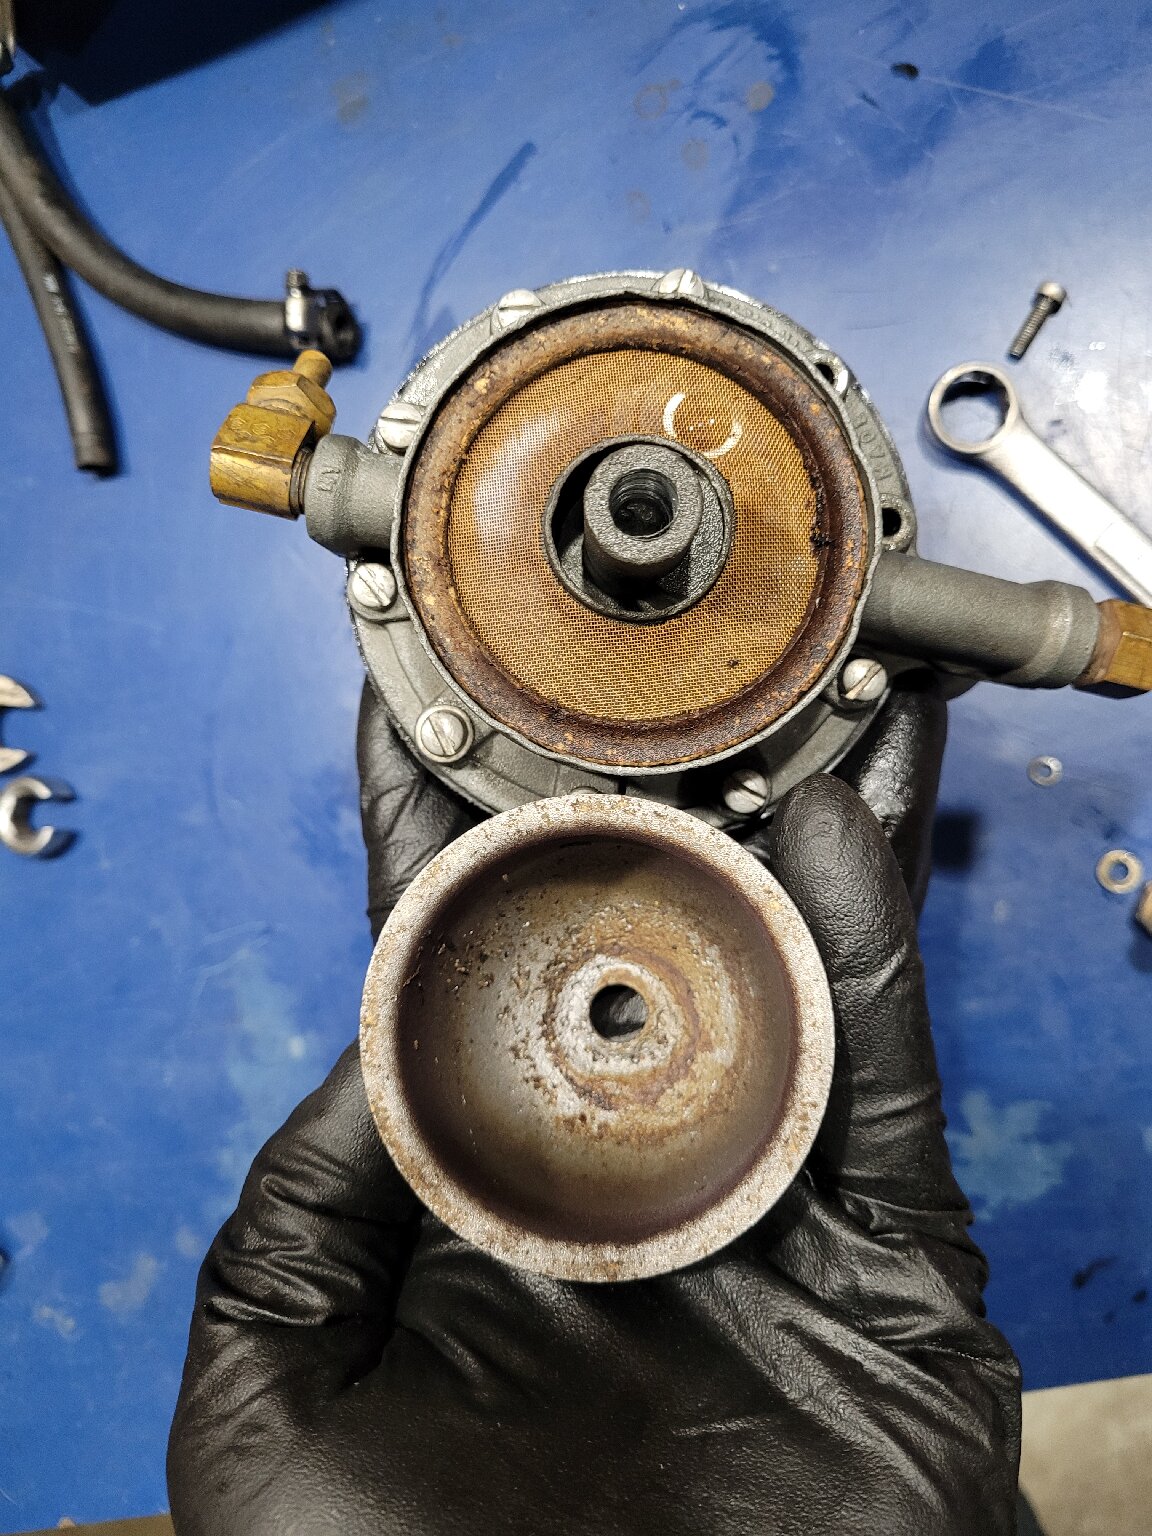 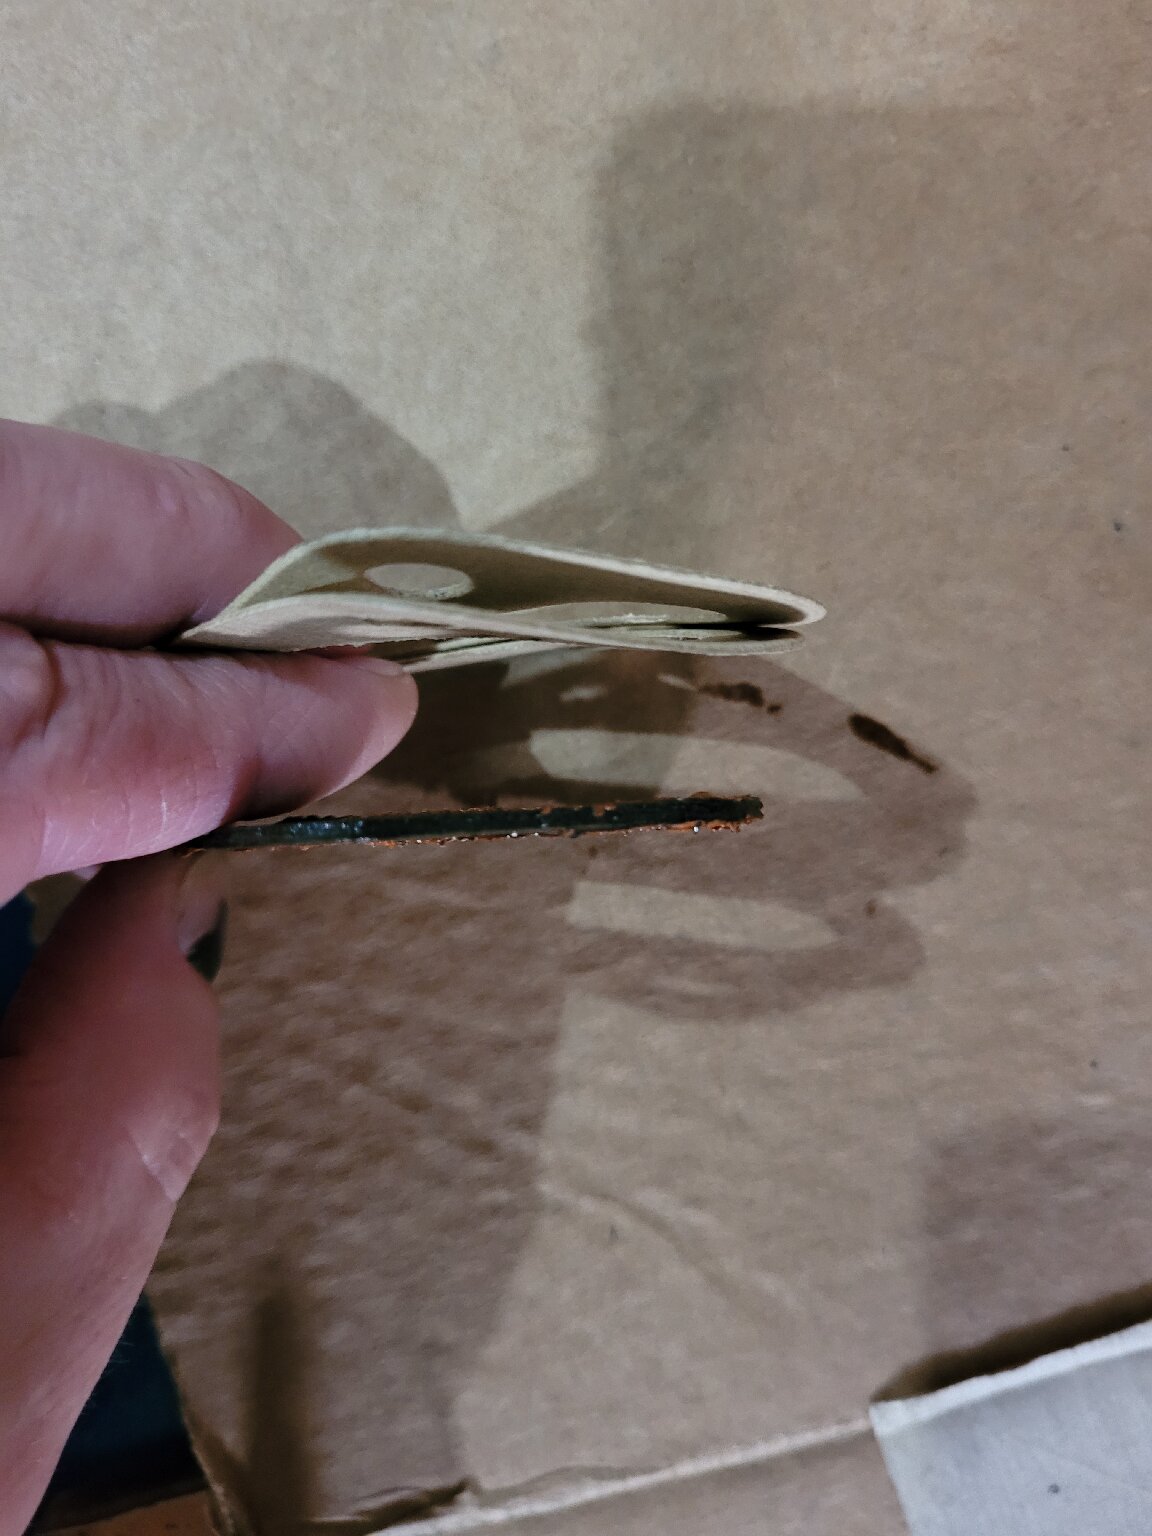 
Posted on: 2024/7/31 9:07
|
|||
|
||||
|
Re: Fuel Pump Rebuild
|
||||
|---|---|---|---|---|
|
Home away from home
|
Quote:
Making one is probably the best solution. I think the gasket thickness would have minimum impact on how the pump operates. I think the more important consideration would be minimizing heat transfer with a thicker gasket.
Posted on: 2024/7/31 10:32
|
|||
|
||||
|
Re: Fuel Pump Rebuild
|
||||
|---|---|---|---|---|
|
Home away from home

|
I agree that heat transfer needs to be minimized. Of course, too much gasket thickness will reduce pump stroke. I'd want to use ALL of the available heat mitigating items: proper gasket, insulating washers, insulating tubes on the studs, and heat shield. The gaskets on the bowl/screen are critical, both to prevent air lock and to prevent fuel from leaking out when the vehicle is parked. I had a fuel pump bowl gasket leak, and it dumped several gallons of gasoline from a full tank over night, which could have been a disaster.
Posted on: 2024/7/31 12:14
|
|||
|
||||
|
Re: Fuel Pump Rebuild
|
||||
|---|---|---|---|---|
|
Home away from home

|
When I did mine I used a film of gasket sealant on the screen/bowl gasket and on the washer gasket under the centre bolt. No sign of leaks. Had the unit out in very hot weather and parked in the sun between runs and no issues with vapour lock either.
Bob J.
Posted on: 2024/7/31 13:58
|
|||
|
||||
|
Re: Fuel Pump Rebuild
|
||||
|---|---|---|---|---|
|
Home away from home

|
The thicker original gasket is meant to reduce heat transfer to the fuel pump from the engine block.
I would just re-use it if its is in good condition. Do you have the fibre sleeves and phenolic washers for the attaching bolts ? These are meant to reduce heat transfer as well.
Posted on: 2024/7/31 14:59
|
|||
|
||||
|
Re: Fuel Pump Rebuild
|
||||
|---|---|---|---|---|
|
Home away from home
|
Quote:
I have the washers, but no sleeves. Would the sleeves be part 324771 "Bushing-Insulator"? Do they slide in the bolt hole from the back where I have the red circle? Even if the sleeves are not installed there is an air gap between the bolt and the pump body because there is a shoulder at the top of the bolt hole. I'm wondering if the 2 thin gaskets that come with the rebuild kit are to be used with the original gasket? My original gasket is in good condition, but is very hard and wasn't sealing. 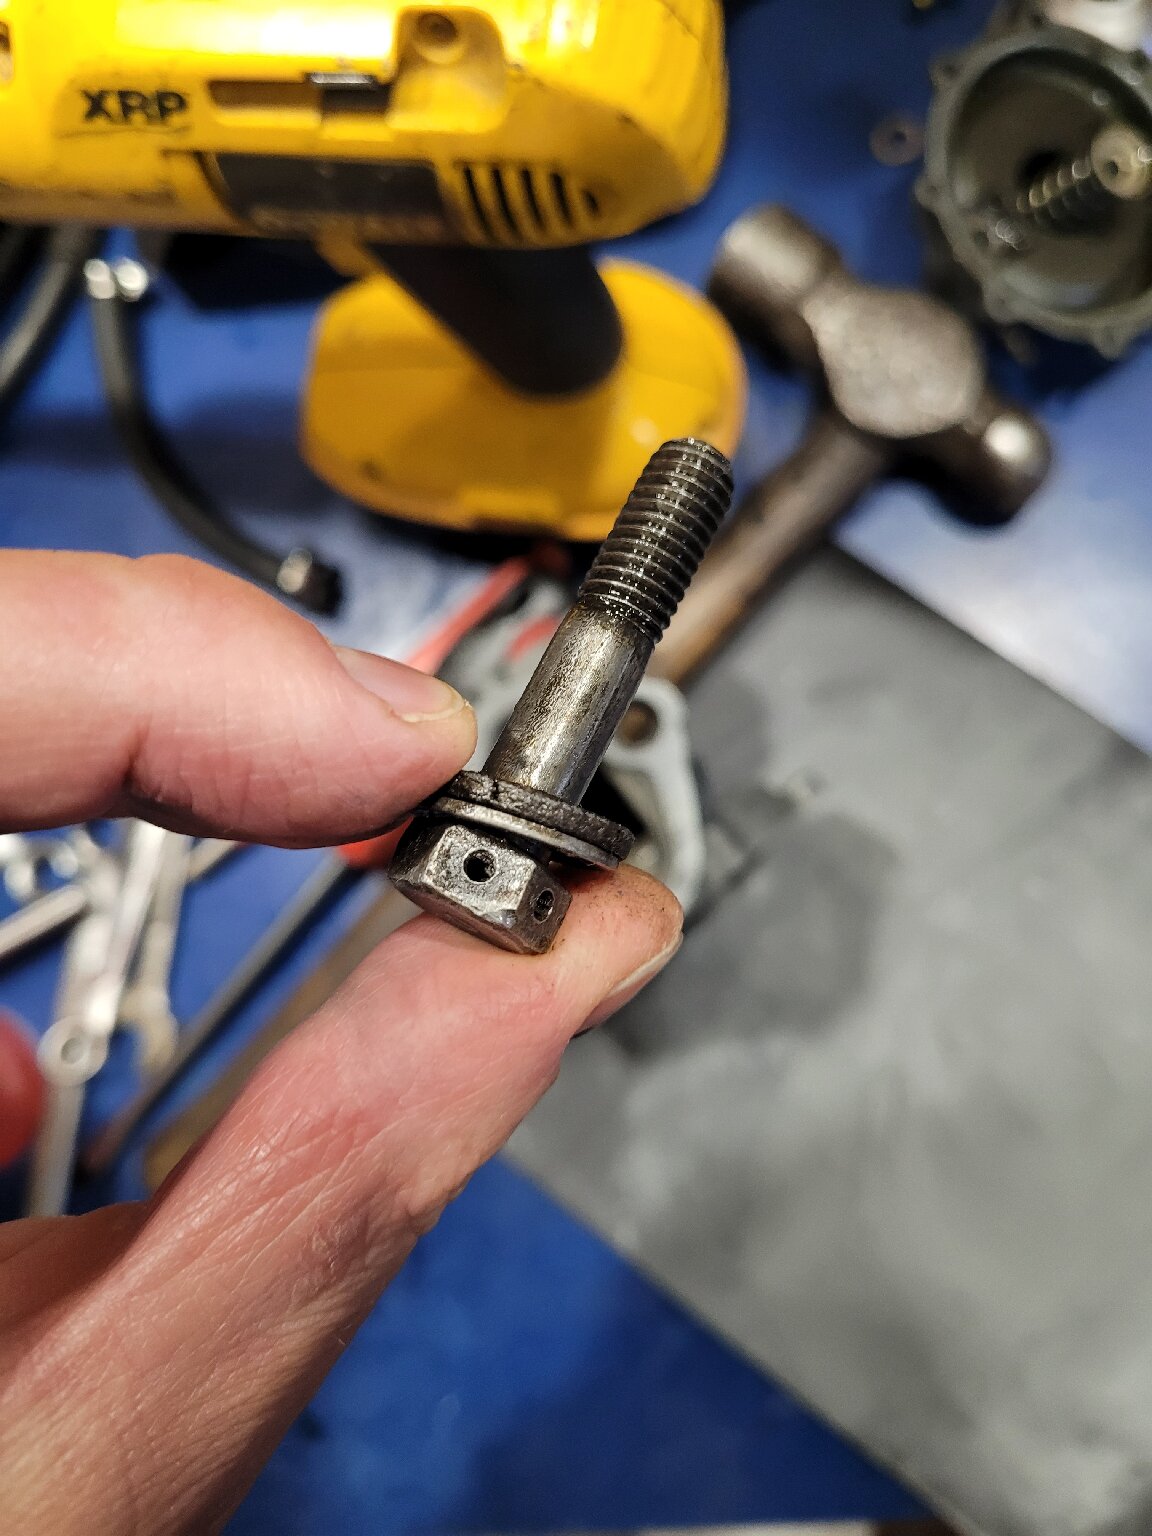 
Posted on: 2024/7/31 16:23
|
|||
|
||||
|
Re: Fuel Pump Rebuild
|
||||
|---|---|---|---|---|
|
Home away from home

|
The sleeves go in the mounting hole on the pump, yes. The bolts sit within the sleeve so that no part of the bolt touches the pump at all. Everything is insulated.
Max Merritt has the sleeves. Mine had to be cut down as they were a bit long. 30 seconds with a Dremel. -Kevin
Posted on: 2024/7/31 16:39
|
|||
|
||||
|
Re: Fuel Pump Rebuild
|
||||
|---|---|---|---|---|
|
Forum Ambassador

|
The bushings fit the hole and bolt fairly close so there is no play in the mounting to the block.
If you don't want to deal with finding or trying to make the fiber bushings Max has a kit for the mounting bolts. As I recall the bushings only fit one way as there is a bit of a ledge inside or maybe a taper with the pump holes. The washers go between the steel flat washer and the pump body. Since there is no lock washers a proper install also used the bolts you show with heads having holes in them so they could be wired together so as not to loosen.
Posted on: 2024/7/31 16:42
|
|||
|
Howard
|
||||
|
||||
|
Re: Fuel Pump Rebuild
|
||||
|---|---|---|---|---|
|
Home away from home

|
Mine were custom made for my 1951, along with the washers, by a member here but as I’m not sure if he still supplies them I don’t want to mention him by name in this public area. You DO need them as the air gap is not only not sufficient but maintaining it while installing the pump is virtually impossible.
Posted on: 2024/7/31 16:45
|
|||
|
All generalities are false.
Once I thought I was wrong but I was mistaken. Don Pierson Packard / IMPERIAL page CA DMV Licensed Vehicle VIN Verification 1951 Henney-Packard 3-Door Long Wheelbase Air Force Ambulance The 1951 Henney-Packard is For Sale! 1954 Packard Patrician 1954 Packard Patrician Parts Car 1956 Clipper Custom Sedan |
||||
|
||||


