|
Re: 51Packard's....51 Packard
|
||||
|---|---|---|---|---|
|
Forum Ambassador

|
Rusty gives good advice as always. My own preference for gaskets like this, oil pan gaskets, valve cover gaskets and the like is to use Permatex or gasket shellac on the side against the pan, and just a thin finger-wipe of light grease or oil (trans oil in this case) on the other. In that way should you need to remove the pan again in the near future you won't be needing a new gasket.
Posted on: 2010/8/29 17:45
|
|||
|
||||
|
Re: 51Packard's....51 Packard
|
||||
|---|---|---|---|---|
|
Home away from home

|
Thanks guys...Rusty, I am a little leary about using silicone. In the Honda I mentioned previously, I put in a new motor from the junkyard. I took the oil pan off to check inside and make sure it was OK. When I put it back on, I put on a new gasket and also silicone where the manual told me to add it. Needless to say...that is where I now have an oil leak! I guess I'm not good with silicone yet..
Owen...great advise on saving a gasket. I will definitely try that because I don't even know if what I did will fix the car, so chances are I will have to take it off again (hopefully not).
Posted on: 2010/8/29 18:37
|
|||
|
[url=h
|
||||
|
||||
|
Re: 51Packard's....51 Packard
|
||||
|---|---|---|---|---|
|
Home away from home

|
8-29-10 Continued
Well, I motivated myself to get a little more done today after cooling off in the afternoon. I got the valve body reinstalled. I used a floor jack to lift it up and hold it for me while I lined it up and put the bolts in. Didn't have any problems. Remembered where the longer bolt was supposed to go. Interesting thing in the manual. They have you take the hold down tool off last, after you have tightened the bolts. If I did that, it would never come out! Connected the manual shift valve to the arm with a new C-clip since the old one disintegrated. Also put some gloss black paint on the trans oil pan. Tomorrow I'll order a new gasket and wait patiently to see if my efforts will make a difference!
Posted on: 2010/8/29 18:49
|
|||
|
[url=h
|
||||
|
||||
|
Re: 51Packard's....51 Packard
|
||||
|---|---|---|---|---|
|
Home away from home
|
Hey guy, I just spotted one of your problems: The throttle lever on the side of the tranny, the one that goes up to the throttle linkage is on upside down!! It should point up and not down. See fig 79, p 24 in the shop manual. With that on upside down, the throttle pressures will always be wrong: there is no chance of kickdown, and the trans will actually decrease it holding power when you give the car more gas. Bad Bad.
Just had this on a car that came in for a visit after the national. Owner was thrilled with his new performance. Here's the deal for quick and dirty Ultra-happiness: Put the throttle linkage in roughly the right orientation, but leave the clamp screw loose on that little arm. Poke your choke open with your finger and let the throttle linkage snap back to a slow idle position (no need to run the engine) Set the length of your throttle pull rod so that the end is close to 2 3/4 inches above the surface of the head (fig 89, p 26) A piece of square cardboard with a pencil mark on the edge works just fine. Now get under the car and lightly turn the shaft that little lever is on CCW til it stops. Bring it CW just a tiny skosh, a couple of degrees, and then tighten the clamp bolt. Done. A right angle screwdriver is a really big help for this.
Posted on: 2010/8/29 20:53
|
|||
|
||||
|
Re: 51Packard's....51 Packard
|
||||
|---|---|---|---|---|
|
Home away from home

|
I'm not crazy about silicone myself but it does a good job if used properly.The secret is to use a small amount and let it set up before tightening then don't tighten too much. For times when no gasket is available it can be a life saver.
When installing gaskets it can help to smear a thin layer of silicone on the gasket and let it dry. This will prevent the gasket sticking.
Posted on: 2010/8/29 21:19
|
|||
|
||||
|
Re: 51Packard's....51 Packard
|
||||
|---|---|---|---|---|
|
Forum Ambassador
|
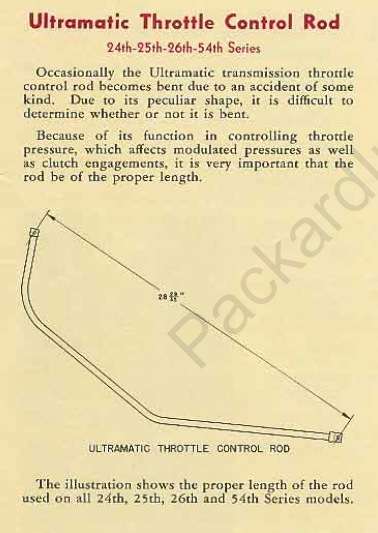
Eyes like a hawk on that throttle rod! Unless an optical delusion, the rod also looks bent so as long as you are going to the trouble to adjust properly might be a good opportunity to check and see if it is 28 29/32 as specified.
Attach file:  (24.55 KB) (24.55 KB)
Posted on: 2010/8/29 21:20
|
|||
|
||||
|
Re: 51Packard's....51 Packard
|
||||
|---|---|---|---|---|
|
Home away from home

|
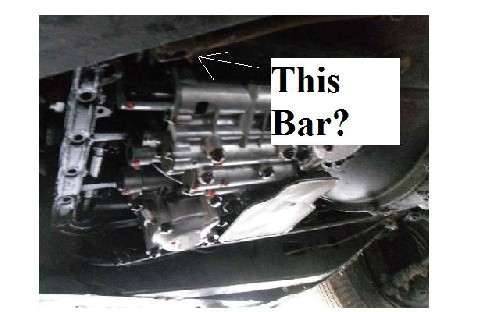
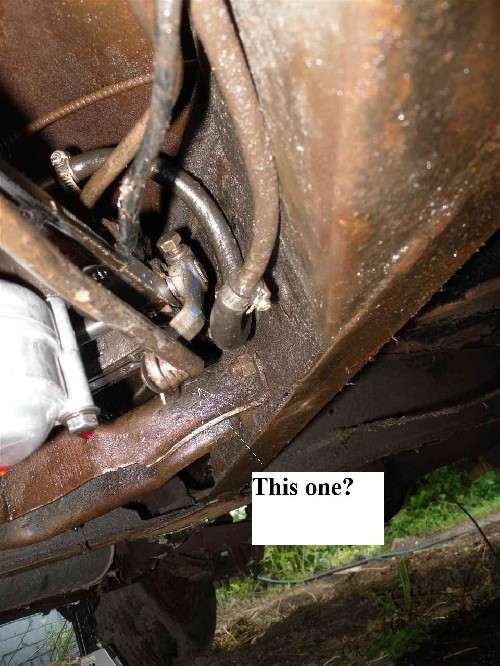
Thanks Ross...I'll have to get under the car and take a look. Which manual are you referring to? I tried the Ultramatic part 1 manual on this site, but I do not see what you are talking about. Attached are some pics with arrows so I know what linkage it is.
I have never touched any linkage and the car did drive at one point. H never had enough power for me to drive it up car ramps. Maybe this was part of the problem too?
Posted on: 2010/8/29 21:24
|
|||
|
[url=h
|
||||
|
||||
|
Re: 51Packard's....51 Packard
|
||||
|---|---|---|---|---|
|
Forum Ambassador
|
Here is a better picture than the service manual--page 44.packardinfo.com/xoops/html/downloads/SC/SC-VOL24NO9.pdf but the procedure was changed after this was printed so follow Ross's suggestions.
Posted on: 2010/8/29 21:41
|
|||
|
||||
|
Re: 51Packard's....51 Packard
|
||||
|---|---|---|---|---|
|
Webmaster
|
Just a note, for those with '54 Gear Start, the kick down "bar" is a different length. These is covered in the '55 Service Manual, and also in the later SSBs.
Posted on: 2010/8/30 0:04
|
|||
|
-BigKev
1954 Packard Clipper Deluxe Touring Sedan -> Registry | Project Blog 1937 Packard 115-C Convertible Coupe -> Registry | Project Blog |
||||
|
||||


