|
Re: 51Packard's....51 Packard
|
||||
|---|---|---|---|---|
|
Home away from home

|
12-11-10
Well, I've been trying to retake the dining room table to work on my harness, but no dice. Wife needs to bake homemade cookies. I have my priorities! So, until I get room again, I thought I would turn to the instrument cluster. I reread BigKev's blog on his clock repair (page 89) and I began to attempt to do mine. Even though the face of his is different, the inner parts are very similar, if not the same. Removed the small screw on the top of the adjuster knob with a knife and pulled off the knob. Removed the mounting screws from the back and moved the electrical connector box out of the way (not sure what it is called). I tried to pull the clock out, but the housing in the front that the adjuster knob stem goes through needed to come out. I pulled it out and tried to turn it thinking it was a screw. No go. Kept messing around with it for about a 1/2 hour before it finally came off. Looks like it was just pushed on after all and only needs to be pulled off! Pics of it below to help anyone out in the future. Once the clock was removed, I wound it by moving the weights. The clock would not work. Then I took a trip out to the garage and sprayed the crap out of it with PB Blaster. I let it soak for a minute and then spun the wheel on the gears (goes back and forth when the clock is running) and the clock started to work! It ran for about 10 seconds and stopped. I spun the wheel and put pressure on moving the weights (the direction they would go as the clock unwound in use) and the clock kept going. I took pressure off the weights and the clock now runs on it's own! Cool! After that, I cleaned the contacts with a file and verified that they opened when the weights wound the clock and closed when the clock was unwound. I did not connect any power to test it. Not really sure how I can do that. I may just "assume" it is fixed and know for sure when I reinstall it in the car with the new harness. Attach file:  (60.88 KB) (60.88 KB)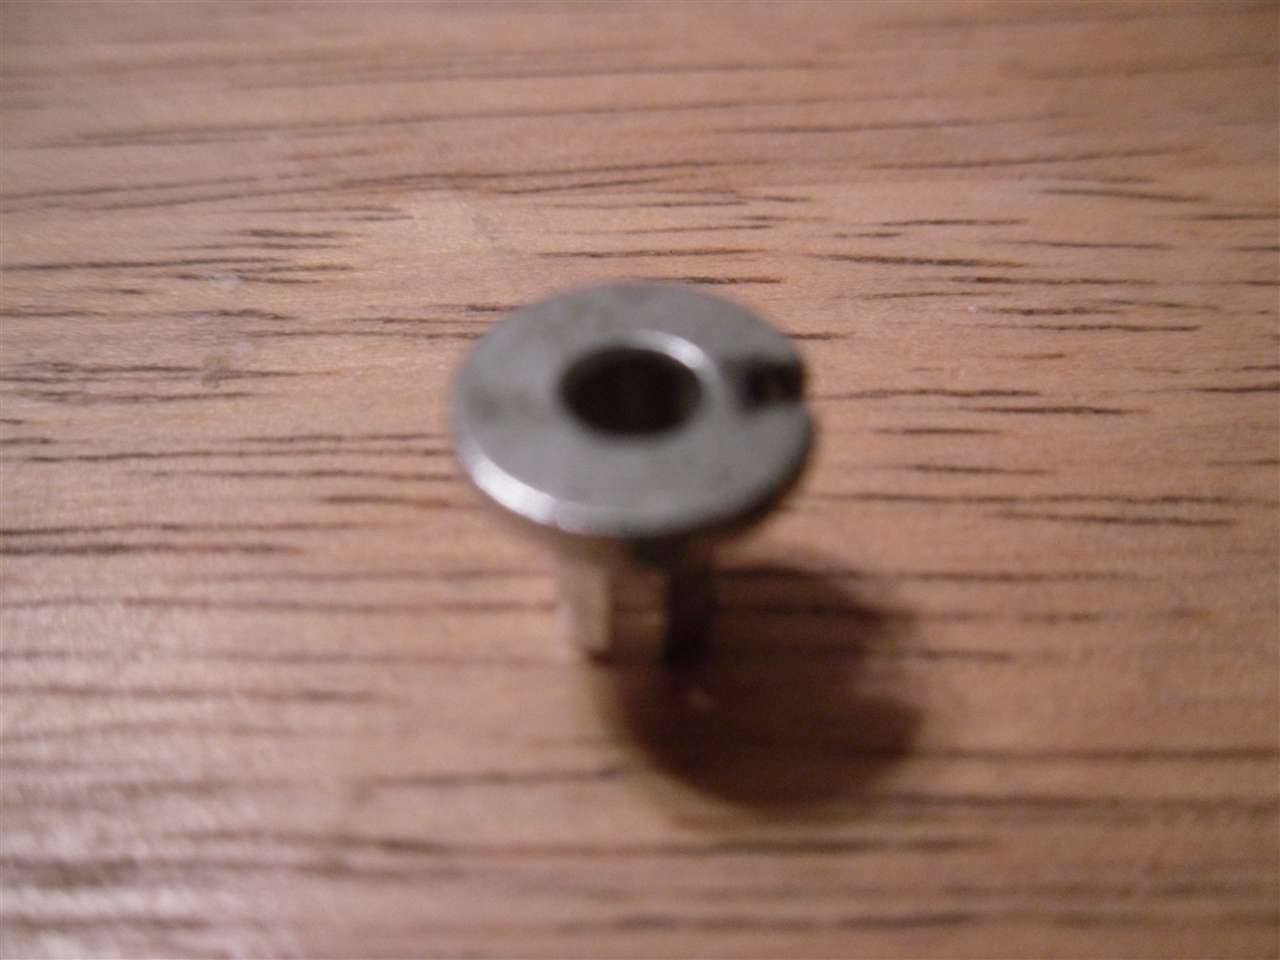 (64.45 KB) (64.45 KB) (86.08 KB) (86.08 KB)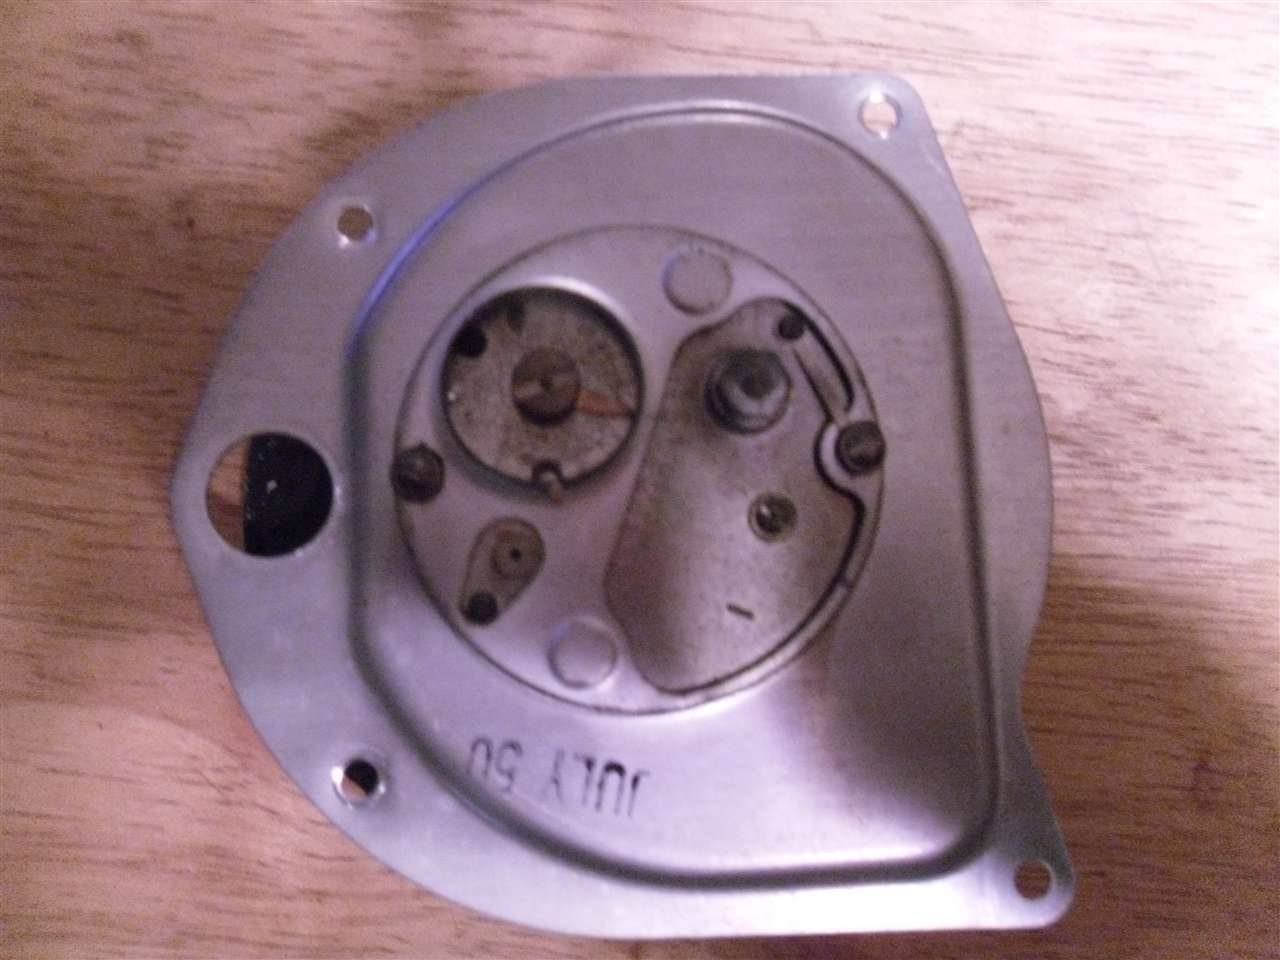 (103.54 KB) (103.54 KB)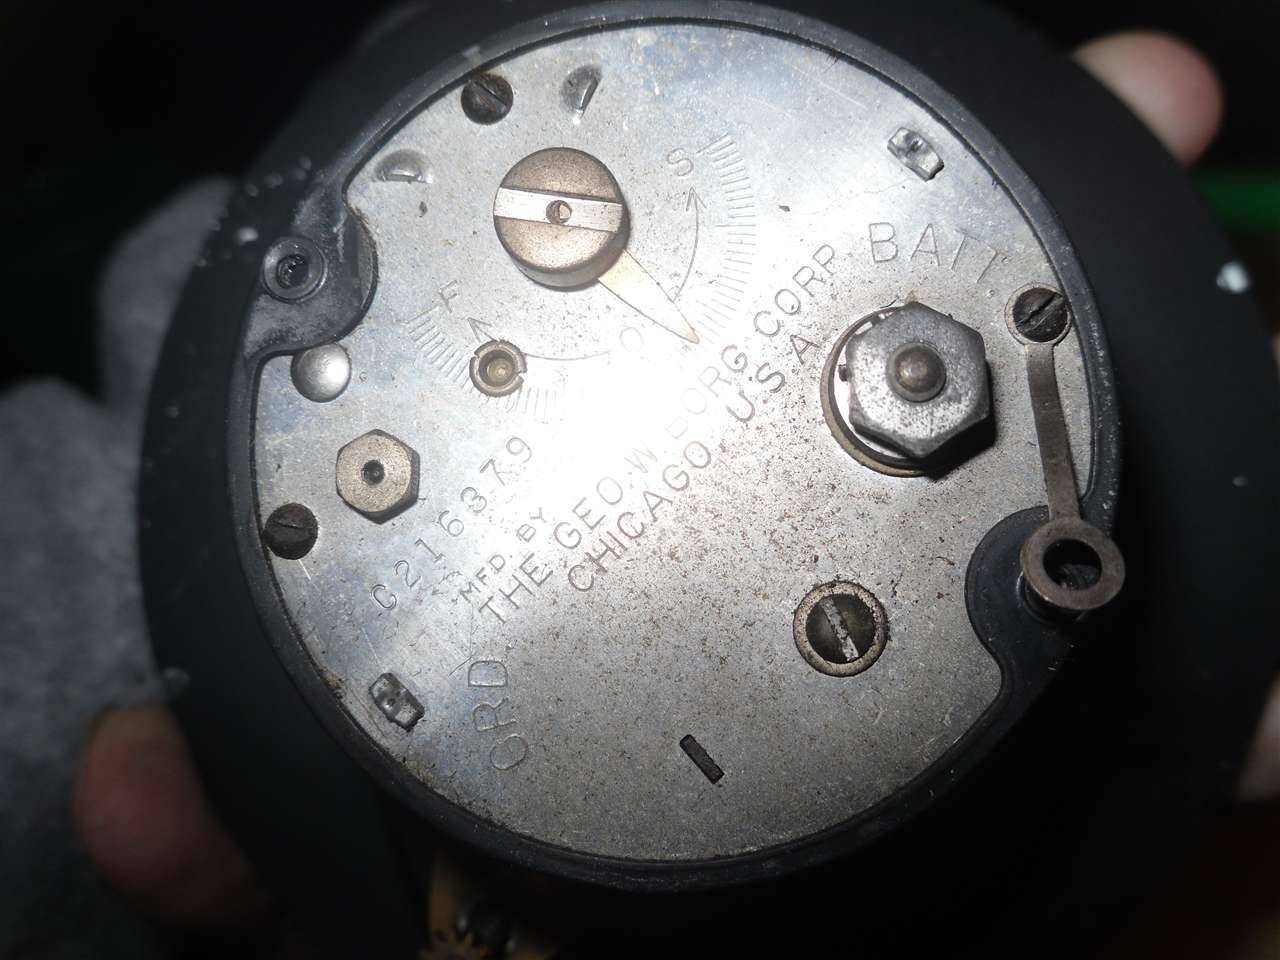 (94.09 KB) (94.09 KB) (82.90 KB) (82.90 KB)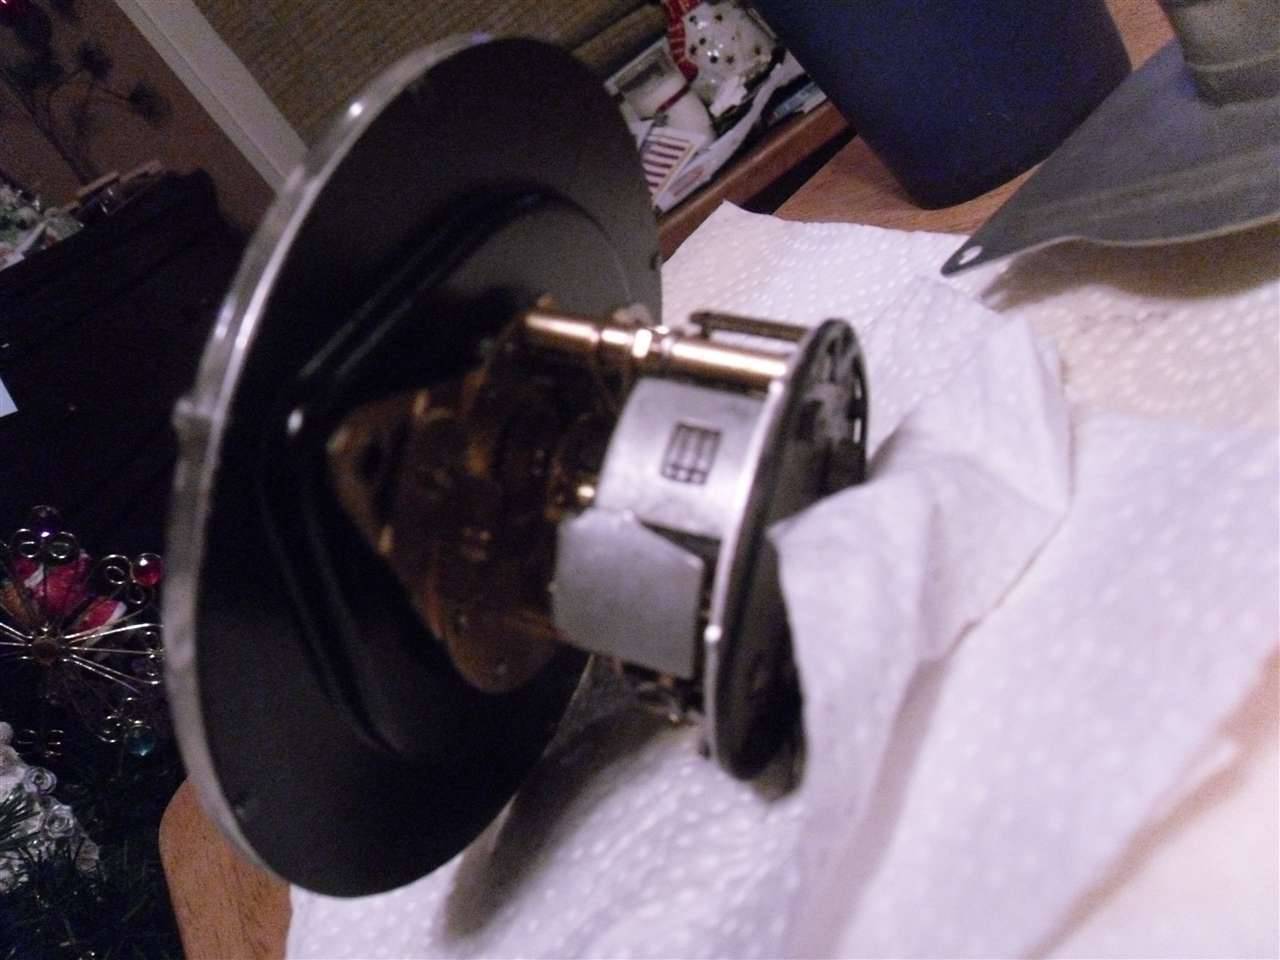 (67.64 KB) (67.64 KB)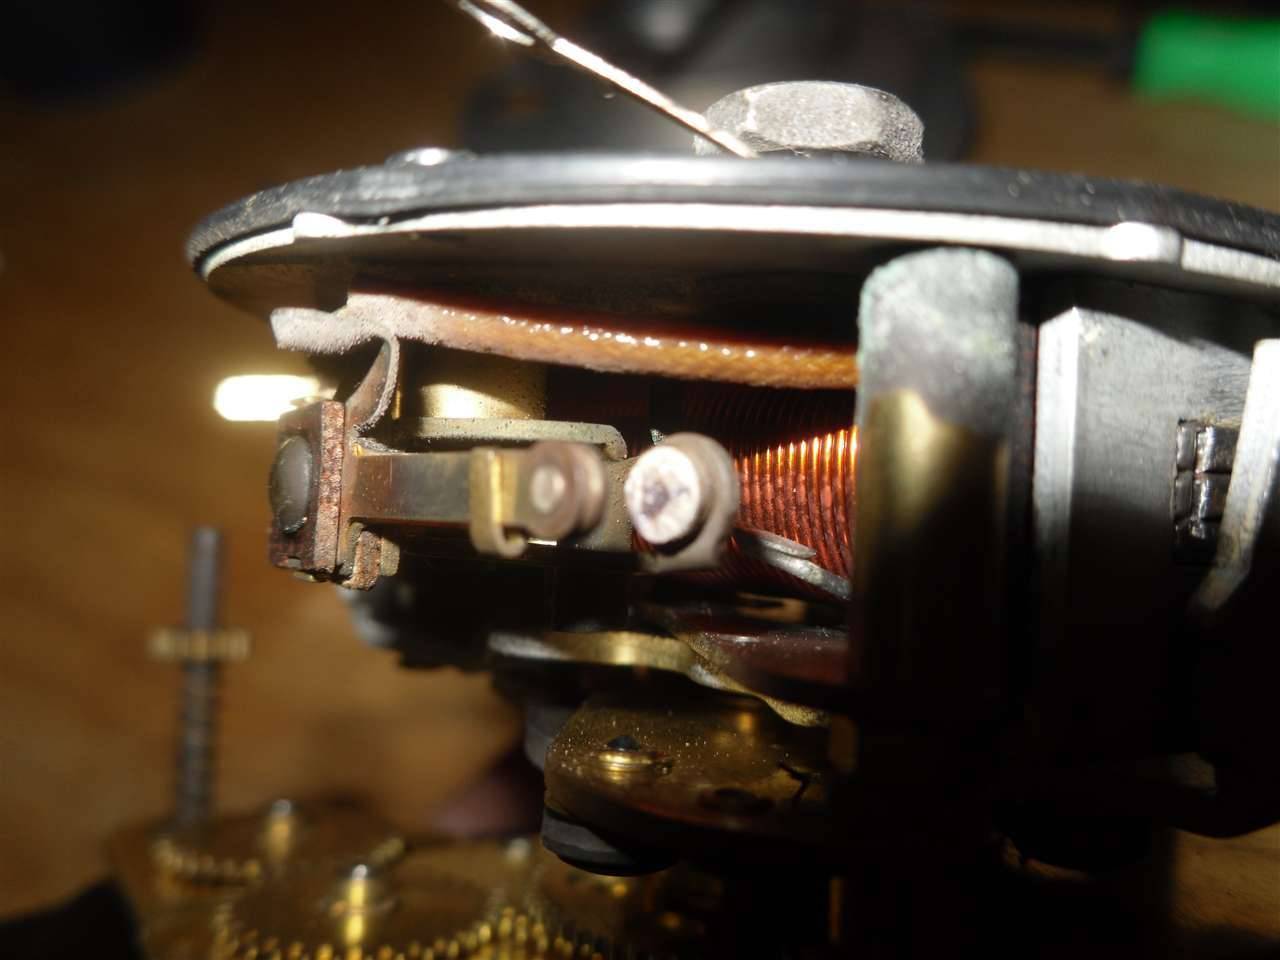 (97.61 KB) (97.61 KB)
Posted on: 2010/12/11 18:02
|
|||
|
[url=h
|
||||
|
||||
|
Re: 51Packard's....51 Packard
|
||||
|---|---|---|---|---|
|
Home away from home
|
So I guess I was a little generous with the PB Blaster. Now I have oil dripping down the face of the clock! I soaked up as much as I could from the edge. I still see some dots of oil in there. Is there a way I can get that out without taking the face apart? If not, how do the needles come off? Is it worth messing with or should I spray something in there instead to clean the oil away?
I plan on oiling the speedometer in the back where the cable screws in. I also want to polish up the chrome since it is pitted and maybe polish the lenses too. Is there anything else I should address to "restore" the instrument cluster?
Posted on: 2010/12/11 18:11
|
|||
|
[url=h
|
||||
|
||||
|
Re: 51Packard's....51 Packard
|
||||
|---|---|---|---|---|
|
Forum Ambassador

|
What I am curious about is how long the PB Blaster will last or will it gum up like so many other lubes do. One thing the clock sites say is to never use anything but clock oil and avoid getting anything other than the cleaner or solvent on the balance wheel spring.
Posted on: 2010/12/11 18:23
|
|||
|
Howard
|
||||
|
||||
|
Re: 51Packard's....51 Packard
|
||||
|---|---|---|---|---|
|
Webmaster

|
Howard, mine has been running for almost two months now without a problem and has kept perfect time. I also hit mine with some compressed air afterwards to blow out any access PB.
Posted on: 2010/12/11 18:39
|
|||
|
-BigKev
1954 Packard Clipper Deluxe Touring Sedan -> Registry | Project Blog 1937 Packard 115-C Convertible Coupe -> Registry | Project Blog |
||||
|
||||
|
Re: 51Packard's....51 Packard
|
||||
|---|---|---|---|---|
|
Forum Ambassador

|
I'm no clock expert but I'd take pains to eliminate as much of the PB blaster or other liquids as can be done. Clocks generally want an absolute minimum of lubricant or none as it collects dust which builds up into a cake and stops the action.
Posted on: 2010/12/11 19:12
|
|||
|
||||
|
Re: 51Packard's....51 Packard
|
||||
|---|---|---|---|---|
|
Home away from home

|
51Packard, don't forget to put your name and date of work somewhere on the back of the clock. I have seen this done and have seen clocks and speedometers with names and dates on them. It's kinda cool to see when the instrument was last repaired.
(o{I}o)
Posted on: 2010/12/11 19:26
|
|||
|
We move toward
And make happen What occupies our mind... (W. Scherer) |
||||
|
||||
|
Re: 51Packard's....51 Packard
|
||||
|---|---|---|---|---|
|
Home away from home
|
JW...that's a neat idea! I'll have to consider that.
I took the clock out to the garage and hit it with the air compressor as BigKev said he had done. blew out the gears the best I could. I tried to use the air to get the PB Blaster off the face, from under the glass, but that didn't help much. I didn't think about dust clogging the clock. That's a good point. Luckily it is at least somewhat protected in a housing. I wonder what is different about the clock oil versus other oil like 3-in-1? I guess I'm going to need to take the glass off to clean the oil out. Anyone know how to do this? Looks like the needles need to come off, but also the hollow shaft that goes to the clock speed adjustment at the 6 o'clock position.
Posted on: 2010/12/11 20:06
|
|||
|
[url=h
|
||||
|
||||
|
Re: 51Packard's....51 Packard
|
||||
|---|---|---|---|---|
|
Home away from home
|
I begin by quoting from the first post on my restoration blog..."If you came here for sound advice and help on how do to things right, you came to the wrong place!"
What do you get when you combine myself with boredom and the desire to have a great looking clock??? DISASTER!! So this PB Blaster I have between the face and lens has been driving me crazy. No one had any thoughts yet on how to remove it, so I took maters into my own hands. Big mistake! I should know better! I noticed some small tabs around the clock face. Pulled one up with my finger nail. Easy! The face should come right part! What's holding me back? Those clock hands. No visible screws....the minute hand should pull right off...and it does! When you bend/stretch out the hole holding it to the shaft! ARGH! I pulled it gently at first and I thought it was coming off so I pulled a little harder. Now I think I just ruined my clock! There were some more tabs holding the top decorative button to the minute hand. I removed those, thinking it would reveal how it is held on. I guess the hole in the minute hand just pressure fits on the shaft. I do not see any glue. Now, do I try to straighten out the hole again, add some super glue and "press" the needle back on? Otherwise, is there a way this is supposed to disassemble correctly? If no one knows, I'll be happy to just get the needle back on. Maybe I could soak up some of the oil by only loosening the tabs around the face. Attach file: (55.65 KB)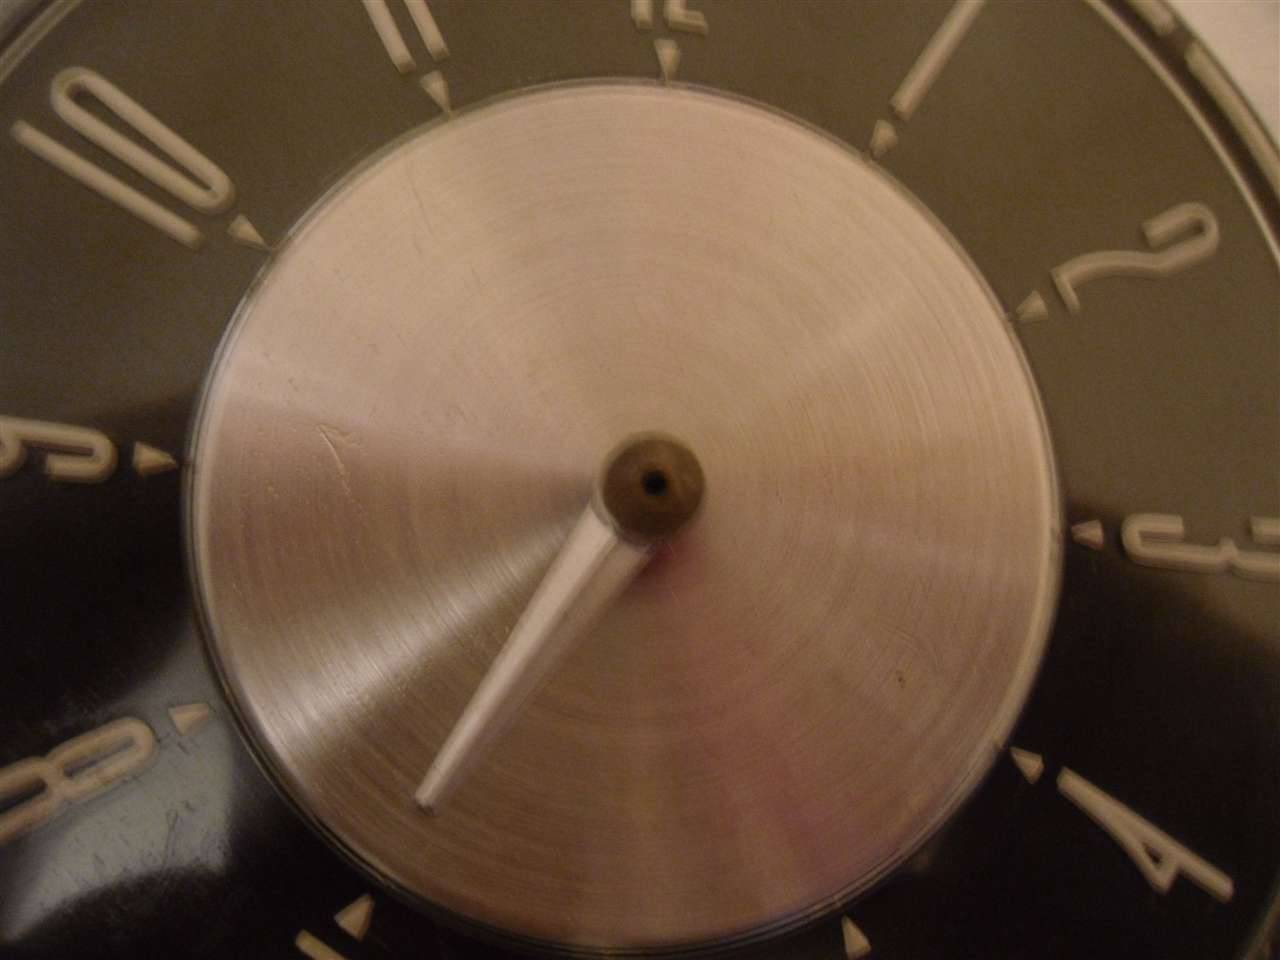 (42.21 KB) (42.21 KB) (46.76 KB) (46.76 KB) (44.18 KB) (44.18 KB)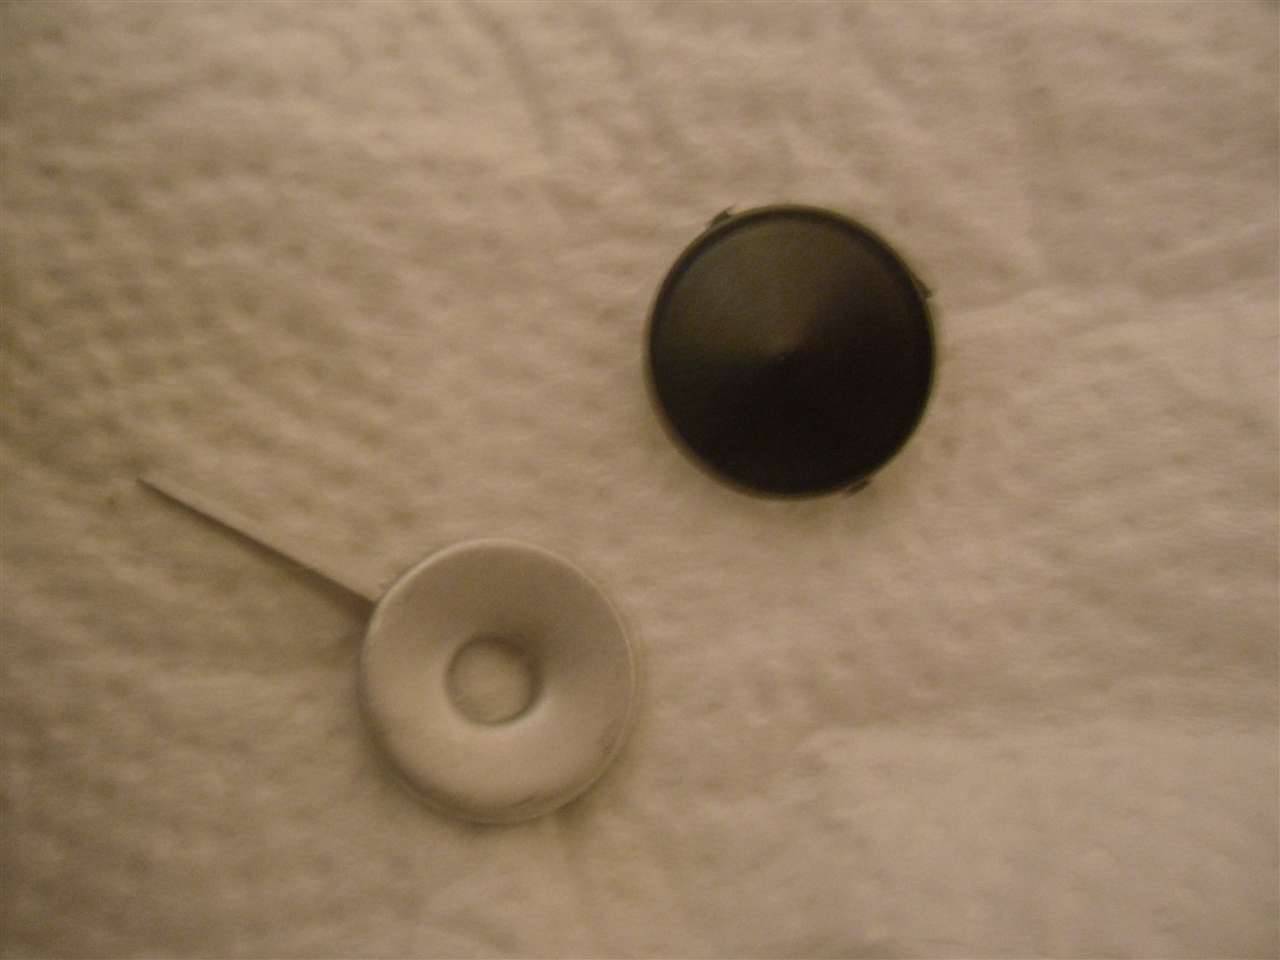 (49.83 KB) (49.83 KB) (47.67 KB) (47.67 KB)
Posted on: 2010/12/13 22:00
|
|||
|
[url=h
|
||||
|
||||
|
Re: 51Packard's....51 Packard
|
||||
|---|---|---|---|---|
|
Forum Ambassador
|
As I recall, hands should just pull off--although there is a slim possibility that unscrews.. Don't know what year I might have to check but if no one comes back with other suggestions, will look tomorrow. As to repair, once that other piece is off I think I would straighten the bent part and use epoxy rather than superglue to hold things. Also, IIRC the plastic is held on mostly by that center metal piece which I think has 4 or 5 tabs which go thru slots in the plastic. Once that is off, you should be able to clean things nicely. Will be interesting to see how much your face has faded once the real color is revealed under the center. A friends 53 Clipper I cleaned and refinished the instruments on had a surprising color under.
Posted on: 2010/12/13 22:22
|
|||
|
Howard
|
||||
|
||||


