|
Re: KPack
|
||||
|---|---|---|---|---|
|
Home away from home

|
I've been wanting to clean up the instrument cluster for some time. The car is supposed to have ruby red gauges (remnants can be seen where UV light did not get to it). I also want to repaint the gold outer bezel, and replace the chrome gauge bezels.
Two questions: 1.) Does anyone have any gauge bezels in better condition? Mine have significant rust and peeling chrome. I'm happy to pay for some in better shape. I don't want to bother with sending these out for rechrome and doing something like hyrdrochrome is not much cheaper. 2.) How do I remove the needles from the speedo and clock? I don't want to break anything. Those have to come off to get the plastic covers off, then I can paint the gauge faces. Attach file:  Instrument gauge disassembled.jpg (134.92 KB) Instrument gauge disassembled.jpg (134.92 KB) NOS on left and faded on right.jpg (146.83 KB) NOS on left and faded on right.jpg (146.83 KB)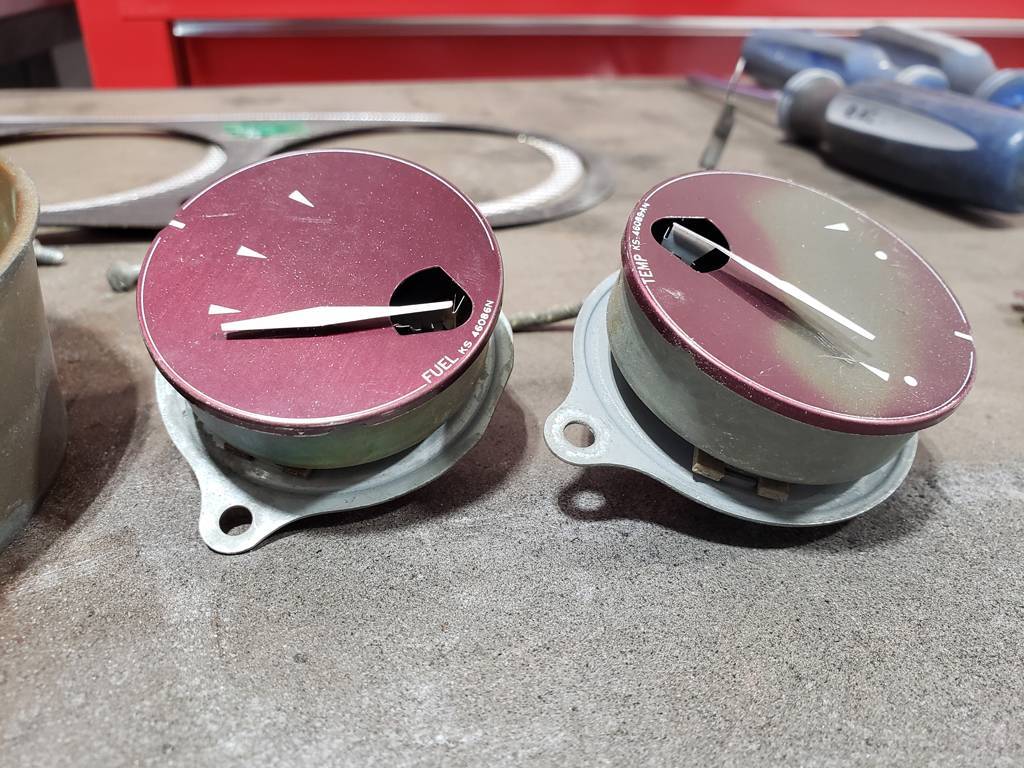 Rusted bezels.jpg (114.00 KB) Rusted bezels.jpg (114.00 KB)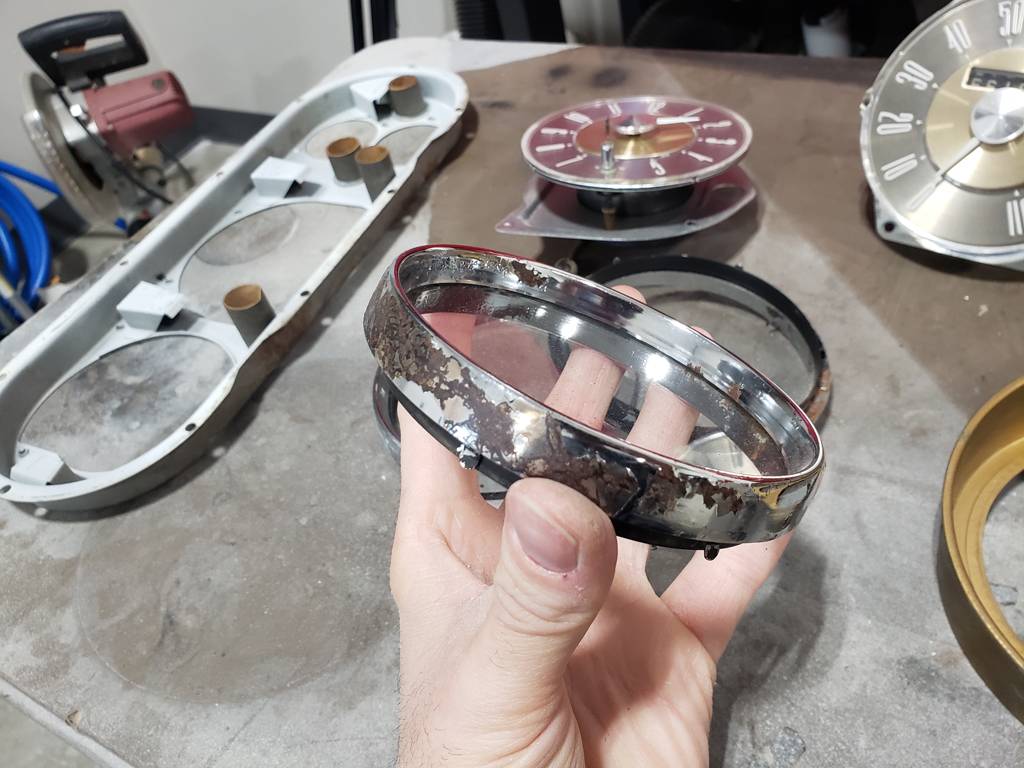 How to remove needle.jpg (123.02 KB) How to remove needle.jpg (123.02 KB)
Posted on: 2022/11/28 15:44
|
|||
|
||||
|
Re: KPack
|
||||
|---|---|---|---|---|
|
Forum Ambassador

|
The clock and speedo needles are just pushed on the shafts but they are tight. I was able to get mine off with fingers only but you might also check out some of the clock hand removal tools if you want some mechanical assistance. Several are shown on ebay. The clock hands should come off without too much drama. The time set knob has a barrel screw threaded on the shaft that will need to be removed. On some clocks the rest of the knob will then pull off but on others it also unthreads from the shaft. The speedo shaft in particular is delicate and the end the needle pushes onto is very thin. When removing that needle use care to pull straight without twists or bends.
Faces are not what I would call ruby red but a richer maroon color than is currently showing. Once the needle on the speedo or hands on clock are off you can pull the face and straighten the tabs on the metal center piece so it can be removed. Once that is removed you will probably see the exact face color. On the faded centers I was able to restore the gold shade without covering the brushed metal look by spraying on a thinned coat of transparent amber glass stain but the clear glass stains seems to be very hard to find now. There are some clear transparent amber shaded lacquers used on refinishing guitar woods that might work. The gauge needles do not remove but you can straighten the tabs holding the faces and with some turning and tilting carefully thread the needles thru the large opening. Be careful not to bend the needles in either direction or they will scrape the face or rub the glass.
Posted on: 2022/11/28 17:11
|
|||
|
Howard
|
||||
|
||||
|
Re: KPack
|
||||
|---|---|---|---|---|
|
Home away from home
|
Thanks Howard. You're right, I was able to get the needles off with some finger pressure. The speedo took a good amount of force to get off.
I took the face off my old fuel gauge and experimented with painting that. I used some dark red metallic paint from Testors, shot through an airbrush at about 30 PSI. I had to do a couple of coats to build up the color. Testors leaves a glossy finish, so I'll probably follow it up with a flat finish to help it look stock. The color is a bit more red and less maroon than the original. The fuel gauge shown is NOS....I'm assuming the color is accurate. But this is the only color I could find that was close. What do you guys think? I'll paint the others if you all feel that it is acceptable. I cleaned, sanded down, and repainted the gold cluster bezel. I used Testors Gold, which was actually a pretty close match. I'll topcoat with a gloss to protect the paint. Attach file: Repainted gauge face.jpg (130.71 KB)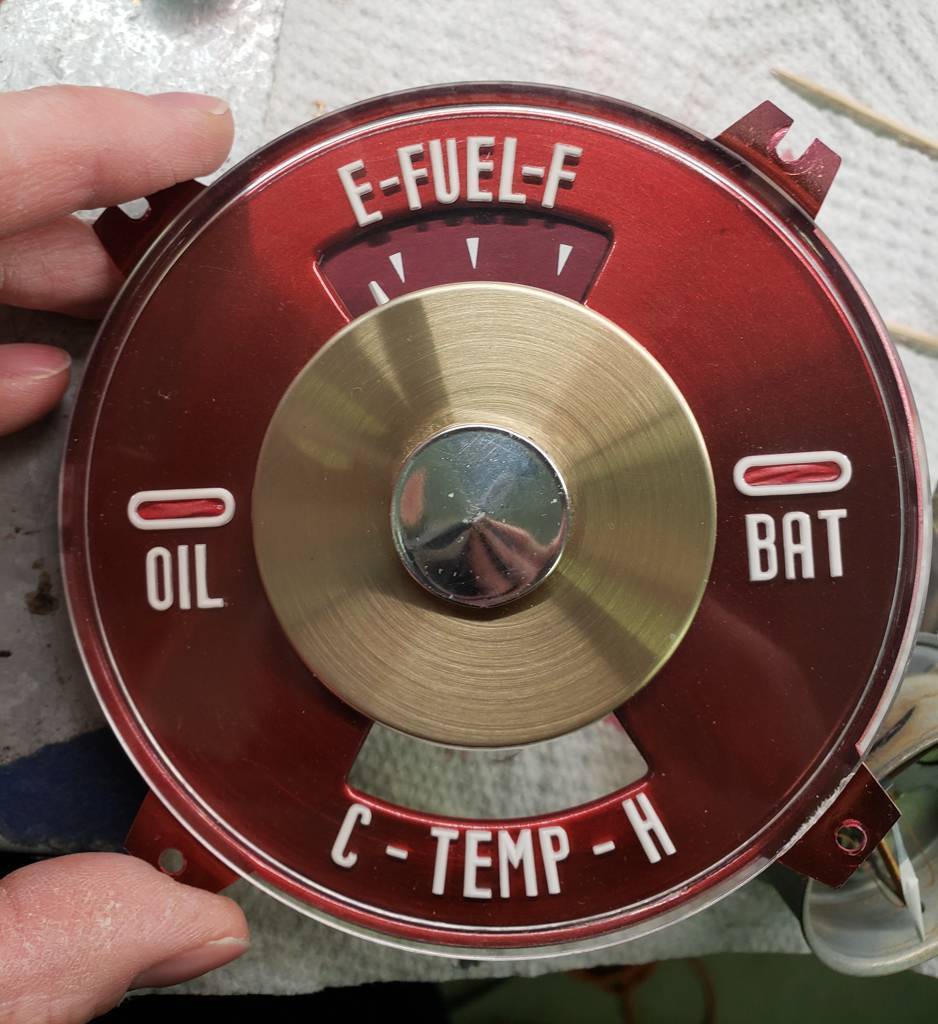 Repainted bezel.jpg (78.71 KB) Repainted bezel.jpg (78.71 KB)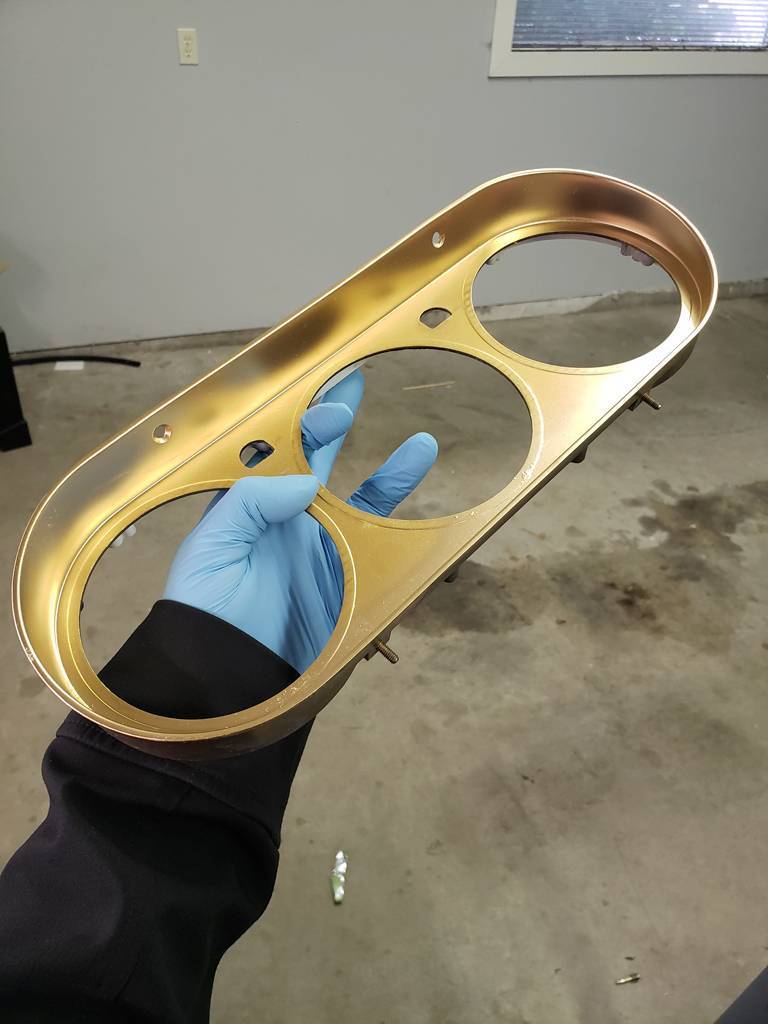
Posted on: 2022/11/28 18:56
|
|||
|
||||
|
Re: KPack's 1954 Panama
|
||||
|---|---|---|---|---|
|
Home away from home
|
Today I picked up some cheap rollers from Harbor Freight and moved the Packard to the other side of the shop. The gauge cluster is still out so can't move the car under it's own power. It was way harder to move the car than I thought it would be. But it is heavy so I guess I shouldn't be surprised.
Either this week or next I should have a two post lift getting installed in the other bay. Just trying to figure out where exactly to put it. Tough decision. -Kevin Attach file: Rolled to the other side.jpg (86.00 KB)
Posted on: 2022/12/5 18:32
|
|||
|
||||
|
Re: KPack
|
||||
|---|---|---|---|---|
|
Forum Ambassador
|
If I were younger and still playing with my Packards very much I would be salivating over all that empty (for now) space.
From what I see of your indicator light color filters they look very faded. If you have not completely finished your gauges and have a hobby shop around you can get new celluloid colors if you want to restore the indicator lights. These sheets are clear so the filaments will show thru unless you back them with something a little more translucent like the white PVC. Orange works for the turn signal if there is some kind of diffuser behind it but if you can find a light tan or amber, that would be closer to the factory look. The .012 white I bought for a diffuser is a bit too thick so if you can find something about half that thickness or maybe a different material to diffuse the bulb it would be better. Attach file: colors001.jpg (94.41 KB)
Posted on: 2022/12/5 20:26
|
|||
|
Howard
|
||||
|
||||
|
Re: KPack
|
||||
|---|---|---|---|---|
|
Webmaster

|
I have a set of car skates that I've had since I started the 54, so nearly 20 years. They must have good wheels and bearings on them as was to move around that 3800lbs just fine. They are currently under the Jackard which is only about 3100lbs, so very easy. I move it out to work on it and put it away (up
against the support post) when done. Also I have to move the car to get the trash bins out.
Posted on: 2022/12/5 20:44
|
|||
|
-BigKev
1954 Packard Clipper Deluxe Touring Sedan -> Registry | Project Blog 1937 Packard 115-C Convertible Coupe -> Registry | Project Blog |
||||
|
||||
|
Re: KPack
|
||||
|---|---|---|---|---|
|
Home away from home

|
Quote:
It was way harder to move the car than I thought it would be. But it is heavy so I guess I shouldn't be surprised. When all my cars first arrived at my Oregon shop, my father pushed them inside with his tractor, then the dollies allowed them to be shoved out of the way for the next. Moving them was easy once the wheels got turned in the proper direction but getting it started in the proper direction took a lot of energy.
Posted on: 2022/12/5 21:27
|
|||
|
All generalities are false.
Once I thought I was wrong but I was mistaken. Don Pierson Packard / IMPERIAL page CA DMV Licensed Vehicle VIN Verification 1951 Henney-Packard 3-Door Long Wheelbase Air Force Ambulance The 1951 Henney-Packard is For Sale! 1954 Packard Patrician 1954 Packard Patrician Parts Car 1956 Clipper Custom Sedan |
||||
|
||||
|
Re: KPack's 1954 Panama
|
||||
|---|---|---|---|---|
|
Home away from home
|
Howard - thanks, I was wondering how I was going to redo those colored bits. Mine are very faded and both turn signals are torn. It does not look good.
I will look around and see if I can find the styrene locally (not likely), and order online if needed. Kev and Don - with the wheels in the right direction it rolled okay, but still took some decent effort. It took my wife and I pushing hard to get it to change direction. But overall much easier than not having them. -Kevin
Posted on: 2022/12/5 22:48
|
|||
|
||||
|
Re: KPack's 1954 Panama
|
||||
|---|---|---|---|---|
|
Forum Ambassador
|
I think your car might have had green turn signal filters so at least you would not need to find a color to make the yellowish or amber shade used before 53. Haven't looked but something that could work for red and green plus some kind of diffuser is probably sold on Amazon.
As I said, my .012 PVC was not great for the diffuser as it was too opaque and needs to be much thinner. A decent diffuser material may be what is harder to find because a fair amount of light does need to get thru. Thin white plexiglass may work better but cannot be very thick. Not much space behind it so if it gets positioned close to the bulb it will get hot and scorch or deform in the middle.
Posted on: 2022/12/6 9:59
|
|||
|
Howard
|
||||
|
||||


