
|
Re: Howard's 47 Custom project
|
||||
|---|---|---|---|---|
|
Home away from home

|
Looking good, I like your attention to detail. Very helpful to me that you mentioned Quiet Ride as a place to get the firewall insulator, because I'll need one of those and was wondering where to get it.
I'd probably have to modify a LHD one to suit my RHD car.
Posted on: 2013/7/23 18:40
|
|||
|
1951 Packard Club Sedan | [url=ht
|
||||
|
||||
|
Re: Howard's 47 Custom project
|
||||
|---|---|---|---|---|
|
Forum Ambassador

|
Mostly minor stuff looked at but not necessarily worked on since the last post.
Did temporarily install the new firewall piece so I could check fit. Not terrible but the molded area formed over the hump is not quite perfect so it throws things off a bit. A couple of the holes were not in line with those in the firewall so had to be enlarged upward. The opening provided for emerg brake cable had to be moved down. A few others were not cut by QuietRide because they are for options so I put those in. Fortunately, except for the brake those needing a touchup were all way up high. The firewall carpet used on the 2106 should cover the brake hole. All in all, compared to what was there before and the lack of many other choices, it will do. Am reasonably pleased with how it turned out -- although with the holes not quite perfect, being mostly hidden high behind the dash is a plus. I was asked how the new shaft and pedal modifications for grease fittings worked out. When everything was assembled, the shaft, and in particular the brake pedal was a bit farther back under the rear crossmember than I anticipated. That required a change to angled zerks instead of straight. Was able to get my grease gun on with no problem and grease came out both sides of the pedals so I think that is a good sign. Here is what I wound up with. I don't think there will be any problems but please, anyone seeing an issue please speak up as there may be someone else wanting to try it. Attach file:  (31.07 KB) (31.07 KB)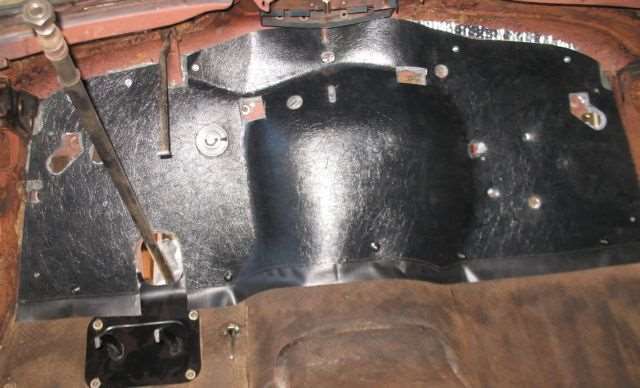 (37.77 KB) (37.77 KB)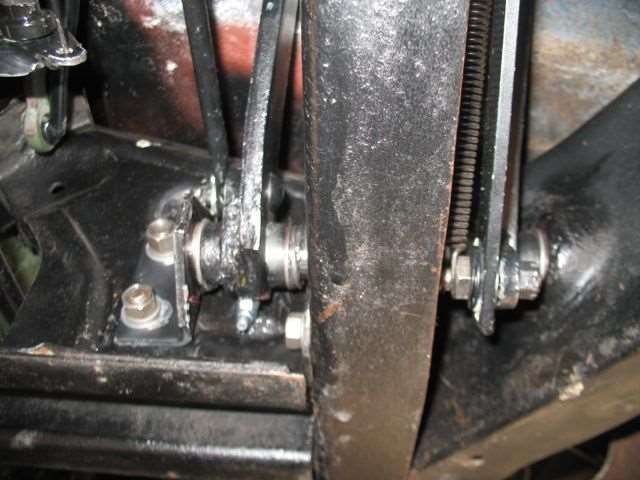 (35.98 KB) (35.98 KB)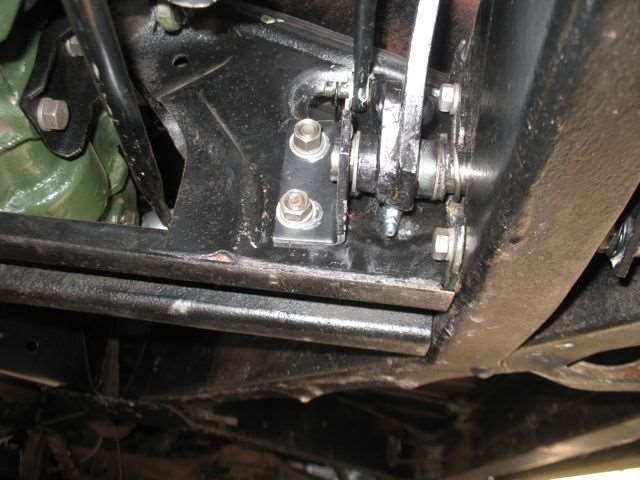 (36.77 KB) (36.77 KB)
Posted on: 2013/8/2 11:22
|
|||
|
Howard
|
||||
|
||||
|
Re: Howard's 47 Custom project
|
||||
|---|---|---|---|---|
|
Forum Ambassador
|
Started playing around with the dash some yesterday. Got the lower burl pattern fairly decent. It was all mostly short stretches so the small extra 3x3 roller I bought was just right. I think that section will turn out fine. Glove box lid and instrument section were larger surfaces but the combination of rollers worked well on those.
Worked on the straight grain today and not having near as good a result. It's has a long flat stretch across the top so would be nice to be able to use the large 4 x nominal 6" roller. Looks like that won't be easy because there are several what look to be casting flaws and lines in the roller right in the working area. Can only use maybe half the roller before running into one of them. Are the other large rollers like this one or did I win the prize. I finally gave up and wiped all the straight grain off. Will let the burl dry a day or so and come at it fresh. Attach file: (13.85 KB)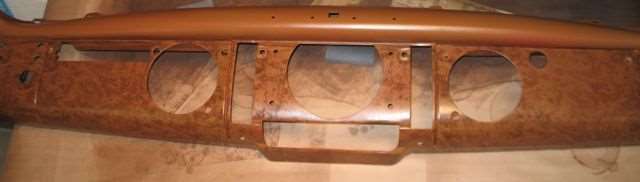 (26.16 KB) (26.16 KB)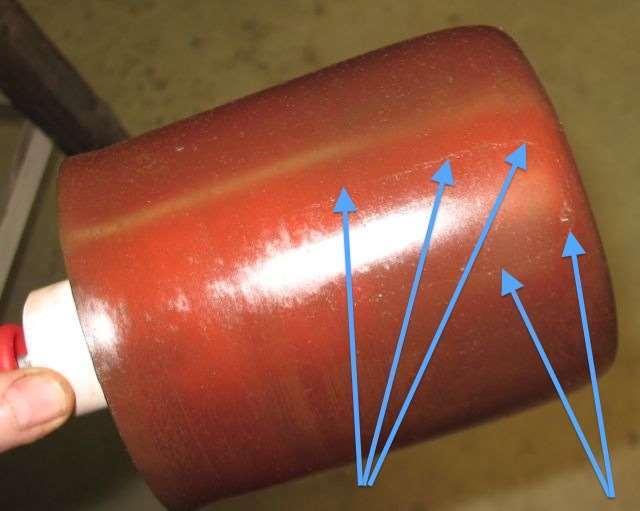 (28.88 KB) (28.88 KB)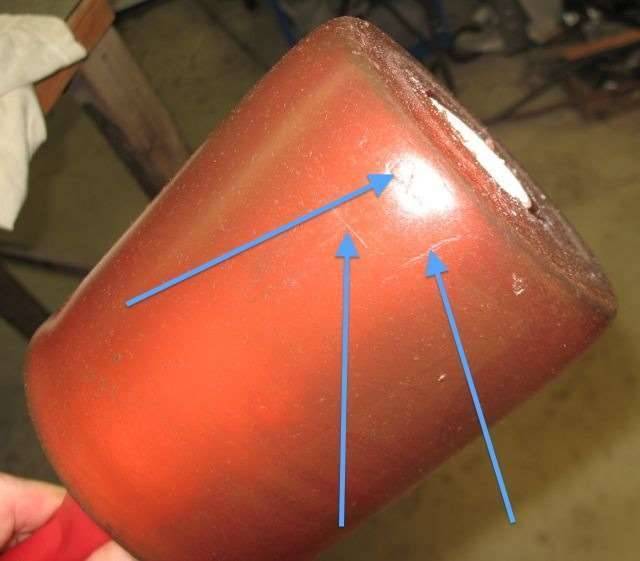
Posted on: 2013/8/3 15:26
|
|||
|
Howard
|
||||
|
||||
|
Re: Howard's 47 Custom project
|
||||
|---|---|---|---|---|
|
Forum Ambassador
|
A little progress with wiring and interior stuff this week. Dash is on hold. I had tried it again and finally sent GIT photos of the roller and the artifacts I'm having problems with. Evan responded and said she would send another roller. Once that arrives - hopefully next week - then it will be time to finish the dash -- and see if the roller or the rollee is the problem.
In the meantime, am still trying to decide exactly how to handle AC. Unit wise, I am committed to a trunk unit and have specs on a couple I think can be modified to have a different air return and to use 6v. Am starting to work a little on the interior so need to come up with a plan for the vents fairly soon. The big central vent behind the rear seat center is not really an option function wise -- even if I did have one to copy, it would be mostly for looks. While this may be blasphemous to some, am toying with making a distribution box on the package shelf. Shelf would look essentially the same only higher. To that end, could I ask a favor the next time someone is near their car. Would you be kind enough to take a measurement. Am interested in how much space is available between the top of the seat back and the package shelf. Am thinking there's about 3" but with the condition mine is in, can't get a decent measurement. The working plan is have a couple of vents in back but also possibly go out the sides of the box and into the space between headliner and body. Go above the headliner with a duct or two to get to the front seat area. Not much room to play with so getting something adequate in size for decent airflow is still in the how to do it phase. I think the headliner bow fixing hooks on each side can be lowered to drop the outer section an inch or so in the area where it curves down above the doors. Not sure how it would look so idea is still iffy until a mockup is made. It may also turn out to be totally impossible to get something large enough to have decent air flow. In that case, package shelf vents only will have to do. In any case, return air will be from under the seat as Packard did it.
Posted on: 2013/8/9 17:14
|
|||
|
Howard
|
||||
|
||||
|
Re: Howard's 47 Custom project
|
||||
|---|---|---|---|---|
|
Home away from home
|
Howard, I measured 2 3/4.
Mark
Posted on: 2013/8/9 18:02
|
|||
|
||||
|
Re: Howard's 47 Custom project
|
||||
|---|---|---|---|---|
|
Forum Ambassador
|
Thanks, Mark. Appreciate it. Am thinking maybe using 1 1/2" of that space might do the trick and still not look too different at first glance.
Posted on: 2013/8/9 18:39
|
|||
|
Howard
|
||||
|
||||
|
Re: Howard's 47 Custom project
|
||||
|---|---|---|---|---|
|
Forum Ambassador
|
Been thinking about and playing around with AC options so not much real progress to report on the rest of the car since last time. Also realize the whole idea of AC in the car is sacrilege to some -- but I'm spoiled.
Anyway, moving on with AC have mostly decided on a dual evaporator system from Old Air I say mostly because there is always something unforseen that can mess up the best plans. May still decide to build the entire thing from scratch. At the moment I like that OldAir unit because of the size -- and since it is two hurricane single units back to back, has individual blower motors and more cooling capacity for a large car. Also believe it would also be the easiest ready made unit to modify and change the return air direction to bring air from under the seat so as to fit inside a false Packard evaporator case. Still want some air flow in the front to blow in the face and to that end have been doing some experimenting. The details are not fully fleshed and the entire idea could still be dropped -- but does look like it would be promising. Will be able to get two 1" ducts under the headliner on each side. While not as good as a single 2" duct on each side would be, does deliver a halfway decent air flow. I am trying my best to make things look like it could have been original so didn't want to mess with the contours of the headliner any. I also think I can get all the ducting done in the trunk so no messing with package shelf either. Current plan is two smallish adjustable air vents in front with a single rear outlet centered like Packards original. That should provide decent cooling and avoid any cold necks. Had rectangular vents on hand to play with in front but believe round might look better -- if I can find some that are not too deep. Vent shape is an up in the air decision along with finish -- woodgrain to match the dash or perhaps some more beige plastic to match the knobs, or a panel covered in fabric to blend with the headliner -- decisions, decisions -- and any ideas gladly accepted. If I decide to continue on with the front vents, would appreciate those with intact cars giving a second opinion on a couple of things. Have done a mockup and don't see any real problems -- but the car is totally apart so hard to judge and, as I've mentioned before sometimes I miss the obvious. First question is if the outlets are flush in the headliner, will the sun visors block the air and second question has to do with controls. Had originally planned to go with the Packard under the dash plastic hang-on brackets but there is not really a great spot. Suddenly got the wild idea of maybe incorporating switches with the vents. If they are with the vents, can two knobs located where the small squares are placed in the mockup be easily reached? Attach file: (43.34 KB)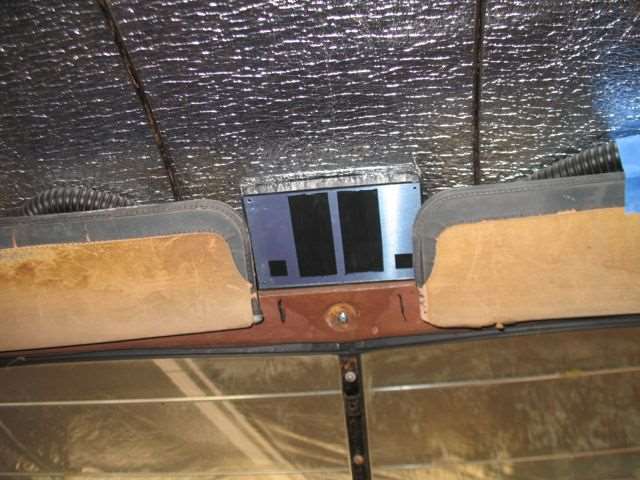 (41.69 KB) (41.69 KB) (37.76 KB) (37.76 KB)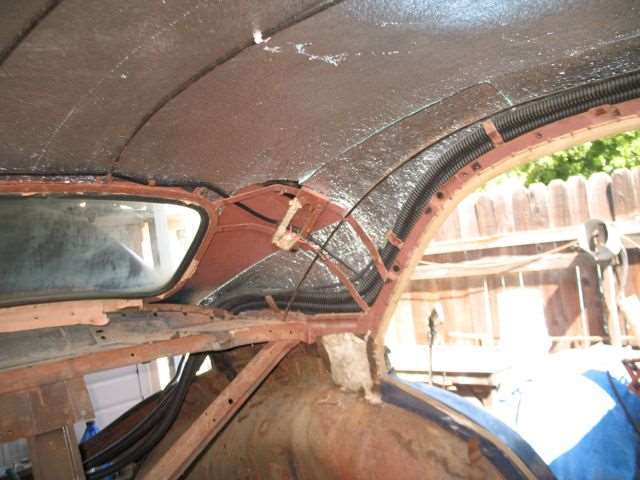
Posted on: 2013/8/26 11:57
|
|||
|
Howard
|
||||
|
||||
|
Re: Howard's 47 Custom project
|
||||
|---|---|---|---|---|
|
Home away from home
|
Howard, very nicely routed and well hidden duct work! I don't think anyone can top your creativity when it comes to offering ideas and this AC endeavor, well I for one will be following your lead with much enthusiasm and admiration. If I'm not mistaken, I believe your goal was to keep the 6 volt system throughout the car therefore I am certainly watching with great anticipation. I'm sure the entire forum including the purists are behind you in this challenging effort!
Posted on: 2013/8/28 9:01
|
|||
|
||||
|
Re: Howard's 47 Custom project
|
||||
|---|---|---|---|---|
|
Forum Ambassador
|
Gator, thanks for the encouragement. As mentioned, this whole AC idea running ducts overhead in the 47 is all still a big maybe. Am not liking the idea of making holes in the headliner but haven't come up with an alternative either -- yet.
In thinking about how the ducts might work, I have done some very unscientific measurements which you might find interesting. Ordinary DVM with 20 amp capacity -- but not a precision unit -- and a cheapo anemometer using the meters per second scale held centered in air flow about 6" from louver. Power was supplied by a 50 amp battery charger for convenience. The test "mule" was a gutted hangon unit I had on hand made by Nostalgic Air. It is a typical modern 12v dual shaft blower with a shunt type motor. High, Medium and Low fixed speeds. I did the measurements at 6v and 12v. The unit ran OK at 6v and didn't see any sign of unhappiness or overheated motor -- but it wasn't on for more than 5 minutes at any one time either. Since it has four 2 1/2" inch outlets, had to get creative for testing. Will admit right off there is a lot of inefficiency in the duct connections and testing method so the air measurements are more a comparison, not a firm value. Here are some numbers using the dual 1" ducts with a louver on one side only. The other two are connected and air is free flowing. All 4 ducts are 12 1/2 foot. 6v Low = 2.8A Air flow 2 m/s --- 12v Low = 3.7A and 3.1 m/s 6v Med = 3.6A Air Flow 2.7 m/s --- 12v Med = 4.9A and 3.5 m/s 6v High = 4.9A Air Flow 3.1 m/s --- 12v High = 6.8A and 5.8 m/s For comparison, air flow at both voltages with the normal 2 1/2" AC duct supplied for use with the unit and the same dual 1" ducts as was present in first tests still connected and free flowing. The large duct is about 5' shorter than the dual 1" ducts. Low 5.4 and 6 m/s Med 6.1 and 9.7 m/s High 7.7 and 11.4 m/s My conclusion is dual 1" ducts would provide a gentle air flow at the front and maybe equivalent of a single 1 3/4 inch. I would not want to try and cool the whole car with just those. Attach file: (29.79 KB)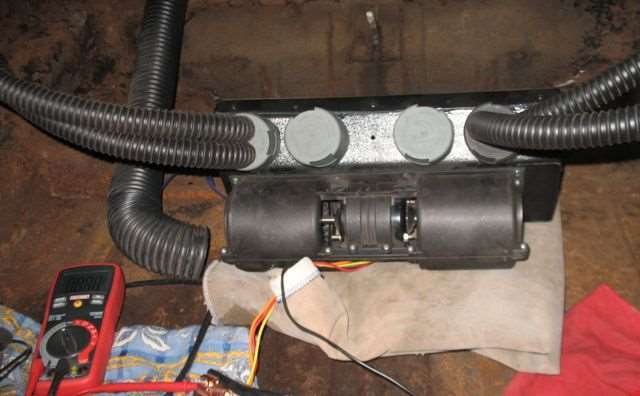 (36.00 KB) (36.00 KB)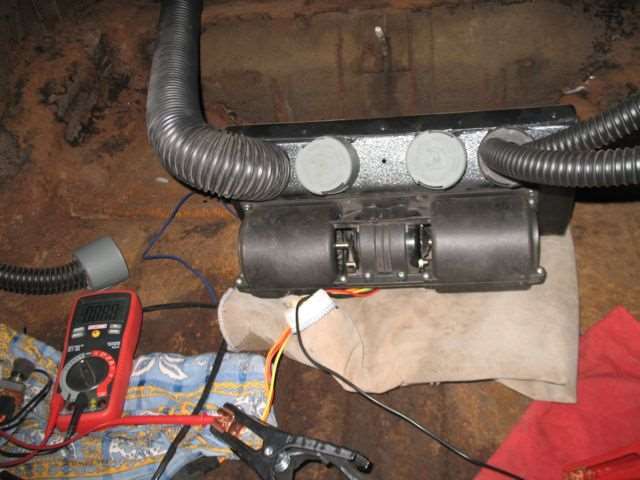 (35.64 KB) (35.64 KB)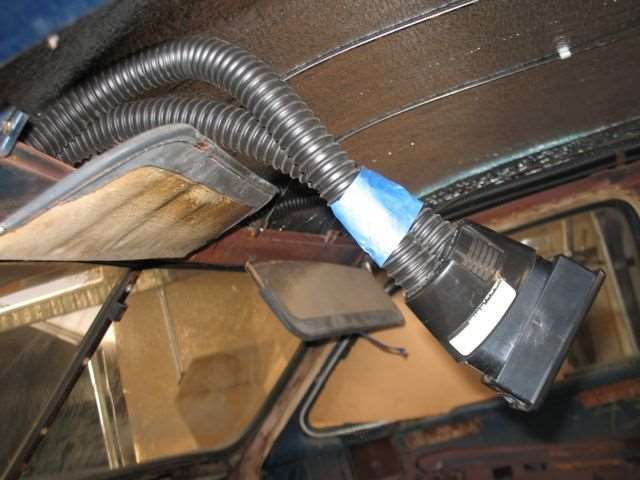 (26.71 KB) (26.71 KB)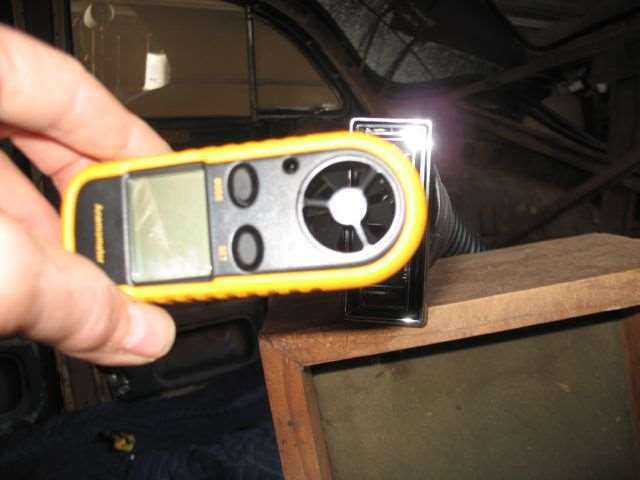
Posted on: 2013/8/28 11:44
|
|||
|
Howard
|
||||
|
||||


