|
Re: KPack's 1954 Panama
|
||||
|---|---|---|---|---|
|
Webmaster

|
I think Gerry at Packard Southwest, Mike at Tucson, or Joel at Patrician Industries would have originals in whatever color you wish. They are pretty common.
Posted on: 1/18 9:56
|
|||
|
-BigKev
1954 Packard Clipper Deluxe Touring Sedan -> Registry | Project Blog 1937 Packard 115-C Convertible Coupe -> Registry | Project Blog |
||||
|
||||
|
Re: KPack's 1954 Panama
|
||||
|---|---|---|---|---|
|
Webmaster
|
If I remember right, the ivory wheel isn't painted, it's cast that color. It is a bit translucent.
Posted on: 1/18 15:37
|
|||
|
-BigKev
1954 Packard Clipper Deluxe Touring Sedan -> Registry | Project Blog 1937 Packard 115-C Convertible Coupe -> Registry | Project Blog |
||||
|
||||
|
Re: KPack's 1954 Panama
|
||||
|---|---|---|---|---|
|
Home away from home

|
Right, I remember Ross talking about that on another thread. I believe the deluxe wheels were made from Tenite. Ross was able to reproduce the look by spraying an ivory color first, then putting a bit of that ivory color with the clear coat and spraying several coats of that.
Posted on: 1/18 18:21
|
|||
|
||||
|
Re: KPack's 1954 Panama
|
||||
|---|---|---|---|---|
|
Home away from home
|
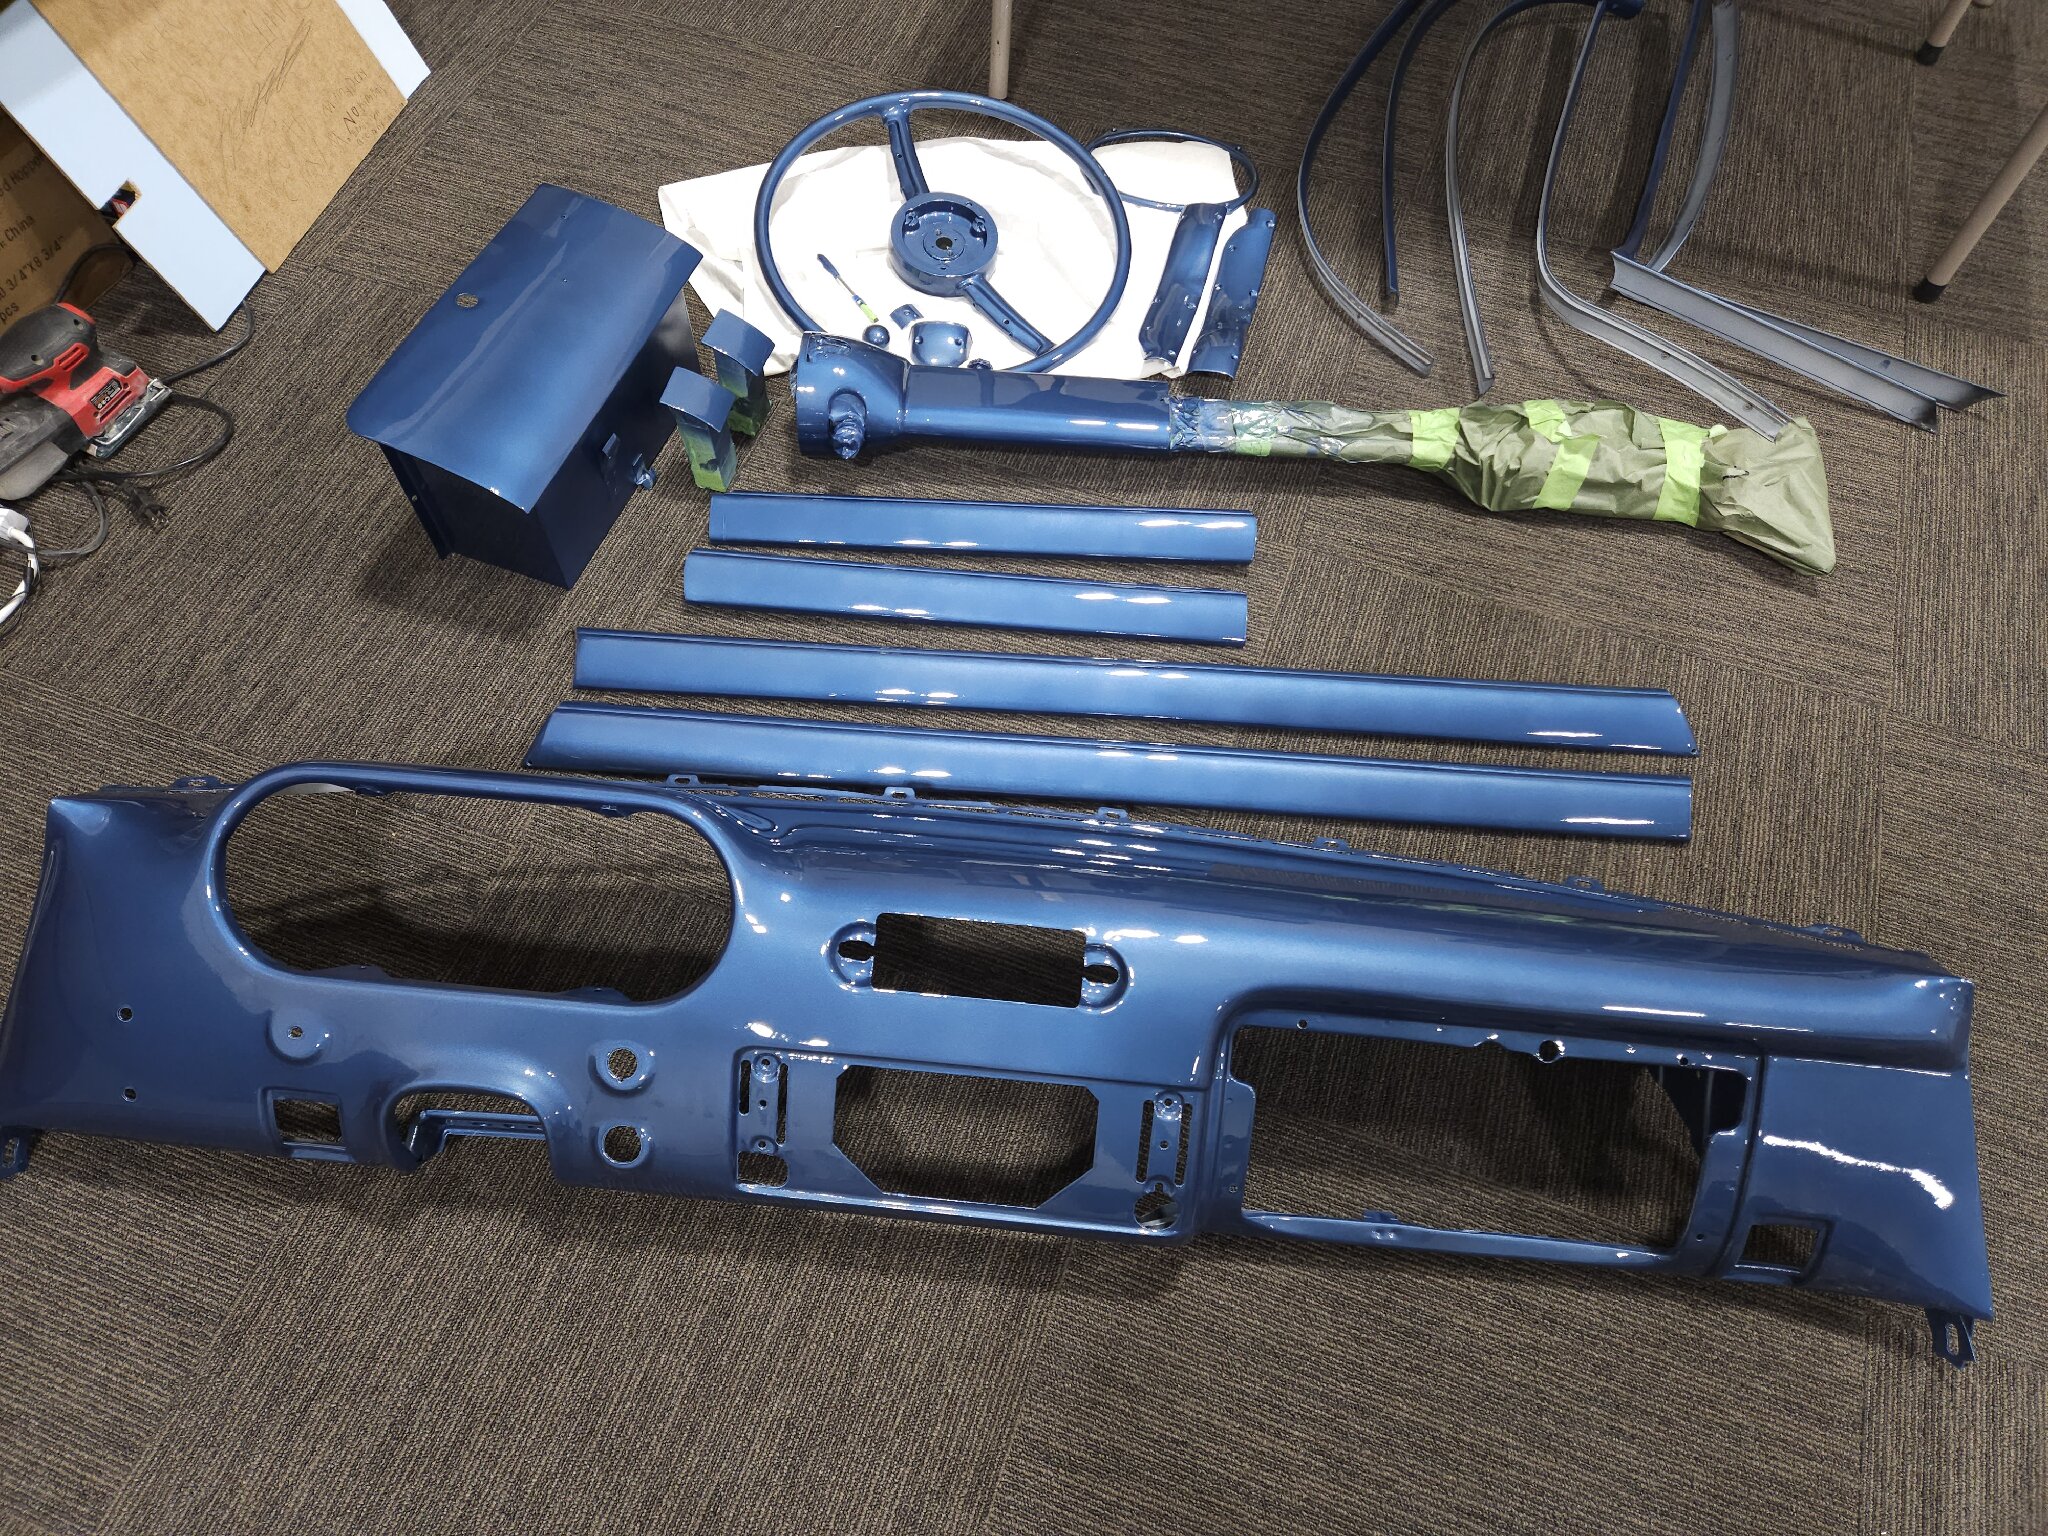
Been spending time in the evenings sanding and prepping the rest of the interior bits. Tonight I was able to go over to a friend's place and borrow his paint booth. I have her limited time behind a paint gun, whereas he has been building hot rods and restoring cars for decades. He knows how to paint very well, and he was kind enough to show me some tricks. I need a lot of practice.
Tonight we finished prepping everything, then sprayed a good coat of high build primer. Probably will not need another coat. We'll let that set for two days, then go back and lightly sand, then spray color and clear. I want to have this set up when I grow up.    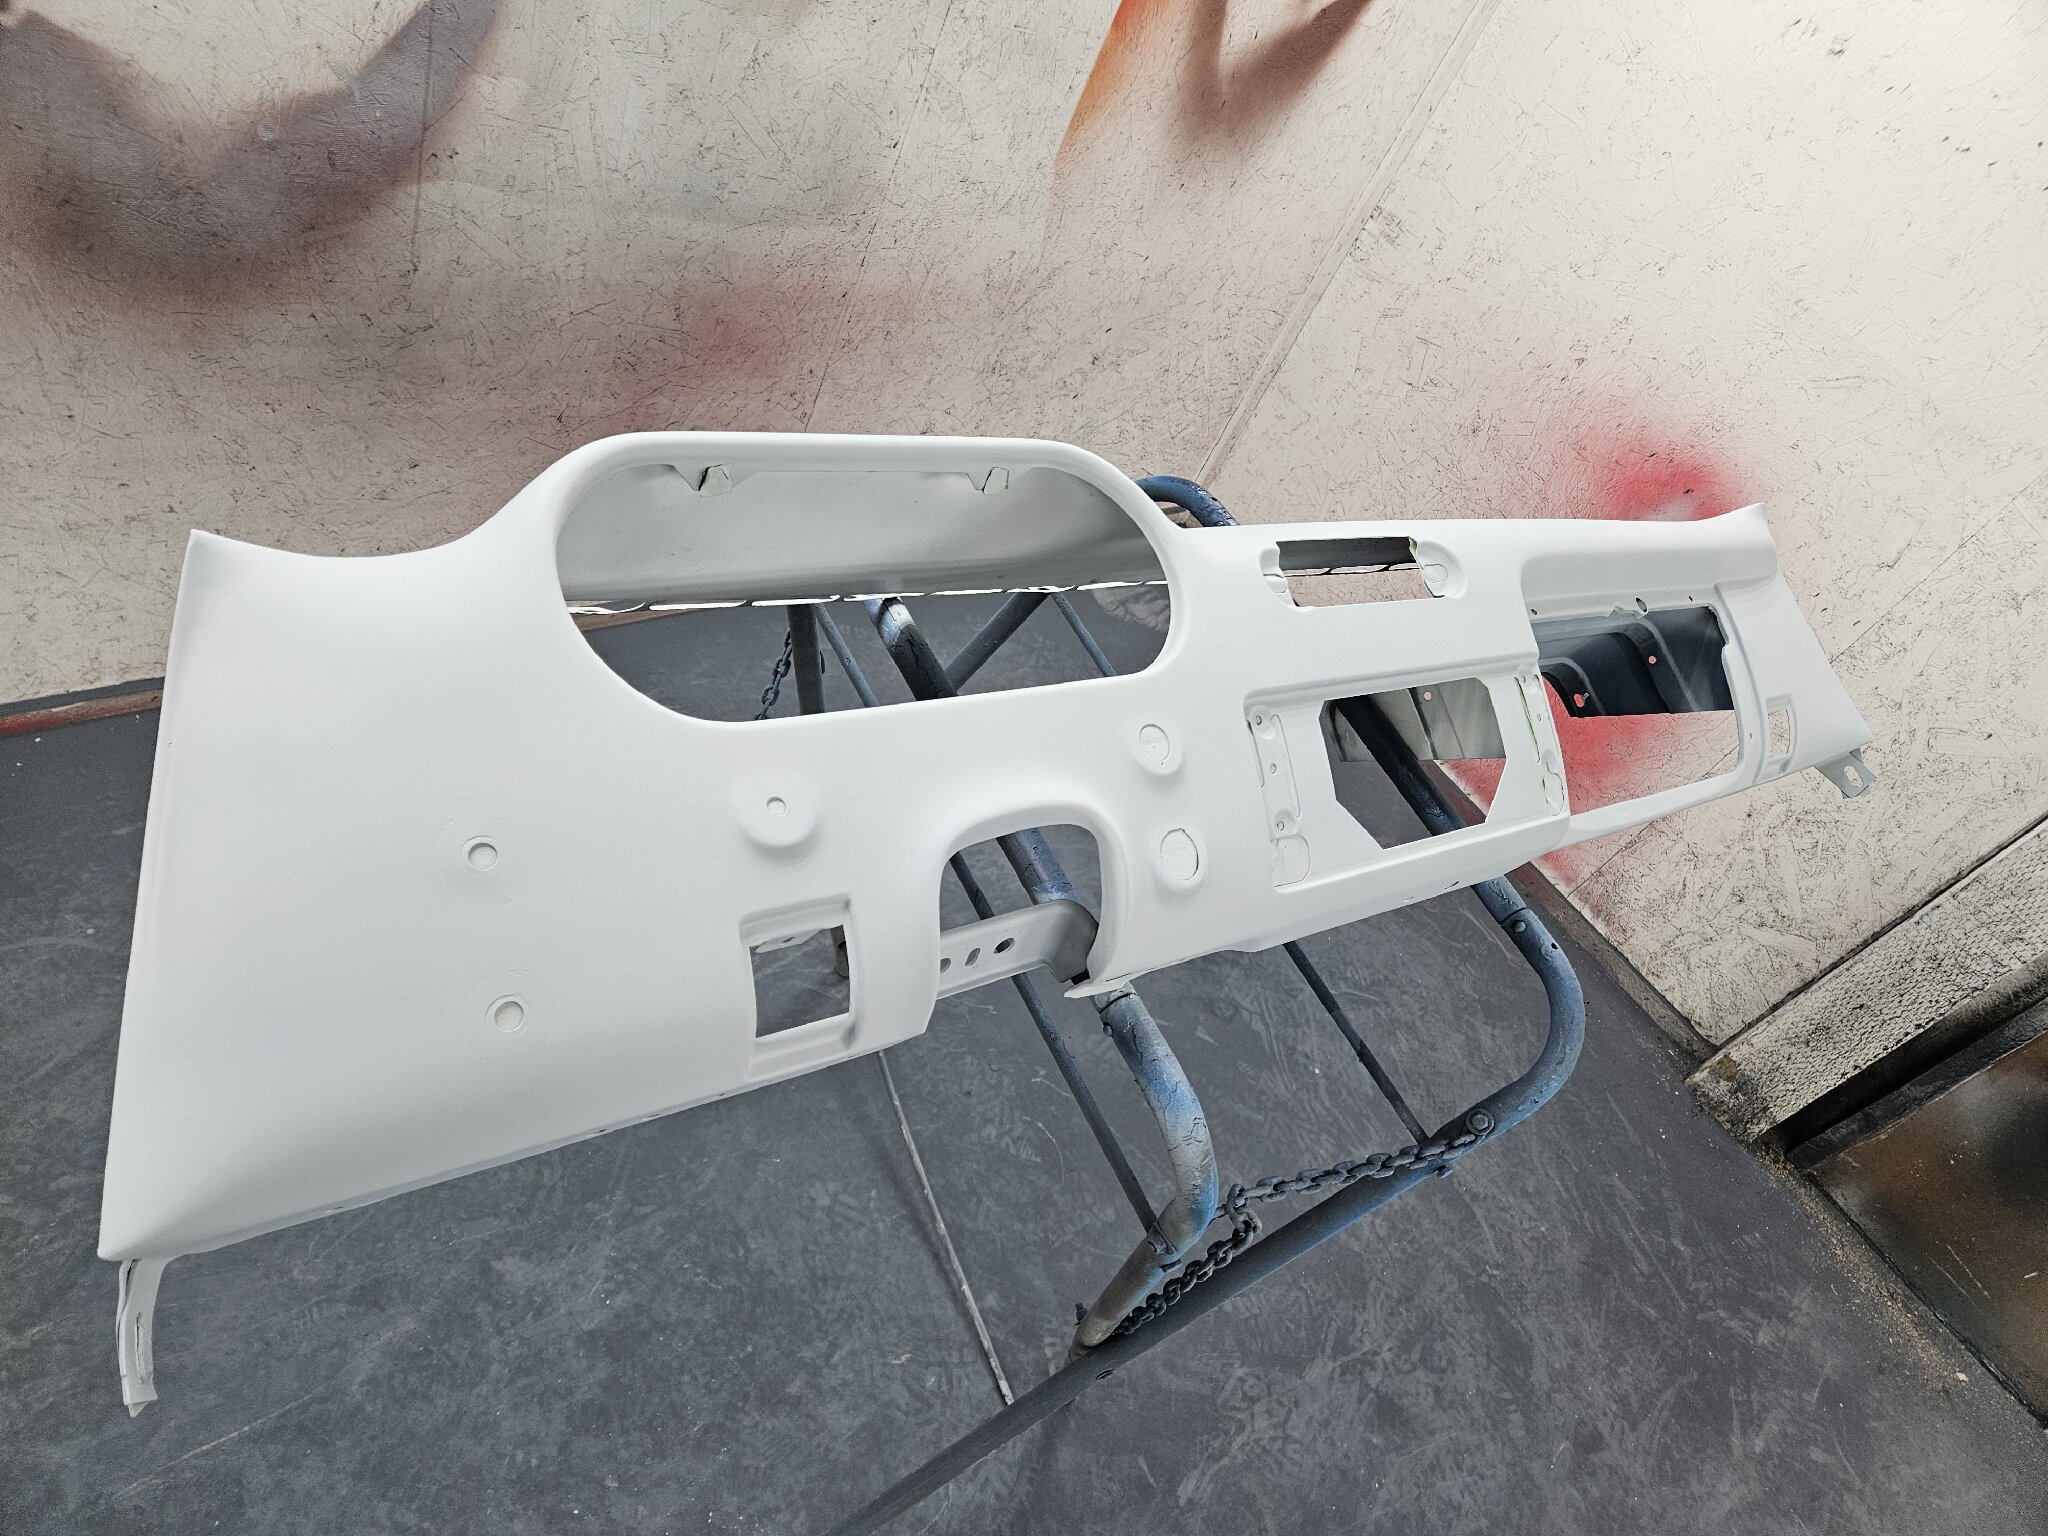 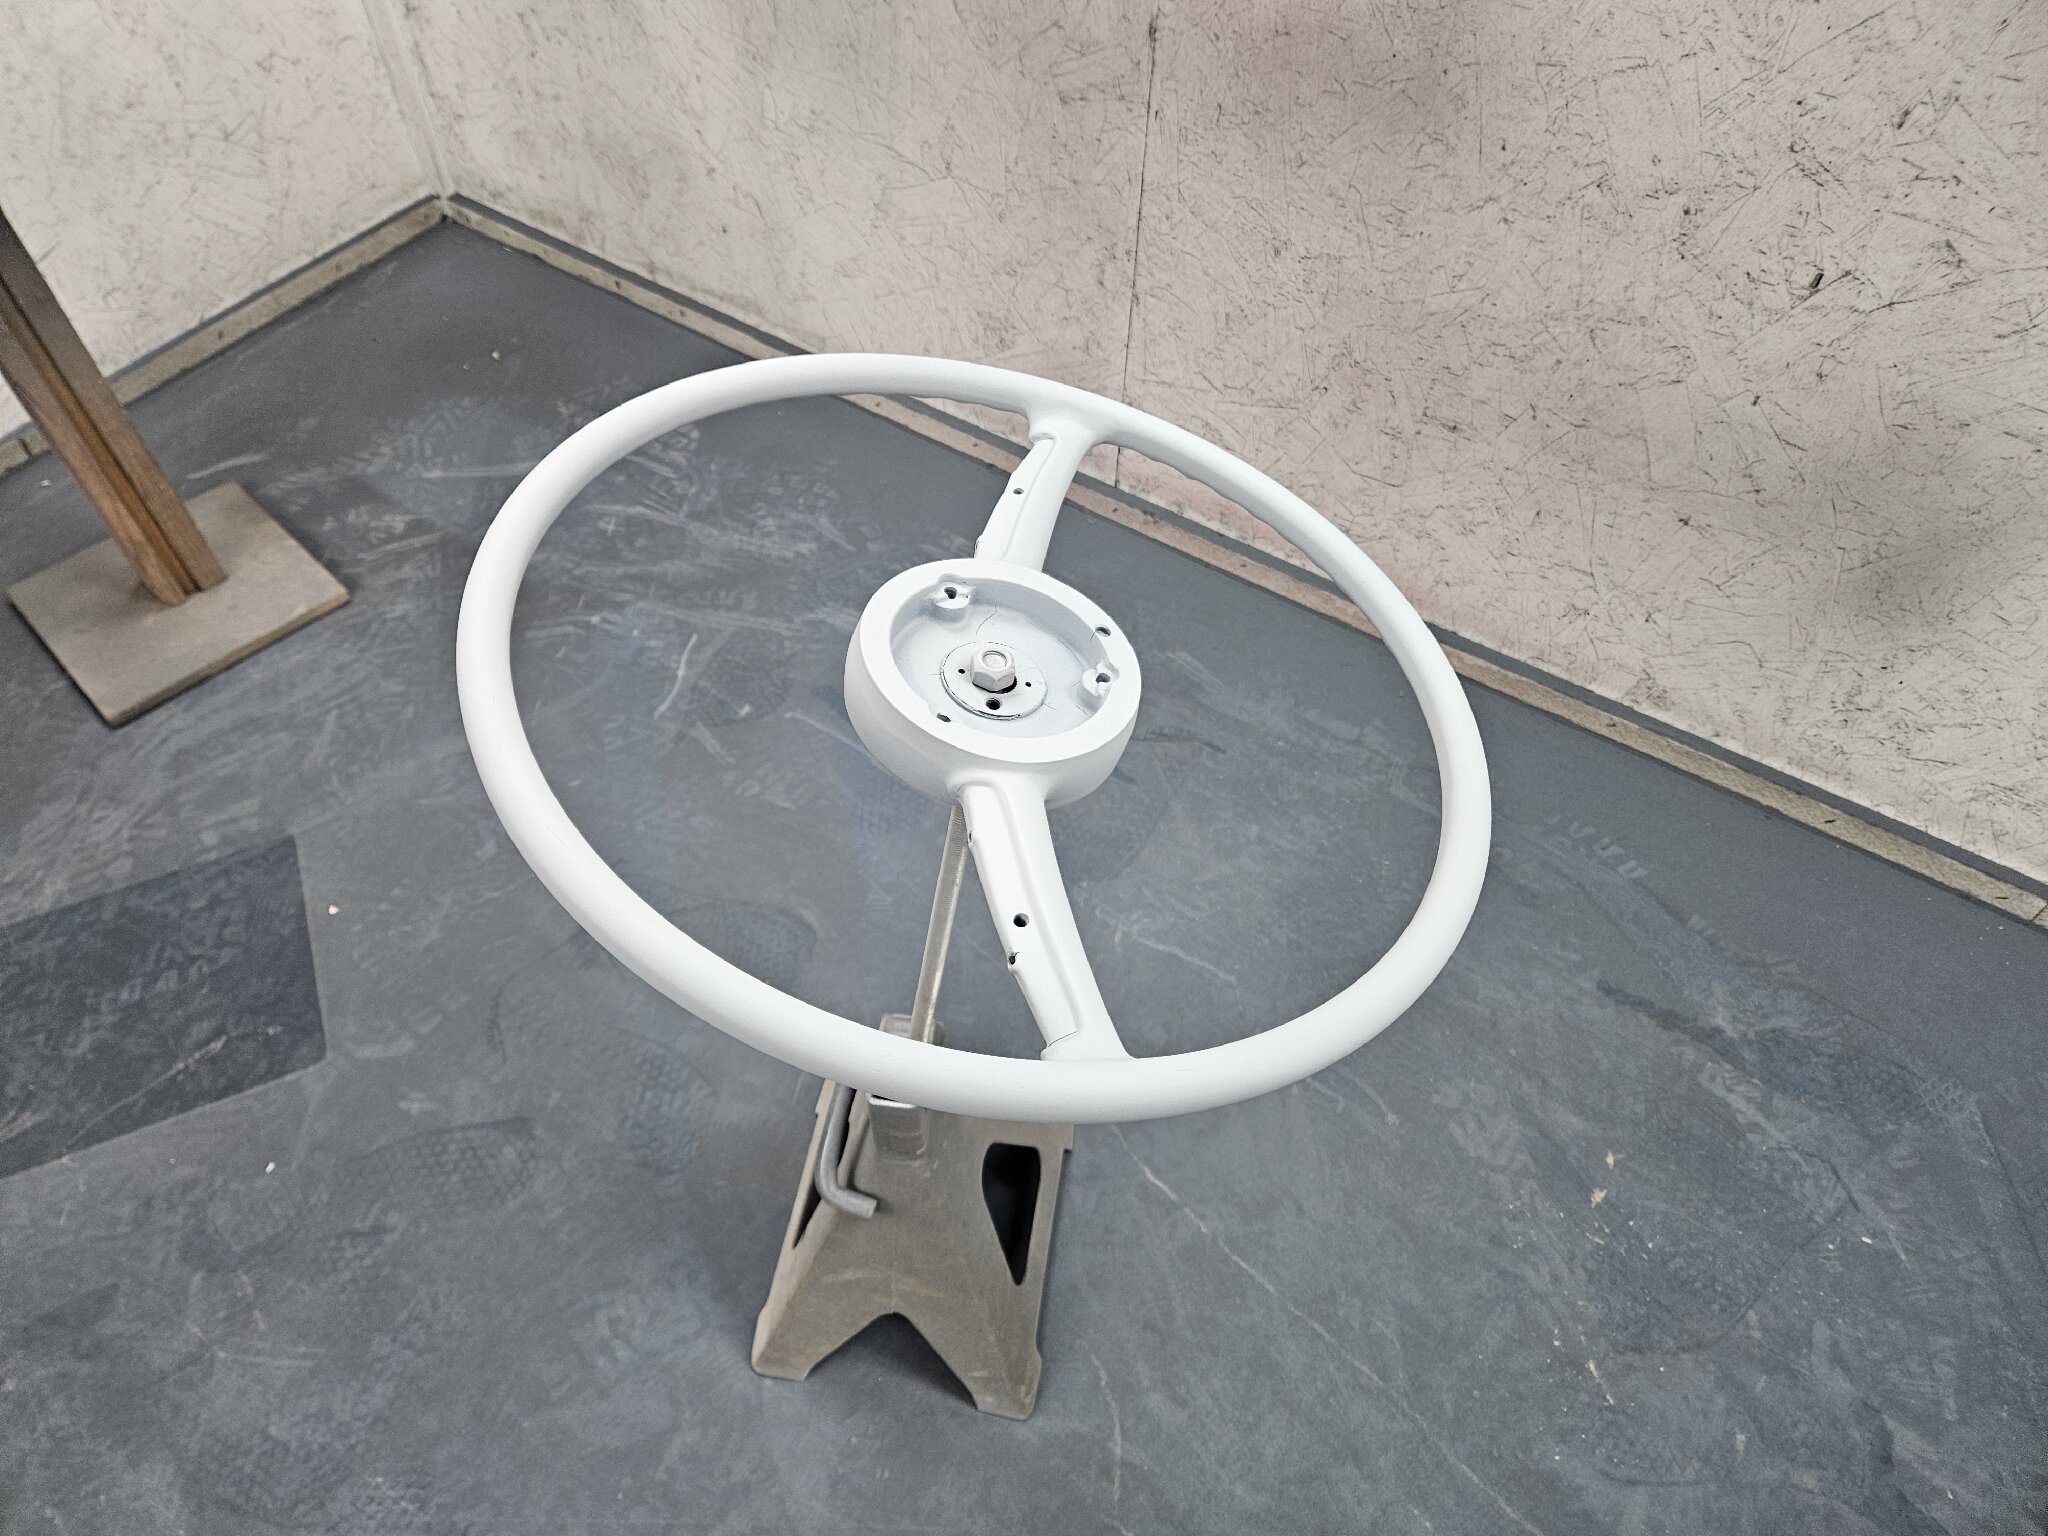
Posted on: 1/26 1:13
|
|||
|
||||
|
Re: KPack's 1954 Panama
|
||||
|---|---|---|---|---|
|
Home away from home
|
After letting the primer sit for a couple days, I got back at it today. First I ran over everything with a red Scotchbrite pad to smooth and clean everything. There were some spots of the dash that we ended up dabbing primer onto that needed to be smoothed off as well. I used 400 on a small sanding block to level all of that out.
 I also repaired the shift knob (it's on borrowed time) and we stuck it on a lathe to turn and shape. Good enough for now. 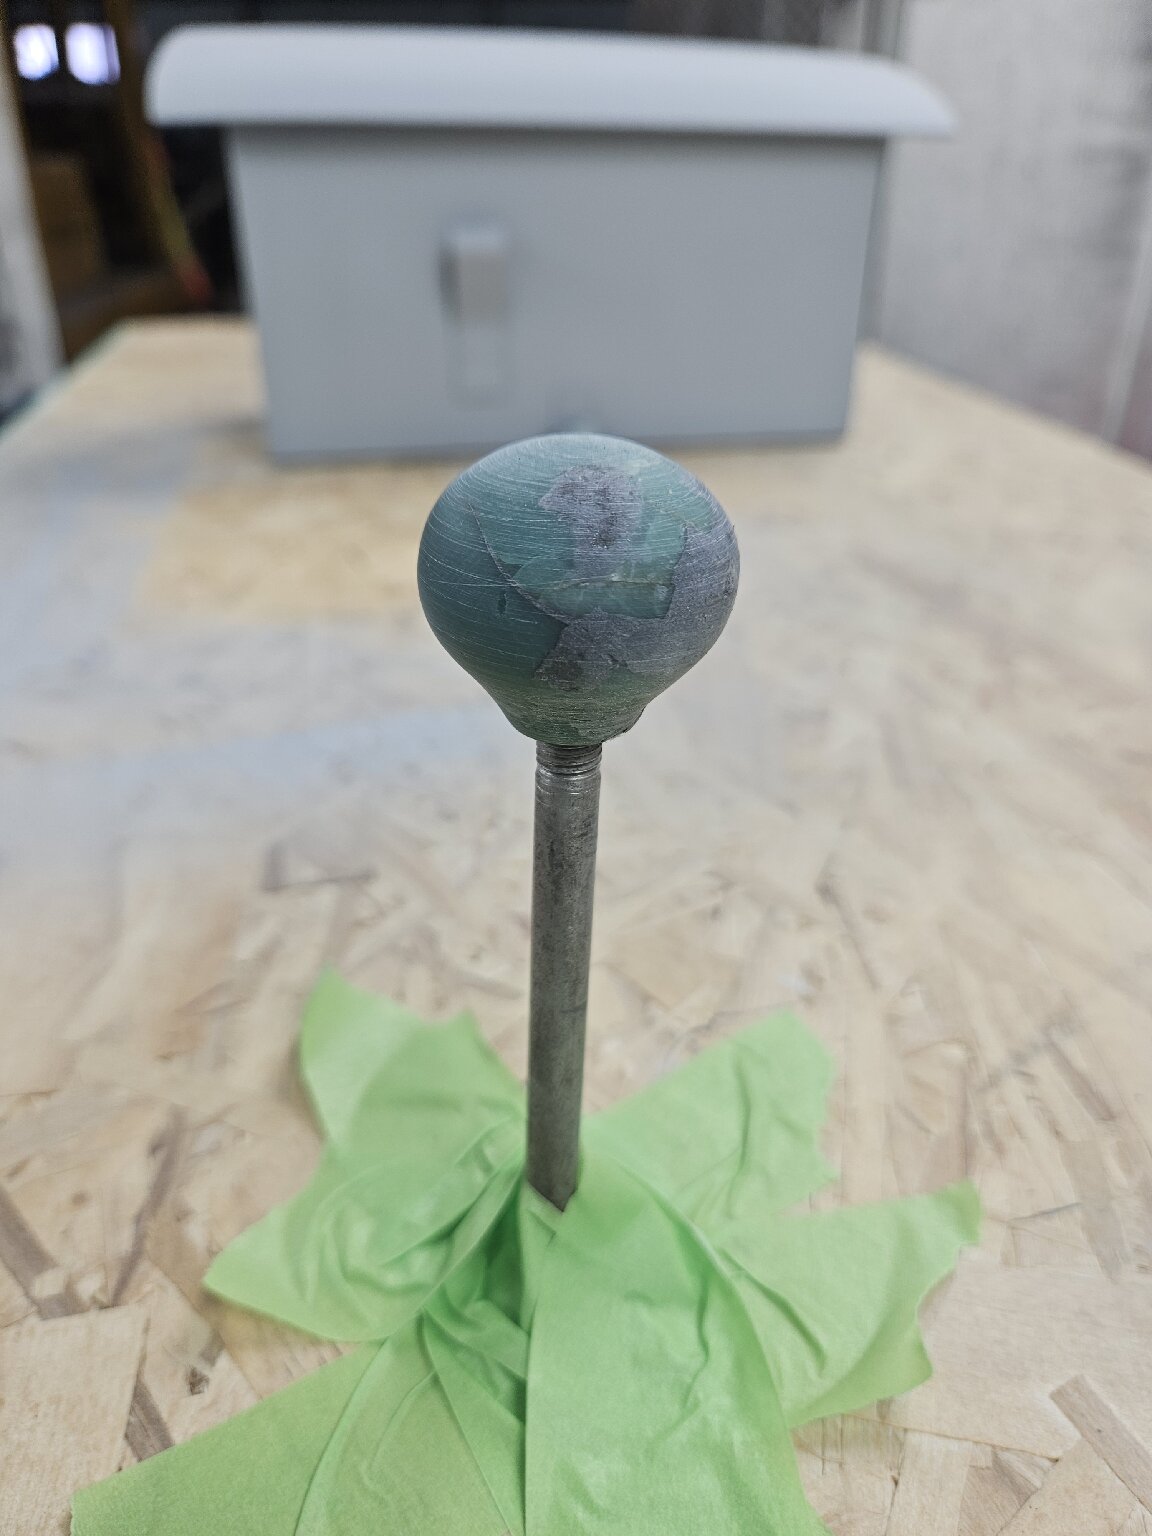 Everything got sprayed off with air, then I ran a tack rag over all the pieces. We mixed up the single-stage metallic blue and I got to work. I'm still awkward with the gun. Did one coat, then let it flash for 15 minutes. Did a second coat and that one looked much better overall. More even color. I had my friend do the second coat on the dash since I was struggling with stripes on the larger pieces. I learned that metallics are tricky. He's been doing this for decades and dropped a perfect coat on it. 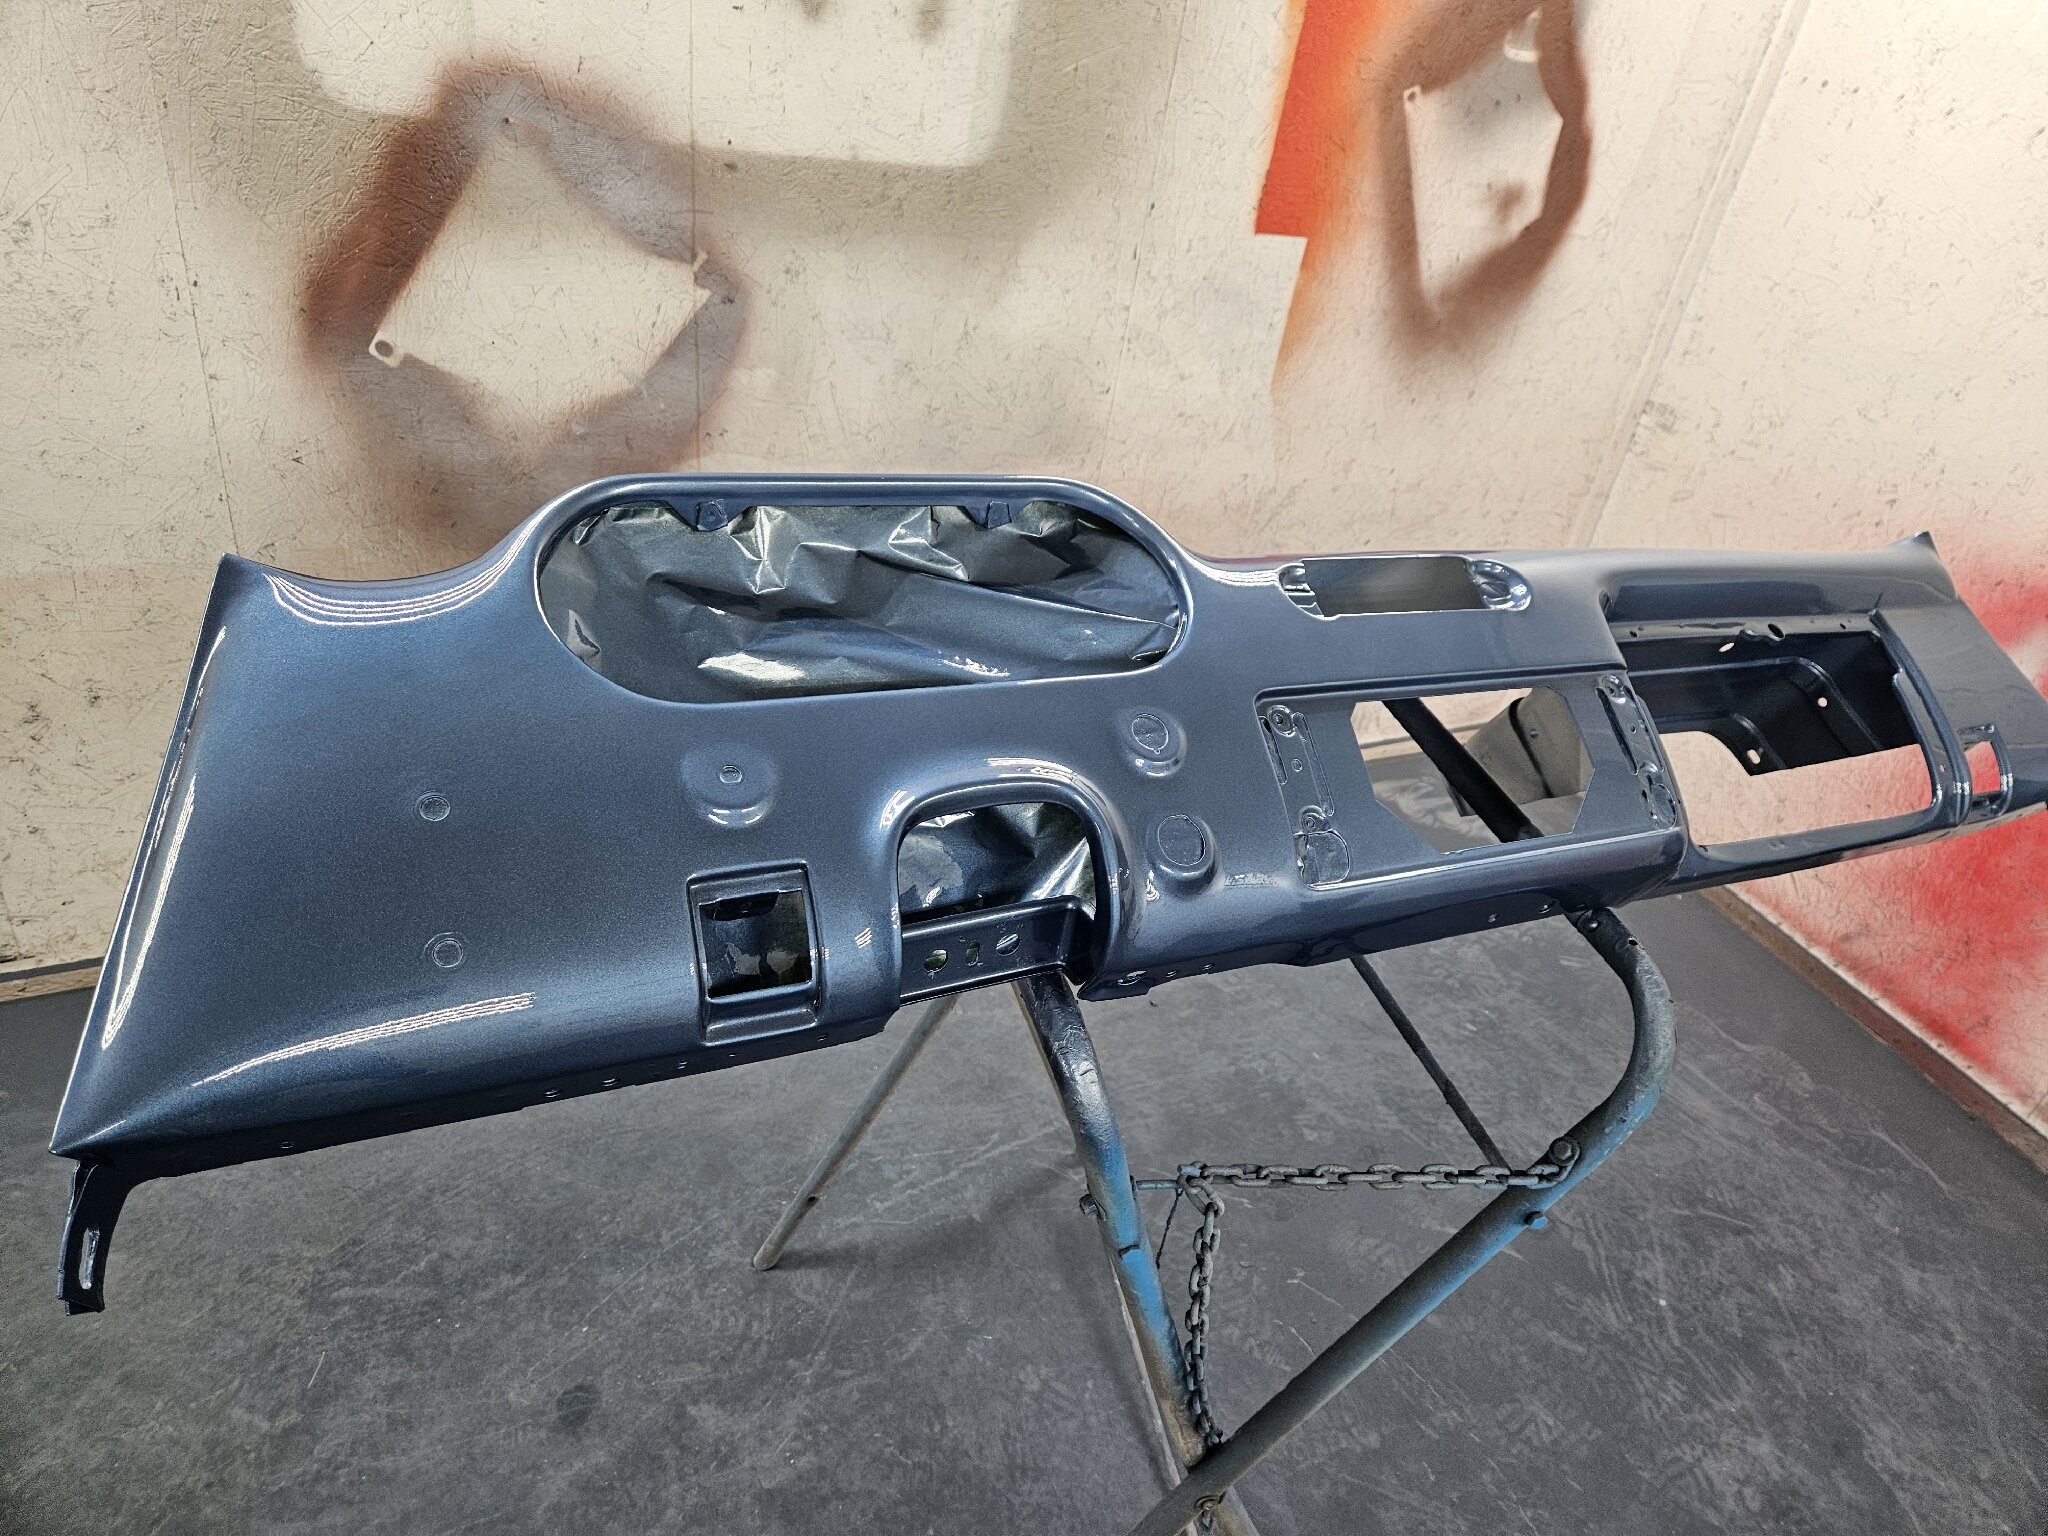 The single stage laid out pretty well but I still wanted to clear coat it. We waited over an hour for the single stage to flash completely then shot clear. The first layer looked pretty good on most of the pieces. 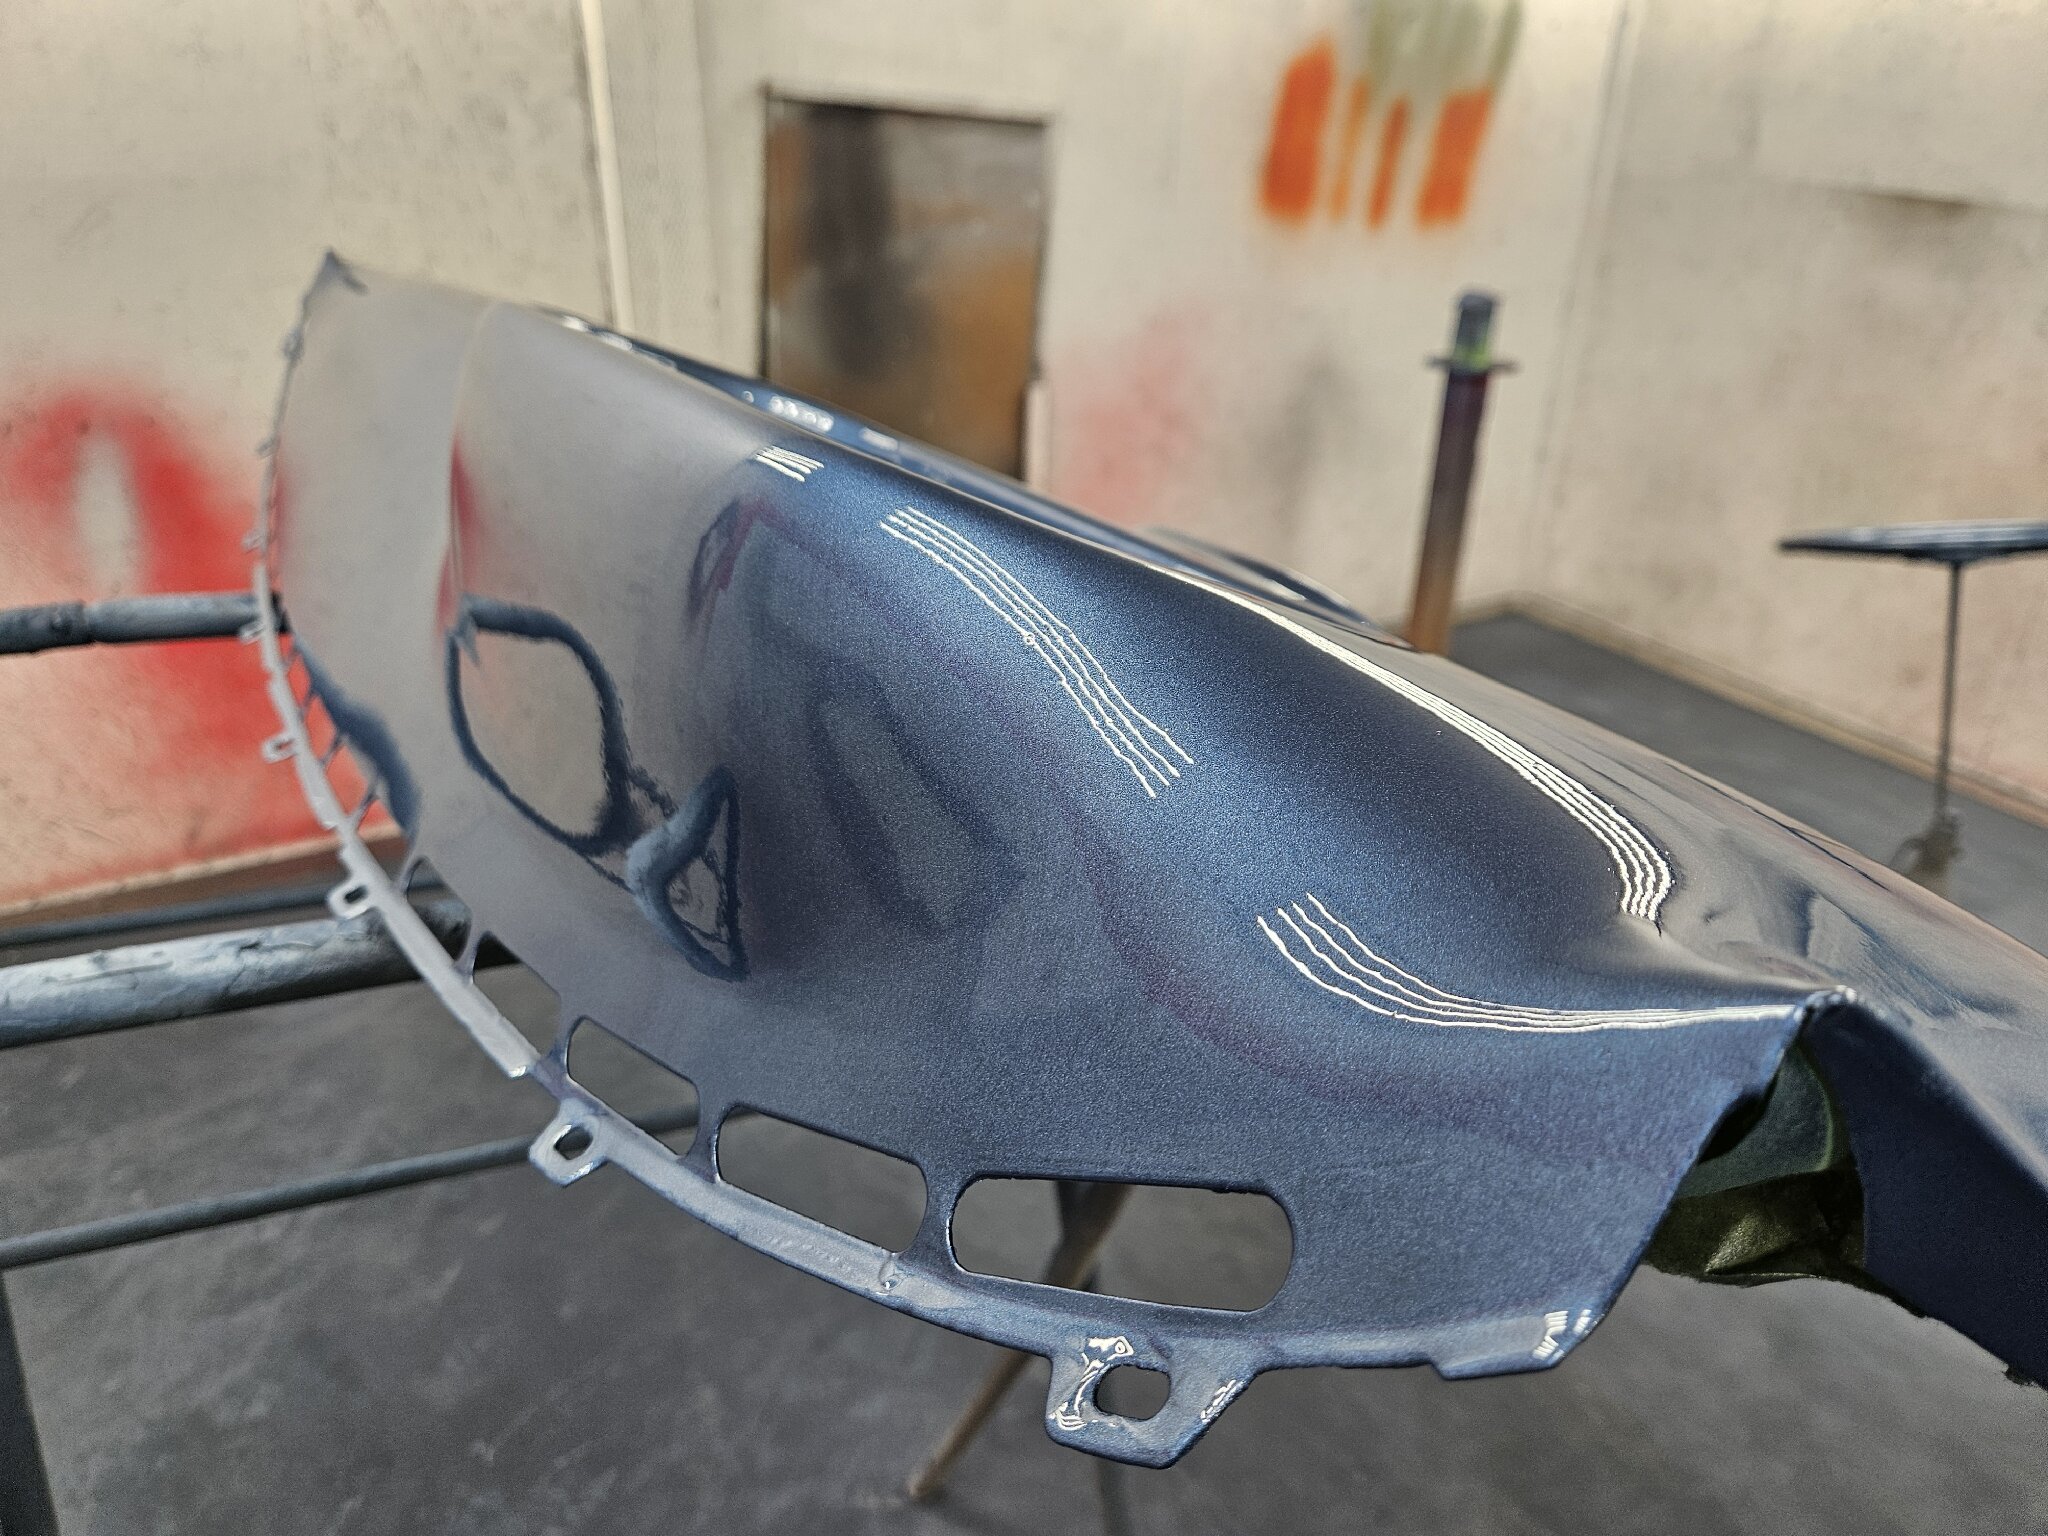 I ended up doing a second coat of clear on the pieces that see the most abuse (everything but the window trim). This really made it look great.   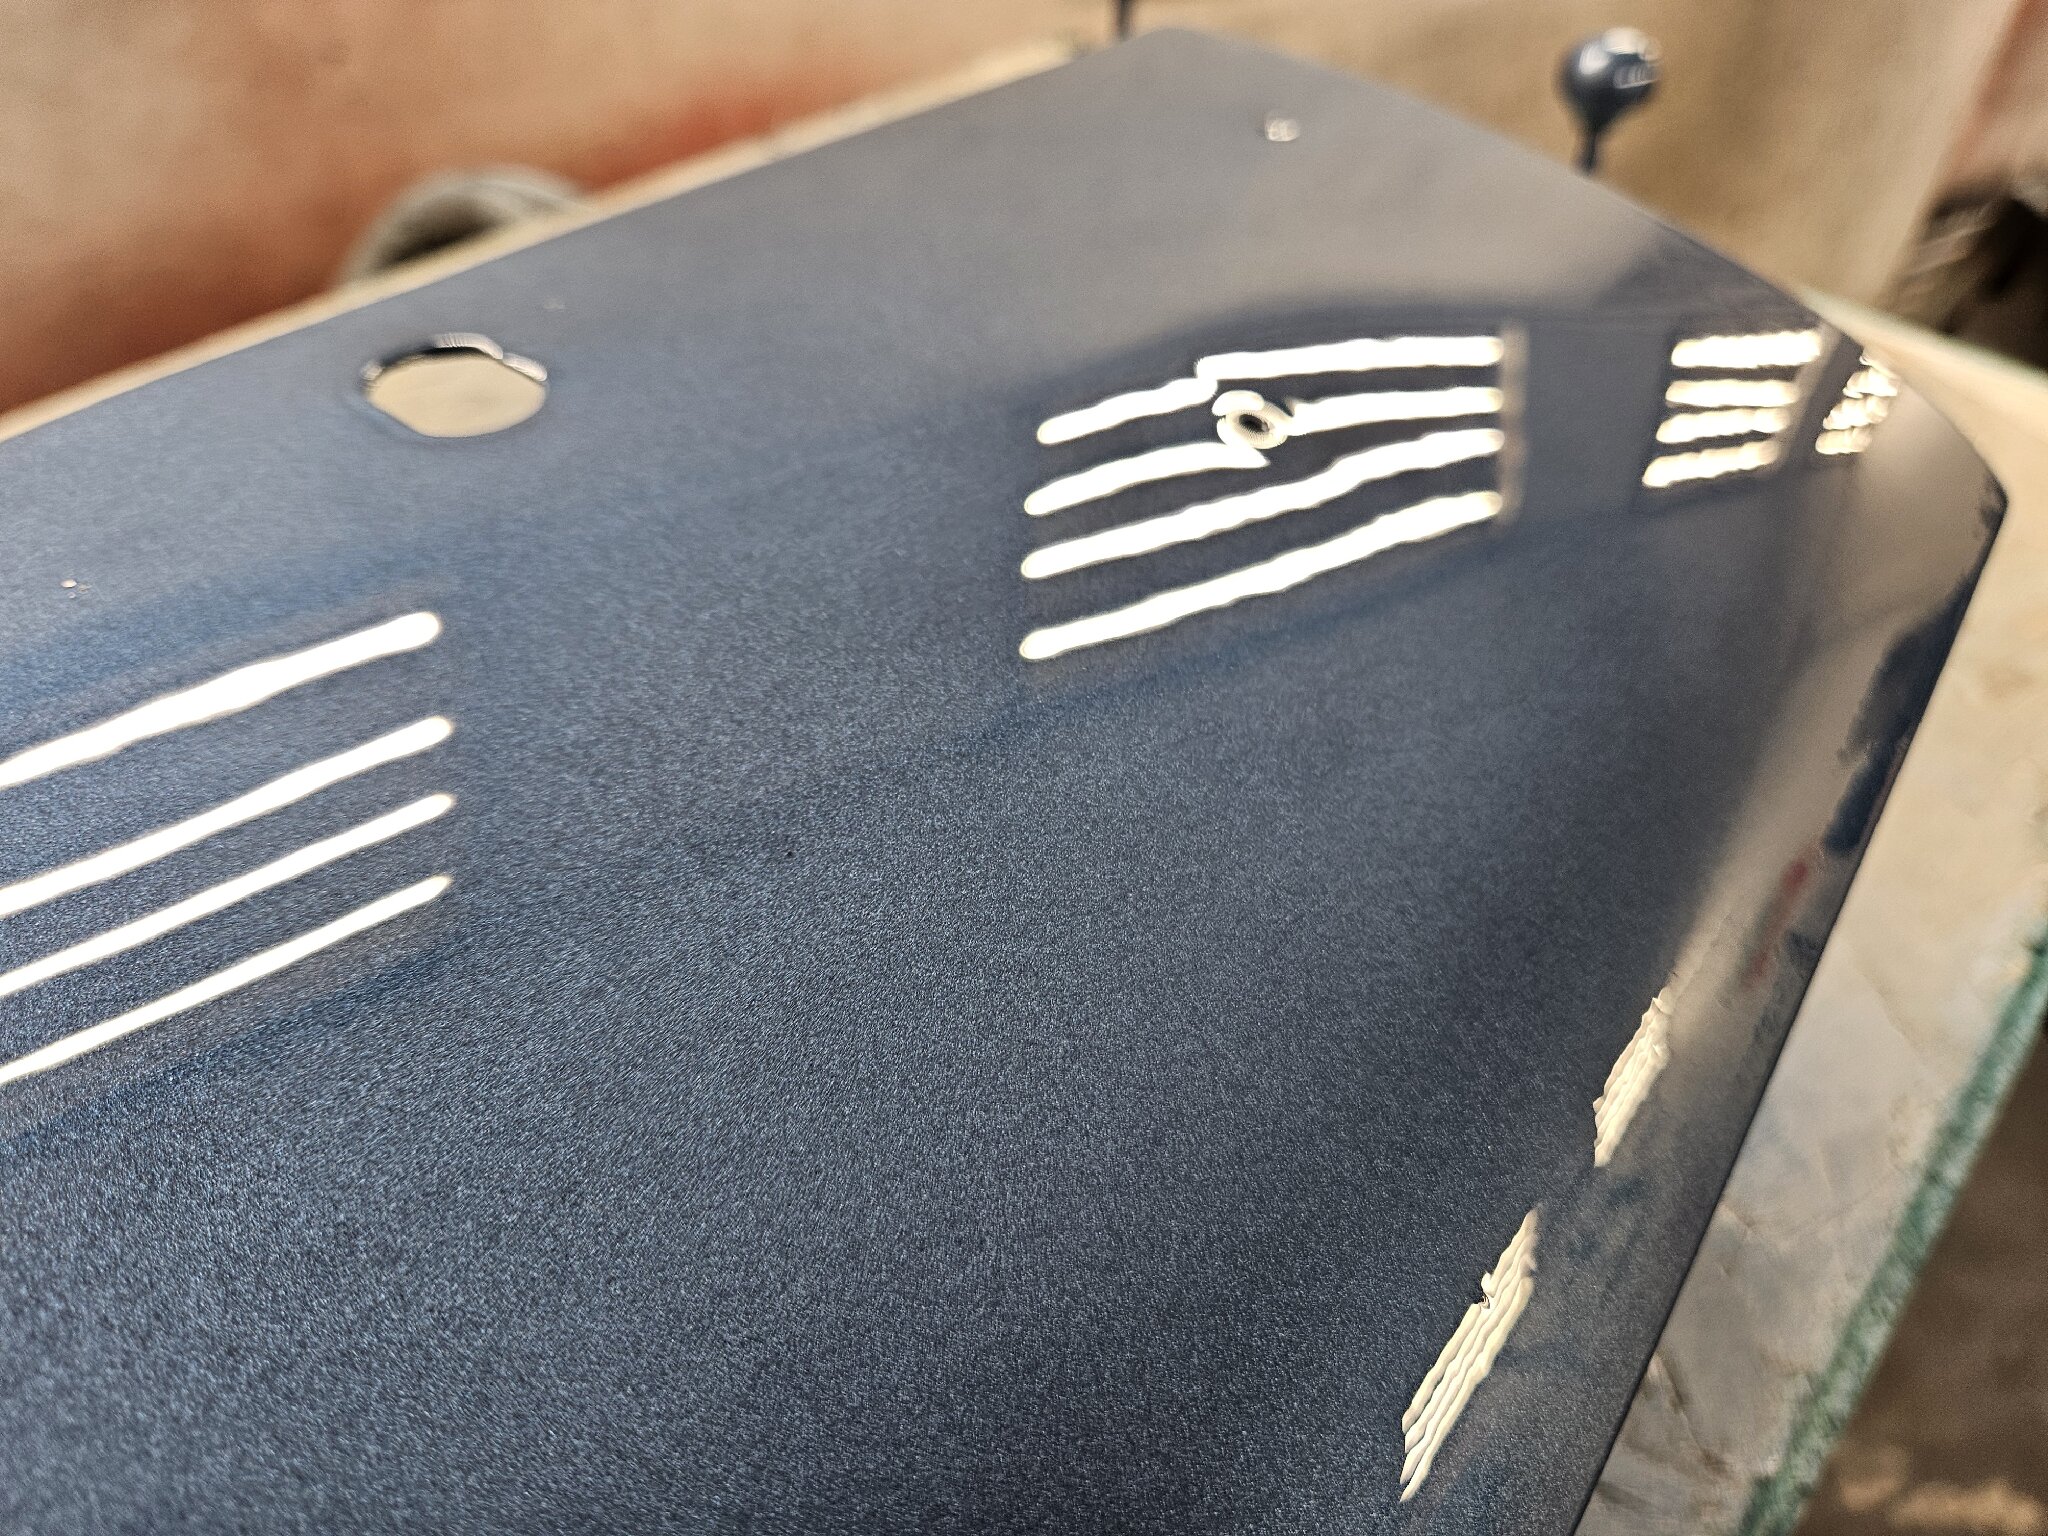 Overall I'm very happy with how it came out. I've never done this before so it was helpful having a mentor to walk me through it. There are some dust nibs that I will need to cut and buff tomorrow night, and there is a spot or two on the window trim that laid out slightly rough. I'm hoping I can polish that out. Didn't catch it until everything was cleaned up and put away. -Kevin
Posted on: 1/29 20:10
|
|||
|
||||
|
Re: KPack's 1954 Panama
|
||||
|---|---|---|---|---|
|
Webmaster
|
Looks great!
Posted on: 1/29 20:48
|
|||
|
-BigKev
1954 Packard Clipper Deluxe Touring Sedan -> Registry | Project Blog 1937 Packard 115-C Convertible Coupe -> Registry | Project Blog |
||||
|
||||
|
Re: KPack's 1954 Panama
|
||||
|---|---|---|---|---|
|
Home away from home

|
Beautiful! Great skill to do that so good to have a mentor to talk you through and especially to have a paint booth in which to do it. Many years ago I took an auto body class at a nearby college which was being taught by a guy in PAC. Although I started working on my 1954 Patrician in the class and got all the body work done, I switched at the last minute to take advantage of the heated spray booth to paint my 1951 Henney-Packard combination which I had been working on at home. I wish I had a spray booth now but not really much room for one.
Posted on: 1/29 22:06
|
|||
|
||||
|
Re: KPack's 1954 Panama
|
||||
|---|---|---|---|---|
|
Home away from home
|
Thanks! I really happy with how it's coming out. The color is a very close match to the original color. And the flake looks just about right in person....it's a little more intense in pictures. There are a couple of spots that aren't perfect, but I should hopefully be able to clean them up.
I really enjoyed the painting and the learning. If I had the space I would totally set up a paint booth. His was pretty simple and worked great. Concrete floors, painted OSB for the walls and ceiling, LED lights at a 45 degree angle, double doors on one side with 2'x2' cutouts filled with filters, and a single powerful fan on the other end. It sucked air from the rest of the shop through the filters in the doors, through the booth, and out the fan to the outside. Worked great. Now I really need to finish the rest of the work so I can get the dash and interior bits installed. I need to paint the door jambs before I can install the new windlace, and the windlace needs to go in before the dash goes back in. Masking and spraying the jambs is going to suck. -Kevin
Posted on: 1/29 23:53
|
|||
|
||||
|
Re: KPack's 1954 Panama
|
||||
|---|---|---|---|---|
|
Home away from home
|
Went back to the paint booth to cut and buff, and turned out it wasn't really needed. The clear laid out beautifully. There are a few dust nubs that I will need to address but I'm going to let the clear completely cure for a day or two. I can't wait to get this all installed.
 I've been working on sanding down the door jambs. The previous owner had just used blue spray paint to cover them as the painters didn't spray them with the body color. Not close to the same color as the body. It looked really bad. He obviously didn't do any prep so the paint was peeling off in places. This is the passenger side and it looks much better than what the drivers side did. 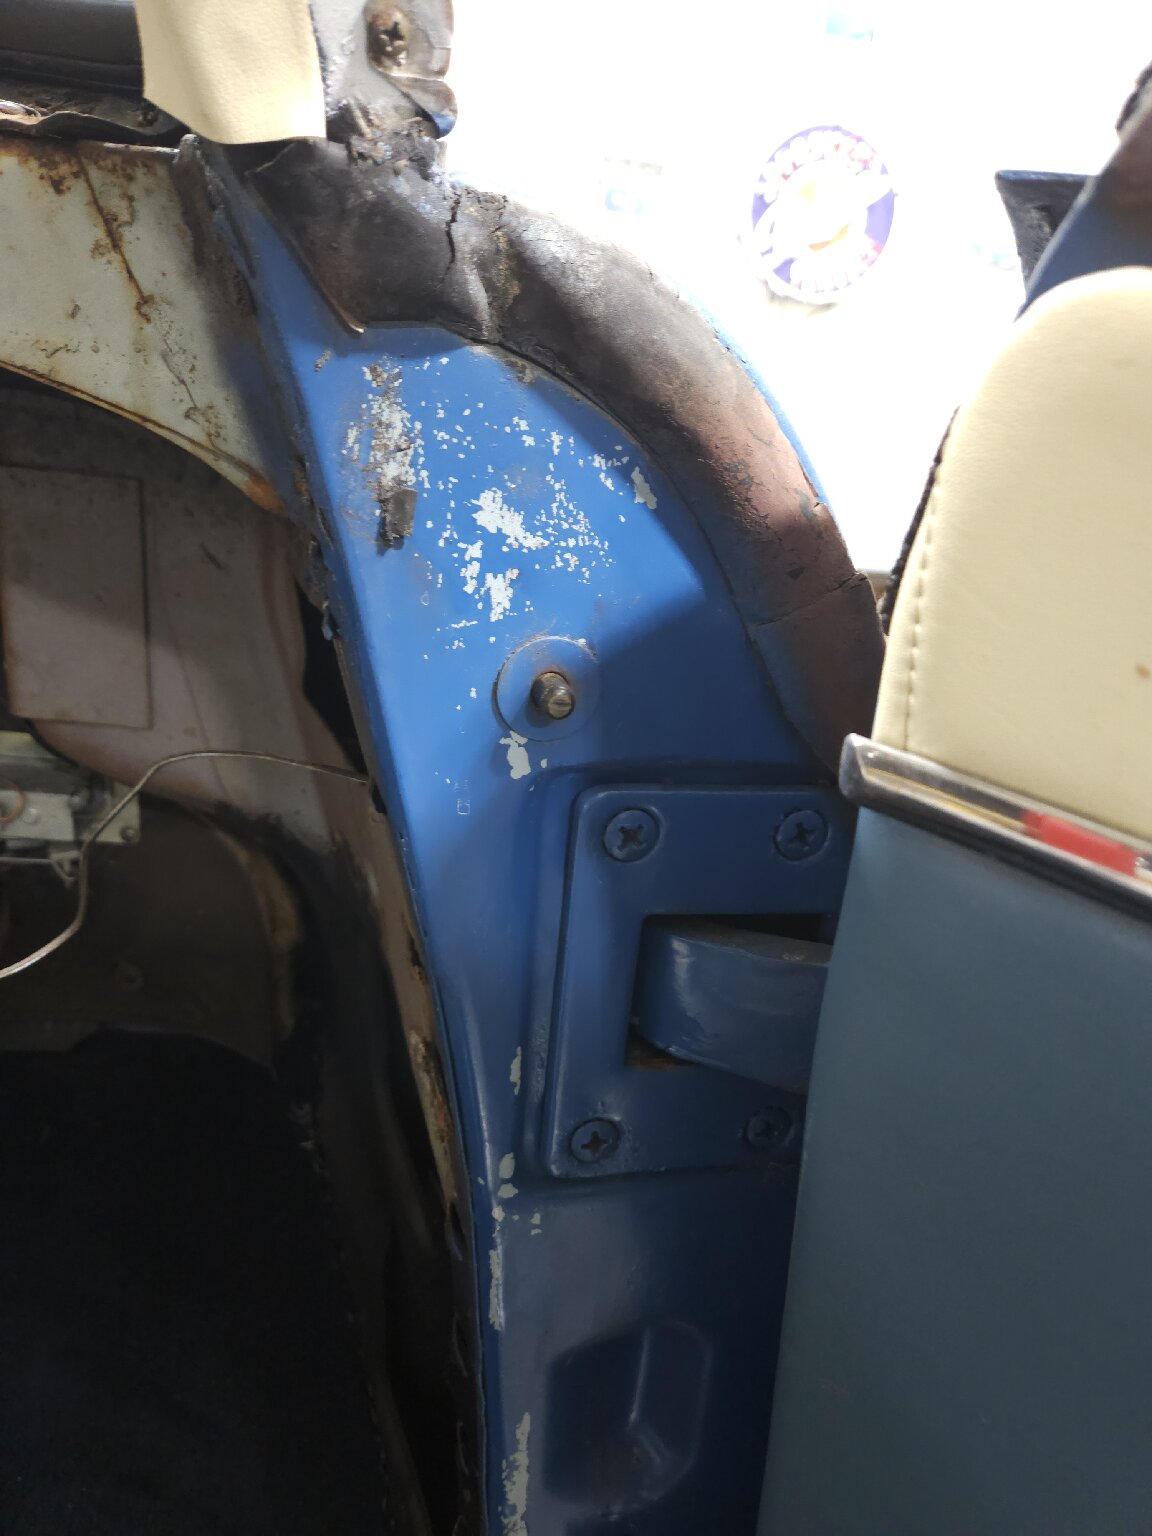 I have the driver's side mostly done. Just need to decide if I'm going to worry about the bottom of the door. When sanding I was able to get a good look at all the layers....spray paint, gray high build primer, red sealer coat, then the original Polaris Blue. 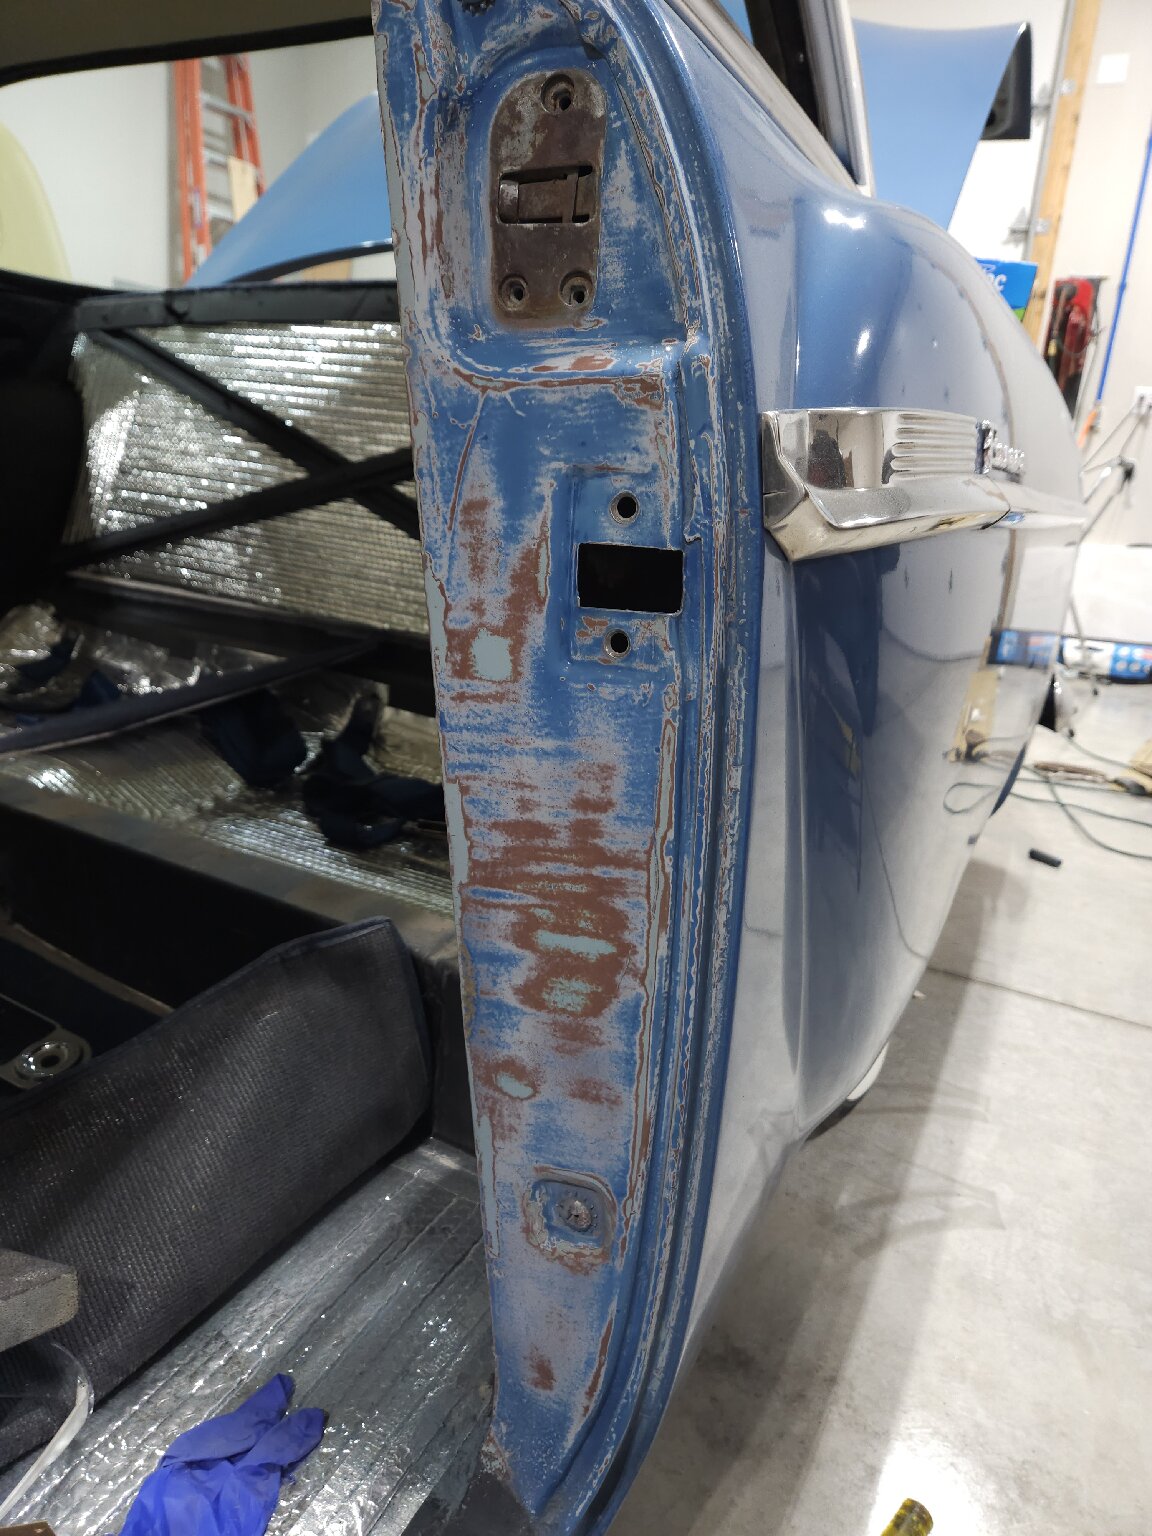 Was the body tag originally kept as clean metal, or did they just paint over it body color?  I also took a few minutes to go over the wiring while it's easily accessible. There are some weird things going on here. The previous owner swapped out the ignition switch for a non-Packard one (can't go back to Packard since he enlarged the opening in the dash to fit this). It's hooked up differently than the wiring diagram shows. All the stuff that should be connected to the ACC post on the diagram is connected to the IGN post on my switch. The ACC switch on my post has all sorts of things on it. I think one of them goes to a push-button switch that once controlled an electric pump by the fuel tank. The pump was gone before I got the car, so I'm going to remove that switch and all the wiring. 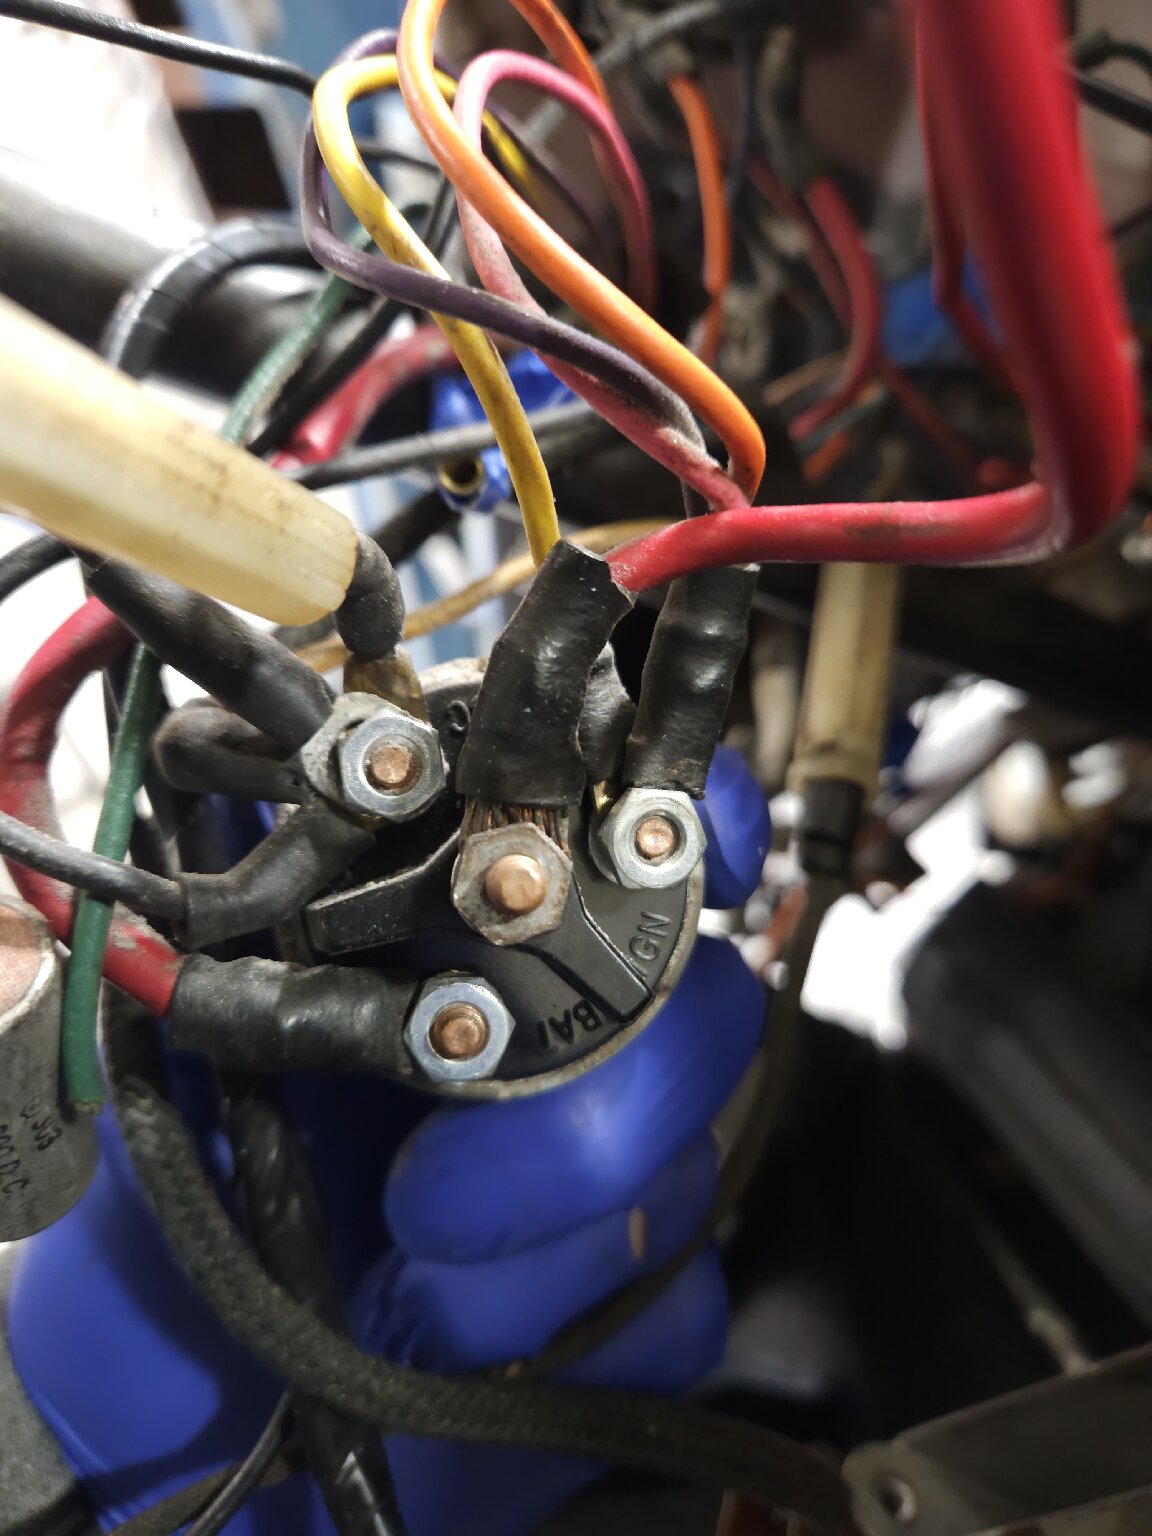 There is also a condenser hanging off the ACC post....no idea what this is for. It's not on the wiring diagram. 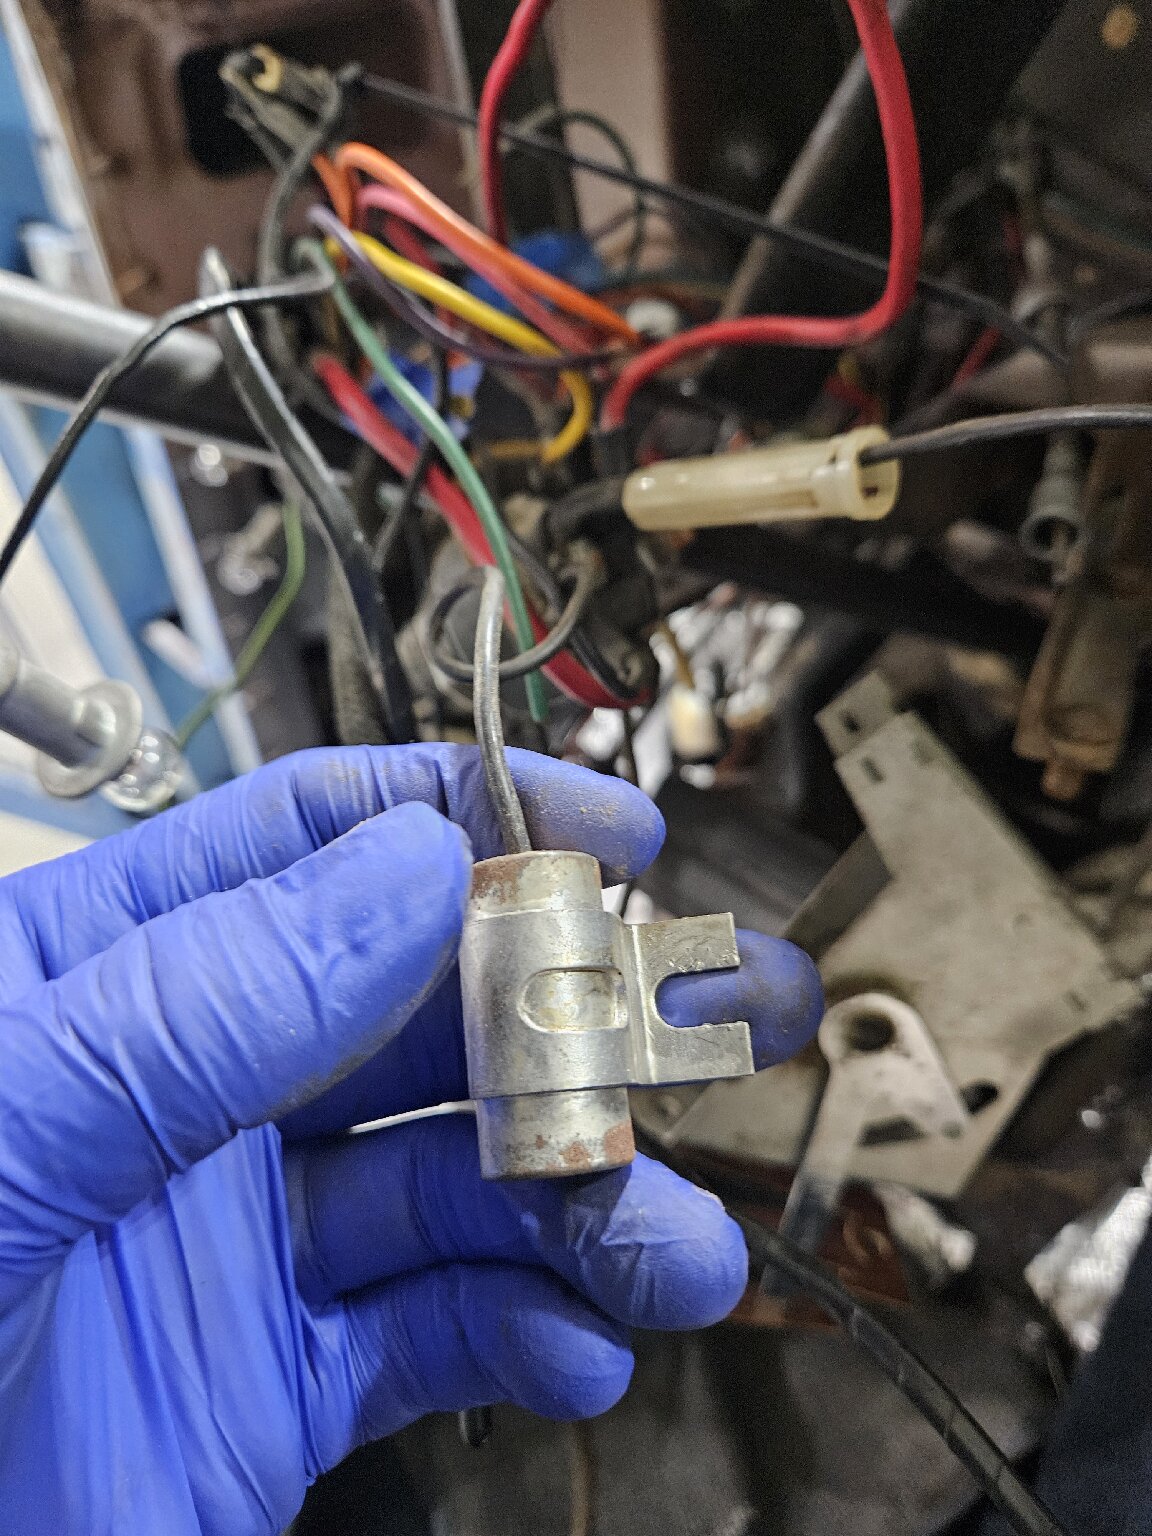 The Starter post does indeed go to the starter solenoid, but is red instead of the proper brown. The big red wire that is supposed to go from the BATT post on the ignition switch to the battery post on the starter solenoid instead goes to a wire cap by the firewall, which is connected to two brown wires that both go to the starter solenoid. I have no idea what to make of it. 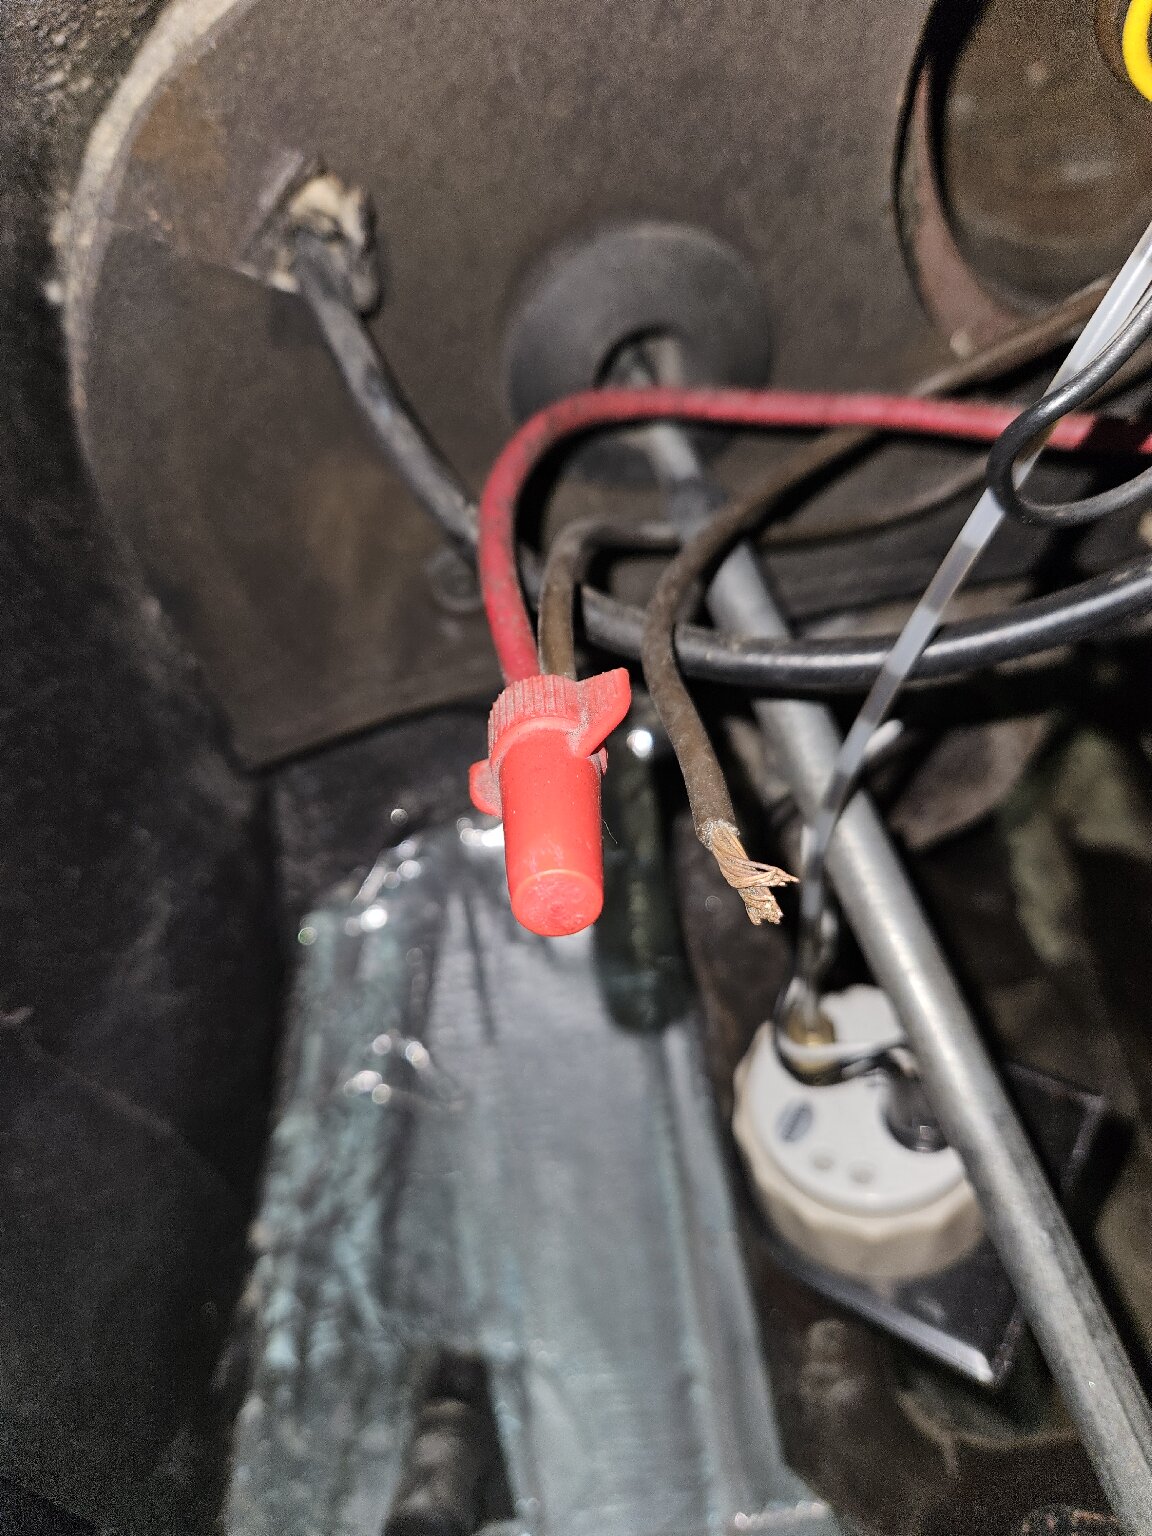  I'm not really sure what exactly to do here. I will for sure fix the BATT post to starter wire. But should I change the other posts to the correct way? It worked as it stands currently for some reason. -Kevin
Posted on: 1/31 1:27
|
|||
|
||||


