|
Re: Engine Bay detailing on a '56 dual carb car
|
||||
|---|---|---|---|---|
|
Home away from home
|
Quote:
Meanwhile, the color of the engine paint shown in 56P400's latest pics seems way off, with far too much metallic. Hopefully that's just a matter of lighting conditions. I am genuinely concerned about the engine block color, as mentioned earlier by Brian. I believe you can get an exact "bronze" match for the paint, and I would recommend doing so, especially considering how detail oriented this restoration is (beautiful work, IMHO). I am especially worried about putting the fenders etc. back on before you address this. I think it would be possible to coat over the paint you have now to get a closer match, and any tiny spots you might miss would be compensated for by the "close-but-not-quite-right" color you have on there now. Don't mean to be a spoilsport, but even considering lighting conditions, I think the paint you have there will be noticeably incorrect. Just offering my 2 cents, and remember, I'm NOT an expert, so you may have change coming from that.
Posted on: 2012/7/25 23:53
|
|||
|
Guy
[b]Not an Expert[/ |
||||
|
||||
|
Re: Engine Bay detailing on a '56 dual carb car
|
||||
|---|---|---|---|---|
|
Home away from home
|
I think the color is not that far off, at least to the remains my car had. I already did much more assembling and at this point I would not like to do everything again, particularly considering that the paint is not that off, at least from my point of view.
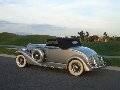
The reason I did the paint myself is that living in Mexico, and having a safe but incredibly slow mail, and since paint cannot be shipped by air mail, I decided I could not wait the 6-8 or more weeks it might have taken to get here. Well, that is one reason, and the other one is that I have had very good results with this type of paint in other cars. Coming back to the clamps, I have not ben able to locate any Corbin clamps in 2" needed for the hoses. I am considering having them made. I can have a small batch made by a spring manufacturer for $25 or so. On the one different clamp, coming out of the water pump and into the transmission oil cooler, I believe I got lucky as I had a similar looking one in my shop. Well... that is, similar to the drawing posted. Perhaps any of you can tell me if it is really similar or not? I am showing it in the first pic. (By the way, it shows a bolt that still needs to be painted, the incorrect double wire hose clamp on the right side of the hose and again odd flash light as you can see from the belt's shadow). Then, another question: were the Corbin clamps supposed to be placed with the 'ears' pointing up? I would guess that is what would be logical, but in my heater I placed them to the sides. I am showing them in the second pic. I currently removed them again to have them galvanized. And then, a final pic just to show I am not restoring the car. The outside will remain with the old paint, which was not correctly matched when it was painted who know how many years ago. I got the correct shade of scottish heather from a sample I got from Dwight Heinmuller and from the car itself once we removed the fenders. I did the engine bay in this 'correct' color, and then in the future, I will paint the car and try not to touch what I am doing now. Thanks! Attach file:  (116.87 KB) (116.87 KB) (84.97 KB) (84.97 KB) (96.01 KB) (96.01 KB)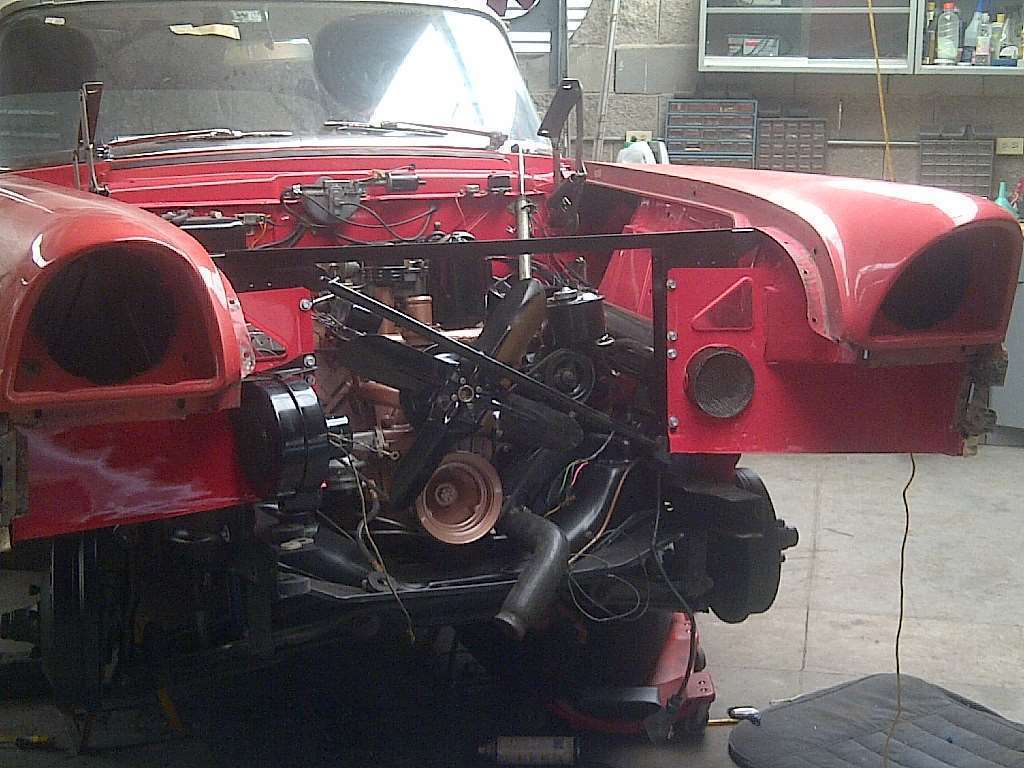
Posted on: 2012/7/27 23:28
|
|||
|
||||
|
Re: Engine Bay detailing on a '56 dual carb car
|
||||
|---|---|---|---|---|
|
Forum Ambassador

|
It's difficult for me to say just how close your engine color is to what's generally accepted as correct, but know that - in addition to lighting conditions and camera proximity - metallic content tends to distort the color in digital imaging. For example, the '56 exterior color Mojave Tan (Code R) is a metallic shade that falls somewhere between gold and copper, but it ends up looking like "mud brown" in scans of paint chip charts. As long as its your name on the title, there's only one person it has to please.
Doubt if you'll find Corbin type clamps at the typcial parts store, but I'd like to think that any of the major Packard vendors would have them on hand. However, with cost of S&H to your location, it might be cheaper to have them made locally - provided your fabricator understands what is needed and the part performs as intended. Meanwhile, looks like you've got the correct style band clamp for the hose at the cast water pump inlet - installed squarely, as well. As for position of the Corbin type clamps, first, let's go back to the shop manual. Figure 1 in "Fenders and Sheet Metal" shows ears up on the hose at the top of the radiator. Figure 2 in "Radiator and Cooling" shows same. You can't see the clamp on the hose at the engine water outlet, but - trust me - you want the ears pointing to the rear. Figure 6 in "Radiator and Cooling" shows ears up on the trans cooler end of the hose. I'm not aware of any image showing the "factory" orientation on the short hose that goes from the bottom of the radiator to the trans cooler, but I simply position the ears so I can get on them with the special pliers. As for heater hoses, Figure 8 in "Fenders and Sheet Metal" shows the most visible one - pointing just about where yours does. The heater installation illustrations in the "Accessories" section of the shop manual don't really show much - except for the water control valve and the connections at underseat heater core (look closely). For the rest, again, think mainly in terms of access for your pliers.
Posted on: 2012/7/28 9:20
|
|||
|
||||
|
Re: Engine Bay detailing on a '56 dual carb car
|
||||
|---|---|---|---|---|
|
Home away from home
|
Thanks! In fact, thank you all for your patience and help. A few more hours of work and I should be able to get the car back on the road.
Posted on: 2012/7/28 10:11
|
|||
|
||||
|
Re: Engine Bay detailing on a '56 dual carb car
|
||||
|---|---|---|---|---|
|
Forum Ambassador

|
You might want to verify the size of the radiator hose clamp before you have any made. The largest wire type Packard shows in their utility section is for 2 3/16 OD hose. I can tell you for a fact the 2 1/8 OD size sold by McMaster is too small. Some GM cars apparently used the wire clamps and there are many Corvette and Camaro places which sell them. Perhaps Brian will know what those sizes are and if they would work.
What is more interesting is Packard does not show that wire radiator hose clamp as being used in my parts book -- unless it's in a later revision. I can't find a picture or reference to verify what a 473183 clamp is but apparently at one time there were 4 used & all 55-6 cars are the same. The remaining clamp 230085 is listed in utilities & was a 2 3/16 screw adjusting type. I'm wondering if the service manual might have had some early pictures and they changed when production started. Reason I say that is because of the pictures in the field install AC instruction manual. That manual was produced after 55 production started so one would think they grabbed a current production car to use in documenting the procedure. All the clamps shown with radiator hoses appear to be the screw type. Maybe in 56 they went to wire again or maybe not. My parts book doesn't say so but again, maybe there is a later revision. The heater hose does show the wire Corbin clamp in that photo on the previous page. The orientation of the legs is different though. I can't believe a single production guy did them all or even would spend a lot of time aligning them exactly the same day in day out. Attach file: (12.81 KB) (43.06 KB) (43.06 KB)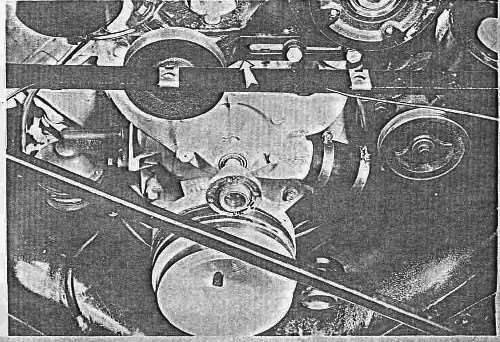 (27.06 KB) (27.06 KB)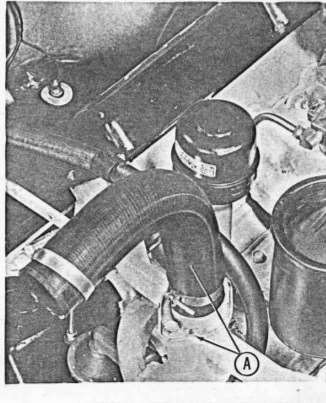
Posted on: 2012/7/28 10:31
|
|||
|
Howard
|
||||
|
||||
|
Re: Engine Bay detailing on a '56 dual carb car
|
||||
|---|---|---|---|---|
|
Home away from home

|
Do you have the decals for the car?
I had to look hard at your pictures to see that it was the antenna that you had in the engine compartment. On my 55 there are rubber wedges on the heater box copper lines. I assume they are used as insulation. Looks good!
Posted on: 2012/7/28 11:15
|
|||
|
||||
|
Re: Engine Bay detailing on a '56 dual carb car
|
||||
|---|---|---|---|---|
|
Forum Ambassador
|
On my 55 there are rubber wedges on the heater box copper lines. I assume they are used as insulation
Used on 56 also. Steele has the rubber wedge shaped grommets for the tube openings. In addition to dressing the hole edges, they help in keeping vibration and air leaking in to a minimum.
Posted on: 2012/7/28 11:23
|
|||
|
Howard
|
||||
|
||||
|
Re: Engine Bay detailing on a '56 dual carb car
|
||||
|---|---|---|---|---|
|
Forum Ambassador
|
From description(location) 473183 is a corbin clamp on upper and lower radiator, and upper and lower transmission oil cooler.
230085 is a band clamp on the water pump outlet (going into the trans cooler) tightened by a screw. It has the number "30" stamped on it. I cannot find the number on the hose clamp that goes on the thermostat housing. Take note that 469636 (GRP 5.19123) clamp does not exist, but 469363 is listed for that GRP number. The manual is not infallible.
Posted on: 2012/7/28 11:30
|
|||
|
||||
|
Re: Engine Bay detailing on a '56 dual carb car
|
||||
|---|---|---|---|---|
|
Forum Ambassador
|
Where did you find the description of the 473183 clamp. I didn't see it described in July 1, 56 revision of parts manual, radiator section other than hose clamp. Didn't find it in utilities either.
Isn't 469636 clip, heater hose the hose support clamp that goes on the top bolt of manifold near rocker cover to hold the heater hose up. Can just see it in that radiator hose photo above. I agree there is a problem with the manual because I can only find 5 clamps mentioned and there should be one more. If they had put quantity two for the 230085 water pump end, all would work out. I still don't understand why they show screw clamps instead of wire on what I think is a production car if wire is what was used.
Posted on: 2012/7/28 12:21
|
|||
|
Howard
|
||||
|
||||


