|
Re: Proud New Owner of a 49 Packard Club Sedan
|
||||
|---|---|---|---|---|
|
Forum Ambassador

|
Distributor is semi gloss black on the body and natural finish on the metal clips & brackets etc.
The Missing, Dead Cylinder thread in the post war 46-54 forum from a few days ago has a few thoughts from well versed people on the need to do a head milling. If it turns out the head needs to be milled just barely do the minimum. Be sure and check valve clearance after it is done just in case it had been done before and more work has made it too thin so valves can hit the top of combustion chamber. There is a suggested method of checking valve clearance in the thread if you have not done it before. Periodic valve regrinds were a common thing back in the day and could be needed now if you have low compression.
Posted on: 2018/11/9 15:03
|
|||
|
Howard
|
||||
|
||||
|
Re: Proud New Owner of a 49 Packard Club Sedan
|
||||
|---|---|---|---|---|
|
Just can't stay away

|
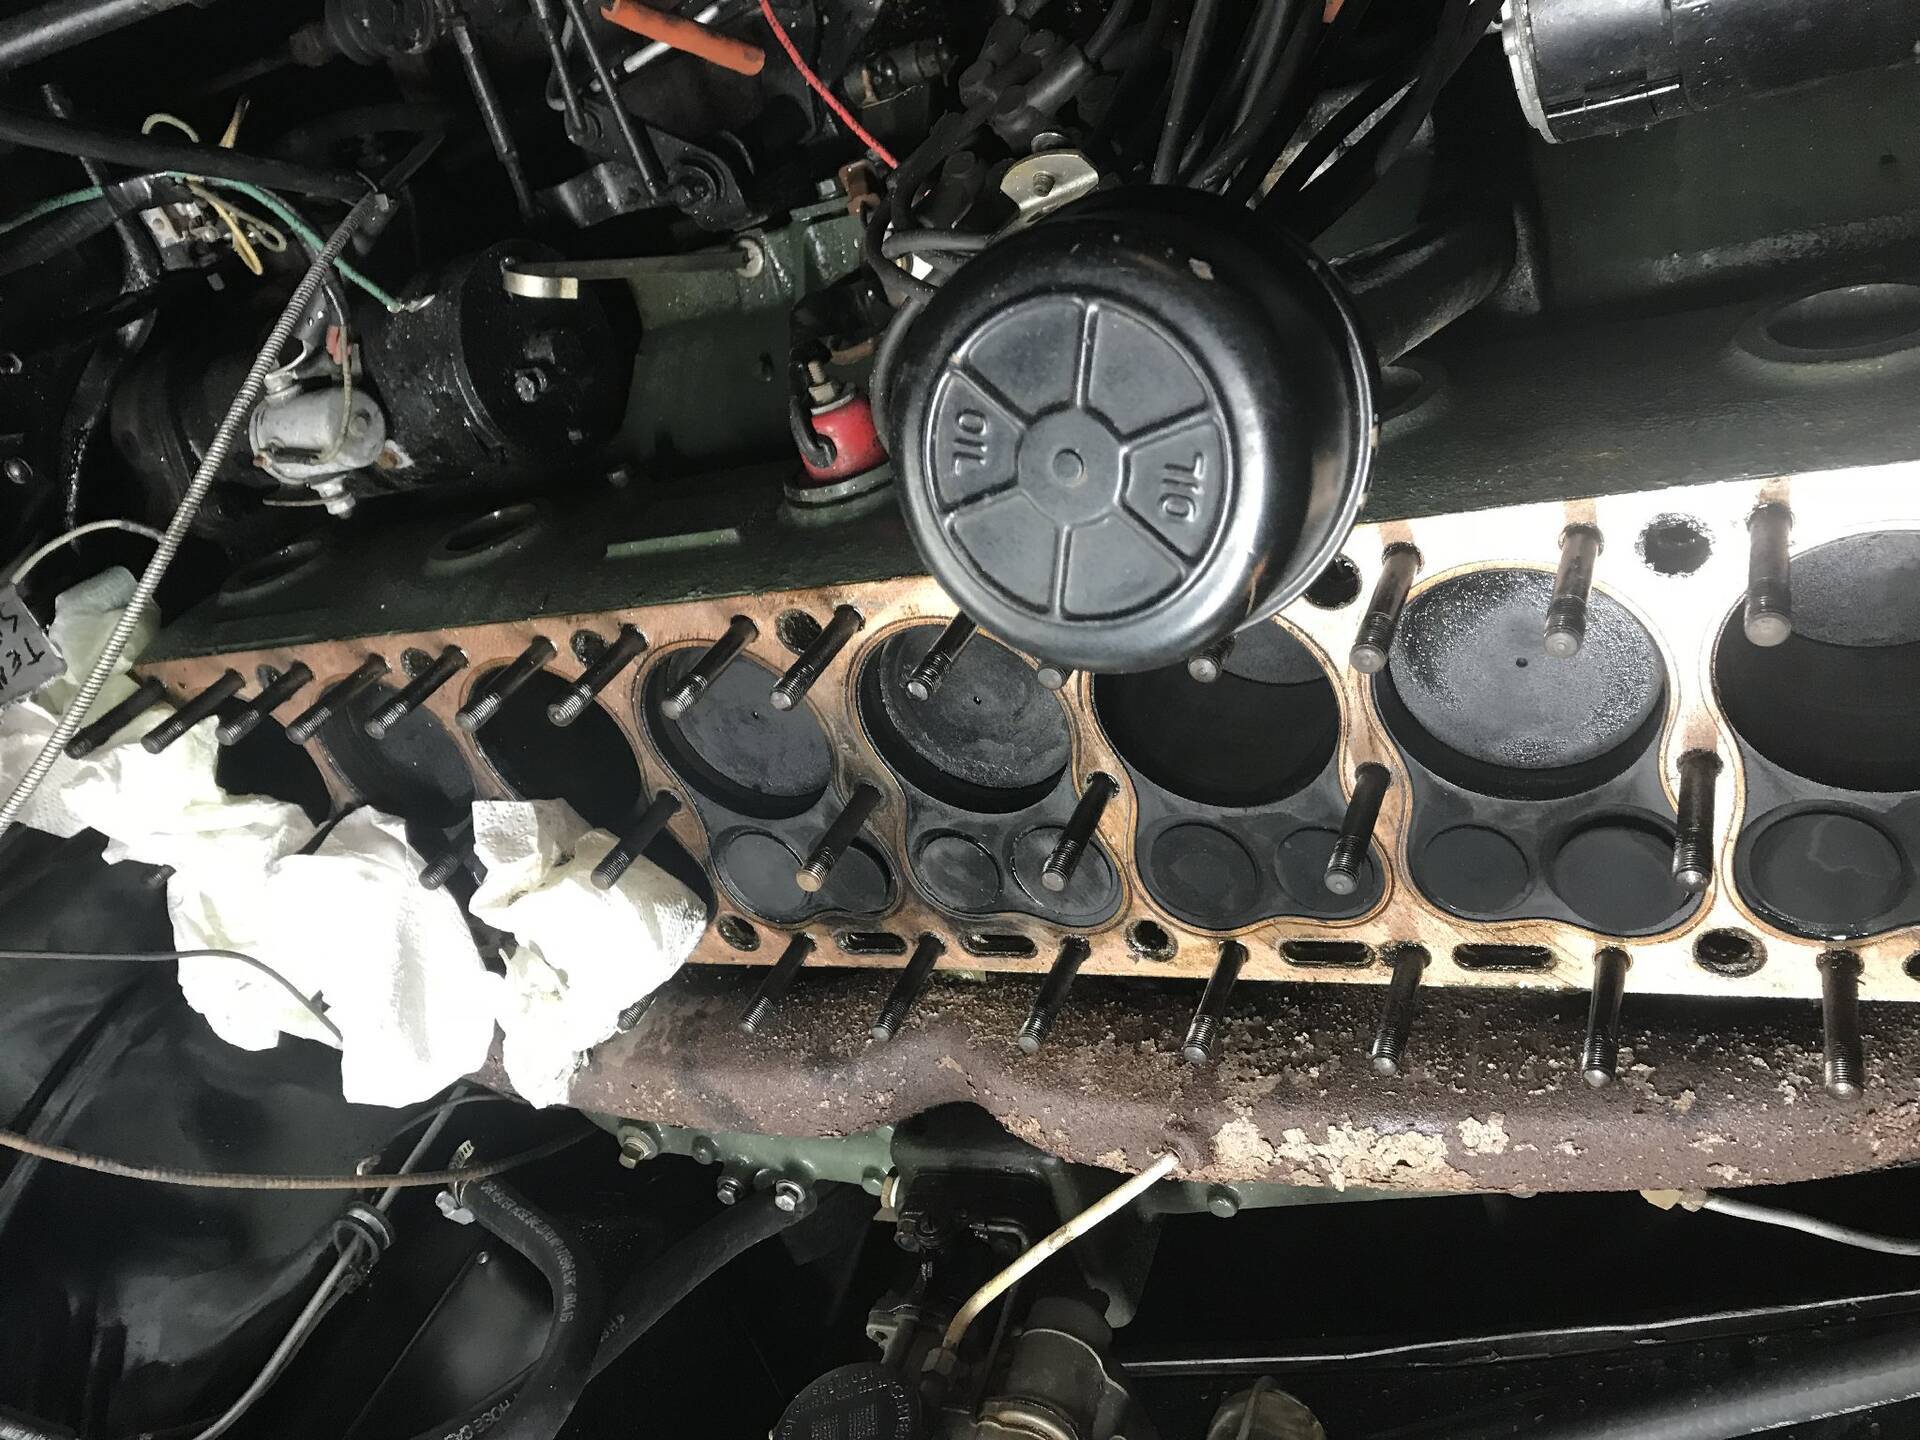
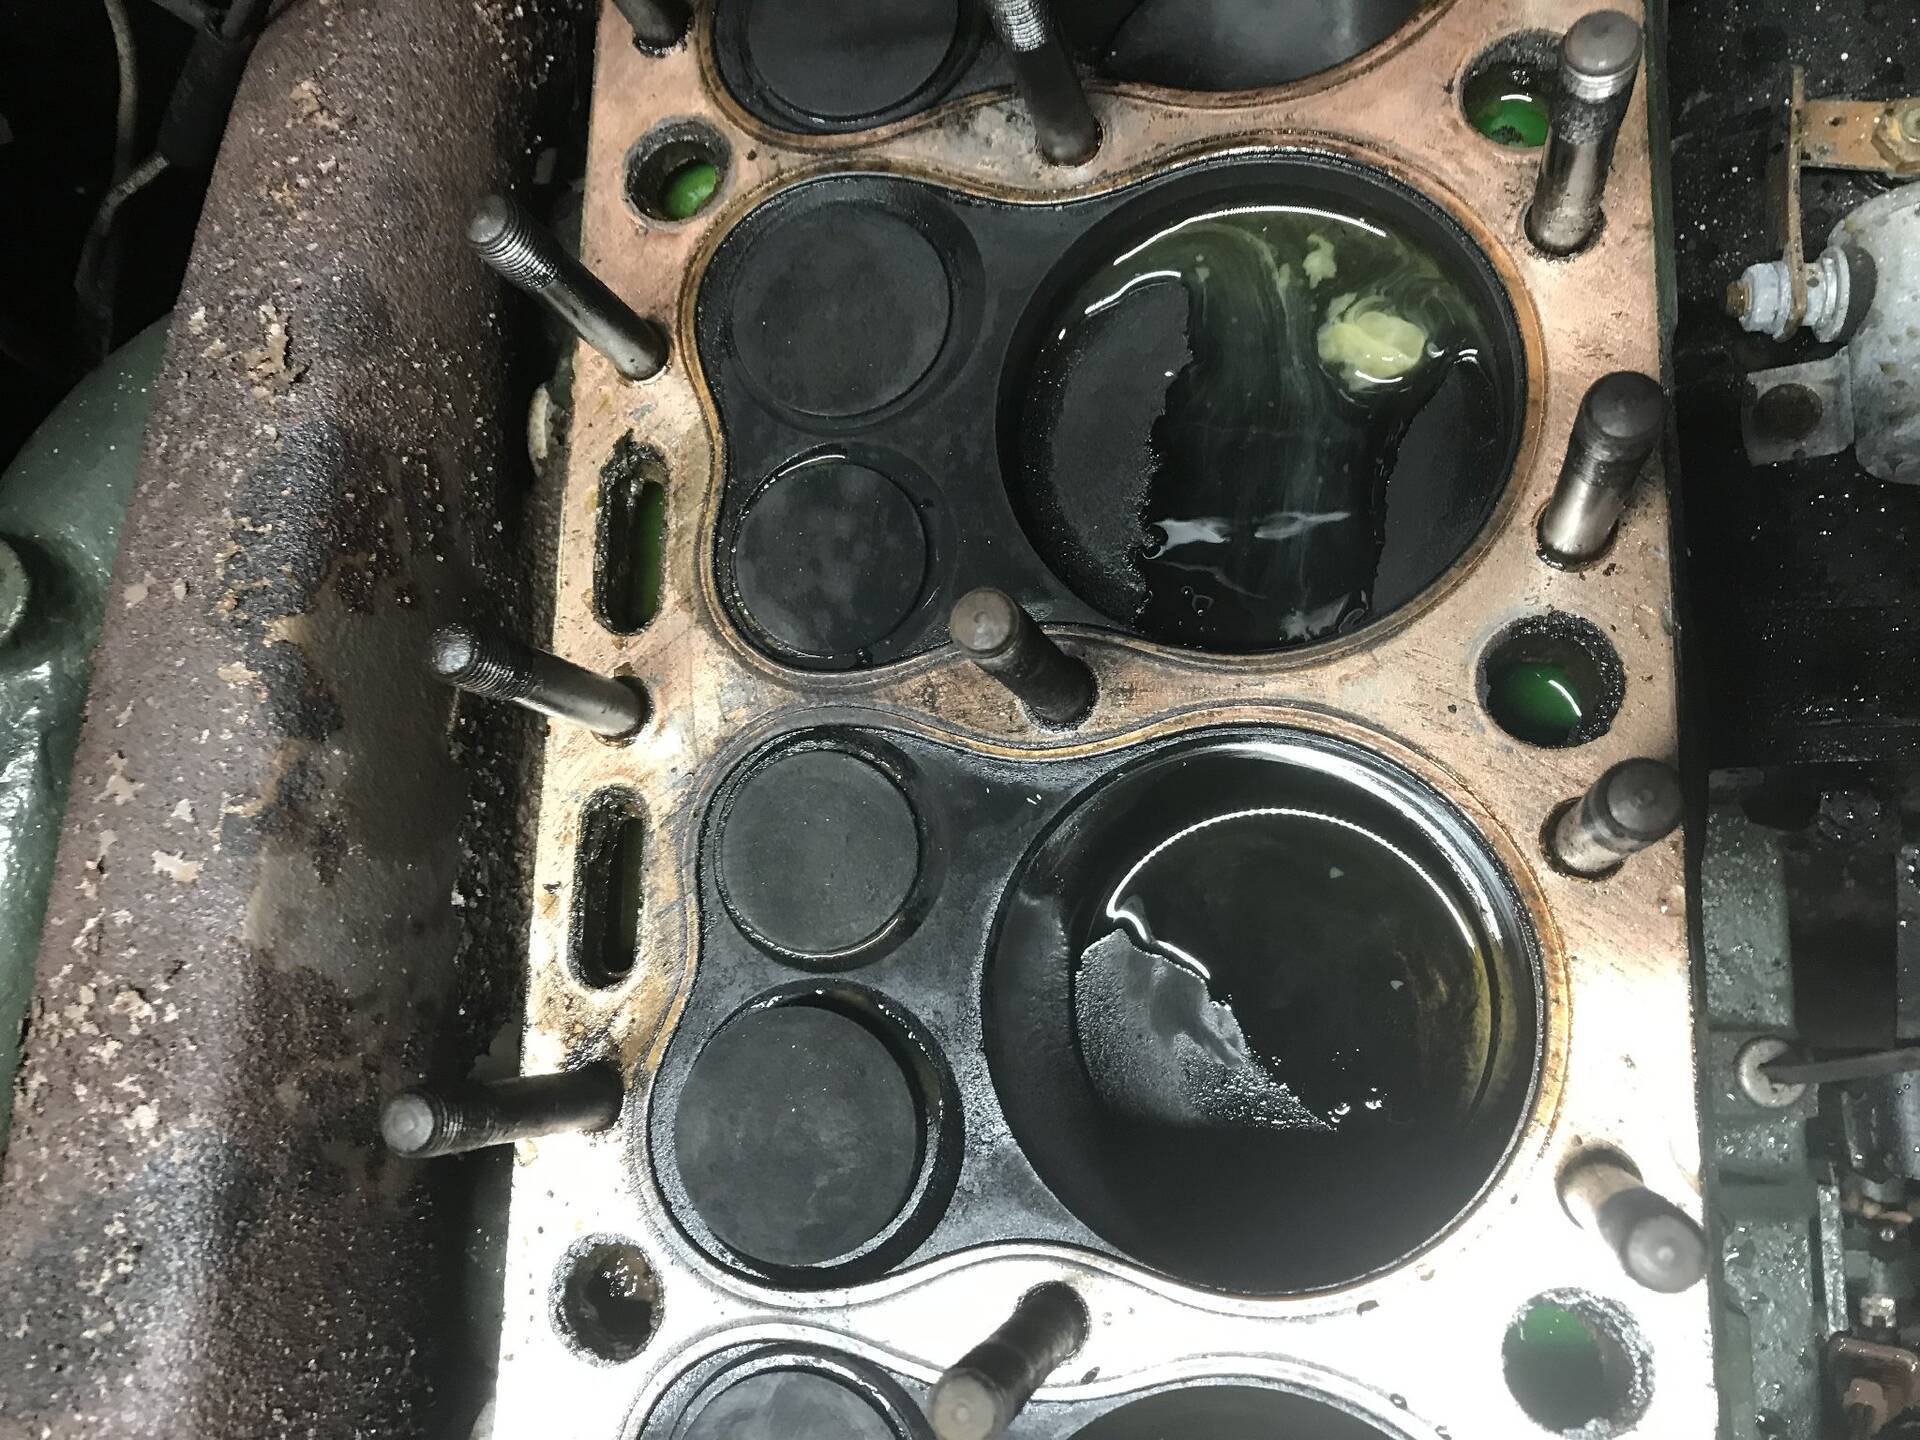
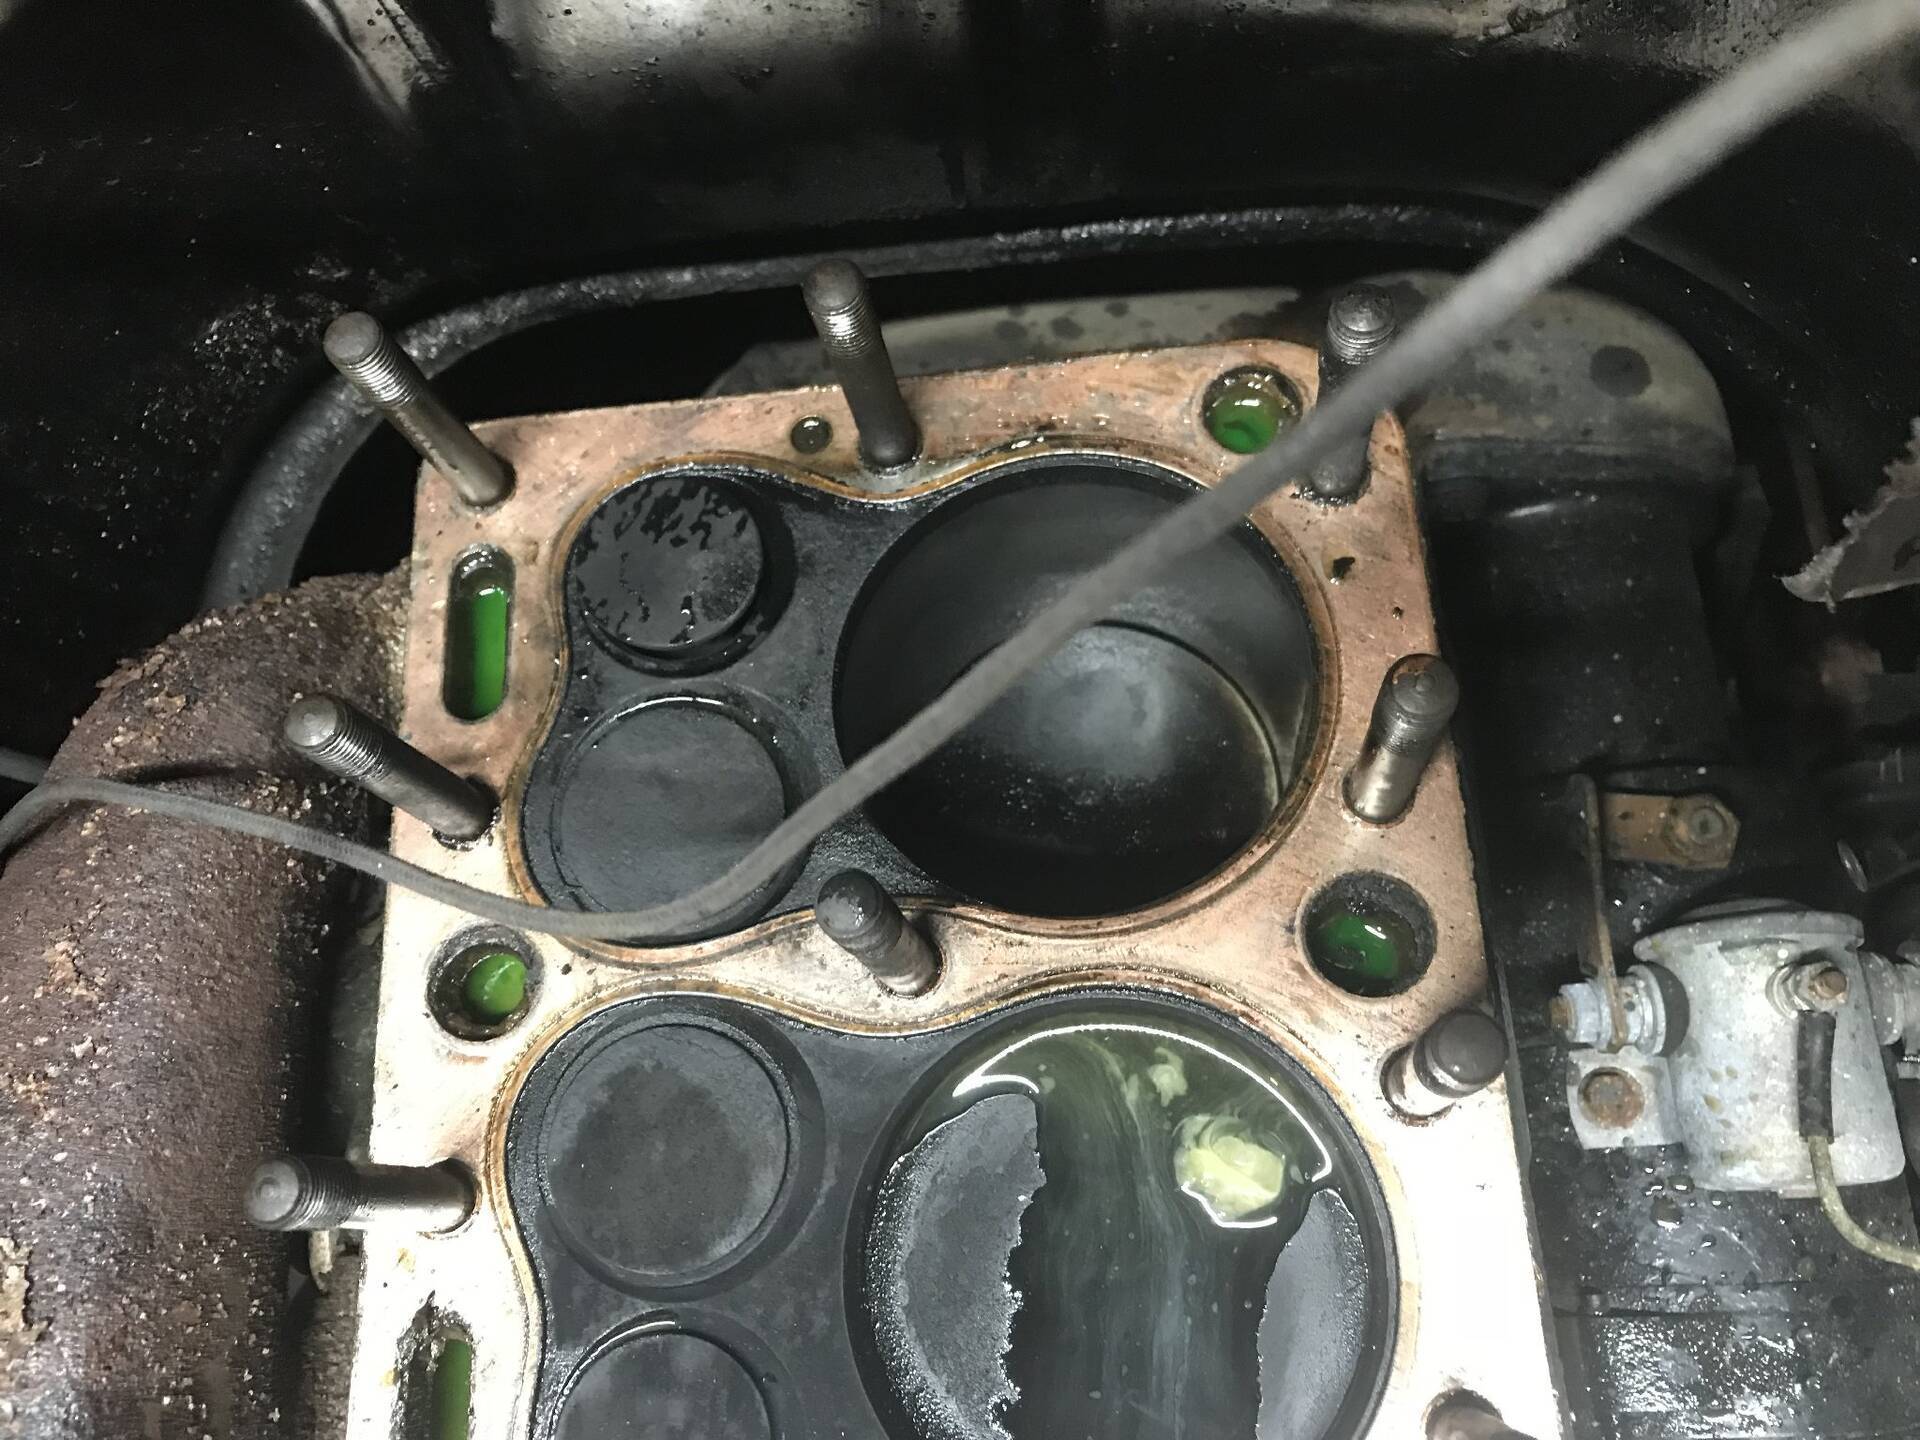
The head is decked! My engine guy had to take 20 thou off of the ends, so I'll have to do a clearance test. The "modeling clay" suggested for this is also known as play dough, by the way. When Algore takes over, I will claim carbon credits for all of the carbon I took out of the head. We also decarbonized the block, paying especial attention to the area between the valves and the cylinder. We could see no cracks, so I went over it with a magnifying glass, and still no problem. Waiting for new head nuts, washers and paint before reinstalling.
I also took the vent system out of the parts car. Every bolt in was either broken off or had to be ground off, but the system itself was not in bad shape. It turns out that my car is also missing the lower splash shields, so I pulled them out, too. the ducts collect a lot of dirt. I have one extra that is rusted, and appears to be from the inside. I used one of those odd cans of wrong color spray paint to paint the insides, and am working on the outsides. All of the rubber bulkhead seals broke into pieces, but I can recreate those. However, on the upper edge of the lower splash shield there is an L shaped piece of rubber where it mates to the upper. Does anyone make those? While the splash shields are out, I took the opportunity to change out the fuel pump. Of course, the good deal I got on one on ebay does not fit. Instead of the usual shape of the fuel pump mounting flange, this one is a parallelogram, ie, a rectangle pushed over to one side. the rest of the pump looks correct. Any idea what this thing is? I'd like to recoup my loss, or at least some of it.
Posted on: 2018/11/14 10:16
|
|||
|
||||
|
Re: Proud New Owner of a 49 Packard Club Sedan
|
||||
|---|---|---|---|---|
|
Forum Ambassador
|
Quote:
However, on the upper edge of the lower splash shield there is an L shaped piece of rubber where it mates to the upper. Does anyone make those? If the rubber pieces denoted by the red arrows around the battery opening and separating the two panel halves are what you need I believe it is the same size and configuration rubber as was used in the earlier Clippers. There is nothing exactly the same dimension available in short lengths that I could find. Everything available was either much shorter in a leg dimension or was considerably thinner or was sold by industrial places that wanted a minimum order enough to do 20 cars. For my 47 I bought a 10' length of U channel edge trim from McMaster-Carr and cut one leg of the U off. The rubber is 1/8 thick and a 10' length was enough for both sides. After cutting the leg off it left an L shaped piece that was almost perfect in all dimensions to what was on the car. The 5/8 cut off strip that remained was useful in a couple of other places. If your rubber is the same it might be an option for your car. Attach file:  (88.86 KB) (88.86 KB)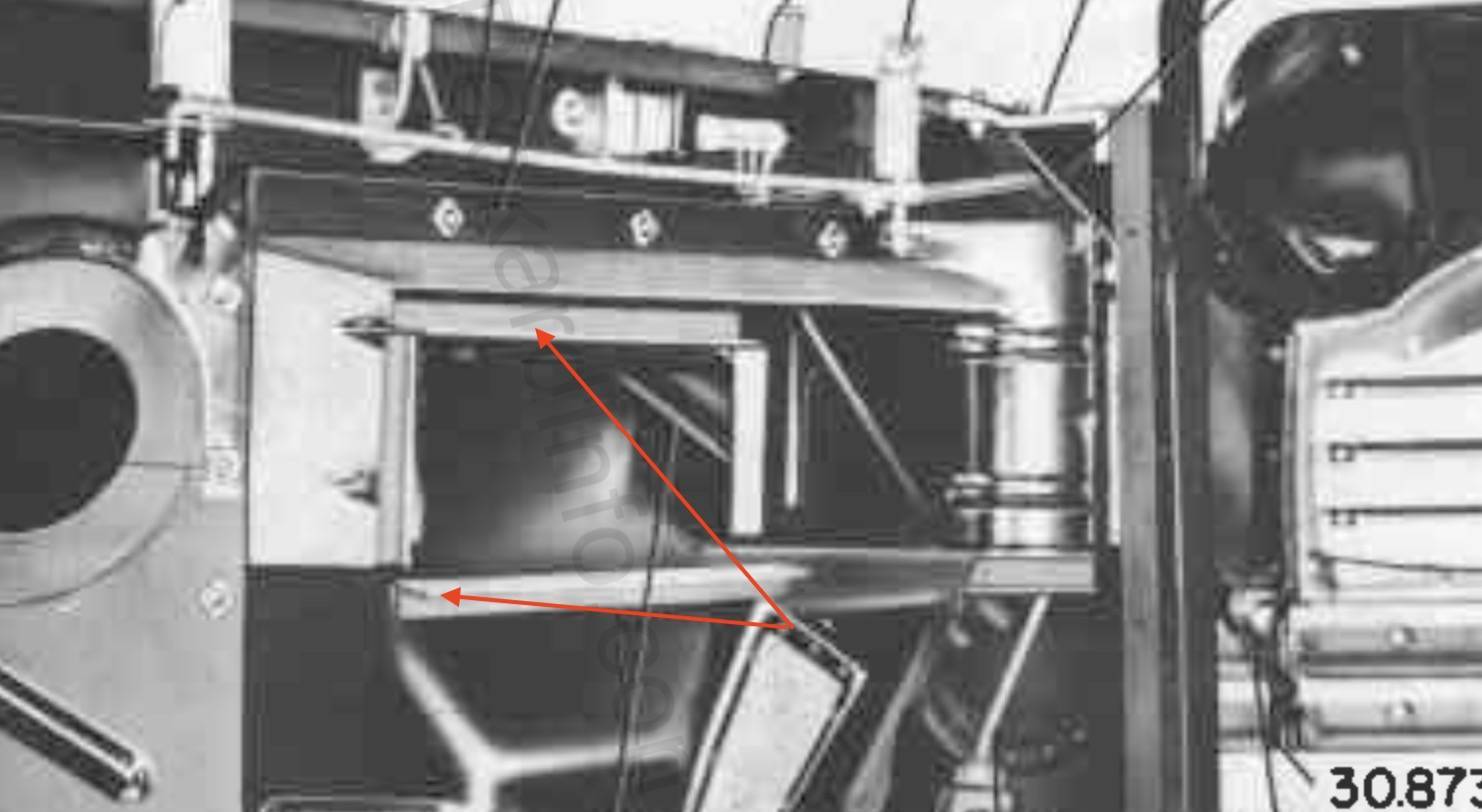 (91.43 KB) (91.43 KB)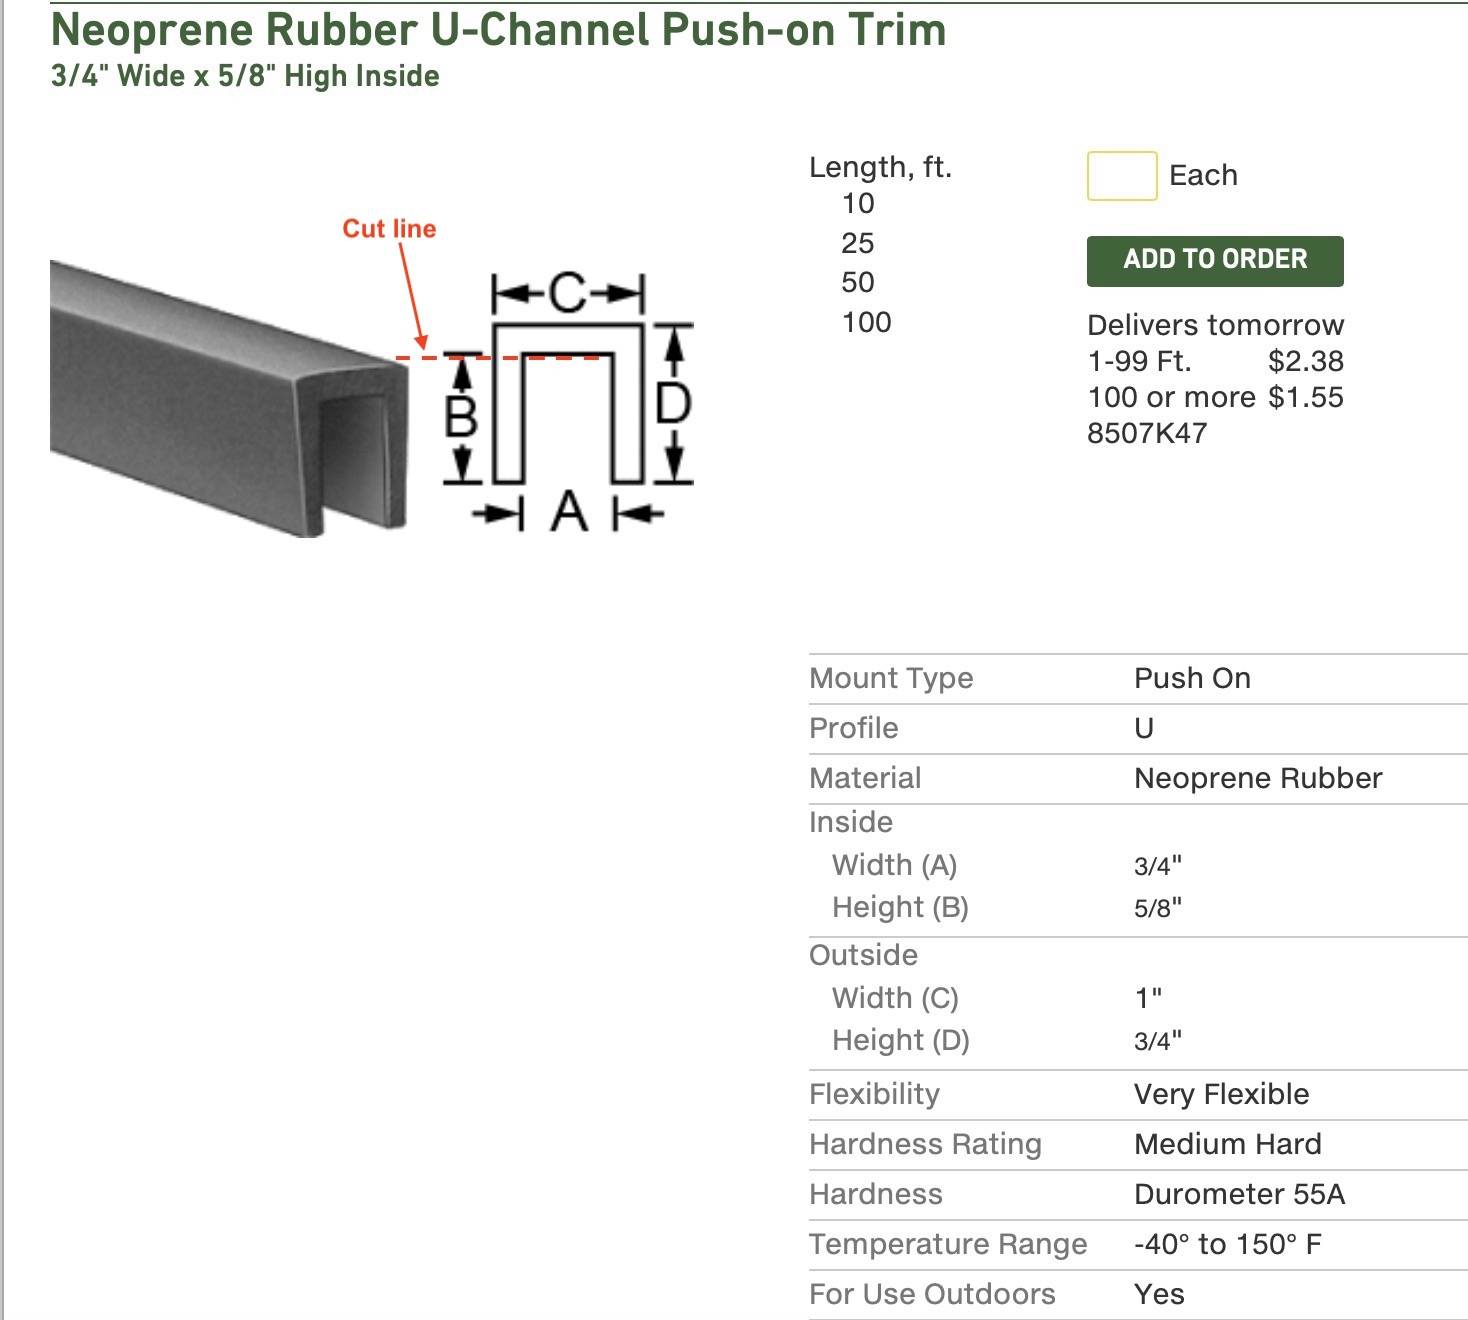
Posted on: 2018/11/14 11:00
|
|||
|
Howard
|
||||
|
||||
|
Re: Proud New Owner of a 49 Packard Club Sedan
|
||||
|---|---|---|---|---|
|
Forum Ambassador

|
AC pumps usually identified by the numbers stamped on the flange. Attachments from 1966 AC Fuel Pump catalog.
Attach file: (202.79 KB) (213.73 KB) (213.73 KB)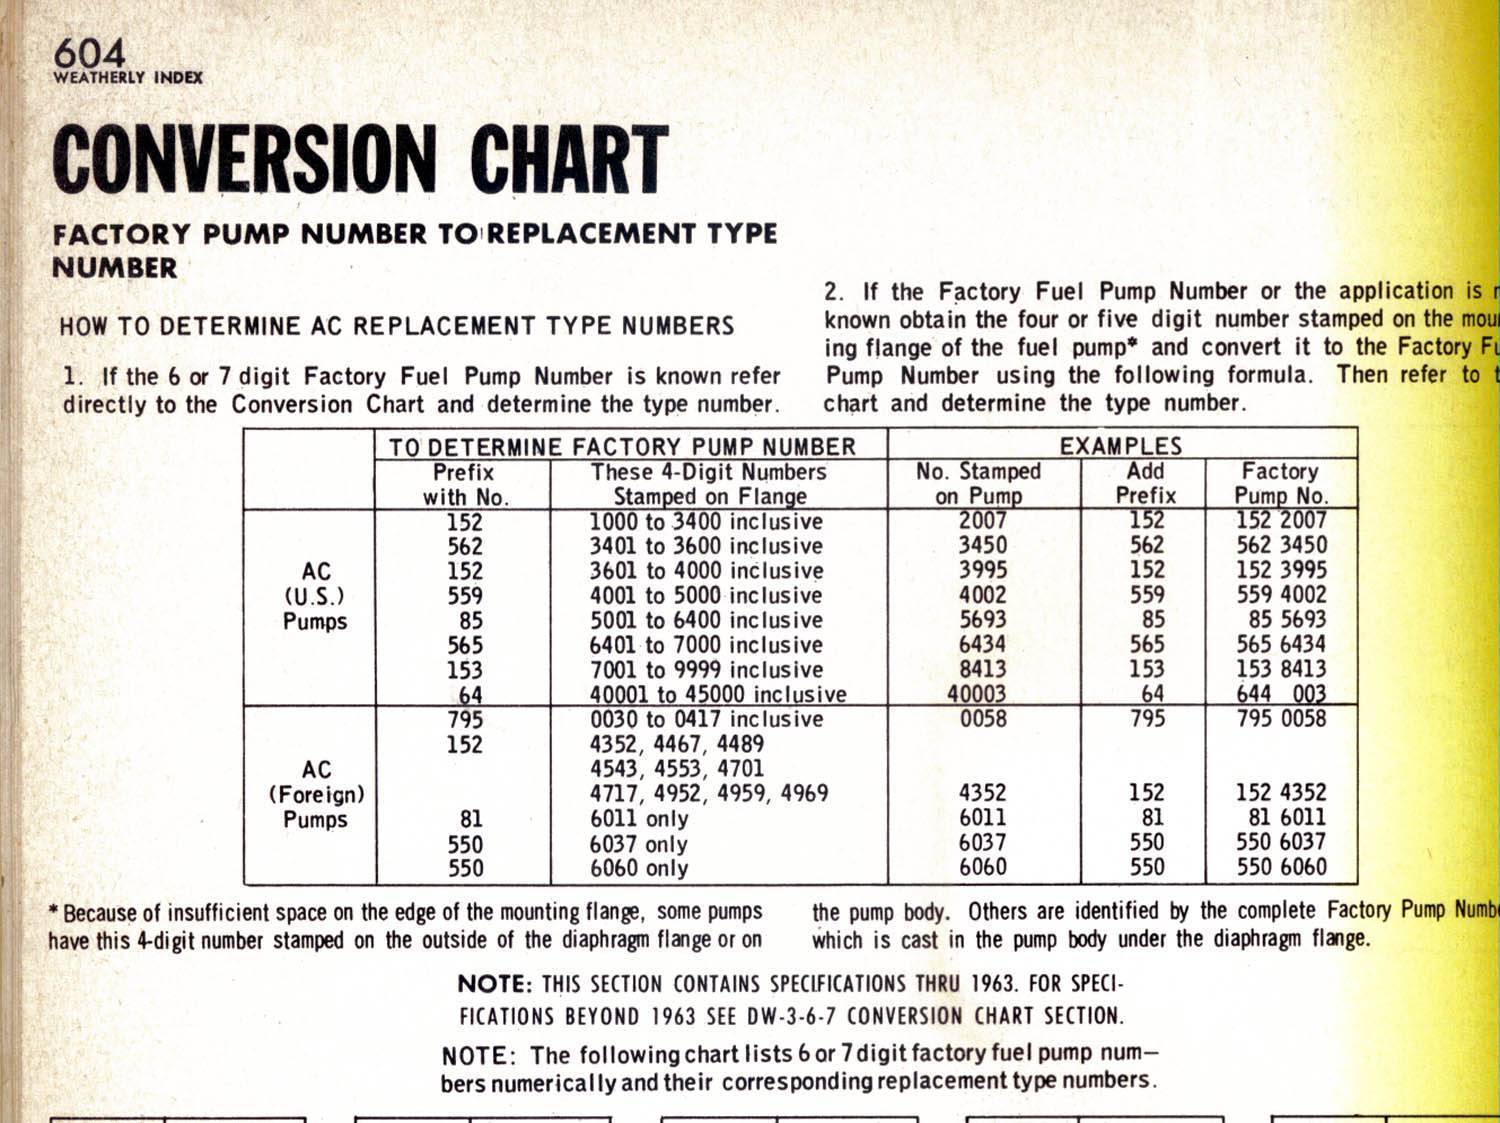
Posted on: 2018/11/14 11:18
|
|||
|
||||
|
Re: Proud New Owner of a 49 Packard Club Sedan
|
||||
|---|---|---|---|---|
|
Just can't stay away
|
Great chart, but the thing has nothing on it except made in the USA and the letter A in a circle. Pic attached.
Did a head clearance check and we are GO for reinstallation once the new head nuts and washers arrive and some painting is done. What color iare the accelerator linkage and brackets supposed to be? Engine color? As for the lower splash panel rubber, Steele has some stuff that is within a quarter inch, part No 70-1446-99. It's not expensive. I got the drivers side vent system painted, so all of that is ready to go back in once I get the inner fender painted. Attach file:  (198.03 KB) (198.03 KB)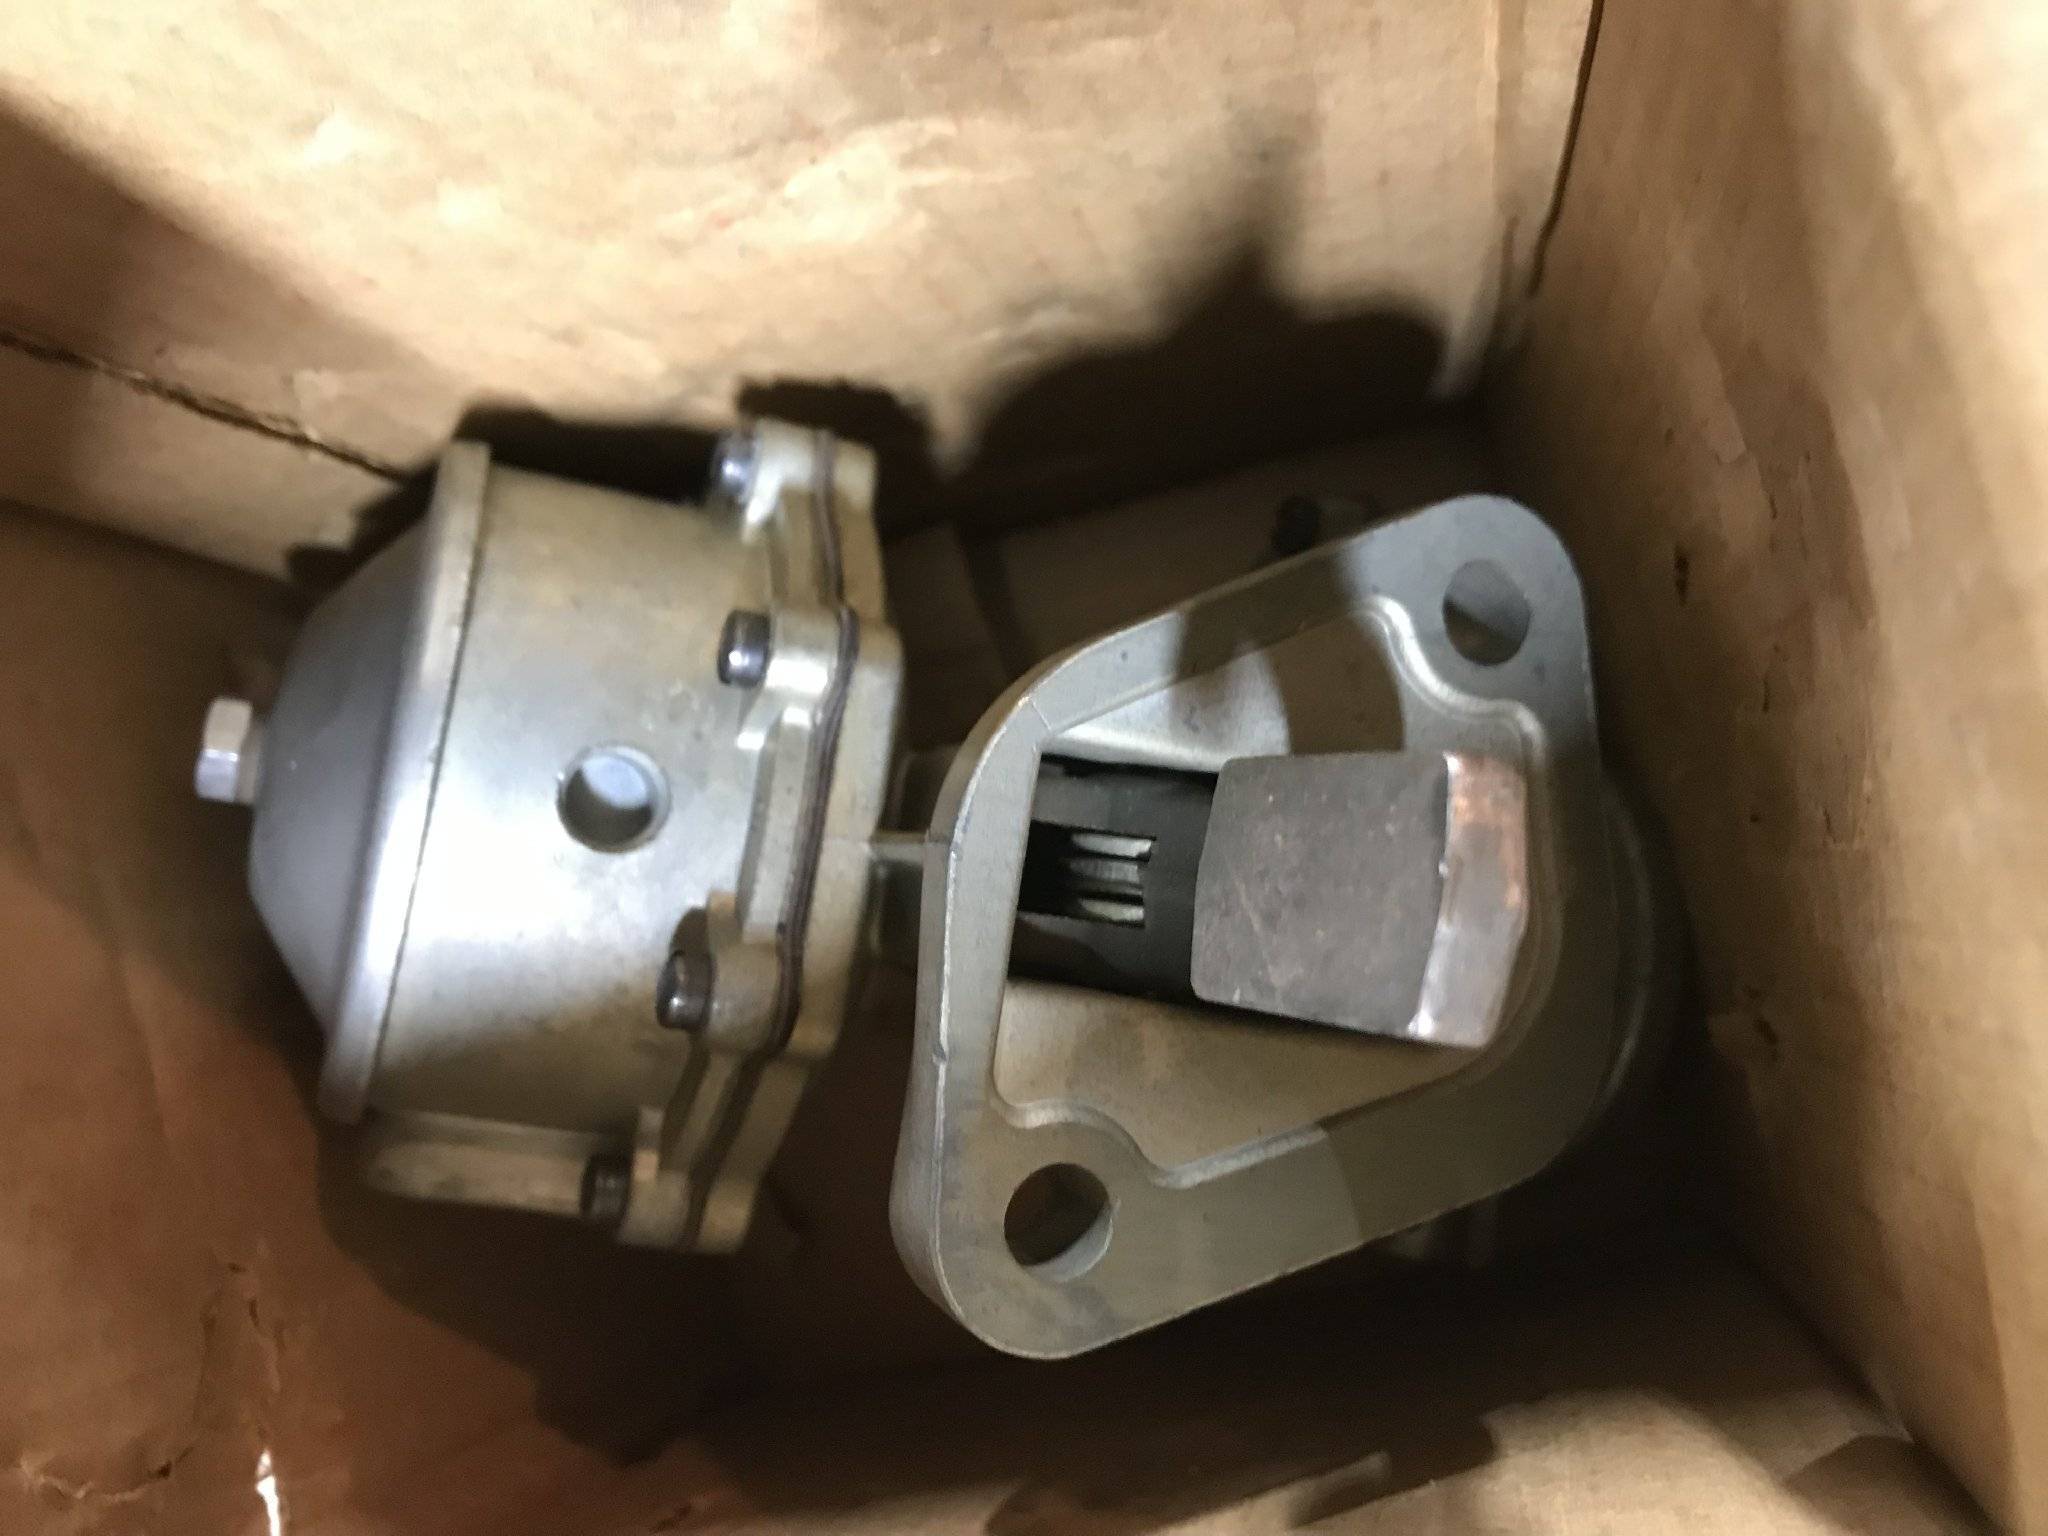
Posted on: 2018/11/14 20:08
|
|||
|
||||
|
Re: Proud New Owner of a 49 Packard Club Sedan
|
||||
|---|---|---|---|---|
|
Just can't stay away
|
After many delays, the head is decked and repainted, and the block surface has been cleaned. New head gasket, sprayed with copper coat. The head went on with few problems. Torqued it to spec in three phases, and put everything back together.
Finally fired it up today, and it ran just like it did before the head gasket replacement, and if anything it coughed out MORE white smoke than it did before. Ran it up to temperature, shut it down, and retorqued the head. Took 3-4 pulls per nut to do so. Now it won't even start. Gave up in disgust and put the charger on the battery. Is it possible the choke and idle mixture are way too rich, thus instaflooding it? Newly cleaned spark plug came out black after we shut down. It has fire, but it seems weak. Won't even hit a lick on starting fluid. Any ideas?
Posted on: 2018/12/1 17:07
|
|||
|
||||
|
Re: Proud New Owner of a 49 Packard Club Sedan
|
||||
|---|---|---|---|---|
|
Home away from home
|
Gas, compression, spark.....If you don't definitely eliminate these 3 items you will get even more discouraged. Not just getting gas, all components of the fuel system, ie, tank pick up, gas lines, fuel pump ....Valve adj, static and dynamic timing with a timing light as well as timing chain with the orientation according to the manual, firing order, all tune up parts, coil carbon tracking to one of the coil terminals, points, CONDENSER, cap (carbon tracks), advance(s) mechanical and vacuum, bad dist ground, bad dist bushings. Obviously you spent a lot of time coming to the conclusion that the head and head gasket were the culprit. PackardusOcutavus This is the point lesser old car owners will give up. My suggestion for you is to take a week off and step back..look at the car but don't touch. Spend time just letting this frustration ebb and do not stampede into this to get instant satisfaction, rather grab a pen and pad and start a check list gleaned from the Packard manuals on this site and choose one system to completely and thoroughly check. If I were you I would start with the electrical/ignition system. If that isn't right nothing will work as it should. Old car owners need to rise to the challenge using fundamental diagnostic practices, just like in medicine, there needs to be an indication to do something. Take a breather we'll still be here. My best,
Steve
Posted on: 2018/12/1 19:00
|
|||
|
Steve
Old cars are my passion  1951 Packard 200 1953 Packard Clipper Custom Touring Sedan 1955 Dodge Custom Royal Lancer Tri-tone 1966 Rambler Classic 770 Convertible |
||||
|
||||
|
Re: Proud New Owner of a 49 Packard Club Sedan
|
||||
|---|---|---|---|---|
|
Forum Ambassador
|
Completely agree with Steve, great advice.
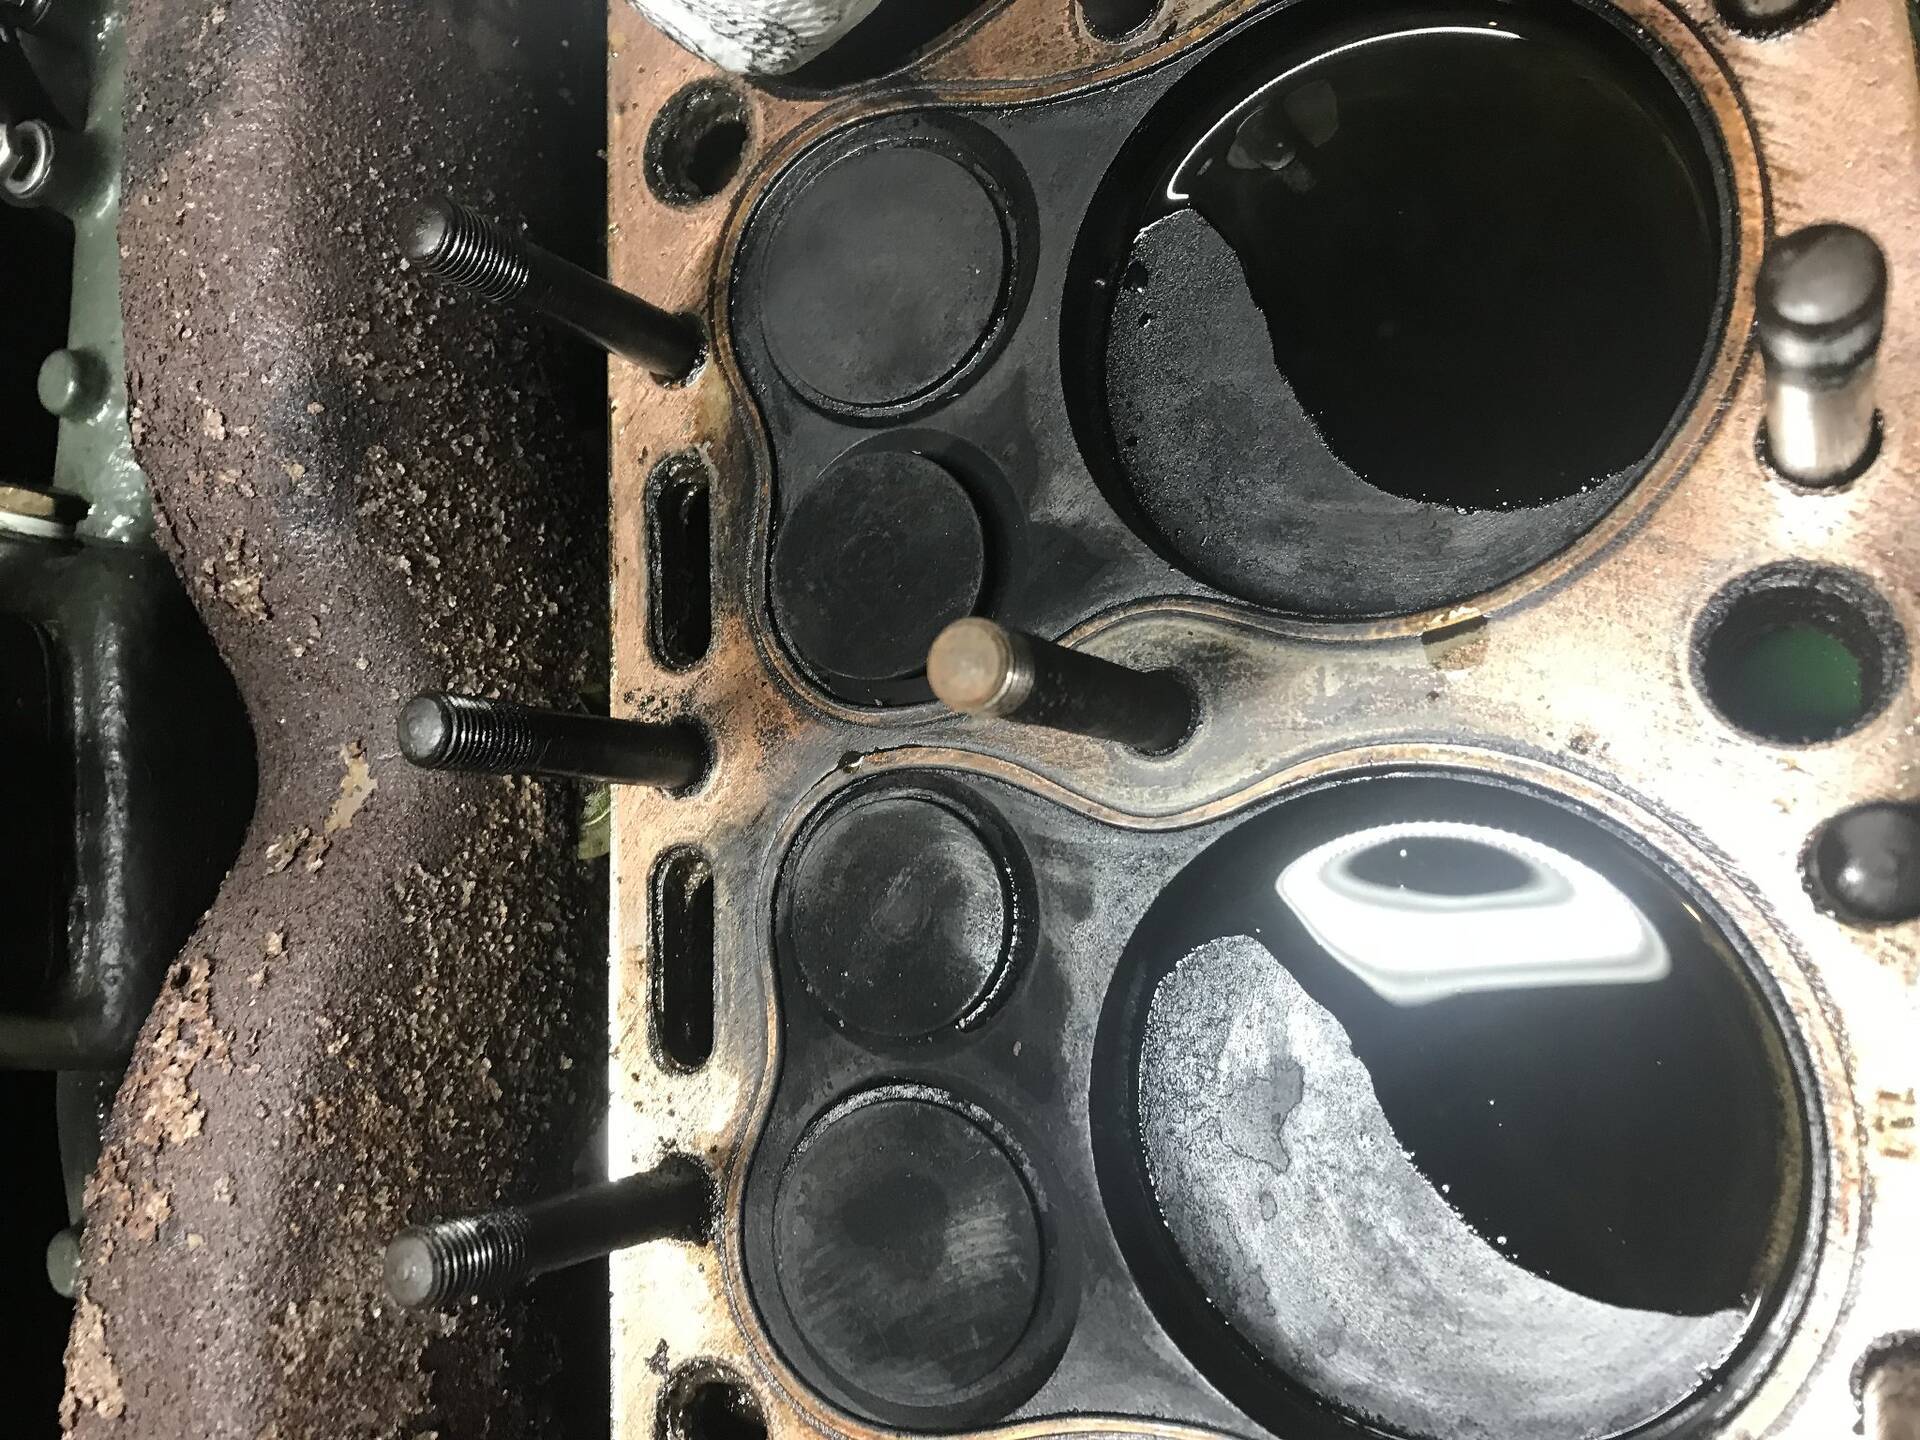
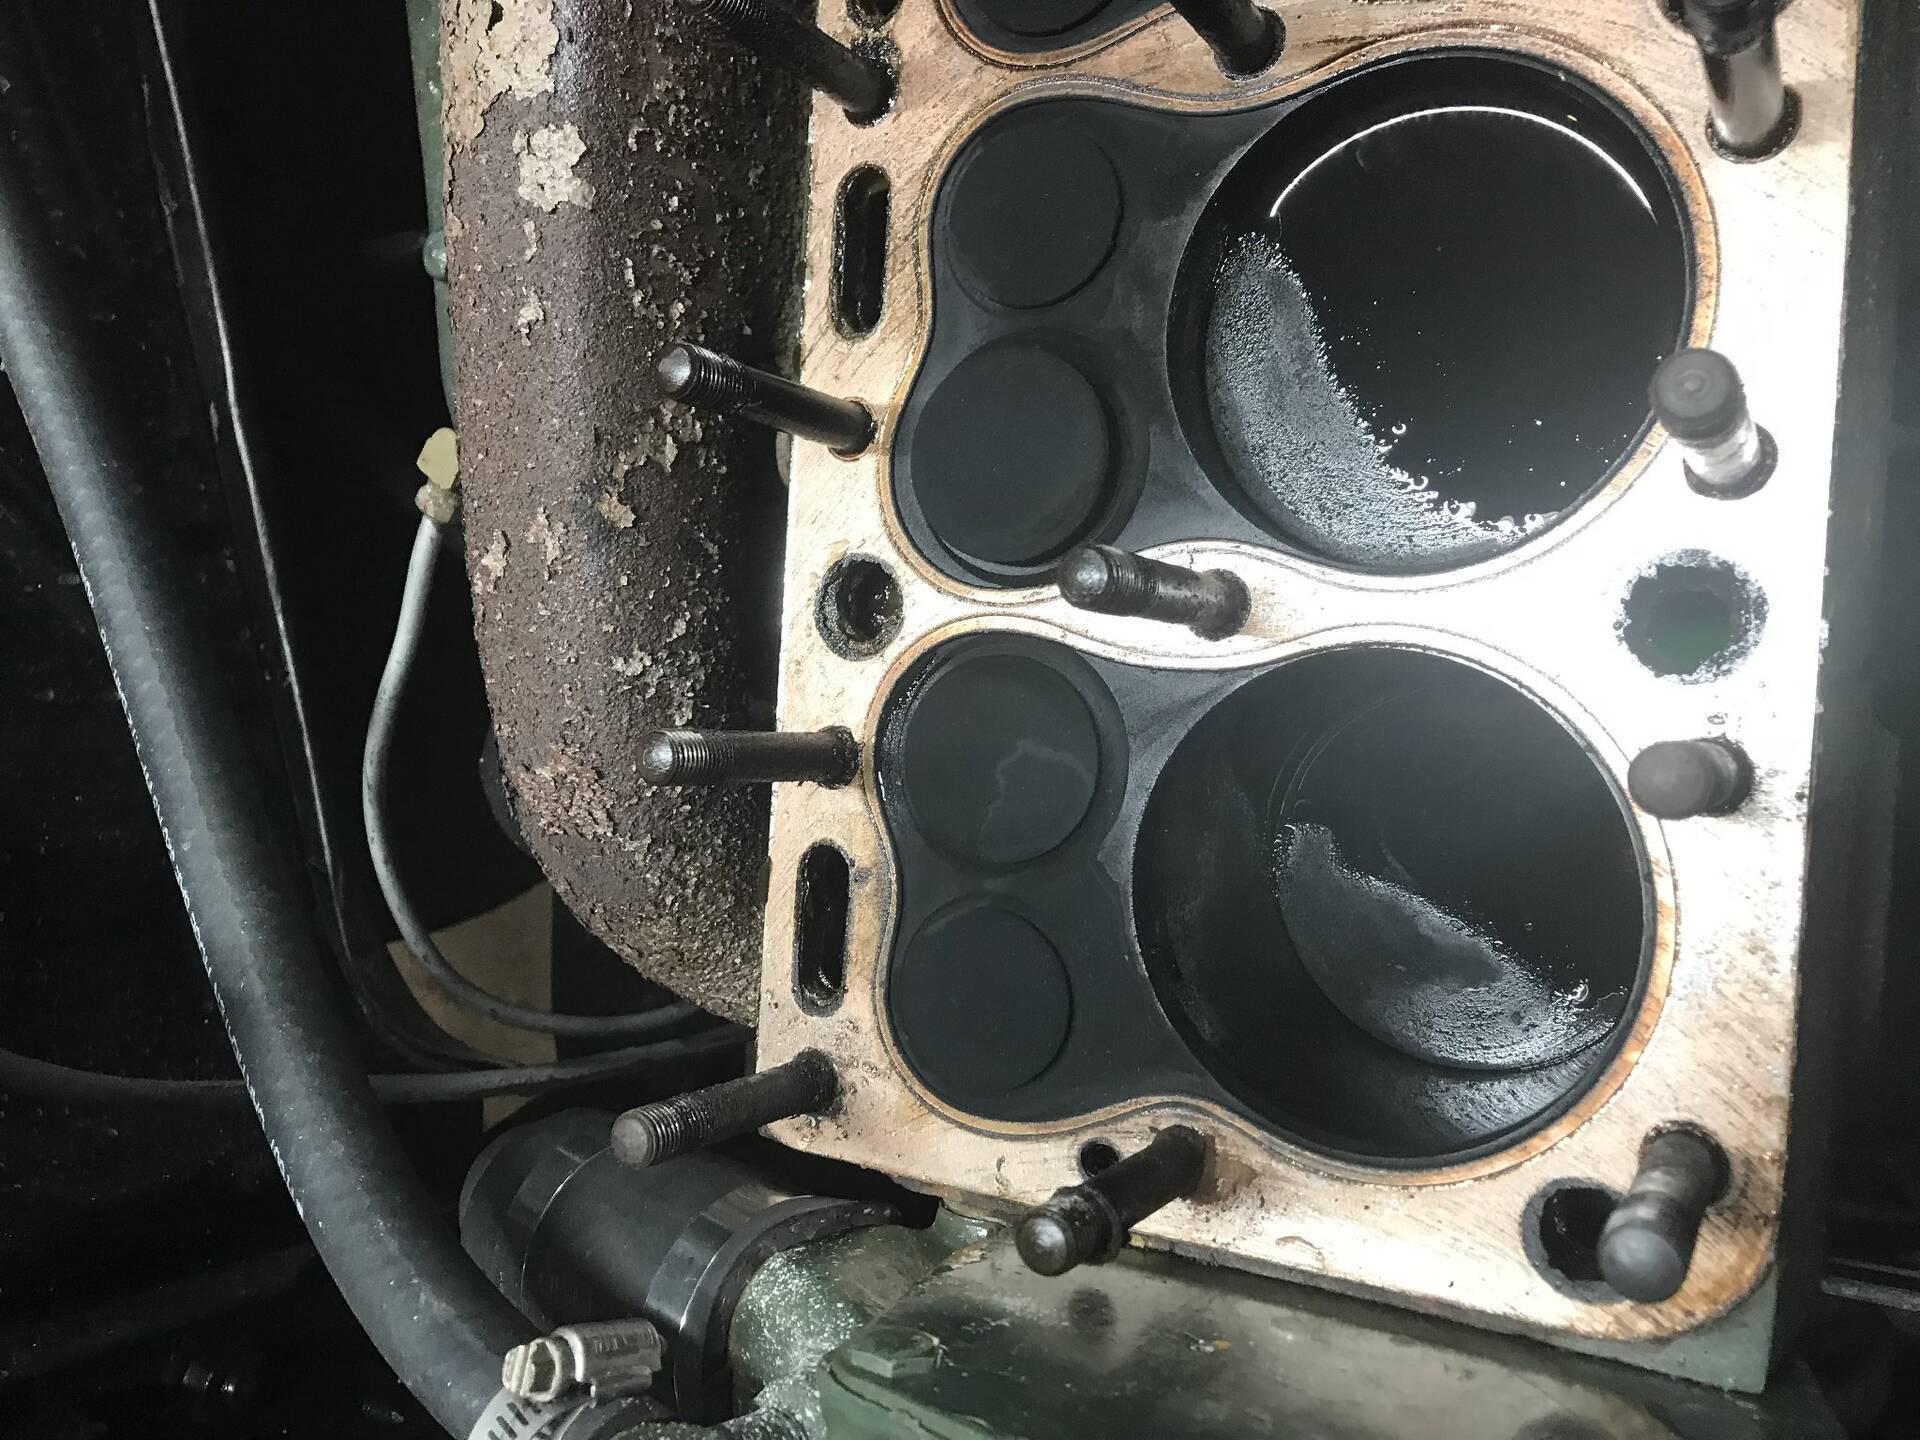
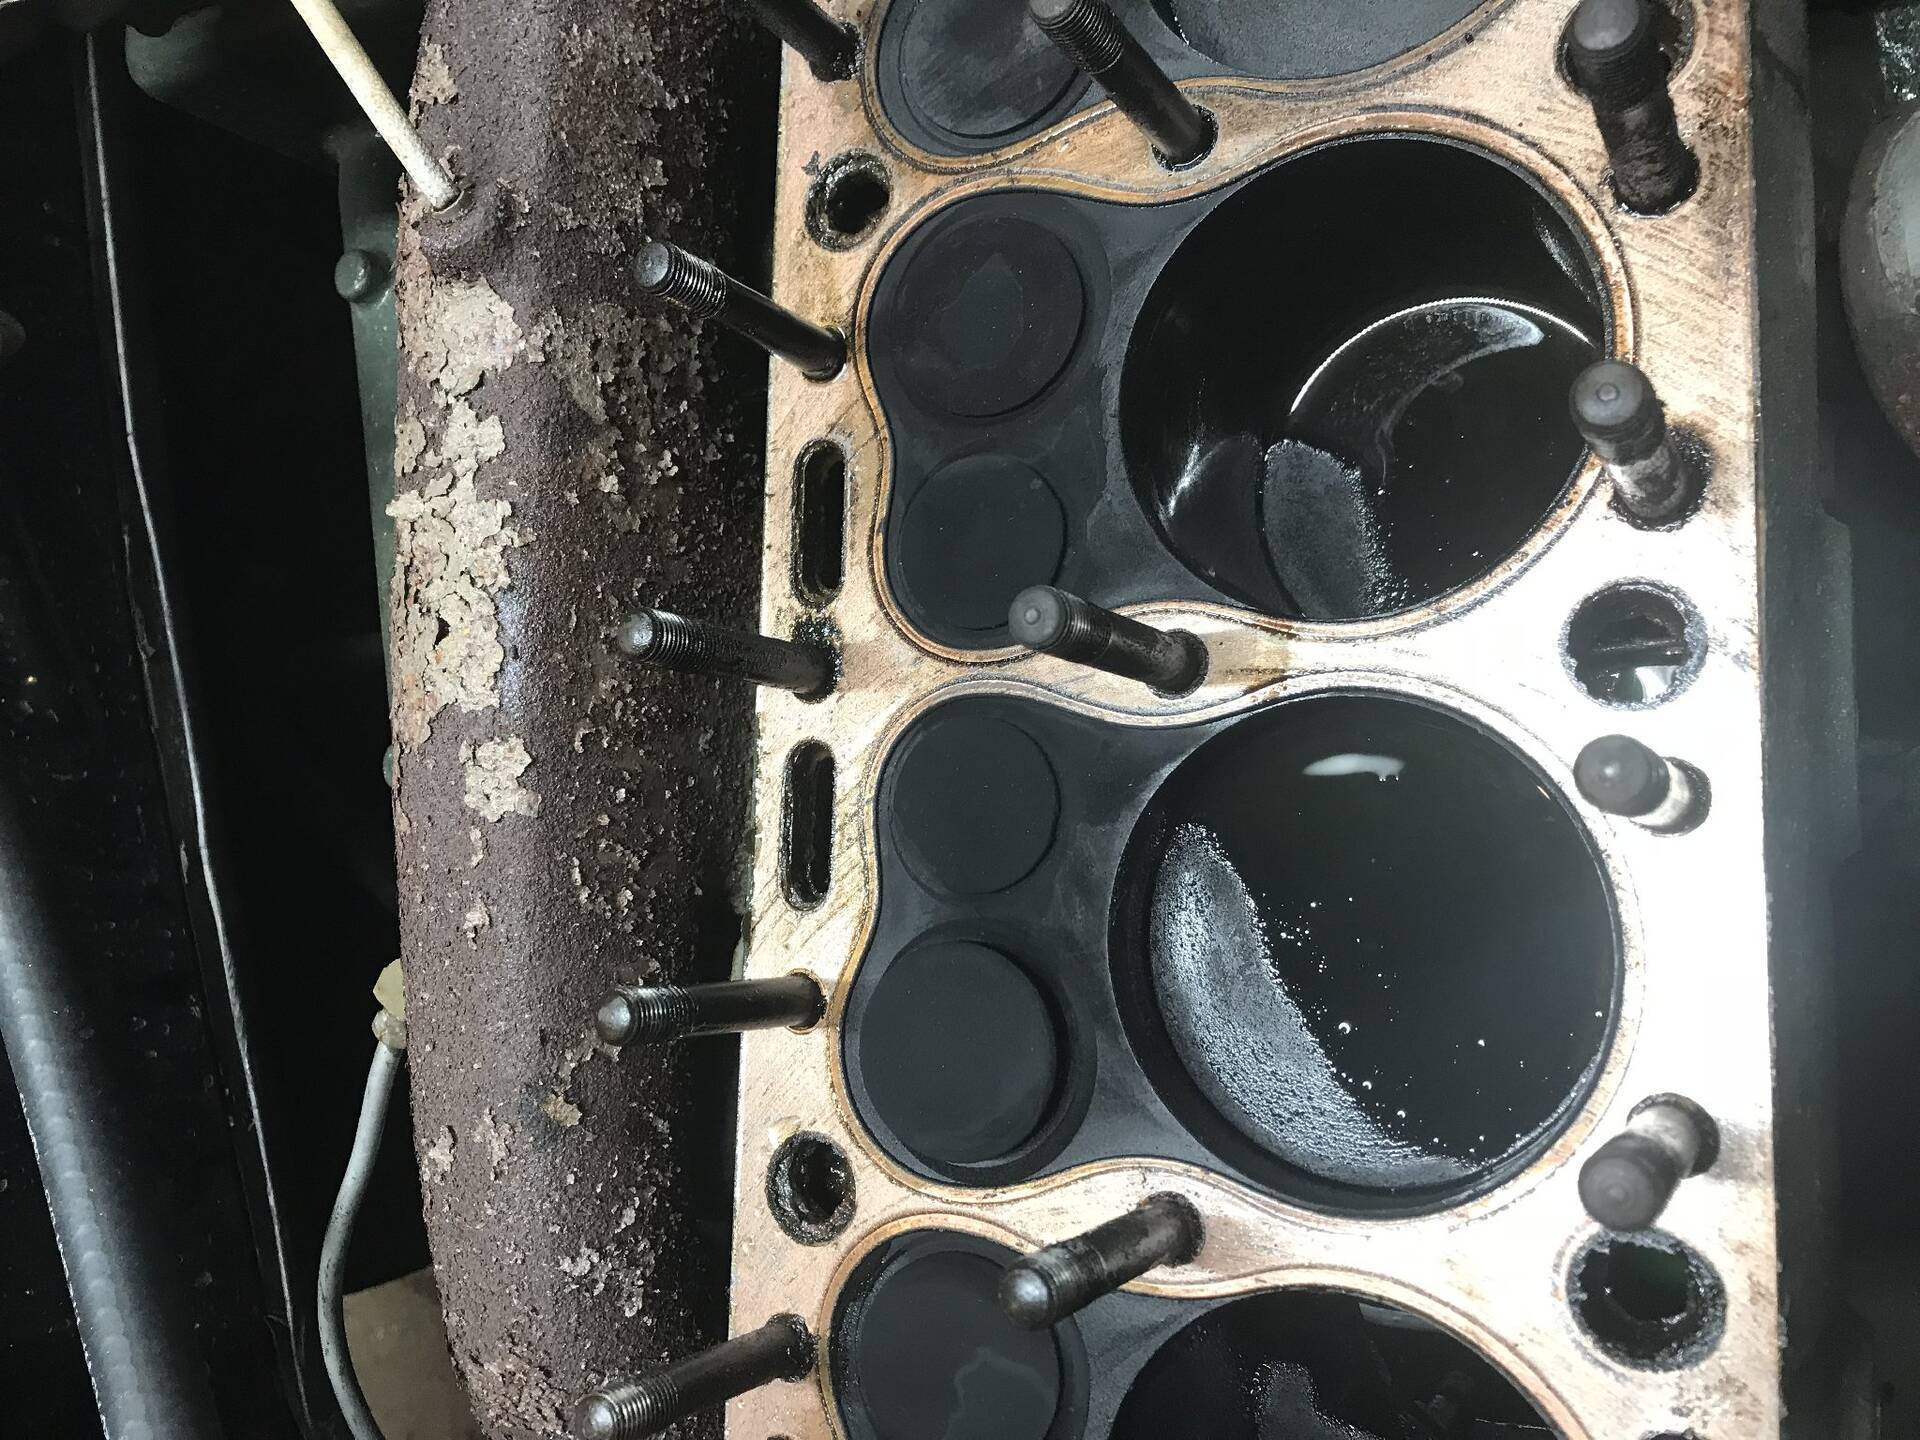
Your photo above when you removed the head shows an engine running extremely rich. Between then and now what if anything did you do to address that situation?
Posted on: 2018/12/1 19:11
|
|||
|
||||
|
Re: Proud New Owner of a 49 Packard Club Sedan
|
||||
|---|---|---|---|---|
|
Just can't stay away
|
I seen you had a Rambler. I had a 64 that I put a new Iron Maiden in alone and spent an hour trying to get in 1 tranny crossmember bolt. I tried everything, gave up in disgust and vowed it was going to the crusher the next morning. The next morning I tried one last time... and it went in immediately! Drove that car for years. It got 29 mpg. The point is that giving up in disgust is a one day thing.
What puzzles me is that it was running, we shut it down to retorque the head, and then it would not start. It took about 5 minutes to retorque the head. I've never had a car not start after just retorquing the head. I've had several amc 1@6 ohvs, so I've retorqued some heads! Please also see next reply.
Posted on: 2018/12/1 21:07
|
|||
|
||||


