|
Re: Keegan's 55 Clipper Deluxe
|
||||
|---|---|---|---|---|
|
Webmaster

|
Looking good! I will take a full set of Keegan Brand Patch Panels!
 How are your doglegs? Both of mine are rotten. What gauge of metal are you using?
Posted on: 2011/1/21 1:16
|
|||
|
-BigKev
1954 Packard Clipper Deluxe Touring Sedan -> Registry | Project Blog 1937 Packard 115-C Convertible Coupe -> Registry | Project Blog |
||||
|
||||

|
Re: Keegan's 55 Clipper Deluxe
|
||||
|---|---|---|---|---|
|
Home away from home

|
Thanks for the kind words! I'm pretty much making this up as I go along. I would really like to take some classes as BigKev has done, but time hasn't permitted me to do so.
Quote: Looking good! I will take a full set of Keegan Brand Patch Panels! How are your doglegs? Both of mine are rotten. What gauge of metal are you using? One dogleg is good and the other is bad. Should be interesting to recreate. I'm using 20ga on the rear in this repair. Much easier to manipulate and shape by hand. I used all 18ga in the floors and braces that I've already repaired.
Posted on: 2011/1/21 18:09
|
|||
|
||||
|
Re: Keegan's 55 Clipper Deluxe
|
||||
|---|---|---|---|---|
|
Quite a regular

|
I know you have your hands full with all this sheet-metal work but don't forget to replace your brake lines while you have good access to the chassis.
Posted on: 2011/1/23 2:18
|
|||
|
39_120_Jr8_4dr
|
||||
|
||||
|
Re: Keegan's 55 Clipper Deluxe
|
||||
|---|---|---|---|---|
|
Home away from home
|
Just a little more today.
Attach file:  (130.40 KB) (130.40 KB)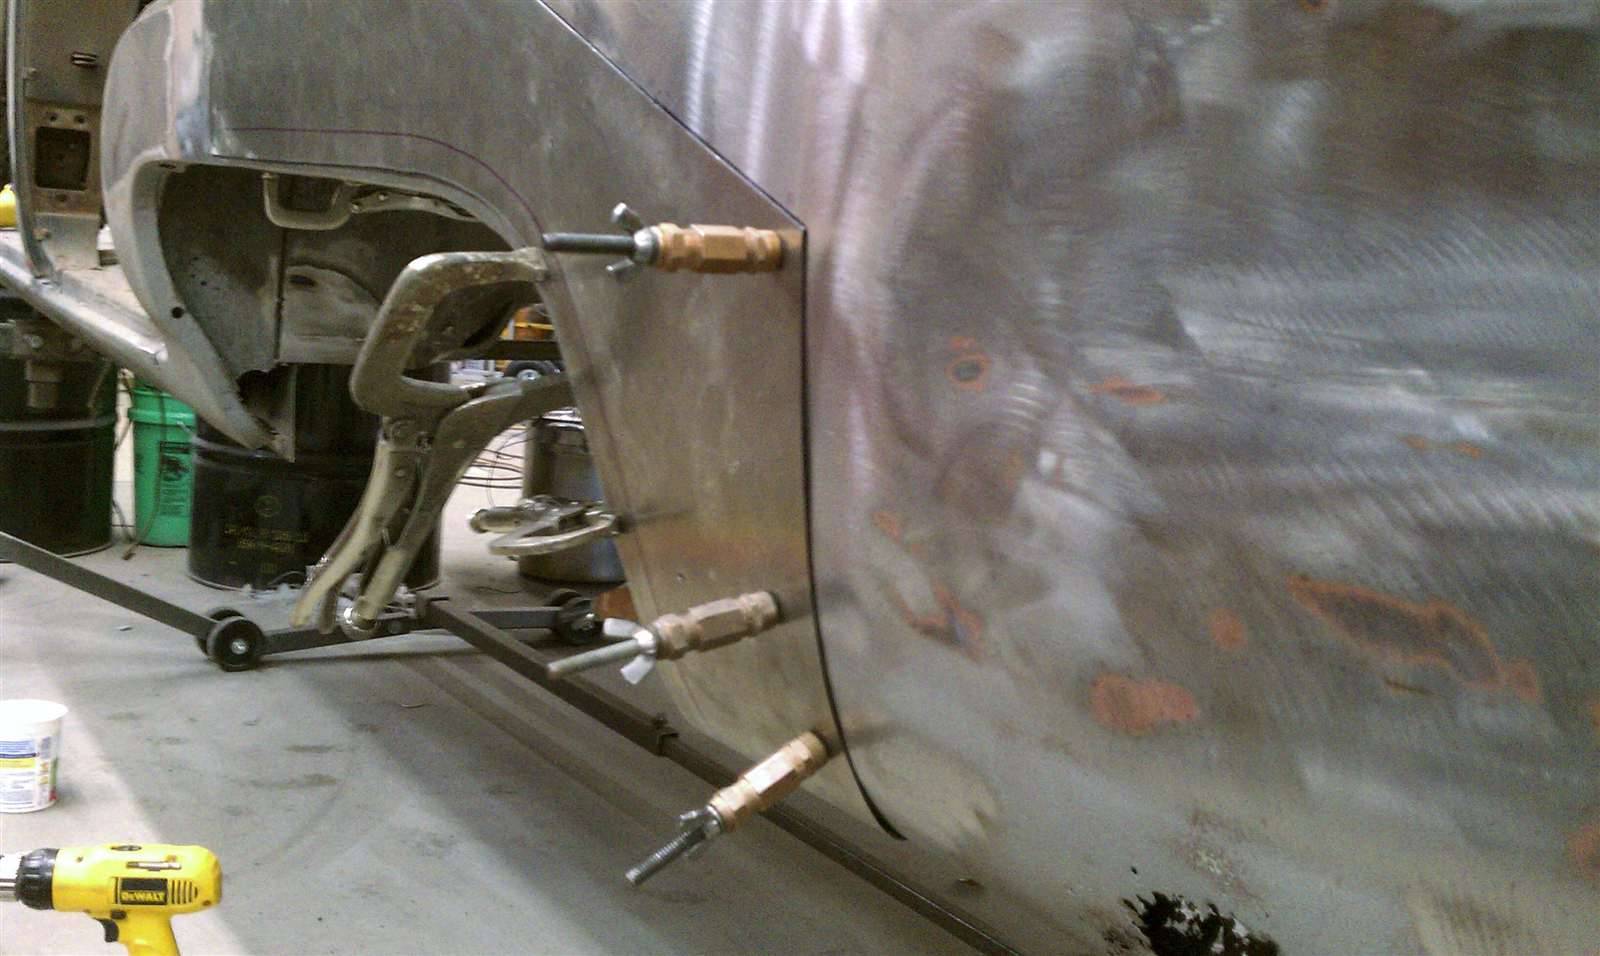 (114.34 KB) (114.34 KB) (131.53 KB) (131.53 KB)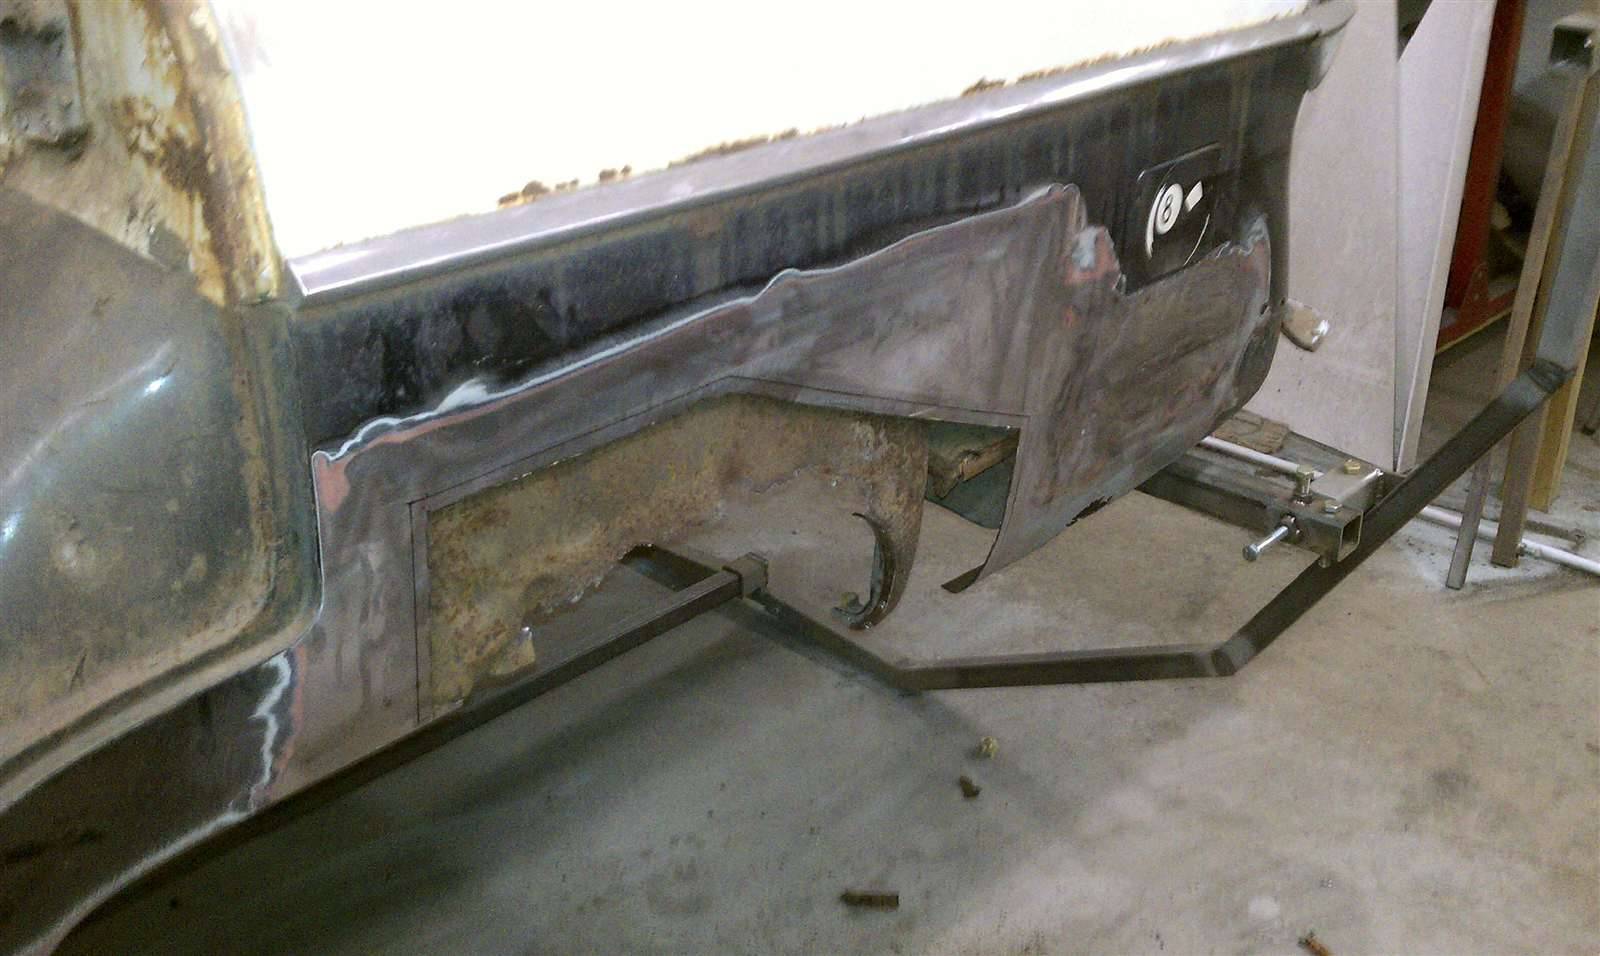
Posted on: 2011/1/26 23:57
|
|||
|
||||
|
Re: Keegan's 55 Clipper Deluxe
|
||||
|---|---|---|---|---|
|
Quite a regular
|
Would you explain how those copper colored clamps work when welding? Good pictures but I may have missed it.
Thanks Lowell
Posted on: 2011/1/27 0:58
|
|||
|
39_120_Jr8_4dr
|
||||
|
||||
|
Re: Keegan's 55 Clipper Deluxe
|
||||
|---|---|---|---|---|
|
Home away from home
|
Quote:
Those are panel clamps. Used originally in aviation I believe. In the car world they're called cleco clamps. They hold two pieces of sheet metal together for fitting and welding. The spring loaded kind have about 50lbs of holding force, but the old school ones I've got can hold up to 300lbs. I picked up a bunch of these on Craigslist a while back. Here's the post I made about it. Craigslist Cleco Find
Posted on: 2011/1/27 10:11
|
|||
|
||||
|
Re: Keegan's 55 Clipper Deluxe
|
||||
|---|---|---|---|---|
|
Home away from home
|
Making sparks finally.
Welding Tip: (I stole this good idea from someone else) When mig welding, especially when tack welding, getting a good, hot arc immediately is essential. So your ground had better be perfect. You'll notice my ground helper is a braided copper wire I've wound around itself and clamped right to the car. This gives at least a dozen good contact points for dependable arc starts every time. No more cold starts or stubbing the electrode into the metal. Attach file: (118.78 KB) (114.57 KB) (114.57 KB)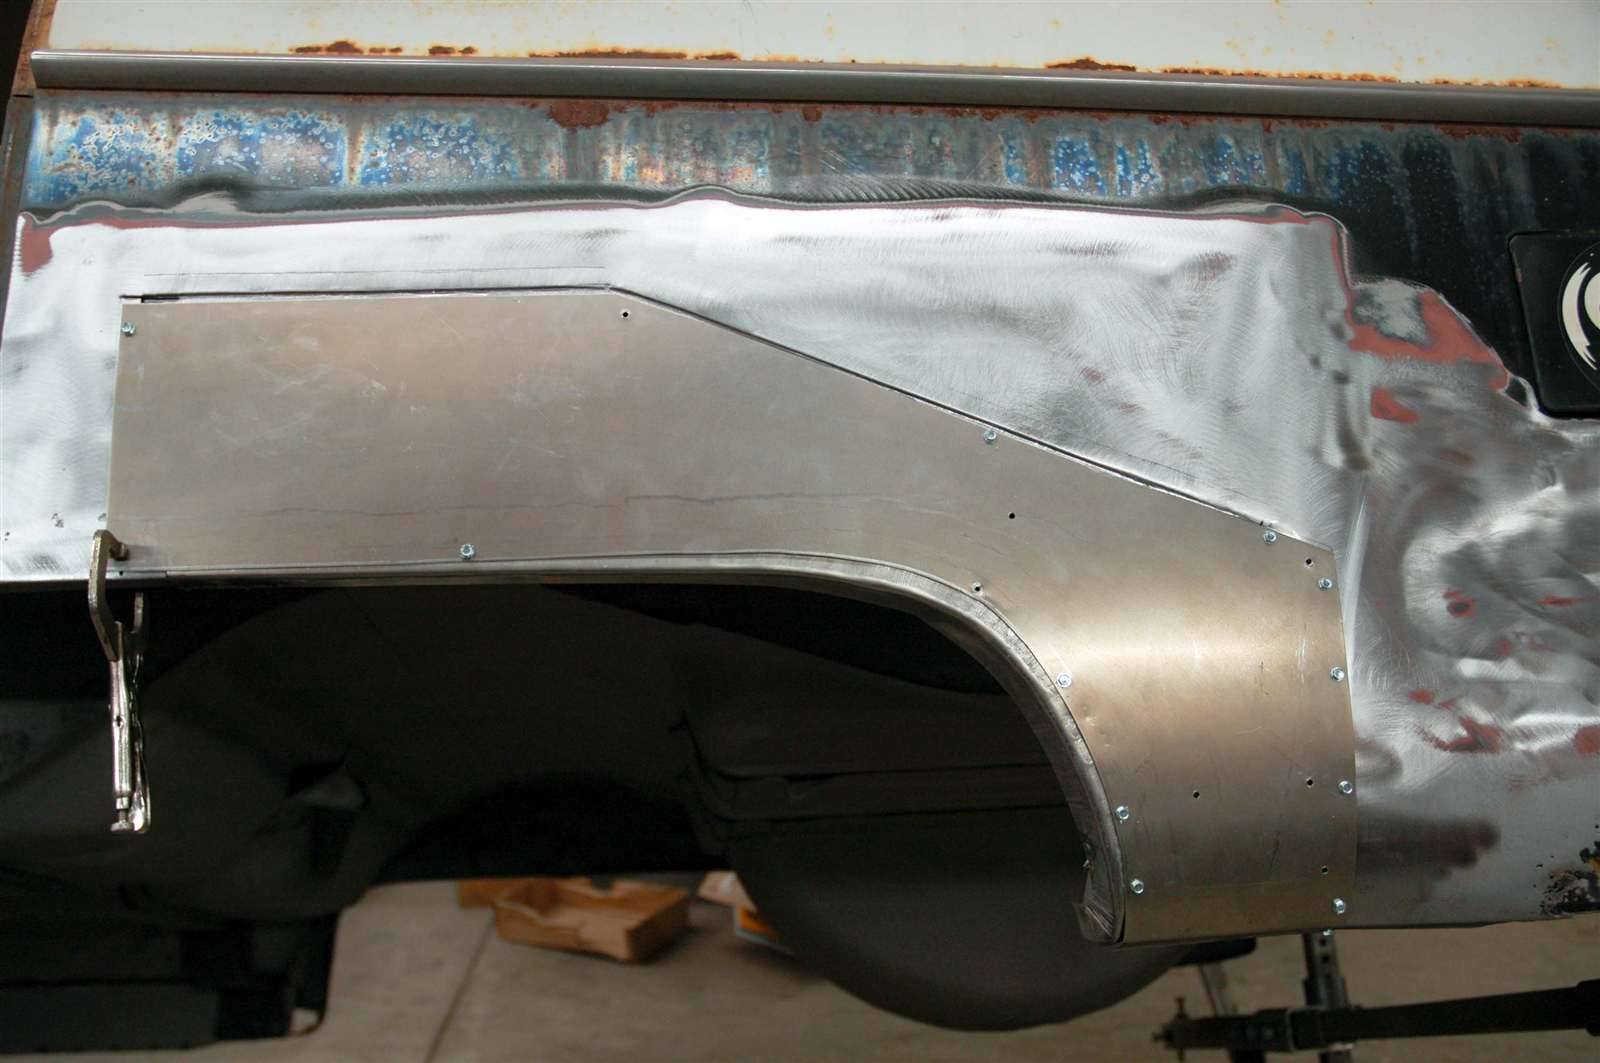 (104.98 KB) (104.98 KB) (60.42 KB) (60.42 KB)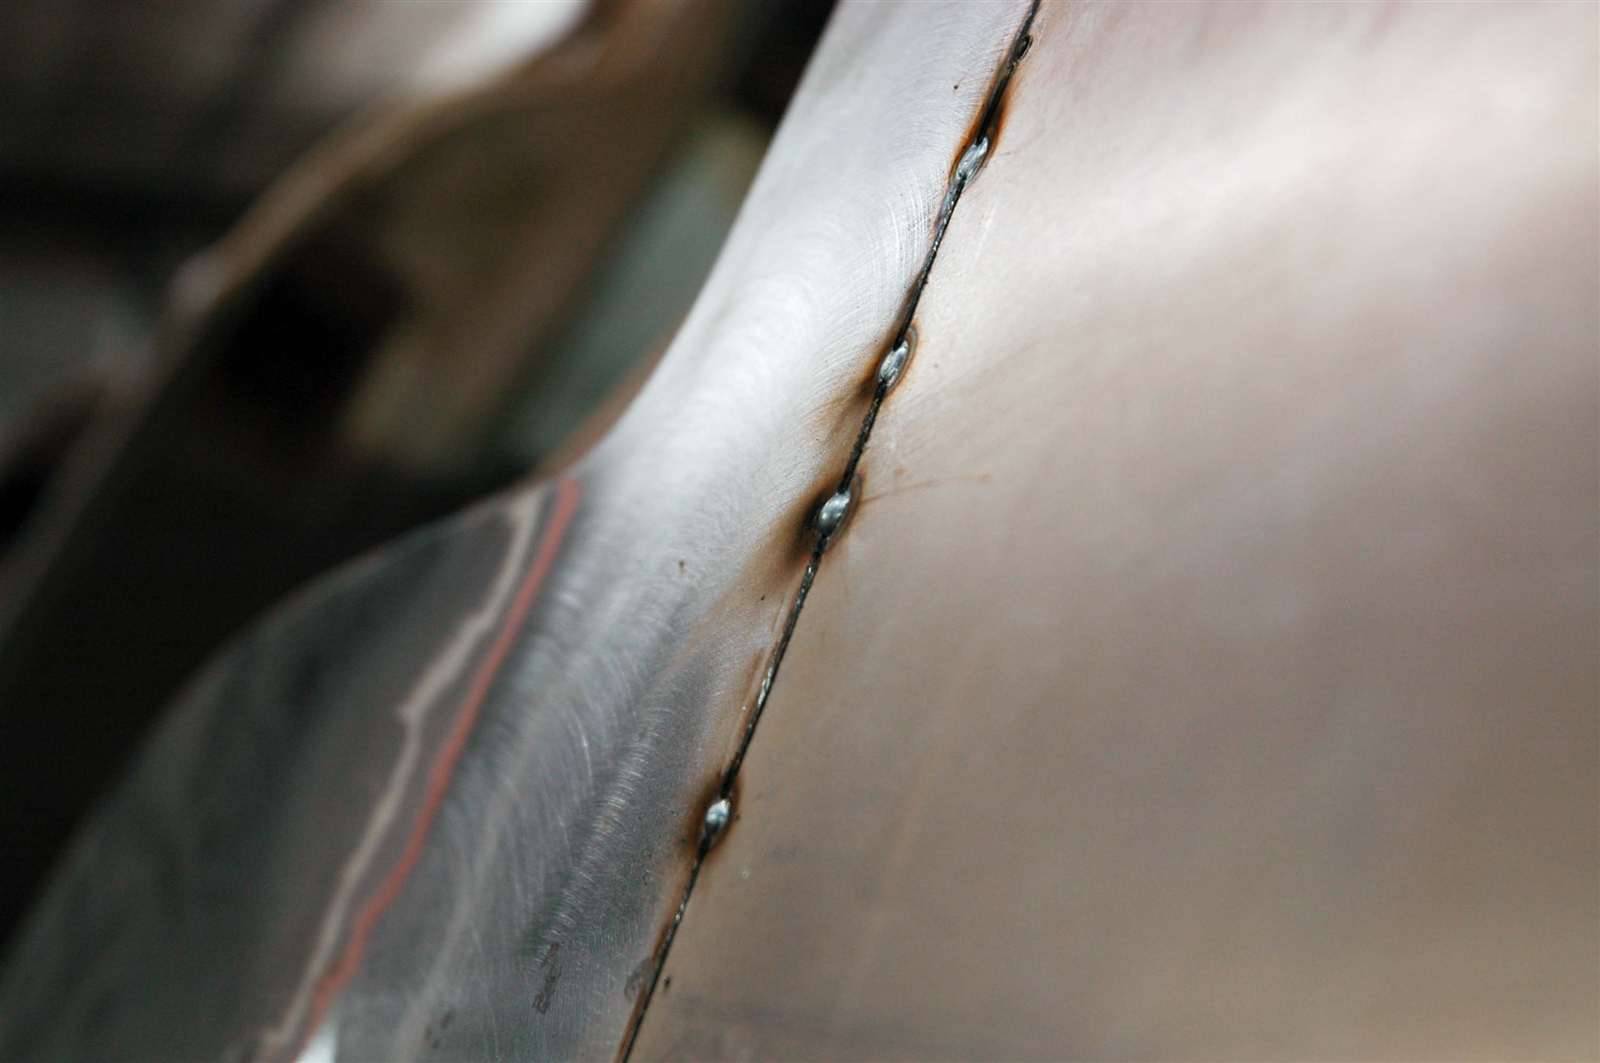
Posted on: 2011/1/27 10:19
|
|||
|
||||
|
Re: Keegan's 55 Clipper Deluxe
|
||||
|---|---|---|---|---|
|
Webmaster
|
Are you planning on patching the inner fender as well? You don't want all the excellent work to go to waste by creating a pocket for mud to get into.
This is what happened on my car. Old body work was put over a rust hole in the outer fender, caused by a hole in the inner fender, but no one ever fixed the inner, so it just rusted out again. The rear quarters on the 51-56 bodies have lots of places were moisture and mud can collect.
Posted on: 2011/1/27 10:26
|
|||
|
-BigKev
1954 Packard Clipper Deluxe Touring Sedan -> Registry | Project Blog 1937 Packard 115-C Convertible Coupe -> Registry | Project Blog |
||||
|
||||
|
Re: Keegan's 55 Clipper Deluxe
|
||||
|---|---|---|---|---|
|
Home away from home
|
Good point Kev!
I am planning on fixing the inner panel as well. I left it open for now to get better access to the outer panel. I'll finish the welding and then seal the panel from the inside. Have to try and remember some drainage holes as well.
Posted on: 2011/1/27 12:05
|
|||
|
||||


