|
Re: Barries's 1950 standard 8
|
||||
|---|---|---|---|---|
|
Home away from home
|
Hi Tom
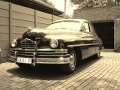
Beautiful, Beautiful car you have there! I am taking a huge risk and it is painful to drive the truck with that nock! I have an extra engine for the chev that is still in relative good condition for a rebuild. You will see it on the stovebolt page on the back of the truck. What is holding me back for a rebuild is the cost as well as my knowledge. I have never rebuild an engine before. Maybe the stovebolt 6 is a good one to learn on but seeing as spares is very difficult to get here and the fact that I do not want to mess it up is holding me back. The truth is that I am more of a backyard mechanic and my only speciality is cleaning and polishing! I will still decide if the drive is worth the risk! I do enjoy driving it immensely and would love to show it at the event -- it is the only 61 in the club. Tomorrow I am gonna try to remove the front wheels of the packard and check out the condition of the brakes and bearings. I read that removing the drums in the back is a big situation so will tackle that at a later stage. Will also fix the inside passenger dome light - the wires needs replacing, but the switch on the pillar is still in very good condition. Someone must have loved this car a lot!
Posted on: 2008/4/11 11:21
|
|||
|
||||
|
Re: Barries's 1950 standard 8
|
||||
|---|---|---|---|---|
|
Webmaster

|
Barrie,
You will need a Tappered Drum Puller to remove those rear drums without damaging them. Do not try to use a different style puller as it may damage the drum. Here is a picture of the one I have which is made by Blue Point (Snap-On). This one is probably 20 years old. But they still make them (looks different, but same general idea). It's basically a puller that is connected to the lug bolts. You remove the axle nut cotter pin and loosen the axle nut (but leave it on). Then the puller is cranked down with a by hitting the "dogbone" with a mallet. Enough wacks and it will break loose. That is why you keep the axel nut on to prevent the drum from flying off. Attach file:  (32.62 KB) (32.62 KB)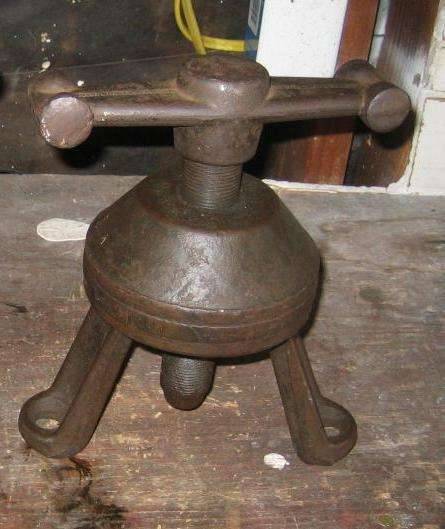
Posted on: 2008/4/12 1:24
|
|||
|
-BigKev
1954 Packard Clipper Deluxe Touring Sedan -> Registry | Project Blog 1937 Packard 115-C Convertible Coupe -> Registry | Project Blog |
||||
|
||||
|
Re: Barries's 1950 standard 8
|
||||
|---|---|---|---|---|
|
Home away from home
|
Hi BigKev
That is one serious puller! I have never seen anything like it. Luckily I read as much on this very same site and will not attempt anything stupid... Hopefully I will find a oldtimer that will be able to help. Anyway, did not get to any of the wheel stuff as the wiring of the cabin light took up most of the day (I am tackling the easy stuff first). My hood liner is still original although brittle and weathered and I want to keep it. When opening the cabin light I discovered that all the wiring was also extremely brittle. For safety sake I decided to replace all wires and rewiring became a whole saturday's job. (Just try to get a wire through a roof with brittle liner) I am proud to say that after hours of work the passenger read light in my car works perfectly! Because of my suffering I decided to take the old girl for a spin and it was wonderful! With the brake lights now working it was a lot less stress! Discovered that I will have to "insulate" the driver door mechanism better as it rattles a lot...maybe cause I removed all the mohair stuffing! I am tired now so no plans for further issues...enjoyment comes from the unknown!
Posted on: 2008/4/12 16:34
|
|||
|
||||
|
Re: Barries's 1950 standard 8
|
||||
|---|---|---|---|---|
|
Home away from home
|
I decided it is time to get some new tires. It worked out that the replacment modern radial size for a 7.6 - 15 bias ply, is a 225/75R15.
After a long search I found a company in Cape Town that imports Hercules brand tyres from the US. Its got a thin white wall and is the correct size. I will have them brought up to Johannesburg next week. 4 plus a spare. Want to have tires removed and rims sand blasted during the weekend. Next week will paint with 2K - I think a flat black will do. Then on my way to the East Rand to have those tires fitted. Will have to use the VW Kombi to transport these babies! Last night jacked up the rear in order to remove those wheels. Actually the car is still in very good condition underneath. It has surface rust but this will be remedied soon with my coal tar paint. (The dog in the pictures name is Kerneels, he likes posing!)Here is some photos: Attach file: (26.18 KB)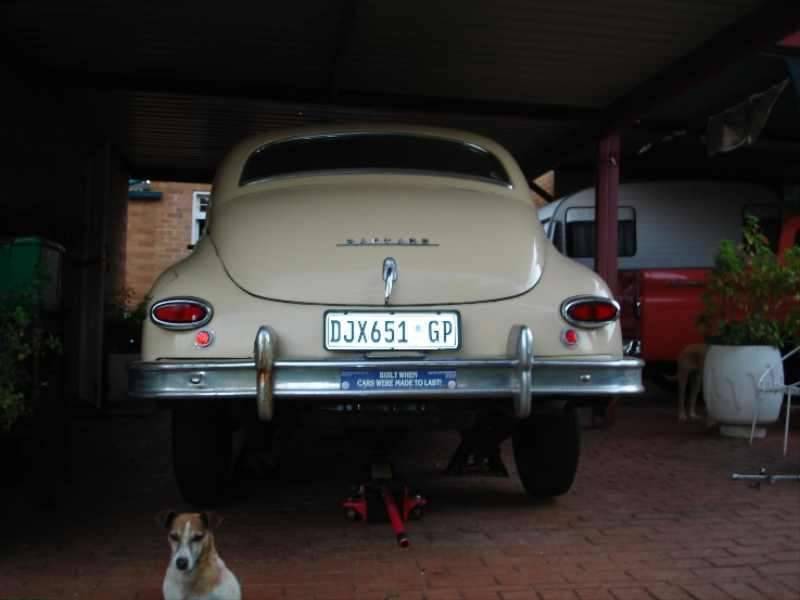 (42.87 KB) (42.87 KB)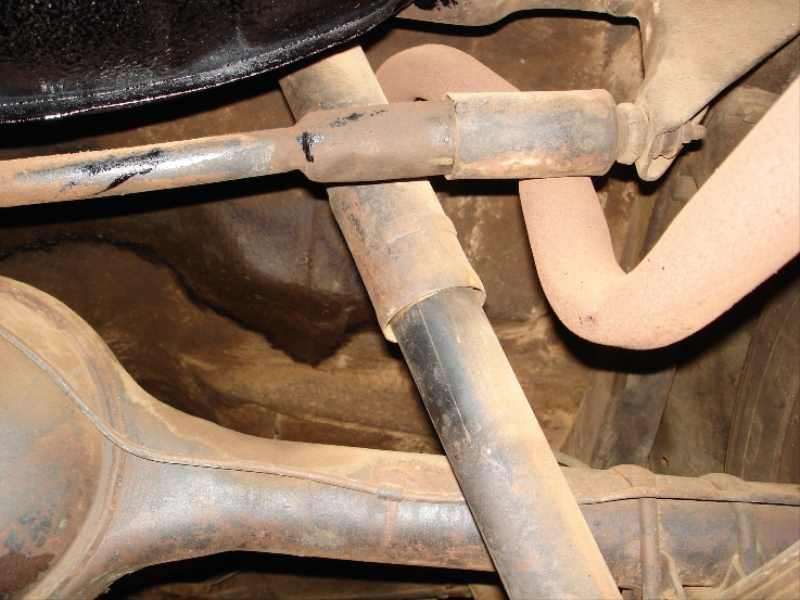 (43.50 KB) (43.50 KB)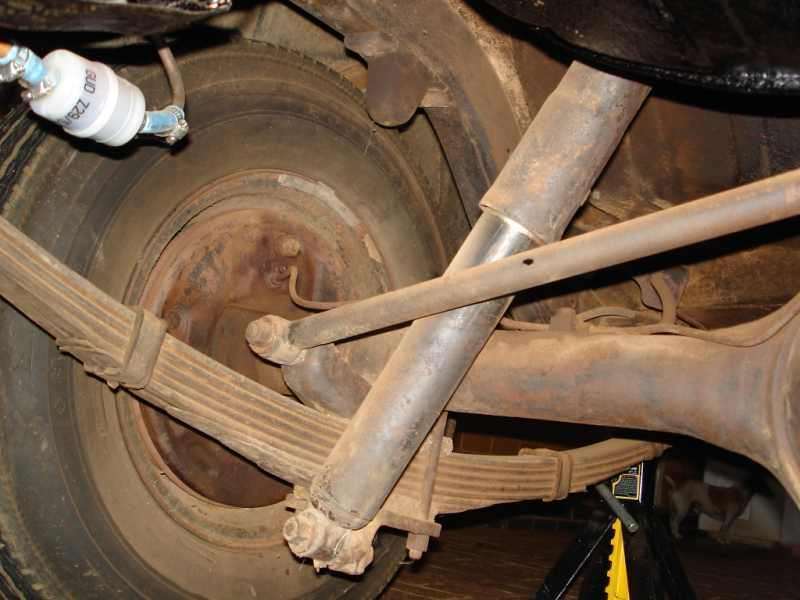 (22.39 KB) (22.39 KB)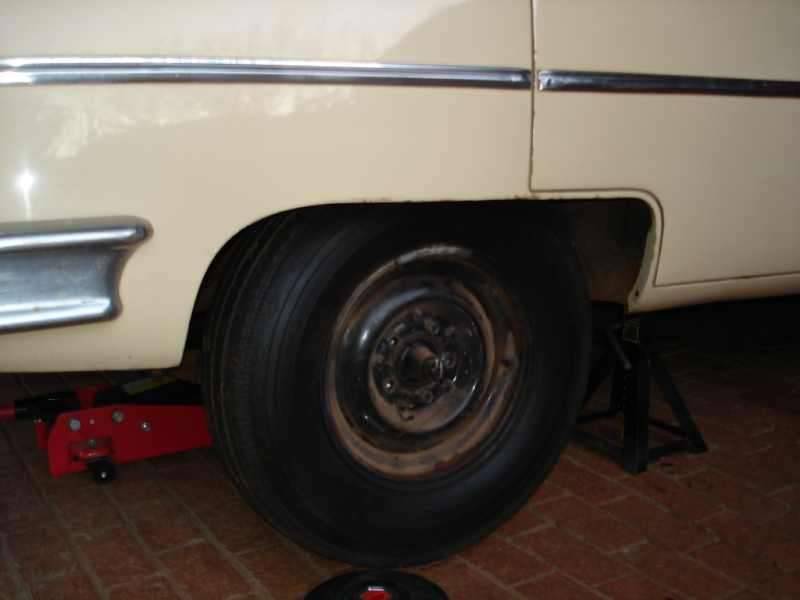 (22.65 KB) (22.65 KB)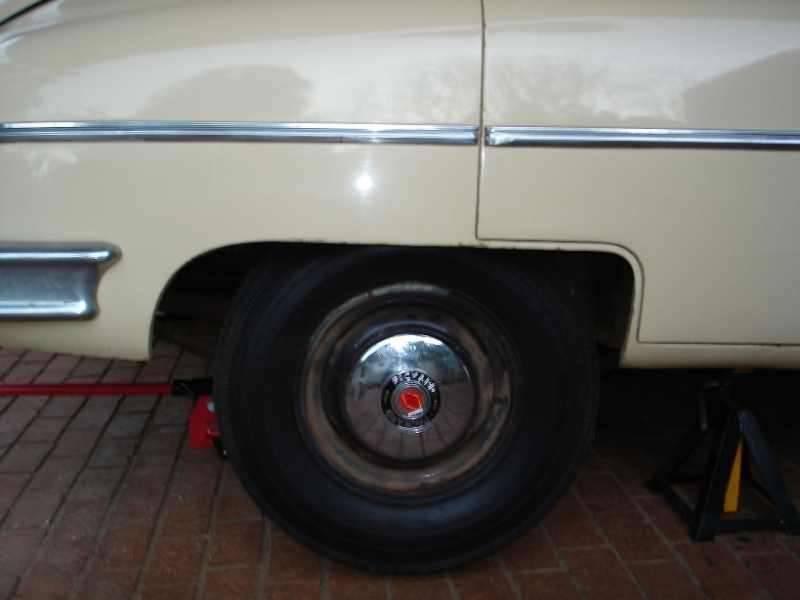
Posted on: 2008/4/18 1:32
|
|||
|
||||
|
Re: Barries's 1950 standard 8
|
||||
|---|---|---|---|---|
|
Home away from home
|
Got up very early today to be at the sand blaster at 8. It went fairly quickly and within an hour all 5 rims were finished. (Glad I am not a sand blaster by profession!)
Rushed back home in the vw kombi to catch the auto paint store still open. Bought 2K primer, hardener and 2K black finishing paint. Cleaned out the rims with compressed air and wiped down with thinners. My first time spraypainting and I must say I was a bit nervous. On the rims is the manufacturer: "Made in the USA by Motor Wheel" Always interesting to see things like that appear after who know how many years! The primer went on easily enough and didnt look too bad. Then had to sand it down with 600 grit wet paper. This took ages. At long last could start with the black. This was not as easy as the primer and I have a few runs as well as some spots I missed. But dark caught up with me and I will have to look at the second coat tomorrow. Must say getting this 2K from my hands was quite a challenge! Here is some pictures. The first is the raw rims fresh from the blaster - didnt realise the metal would be dull like that! The last picture is of the first coat - it was still a bit wet and I had to store it inside as we are expecting rain tonight. Attach file: (42.82 KB)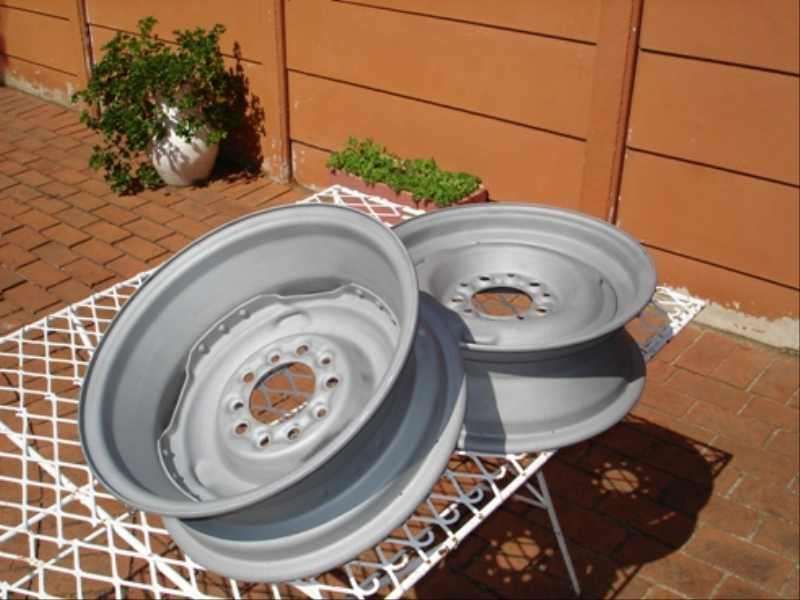 (46.47 KB) (46.47 KB)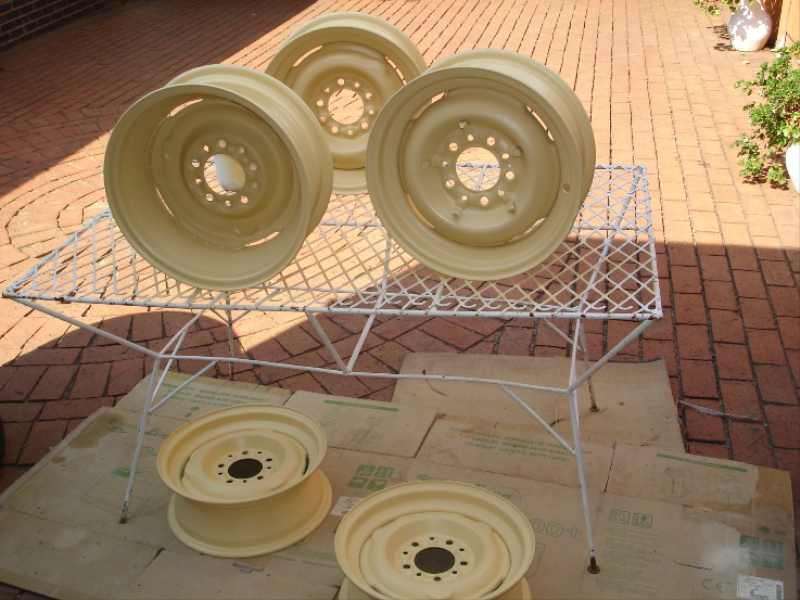 (34.14 KB) (34.14 KB)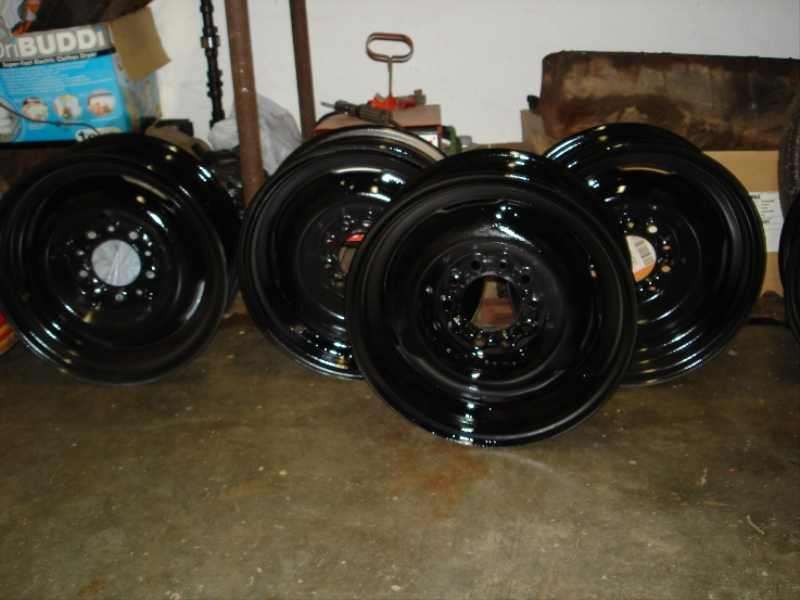
Posted on: 2008/4/19 12:54
|
|||
|
||||
|
Re: Barries's 1950 standard 8
|
||||
|---|---|---|---|---|
|
Home away from home
|
Well had a whole week holiday last week and decided to start fixing the front brakes and then just kept going. My made in China engine stand was definitely not designed for a straight eight! Haha! In the end it turned into a big job but I am glad I did it. The results will be worth it.
Attach file: (47.21 KB)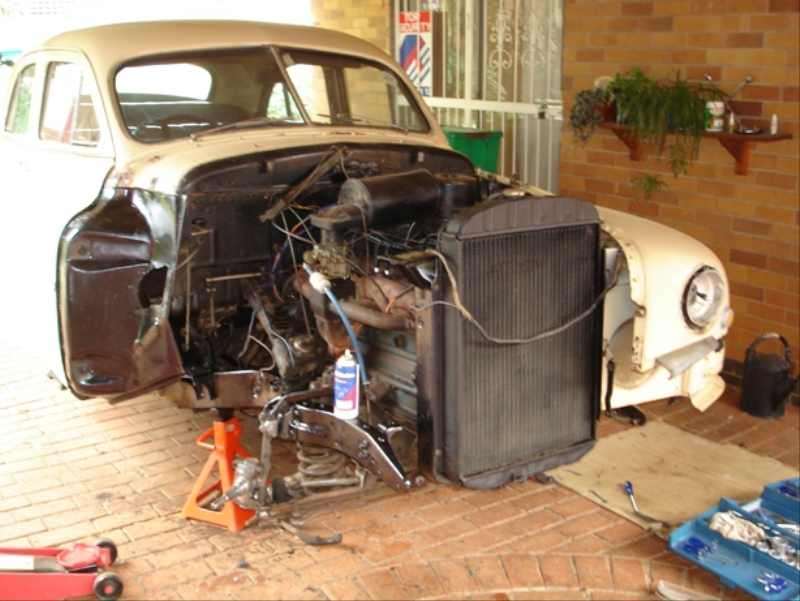 (56.84 KB) (56.84 KB)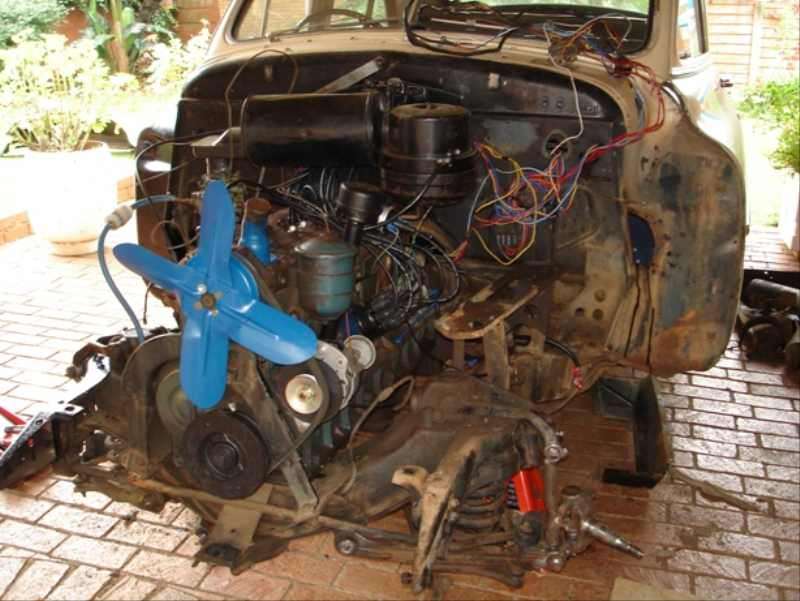 (44.44 KB) (44.44 KB)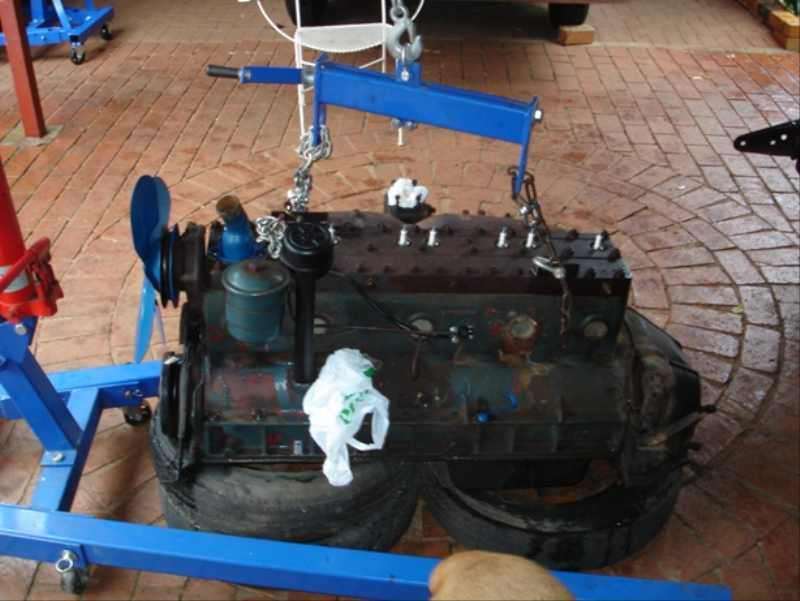 (45.80 KB) (45.80 KB)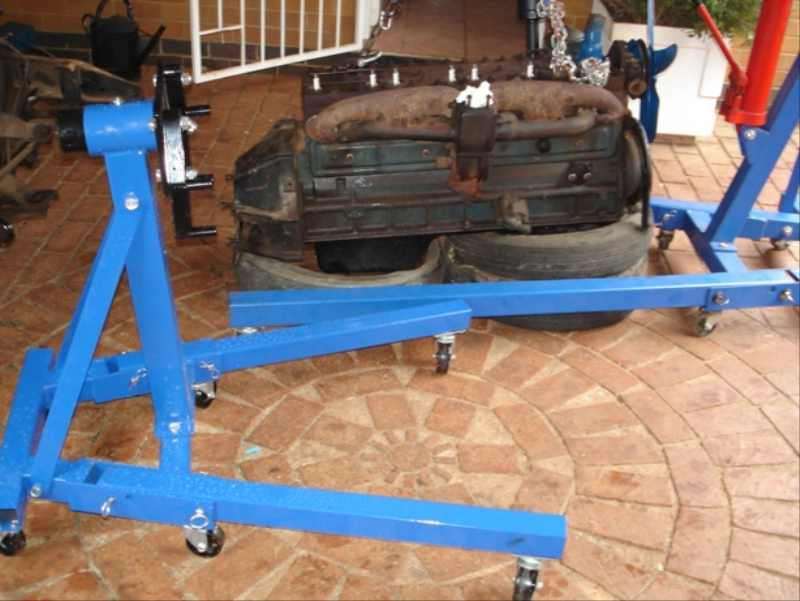 (48.40 KB) (48.40 KB)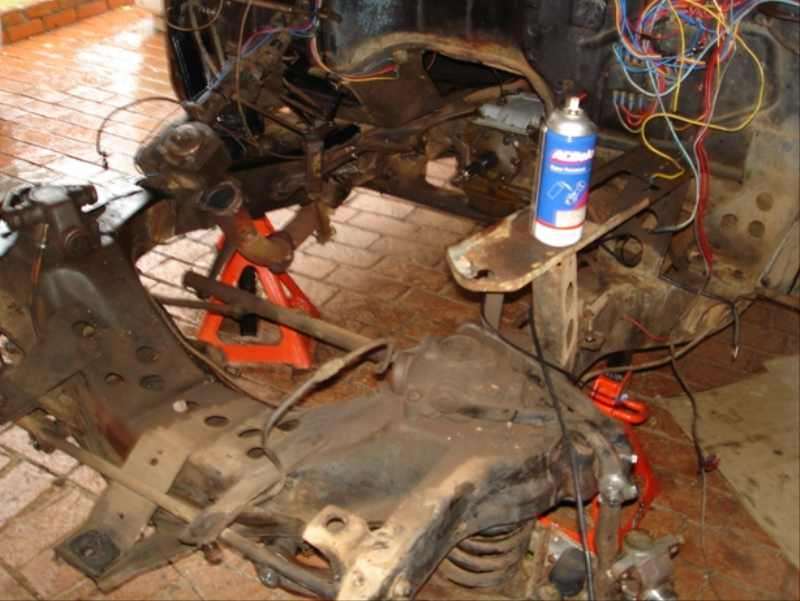
Posted on: 2008/5/5 2:29
|
|||
|
||||
|
Re: Barries's 1950 standard 8
|
||||
|---|---|---|---|---|
|
Forum Ambassador

|
Quote:
Barrie, Know exactly what you mean, it just keeps growing, like a fishing story. But as you say, it will be worth it! Pity about the engine stand.
Posted on: 2008/5/5 3:10
|
|||
|
Mal
/o[]o\ ====  Bowral, Southern Highlands of NSW, Australia "Out of chaos comes order" - Nietzsche. 1938 Eight Touring Sedan - SOLD 1941 One-Twenty Club Coupe - SOLD 1948 Super Eight Limo, chassis RHD - SOLD 1950 Eight Touring Sedan - SOLD What's this?  Put your Packard in the Packard Vehicle Registry! Here's how! Any questions - PM or email me at ozstatman@gmail.com |
||||
|
||||
|
Re: Barries's 1950 standard 8
|
||||
|---|---|---|---|---|
|
Home away from home

|
Here's a tip on the engine stand, take off the bellhousing and the flywheel. You'll reduce 10" on the length and make it more stable. And as always, USE CAUTION with a 44" long engine!!
Posted on: 2008/5/5 3:19
|
|||
|
||||
|
Re: Barries's 1950 standard 8
|
||||
|---|---|---|---|---|
|
Home away from home
|
Great job on getting the engine out. I just did that on my 30. Wow are these engines heavy!
Tom
Posted on: 2008/5/14 16:21
|
|||
|
||||


