|
Re: Water Distribution Tube Removal
|
||||
|---|---|---|---|---|
|
Forum Ambassador

|
Here is what Packard recommended as a tool in the 51-4 manual. It sounds like yours is really "sedimented" in place. Maybe a longer rod to reach halfway or further back so less likely to tear holes and also maybe work the rod a bit to see if any stuff can be loosened on the inside of tube which might break a bit holding the outside loose with it. Have you tried with a hose and nozzle to see if anything can be flushed.
Attach file:  (46.20 KB) (46.20 KB)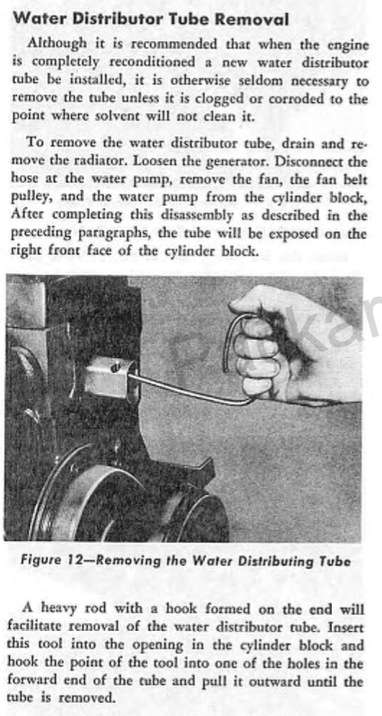
Posted on: 2009/2/8 15:16
|
|||
|
||||
|
Re: Water Distribution Tube Removal
|
||||
|---|---|---|---|---|
|
Webmaster

|
I used a straighten coat hanger and ran it down the out side of the tube on the beveled side to help loosen it up. Then bent the coat hanger into a hook as described in the manual. Yup may also try to tap the tube gently with a rubber mallet to break it loose. Beware as the tube is very thin metal and will bend easily. Check my project blog for pictures when I removed mine.
Posted on: 2009/2/8 17:43
|
|||
|
-BigKev
1954 Packard Clipper Deluxe Touring Sedan -> Registry | Project Blog 1937 Packard 115-C Convertible Coupe -> Registry | Project Blog |
||||
|
||||
|
Re: Water Distribution Tube Removal
|
||||
|---|---|---|---|---|
|
Home away from home

|
If you are having that much trouble removing the tube, I'd say you have found a major part of your heating problems. I'v found they do get pretty stuck at times, But, so far I haven't had any that wouldn't come out. As Kev suggests, use a welding rod or something similar to shove down both the inside and outside of the tube. Use the hook to move the tube a little at a time in and out. That should help loosen it.
Good luck. Edit. I failed to mention that I use a hose to wash out the passages as much as possible before trying this.
Posted on: 2009/2/8 20:32
|
|||
|
North Hills Packards
2 - 1949 Super Convertibles 1949 Club Sedan 1947 Custom Sedan Completed a book on the 22nd & 23rd series cars |
||||
|
||||
|
Re: Water Distribution Tube Removal
|
||||
|---|---|---|---|---|
|
Webmaster
|
I back flushed the block with the waterpump and thermostat housing off. This helped to flush out alot of the rust scale.
I had a couple of inches of packed in sediment in the rear of the tube. This is basically where all the rusted pieces of the Ultramatic cooler ends that fell off collected.
Posted on: 2009/2/8 20:40
|
|||
|
-BigKev
1954 Packard Clipper Deluxe Touring Sedan -> Registry | Project Blog 1937 Packard 115-C Convertible Coupe -> Registry | Project Blog |
||||
|
||||
|
Re: Water Distribution Tube Removal
|
||||
|---|---|---|---|---|
|
Home away from home

|
This thread inspired me to remove the tube on my crusty '53 327, and it was really a cinch to remove, even though it was in there pretty good. It was also plugged with gunk, and had a rattle inside, which turned out to be solder, from God knows where. (Probably from the tube itself) Here's some pics:
Attach file: (84.65 KB)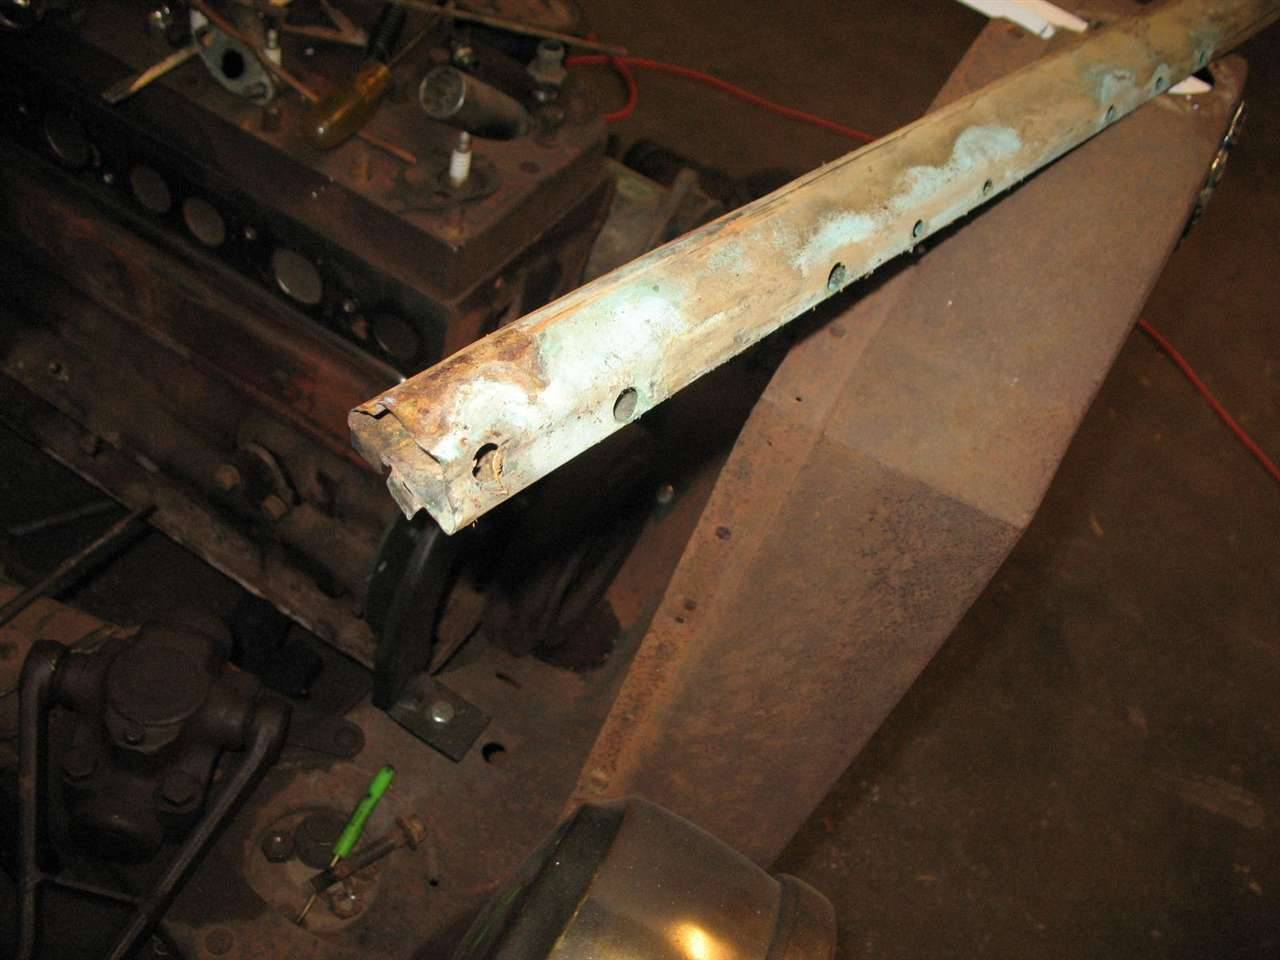 (100.16 KB) (100.16 KB)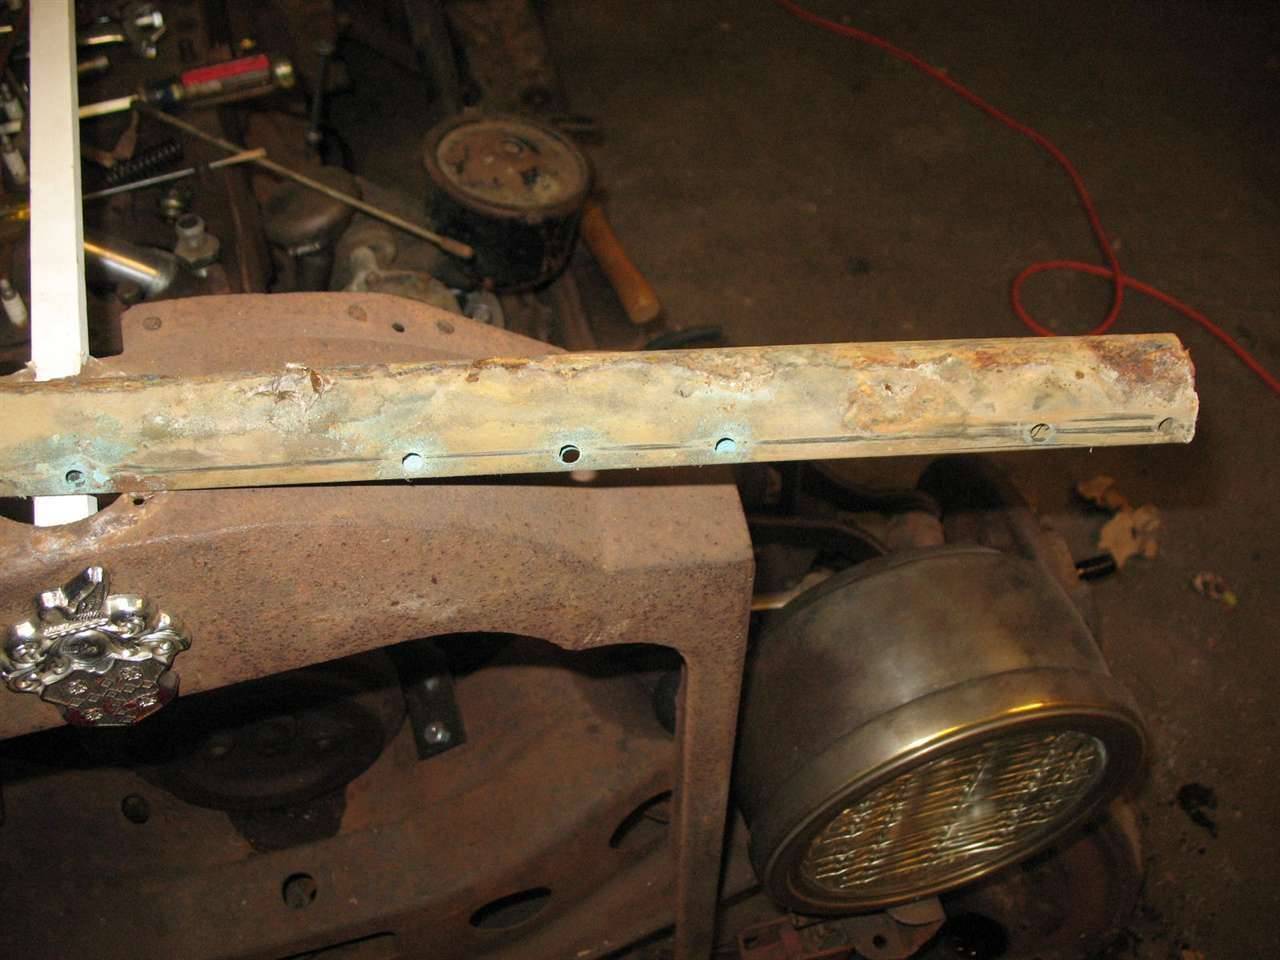 (80.14 KB) (80.14 KB)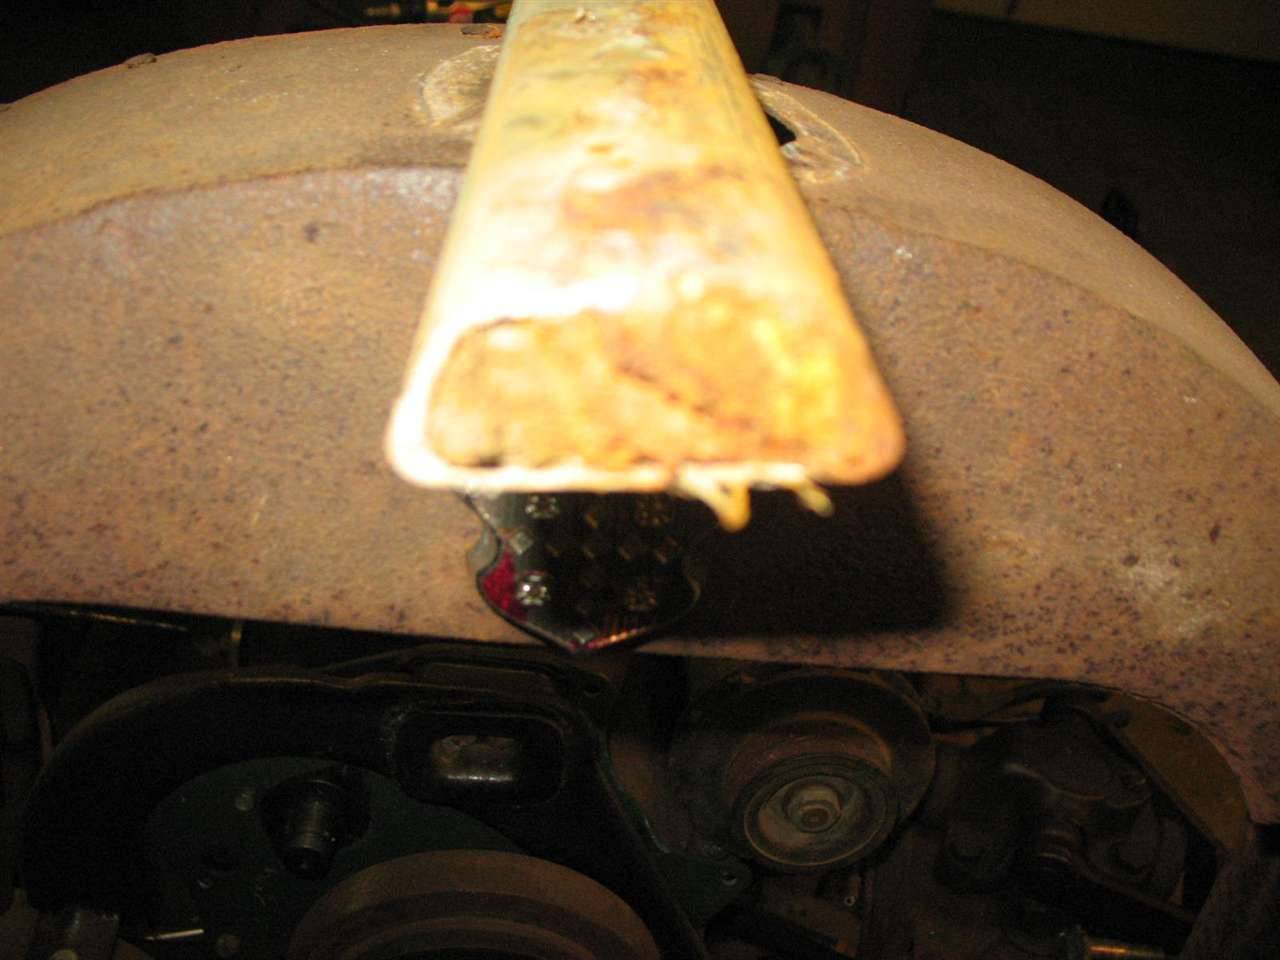 (132.31 KB) (132.31 KB)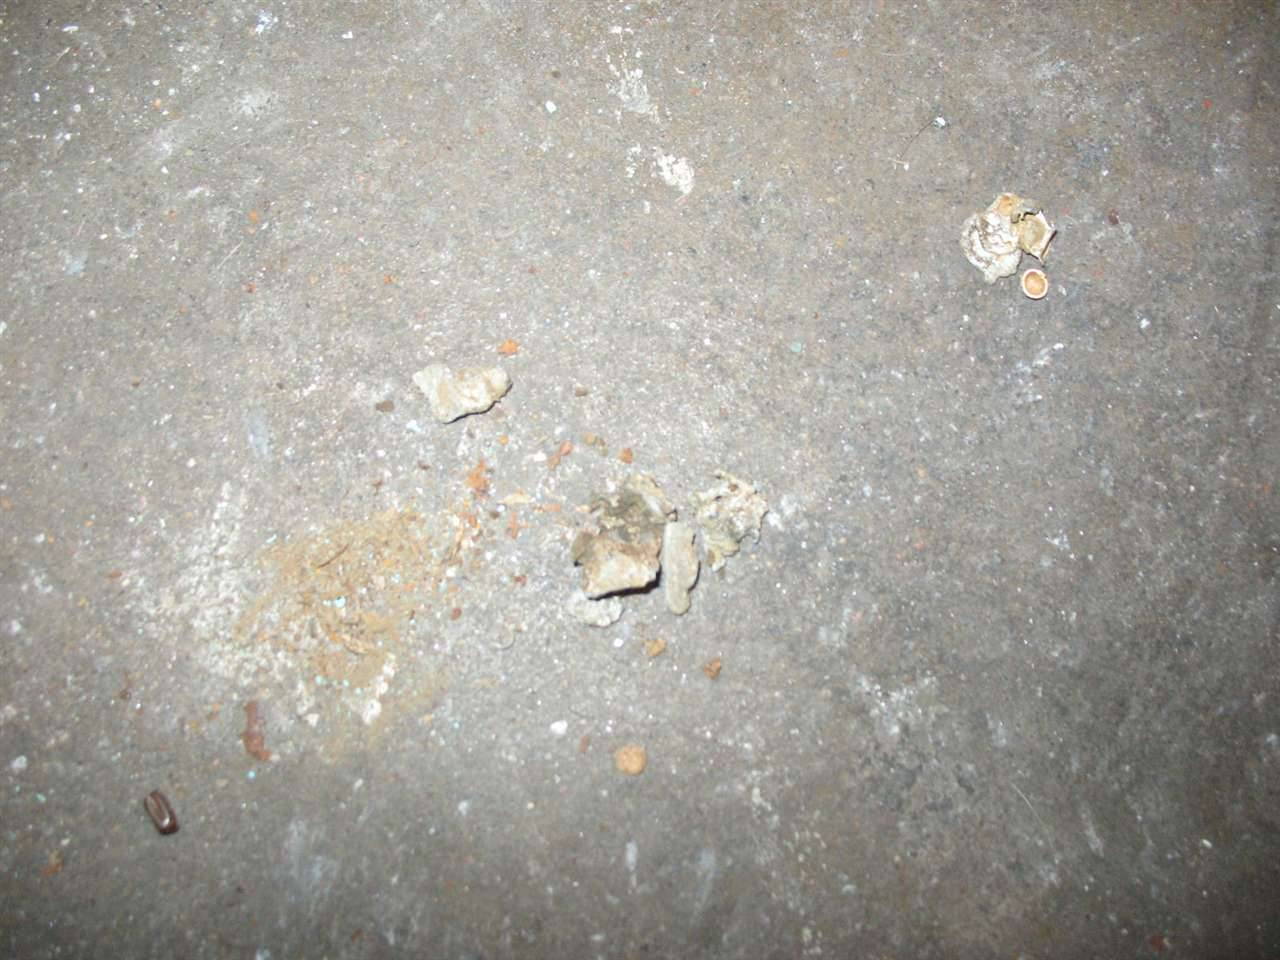 (82.80 KB) (82.80 KB)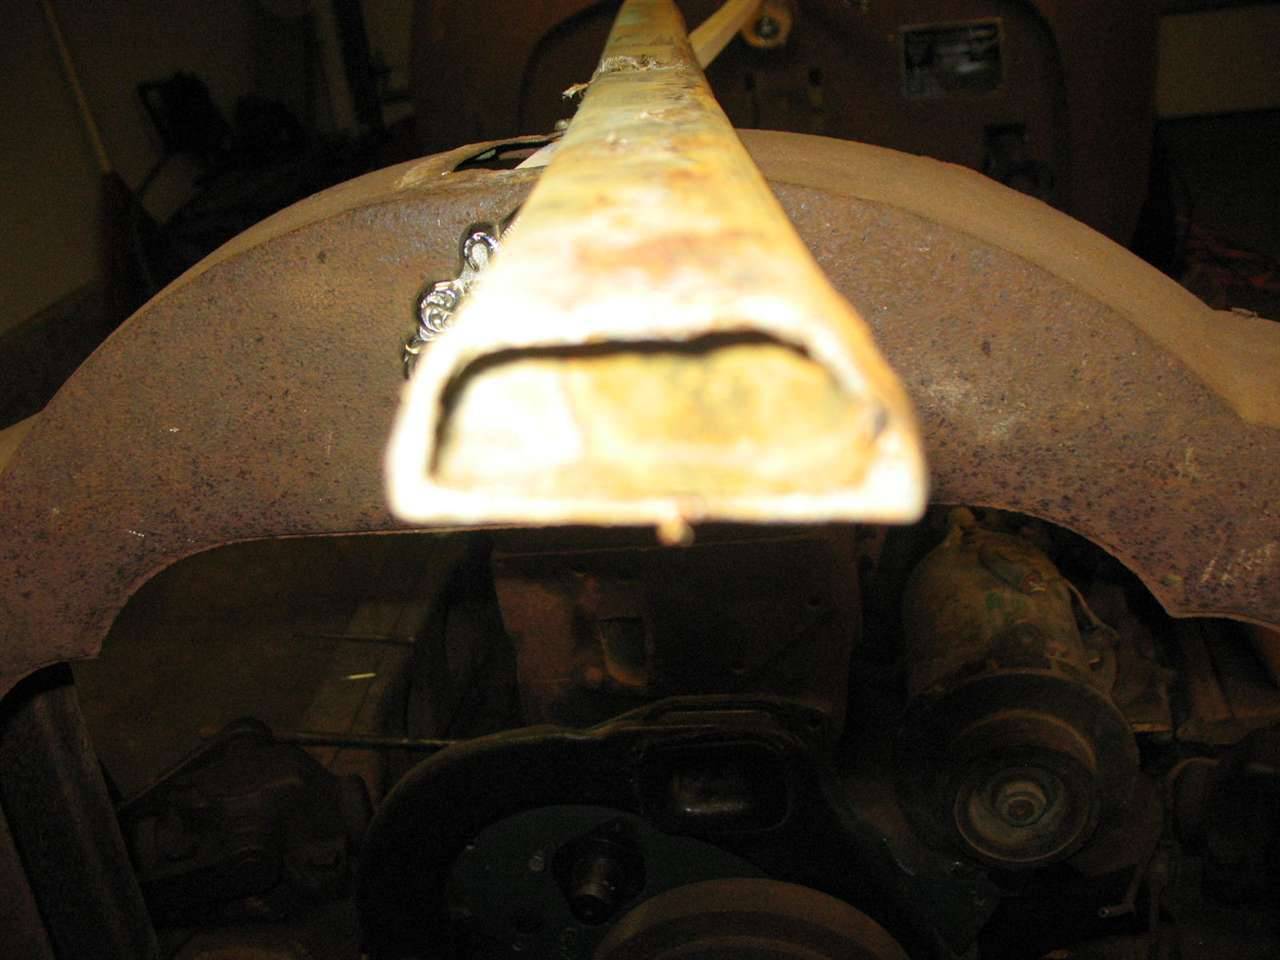
Posted on: 2009/2/13 1:55
|
|||
|
||||
|
Re: Water Distribution Tube Removal
|
||||
|---|---|---|---|---|
|
Home away from home
|
BTW, I used a thin screwdriver to wiggle it loose, then pulled it out with a pair of needle nosed pliers. It really did come out easy with a little tugging.
Posted on: 2009/2/13 1:57
|
|||
|
||||
|
Re: Water Distribution Tube Removal
|
||||
|---|---|---|---|---|
|
Forum Ambassador

|
The pictures show the value in removing and cleaning the distribution tube. The holes in the tube direct the coolest water to the hottest area of the block first, the exhaust valve seats; failure here leads to overheating, burned exhaust valves and pitted seats, and eventually can lead to to cracked engine blocks at the exhaust seats. The usual crack then runs across the block to the cylinder bore, and then you're shopping for another engine block. Removing and checking the tube should be considered mandatory whenever the condition of the tube is not known.
On the aluminum crankcase/cast iron bore engines (the Eight and Super Eight thru 1939), the water jacket side plate performs this function and should similarly be removed and checked if it's condition is unknown.
Posted on: 2009/2/13 10:05
|
|||
|
||||
|
Re: Water Distribution Tube Removal
|
||||
|---|---|---|---|---|
|
Home away from home
|
Eric-
How clean were you able to get the water distributing tube? All the gunk out of the inside? -Carl
Posted on: 2009/2/14 1:21
|
|||
|
-Carl | [url=https://packardinfo.
|
||||
|
||||
|
Re: Water Distribution Tube Removal
|
||||
|---|---|---|---|---|
|
Home away from home
|
It's still as you see it. I'm thinking that some kind of caustic soda solution might do it, or better yet, take it to a radiator shop and have them soak it in their radiator dip tank. Doing it at home, which I might do, I think I might just use one of my gun cleaning brushes and some Comet to clean it up. It won't be hard, but the tube bends REALLY easily, I've already bent it a little in the middle. Fortunately, I have a plan to straighten it back up, which involves 3 pieces of wood door trim and a small hammer.
Posted on: 2009/2/14 13:16
|
|||
|
||||


