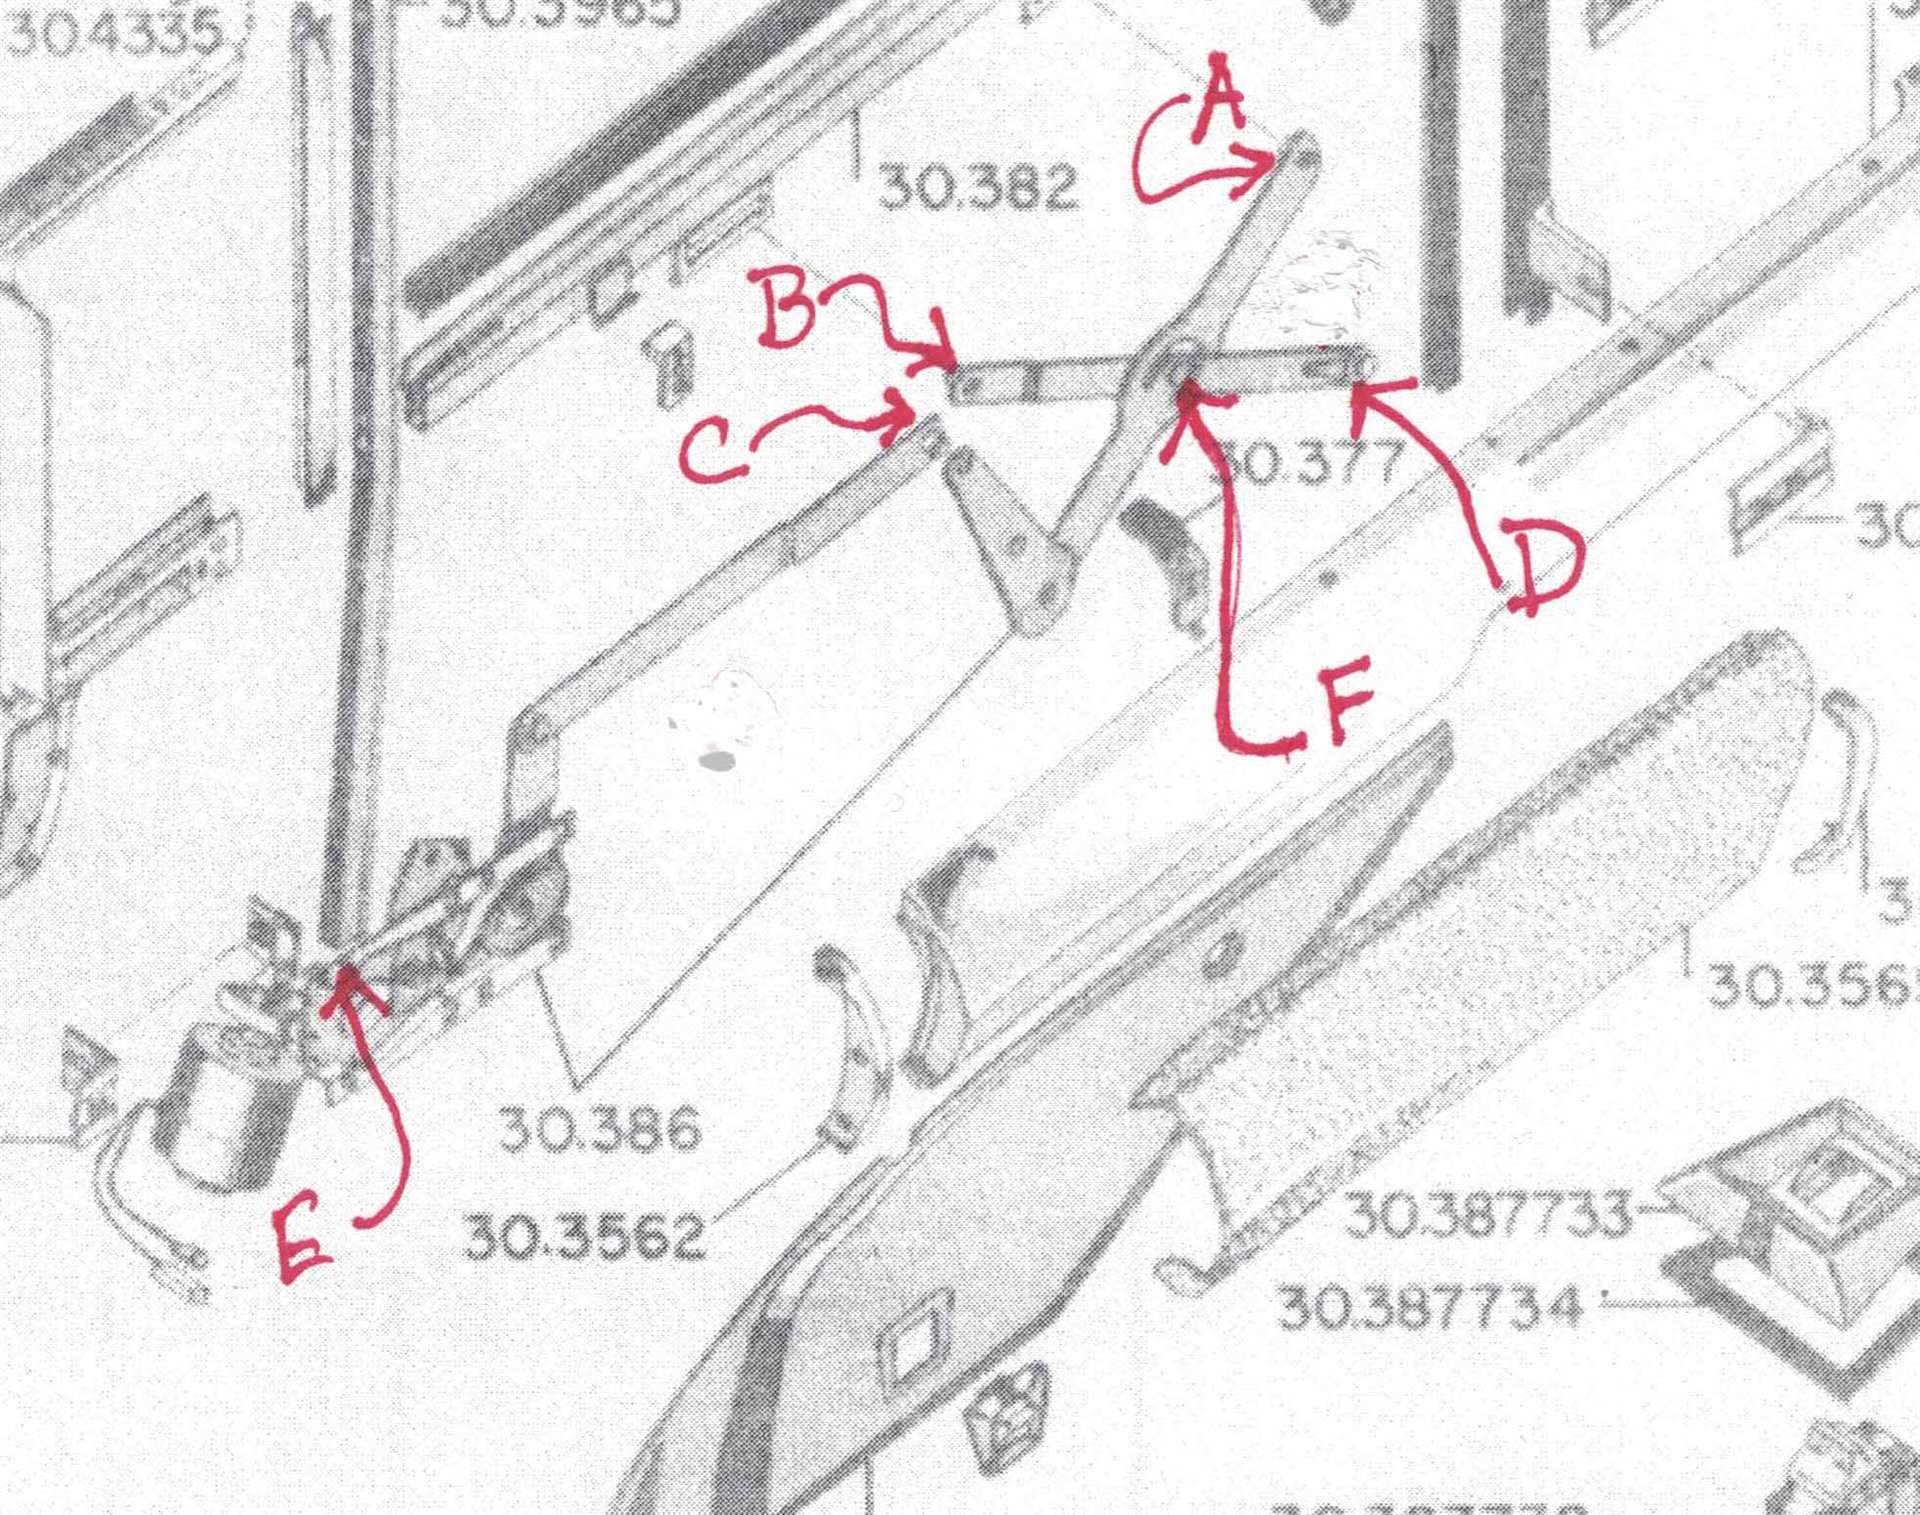
I got the replacement PW motor and had way too much fun installing it. Not sure if I came up with the best way to do it (probably way to true), but I thought I would record the steps that I finally took to get it installed. Remember that I had detached points A, B, & D in order to get to the clip on C. Since everything was detached from the windows I replaced the leather washers with nylon ones.
1) I attached points B and C as required (Note: In order to ensure that D stayed in its track, I drilled the door panel at both ends where the track ended and screwed sheet metals screw so I couldn’t come loose).
2) I inserted the motor which was attached to spring/gear mechanism
3) Raise the window to the top (I cramped a pair of Vise Grips on the window frame to hold it in place
4) I loosely attached the motor with a single screw to the door at point E
5) Remove the nut on F so the “X” bars can around float
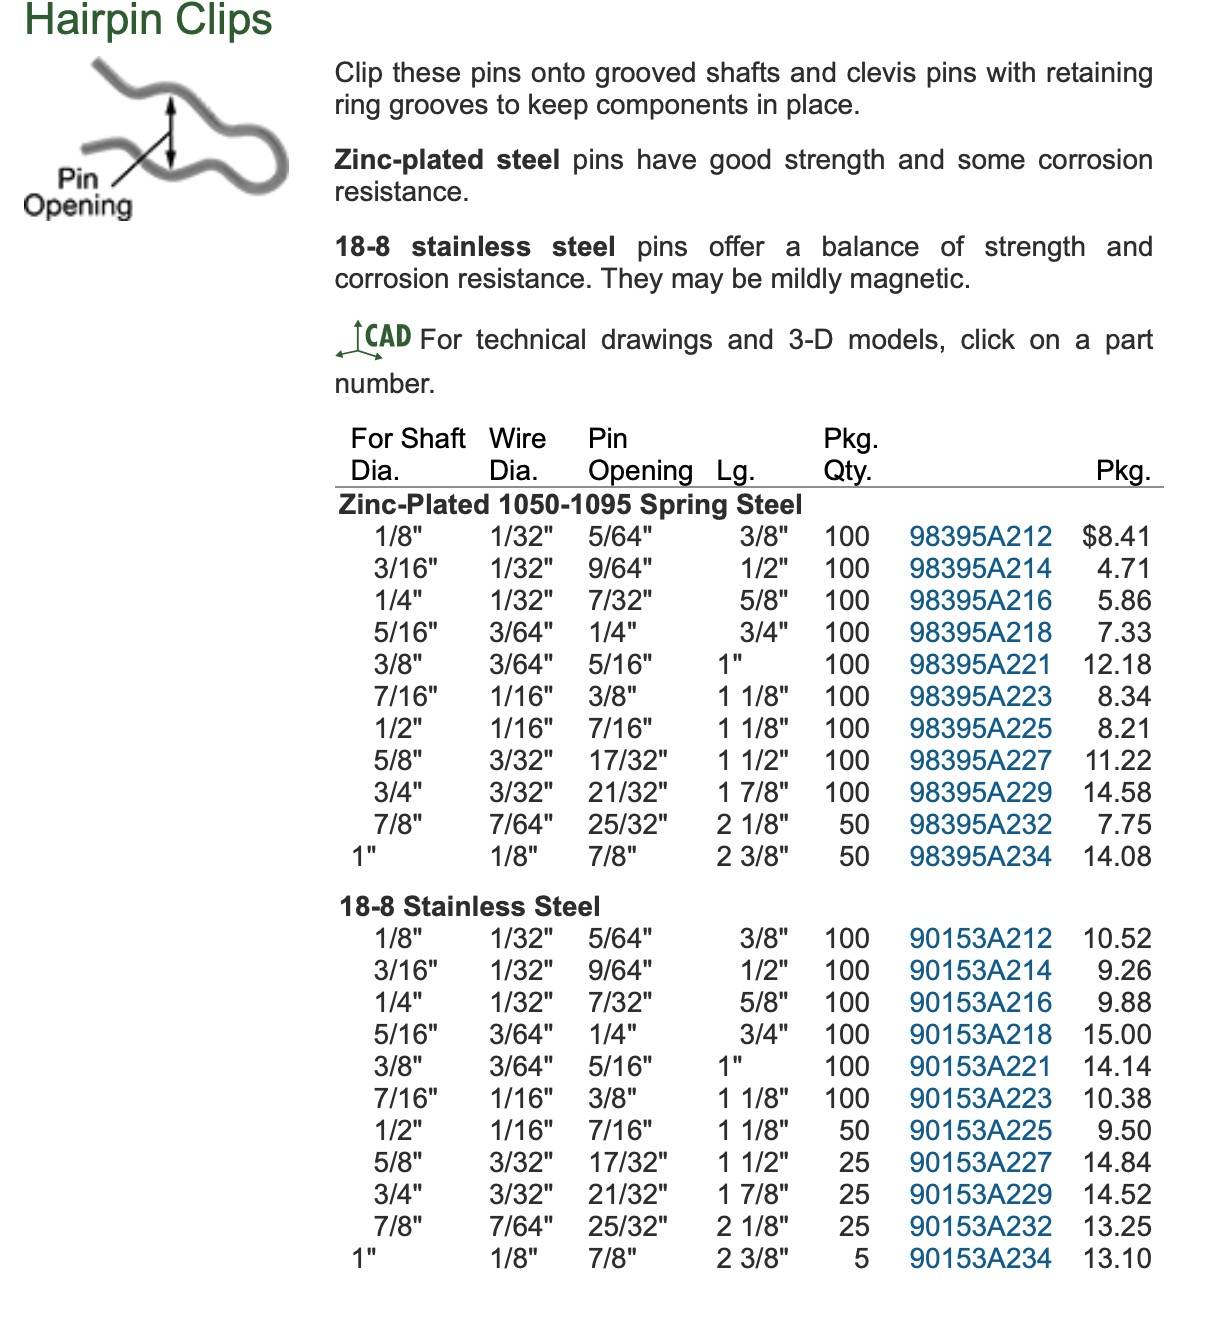
6) At this point you should be able to insert C into the arm by energizing the motor with 12 VDC (one wire is up the other is low) to get the pin near the hole in the arm. Now you can insert it into the hole and clip the hairpin clip in place by moving the motor around a bit
7) Next is inserting pin A into its slot. You will need the flex the metal arm away from the slot. A high window gives more flexibility of the arm but is harder to reach. To lower the window, you will need to energize the motor with 12 VDC. I lower the widow just far enough that I could reach it. I used a 3/4” wide piece of steel bar and inserted it between the slot on the window and the metal arm. By rotating the steel bar 90 or so degrees you can flex the arm away from the slot on the window. By playing with the motor, you should be able to slip the pin in place
8) Place and secure nut F
9) Finish screwing motor to window
10) Clip pin A, which is easier by lowing the window 4 inches or so
11) Test the window operation
Thanks to everyone who helped. I ended up buying a package of 100 clips from McMaster. Turns out I did not need any. Anyone who would like 10 can mail me a stamped self-address envelop. PM me for my address

 clip.jpg (172.09 KB)