 Starter before rebuild.JPG (707.46 KB)
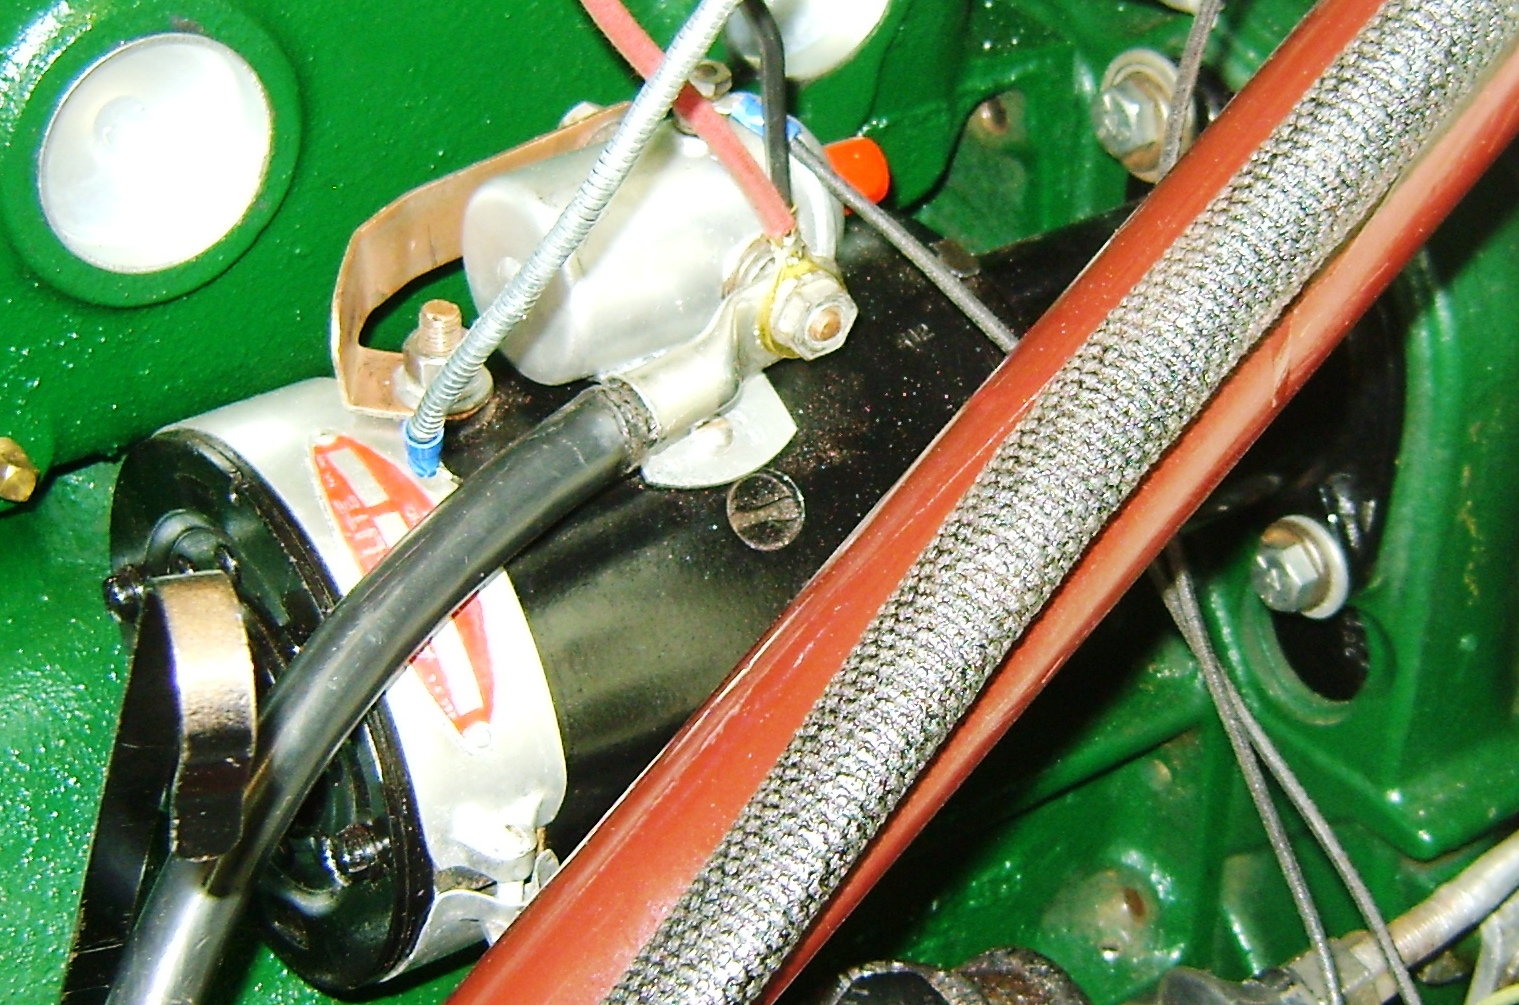
|
Re: 1937 120 Conv. Sedan - Blanche
|
||||
|---|---|---|---|---|
|
Home away from home

|
If the battery is in the trunk, be sure it has at least 00 ga cables. Anything smaller will likely starve it of the needed amps at the starter.
Posted on: 4/24 19:29
|
|||
|
||||
|
Re: 1937 120 Conv. Sedan - Blanche
|
||||
|---|---|---|---|---|
|
Home away from home

|
Thanks Don and Bob.
So the battery is still under the driver seat, and i do have 00 cable. If you scroll up, that is what BigKev was asking about. "What is the Big Red Cable". My Grandmother had a switch installed in the trunk for easy access. I call it a "Kill switch" not sure that is the proper name. It basically is an on/off switch. Turn on, when I want to start it and off when I am not driving it. It is so the battery does not drain when not in use. It is hooked up to the Positive and grounded. I can get more pics if you would like to see it. Bob, I am going to try your tests today. May reach out direct with questions.
Posted on: 4/25 6:24
|
|||
|
||||
|
Re: 1937 120 Conv. Sedan - Blanche
|
||||
|---|---|---|---|---|
|
Home away from home
|
If you have a kill switch located in the trunk with cable running from the battery to the switch, that is a LOT of extra cable, and it WILL reduce the amount of power available to the starter.
I suggest you move the switch to the front floorboard just forward of the driver's seat. That makes it accessible to the driver and eliminates the long cable or cables. All 6 volt cables need to be full size and of top quality, and all fittings and switches need to be of high quality. You want the shortest path for the heavy starter current that is practical. Adding a ground cable from the engine to the frame is a good idea. All connections must be clean and tight.
Posted on: 4/25 7:47
|
|||
|
||||
|
Re: 1937 120 Conv. Sedan - Blanche
|
||||
|---|---|---|---|---|
|
Home away from home
|
Thanks Bob J for the help today. I think we have figured it out to be a bad solenoid. All test points worked. Was able to get the starter going by pushing the button on the solenoid. Other tests were positive so it all pointed to the solenoid.
I have a new solenoid and will replace tomorrow to confirm. Thanks again Bob for offering a phone call. Was very helpful!
Posted on: 4/25 19:15
|
|||
|
||||
|
Re: 1937 120 Conv. Sedan - Blanche
|
||||
|---|---|---|---|---|
|
Home away from home
|
ok. New Solenoid on, and she starts!! Not sure how the solenoid went from working to not working other than as Bob suggested, maybe 87 years is their life expectancy!
Back to the Running boards
Posted on: 4/26 8:18
|
|||
|
||||
|
Re: 1937 120 Conv. Sedan - Blanche
|
||||
|---|---|---|---|---|
|
Home away from home
|
Oh that is fantastic!! That must have been such a jolt of adrenaline when she worked! As well as a big sigh of relief! I think that would have made it beer o'clock! Well done. (Send the old one back to Autolite and demand a refund!)
Is there any way to relieve the stress in the rubber down the sides of the running board rubber by carefully cutting a groove or something? Like in a cardboard box or something? This would give it a hinge so it could bend without affecting the top's surface. I know it is thick and tough so a burr type cutter in a router tool with a board used as a fence to guide the cut and the depth on the router set so it leaves a groove of a specific depth? Just trying to spur an idea to help get the wrap nice on the running board edges. Bob J. Edit: Failed to indicate that this relief groove would occur on the backside so it would not affect the smooth top side's appearance.
Posted on: 4/26 9:03
|
|||
|
||||
|
Re: 1937 120 Conv. Sedan - Blanche
|
||||
|---|---|---|---|---|
|
Home away from home
|
So back at it. Spent the week focused on the running board. Got the passenger side on.
Used a lot of clamps. 50 to be exact. If you are looking for clamps at Harbor freight I may have put them on back order!! I went with an adhesive E6000. Clamped the top side and cured for 72 hours. I ran furring strips longways in the valley and the across and clamped the cross rails. 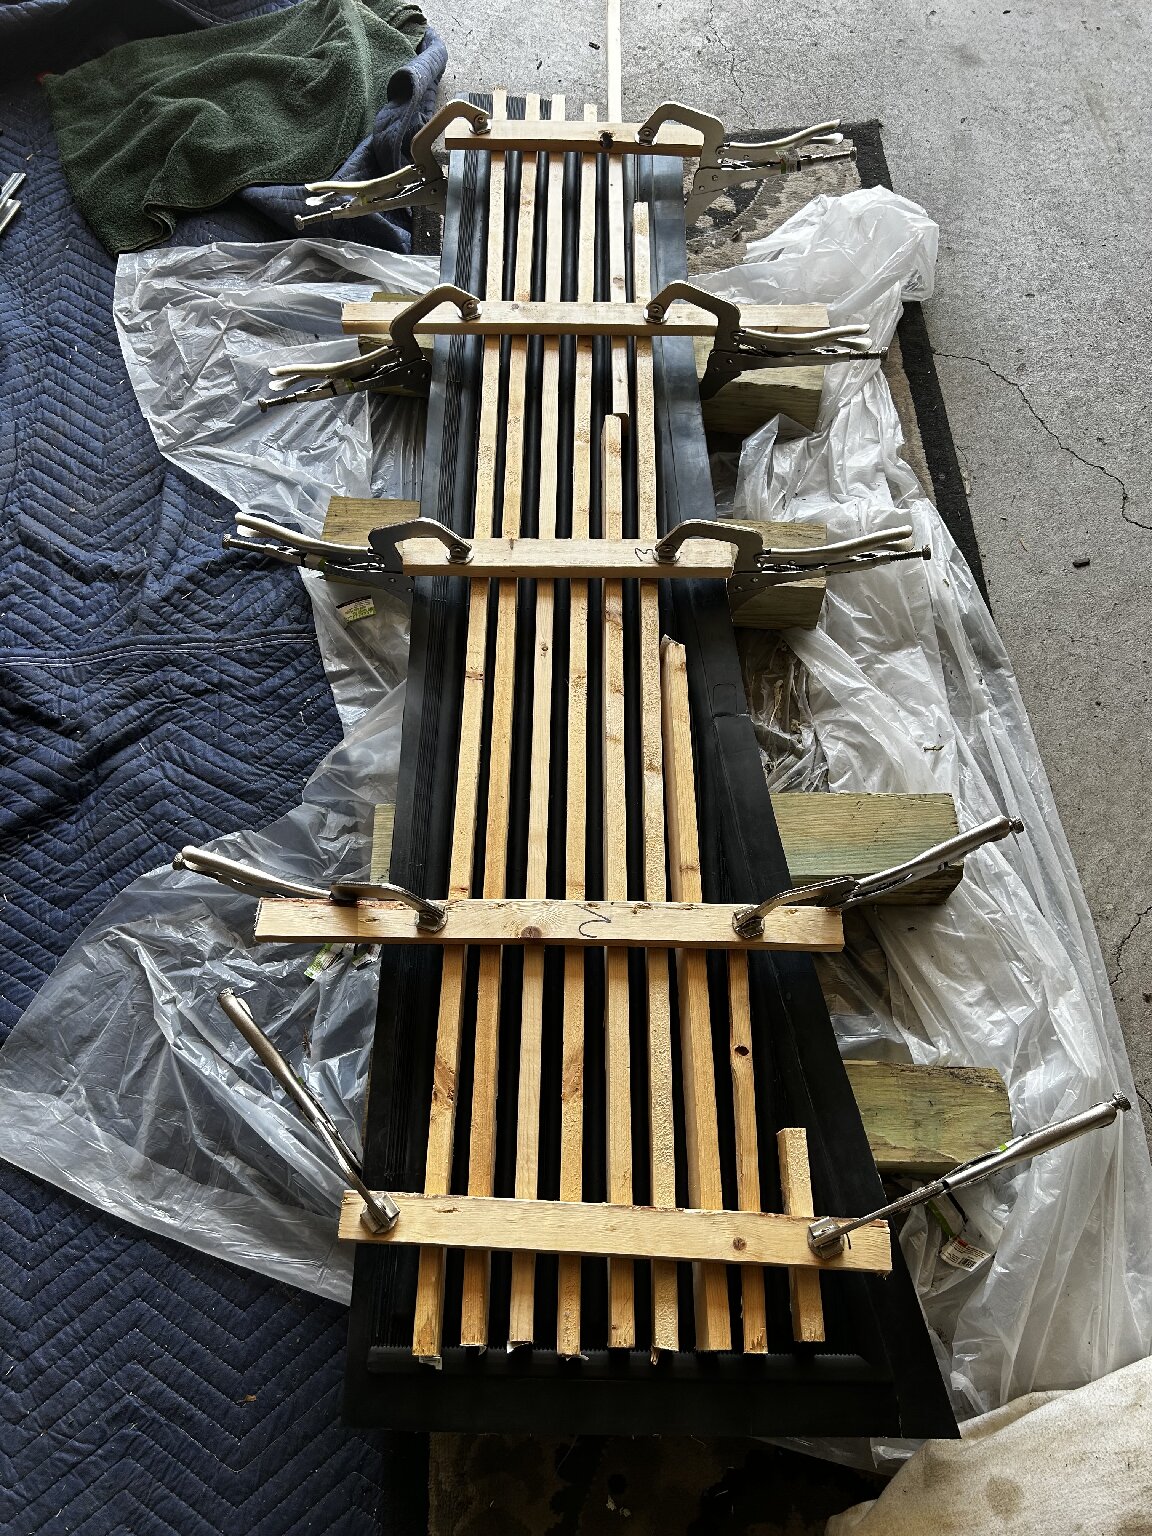 I then clamped the edges on the top side before wrapping the sides and the. Clamping the sides. I cut the furring strips on 45s for the inside curve. Let that cure for 72 hours. 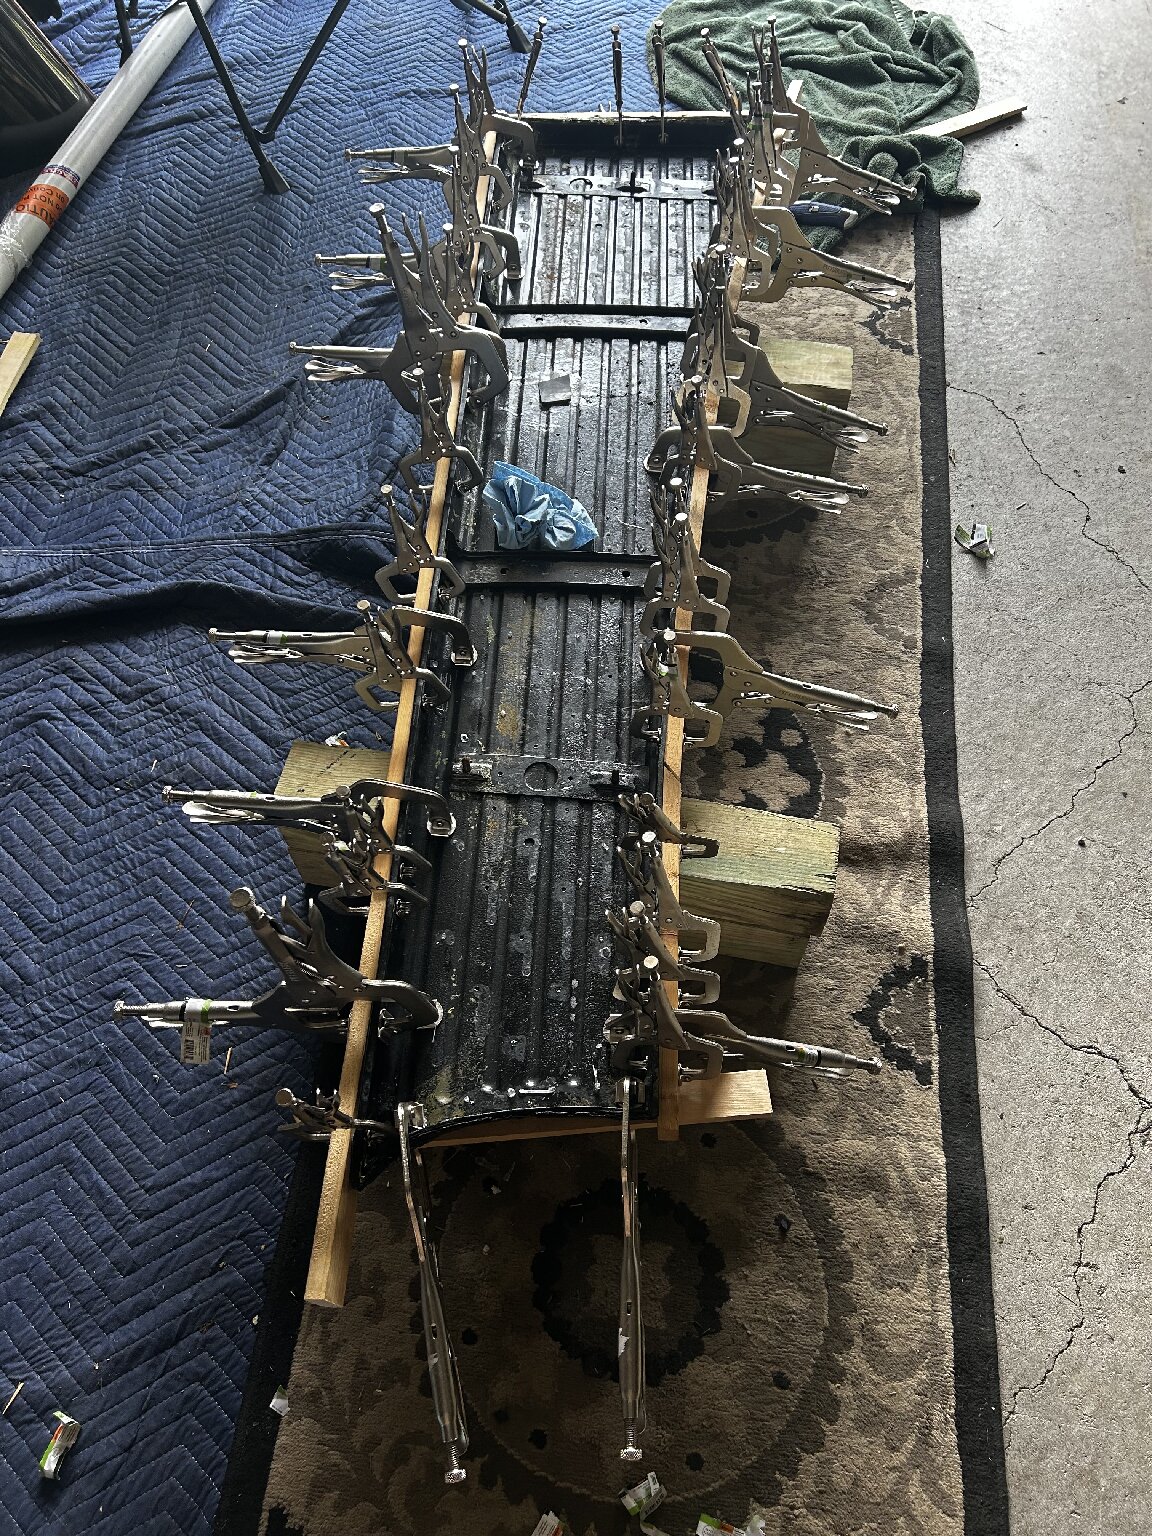 Unclamped and cut the holes for connection to the body.  Installed and put on trim. 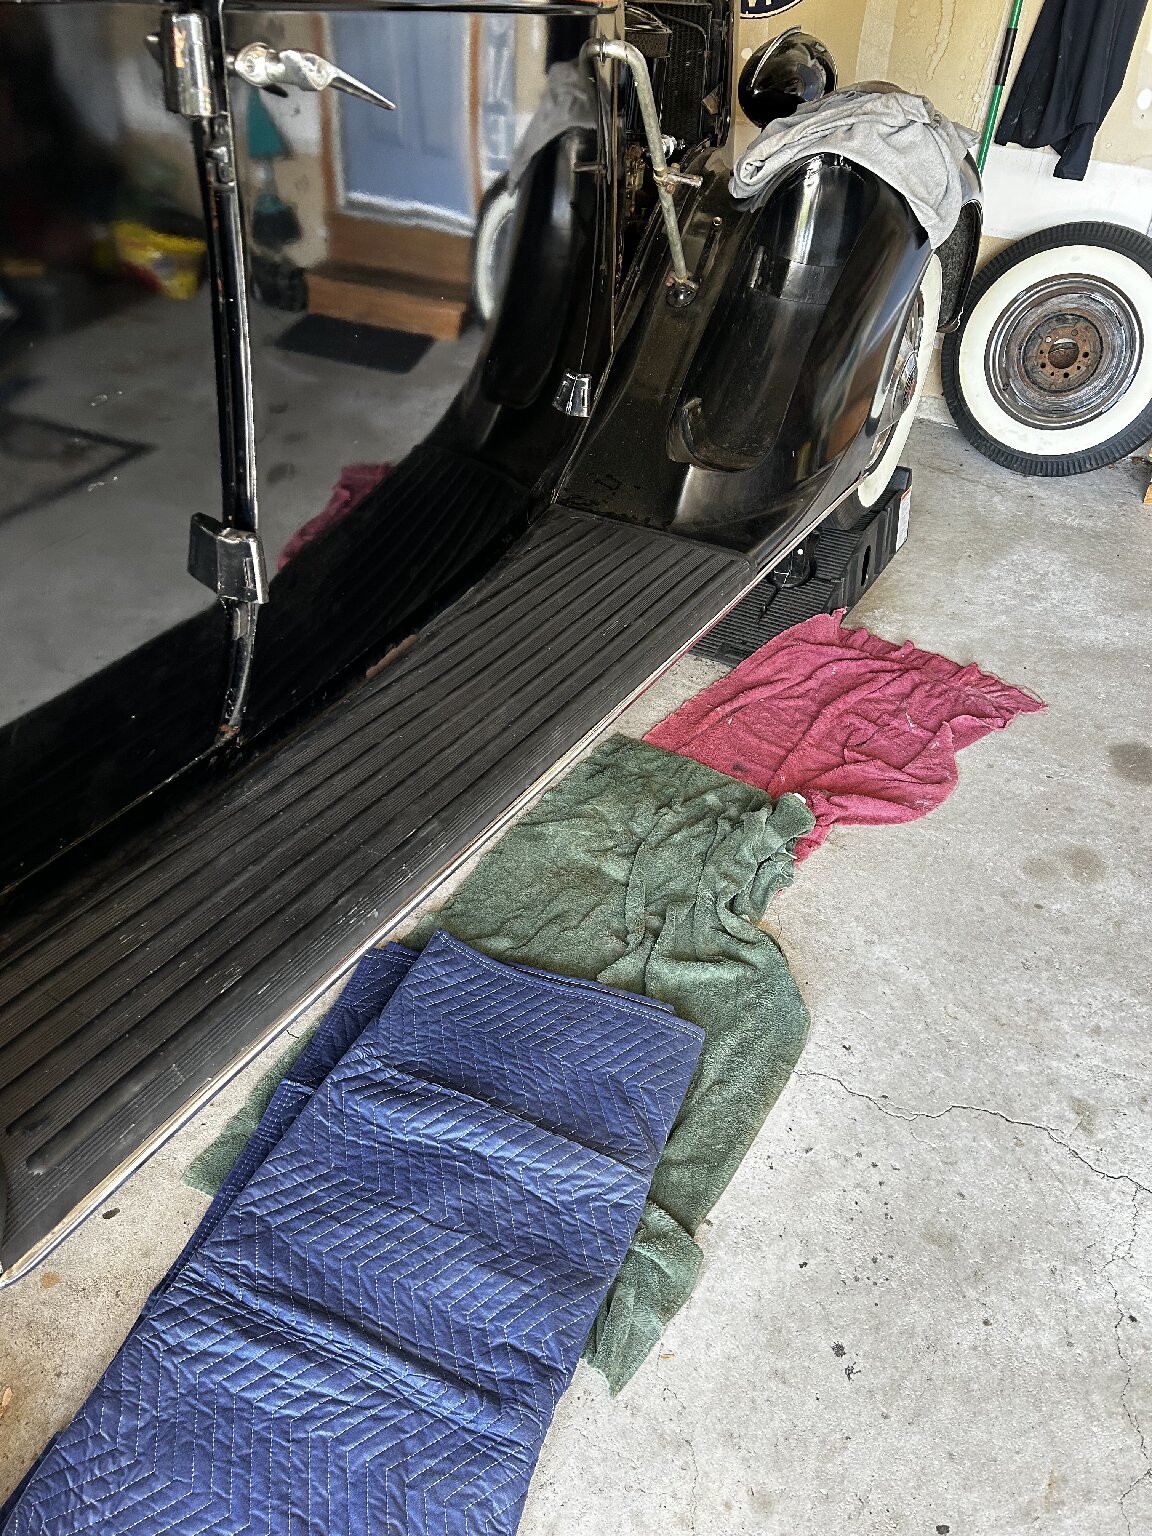 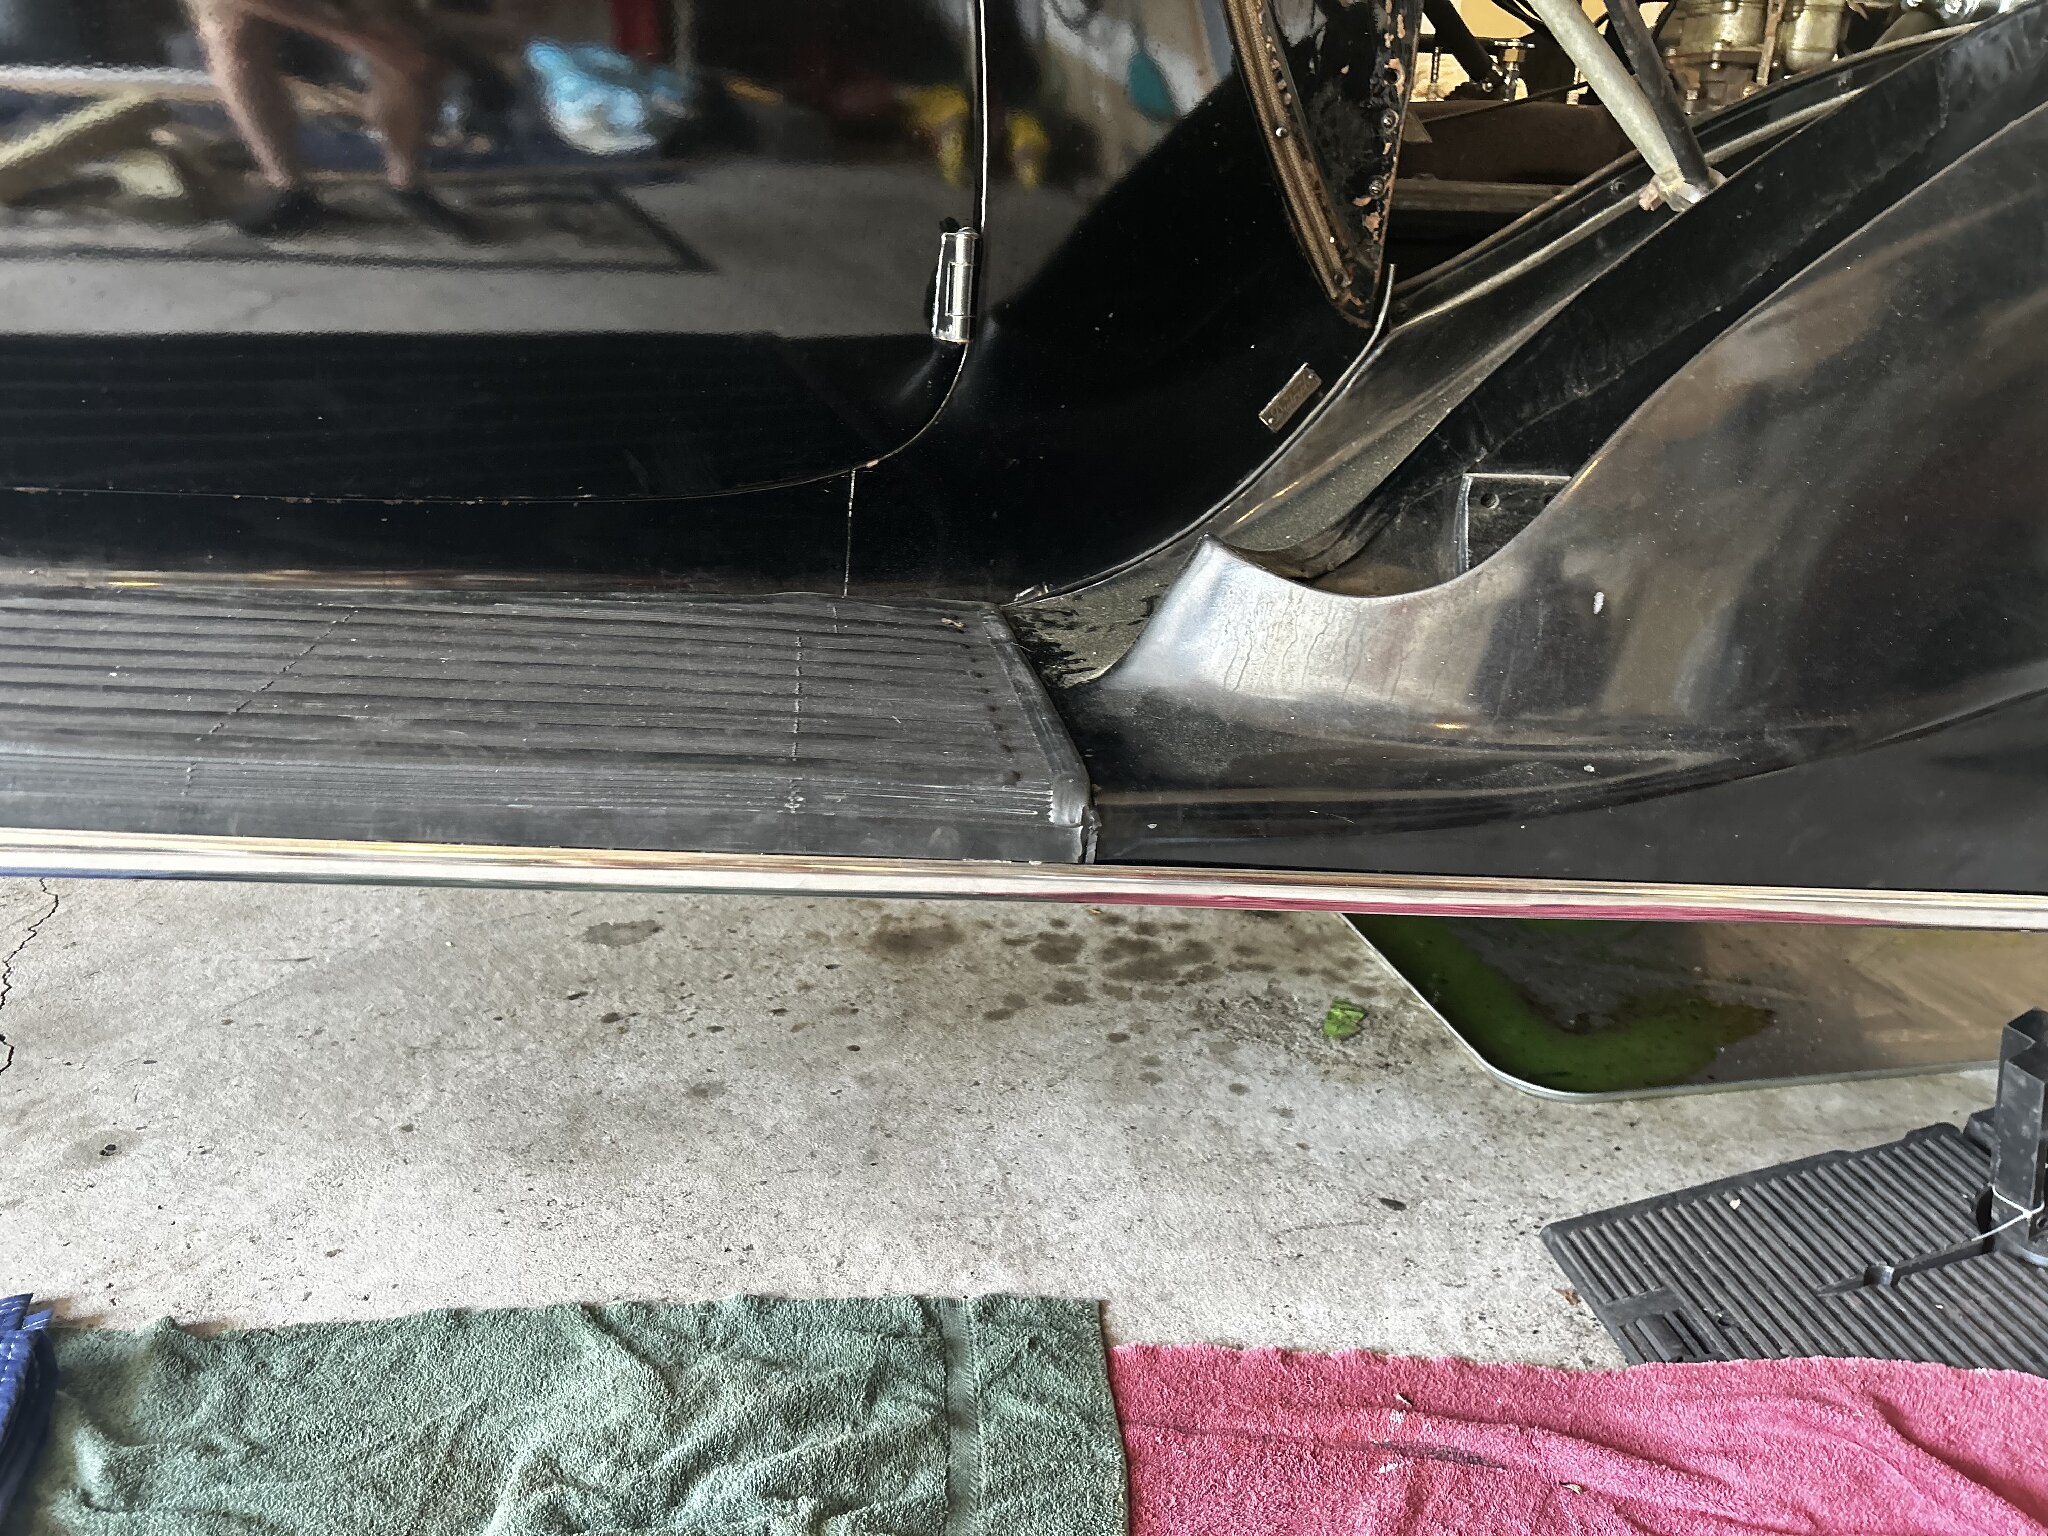 Couple areas I need to work still 1. Trim piece between running board and rear fender. Need to figure out the back cut need to make the bend and finish nicely against the trim 2. Front fender looks to have a slight curve towards the front so the trim does not fit snug. Not sure if the fender is bent? Or if I need to bend the trim to fit the contour? Happy overall. Some blemishes here and there but we will call them me leaving my mark!
Posted on: 5/2 12:45
|
|||
|
||||
|
Re: 1937 120 Conv. Sedan - Blanche
|
||||
|---|---|---|---|---|
|
Home away from home
|
The front fenders on my 120 do have a slight inboard curve at the bottom. Laying a straight edge along the running board shows a inward curve of about 5/8" to 3/4" measured just behind the front wheel opening. With the front fender to frame braces in place, the braces should locate the fender skirt accurately. The braces are straight. One of my braces is bent slightly, which pulls the bottom of the fender in very slightly, maybe 1/8". I believe the trim is made straight, and that it is flexible enough to conform to the slight inward curve of the lower fenders. My car does not have side mounts, but I think the fender contour and trim is the same. The curve amounts to 5/8" or a little more in the 2 feet or so of fender between the front of the running board and the wheel opening. Installing the trim with the fender skirt braces off, then installing the braces, should pull the fender into the proper place.
Posted on: 5/2 13:47
|
|||
|
||||
|
Re: 1937 120 Conv. Sedan - Blanche
|
||||
|---|---|---|---|---|
|
Home away from home
|
Thanks. Will play around with that and see what i can come up with.
Posted on: 5/2 14:56
|
|||
|
||||


