|
Re: Larry's 1951 Club Sedan Project
|
||||
|---|---|---|---|---|
|
Home away from home

|
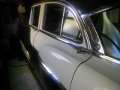
Photos of one of the new door trims.
  Pleased with the job SMS did, although I waited almos a year to get them Pics of the original ones. It was handy to have them as patterns. There aren't a lot of 2465 Club Sedan pics with original interiors although I have found a couple after a lot of searching. Most cars have been re-done nonstandard. 
Posted on: 2014/6/30 18:23
|
|||
|
1951 Packard Club Sedan | [url=ht
|
||||
|
||||
|
Re: Larry's 1951 Club Sedan Project
|
||||
|---|---|---|---|---|
|
Home away from home
|
The upholsterer has started on doing the seats and called to say I could pick up the seat frames and springs, so brought them home for painting, except for the ones in back of the front seat. Those were still in very good condition with the original black paint in place all over and no surface rust at all.
The same couldn't be said for the spring from the lower part of the front seat. It was rusty so needs a lot of sanding. It's getting painted with cold gal paint first after deoxidine treatment, then I'll hit it with black to maintain the original colour. Luckily the rust is localized and not too bad. No metal has to be replaced, just cleaned up and painted. Some surface rust but not too bad . . . .  Good spray with gal paint then top coated with gloss black 
Posted on: 2014/6/30 18:32
|
|||
|
1951 Packard Club Sedan | [url=ht
|
||||
|
||||

|
Re: Larry's 1951 Club Sedan Project
|
||||
|---|---|---|---|---|
|
Forum Ambassador

|
Quote:
I too am impressed. Is that real heat pressed in lines or did they just stitch them? Either way, it looks great. Hate to think of the cost though. Did you have to mortgage a relative? If so I hope it was one you weren't particularly fond of. 
Posted on: 2014/6/30 20:52
|
|||
|
Howard
|
||||
|
||||
|
Re: Larry's 1951 Club Sedan Project
|
||||
|---|---|---|---|---|
|
Home away from home
|
I made a lot of enquiries to maybe ten companies and found that it was only SMS that could do the exact same pattern and had the exact broadcloth and colours. Others said basically they didn't know the details (- pattern, cloth type and colour) and if I sent my old panels then MAYBE they could make copies. Hirsch does broadcloth but couldn't replicate the pattern (which is done with heat and pressure, and not stitched). Plus no-one had the patterns.
SMS said they knew exactly the size, cloth, colours and style for the 2465, and sent a colour print of exact same panels with the cloth samples. Assured me they had the 'patterns' to do mine. Quite a few Packardians said: 'You might die of old age before these arrive' but I went with it. Wanted the same as original. Yep - very expensive. I could have non-standard panels made up for maybe half the cost but wanted the original style, as they're different from most other offerings. Have put so much into the car that it would be silly to compromise now. We had a surplus child and we sold him into slavery to raise the funds!
Posted on: 2014/7/1 8:34
|
|||
|
1951 Packard Club Sedan | [url=ht
|
||||
|
||||
|
Re: Larry's 1951 Club Sedan Project
|
||||
|---|---|---|---|---|
|
Home away from home
|
Today was "fit the windscreen day" - but not quite. The mobile windscreen guy arrived and we started fitting the Steele Rubber windscreen seal into the body. It soon was obvious that the rubber was too small, we needed around 2 inches more length on the run along the bottom.
Checked the part number and description on the plastic bag just in case, but it was OK as per the Invoice number and description. I had installed the rear windscreen a while ago and the Steele seal was just right, not too small or too big. So what this means is that the front seal is poorly manufactured, it is just too small. Installer has struck this problem a few times with other cars, and suggested we stretch the seal around the glass and leave it for a few days then take it off the screen and try it in the body again. It might stretch enough to allow us to 'struggle' it in. But it will prove difficult to do, being miles too small. I have had a few problems with Steele Rubber products: - Headlight gaskets were not even a close fit, the holes and rebated parts didn't match. So I made my own using sheet rubber I had. - The gasket between rear of the hood and top of firewall is floppy because the rubber dowels don't line up with the holes. Big Kev also mentioned this in one of his posts a while ago. - The steering column grommet is not same as my original, being much shorter so I have used the original which is in fair condition. I now have a $49 grommet that I don't need. I have yet to fit the door rubbers and a few other bits and pieces, so here's hoping they are ok. For the money you pay for these rubber bits I think they should be perfect in every way. Monday is the day for the next attempt at fitting the screen. Wish me luck!
Posted on: 2014/7/2 6:45
|
|||
|
1951 Packard Club Sedan | [url=ht
|
||||
|
||||
|
Re: Larry's 1951 Club Sedan Project
|
||||
|---|---|---|---|---|
|
Home away from home
|
Before I went away some months ago my son helped me put the dash in and also the rear windscreen. I didn't have time to post before leaving so this is a couple of months back.
Had not been looking forward to the windscreen job, and true to form it was very labour intensive. Took a couple of hours because we were being very careful to not put any strain on it. Very difficult to get Packard windscreens here in Oz and it costs a fortune in shipping to bring one over from the States. It went in eventually after some incantations were offered up and loads of soap was applied to the new rubber seal. It might have been an easier job if we had used the string loop method. The old labels on two screens tend to confirm the 'last driven' date for my car, being mid-1970's or earlier. The screens with labels are off two different 24rh series cars. The new front screen is being installed by a mobile installer(- earlier post). Don't mind trying it myself but it's a 2 person job and I am on my own here at present, plus what it I break it? It's a new one bought locally. The company had it in stock for many years and I was fortunate to discover they had it, because they didn't know what year / model Packard it was for. I measured one of my old scratched screens and it turned out to be the same one, complete with tint. My old screens (- have three) are all either cracked or very deeply scratched. The best of them has been scratched deeply by the ends of the wipers, which I noted is mentioned in a Tech Bulletin. Packard altered the style of the blades and rounded off the metal blade ends, which were prone to doing damage to screens. Dashboard was a very tight fit. It eventually went in with no scratching, but I was surprised at how tight the fit was, horizontally. Might be tooled a little differently because it's a RHD dashboard. Or my coupe has shrunk! Then connected all the new wiring harness and fed it through the firewall grommet for the engine bay tributaries. I had the most difficulty connecting the Neutral Switch wires to the Ultramatic. Better name might be "Ultra-Traumatic". In hindsight it would have been sensible for me to change the connectors from the original screw type to push-on. Quite a tight place to get to with a screwdriver, and you are trying to hold the wire in position at the same time. Anyway, I did succeed in getting the wires in and tightened. Rear screen fitted . . . a two man job and great exercise for the fingers and thumbs  Restored dash fitted  The 'best old' windscreen I have is badly scratched. Old 1974 Registration label still attached is of interest  Another badly cracked screen with original Registration label 
Posted on: 2014/7/4 18:42
|
|||
|
1951 Packard Club Sedan | [url=ht
|
||||
|
||||
|
Re: Larry's 1951 Club Sedan Project
|
||||
|---|---|---|---|---|
|
Home away from home
|
Just a small job but an important one I think . . . .
Holes drilled for rustproofing access, and I drilled drain holes at ends of the rockers (sills) as well. My choice for 1) making a mess, and 2) stopping rust very effectively is Dynax S-50. It's truly filthy stuff, but works well. The spray pack comes with a long application tube to help you get into the difficult places easily, but I've found that tube is not quite long enough. There are still places where you can't get to without a longer one, so holes and plugs where necessary. Hole with plug drilled in middle of the rocker (sill)  Yesterday I got under and fitted the new shock absorbers which were a breeze to fit. They are Delco ones and apparently same look and rating as the original Packard shocks.
Posted on: 2014/7/6 18:34
|
|||
|
1951 Packard Club Sedan | [url=ht
|
||||
|
||||
|
Re: Larry's 1951 Club Sedan Project
|
||||
|---|---|---|---|---|
|
Home away from home
|
Yesterday I spent some time doing a major brake adjustment and got the two RHS wheels done before deciding it was too darned difficult trying to use a screwdriver as a tool to rotate the adjuster (star wheel) on the front LHS wheel. After a lot of fairly futile 'ratcheting' with my screwdriver and getting nowhere it was time to go and buy the proper tool.
So I went and bought an adjusting tool for $12 today to make it easier. . . . . Biggest problem was trying to decide which way to rotate the star wheel and also where to stick the feeler gauge to measure the gaps. Tomorrow I should be Ok because I've checked my old photos of the brakes. I don't have any pics of the RHS brakes, so here's hoping that I got it right on the RHS drums. Had to do some mental gymnastics and figure out if the same direction was correct for the LHS drums (- before I looked at my photos). Hoping that I got everything correct with the primary and secondary shoes back when I installed them. I reconditioned the brakes years ago and can't remember the details too well regarding primary and secondary shoes. (I put them back on the same orientation they were when I took them off). Manual says go by the colour of the springs and the direction that the adjustment nut is facing. - Orange spring is used on the primary shoe, yellow the secondary - On the left side brakes the adjusting screw NUT is facing towards the secondary shoe, and on the right wheel brakes it faces towards the primary shoe. (Guess these adjusters can't be reversed - or can they? That would tend to stuff things up, but would it cause any braking problems I wonder??) So by my photos I can tell which are primary and which are secondary (- at least, I can for the LHS brakes. I don't have any pics of the RHS brakes). Manual says the primary and secondary linings are of different material, having a different coefficient of friction. So you would want to get it all correct. Rear LHS brake before reconditioning  Rear LHS brake after reconditioning  Front LHS brake 
Posted on: 2014/7/12 7:13
|
|||
|
1951 Packard Club Sedan | [url=ht
|
||||
|
||||
|
Re: Larry's 1951 Club Sedan Project
|
||||
|---|---|---|---|---|
|
Home away from home
|
Hey Larry. I am not sure of the Packard specific spring colors but as I remember on all gm cars primary shoe is the large shoe and the rule was -primary shoe to the rear of the vehicle. With newer style drum breaks with "self adjusters there is a bracket with an arm acting on the star wheel. the star wheels and threaded sleeves are different right and left and cannot be interchanged or the self adj when engaged will loosen the shoes away from the drum surface instead of bringing them closer to compensate for shoe lining wear. If that yr Packard has no self adj bracket and must be manually adj per mileage the star wheel adjusters may all be the same rt hand threads. Anyone else have info on the 51 star adjusters?
The drum brakes with 1 hyd wheel cyl at the top of the backing plate are called self energizing due to the rotation of the drum(with the vehicle moving forward) causing the bottom of rear shoe to be pulled against the drum face and apply more force. hope this helps
Posted on: 2014/7/12 10:46
|
|||
|
||||


