|
Re: Howard's 47 Custom project
|
||||
|---|---|---|---|---|
|
Home away from home
|
The fellow in Texas passed away. We owned a 1942 Clipper with factory air. The trunk unit was the same color as in my 1940 One-Eighty. Kind of a light tan/beige.
I would go with the same color you used for your cowl vent brackets.
Posted on: 2014/1/28 12:31
|
|||
|
West Peterson
1930 Packard Speedster Eight Runabout (boattail) 1940 Packard 1808 w/Factory Air 1947 Chrysler Town and Country sedan 1970 Camaro RS https://packardinfo.com/xoops/html/modules/newbb/viewtopic.php?topic_id=4307&forum=10 http://aaca.org/ |
||||
|
||||
|
Re: Howard's 47 Custom project
|
||||
|---|---|---|---|---|
|
Forum Ambassador

|
Quote:
Thanks. That beigey color I used for the vent handles is not a bad color so will go with it. I know Jim Hollingsworth passed but are you referring to the fellow JW mentioned who I believe bought his car also passing? He is the one I asked.
Posted on: 2014/1/28 12:47
|
|||
|
Howard
|
||||
|
||||
|
Re: Howard's 47 Custom project
|
||||
|---|---|---|---|---|
|
Home away from home

|
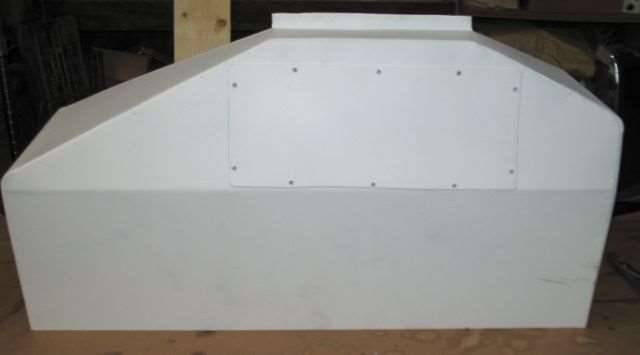
The person to whom I referred was Terry Weiss. He bought Hollingsworth's '41 Clipper with factory installed AC. Here are two photos of a '40 Super 8 with AC.
(o{}o) Attach file:  (143.91 KB) (143.91 KB)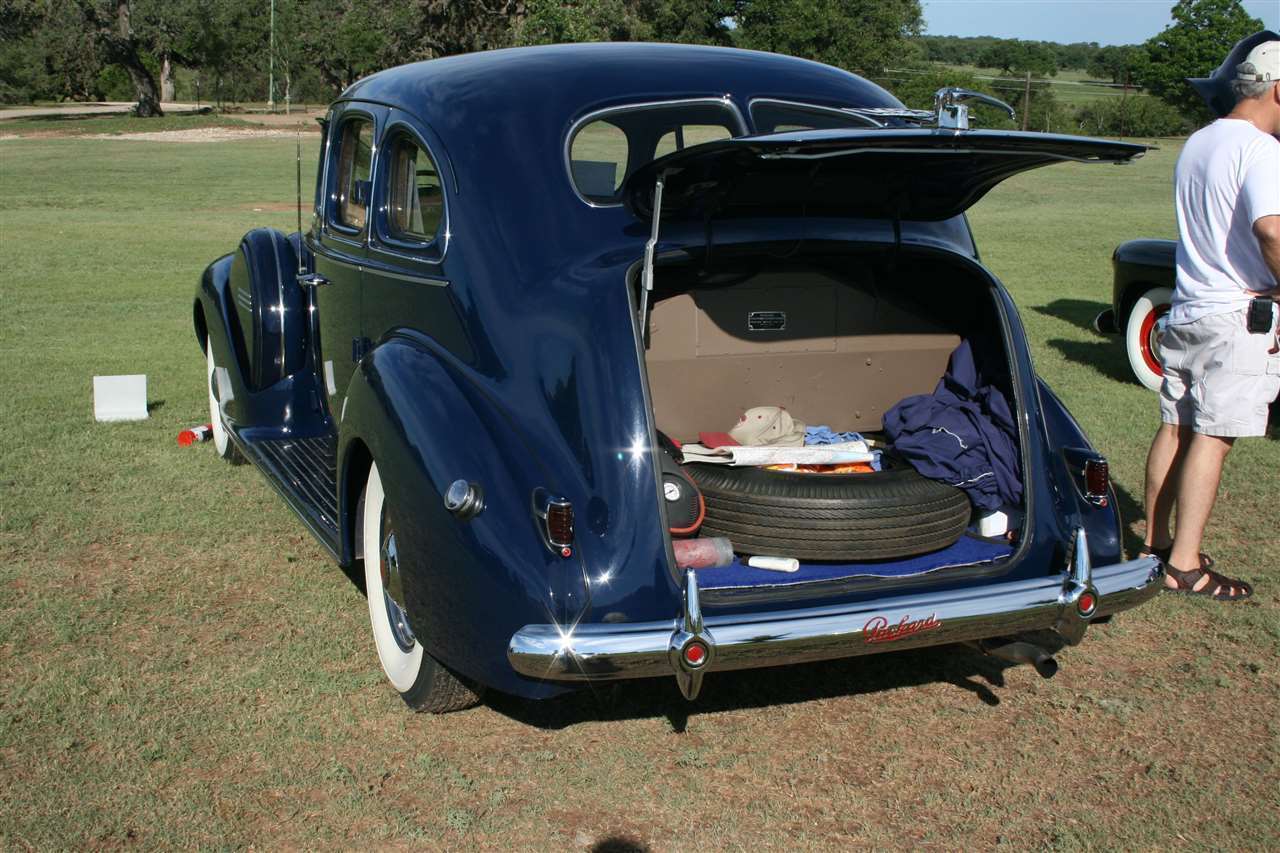 (29.83 KB) (29.83 KB)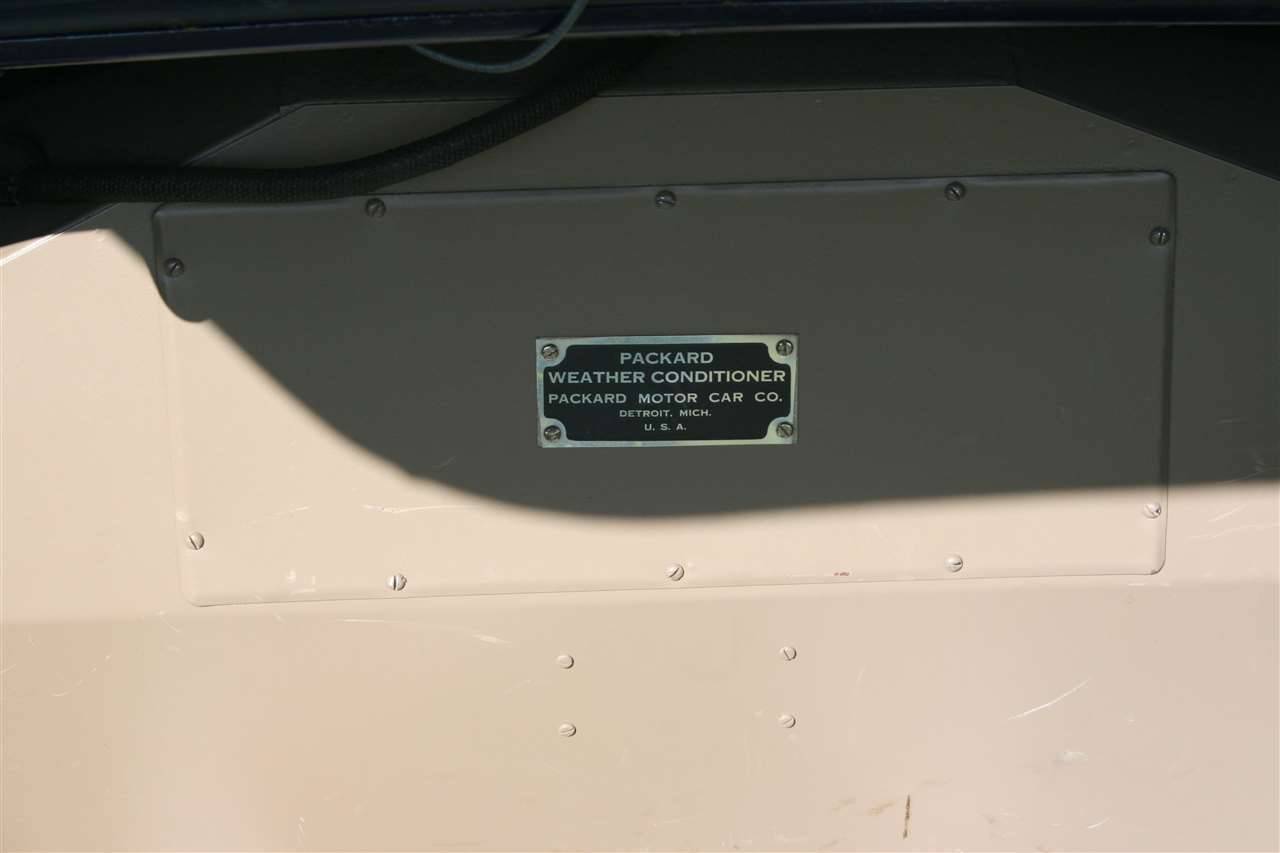
Posted on: 2014/1/28 13:18
|
|||
|
We move toward
And make happen What occupies our mind... (W. Scherer) |
||||
|
||||
|
Re: Howard's 47 Custom project
|
||||
|---|---|---|---|---|
|
Home away from home
|
Quote:
Sorry. No. I was referring to Jim. I missed JW's post.
Posted on: 2014/1/28 13:41
|
|||
|
West Peterson
1930 Packard Speedster Eight Runabout (boattail) 1940 Packard 1808 w/Factory Air 1947 Chrysler Town and Country sedan 1970 Camaro RS https://packardinfo.com/xoops/html/modules/newbb/viewtopic.php?topic_id=4307&forum=10 http://aaca.org/ |
||||
|
||||
|
Re: Howard's 47 Custom project
|
||||
|---|---|---|---|---|
|
Home away from home

|
That's the first photo I've ever seen of the Packard "Weather Conditioner". I'm impressed, very business-like enclosure and tag. I would imagine that just the 'word association' with this optional extra would have helped sell quite a few of them, back in the days when this seemed like a magic device!
Nowadays air conditioning is an 'expected' standard feature but then it would have been a very exciting option. Can imagine one question might have been: "Where d'you put the kerosene in for the little flame?" (- which is what I asked when I saw my first kerosene fridge way back in the 50's). Great project!
Posted on: 2014/2/12 22:31
|
|||
|
1951 Packard Club Sedan | [url=ht
|
||||
|
||||
|
Re: Howard's 47 Custom project
|
||||
|---|---|---|---|---|
|
Forum Ambassador
|
The Weather Conditioner must be the original unit with the heater core also mounted inside. I'd like to see one of those myself to see how the heater air flow was handled.
I believe Joe's original case that was used as the template for the repro copy only contained the AC coil. That takes air in from the bottom, thru the coil and out the top. His repro labels are different and say Packard Air Conditioner. In adapting the modern unit to fit inside the enclosure, decided to totally revise my earlier package. Believe it is turning out nicely and is certainly much cleaner. Will have a photo or two to show later for those interested. Am now trying to decide how the case will be removed to gain access to the modern unit. Not much should need service inside except the blower motor. With the air flow diversion plenum that was made to accommodate my front ducts, it will be somewhat hidden and below the opening. Right now the case lifts off. If I keep it that way the entire unit would need to rotate out of position so it could slide up. Using hoses containing a little extra length, that would not be hard to do. From what I can see in photos, it appears Packard used hard lines. If I go that way, the cover will have to be modified and a fastening method devised so it can slide straight back. Decisions, decisions. Anyone have thoughts on the way it should go?
Posted on: 2014/2/13 10:57
|
|||
|
Howard
|
||||
|
||||
|
Re: Howard's 47 Custom project
|
||||
|---|---|---|---|---|
|
Forum Ambassador
|
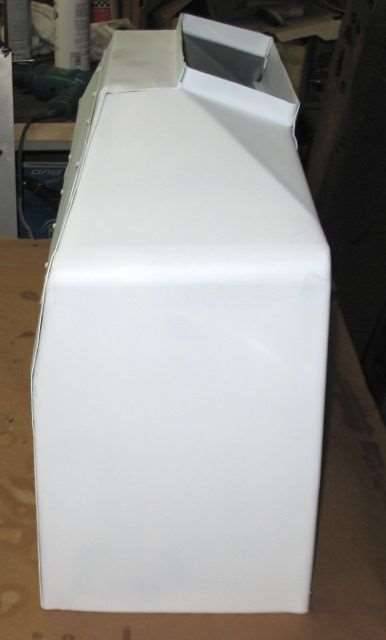
Been playing around with the AC package. Decided to completely revise the original plan to take advantage of the space in the replica case and keep it all looking more or less like Packard might have done it.
The return air collection was decided some time ago so that changed very little -- just a slight outlet relocation and a direct connection via hose instead of the original slip fit idea. It now exits thru the cardboard and directly into the evaporator. That entire return air flow plan came to be mostly because of the seat back braces. No idea how Packard did that part originally in a Clipper. The conventional body Packard return air piece is a tapered funnel like affair with a large inlet directly in the center to collect air from under the raised rear seat. I couldn't use the way Packard did it without modifying the car which would mean cutting out the vertical piece at the bottom and then re-supporting it somehow. Didn't want to do that so mine is collecting from under the seat as well as from behind the seat back at the top. To do that, made a narrow plenum that is open at the bottom and a couple of places at the top. Seat back will move forward about 1" but that doesn't seem to cause any major issues -- yet. Bottom might move forward but haven't yet decided whether to raise it or just add some vents to the lower front edge. Mounted the evaporator in the repro case and turned the blower 90 degrees. Made a new blower inlet section and connected the two with some of the return air hose. Because the resistors needed for blower speed control with the 6v motor need cooling, mounted that package in the new inlet so they can be in the air flow for heat dissipation. The blower feeds a new plenum for air distribution. If there was only going to be a rear vent, then the job would be simple and air would just go out the original opening and into the package shelf vent. My projects never are simple so made a cable controlled flapper valve to direct air to the rear vent as well as to my ducts going to the added front outlet. Had to make a complete second air path using the very limited space so that meant extra holes in the case -- but it turned out halfway neatly done. The only part seen will be the extra box piece sitting on top of the case with outlets for the flex ducts to connect into. Works nicely on the bench but how well it works in practice, only time will tell. At least if it doesn't work out nothing is horribly disfigured and the extra holes can all be covered with a plate. The thermostat will also be cable controlled. Will order Vintage's combination pull cable/blower switch and use the pull portion for temp. My original dash plan stays intact with the other knob still being for the vent control. Case removal is an ongoing thought process and not finalized. Because of the blower motor location, there needed to be access other than the stock opening. I had originally planned for case to lift off from top but that would have required removing or at least long hoses for twisting the unit in the car for vertical access. Realized how stupid that was so made the cover pull out instead. Currently the distribution plenum has to be removed to slide the cover off. A little more work but still fairly easily done. Contemplating whether to sacrifice the structure of the case at the vent opening to make it completely slideable without removing anything. Cover is held on by long screws so had to come up with guides for the case and for the screws. Few things more frustrating than trying to blindly start screws that are 8" and 10" long. Here are a few photos of the latest configuration. The inner parts are fairly well finalized but the outer parts are still in primer until that removal plan is thought thru. The cardboard trunk separator is sitting in place for fitting. Ultimately even though most of it is hidden, it will get flocked to make it look better. I would have provided a photo with unit in the car but didn't feel like lifting it again. It's heavier than it looks. Attach file: (27.72 KB)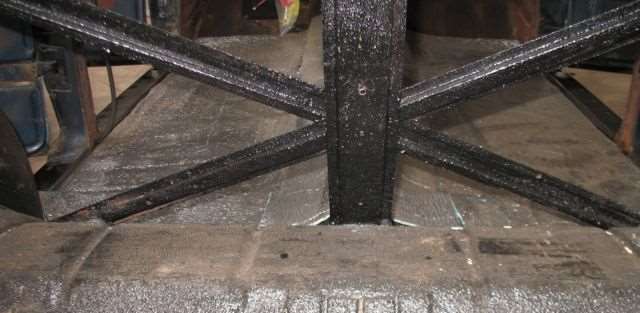 (19.10 KB) (19.10 KB)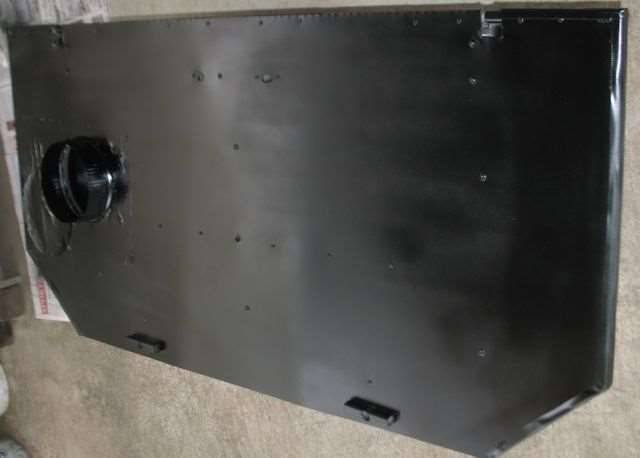 (31.55 KB) (31.55 KB)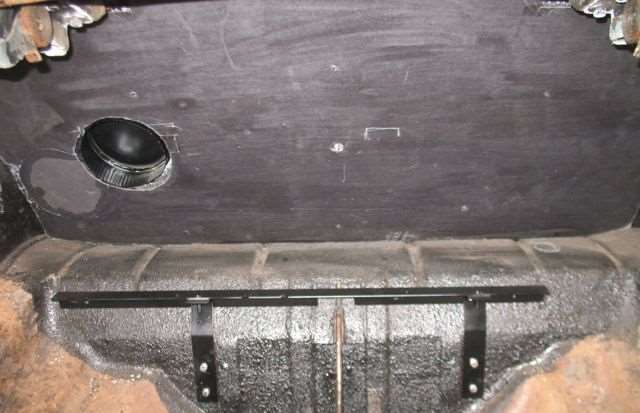 (26.96 KB) (26.96 KB)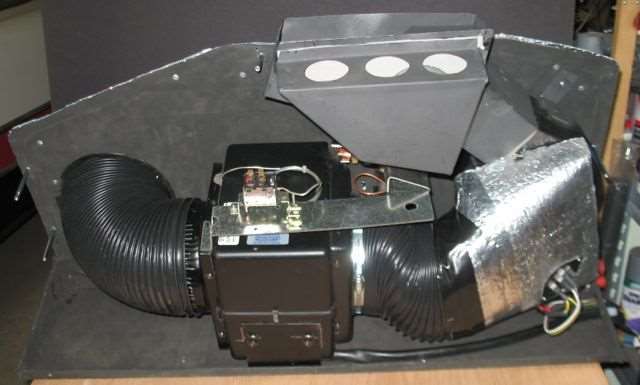 (13.69 KB) (13.69 KB) (14.75 KB) (14.75 KB)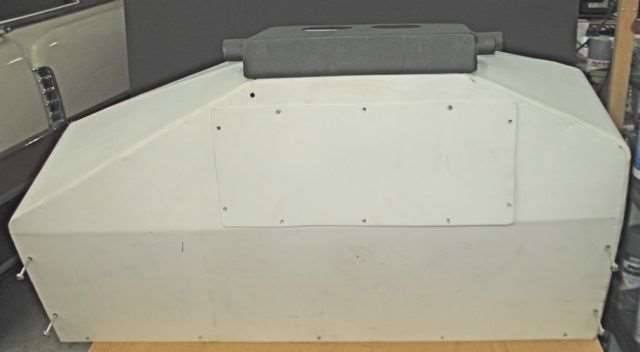
Posted on: 2014/2/22 17:23
|
|||
|
Howard
|
||||
|
||||
|
Re: Howard's 47 Custom project
|
||||
|---|---|---|---|---|
|
Forum Ambassador

|
I guess the original units were made by Babcock & Bishop? Just as a finishing touch are those nameplates available?
Posted on: 2014/2/22 18:42
|
|||
|
||||
|
Re: Howard's 47 Custom project
|
||||
|---|---|---|---|---|
|
Forum Ambassador
|
Quote:
They are. The fellow that made the enclosure also had those reproduced. Hopefully he will even have the vent before too long. Attach file: (92.17 KB)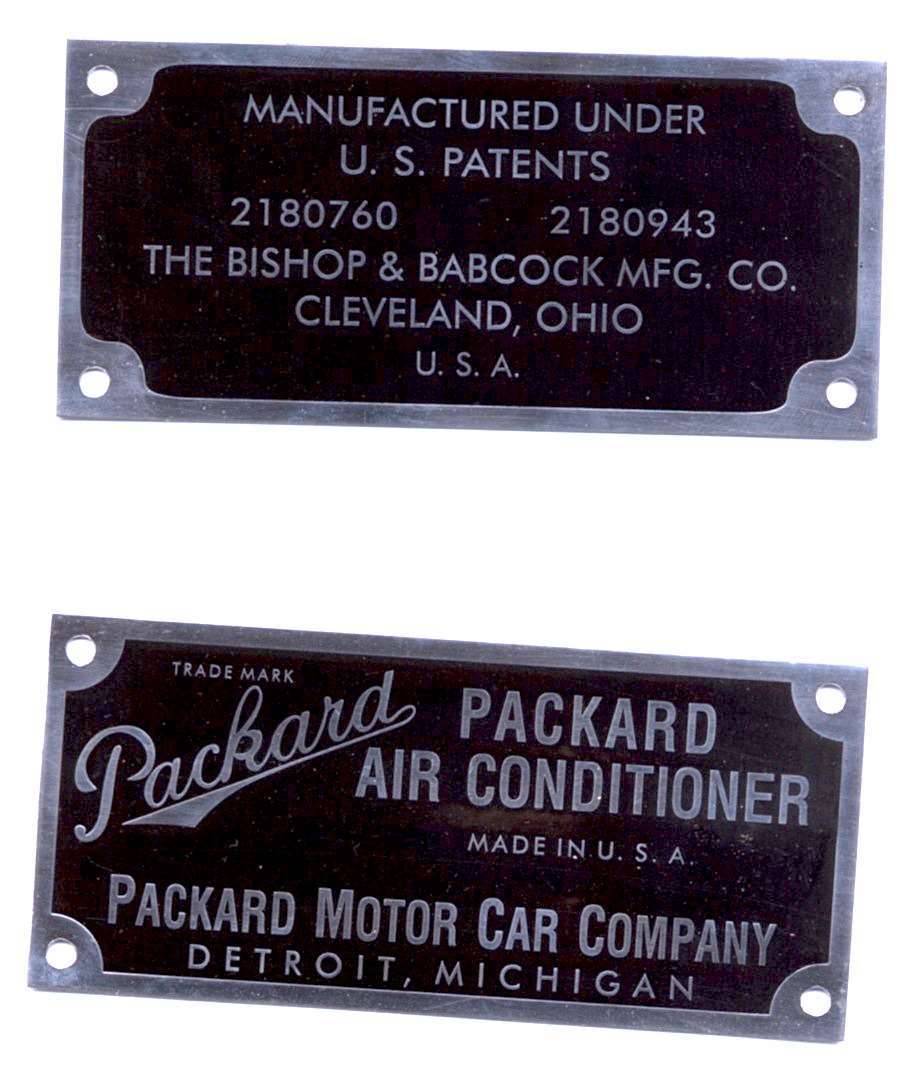
Posted on: 2014/2/22 18:55
|
|||
|
Howard
|
||||
|
||||


